uniApp中文件上传
前言
uniapp图片上传插件unifilePicker
在开发uniapp的时候上传文件是必不可少的,
本文的方案
1、通过unifilePicker插件来上传到云存储,然后云存储生成链接然后存入云数据库
2、通过原生的 uniCloud.uploadFile来上传到云存储,在通过云存储的链接添加到数据库
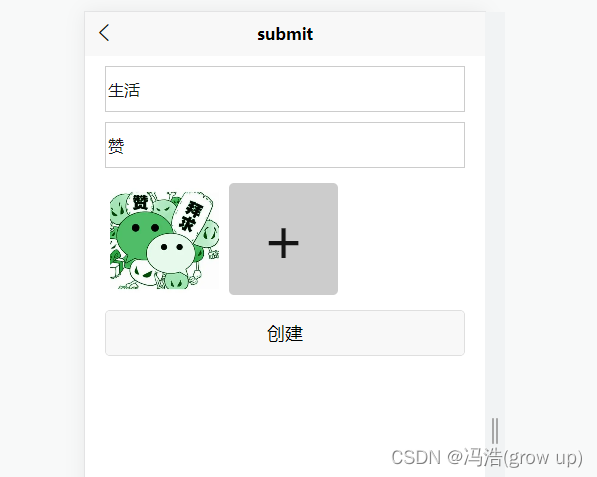
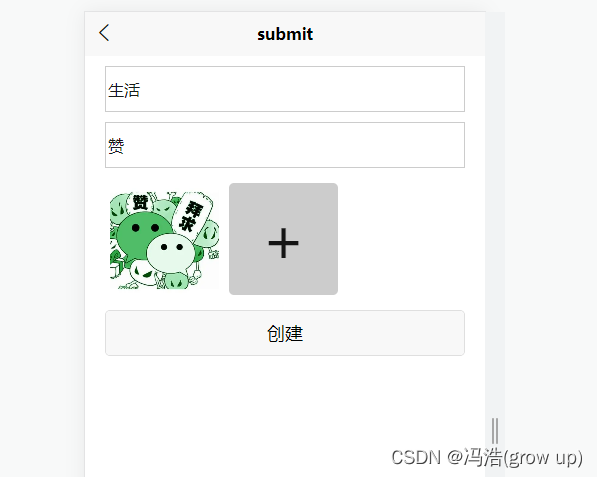
效果图

1、使用unifilePicker插件
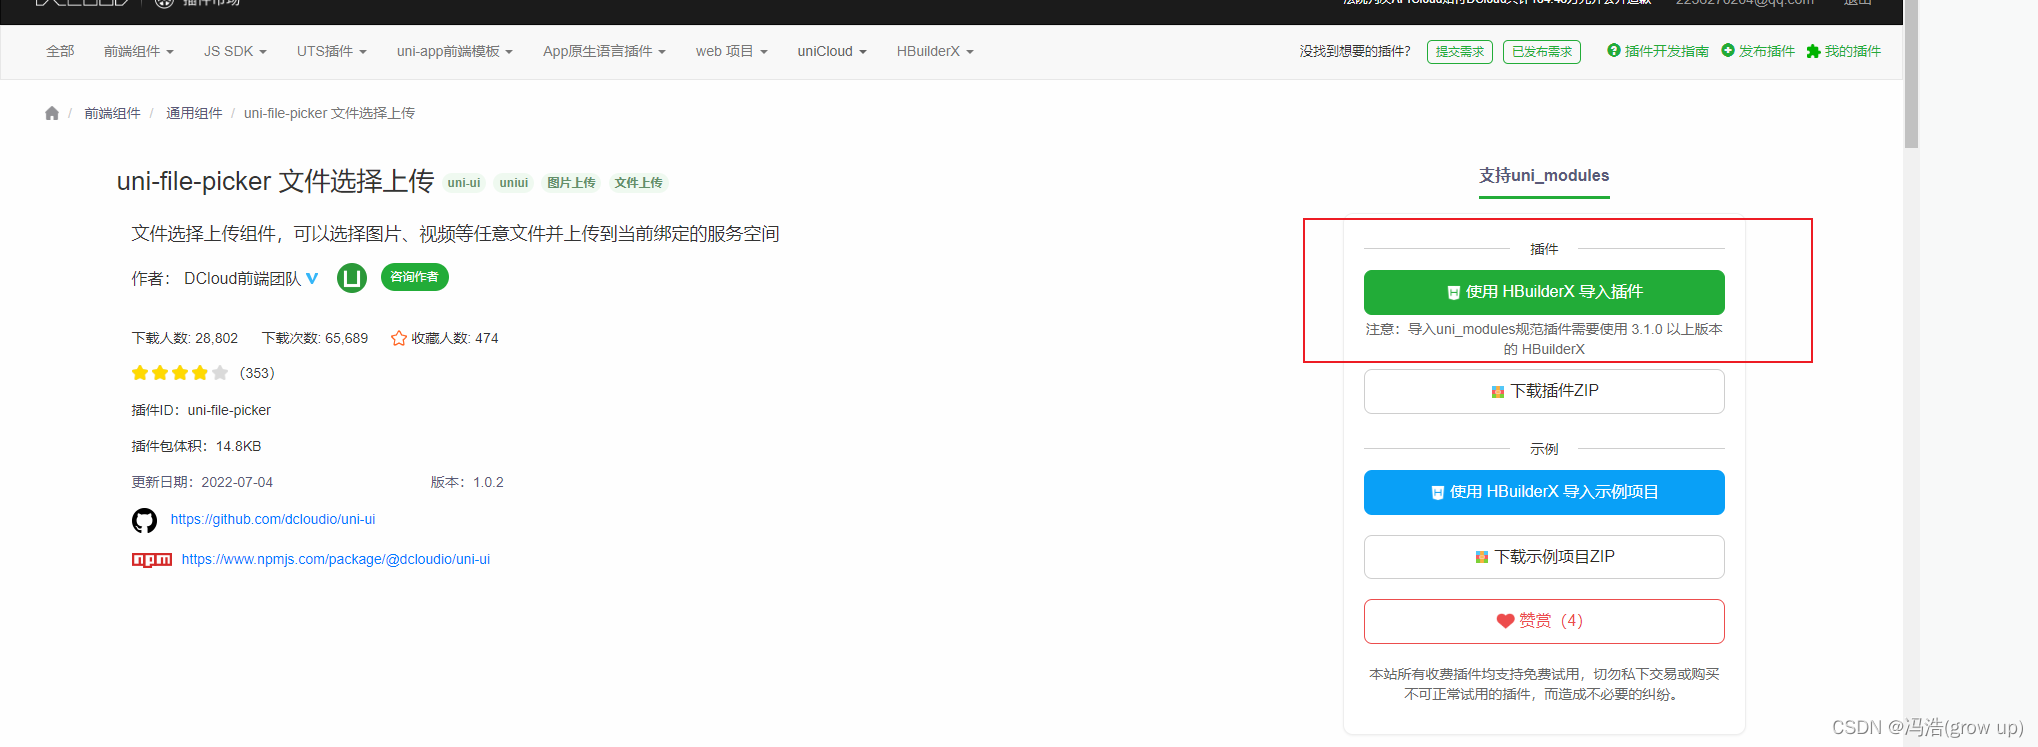
(1)安装unifilePicker插件

(2)简单案例
<template>
	<view class="home">
		<view style="width:80%;margin: 0 auto">
			<text>上传文件</text>
			<input v-model="title" type="text" style='border:1px solid #ccc;height:40px;margin: 10px 0;'>
			<view class="upload">
				<!-- auto-upload:是否自动上传,默认为自动上传 -->
				<!-- limit:最多可以选择多少文件 -->
				<!-- 配置 file-mediatype 属性为 image,限定只选择图片 -->
				<!-- mode:上传的样式  grid:九宫格上传  list:列表上传 -->
				<!-- list-styles 格式 -->
				<!-- image-styles 格式 -->
				<!-- @select	选择文件后触发
				@progress	文件上传时触发
				@success	上传成功触发
				@fail	上传失败触发
				@delete	文件从列表移除时触发	-->
				<uni-file-picker :auto-upload="false" :limit="9" v-model="imageValue" fileMediatype="image" mode="grid"
					ref="files" @select="select" @progress="progress" @success="success" @fail="fail" />
			</view>
			<button @click="upload">上传</button>

		</view>
	</view>
</template>

<script>
	export default {


		data() {


			return {


				title: 'Hello',
				imageValue: [],
				tempFiles: []
			}
		},
		methods: {


			// 手动上传
			upload() {


				// 插件上传
				this.$refs.files.upload()
			},
			// 获取上传状态
			select(e) {


				console.log('选择文件:', e)
			},
			// 获取上传进度
			progress(e) {


				console.log('上传进度:', e)
			},

			// 上传成功
			success(e) {


				console.log('上传成功', e)
				this.Add({


					title: this.title,
					file: e.tempFilePaths
				})
			},


			// 上传失败
			fail(e) {


				console.log('上传失败:', e)
			},

			// 添加
			Add(obj) {


				uniCloud.callFunction({


					name: "cloudDemo1",
					data: obj
				}).then(res => {


					console.log(res)
				})
			},
		}
	}
</script>

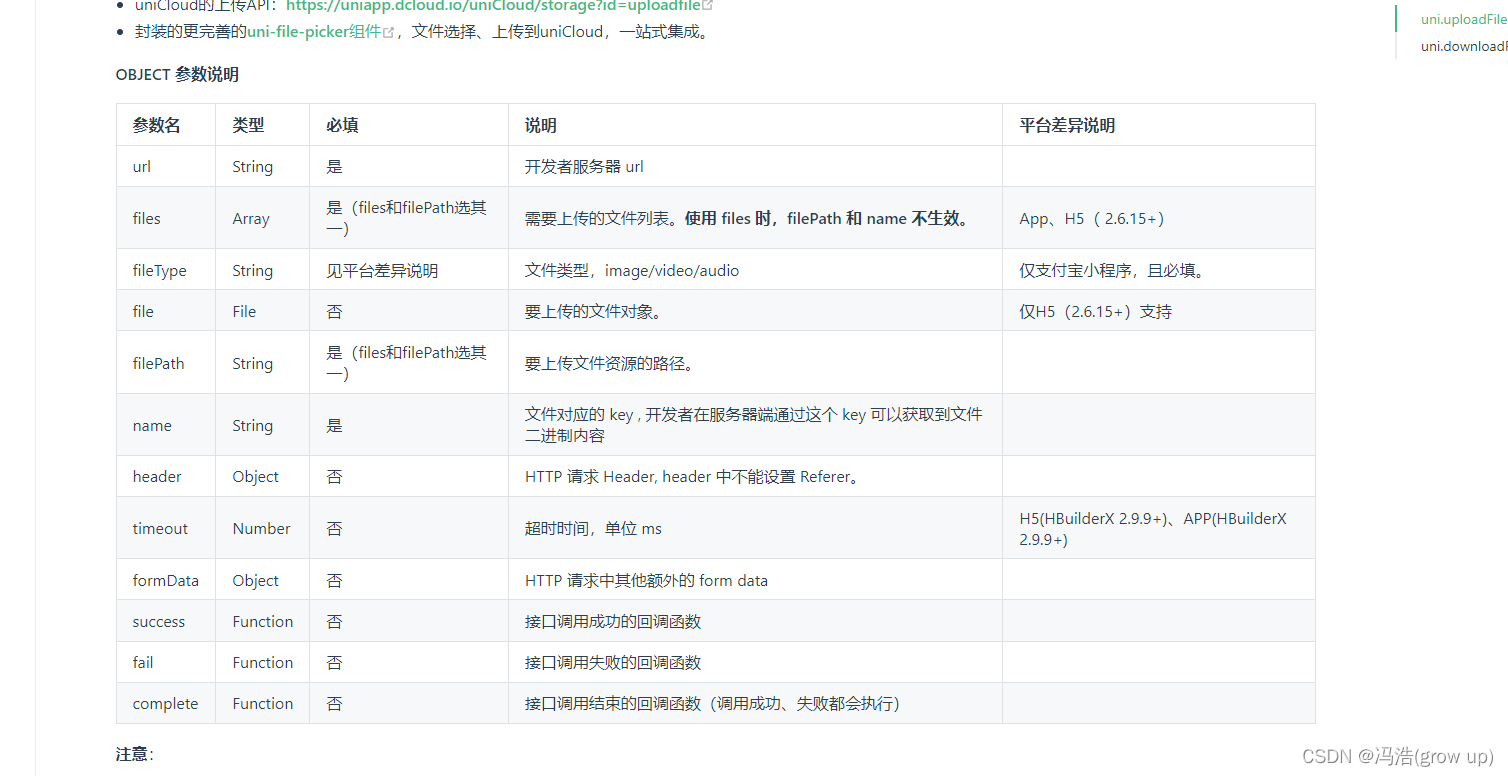
2、通过原生的 uniCloud.uploadFile来实现
uni.chooseImage(OBJECT)选择文件的参数

uni.uploadFile(OBJECT) 上传文件的参数
<template>
	<view class='submit'>
		<input type="text" class='title' v-model="title" placeholder="标题">
		<input type="text" class='title' v-model='countent' placeholder="内容">
		<view class="imageArr">
			<view class="imagess" v-for="(item,index) in tempFiles" :key="index">
				<image :src='item.path' mode="aspectFill" @click='imageClick(index)'></image>
			</view>
			<view class="add imagess" @click='addImage'>+</view>
		</view>
		<button @click='upload'>创建</button>
	</view>
</template>

<script>
	export default {


		data() {


			return {


				title: '',
				countent: '',
				tempFiles: []
			};
		},
		methods: {


			// 点击图片预览
			imageClick(index){


				uni.previewImage({


					urls:this.tempFiles,
					count:index
				});
			},
			// 添加图片
			addImage() {


				uni.chooseImage({


					// 条数
					count: 3,
					success: res => {


						const newimg = res.tempFiles
						this.tempFiles = [...newimg, ...this.tempFiles]
					}
				})
			},

			upload() {


				// 原生上传
				let newsArr = this.tempFiles.map(async item => {


					return await this.uploadFun(item)
				})
				// 全部上传完成
				Promise.all(newsArr).then(res => {


					console.log(res)
					let arr = res.map(item => {


						return item.fileID
					})
					this.Add({


						title: this.title,
						countent: this.countent,
						files: arr
					})
				})
			},

			uploadFun(item) {


				return uniCloud.uploadFile({


					filePath: item.path,
					cloudPath: item.name,
					onUploadProgress:(progressEvent=>{


						// 进度条
						const presents = Math.round(
							(progressEvent.loaded * 100) / progressEvent.total
						);
					}),
					// 单个上传完成后调用
					// success() {


					// 	uni.showToast({


					// 		icon: 'none',
					// 		title: '上传成功',
					// 		duration: 1500
					// 	})
					// }
				})
			},

			// 添加的云函数
			Add(obj) {


				uniCloud.callFunction({


					name: "cloudDemo1",
					data: obj
				}).then(res => {


					console.log(res)
				})
			},
		},
	}
</script>

<style lang="scss" scoped>
	.submit {


		width: 90%;
		margin: 0 auto;

		.title {


			border: 1px solid #ccc;
			height: 40px;
			margin: 10px 0;
			padding: 2px
		}

		.imageArr {


			display: flex;
			flex-wrap: wrap;
			margin-bottom: 10px;

			.imagess {


				display: inline-block;
				width: 205rpx;
				height: 7rem;
				border-radius: 5px;
				margin: 5px;

				image {


					width: 100%;
					height: 100%
				}
			}

			;

			.add {


				background: #ccc;
				font-size: 60px;
				text-align: center;
				line-height: 7rem;
			}
		}
	}
</style>
共同成长共同进步
