文章目录
-
- 一、完整构建流程
-
-
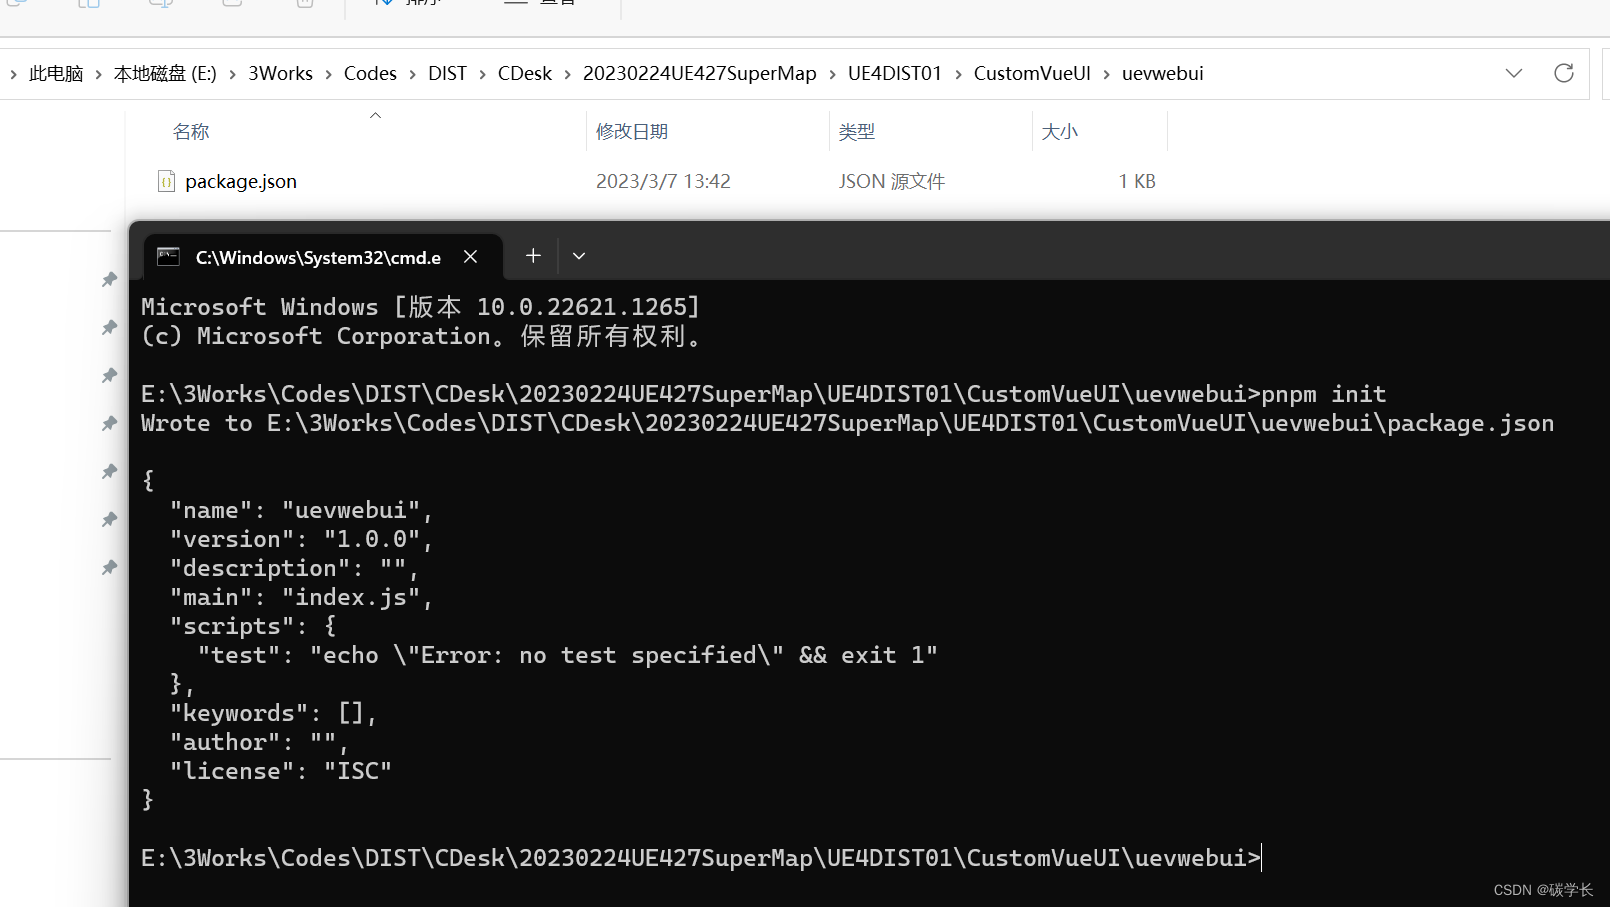
- 1、在指定目录下执行 pnpm init,初始化 package.json
- 2、执行 pnpm install vite -D,安装 vite。
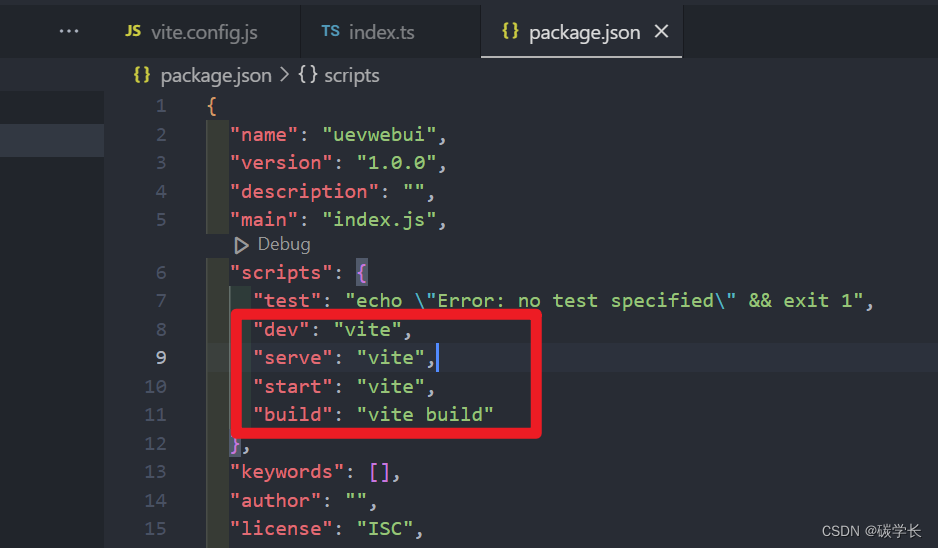
- 3、package.json 中增加启动、构建命令
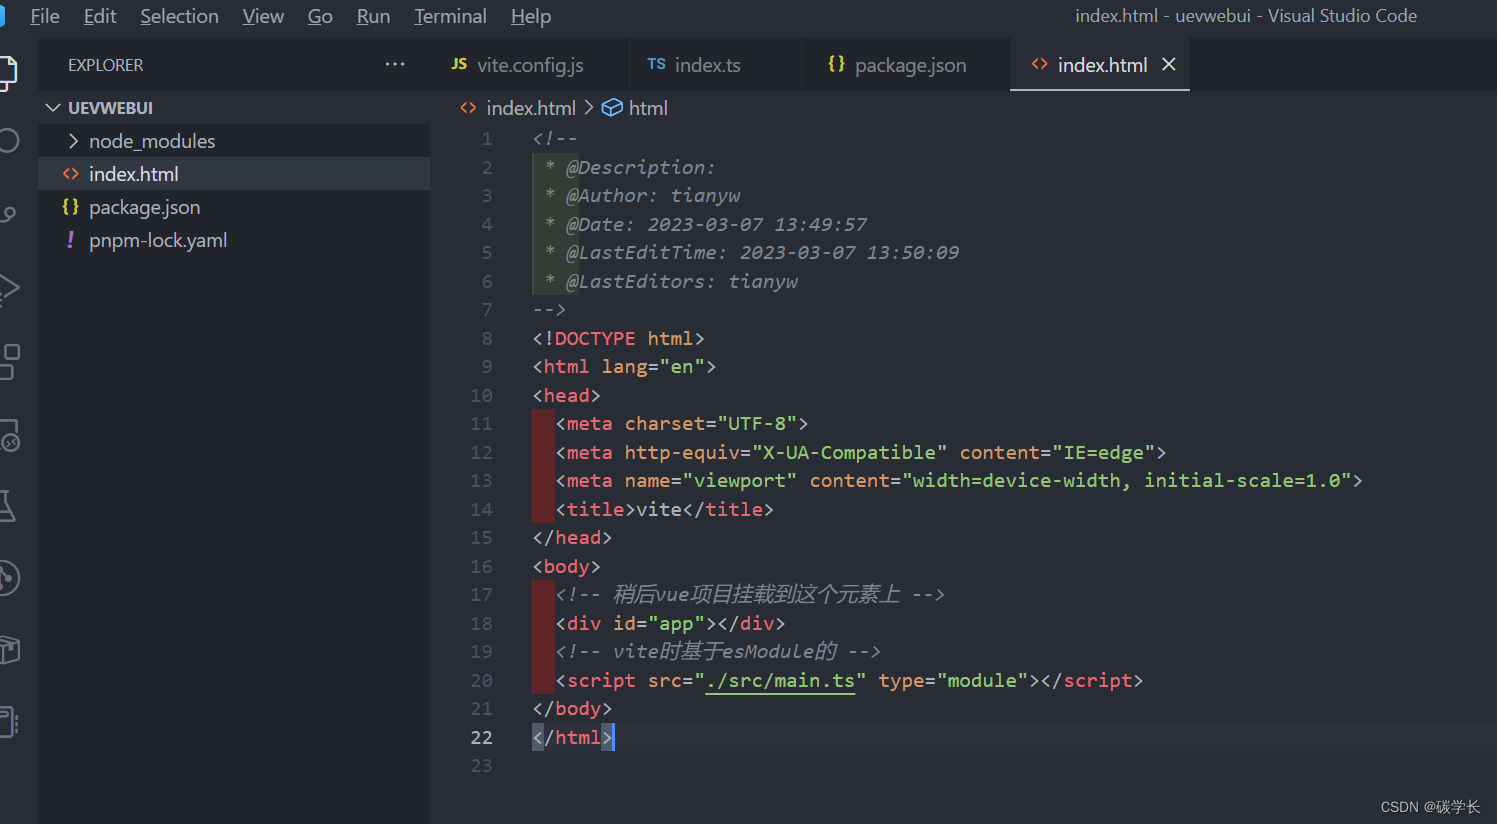
- 4、新建 index.html
- 5、根目录下新建 src 文件夹,并在其下方新建 main.ts
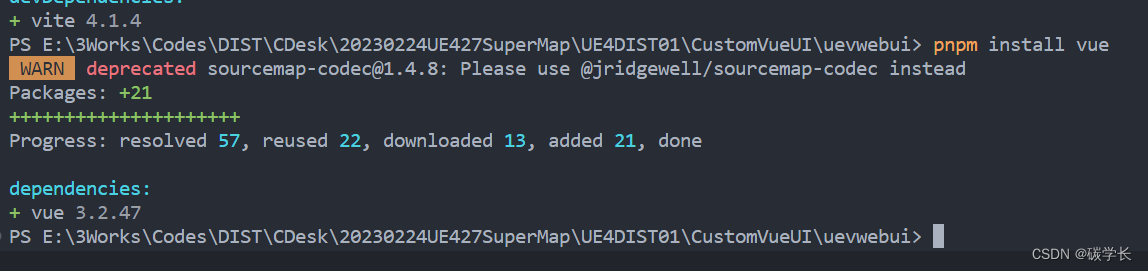
- 6、安装 vue:pnpm install vue
- 7、根目录下新建 env.d.ts 文件,输入内容用以支持其他文件引入 vue
- 8、安装 @vitejs/plugin-vue 用于让 vite 支持 vue 文件的解析
- 9、根目录下新建 vite.config.ts,添加以下内容用于支持 vue 文件解析
- 10、引入 typescrpit、vue-tsc:pnpm install typescript vue-tsc -D
- 11、根目录下新建 tsconfig.json,并配置如下
- 12、src 目录下新建 App.vue 文件,内容如下:
- 13、main.ts 中引入内容
- 14、执行 yarn dev 运行项目,可以看到效果如下:
- 15、安装 @types/node
- 16、修改 vite.config.ts 配置如下
- 17、引入 eslint
- 18、根目录下新建 .eslintrc.js 文件,内容配置如下:
- 19、根目录下新建 .eslintignore,配置如下:
- 20、修改 package.json 中 build 及新增 lint 配置
- 21、引入 prettier:pnpm install prettier eslint-plugin-prettier @vue/eslint-config-prettier -D
- 22、.eslintrc.js 中增加 prettier 的配置,完整内容如下:
- 23、根目录下新建 `.prettierrc.js` 文件,配置如下:
- 24、根目录下新建 .prettierignore 文件,配置内容如下:
- 25、package.json 添加 prettier 命令
- 26、 解决 eslint 与 prettier 的冲突
- 27、安装 vscode 的 Prettier - Code formatter 插件,实现修改保存时就自动格式化
- 28、引入 EditorConfig 配置,用于统一不同 IDE 编辑器的编码风格
- 29、引入 stylelint 配置:适用 css/less/sass/vue/scss
- 30、为 vscode 安装 stylelint 插件,并在 settings.json 中添加 stylelint 配置
- 31、根目录下新增 `.stylelintrc.js` 文件,并配置如下:
- 32、package.json 中新增 stylelint 命令
- 33、根目录下新增 .stylelintignore 文件,配置内容如下:
- 34、新建 styles 文件夹及其下的 index.scss 等文件,具体如下:
- 35、vite.config.ts 中增加 css 配置,引入 index.scss
- 36、根目录下新建 type-css.d.ts 配置内容如下,使得 js、vue 文件可以正常 import 样式文件
- 37、tsconfig.json 中新增 type-css.d.ts 配置
- 38、App.vue 中 style 里设置、引用定义的样式属性
- 39、建立 gitlab 远程连接
- 40、集成 husky 和 lint-staged
- 41、引入路由 vue-router
- 42、引入 pinia 状态管理
- 43、引入 echarts
- 44、解决 Ctrl + S 自动保存时,保存过慢的问题
- 45、引入 axios
- 46、区分开发、测试、生产(线上)环境(nginx/tomcat、docker)
- 47、引入 tailwind.css
-
- 1、安装:pnpm add tailwindcss@latest postcss@latest autoprefixer@latest -D
- 2、执行:npx tailwindcss init -p
- 3、修改 tailwind.config.js 文件内容如下:
- 4、修改 vite.config.ts:增加 postcss 配置,如下:
- 5、在 styles 下新建 index.css 和 tailwind.css,内容如下:
- 6、解决 @tailwind(scss/at-rule-no-unknown) 报错问题
- 7、main.ts 中引入 css 入口文件 index.css
- 8、修改 tailwind.config.js,可为其增加/修改默认配置
- 9、运行项目,查看样式
- 10、通过 tialwind.css 设置 button 样式
- 48、引入 View UI Plus (iview)
- 49、引入 animate.css
- 50、自定义 view-ui-plus 主题样式 及 less 的引入、使用
- 51、初步引入微前端 qiankun 框架
- 52、静态资源引入与配置
- 53、Vite 应用 屏幕适应
- 54、Vite 优化打包配置
- 55、开发、生产环境(nginx/tomcat、docker)验证
-
- 1、主应用
-
- 1、引入 .env.docker 用于 docker 环境
- 2、package.json 中配置 docker 打包命令,用于区分判断 是 docker 环境打包还是其他环境
- 3、设置主应用路由以及引入子应用路由,这里子路由的 path 为 /uevwebuisystem,通过 NODE_ENV 判断打包环境
- 4、根据不同环境,判断、设置子应用的 entry,这里子应用名称为 uevwebuistystem,这需要和子应用注册 qiankun 时保持一致。
- 4、配置 Dockerfile 和 nginx.conf 接口
- 5、配置 vue.config.js 生产环境、开发环境的 publicPath
- 2、子应用
-
- 1、配置不同环境的 .env:原则是 nginx/tomcat 打包时,打包的文件夹名称为 uevwebuisystem,其他都为 dist,且都配置了 HOST 和 PORT(地址和端口,需要根据实际的生产环境修改 .env.prod 的内容,这里是本地部署所以 HOST 为 localhost,端口为 30307)
- 2、配置 package.json 打包命令:正常生产环境和 Docker 环境用 yarn/pnpm build 即可,nginx 和 tomcat 生产环境用 yarn/pnpm build:nginx/tomcat
- 3、vite.config.ts 中配置 base 路径(生产环境需要配置真实的 HOST 和 PORT 地址)以及注册 qiankun
- 4、配置子应用创建路由时的路径问题:通过 qiankun 访问子应用时,通过 /uevwebuisystem/ 方式,独立访问时需要判断是 nginx、tomcat 环境还是开发环境
- 5、处理静态资源网络请求:当请求 public/static 下内容时,需要判断不同环境下的请求路径,防止从主应用访问子应用时,请求不到问题
- 3、nginx、tomcat 环境的打包命令及 nginx 的配置
- 4、Docker 环境的打包命令
-
- 二、参考资料
使用 Vite + Vue3 + Typescript + axios + echarts + pinia + view-ui-plus + vue-router + less + sass + scss + css + tailwindcss + animate.css + vite-svg-loader + postcss + stylelint + eslint + prettier + autoprefixer + commitizen + commitlint + vite-plugin-compression + vite-plugin-qiankun + Docker + nginx.conf…等等插件,带你从 0 开始一步一步搭建,实现一个完整的前端工程化流程、项目。
一、完整构建流程
1、在指定目录下执行 pnpm init,初始化 package.json
2、执行 pnpm install vite -D,安装 vite。

3、package.json 中增加启动、构建命令
4、新建 index.html
<!--
 * @Description:
 * @Author: tianyw
 * @Date: 2023-03-07 13:49:57
 * @LastEditTime: 2023-03-07 13:50:09
 * @LastEditors: tianyw
-->
<!DOCTYPE html>
<html lang="en">
<head>
  <meta charset="UTF-8">
  <meta http-equiv="X-UA-Compatible" content="IE=edge">
  <meta name="viewport" content="width=device-width, initial-scale=1.0">
  <title>vite</title>
</head>
<body>
  <!-- 稍后vue项目挂载到这个元素上 -->
  <div id="app"></div>
  <!-- vite时基于esModule的 -->
  <script src="./src/main.ts" type="module"></script>
</body>
</html>
5、根目录下新建 src 文件夹,并在其下方新建 main.ts

6、安装 vue:pnpm install vue
7、根目录下新建 env.d.ts 文件,输入内容用以支持其他文件引入 vue
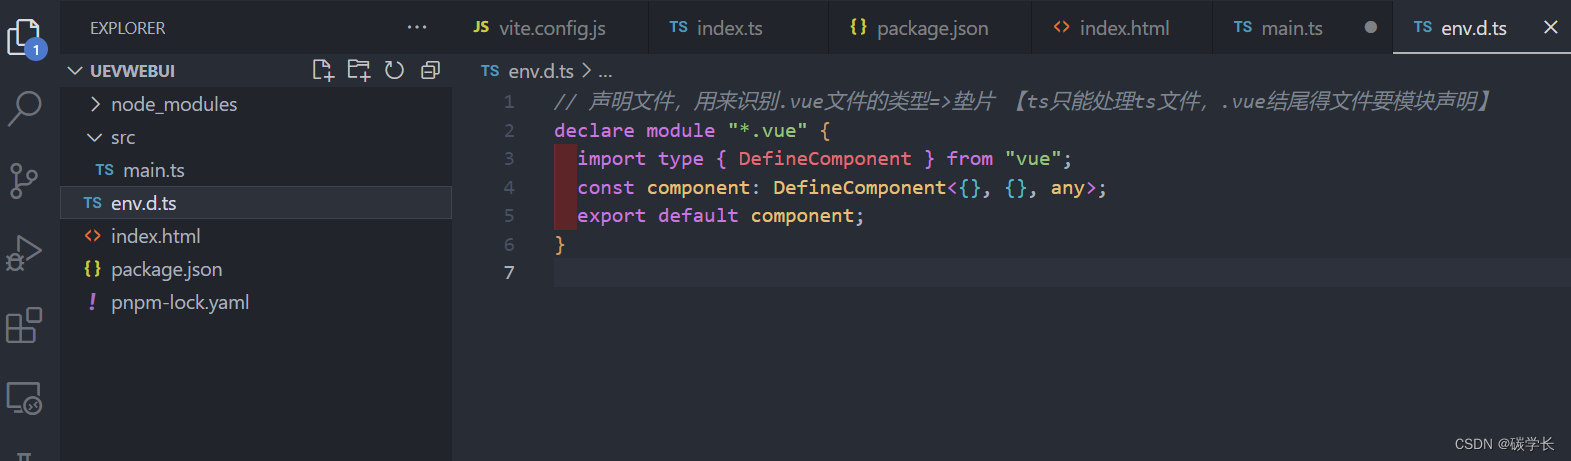
// 声明文件,用来识别.vue文件的类型=>垫片 【ts只能处理ts文件,.vue结尾得文件要模块声明】
declare module "*.vue" {


  import type {

     DefineComponent } from "vue";
  const component: DefineComponent<{

    }, {

    }, any>;
  export default component;
}
8、安装 @vitejs/plugin-vue 用于让 vite 支持 vue 文件的解析

9、根目录下新建 vite.config.ts,添加以下内容用于支持 vue 文件解析
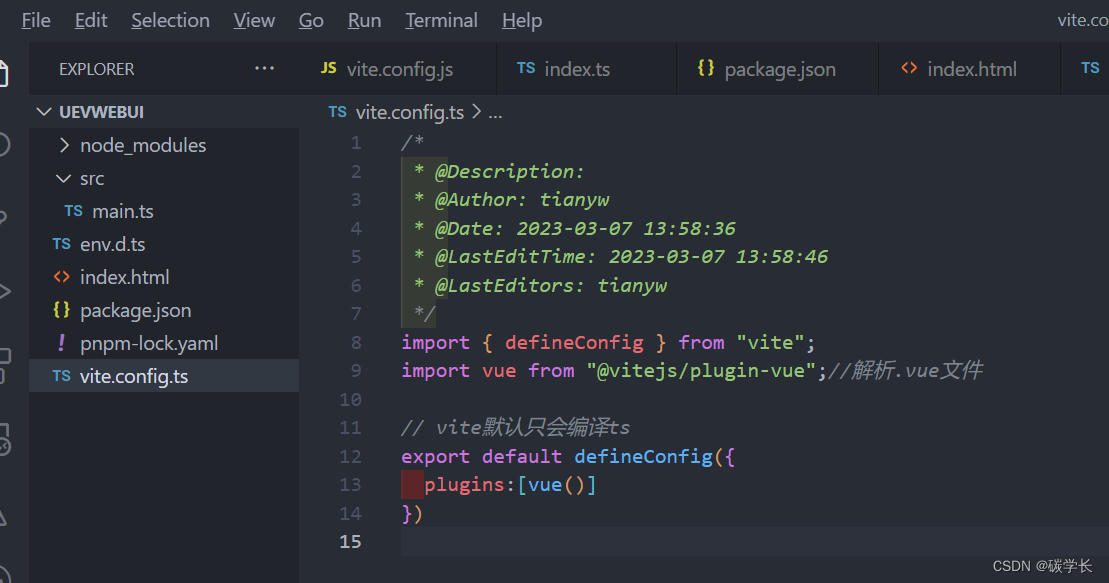
/*
 * @Description:
 * @Author: tianyw
 * @Date: 2023-03-07 13:58:36
 * @LastEditTime: 2023-03-07 13:58:46
 * @LastEditors: tianyw
 */
import {

     defineConfig } from "vite";
import vue from "@vitejs/plugin-vue";//解析.vue文件

// vite默认只会编译ts
export default defineConfig({


  plugins:[vue()]
})
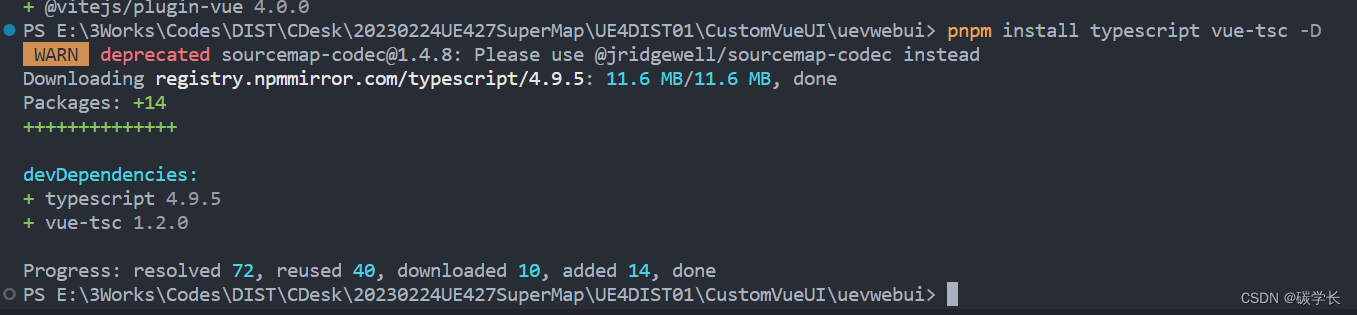
10、引入 typescrpit、vue-tsc:pnpm install typescript vue-tsc -D
Vite 仅执行 .ts 文件的转译工作,并不执行任何类型检查。vue-tsc 可以对 Vue3 进行 Typescript 类型校验
11、根目录下新建 tsconfig.json,并配置如下
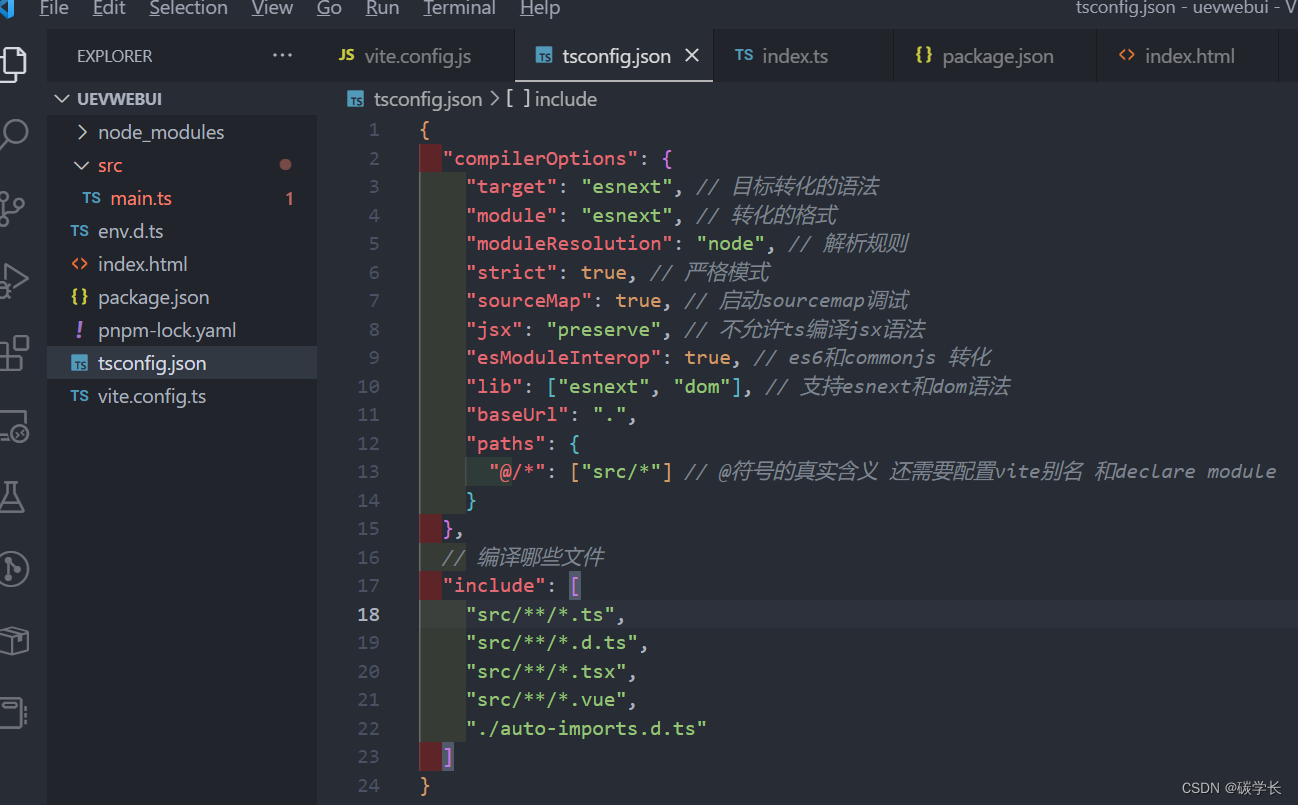
{


  "compilerOptions": {


    "target": "esnext", // 目标转化的语法
    "module": "esnext", // 转化的格式
    "moduleResolution": "node", // 解析规则
    "strict": true, // 严格模式
    "sourceMap": true, // 启动sourcemap调试
    "jsx": "preserve", // 不允许ts编译jsx语法
    "esModuleInterop": true, // es6和commonjs 转化
    "lib": ["esnext", "dom"], // 支持esnext和dom语法
    "baseUrl": ".",
    "paths": {


      "@/*": ["src/*"] // @符号的真实含义 还需要配置vite别名 和declare module
    }
  },
  // 编译哪些文件
  "include": [
    "src/**/*.ts",
    "src/**/*.d.ts",
    "src/**/*.tsx",
    "src/**/*.vue"
  ]
}
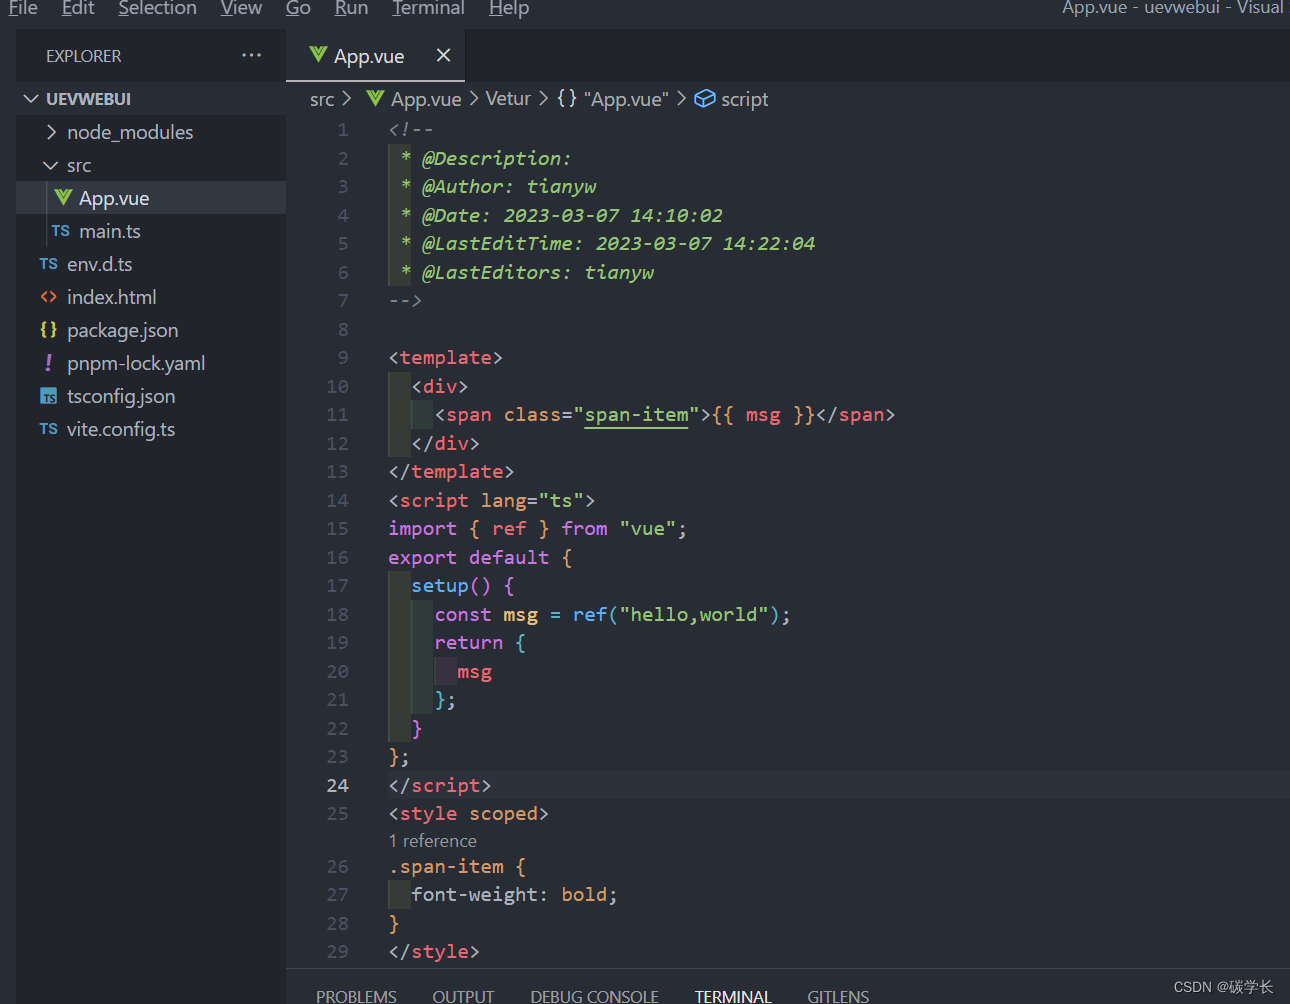
12、src 目录下新建 App.vue 文件,内容如下:
<!--
 * @Description:
 * @Author: tianyw
 * @Date: 2023-03-07 14:10:02
 * @LastEditTime: 2023-03-07 14:22:04
 * @LastEditors: tianyw
-->

<template>
  <div>
    <span class="span-item">{

    {

     msg }}</span>
  </div>
</template>
<script lang="ts">
import {

     ref } from "vue";
export default {


  setup() {


    const msg = ref("hello,world");
    return {


      msg
    };
  }
};
</script>
<style scoped>
.span-item {


  font-weight: bold;
}
</style>
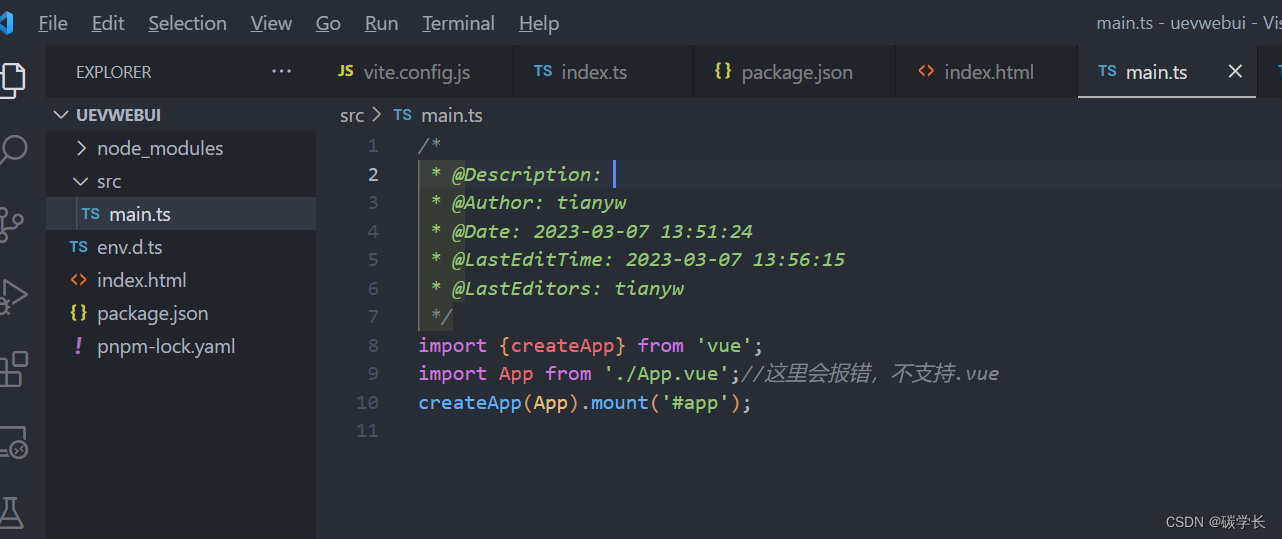
13、main.ts 中引入内容
/*
 * @Description:
 * @Author: tianyw
 * @Date: 2023-03-07 13:51:24
 * @LastEditTime: 2023-03-07 13:56:15
 * @LastEditors: tianyw
 */
import {

    createApp} from 'vue';
import App from './App.vue';//这里会报错,不支持.vue 通过 env.d.ts 声明后就不会报错了
createApp(App).mount('#app');
14、执行 yarn dev 运行项目,可以看到效果如下:

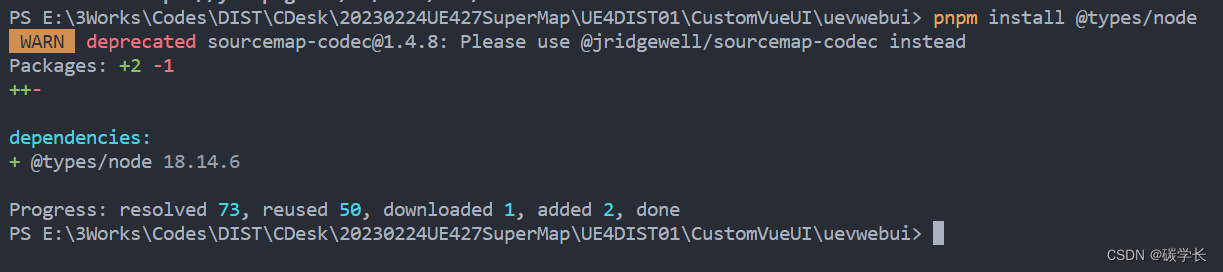
15、安装 @types/node
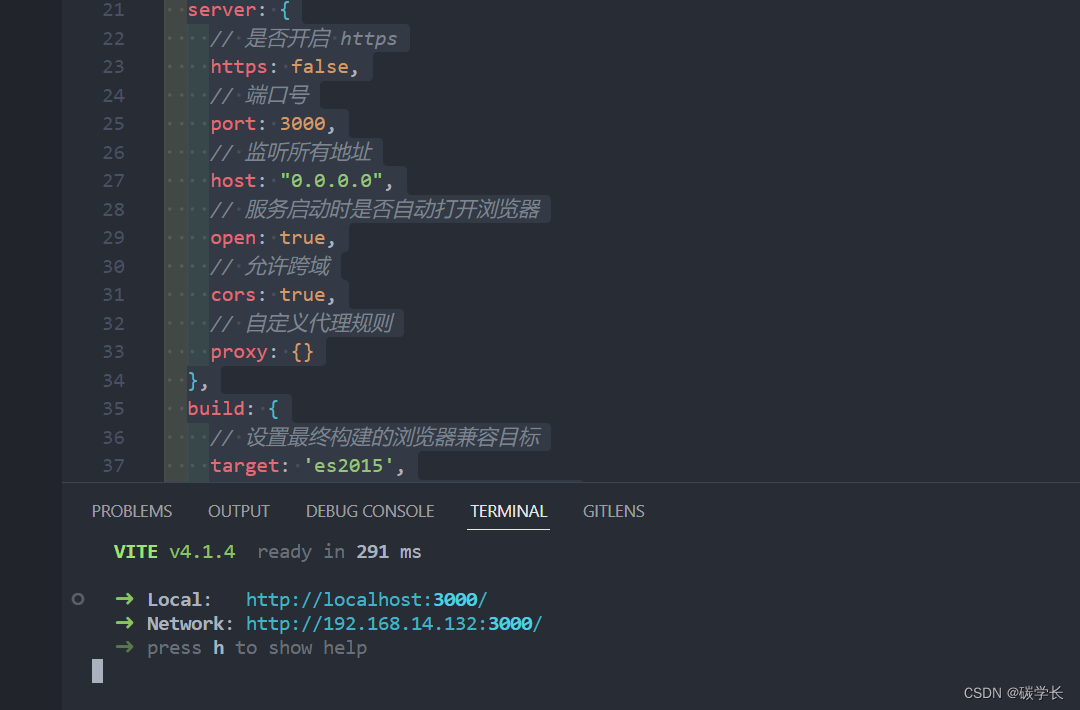
16、修改 vite.config.ts 配置如下
/*
 * @Description:
 * @Author: tianyw
 * @Date: 2023-03-07 13:58:36
 * @LastEditTime: 2023-03-07 14:40:08
 * @LastEditors: tianyw
 */
import {

     defineConfig } from "vite";
import vue from "@vitejs/plugin-vue"; //解析.vue文件
import {

     resolve } from "path";

// vite默认只会编译ts
export default defineConfig({


  base: "./",
  plugins: [vue()],
  resolve: {


    alias: {


      "@": resolve(__dirname, "./src") // @ 代替 src
    }
  },
  server: {


    // 是否开启 https
    https: false,
    // 端口号
    port: 3000,
    // 监听所有地址
    host: "0.0.0.0",
    // 服务启动时是否自动打开浏览器
    open: true,
    // 允许跨域
    cors: true,
    // 自定义代理规则
    proxy: {

    }
  },
  build: {


    // 设置最终构建的浏览器兼容目标
    target: 'es2015',
    // 构建后是否生成 source map 文件
    sourcemap: false,
    // chunk 大小警告的限制(以 kbs 为单位)
    chunkSizeWarningLimit: 2000,
    // 启用/禁用 gzip 压缩大小报告
    reportCompressedSize: false
  }
});
执行 yarn dev 后,端口变为了设置的 3000,且会自动打开浏览器。
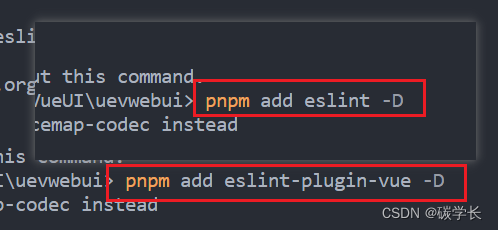
17、引入 eslint
执行 pnpm add eslint -D 、pnpm add eslint-plugin-vue -D、pnpm i @vue/eslint-config-typescript -D

18、根目录下新建 .eslintrc.js 文件,内容配置如下:
/*
 * @Description:
 * @Author: tianyw
 * @Date: 2023-03-07 14:43:18
 * @LastEditTime: 2023-03-07 14:43:30
 * @LastEditors: tianyw
 */
module.exports = {


  env: {


    // 环境 针对哪些环境的语言 window
    browser: true,
    es2021: true, //new Promise
    node: true
  },
  extends: [
    // 继承了哪些规则,别人写好的规则拿来用
    "eslint:recommended",
    "plugin:vue/vue3-essential", // eslint-plugin-vue
    "plugin:@typescript-eslint/recommended" // typescript 规则
  ],
  overrides: [],
  // 可以解析.vue文件
  parser: "vue-eslint-parser", // esprima babel-eslint @typescript-eslint/parser
  parserOptions: {


    parser: "@typescript-eslint/parser", // 解析ts文件的
    ecmaVersion: "latest",
    sourceType: "module"
  },
  plugins: ["vue", "@typescript-eslint"],
  rules: {

    }
};
19、根目录下新建 .eslintignore,配置如下:
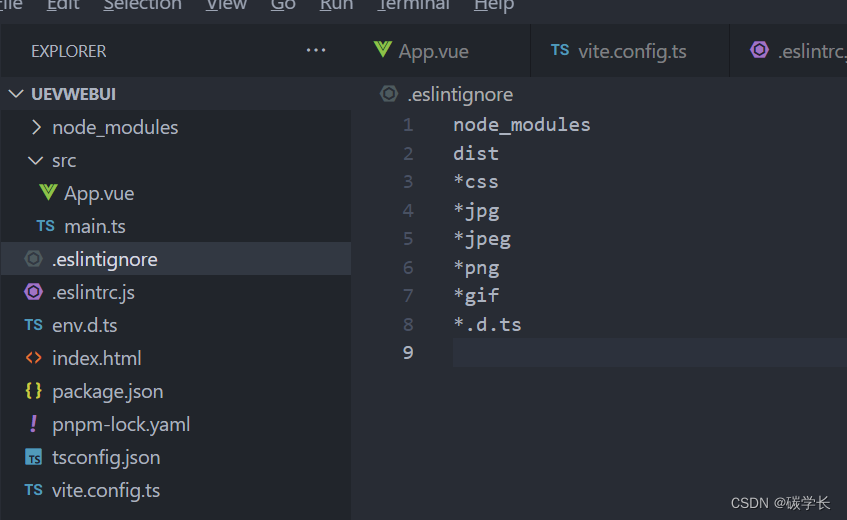
node_modules
dist
*css
*jpg
*jpeg
*png
*gif
*.d.ts
20、修改 package.json 中 build 及新增 lint 配置
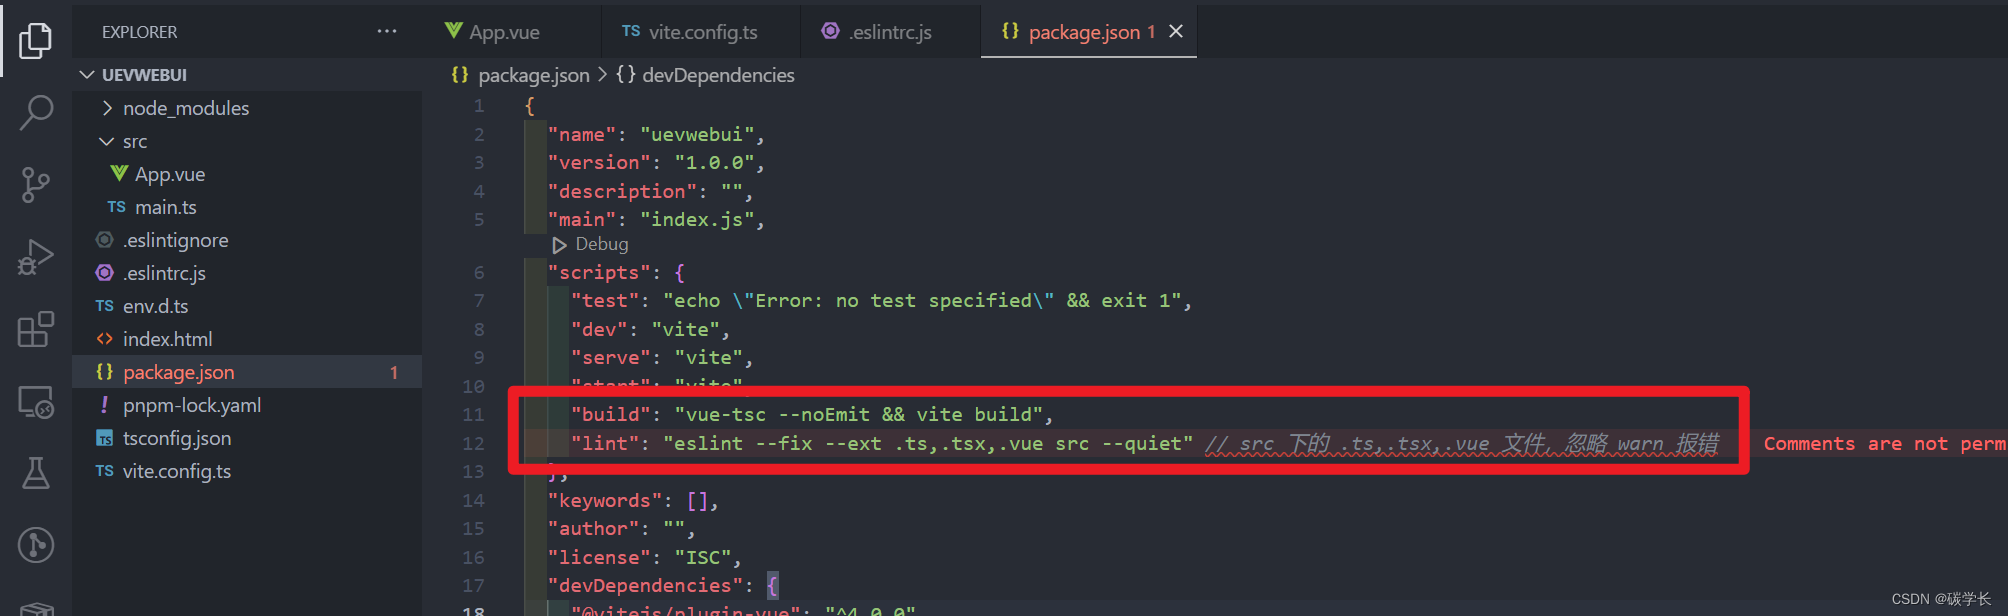
完整内容如下:
{


  "name": "uevwebui",
  "version": "1.0.0",
  "description": "",
  "main": "index.js",
  "scripts": {


    "test": "echo \"Error: no test specified\" && exit 1",
    "dev": "vite",
    "serve": "vite",
    "start": "vite",
    "build": "vue-tsc --noEmit && vite build",
    "lint": "eslint --fix --ext .ts,.tsx,.vue src --quiet"
  },
  "keywords": [],
  "author": "",
  "license": "ISC",
  "devDependencies": {


    "@vitejs/plugin-vue": "^4.0.0",
    "@vue/eslint-config-typescript": "^11.0.2",
    "typescript": "^4.9.5",
    "vite": "^4.1.4",
    "vue-tsc": "^1.2.0"
  },
  "dependencies": {


    "@types/node": "^18.14.6",
    "vue": "^3.2.47"
  }
}
21、引入 prettier:pnpm install prettier eslint-plugin-prettier @vue/eslint-config-prettier -D

22、.eslintrc.js 中增加 prettier 的配置,完整内容如下:
/*
 * @Description:
 * @Author: tianyw
 * @Date: 2023-03-07 14:43:18
 * @LastEditTime: 2023-03-07 14:57:35
 * @LastEditors: tianyw
 */
module.exports = {


  env: {


    // 环境 针对哪些环境的语言 window
    browser: true,
    es2021: true, //new Promise
    node: true
  },
  extends: [
    // 继承了哪些规则,别人写好的规则拿来用
    "eslint:recommended",
    "plugin:vue/vue3-essential", // eslint-plugin-vue
    "plugin:@typescript-eslint/recommended", // typescript 规则
    "@vue/eslint-config-prettier"
  ],
  overrides: [],
  // 可以解析.vue文件
  parser: "vue-eslint-parser", // esprima babel-eslint @typescript-eslint/parser
  parserOptions: {


    parser: "@typescript-eslint/parser", // 解析ts文件的
    ecmaVersion: "latest",
    sourceType: "module"
  },
  plugins: ["vue", "@typescript-eslint"],
  rules: {


    "vue/multi-word-component-names": "off", // 组件命名校验关闭
    // 自定义规则 // 自带的 prettier 规则
    "prettier/prettier": [
      "error",
      {


        singleQuote: false, // 使用双引号
        semi: false, // 末尾添加分号
        tabWidth: 2, // tab=2
        trailingComma: "none", // {a:1,}有无逗号
        useTabs: false,
        endOfLine: "auto"
      }
    ]
  }
};
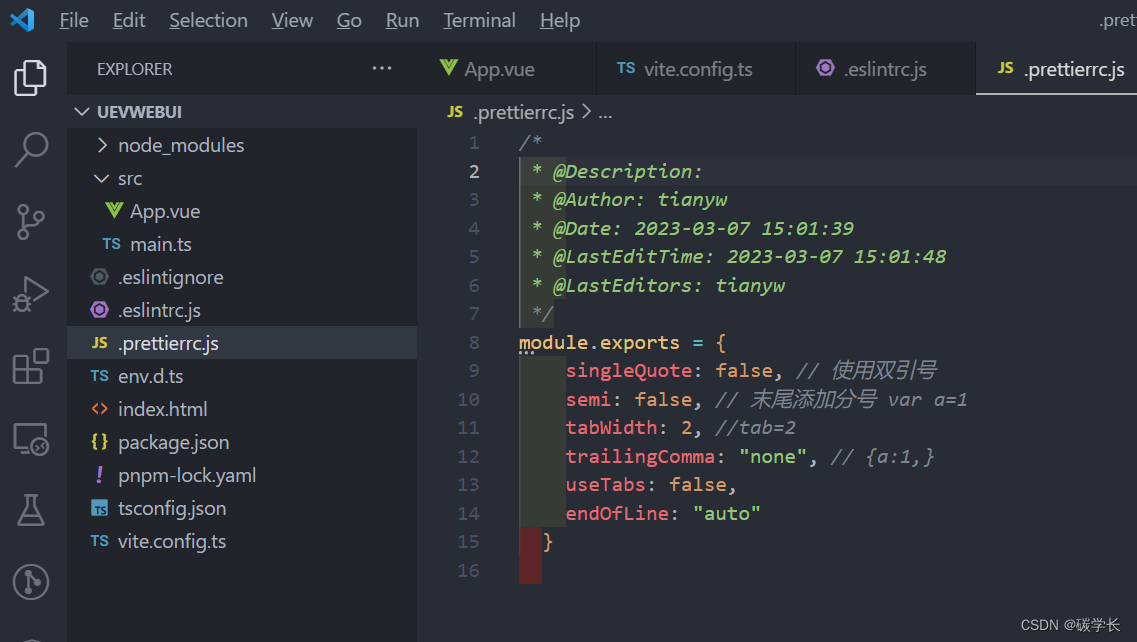
23、根目录下新建 .prettierrc.js 文件,配置如下:
/*
 * @Description:
 * @Author: tianyw
 * @Date: 2023-03-07 15:01:39
 * @LastEditTime: 2023-03-07 15:01:48
 * @LastEditors: tianyw
 */
module.exports = {


    singleQuote: false, // 使用双引号
    semi: false, // 末尾添加分号 var a=1
    tabWidth: 2, //tab=2
    trailingComma: "none", // {a:1,}
    useTabs: false,
    endOfLine: "auto"
  }
24、根目录下新建 .prettierignore 文件,配置内容如下:
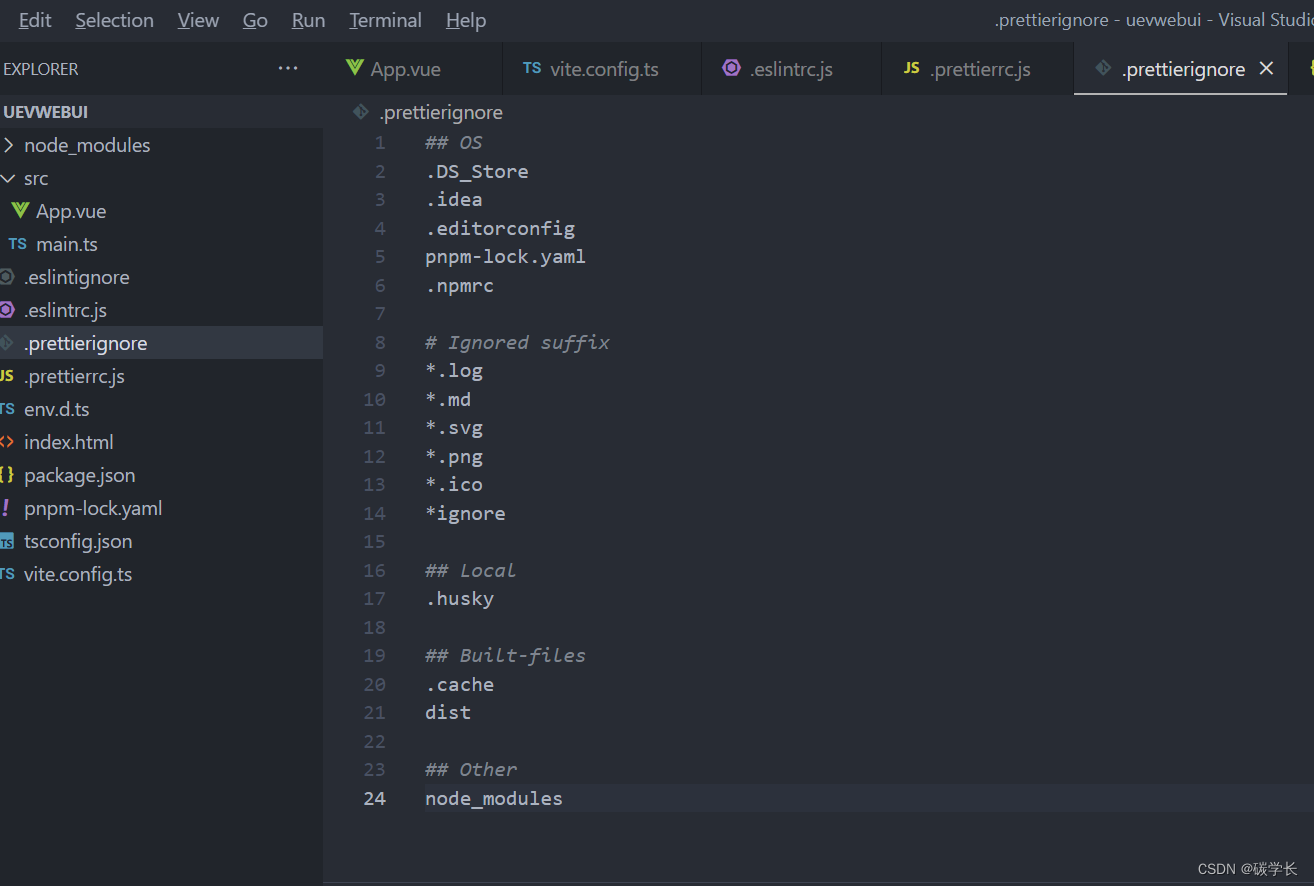
## OS
.DS_Store
.idea
.editorconfig
pnpm-lock.yaml
.npmrc

# Ignored suffix
*.log
*.md
*.svg
*.png
*.ico
*ignore

## Local
.husky

## Built-files
.cache
dist

## Other
node_modules
25、package.json 添加 prettier 命令
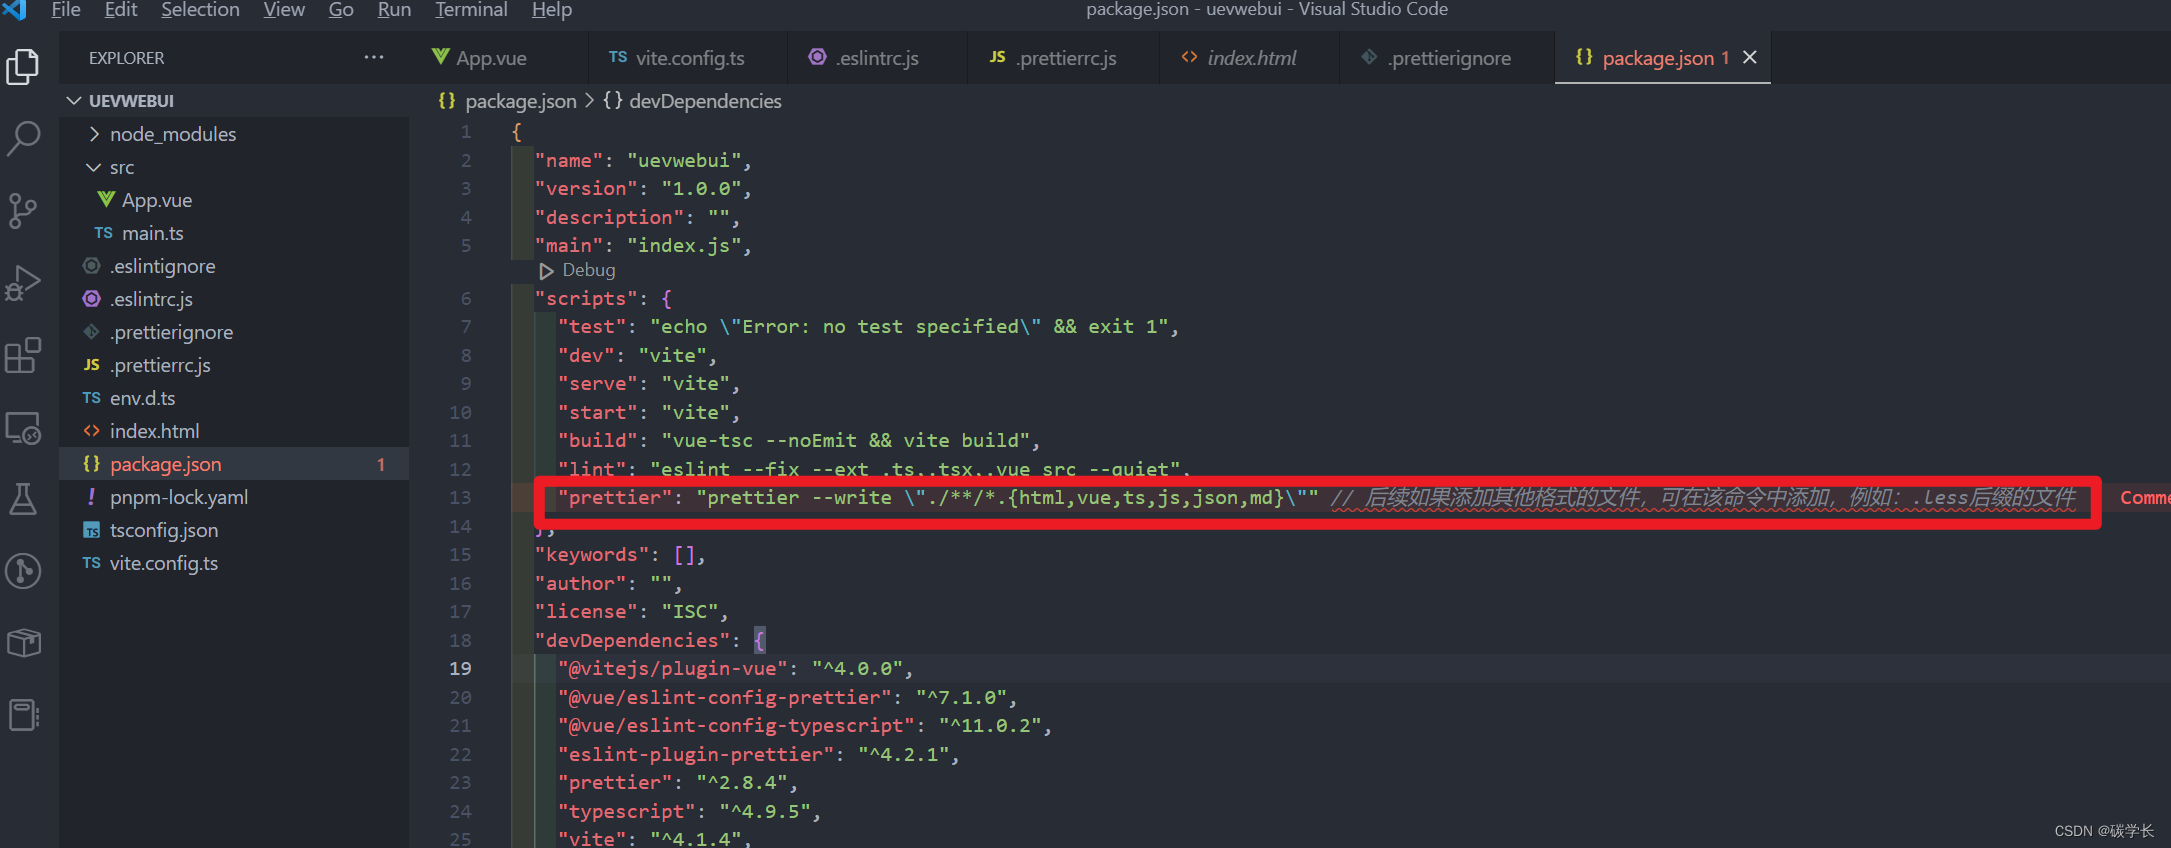
"prettier": "prettier --write \"./**/*.{html,vue,ts,tsx,js,json,md}\"" // 后续如果添加其他格式的文件,可在该命令中添加,例如:.less后缀的文件
此时可以在控制台执行 yarn prettier 命令执行格式化。
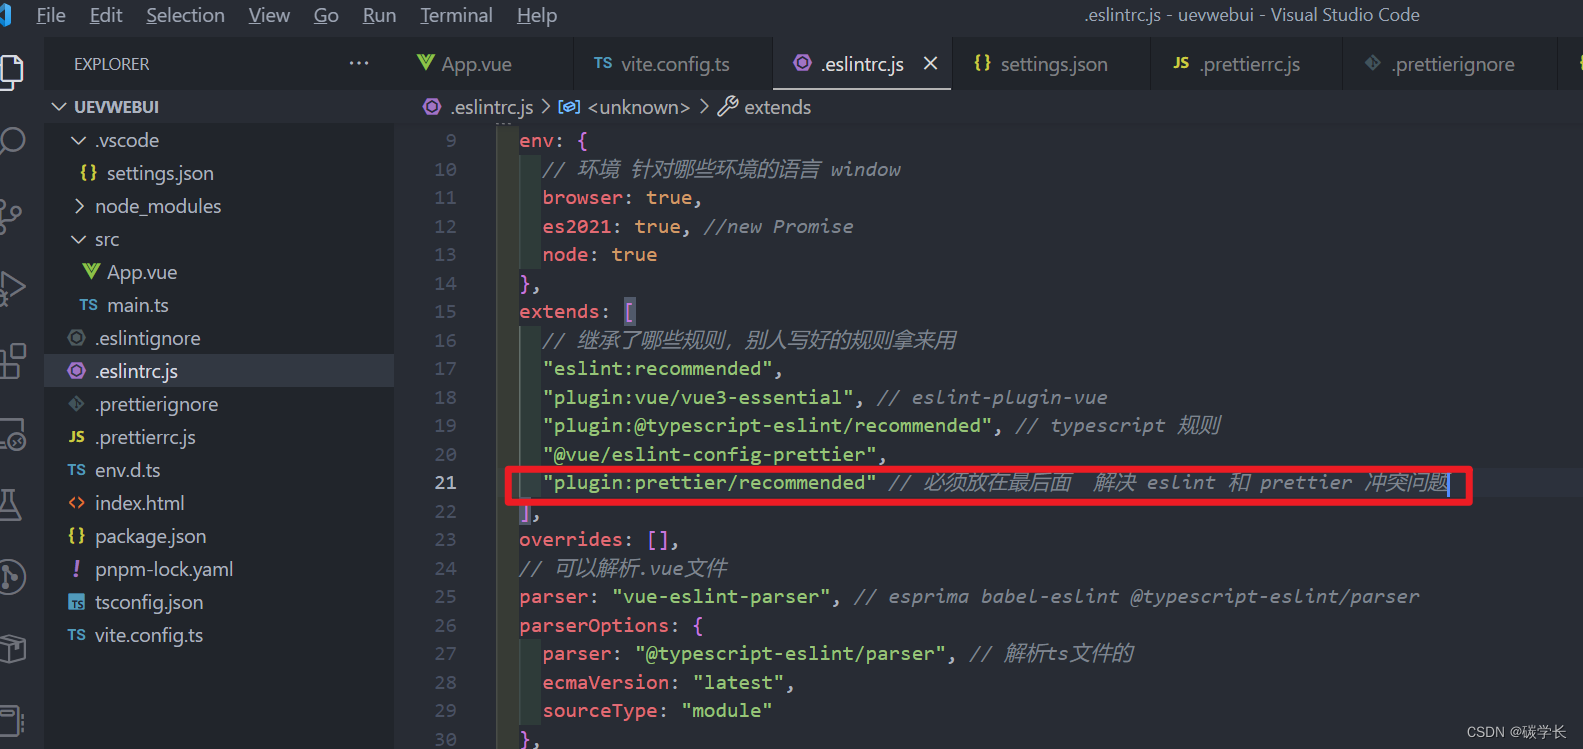
26、 解决 eslint 与 prettier 的冲突
安装 pnpm add eslint-config-prettier eslint-plugin-prettier -D

2、在 .eslintrc.js 中新增 “plugin:prettier/recommended” 配置
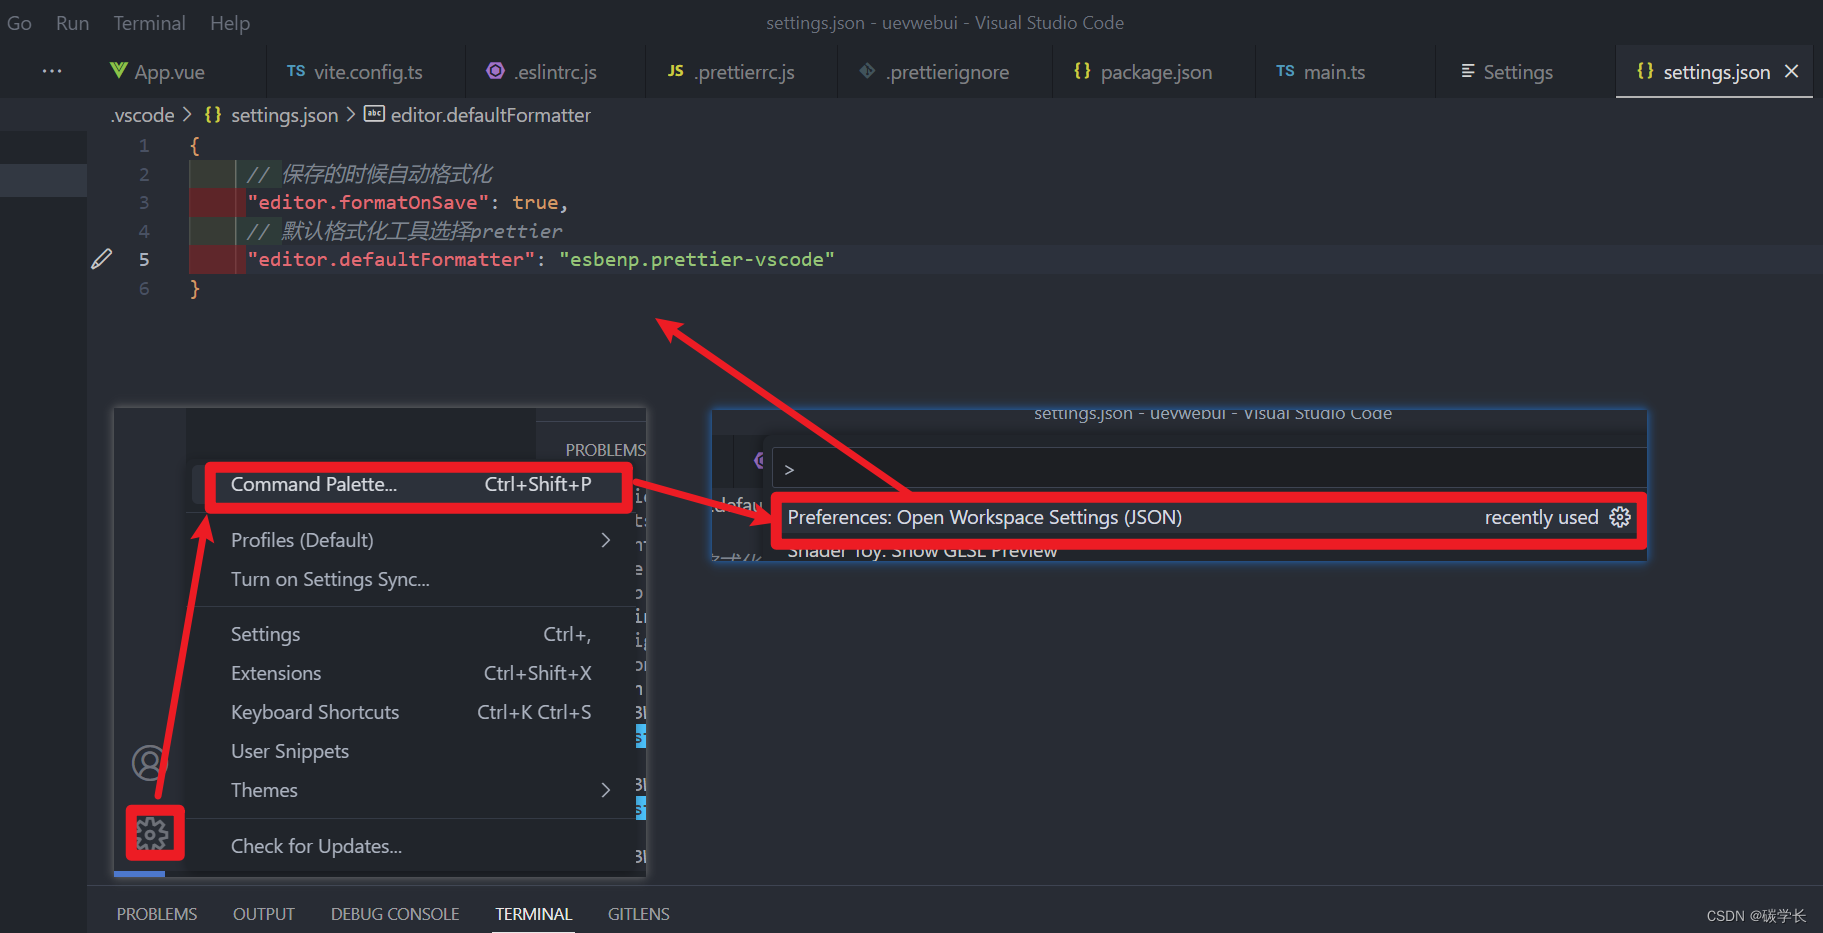
27、安装 vscode 的 Prettier - Code formatter 插件,实现修改保存时就自动格式化
修改 settings.json 文件如下内容:通过 settings -> Command Plalette,然后输入 Preferences:Open Workspace Settings(JSON),为项目新建 .vscode/settings.json 文件:
1、添加 prettier 配置
2、添加 eslint 配置:
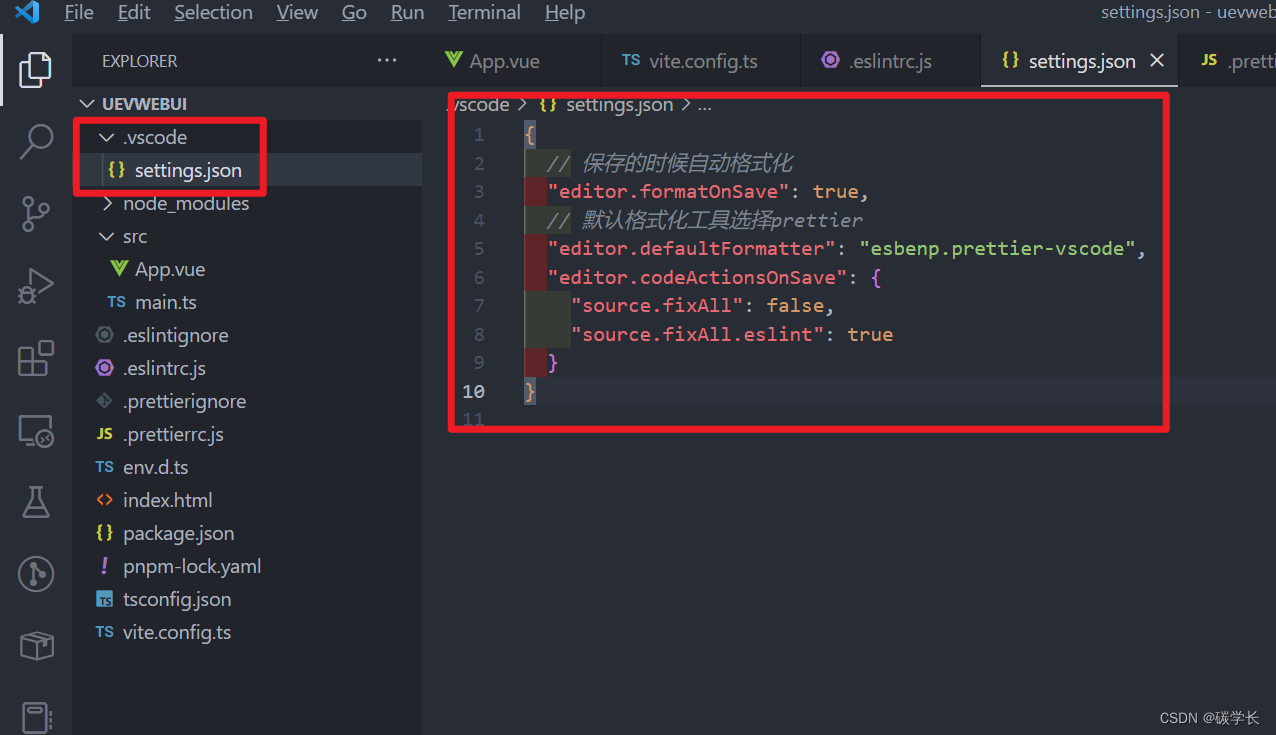
此时就可以实现修改并保存某个文件后,自动格式化的效果。
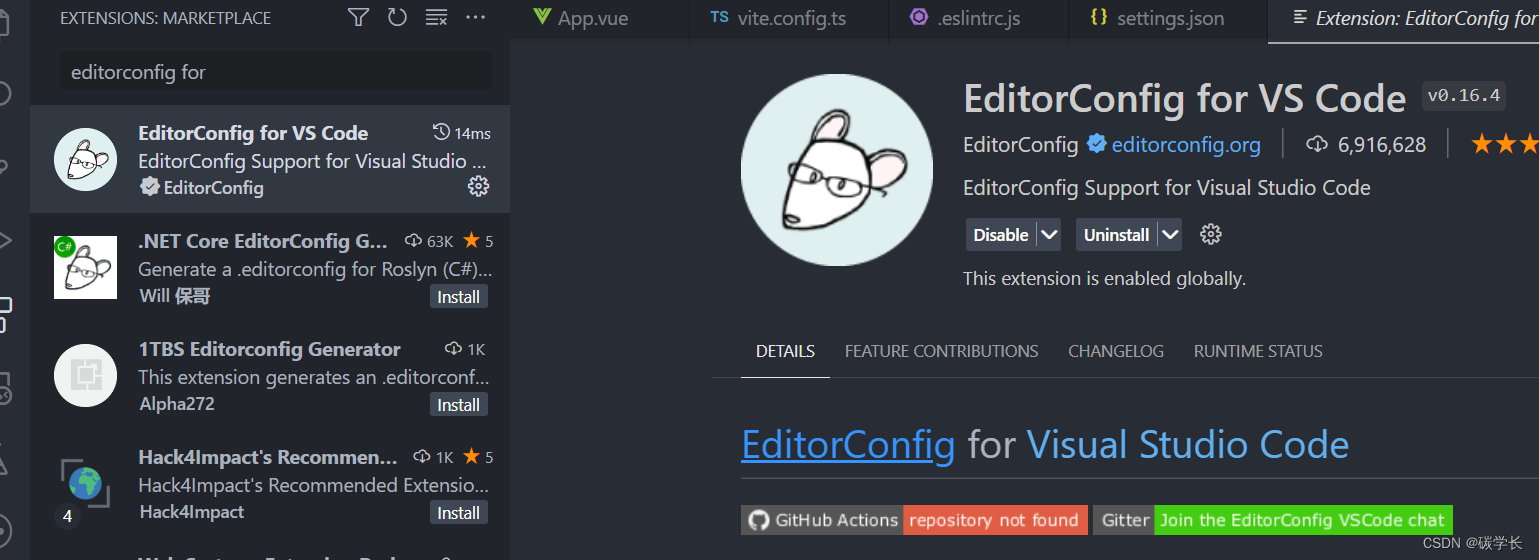
28、引入 EditorConfig 配置,用于统一不同 IDE 编辑器的编码风格
很多 IDE 中会默认支持此配置,但是也有些不支持,如:VSCode、Atom、Sublime Text 等。如果在 VSCode 中使用需要安装 EditorConfig for VS Code 插件。
根目录下新建 .editorconfig 文件,文件内容如下:
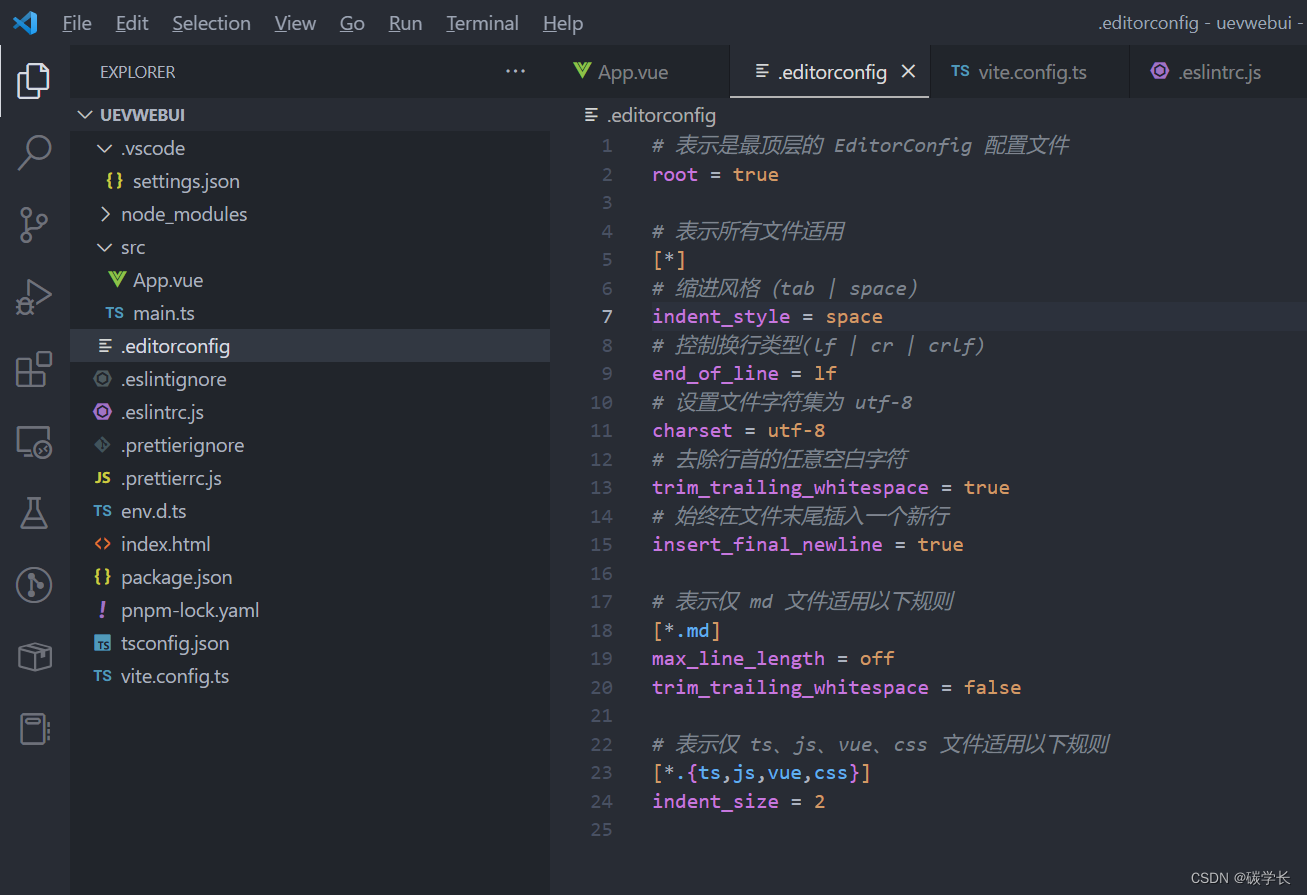
# 表示是最顶层的 EditorConfig 配置文件
root = true

# 表示所有文件适用
[*]
# 缩进风格(tab | space)
indent_style = space
# 控制换行类型(lf | cr | crlf)
end_of_line = lf
# 设置文件字符集为 utf-8
charset = utf-8
# 去除行首的任意空白字符
trim_trailing_whitespace = true
# 始终在文件末尾插入一个新行
insert_final_newline = true

# 表示仅 md 文件适用以下规则
[*.md]
max_line_length = off
trim_trailing_whitespace = false

# 表示仅 ts、js、vue、css 文件适用以下规则
[*.{ts,js,vue,css}]
indent_size = 2
29、引入 stylelint 配置:适用 css/less/sass/vue/scss
执行以下命令:
pnpm add stylelint postcss postcss-less postcss-html postcss-scss postcss-sass stylelint-config-prettier stylelint-config-recommended-less stylelint-config-recommended-scss stylelint-config-recommended-vue stylelint-config-standard stylelint-config-standard-vue stylelint-less stylelint-order stylelint-config-html sass sass-loader -D
stylelint: css 样式 lint 工具
postcss: 转换 css 代码工具
postcss-less: 识别 less 语法
postcss-html: 识别 html/vue 中的 标签中的样式
stylelint-config-standard: Stylelint 的标准可共享配置规则,详细可查看官方文档
stylelint-config-prettier: 关闭所有不必要或可能与 Prettier 冲突的规则
stylelint-config-recommended-less: less 的推荐可共享配置规则,详细可查看官方文档
stylelint-config-standard-vue: lint.vue 文件的样式配置
stylelint-less: stylelint-config-recommended-less 的依赖,less 的stylelint 规则集合
stylelint-order: 指定样式书写的顺序,在. stylelintrc.js 中 order/properties-order 指定顺序
…

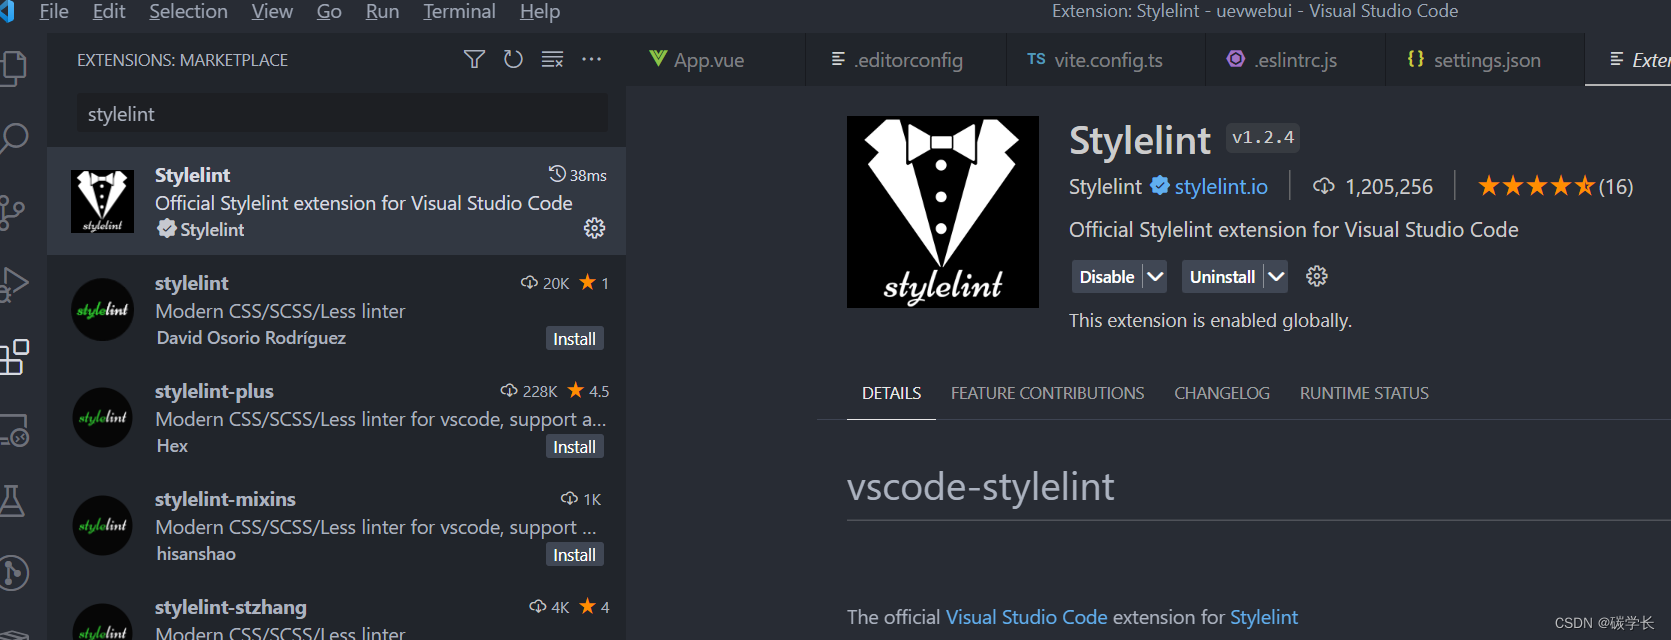
30、为 vscode 安装 stylelint 插件,并在 settings.json 中添加 stylelint 配置
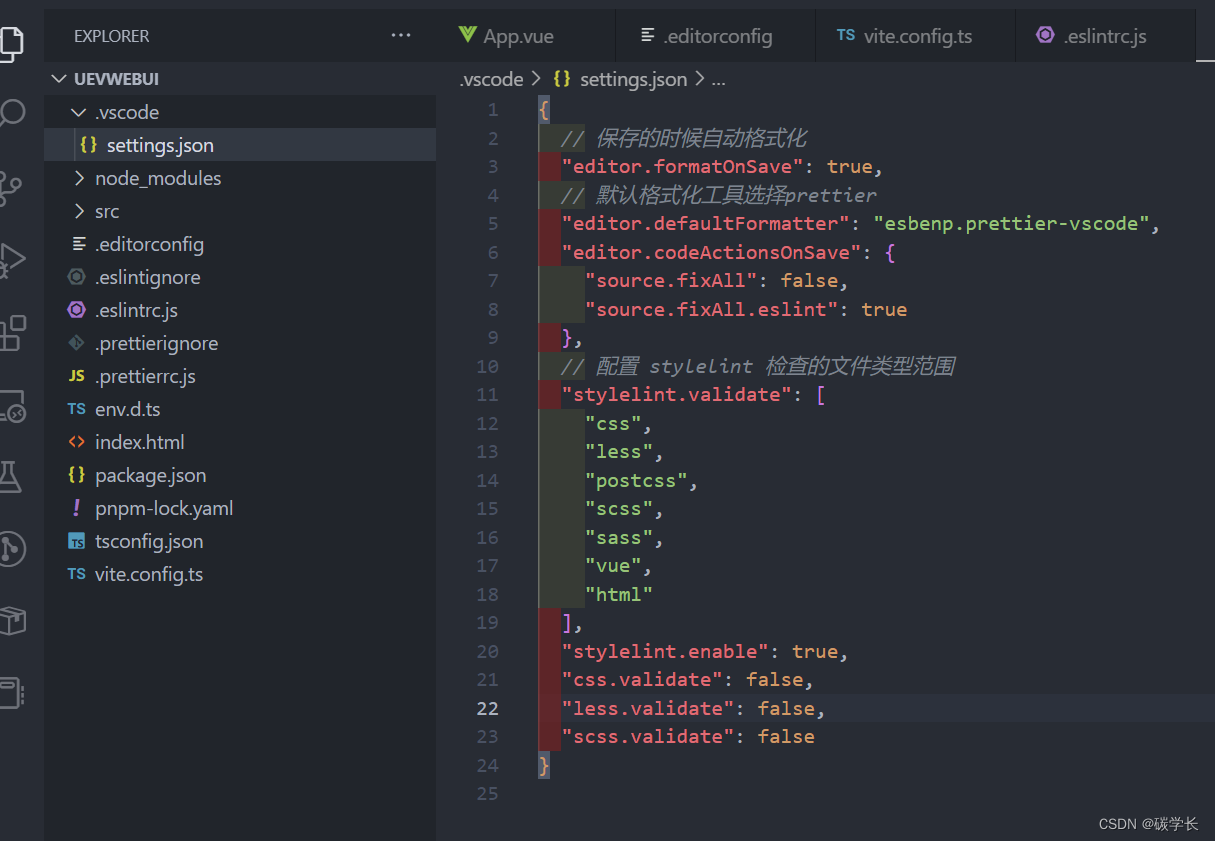
{


  // 保存的时候自动格式化
  "editor.formatOnSave": true,
  // 默认格式化工具选择prettier
  "editor.defaultFormatter": "esbenp.prettier-vscode",
  "editor.codeActionsOnSave": {


    "source.fixAll": false,
    "source.fixAll.eslint": true
  },
  // 配置 stylelint 检查的文件类型范围
  "stylelint.validate": [
    "css",
    "less",
    "postcss",
    "scss",
    "sass",
    "vue",
    "html"
  ],
  "stylelint.enable": true,
  "css.validate": false,
  "less.validate": false,
  "scss.validate": false
}
31、根目录下新增 .stylelintrc.js 文件,并配置如下:
module.exports = {


  extends: [
    "stylelint-config-standard",
    "stylelint-config-prettier",
    "stylelint-config-html/vue",
    "stylelint-config-recommended-vue/scss",
    "stylelint-config-recommended-less",
    "stylelint-config-recommended-scss"
  ],
  plugins: ["stylelint-order"],
  overrides: [
    {


      files: ["**/*.less"],
      customSyntax: "postcss-less"
    },
    {


      files: ["**/*.sass"],
      customSyntax: "postcss-sass"
    },
    {


      files: ["**/*.scss"],
      customSyntax: "postcss-scss"
    },
    {


      files: ["**/*.(html|vue)"],
      customSyntax: "postcss-html"
    }
  ],
  ignoreFiles: [
    "**/*.js",
    "**/*.jsx",
    "**/*.tsx",
    "**/*.ts",
    "**/*.json",
    "**/*.md",
    "**/*.yaml"
  ],
  rules: {


    indentation: 2,
    "selector-pseudo-element-no-unknown": [
      true,
      {


        ignorePseudoElements: ["v-deep", ":deep"]
      }
    ],
    "number-leading-zero": "always",
    "no-descending-specificity": null, // 禁止在具有较高优先级的选择器后出现被其覆盖的较低优先级的选择器
    "function-url-quotes": null,
    "string-quotes": "double",
    "unit-case": null,
    "color-hex-case": "lower",
    "color-hex-length": "long",
    "rule-empty-line-before": "never",
    "font-family-no-missing-generic-family-keyword": null,
    "selector-type-no-unknown": null,
    "block-opening-brace-space-before": "always",
    "at-rule-no-unknown": null,
    "no-duplicate-selectors": null,
    "property-no-unknown": null,
    "no-empty-source": null,
    "selector-class-pattern": null,
    "keyframes-name-pattern": null,
    "import-notation": "string",
    "selector-pseudo-class-no-unknown": [
      true,
      {

     ignorePseudoClasses: ["global", "deep"] }
    ],
    "function-no-unknown": null,
    // 指定样式的排序
    "order/properties-order": [
      "position",
      "top",
      "right",
      "bottom",
      "left",
      "z-index",
      "display",
      "justify-content",
      "align-items",
      "float",
      "clear",
      "overflow",
      "overflow-x",
      "overflow-y",
      "margin",
      "margin-top",
      "margin-right",
      "margin-bottom",
      "margin-left",
      "padding",
      "padding-top",
      "padding-right",
      "padding-bottom",
      "padding-left",
      "width",
      "min-width",
      "max-width",
      "height",
      "min-height",
      "max-height",
      "font-size",
      "font-family",
      "font-weight",
      "border",
      "border-style",
      "border-width",
      "border-color",
      "border-top",
      "border-top-style",
      "border-top-width",
      "border-top-color",
      "border-right",
      "border-right-style",
      "border-right-width",
      "border-right-color",
      "border-bottom",
      "border-bottom-style",
      "border-bottom-width",
      "border-bottom-color",
      "border-left",
      "border-left-style",
      "border-left-width",
      "border-left-color",
      "border-radius",
      "text-align",
      "text-justify",
      "text-indent",
      "text-overflow",
      "text-decoration",
      "white-space",
      "color",
      "background",
      "background-position",
      "background-repeat",
      "background-size",
      "background-color",
      "background-clip",
      "opacity",
      "filter",
      "list-style",
      "outline",
      "visibility",
      "box-shadow",
      "text-shadow",
      "resize",
      "transition"
    ]
  }
}
32、package.json 中新增 stylelint 命令
33、根目录下新增 .stylelintignore 文件,配置内容如下:
# .stylelintignore
# 旧的不需打包的样式库
*.min.css

# 其他类型文件
*.js
*.jpg
*.woff

# 测试和打包目录
/test/
/dist/*
/public/*
public/*
/node_modules/
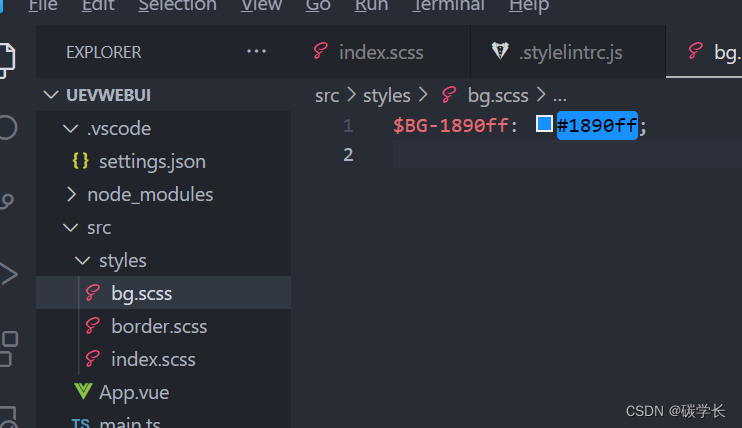
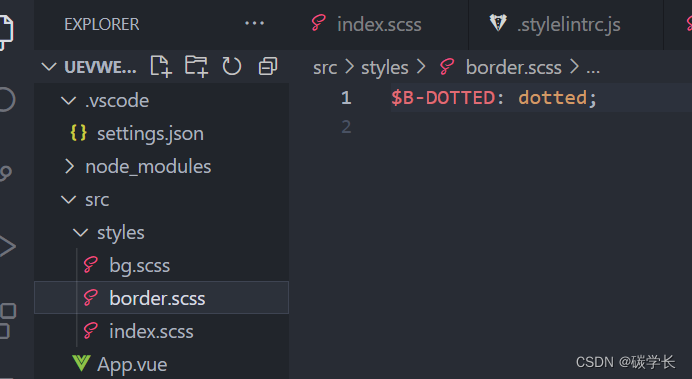
34、新建 styles 文件夹及其下的 index.scss 等文件,具体如下:
bg.scss 内新增 $BG-1890ff,比如 bg.scss 用于设置 background 方面的样式。
border.scss 内新增 $B-DOTTED,比如border.scss 用于设置 border 相关的样式。
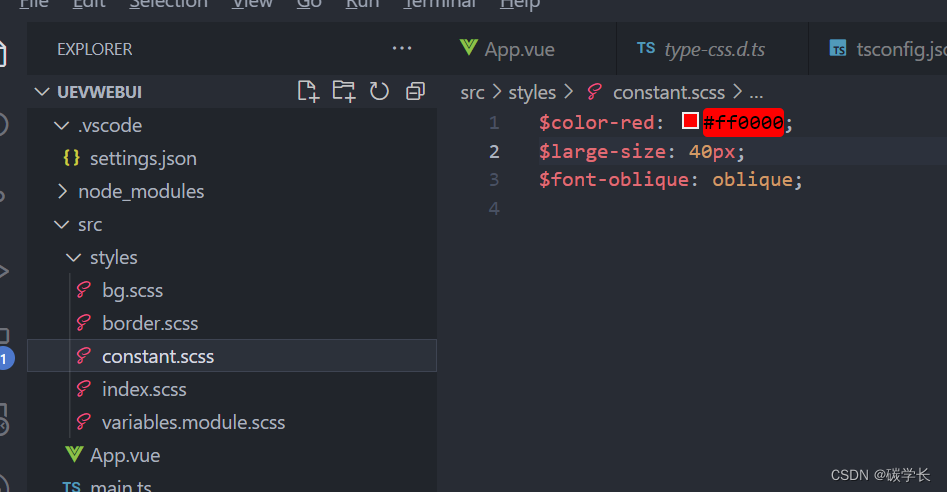
constant.scss:用于放置项目中的sass变量,比如主题颜色,大字体的字号,小字体的字号等等
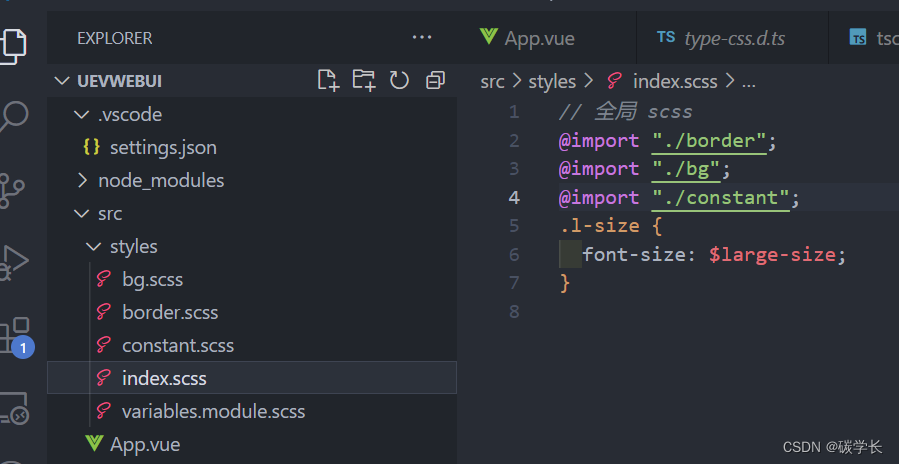
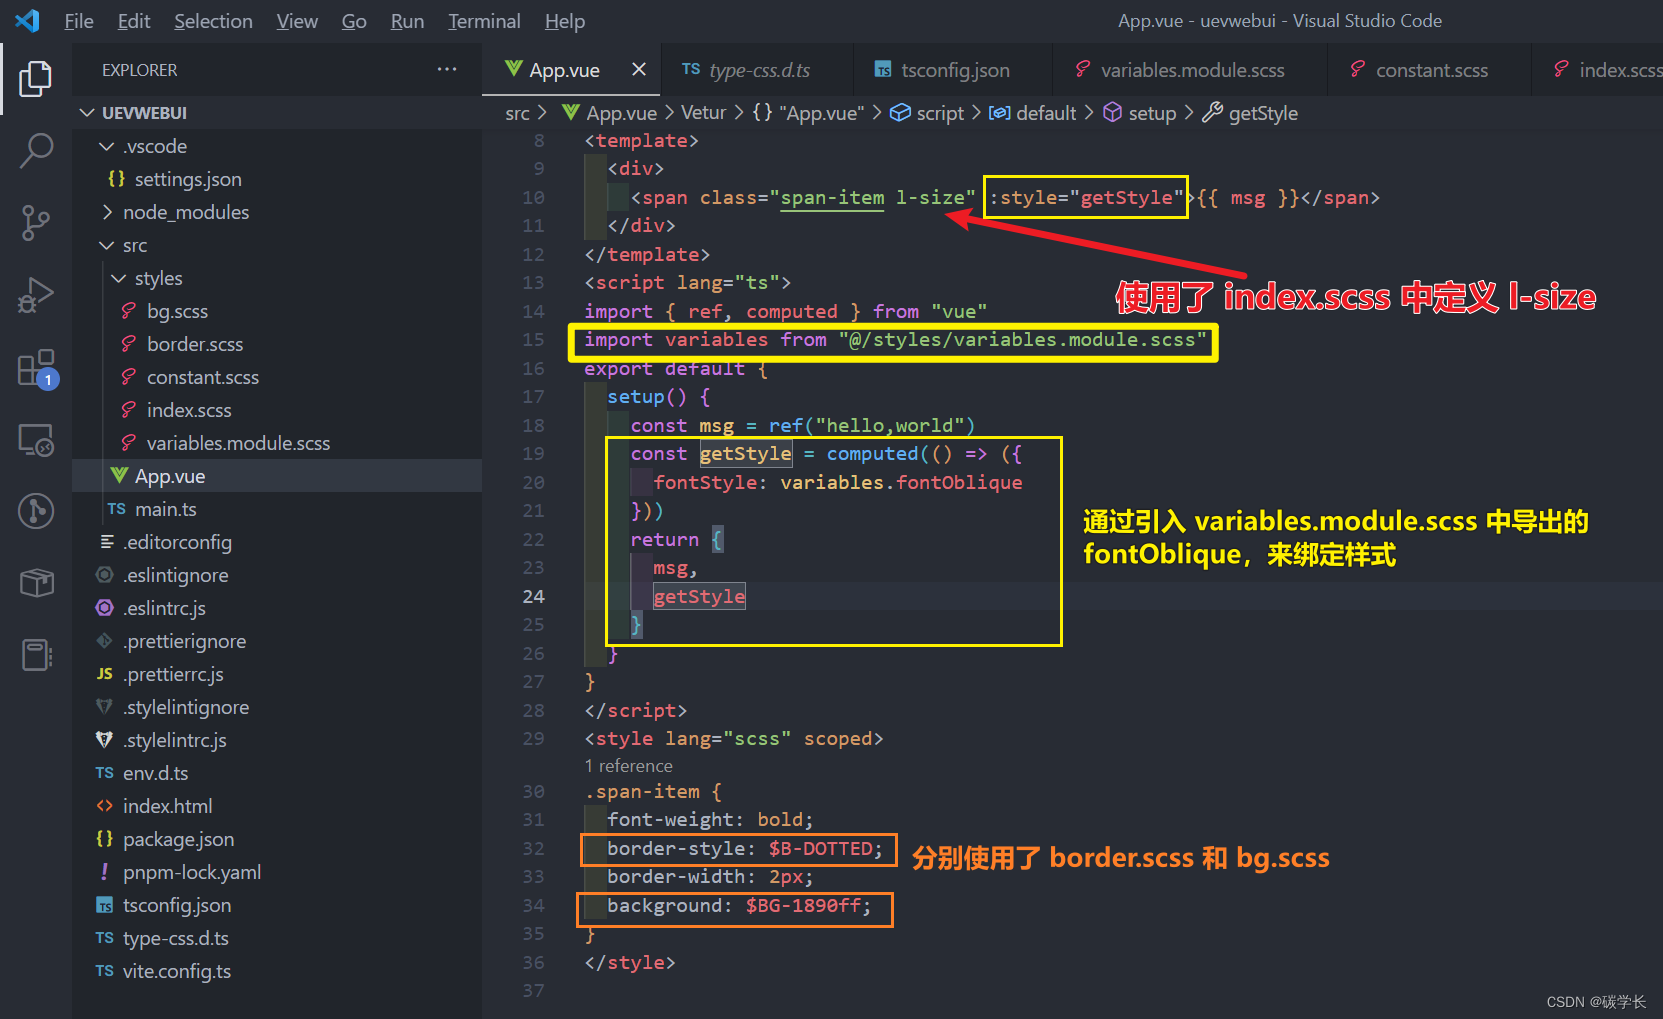
index.scss 作为所有 scss 的入口,引入 border.scss 和 bg.scss,用于放置项目中自己封装的一些常用的样式,class类名,比如flex布局,定位,字体等等,这里定义了一个类名 l-size
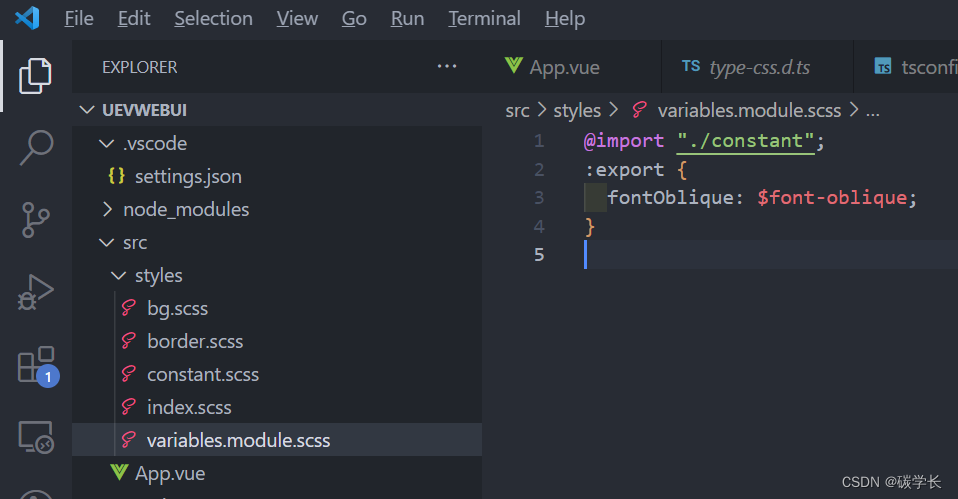
variables.module.scss:用于 scss 变量的导出,大部分用于 vue 文件中 js 中使用,这里没有将 variables.module.scss 引入到 index.scss 中,为了后面测试 scss 变量的导出及其使用方法。
35、vite.config.ts 中增加 css 配置,引入 index.scss
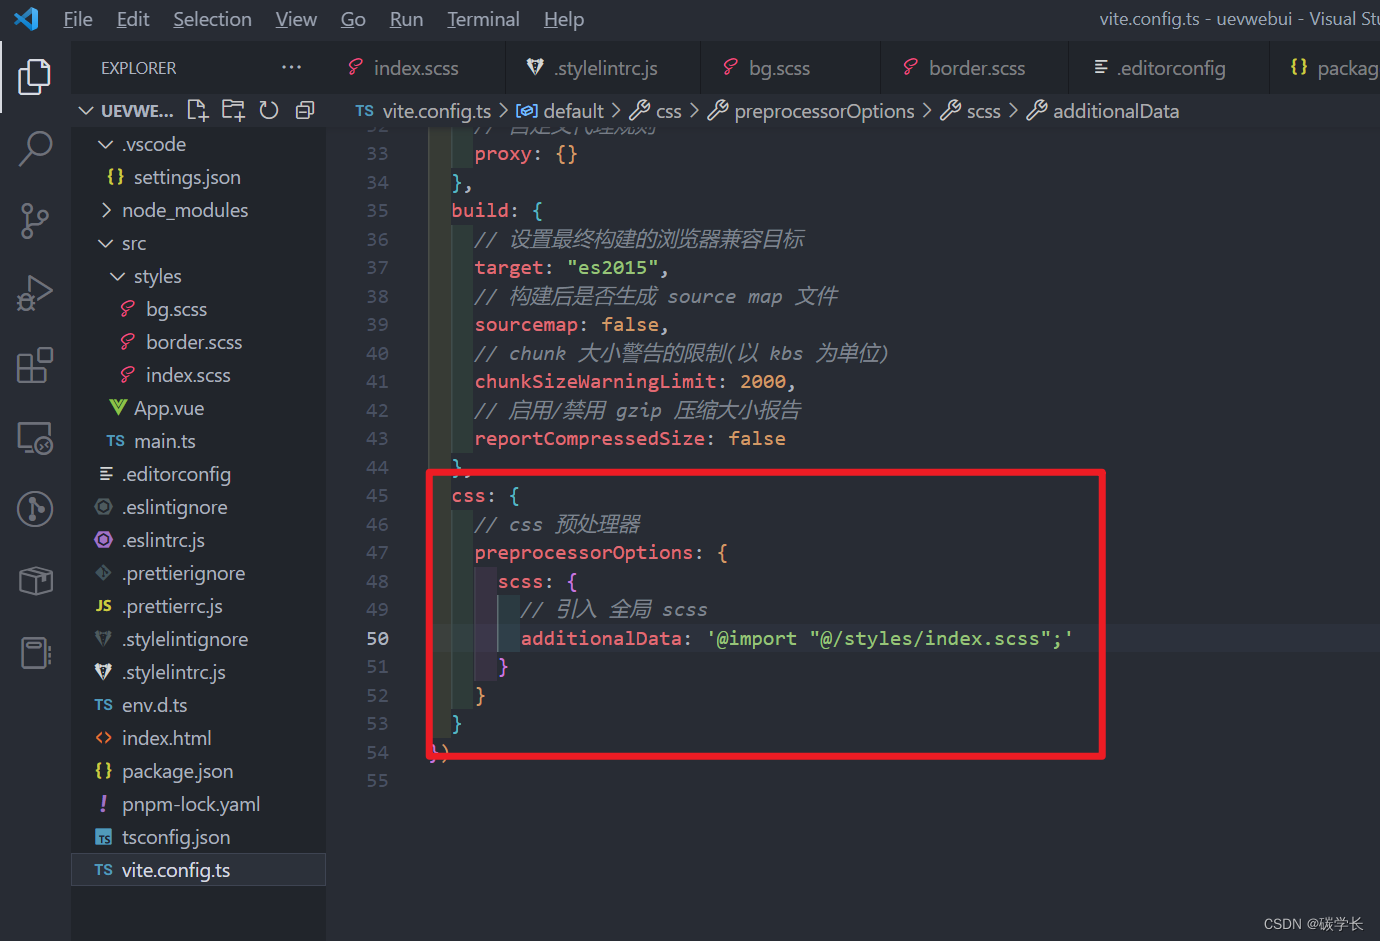
完整内容如下:
/*
 * @Description:
 * @Author: tianyw
 * @Date: 2023-03-07 13:58:36
 * @LastEditTime: 2023-03-07 17:42:28
 * @LastEditors: tianyw
 */
import {

     defineConfig } from "vite"
import vue from "@vitejs/plugin-vue" //解析.vue文件
import {

     resolve } from "path"

// vite默认只会编译ts
export default defineConfig({


  base: "./",
  plugins: [vue()],
  resolve: {


    alias: {


      "@": resolve(__dirname, "./src") // @ 代替 src
    }
  },
  server: {


    // 是否开启 https
    https: false,
    // 端口号
    port: 3000,
    // 监听所有地址
    host: "0.0.0.0",
    // 服务启动时是否自动打开浏览器
    open: true,
    // 允许跨域
    cors: true,
    // 自定义代理规则
    proxy: {

    }
  },
  build: {


    // 设置最终构建的浏览器兼容目标
    target: "es2015",
    // 构建后是否生成 source map 文件
    sourcemap: false,
    // chunk 大小警告的限制(以 kbs 为单位)
    chunkSizeWarningLimit: 2000,
    // 启用/禁用 gzip 压缩大小报告
    reportCompressedSize: false
  },
  css: {


    // css 预处理器
    preprocessorOptions: {


      scss: {


        // 引入 全局 scss
        additionalData: '@import "@/styles/index.scss";'
      }
    }
  }
})
36、根目录下新建 type-css.d.ts 配置内容如下,使得 js、vue 文件可以正常 import 样式文件

declare module "*.module.css" {


  const classes: {

     readonly [key: string]: string }
  export default classes
}

declare module "*.module.sass" {


  const classes: {

     readonly [key: string]: string }
  export default classes
}

declare module "*.module.scss" {


  const classes: {

     readonly [key: string]: string }
  export default classes
}
37、tsconfig.json 中新增 type-css.d.ts 配置

{


  "compilerOptions": {


    "target": "esnext", // 目标转化的语法
    "module": "esnext", // 转化的格式
    "moduleResolution": "node", // 解析规则
    "strict": true, // 严格模式
    "sourceMap": true, // 启动sourcemap调试
    "jsx": "preserve", // 不允许ts编译jsx语法
    "esModuleInterop": true, // es6和commonjs 转化
    "lib": ["esnext", "dom"], // 支持esnext和dom语法
    "baseUrl": ".",
    "paths": {


      "@/*": ["src/*"] // @符号的真实含义 还需要配置vite别名 和declare module
    }
  },
  // 编译哪些文件
  "include": [
    "src/**/*.ts",
    "src/**/*.d.ts",
    "src/**/*.tsx",
    "src/**/*.vue",
    "type-css.d.ts"
  ]
}
38、App.vue 中 style 里设置、引用定义的样式属性
<!--
 * @Description:
 * @Author: tianyw
 * @Date: 2023-03-07 14:10:02
 * @LastEditTime: 2023-03-08 11:20:24
 * @LastEditors: tianyw
-->
<template>
  <div>
    <span class="span-item l-size" :style="getStyle">{

   { msg }}</span>
  </div>
</template>
<script lang="ts">
import { ref, computed } from "vue"
import variables from "@/styles/variables.module.scss"
export default {
  setup() {
    const msg = ref("hello,world")
    const getStyle = computed(() => ({
      fontStyle: variables.fontOblique
    }))
    return {
      msg,
      getStyle
    }
  }
}
</script>
<style lang="scss" scoped>
.span-item {
  font-weight: bold;
  border-style: $B-DOTTED;
  border-width: 2px;
  background: $BG-1890ff;
}
</style>
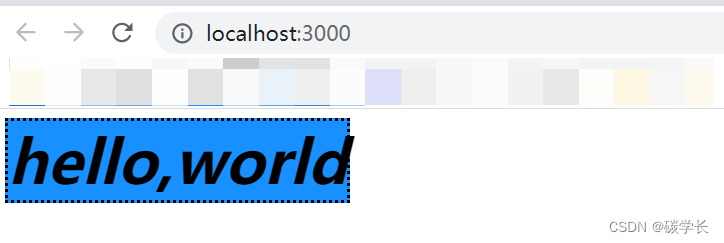
运行项目后可以看到,span 已经有了背景色和边框样式以及大字、斜体的效果,说明 scss 可以正常配置和使用了。
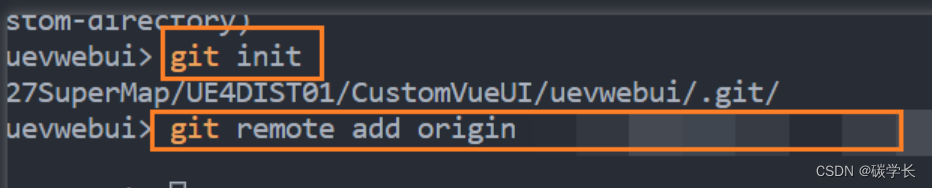
39、建立 gitlab 远程连接
1、git init
2、git remote add origin + url 地址
3、根目录下 新建 .gitignore,并配置如下:
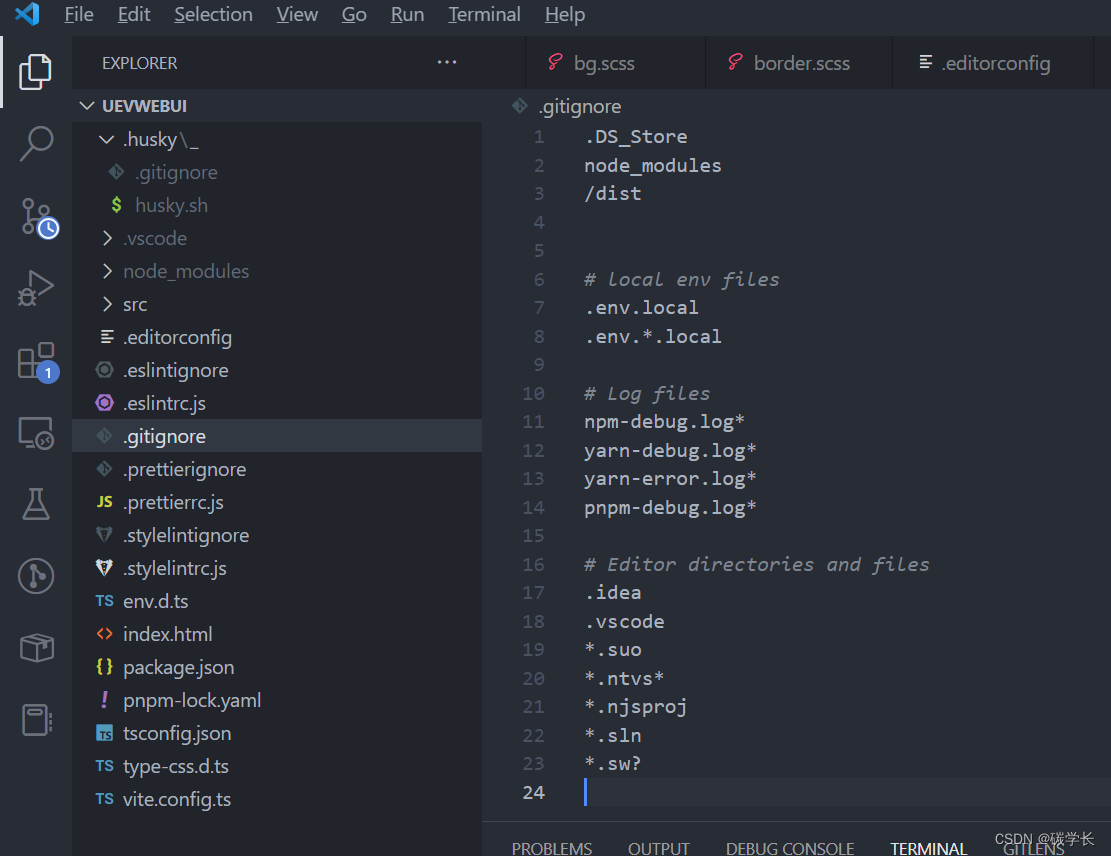
.DS_Store
node_modules
/dist


# local env files
.env.local
.env.*.local

# Log files
npm-debug.log*
yarn-debug.log*
yarn-error.log*
pnpm-debug.log*

# Editor directories and files
.idea
.vscode
*.suo
*.ntvs*
*.njsproj
*.sln
*.sw?
40、集成 husky 和 lint-staged
在项目中已集成 ESLint 和 Prettier,在编码时,这些工具可以对我们写的代码进行实时校验,在一定程度上能有效规范我们写的代码,但团队可能会有些人觉得这些条条框框的限制很麻烦,选择视“提示”而不见,依旧按自己的一套风格来写代码,或者干脆禁用掉这些工具,开发完成就直接把代码提交到了仓库,日积月累,ESLint 也就形同虚设。
所以,我们还需要做一些限制,让没通过 ESLint 检测和修复的代码禁止提交,从而保证仓库代码都是符合规范的。
为了解决这个问题,我们需要用到 Git Hook,在本地执行 git commit 的时候,就对所提交的代码进行 ESLint 检测和修复(即执行 eslint --fix),如果这些代码没通过 ESLint 规则校验,则禁止提交。
实现这一功能,我们借助 husky + lint-staged 。
husky —— Git Hook 工具,可以设置在 git 各个阶段(pre-commit、commit-msg、pre-push 等)触发我们的命令。
lint-staged —— 在 git 暂存的文件上运行 linters。
1、分别执行 pnpm add husky -D 和 npx husky install
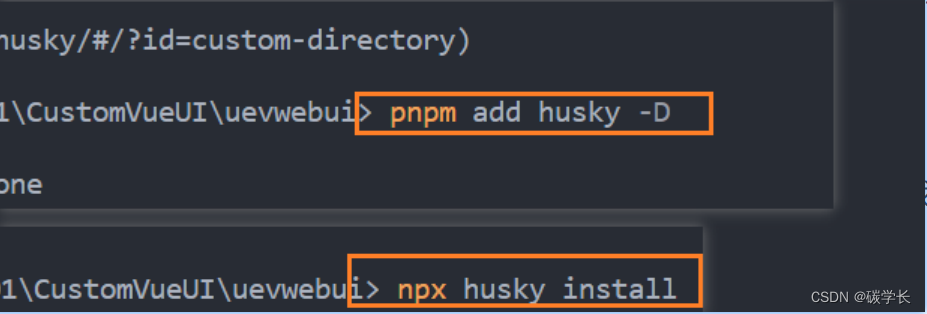
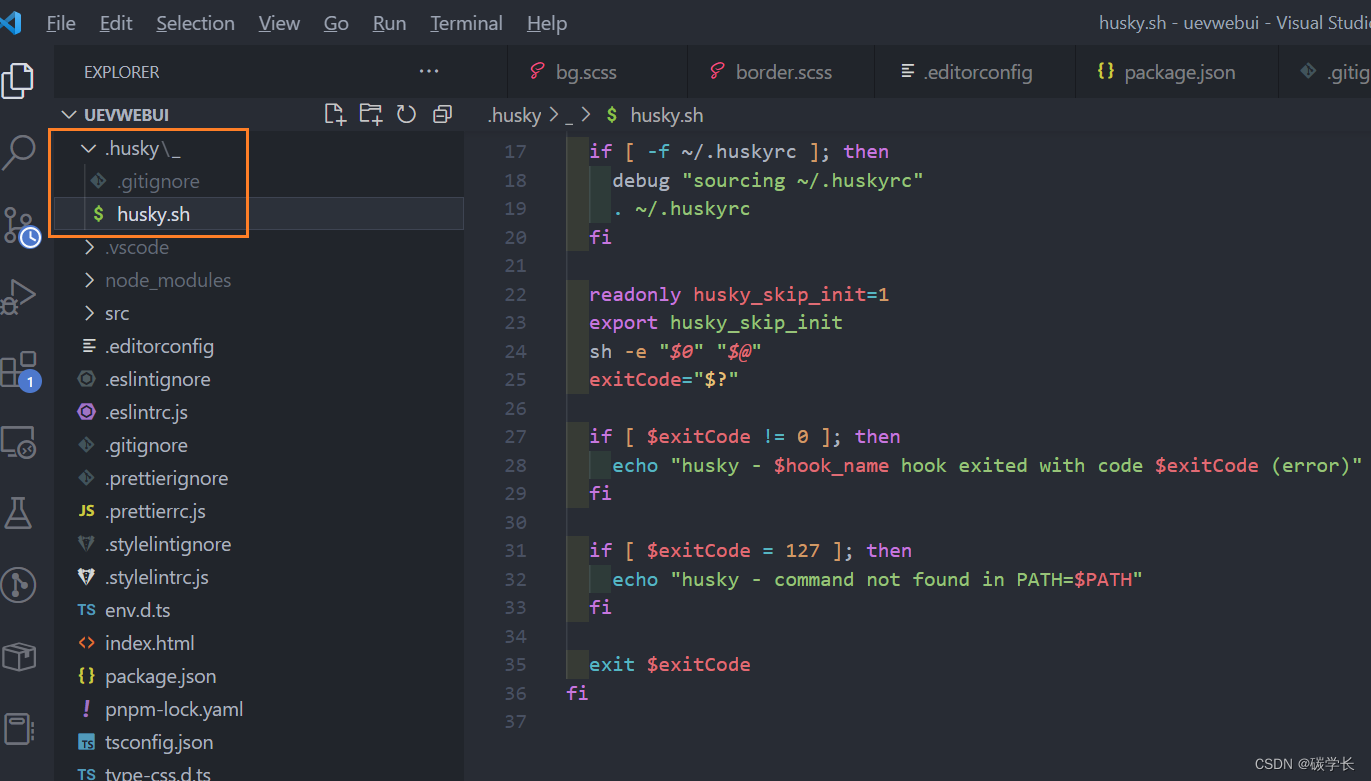
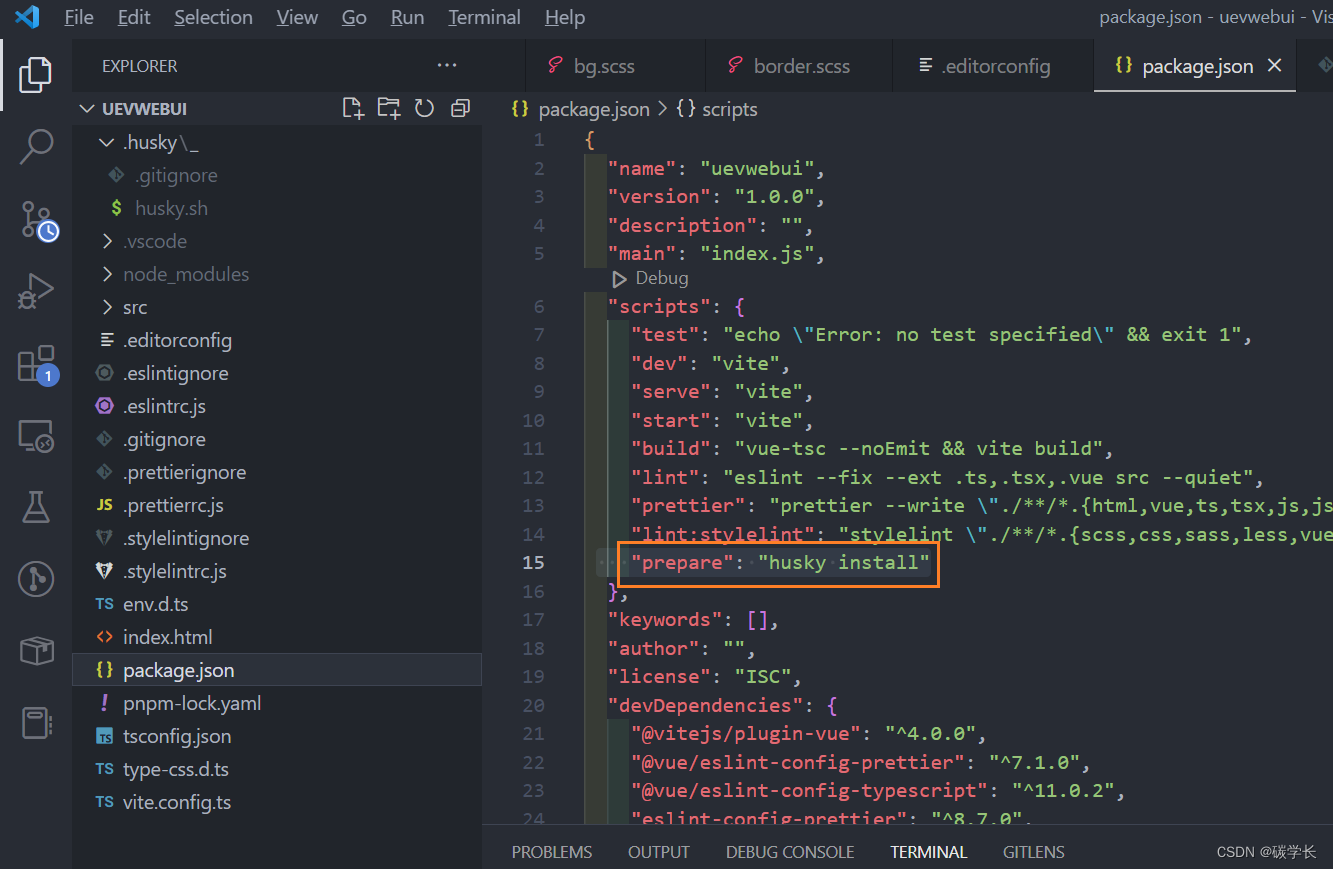
执行 npx husky install 后可以看到根目录下生成了 .husky 文件夹,并且 package.json 中自动增加了 “prepare”: “husky install”,该配置可以将下载其他依赖完成时自动启用 git 钩子
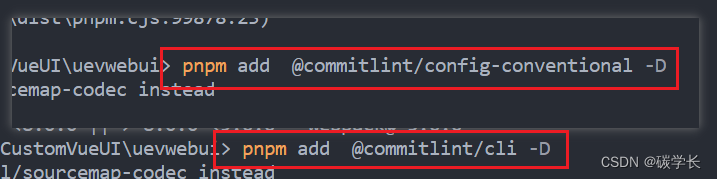
2、引入 commitlint
分别执行 pnpm add @commitlint/config-conventional -D 和 pnpm add @commitlint/cli -D 命令
3、根目录下新建 commitlint.config.js 文件,并配置如下:
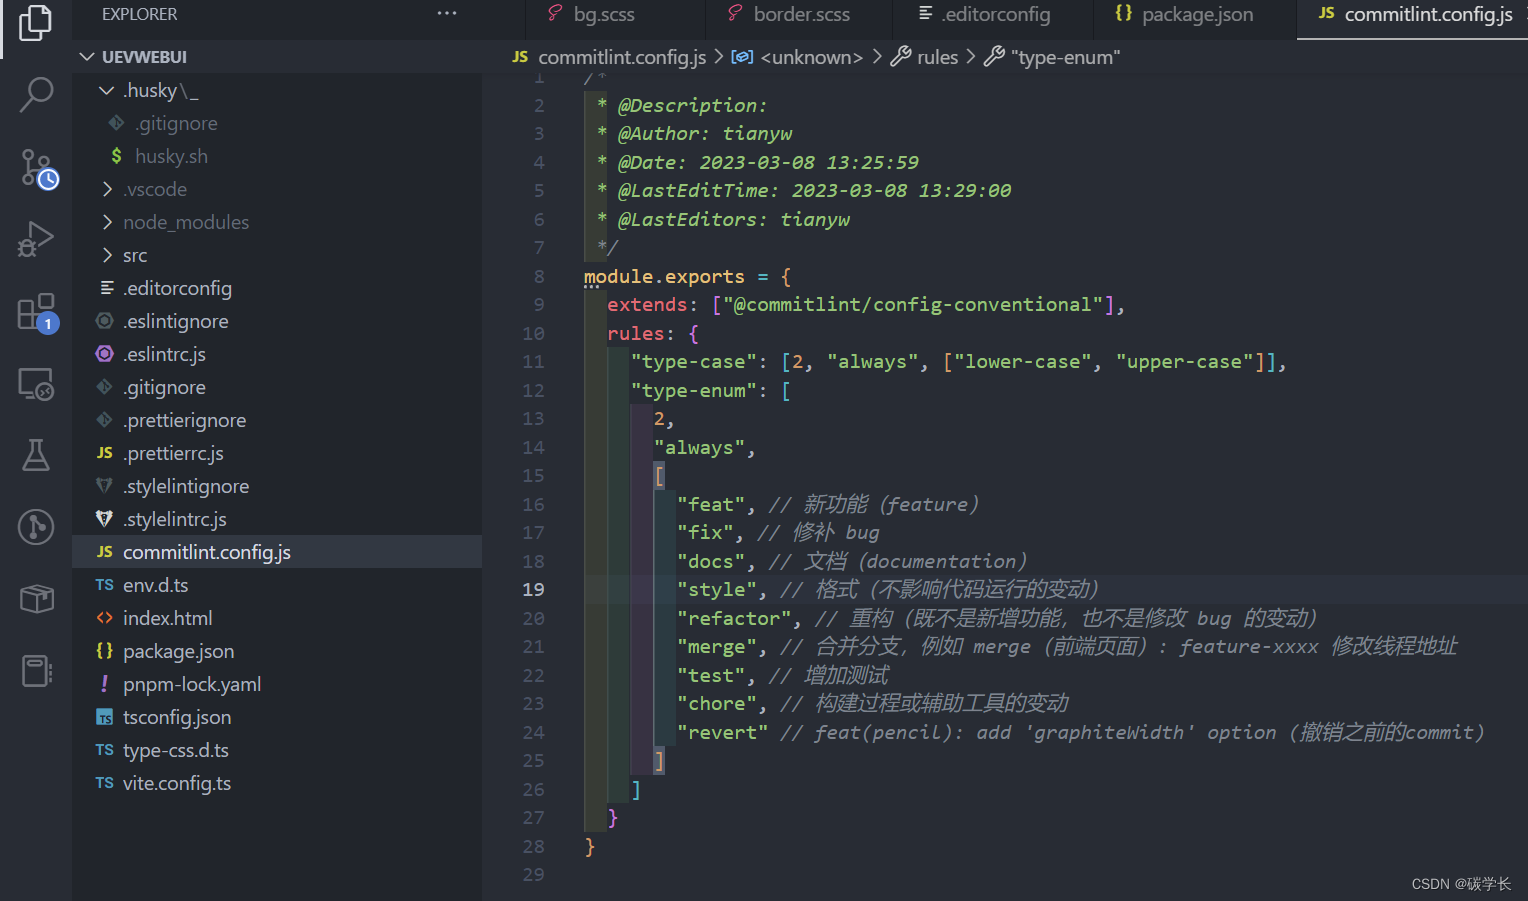
/*
 * @Description:
 * @Author: tianyw
 * @Date: 2023-03-08 13:25:59
 * @LastEditTime: 2023-03-08 13:36:58
 * @LastEditors: tianyw
 */
module.exports = {


  extends: ["@commitlint/config-conventional"],
  rules: {


    "type-case": [2, "always", ["lower-case", "upper-case"]],
    "type-enum": [
      2,
      "always",
      [
        "feat", // 新功能(feature)
        "fix", // 修补 bug
        "docs", // 文档(documentation)
        "style", // 格式(不影响代码运行的变动)
        "refactor", // 重构(既不是新增功能,也不是修改 bug 的变动)
        "merge", // 合并分支,例如 merge(前端页面): feature-xxxx 修改线程地址
        "test", // 增加测试
        "chore", // 构建过程或辅助工具的变动
        "revert", // feat(pencil): add 'graphiteWidth' option (撤销之前的commit)
        "build", // 更改构建系统和外部依赖项(如将 gulp 改为 webpack,更新某个 npm 包)
        "ci", // 对 CI 配置文件和脚本的更改
        "perf" // 更改代码以提高性能
      ]
    ]
  }
}
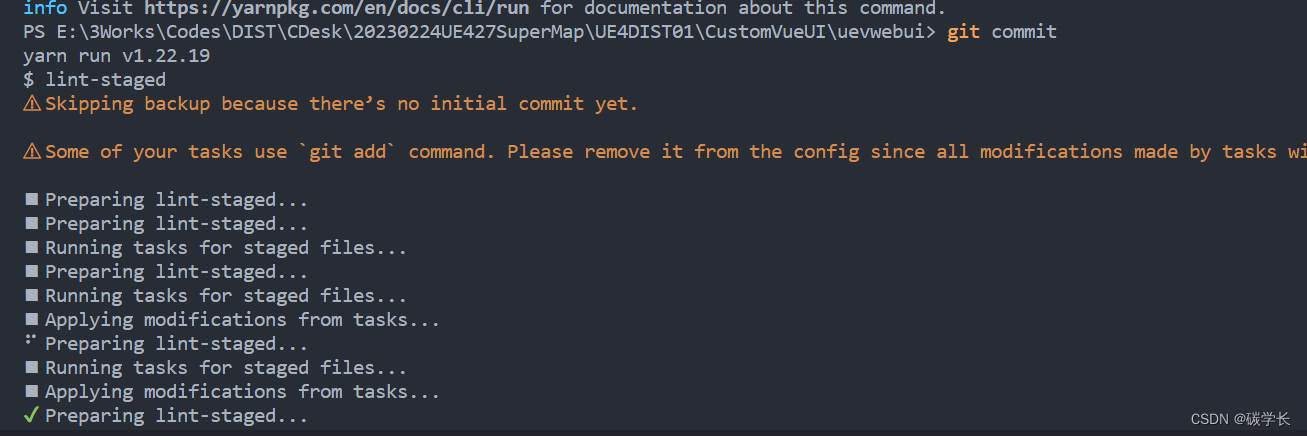
4、执行 npx husky add .husky/pre-commit ‘yarn lint-staged’
可以看到 .husky 文件夹下新增了一个 pre-commit 文件,且内容中有 yarn lint-staged
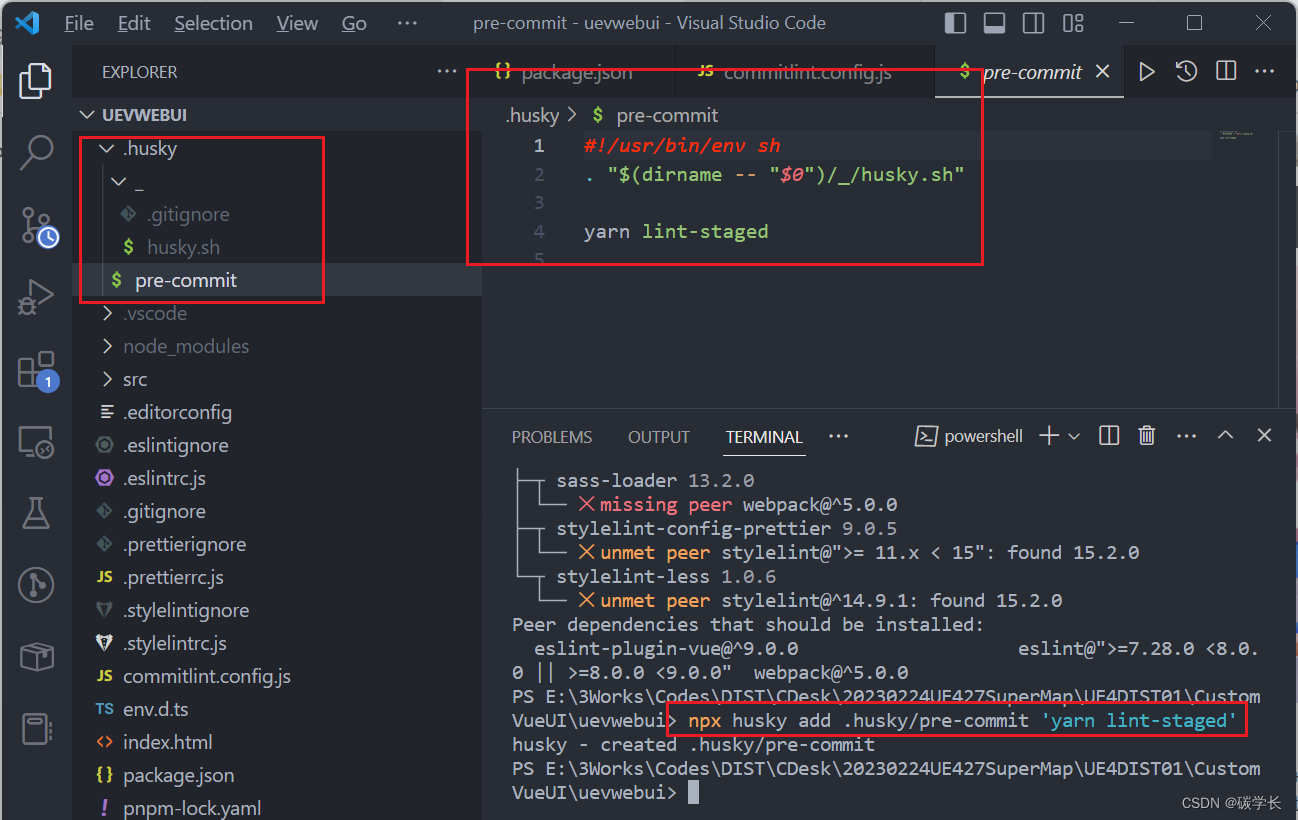
此 hook 文件的作用是:当我们执行 git commit -m “xxx” 时,会先执行 eslint 检查命令,如果 eslint 通过,成功 commit,否则终止 commit。
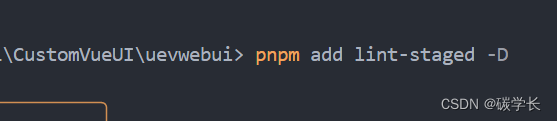
5、引入 lint-staged
执行 pnpm add lint-staged -D 命令。
6、修改 package.json 中内容,配置 lint-staged
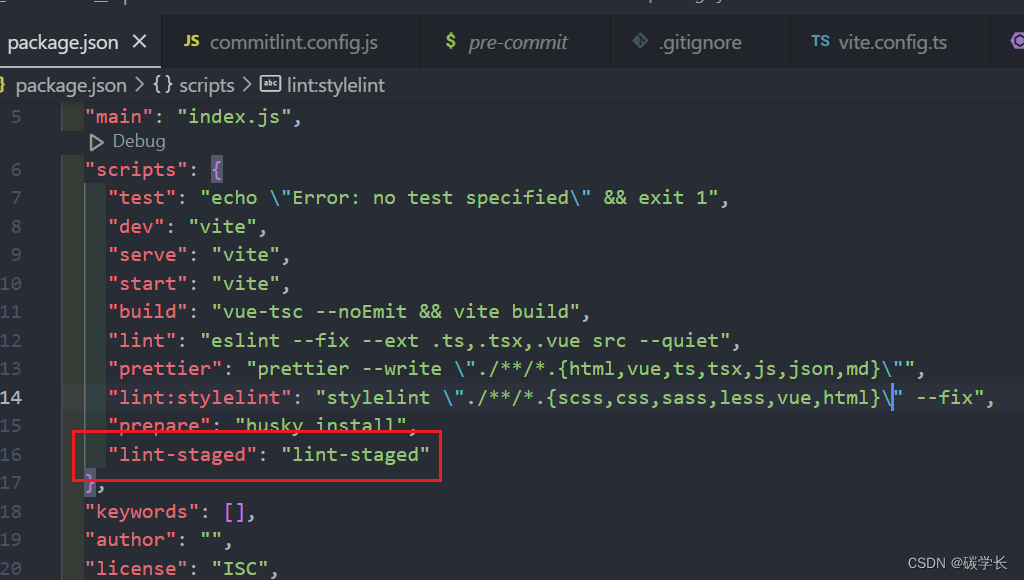
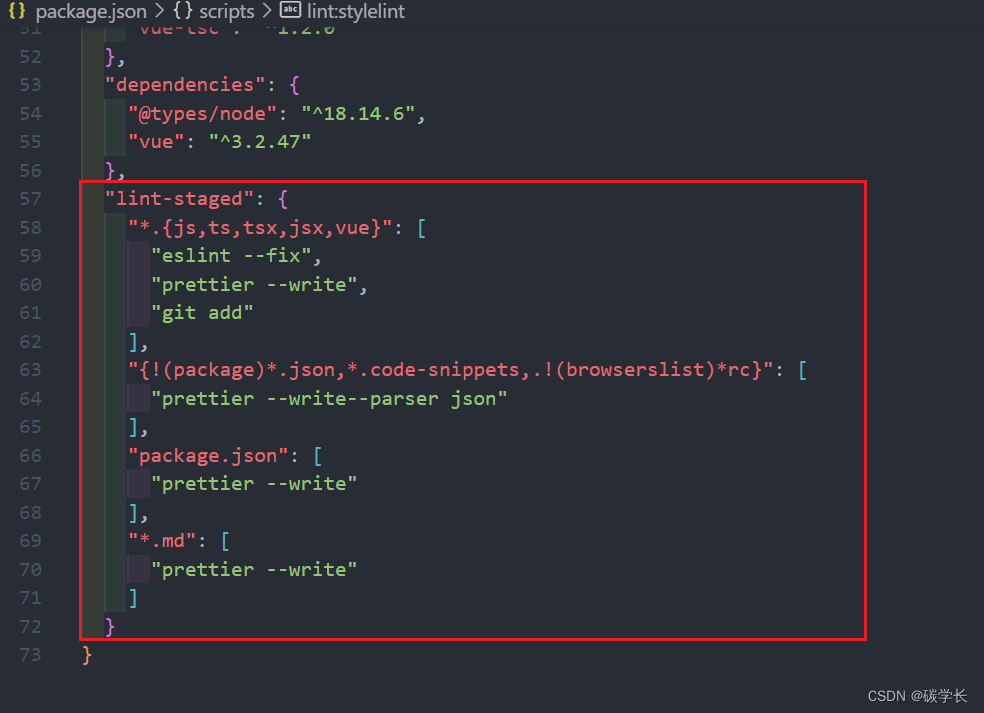
此时,package.json 完整内容如下:
{
"name": "uevwebui",
"version": "1.0.0",
"description": "",
"main": "index.js",
"scripts": {
"test": "echo \"Error: no test specified\" && exit 1",
"dev": "vite",
"serve": "vite",
"start": "vite",
"build": "vue-tsc --noEmit && vite build",
"lint": "eslint --fix --ext .ts,.tsx,.vue src --quiet",
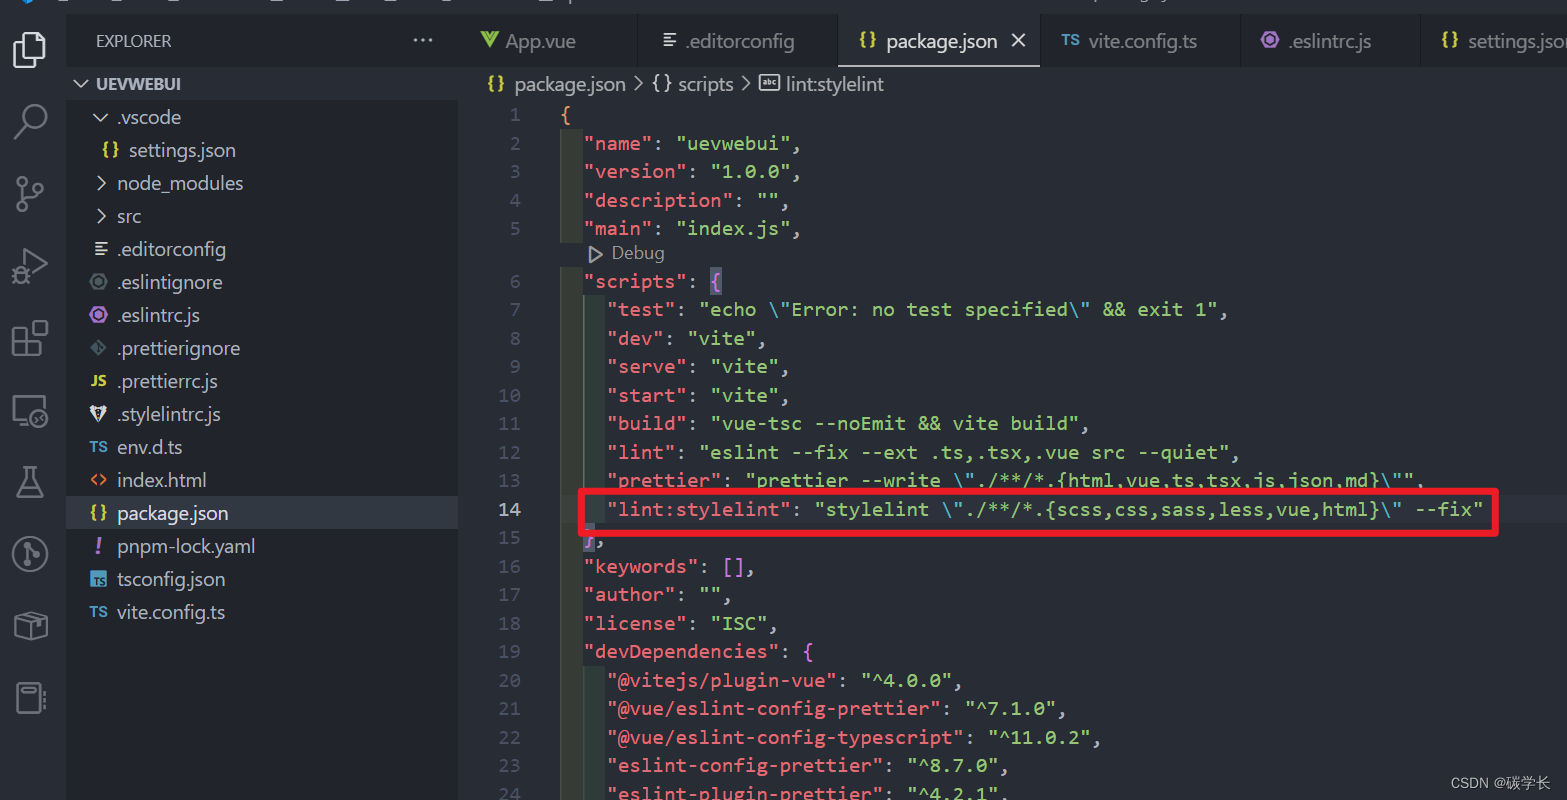
"prettier": "prettier --write \"./**/*.{html,vue,ts,tsx,js,json,md}\"",
"lint:stylelint": "stylelint \"./**/*.{scss,css,sass,less,vue,html}\" --fix",
"prepare": "husky install",
"lint-staged": "lint-staged"
},
"keywords": [],
"author": "",
"license": "ISC",
"devDependencies": {
"@commitlint/cli": "^17.4.4",
"@commitlint/config-conventional": "^17.4.4",
"@vitejs/plugin-vue": "^4.0.0",
"@vue/eslint-config-prettier": "^7.1.0",
"@vue/eslint-config-typescript": "^11.0.2",
"commitizen": "^4.3.0",
"cz-conventional-changelog": "^3.3.0",
"cz-customizable": "^7.0.0",
"eslint": "^8.35.0",
"eslint-config-prettier": "^8.7.0",
"eslint-plugin-prettier": "^4.2.1",
"eslint-plugin-vue": "^9.9.0",
"husky": "^8.0.3",
"lint-staged": "^13.1.2",
"postcss": "^8.4.21",
"postcss-html": "^1.5.0",
"postcss-less": "^6.0.0",
"postcss-sass": "^0.5.0",
"postcss-scss": "^4.0.6",
"prettier": "^2.8.4",
"sass": "^1.58.3",
"sass-loader": "^13.2.0",
"stylelint": "^15.2.0",
"stylelint-config-html": "^1.1.0",
"stylelint-config-prettier": "^9.0.5",
"stylelint-config-recommended-less": "^1.0.4",
"stylelint-config-recommended-scss": "^9.0.1",
"stylelint-config-recommended-vue": "^1.4.0",
"stylelint-config-standard": "^30.0.1",
"stylelint-config-standard-vue": "^1.0.0",
"stylelint-less": "^1.0.6",
"stylelint-order": "^6.0.2",
"typescript": "^4.9.5",
"vite": "^4.1.4",
"vue-tsc": "^1.2.0"
},
"dependencies": {
"@types/node": "^18.14.6",
"vue": "^3.2.47"
},
"lint-staged": {
"*.{js,ts,tsx,jsx,vue}": [
"eslint --fix",
"prettier --write",
"git add"
],
"{!(package)*.json,*.code-snippets,.!(browserslist)*rc}": [
"prettier --write--parser json"
],
"package.json": [
"prettier --write"
],
"*.md": [
"prettier --write"
]
}
}
7、增加代码提交规范与提示
1、执行 pnpm add commitizen cz-conventional-changelog -D 命令

2、修改 package.json 中内容如下:
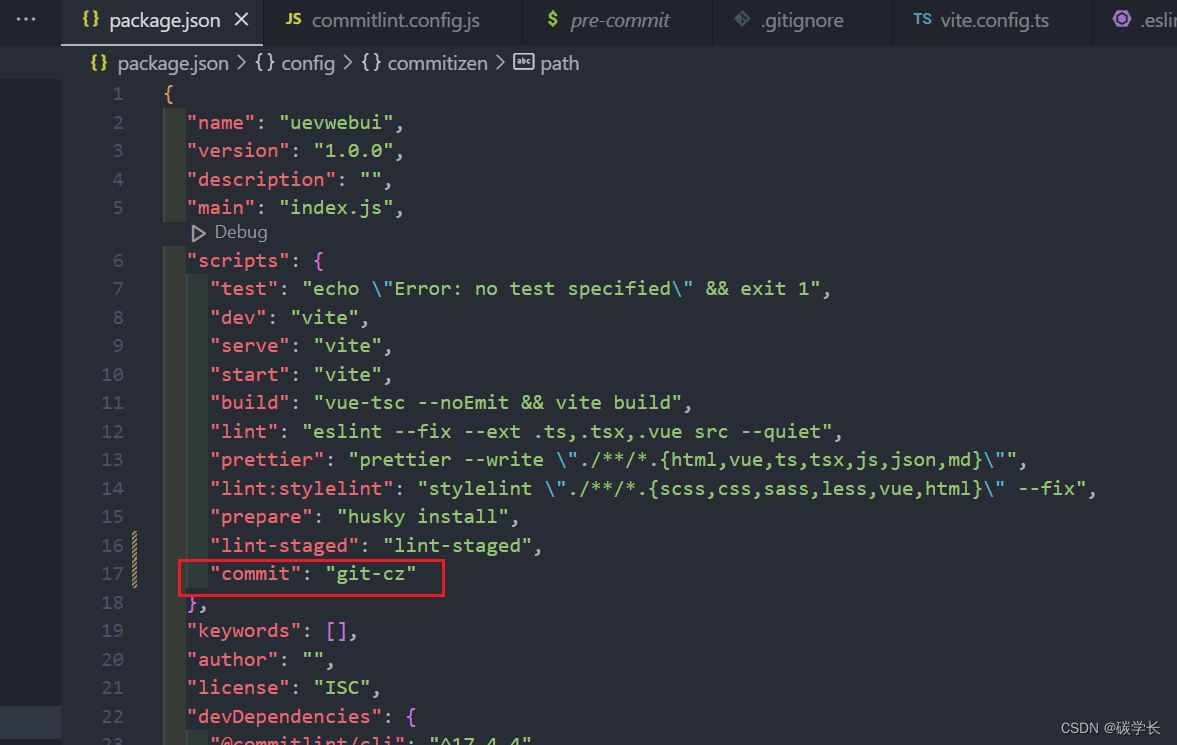
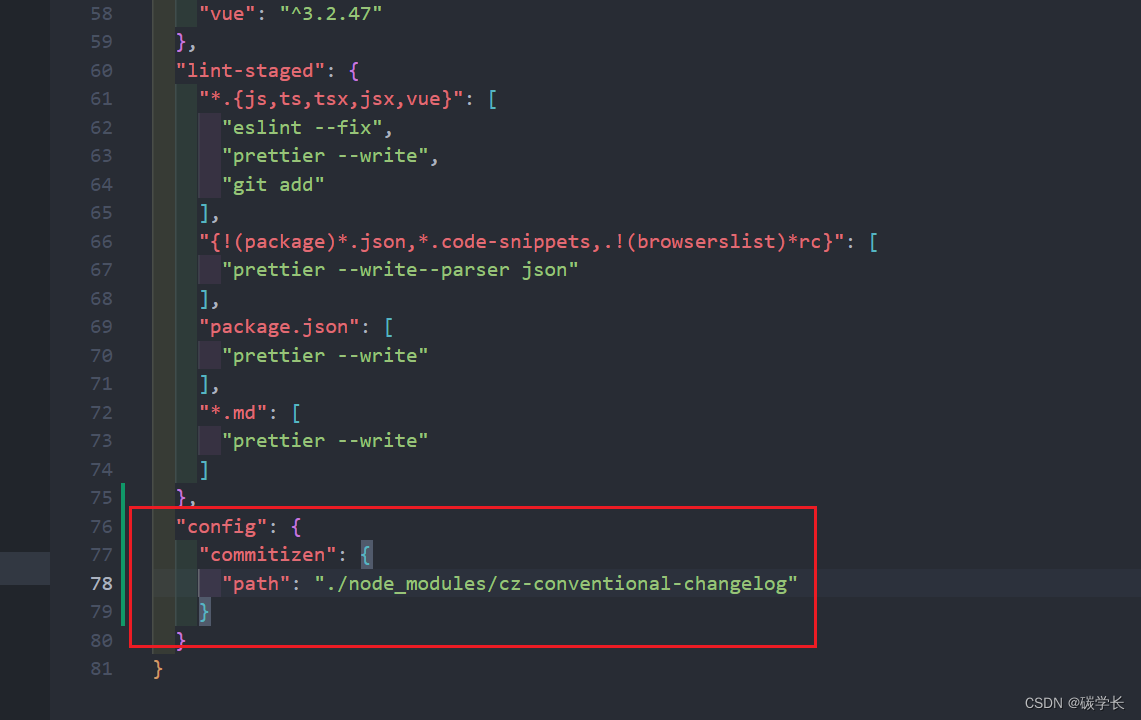
package.json 此时完整内容为:
{


  "name": "uevwebui",
  "version": "1.0.0",
  "description": "",
  "main": "index.js",
  "scripts": {


    "test": "echo \"Error: no test specified\" && exit 1",
    "dev": "vite",
    "serve": "vite",
    "start": "vite",
    "build": "vue-tsc --noEmit && vite build",
    "lint": "eslint --fix --ext .ts,.tsx,.vue src --quiet",
    "prettier": "prettier --write \"./**/*.{html,vue,ts,tsx,js,json,md}\"",
    "lint:stylelint": "stylelint \"./**/*.{scss,css,sass,less,vue,html}\" --fix",
    "prepare": "husky install",
    "lint-staged": "lint-staged",
    "commit": "git-cz"
  },
  "keywords": [],
  "author": "",
  "license": "ISC",
  "devDependencies": {


    "@commitlint/cli": "^17.4.4",
    "@commitlint/config-conventional": "^17.4.4",
    "@vitejs/plugin-vue": "^4.0.0",
    "@vue/eslint-config-prettier": "^7.1.0",
    "@vue/eslint-config-typescript": "^11.0.2",
    "commitizen": "^4.3.0",
    "cz-conventional-changelog": "^3.3.0",
    "cz-customizable": "^7.0.0",
    "eslint": "^8.35.0",
    "eslint-config-prettier": "^8.7.0",
    "eslint-plugin-prettier": "^4.2.1",
    "eslint-plugin-vue": "^9.9.0",
    "husky": "^8.0.3",
    "lint-staged": "^13.1.2",
    "postcss": "^8.4.21",
    "postcss-html": "^1.5.0",
    "postcss-less": "^6.0.0",
    "postcss-sass": "^0.5.0",
    "postcss-scss": "^4.0.6",
    "prettier": "^2.8.4",
    "sass": "^1.58.3",
    "sass-loader": "^13.2.0",
    "stylelint": "^15.2.0",
    "stylelint-config-html": "^1.1.0",
    "stylelint-config-prettier": "^9.0.5",
    "stylelint-config-recommended-less": "^1.0.4",
    "stylelint-config-recommended-scss": "^9.0.1",
    "stylelint-config-recommended-vue": "^1.4.0",
    "stylelint-config-standard": "^30.0.1",
    "stylelint-config-standard-vue": "^1.0.0",
    "stylelint-less": "^1.0.6",
    "stylelint-order": "^6.0.2",
    "typescript": "^4.9.5",
    "vite": "^4.1.4",
    "vue-tsc": "^1.2.0"
  },
  "dependencies": {


    "@types/node": "^18.14.6",
    "vue": "^3.2.47"
  },
  "lint-staged": {


    "*.{js,ts,tsx,jsx,vue}": [
      "eslint --fix",
      "prettier --write",
      "git add"
    ],
    "{!(package)*.json,*.code-snippets,.!(browserslist)*rc}": [
      "prettier --write--parser json"
    ],
    "package.json": [
      "prettier --write"
    ],
    "*.md": [
      "prettier --write"
    ]
  },
  "config": {


    "commitizen": {


      "path": "./node_modules/cz-conventional-changelog"
    }
  }
}
3、使用、测试
此时,git commit 仍然是普通的 git 提交模式;但使用 yarn commit 会执行交互式 commit 提交,在终端跟着提示一步步输入,就能生成规范的 commit message。
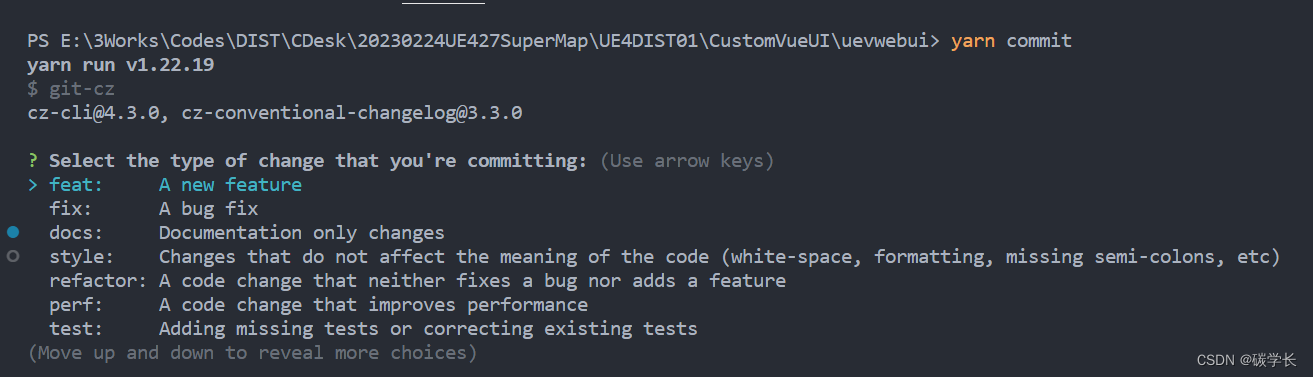
现在的 yarn comit 还是英文的,改成中文。
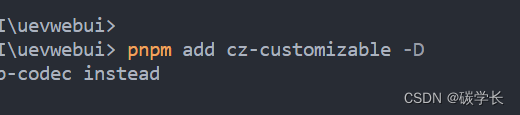
4、引入 cz-customizable
1、执行 pnpm add cz-customizable -D
2、修改 package.json 配置如下:
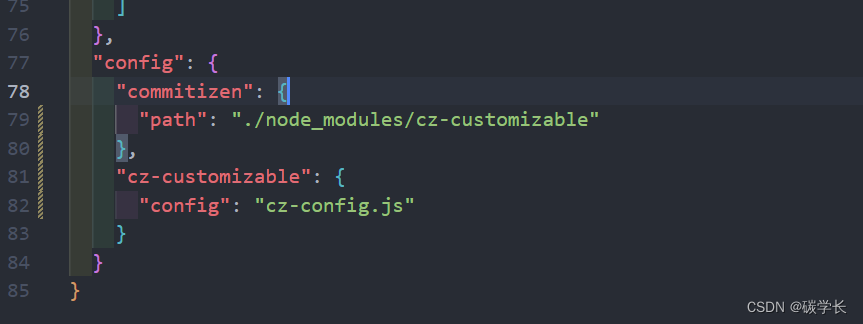
此时 package.json 内容为:
{


  "name": "uevwebui",
  "version": "1.0.0",
  "description": "",
  "main": "index.js",
  "scripts": {


    "test": "echo \"Error: no test specified\" && exit 1",
    "dev": "vite",
    "serve": "vite",
    "start": "vite",
    "build": "vue-tsc --noEmit && vite build",
    "lint": "eslint --fix --ext .ts,.tsx,.vue src --quiet",
    "prettier": "prettier --write \"./**/*.{html,vue,ts,tsx,js,json,md}\"",
    "lint:stylelint": "stylelint \"./**/*.{scss,css,sass,less,vue,html}\" --fix",
    "prepare": "husky install",
    "lint-staged": "lint-staged",
    "commit": "git-cz"
  },
  "keywords": [],
  "author": "",
  "license": "ISC",
  "devDependencies": {


    "@commitlint/cli": "^17.4.4",
    "@commitlint/config-conventional": "^17.4.4",
    "@vitejs/plugin-vue": "^4.0.0",
    "@vue/eslint-config-prettier": "^7.1.0",
    "@vue/eslint-config-typescript": "^11.0.2",
    "commitizen": "^4.3.0",
    "cz-conventional-changelog": "^3.3.0",
    "cz-customizable": "^7.0.0",
    "eslint": "^8.35.0",
    "eslint-config-prettier": "^8.7.0",
    "eslint-plugin-prettier": "^4.2.1",
    "eslint-plugin-vue": "^9.9.0",
    "husky": "^8.0.3",
    "lint-staged": "^13.1.2",
    "postcss": "^8.4.21",
    "postcss-html": "^1.5.0",
    "postcss-less": "^6.0.0",
    "postcss-sass": "^0.5.0",
    "postcss-scss": "^4.0.6",
    "prettier": "^2.8.4",
    "sass": "^1.58.3",
    "sass-loader": "^13.2.0",
    "stylelint": "^15.2.0",
    "stylelint-config-html": "^1.1.0",
    "stylelint-config-prettier": "^9.0.5",
    "stylelint-config-recommended-less": "^1.0.4",
    "stylelint-config-recommended-scss": "^9.0.1",
    "stylelint-config-recommended-vue": "^1.4.0",
    "stylelint-config-standard": "^30.0.1",
    "stylelint-config-standard-vue": "^1.0.0",
    "stylelint-less": "^1.0.6",
    "stylelint-order": "^6.0.2",
    "typescript": "^4.9.5",
    "vite": "^4.1.4",
    "vue-tsc": "^1.2.0"
  },
  "dependencies": {


    "@types/node": "^18.14.6",
    "vue": "^3.2.47"
  },
  "lint-staged": {


    "*.{js,ts,tsx,jsx,vue}": [
      "eslint --fix",
      "prettier --write",
      "git add"
    ],
    "{!(package)*.json,*.code-snippets,.!(browserslist)*rc}": [
      "prettier --write--parser json"
    ],
    "package.json": [
      "prettier --write"
    ],
    "*.md": [
      "prettier --write"
    ]
  },
  "config": {


    "commitizen": {


      "path": "./node_modules/cz-customizable"
    },
    "cz-customizable": {


      "config": "cz-config.js"
    }
  }
}
3、根目录下新建 cz-config.js 配置自定义内容
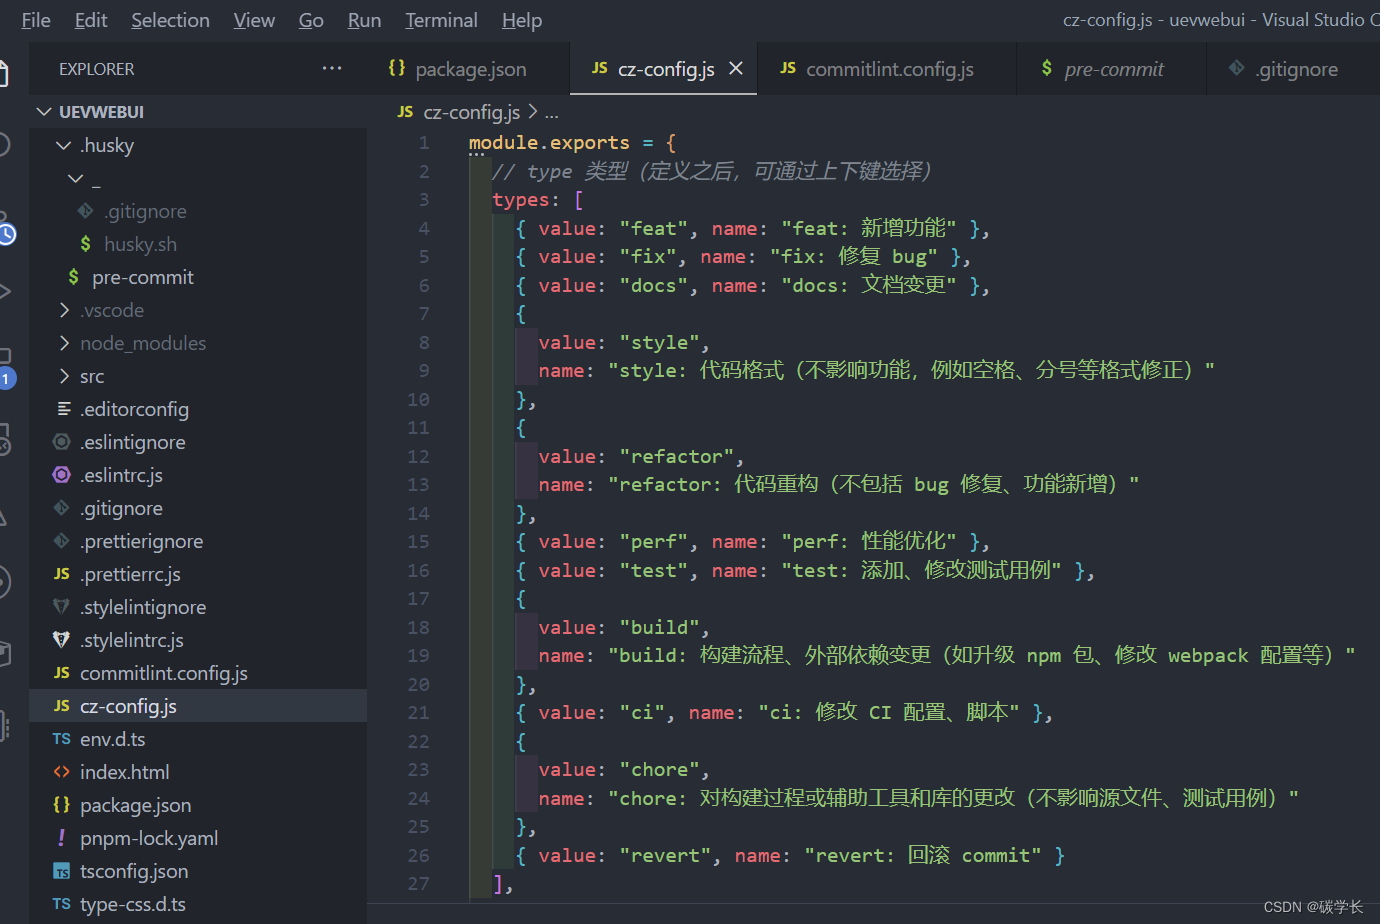
module.exports = {


  // type 类型(定义之后,可通过上下键选择)
  types: [
    {

     value: "feat", name: "feat: 新增功能" },
    {

     value: "fix", name: "fix: 修复 bug" },
    {

     value: "docs", name: "docs: 文档变更" },
    {


      value: "style",
      name: "style: 代码格式(不影响功能,例如空格、分号等格式修正)"
    },
    {


      value: "refactor",
      name: "refactor: 代码重构(不包括 bug 修复、功能新增)"
    },
    {

     value: "perf", name: "perf: 性能优化" },
    {

     value: "test", name: "test: 添加、修改测试用例" },
    {


      value: "build",
      name: "build: 构建流程、外部依赖变更(如升级 npm 包、修改 webpack 配置等)"
    },
    {

     value: "ci", name: "ci: 修改 CI 配置、脚本" },
    {


      value: "chore",
      name: "chore: 对构建过程或辅助工具和库的更改(不影响源文件、测试用例)"
    },
    {

     value: "revert", name: "revert: 回滚 commit" }
  ],

  // scope 类型(定义之后,可通过上下键选择)
  scopes: [
    ["components", "组件相关"],
    ["hooks", "hook 相关"],
    ["utils", "utils 相关"],
    ["styles", "样式相关"],
    ["deps", "项目依赖"],
    ["auth", "对 auth 修改"],
    ["other", "其他修改"],
    // 如果选择 custom,后面会让你再输入一个自定义的 scope。也可以不设置此项,把后面的 allowCustomScopes 设置为 true
    ["custom", "以上都不是?我要自定义"]
  ].map(([value, description]) => {


    return {


      value,
      name: `${

      value.padEnd(30)} (${

      description})`
    }
  }),

  // 是否允许自定义填写 scope,在 scope 选择的时候,会有 empty 和 custom 可以选择。
  // allowCustomScopes: true,

  // allowTicketNumber: false,
  // isTicketNumberRequired: false,
  // ticketNumberPrefix: 'TICKET-',
  // ticketNumberRegExp: '\\d{1,5}',

  // 针对每一个 type 去定义对应的 scopes,例如 fix
  /*
  scopeOverrides: {
    fix: [
      { name: 'merge' },
      { name: 'style' },
      { name: 'e2eTest' },
      { name: 'unitTest' }
    ]
  },
  */

  // 交互提示信息
  messages: {


    type: "请选择提交类型(必填)",
    scope: "选择一个 scope (可选)",
    // 选择 scope: custom 时会出下面的提示
    customScope: "请输入文件修改范围(可选)",
    subject: "请简要描述提交(必填)",
    body: "请输入详细描述(可选)",
    breaking: "列出任何BREAKING CHANGES(破坏性修改)(可选)",
    footer: "请输入要关闭的issue(可选)",
    confirmCommit: "确认提交?"
  },

  // 设置只有 type 选择了 feat 或 fix,才询问 breaking message
  allowBreakingChanges: ["feat", "fix"],

  // 跳过要询问的步骤
  // skipQuestions: ['body', 'footer'],

  // subject 限制长度
  subjectLimit: 100,
  breaklineChar: "|" // 支持 body 和 footer
  // footerPrefix : 'ISSUES CLOSED:'
  // askForBreakingChangeFirst : true,
}
此时执行 yarn commit,可以看到提示内容就变成了自定义的中文信息:

5、限制 git commit,使其提交也规范
上面配置之后,使用 git commit 依旧可以提交不规范的格式,所以要通过 commitlint 来限制提交。

6、使用验证
对 package.json 做一些调整,调整后如下:
{


  "name": "uevwebui",
  "version": "1.0.0",
  "description": "",
  "main": "index.js",
  "scripts": {


    "test": "echo \"Error: no test specified\" && exit 1",
    "dev": "vite",
    "serve": "vite",
    "start": "vite",
    "build": "vue-tsc --noEmit && vite build",
    "lint": "eslint --fix --ext .ts,.tsx,.vue src --quiet",
    "prettier": "prettier --write \"./**/*.{html,vue,ts,tsx,js,json,md}\"",
    "lint:stylelint": "stylelint \"./**/*.{scss,css,sass,less,vue,html}\" --fix",
    "prepare": "husky install",
    "lint-staged": "lint-staged",
    "commit": "git-cz"
  },
  "keywords": [],
  "author": "",
  "license": "ISC",
  "devDependencies": {


    "@commitlint/cli": "^17.4.4",
    "@commitlint/config-conventional": "^17.4.4",
    "@vitejs/plugin-vue": "^4.0.0",
    "@vue/eslint-config-prettier": "^7.1.0",
    "@vue/eslint-config-typescript": "^11.0.2",
    "commitizen": "^4.3.0",
    "cz-conventional-changelog": "^3.3.0",
    "cz-customizable": "^7.0.0",
    "eslint": "^8.35.0",
    "eslint-config-prettier": "^8.7.0",
    "eslint-plugin-prettier": "^4.2.1",
    "eslint-plugin-vue": "^9.9.0",
    "husky": "^8.0.3",
    "lint-staged": "^13.1.2",
    "postcss": "^8.4.21",
    "postcss-html": "^1.5.0",
    "postcss-less": "^6.0.0",
    "postcss-sass": "^0.5.0",
    "postcss-scss": "^4.0.6",
    "prettier": "^2.8.4",
    "sass": "^1.58.3",
    "sass-loader": "^13.2.0",
    "stylelint": "^15.2.0",
    "stylelint-config-html": "^1.1.0",
    "stylelint-config-prettier": "^9.0.5",
    "stylelint-config-recommended-less": "^1.0.4",
    "stylelint-config-recommended-scss": "^9.0.1",
    "stylelint-config-recommended-vue": "^1.4.0",
    "stylelint-config-standard": "^30.0.1",
    "stylelint-config-standard-vue": "^1.0.0",
    "stylelint-less": "^1.0.6",
    "stylelint-order": "^6.0.2",
    "typescript": "^4.9.5",
    "vite": "^4.1.4",
    "vue-tsc": "^1.2.0"
  },
  "dependencies": {


    "@types/node": "^18.14.6",
    "vue": "^3.2.47"
  },
  "lint-staged": {


    "src/**/*.{js,ts,tsx,jsx,vue}": [
      "eslint --fix",
      "prettier --write",
      "git add"
    ],
    "scr/**/*.{scss,css,sass,less,vue,html}": [
      "yarn lint:stylelint",
      "git add"
    ],
    "package.json": [
      "prettier --write",
      "git add"
    ],
    "*.md": [
      "prettier --write",
      "git add"
    ]
  },
  "config": {


    "commitizen": {


      "path": "./node_modules/cz-customizable"
    },
    "cz-customizable": {


      "config": "cz-config.js"
    }
  }
}
此时执行 git add . 和 yarn commit 后,可以看到,可以正常检验规则、修复,可以正常执行提交、push 等操作。
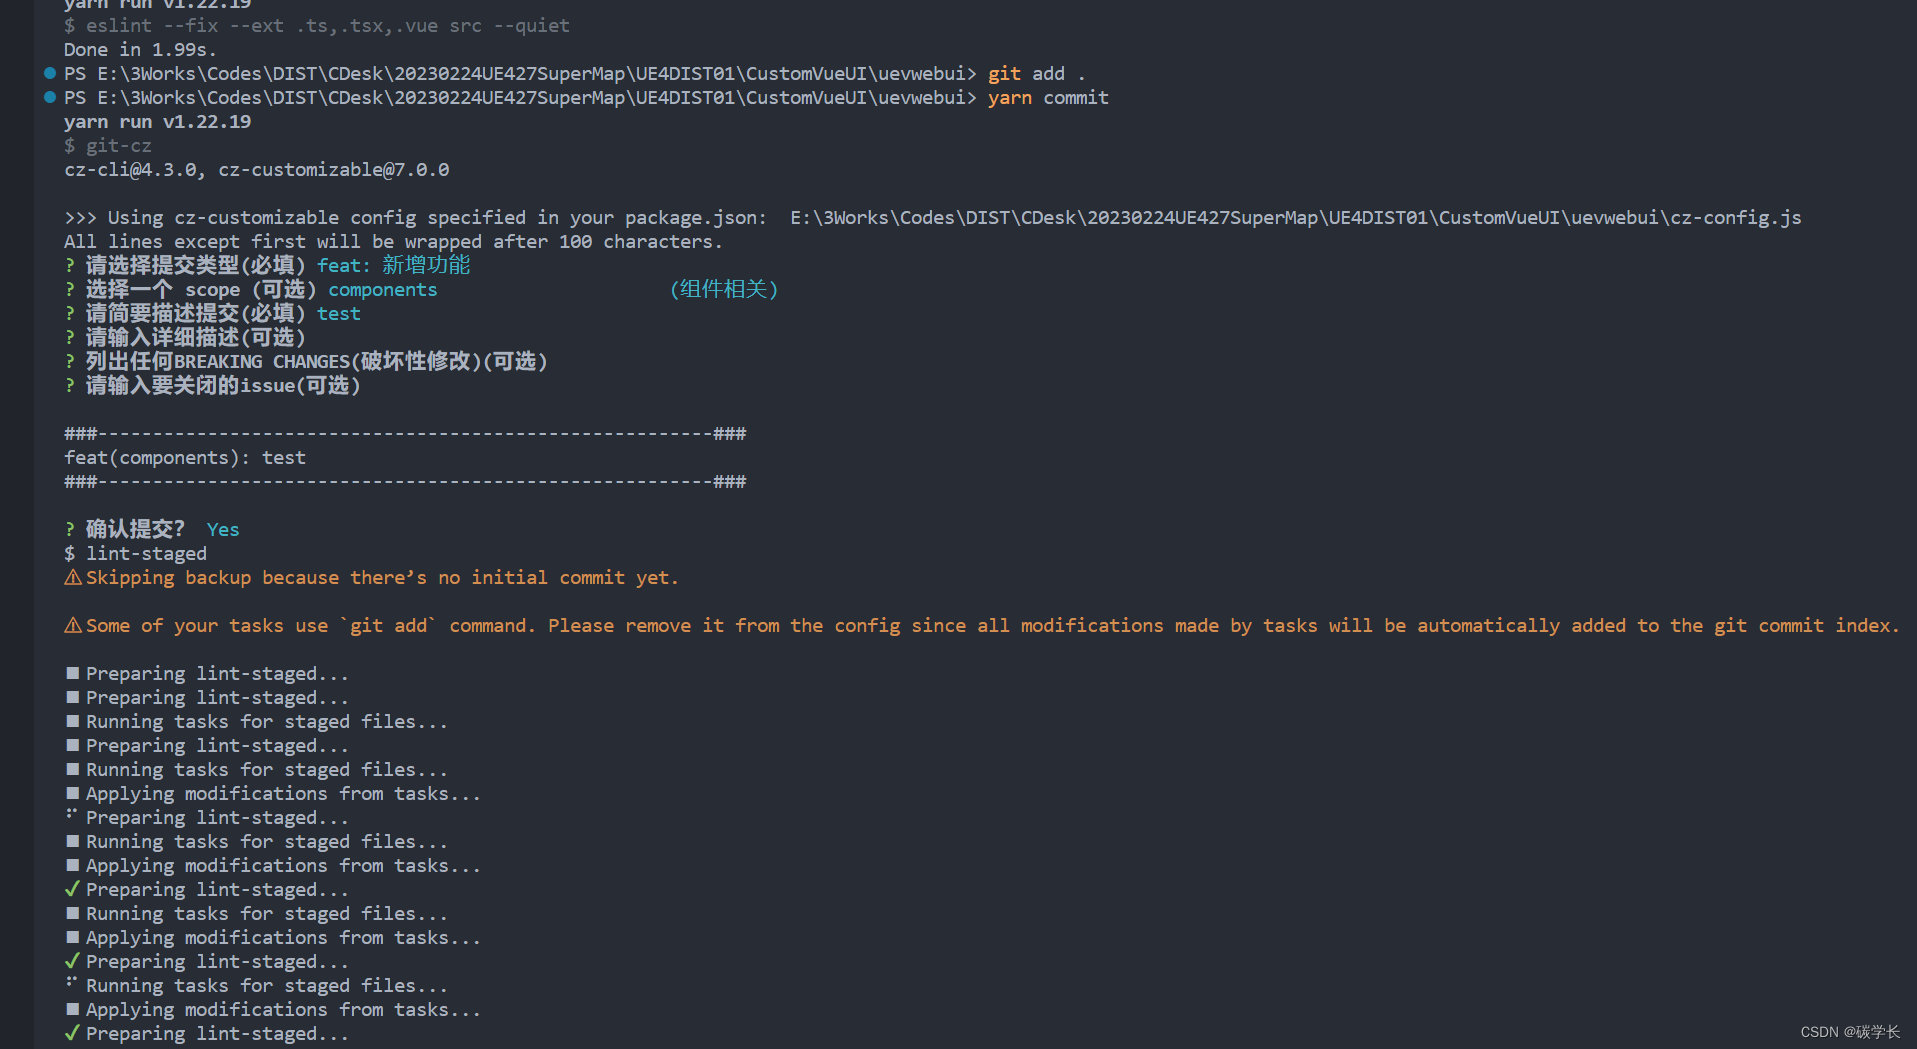
至此 husky 和 lint-staged 的集成就完成了。
41、引入路由 vue-router
1、执行 pnpm add vue-router@next
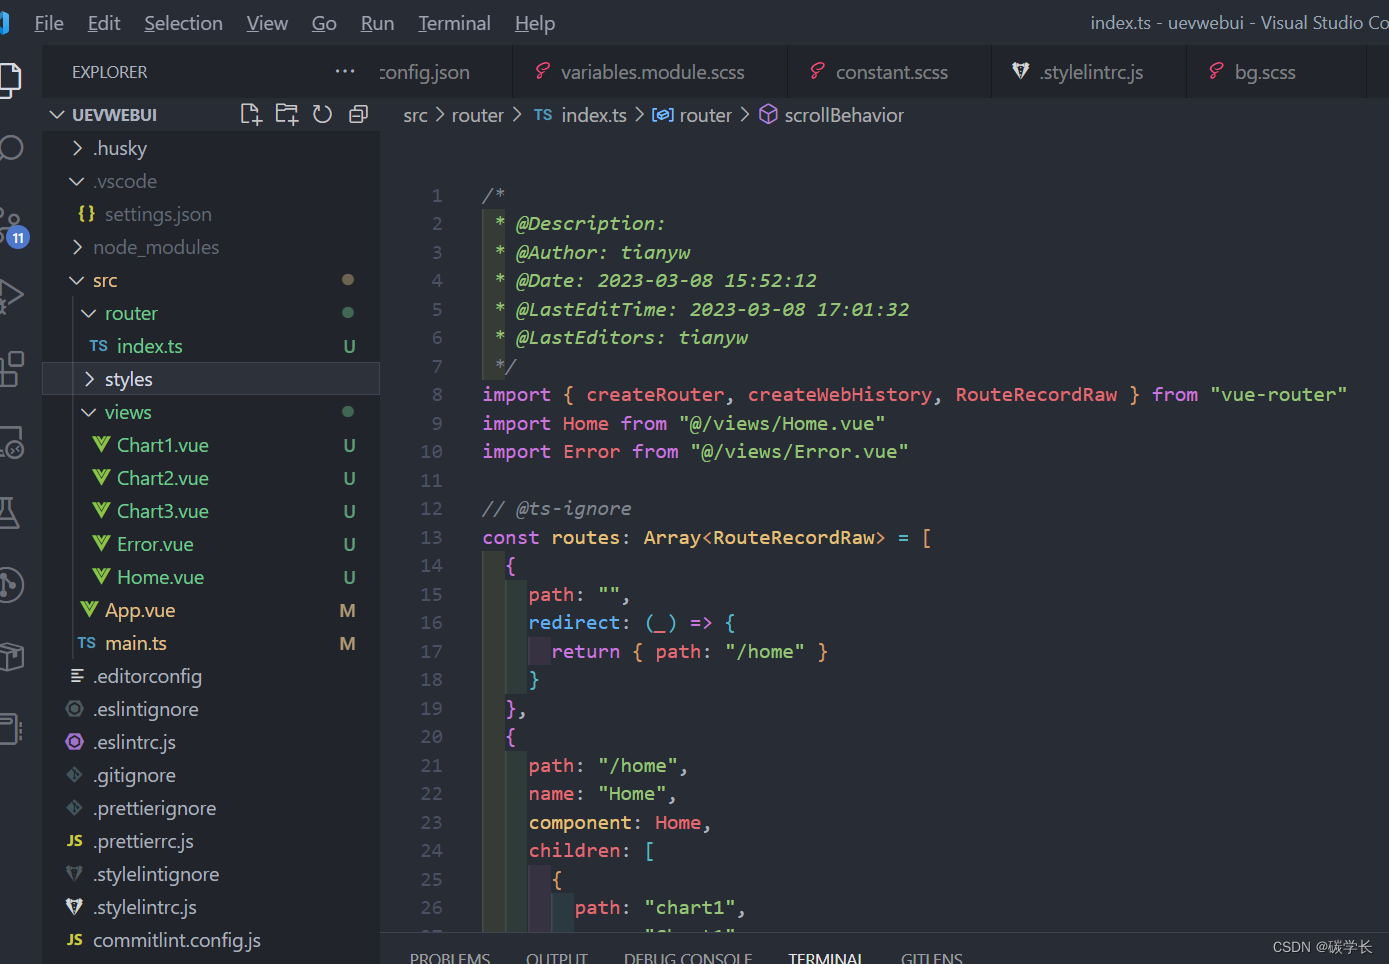
2、在 src 目录下新建 routes 文件夹及index.ts 文件,内容如下:
/*
 * @Description:
 * @Author: tianyw
 * @Date: 2023-03-08 15:52:12
 * @LastEditTime: 2023-03-08 17:01:32
 * @LastEditors: tianyw
 */
import {

     createRouter, createWebHistory, RouteRecordRaw } from "vue-router"
import Home from "@/views/Home.vue"
import Error from "@/views/Error.vue"

// @ts-ignore
const routes: Array<RouteRecordRaw> = [
  {


    path: "",
    redirect: (_) => {


      return {

     path: "/home" }
    }
  },
  {


    path: "/home",
    name: "Home",
    component: Home,
    children: [
      {


        path: "chart1",
        name: "Chart1",
        component: () => import("@/views/Chart1.vue")
      },
      {


        path: "chart2",
        name: "Chart2",
        component: () =>
          import(/* webpackChunkName: "About" */ "@/views/Chart2.vue")
      }
    ]
  },
  {


    path: "/chart3",
    name: "Chart3",
    component: () =>
      import(/* webpackChunkName: "About" */ "@/views/Chart3.vue")
  },
  {


    path: "/404",
    name: "404",
    component: Error
  },
  {


    path: "/:currentPath(.*)*", // 路由未匹配到,进入这个
    redirect: (_) => {


      return {

     path: "/404" }
    }
  }
]
const router = createRouter({


  history: createWebHistory(""),
  routes,
  scrollBehavior(to, from, savedPosition) {


    return {


      el: "#app",
      top: 0,
      behavior: "smooth"
    }
  }
})
export default router
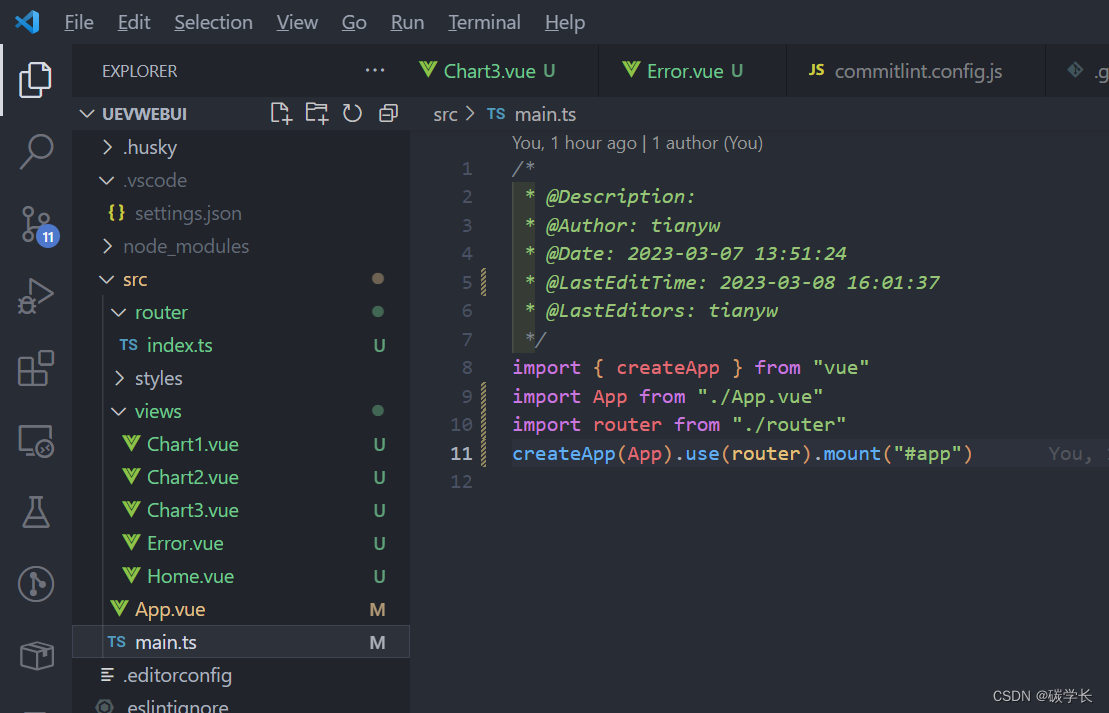
3、修改 main.ts 内容如下:
在 main.ts 中引入 router。
/*
 * @Description:
 * @Author: tianyw
 * @Date: 2023-03-07 13:51:24
 * @LastEditTime: 2023-03-08 16:01:37
 * @LastEditors: tianyw
 */
import {

     createApp } from "vue"
import App from "./App.vue"
import router from "./router"
createApp(App).use(router).mount("#app")
4、在 src/views 下新建如下文件夹及其内容如下:
Chart1.vue:
<template>
  <div>
    <span class="span-item l-size" :style="getStyle">{

   { msg }}</span>
  </div>
</template>
<script lang="ts">
import { ref, computed } from "vue"
import variables from "@/styles/variables.module.scss"
export default {
  setup() {
    const msg = ref("Chart1页面")
    const getStyle = computed(() => ({
      fontStyle: variables.fontOblique
    }))
    return {
      msg,
      getStyle
    }
  }
}
</script>
<style lang="scss" scoped>
.span-item {
  font-weight: bold;
  border-style: $B-DOTTED;
  border-width: 2px;
  background: $BG-1890ff;
}
</style>
Chart2.vue:
<template>
  <div>
    <span class="span-item l-size" :style="getStyle">{

   { msg }}</span>
  </div>
</template>
<script lang="ts">
import { ref, computed } from "vue"
import variables from "@/styles/variables.module.scss"
export default {
  setup() {
    const msg = ref("Chart2页面")
    const getStyle = computed(() => ({
      fontStyle: variables.fontOblique
    }))
    return {
      msg,
      getStyle
    }
  }
}
</script>
<style lang="scss" scoped>
.span-item {
  font-weight: bold;
  border-style: $B-DOTTED;
  border-width: 2px;
  background: $BG-1890ff;
}
</style>
Chart3.vue:
<template>
  <div>
    <span class="span-item l-size" :style="getStyle">{

   { msg }}</span>
  </div>
</template>
<script lang="ts">
import { ref, computed } from "vue"
import variables from "@/styles/variables.module.scss"
export default {
  setup() {
    const msg = ref("Chart3页面")
    const getStyle = computed(() => ({
      fontStyle: variables.fontOblique
    }))
    return {
      msg,
      getStyle
    }
  }
}
</script>
<style lang="scss" scoped>
.span-item {
  font-weight: bold;
  border-style: $B-DOTTED;
  border-width: 2px;
  background: $BG-1890ff;
}
</style>
Error.vue:
<template>
  <div>
    <span class="span-item l-size" :style="getStyle">{

   { msg }}</span>
  </div>
</template>
<script lang="ts">
import { ref, computed } from "vue"
import variables from "@/styles/variables.module.scss"
export default {
  setup() {
    const msg = ref("404页面")
    const getStyle = computed(() => ({
      fontStyle: variables.fontOblique
    }))
    return {
      msg,
      getStyle
    }
  }
}
</script>
<style lang="scss" scoped>
.span-item {
  font-weight: bold;
  border-style: $B-DOTTED;
  border-width: 2px;
  background: $BG-1890ff;
}
</style>
Home.vue:
<!--
 * @Description:
 * @Author: tianyw
 * @Date: 2023-03-08 15:54:13
 * @LastEditTime: 2023-03-08 16:58:47
 * @LastEditors: tianyw
-->
<template>
  <div class="home-item">
    <span class="span-item l-size" :style="getStyle">{

   { msg }}</span>
    <div class="btn-items">
      <button @click="goToChart1">显示 Chart1 页面</button>
      <button @click="goToChart2">显示 Chart2 页面</button>
      <button @click="goToChart3">跳转到 Chart3 页面</button>
      <button @click="goToChart4">页面跳转异常</button>
    </div>
    <div class="router-item">
      <router-view />
    </div>
  </div>
</template>
<script lang="ts">
import { ref, computed } from "vue"
import variables from "@/styles/variables.module.scss"
import { useRouter } from "vue-router"
export default {
  setup() {
    const msg = ref("Home页面")
    const getStyle = computed(() => ({
      fontStyle: variables.fontOblique
    }))
    const router = useRouter()
    const goToChart1 = () => {
      router.push({ path: "/home/chart1" })
    }
    const goToChart2 = () => {
      router.push({ path: "/home/chart2" })
    }
    const goToChart3 = () => {
      router.push({ path: "/chart3" })
    }
    const goToChart4 = () => {
      router.push({ path: "/chart4" })
    }
    return {
      msg,
      getStyle,
      goToChart1,
      goToChart2,
      goToChart3,
      goToChart4
    }
  }
}
</script>
<style lang="scss" scoped>
.home-item {
  width: 100%;
  height: 100%;
}
.span-item {
  font-weight: bold;
  border-style: $B-DOTTED;
  border-width: 2px;
  background: $BG-1890ff;
}
.btn-items {
  margin-top: 0.8rem;
}
.router-item {
  width: 100%;
  height: 100%;
}
</style>
4、修改 App.vue 为如下内容:
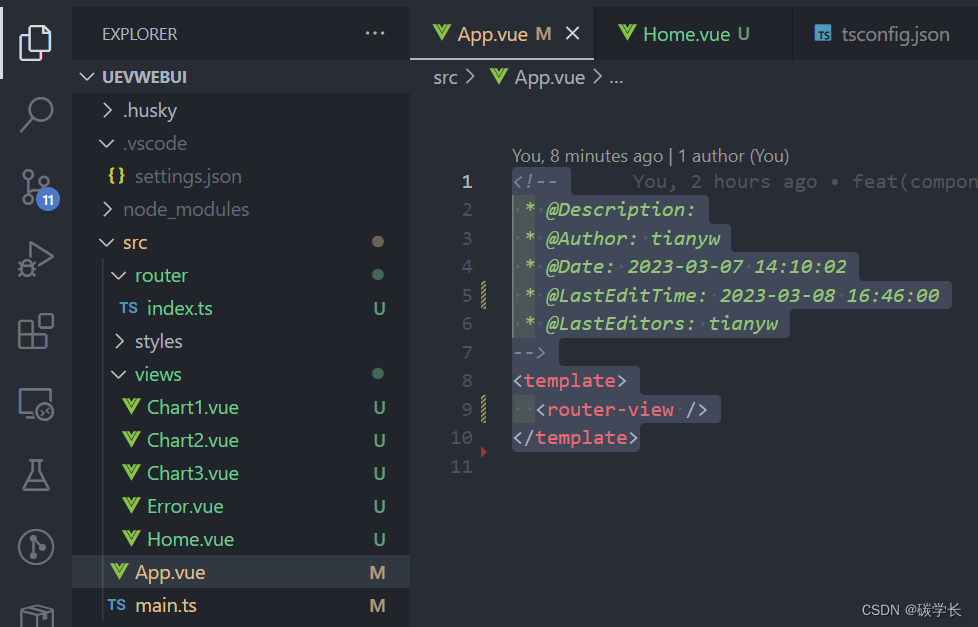
<!--
 * @Description:
 * @Author: tianyw
 * @Date: 2023-03-07 14:10:02
 * @LastEditTime: 2023-03-08 16:46:00
 * @LastEditors: tianyw
-->
<template>
  <router-view />
</template>
5、修改根目录下的 index.html,添加基础样式
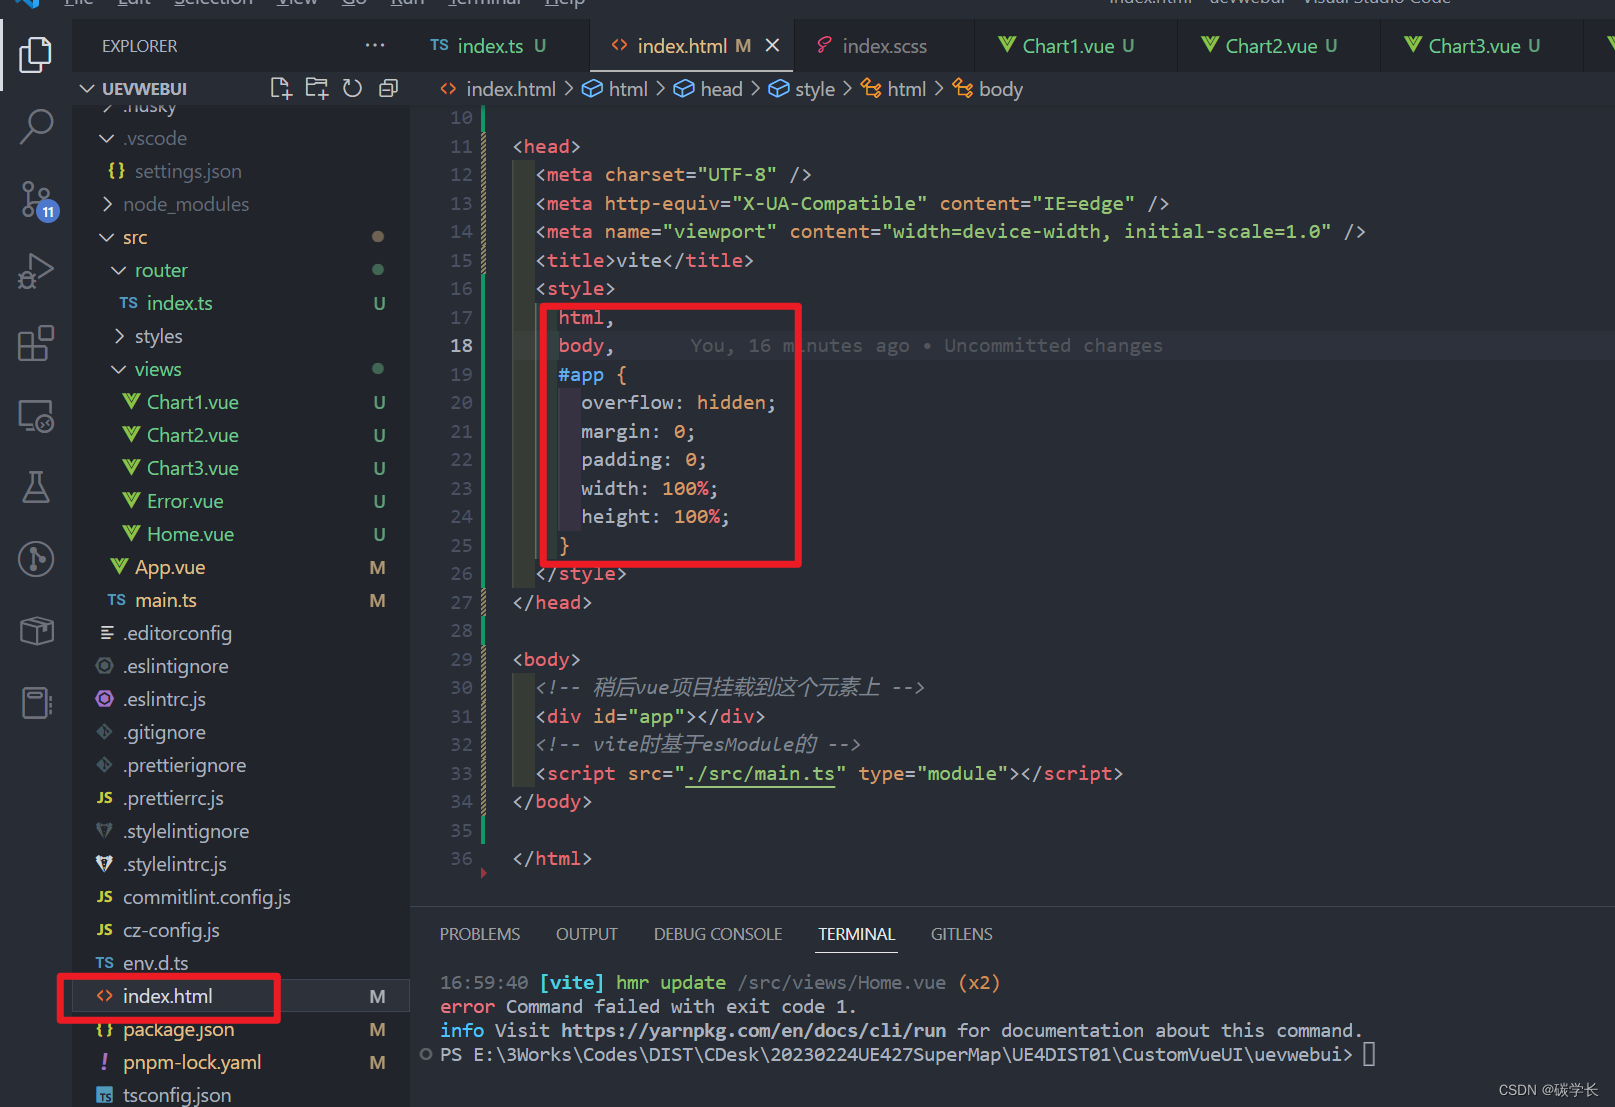
此时即可运行项目,看到可以正常切换页面。
42、引入 pinia 状态管理
1、安装 pinia
2、main.ts 中使用 pinia
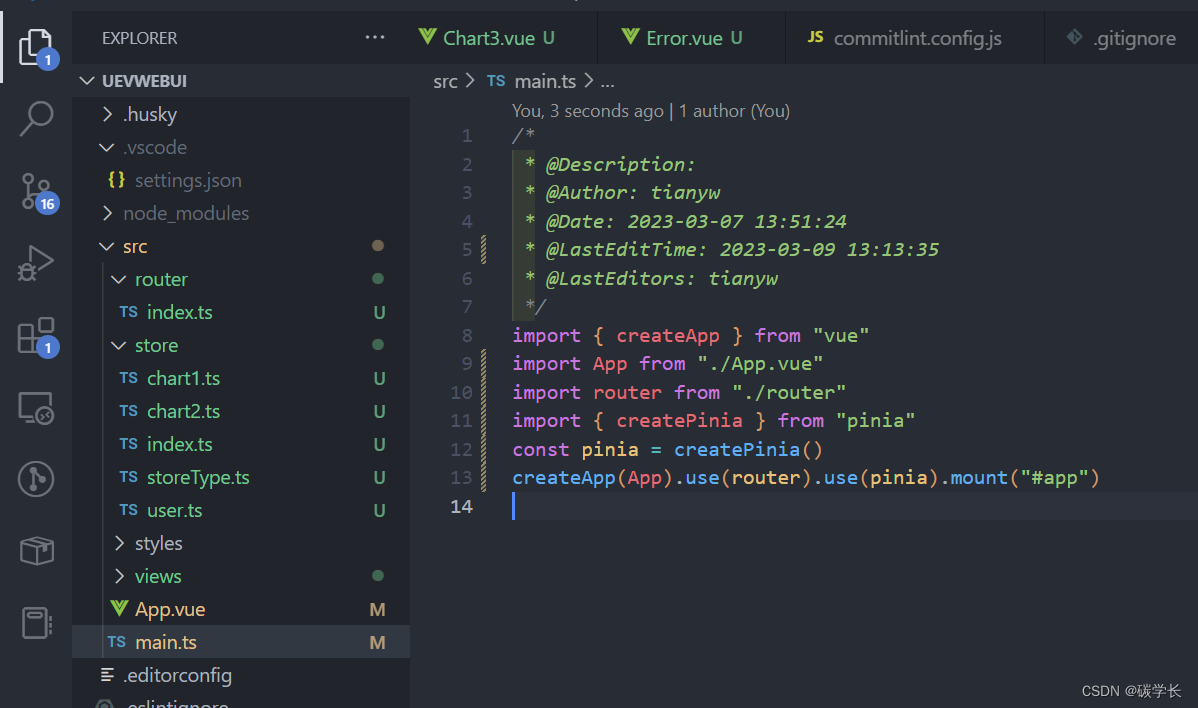
/*
 * @Description:
 * @Author: tianyw
 * @Date: 2023-03-07 13:51:24
 * @LastEditTime: 2023-03-09 13:13:35
 * @LastEditors: tianyw
 */
import {

     createApp } from "vue"
import App from "./App.vue"
import router from "./router"
import {

     createPinia } from "pinia"
const pinia = createPinia()
createApp(App).use(router).use(pinia).mount("#app")
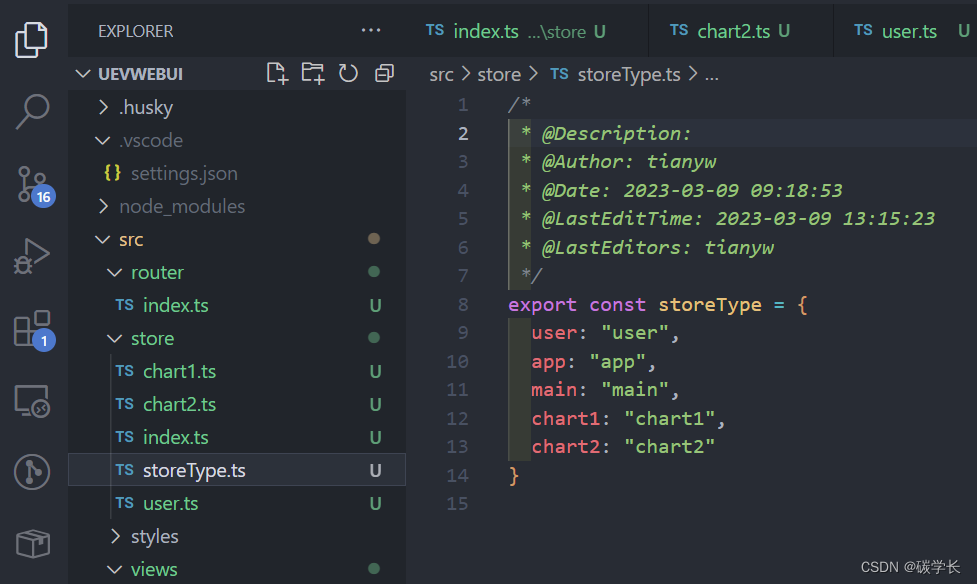
3、src 目录下创建 store 文件夹及文件,具体如下:
storeType.ts: 作为所有 store 的 唯一 id 的类别,作为类别管理的统一入口:
/*
 * @Description:
 * @Author: tianyw
 * @Date: 2023-03-09 09:18:53
 * @LastEditTime: 2023-03-09 13:15:23
 * @LastEditors: tianyw
 */
export const storeType = {


  user: "user",
  app: "app",
  main: "main",
  chart1: "chart1",
  chart2: "chart2"
}
index.ts:作为所有状态管理的出入口
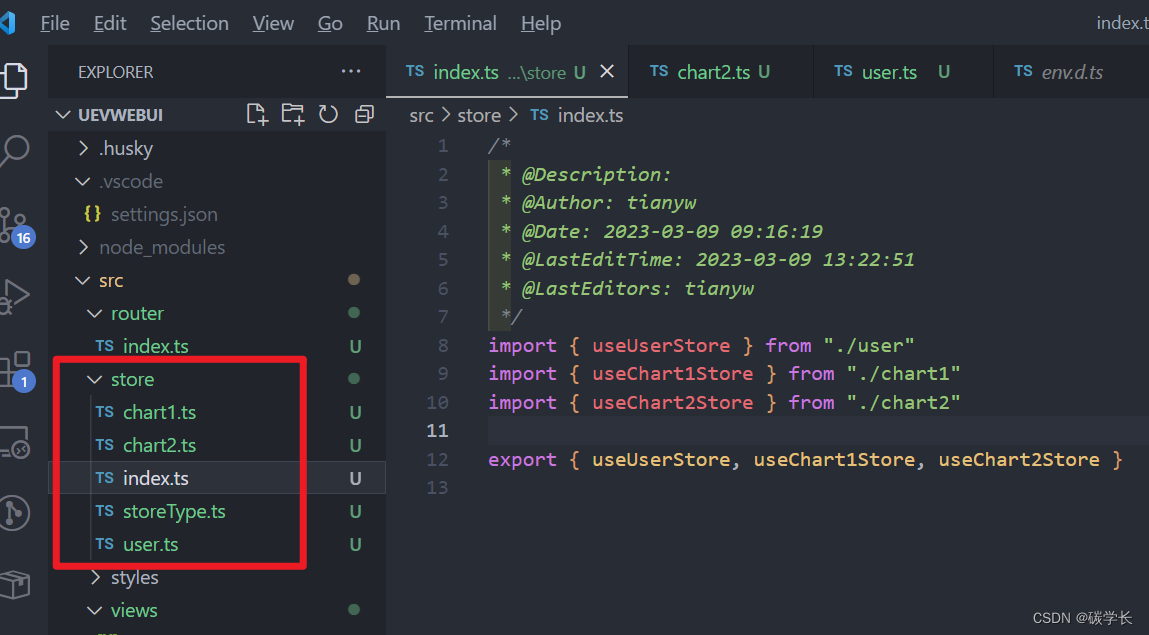
chart1.ts:chart1 状态管理
/*
 * @Description:
 * @Author: tianyw
 * @Date: 2023-03-09 09:17:43
 * @LastEditTime: 2023-03-09 13:19:41
 * @LastEditors: tianyw
 */
import {

     defineStore } from "pinia"
import {

     storeType } from "./storeType"
// 1、定义容器、导出容器
// 参数1:容器的 ID,必须是唯一的,后面 Pinia 会把所有的容器挂载到根容器
// 参数2:一些选项对象,也就是 state、getter 和 action
// 返回值:一个函数,调用即可得到容器实例
export const useChart1Store = defineStore(storeType.chart1, {


  // 类似于 Vue2 组件中的 data,用于存储全局状态数据 但有两个要求
  // 1、必须是函数,目的是为了在服务端渲染的时候避免交叉请求导致的数据状态污染
  // 2、必须是箭头函数,是为了更好的 TS 类型推导
  state: () => ({


    option: {


      title: {


        text: "Stacked Line"
      },
      tooltip: {


        trigger: "axis"
      },
      legend: {


        data: ["Email", "Union Ads", "Video Ads", "Direct", "Search Engine"]
      },
      grid: {


        left: "3%",
        right: "4%",
        bottom: "3%",
        containLabel: true
      },
      toolbox: {


        feature: {


          saveAsImage: {

    }
        }
      },
      xAxis: {


        type: "category",
        boundaryGap: false,
        data: ["Mon", "Tue", "Wed", "Thu", "Fri", "Sat", "Sun"]
      },
      yAxis: {


        type: "value"
      },
      series: [
        {


          name: "Email",
          type: "line",
          stack: "Total",
          data: [120, 132, 101, 134, 90, 230, 210]
        },
        {


          name: "Union Ads",
          type: "line",
          stack: "Total",
          data: [220, 182, 191, 234, 290, 330, 310]
        },
        {


          name: "Video Ads",
          type: "line",
          stack: "Total",
          data: [150, 232, 201, 154, 190, 330, 410]
        },
        {


          name: "Direct",
          type: "line",
          stack: "Total",
          data: [320, 332, 301, 334, 390, 330, 320]
        },
        {


          name: "Search Engine",
          type: "line",
          stack: "Total",
          data: [820, 932, 901, 934, 1290, 1330, 1320]
        }
      ]
    }
  }),
  // 相当于计算属性
  getters: {

    },
  // 相当于 vuex 的 mutation + action
  actions: {

    }
})
chart2.ts:chart2 状态管理
/*
 * @Description:
 * @Author: tianyw
 * @Date: 2023-03-09 09:17:43
 * @LastEditTime: 2023-03-09 13:20:08
 * @LastEditors: tianyw
 */
import {

     defineStore } from "pinia"
import {

     storeType } from "./storeType"
// 1、定义容器、导出容器
// 参数1:容器的 ID,必须是唯一的,后面 Pinia 会把所有的容器挂载到根容器
// 参数2:一些选项对象,也就是 state、getter 和 action
// 返回值:一个函数,调用即可得到容器实例
export const useChart2Store = defineStore(storeType.chart2, {


  // 类似于 Vue2 组件中的 data,用于存储全局状态数据 但有两个要求
  // 1、必须是函数,目的是为了在服务端渲染的时候避免交叉请求导致的数据状态污染
  // 2、必须是箭头函数,是为了更好的 TS 类型推导
  state: () => ({


    option: {


      tooltip: {


        trigger: "axis",
        axisPointer: {


          // Use axis to trigger tooltip
          type: "shadow" // 'shadow' as default; can also be 'line' or 'shadow'
        }
      },
      legend: {

    },
      grid: {


        left: "3%",
        right: "4%",
        bottom: "3%",
        containLabel: true
      },
      xAxis: {


        type: "value"
      },
      yAxis: {


        type: "category",
        data: ["Mon", "Tue", "Wed", "Thu", "Fri", "Sat", "Sun"]
      },
      series: [
        {


          name: "Direct",
          type: "bar",
          stack: "total",
          label: {


            show: true
          },
          emphasis: {


            focus: "series"
          },
          data: [320, 302, 301, 334, 390, 330, 320]
        },
        {


          name: "Mail Ad",
          type: "bar",
          stack: "total",
          label: {


            show: true
          },
          emphasis: {


            focus: "series"
          },
          data: [120, 132, 101, 134, 90, 230, 210]
        },
        {


          name: "Affiliate Ad",
          type: "bar",
          stack: "total",
          label: {


            show: true
          },
          emphasis: {


            focus: "series"
          },
          data: [220, 182, 191, 234, 290, 330, 310]
        },
        {


          name: "Video Ad",
          type: "bar",
          stack: "total",
          label: {


            show: true
          },
          emphasis: {


            focus: "series"
          },
          data: [150, 212, 201, 154, 190, 330, 410]
        },
        {


          name: "Search Engine",
          type: "bar",
          stack: "total",
          label: {


            show: true
          },
          emphasis: {


            focus: "series"
          },
          data: [820, 832, 901, 934, 1290, 1330, 1320]
        }
      ]
    }
  }),
  // 相当于计算属性
  getters: {

    },
  // 相当于 vuex 的 mutation + action
  actions: {

    }
})
user.ts:用户状态管理
/*
 * @Description:
 * @Author: tianyw
 * @Date: 2023-03-09 09:17:43
 * @LastEditTime: 2023-03-09 13:30:58
 * @LastEditors: tianyw
 */
import {

     defineStore } from "pinia"
import {

     storeType } from "./storeType"
// 1、定义容器、导出容器
// 参数1:容器的 ID,必须是唯一的,后面 Pinia 会把所有的容器挂载到根容器
// 参数2:一些选项对象,也就是 state、getter 和 action
// 返回值:一个函数,调用即可得到容器实例
export const useUserStore = defineStore(storeType.user, {


  // 类似于 Vue2 组件中的 data,用于存储全局状态数据 但有两个要求
  // 1、必须是函数,目的是为了在服务端渲染的时候避免交叉请求导致的数据状态污染
  // 2、必须是箭头函数,是为了更好的 TS 类型推导
  state: () => ({


    userName: "admin",
    password: "pass",
    isLogin: false,
    id: -1
  }),
  // 相当于计算属性
  getters: {


    loginReverse: (state) => {


      return !state.isLogin
    },
    getNameAndID: (state) => {


      return state.userName + state.id.toString()
    },
    getNameAndIdAndPassWord(): string {


      return this.getNameAndID + this.password
    }
  },
  // 相当于 vuex 的 mutation + action
  actions: {


    setUserName(data: string) {


      this.userName = data
    },
    randomUUID() {


      setTimeout(() => {


        this.id = Math.round(100 * Math.random())
      }, 1000)
    }
  }
})
4、在对应的 vue 文件中使用
这里对每个 vue 的 setup 的使用方式做了调整,具体调整如下:
Home.vue:
<!--
 * @Description:
 * @Author: tianyw
 * @Date: 2023-03-08 15:54:13
 * @LastEditTime: 2023-03-09 13:25:12
 * @LastEditors: tianyw
-->
<template>
  <div class="home-item">
    <span class="span-item l-size" :style="getStyle">{

   { msg }}</span>
    <div class="btn-items">
      <button @click="goToChart1">显示 Chart1 页面</button>
      <button @click="goToChart2">显示 Chart2 页面</button>
      <button @click="goToChart3">跳转到 Chart3 页面</button>
      <button @click="goToChart4">页面跳转异常</button>
    </div>
    <div class="router-item">
      <router-view />
    </div>
  </div>
</template>
<script lang="ts" setup>
import { ref, computed } from "vue"
import variables from "@/styles/variables.module.scss"
import { useRouter } from "vue-router"

const msg = ref("Home页面")
const getStyle = computed(() => ({
  fontStyle: variables.fontOblique
}))
const router = useRouter()
const goToChart1 = () => {
  router.push({ path: "/home/chart1" })
}
const goToChart2 = () => {
  router.push({ path: "/home/chart2" })
}
const goToChart3 = () => {
  router.push({ path: "/chart3" })
}
const goToChart4 = () => {
  router.push({ path: "/chart4" })
}
</script>
<style lang="scss" scoped>
.home-item {
  width: 100%;
  height: 100%;
}
.span-item {
  font-weight: bold;
  border-style: $B-DOTTED;
  border-width: 2px;
  background: $BG-1890ff;
}
.btn-items {
  margin-top: 0.8rem;
}
.router-item {
  width: 100%;
  height: 100%;
}
</style>
Error.vue:(未做调整)
<template>
  <div>
    <span class="span-item l-size" :style="getStyle">{

   { msg }}</span>
  </div>
</template>
<script lang="ts">
import { ref, computed } from "vue"
import variables from "@/styles/variables.module.scss"
export default {
  setup() {
    const msg = ref("404页面")
    const getStyle = computed(() => ({
      fontStyle: variables.fontOblique
    }))
    return {
      msg,
      getStyle
    }
  }
}
</script>
<style lang="scss" scoped>
.span-item {
  font-weight: bold;
  border-style: $B-DOTTED;
  border-width: 2px;
  background: $BG-1890ff;
}
</style>
Chart3.vue:(使用了 userStore)
<template>
  <div>
    <span class="span-item l-size" :style="getStyle">{

   { msg }}</span>
    <div>
      <p>姓名(非响应式):{

   { name2 }}</p>
      <p>姓名(响应式):{

   { userName }}</p>
      <p>密码:{

   { password }}</p>
      <p>ID:{

   { id }}</p>
      <p>姓名+密码+ID:{

   { nip }}</p>
    </div>
    <button @click="changeName">改变名称</button>
  </div>
</template>
<script lang="ts" setup>
import { ref, computed } from "vue"
import variables from "@/styles/variables.module.scss"
import { useUserStore } from "@/store"
import { storeToRefs } from "pinia"
const userStore = useUserStore()
const msg = ref("Chart3页面")
const getStyle = computed(() => ({
  fontStyle: variables.fontOblique
}))
const name2 = ref<string>(userStore.userName)
const password = ref<string>(userStore.password)
const id = ref<number>(userStore.id)
const nip = userStore.getNameAndIdAndPassWord
const { userName } = storeToRefs(userStore) // 响应式
const changeName = () => {
  userStore.setUserName("newName")
  console.log(userStore.userName)
}
</script>
<style lang="scss" scoped>
.span-item {
  font-weight: bold;
  border-style: $B-DOTTED;
  border-width: 2px;
  background: $BG-1890ff;
}
</style>
Chart2.vue:(使用了 chart2Store)
<!--
 * @Description:
 * @Author: tianyw
 * @Date: 2023-03-08 15:55:55
 * @LastEditTime: 2023-03-09 13:32:18
 * @LastEditors: tianyw
-->
<template>
  <div>
    <span class="span-item l-size" :style="getStyle">{

   { msg }}</span>
    <div>
      <p>{

   { option }}</p>
    </div>
  </div>
</template>
<script lang="ts" setup>
import { ref, computed } from "vue"
import variables from "@/styles/variables.module.scss"
import { useChart2Store } from "@/store"
const chart2Store = useChart2Store()
const msg = ref("Chart2页面")
const getStyle = computed(() => ({
  fontStyle: variables.fontOblique
}))
const option = chart2Store.option
</script>
<style lang="scss" scoped>
.span-item {
  font-weight: bold;
  border-style: $B-DOTTED;
  border-width: 2px;
  background: $BG-1890ff;
}
</style>
Chart1.vue:使用了 chart1Store
<template>
  <div>
    <span class="span-item l-size" :style="getStyle">{

   { msg }}</span>
    <div>
      <p>{

   { option }}</p>
    </div>
  </div>
</template>
<script lang="ts" setup>
import { ref, computed } from "vue"
import variables from "@/styles/variables.module.scss"
import { useChart1Store } from "@/store"
const chart1Store = useChart1Store()
const msg = ref("Chart1页面")
const getStyle = computed(() => ({
  fontStyle: variables.fontOblique
}))
const option = chart1Store.option
</script>
<style lang="scss" scoped>
.span-item {
  font-weight: bold;
  border-style: $B-DOTTED;
  border-width: 2px;
  background: $BG-1890ff;
}
</style>
之后,运行后效果如下,可以看到可以正常绑定及使用:
至此 pinia 的引入及初步使用就完成了。
43、引入 echarts
1、安装 echarts

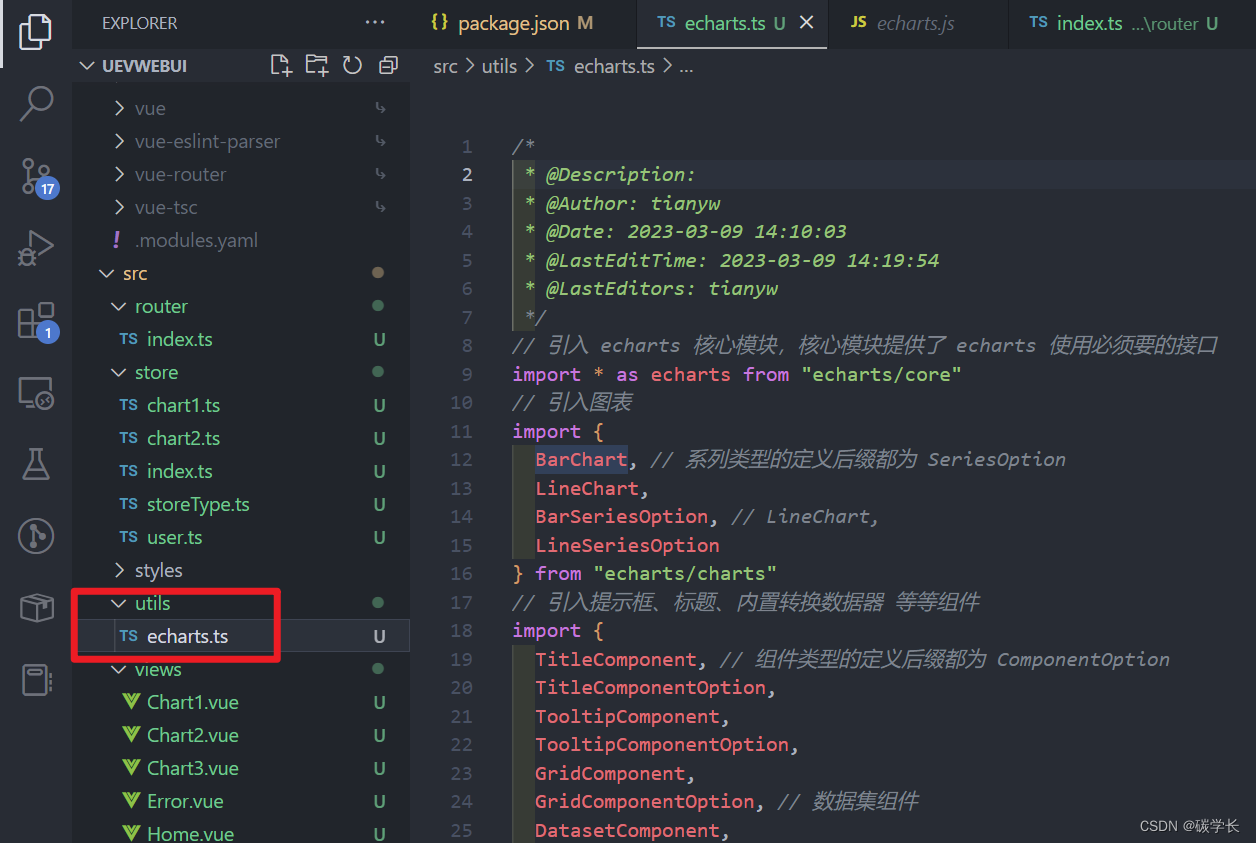
2、src 目录下新建 utils 及 echarts.ts 文件,实现 echarts 的按需引入
/*
 * @Description:
 * @Author: tianyw
 * @Date: 2023-03-09 14:10:03
 * @LastEditTime: 2023-03-09 14:22:36
 * @LastEditors: tianyw
 */
// 引入 echarts 核心模块,核心模块提供了 echarts 使用必须要的接口
import * as echarts from "echarts/core"
// 引入图表
import {


  BarChart, // 系列类型的定义后缀都为 SeriesOption
  LineChart,
  BarSeriesOption, // LineChart,
  LineSeriesOption
} from "echarts/charts"
// 引入提示框、标题、内置转换数据器 等等组件
import {


  TitleComponent, // 组件类型的定义后缀都为 ComponentOption
  TitleComponentOption,
  TooltipComponent,
  TooltipComponentOption,
  GridComponent,
  GridComponentOption, // 数据集组件
  DatasetComponent,
  DatasetComponentOption, // 内置数据转换器组件 (filter, sort)
  TransformComponent,
  LegendComponent
} from "echarts/components"
// 标签自动布局、全局过去动画等特性
import {

     LabelLayout, UniversalTransition } from "echarts/features"
// 引入 Canvas 渲染器,注意引入 CanvasRenderer 或 SVGRender 是必须的一步
import {

     CanvasRenderer } from "echarts/renderers"
// 通过 ComposeOption 来组合出一个只有必须组件和图表的 Option 类型
export type ECOption = echarts.ComposeOption<
  | BarSeriesOption
  | LineSeriesOption
  | TitleComponentOption
  | TooltipComponentOption
  | GridComponentOption
  | DatasetComponentOption
>
// 注册必须的组件
echarts.use([
  TitleComponent,
  TooltipComponent,
  GridComponent,
  DatasetComponent,
  TransformComponent,
  BarChart,
  LineChart,
  LabelLayout,
  UniversalTransition,
  CanvasRenderer,
  LegendComponent
])

export {

     echarts }
3、在 vue 中使用 echarts
修改了 Chart1.vue 和 Chart2.vue 具体内容如下:
Chart1.vue:
<!--
 * @Description:
 * @Author: tianyw
 * @Date: 2023-03-08 15:55:49
 * @LastEditTime: 2023-03-09 15:09:11
 * @LastEditors: tianyw
-->
<template>
  <div>
    <span class="span-item l-size" :style="getStyle">{

   { msg }}</span>
    <div>
      <p>{

   { option }}</p>
    </div>
    <button @click="showCharts">显示表格</button>
    <div ref="chart2Ref" class="chart-item"></div>
  </div>
</template>
<script lang="ts" setup>
import { ref, computed, onMounted, Ref } from "vue"
import variables from "@/styles/variables.module.scss"
import { useChart1Store } from "@/store"
import { echarts } from "@/utils/echarts"
const chart1Store = useChart1Store()
const msg = ref("Chart1页面")
const getStyle = computed(() => ({
  fontStyle: variables.fontOblique
}))
const option = chart1Store.option
const chart2Ref: Ref<HTMLElement | null> = ref(null)
onMounted(() => {
  console.log(chart2Ref.value)
})
const showCharts = () => {
  const chart1 = echarts.init(chart2Ref.value as HTMLElement)
  chart1.setOption(option)
}
</script>
<style lang="scss" scoped>
.span-item {
  font-weight: bold;
  border-style: $B-DOTTED;
  border-width: 2px;
  background: $BG-1890ff;
}
.chart-item {
  width: 100%;
  height: 30rem;
}
</style>
Chart2.vue:
<!--
 * @Description:
 * @Author: tianyw
 * @Date: 2023-03-08 15:55:55
 * @LastEditTime: 2023-03-09 14:49:24
 * @LastEditors: tianyw
-->
<template>
  <div>
    <span class="span-item l-size" :style="getStyle">{

   { msg }}</span>
    <div>
      <p>{

   { option }}</p>
      <button @click="showCharts">显示表格</button>
      <div ref="chart1Ref" class="chart-item"></div>
    </div>
  </div>
</template>
<script lang="ts" setup>
import { ref, computed, onMounted, Ref } from "vue"
import variables from "@/styles/variables.module.scss"
import { useChart2Store } from "@/store"
import { echarts } from "@/utils/echarts"
const chart2Store = useChart2Store()
const msg = ref("Chart2页面")
const getStyle = computed(() => ({
  fontStyle: variables.fontOblique
}))
const option = chart2Store.option

const chart1Ref: Ref<HTMLElement | null> = ref(null)
onMounted(() => {
  console.log(chart1Ref.value)
})
const showCharts = () => {
  const chart1 = echarts.init(chart1Ref.value as HTMLElement)
  chart1.setOption(option)
}
</script>
<style lang="scss" scoped>
.span-item {
  font-weight: bold;
  border-style: $B-DOTTED;
  border-width: 2px;
  background: $BG-1890ff;
}
.chart-item {
  width: 100%;
  height: 30rem;
}
</style>
运行项目后,可以看到 echart 的图表可以正常显示:
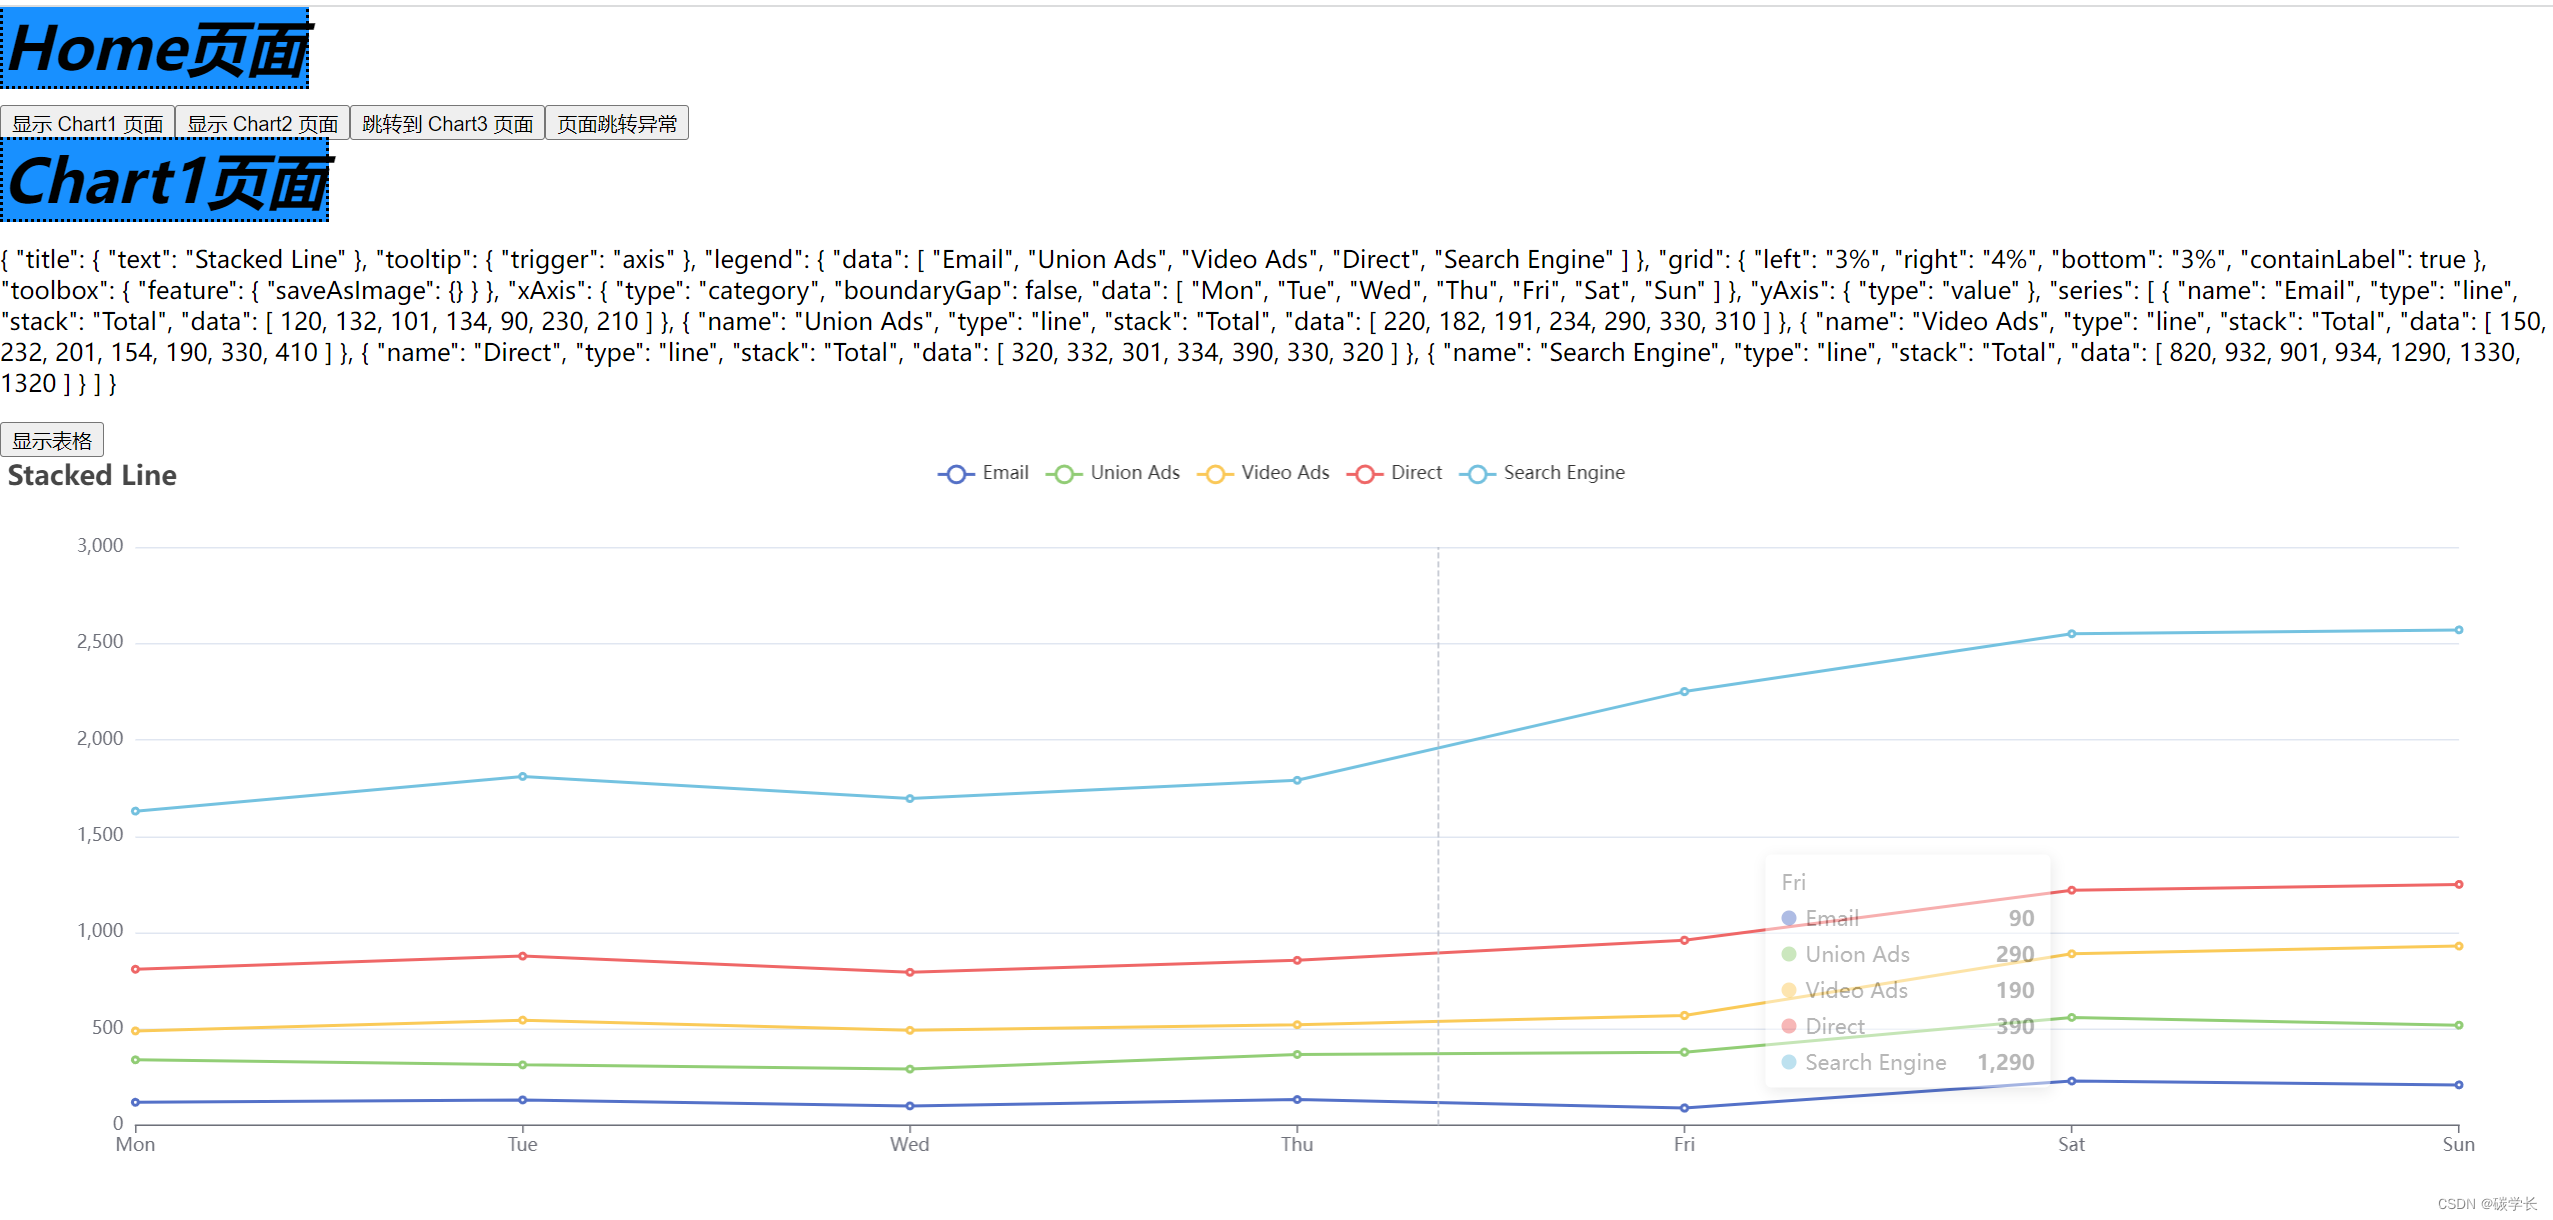
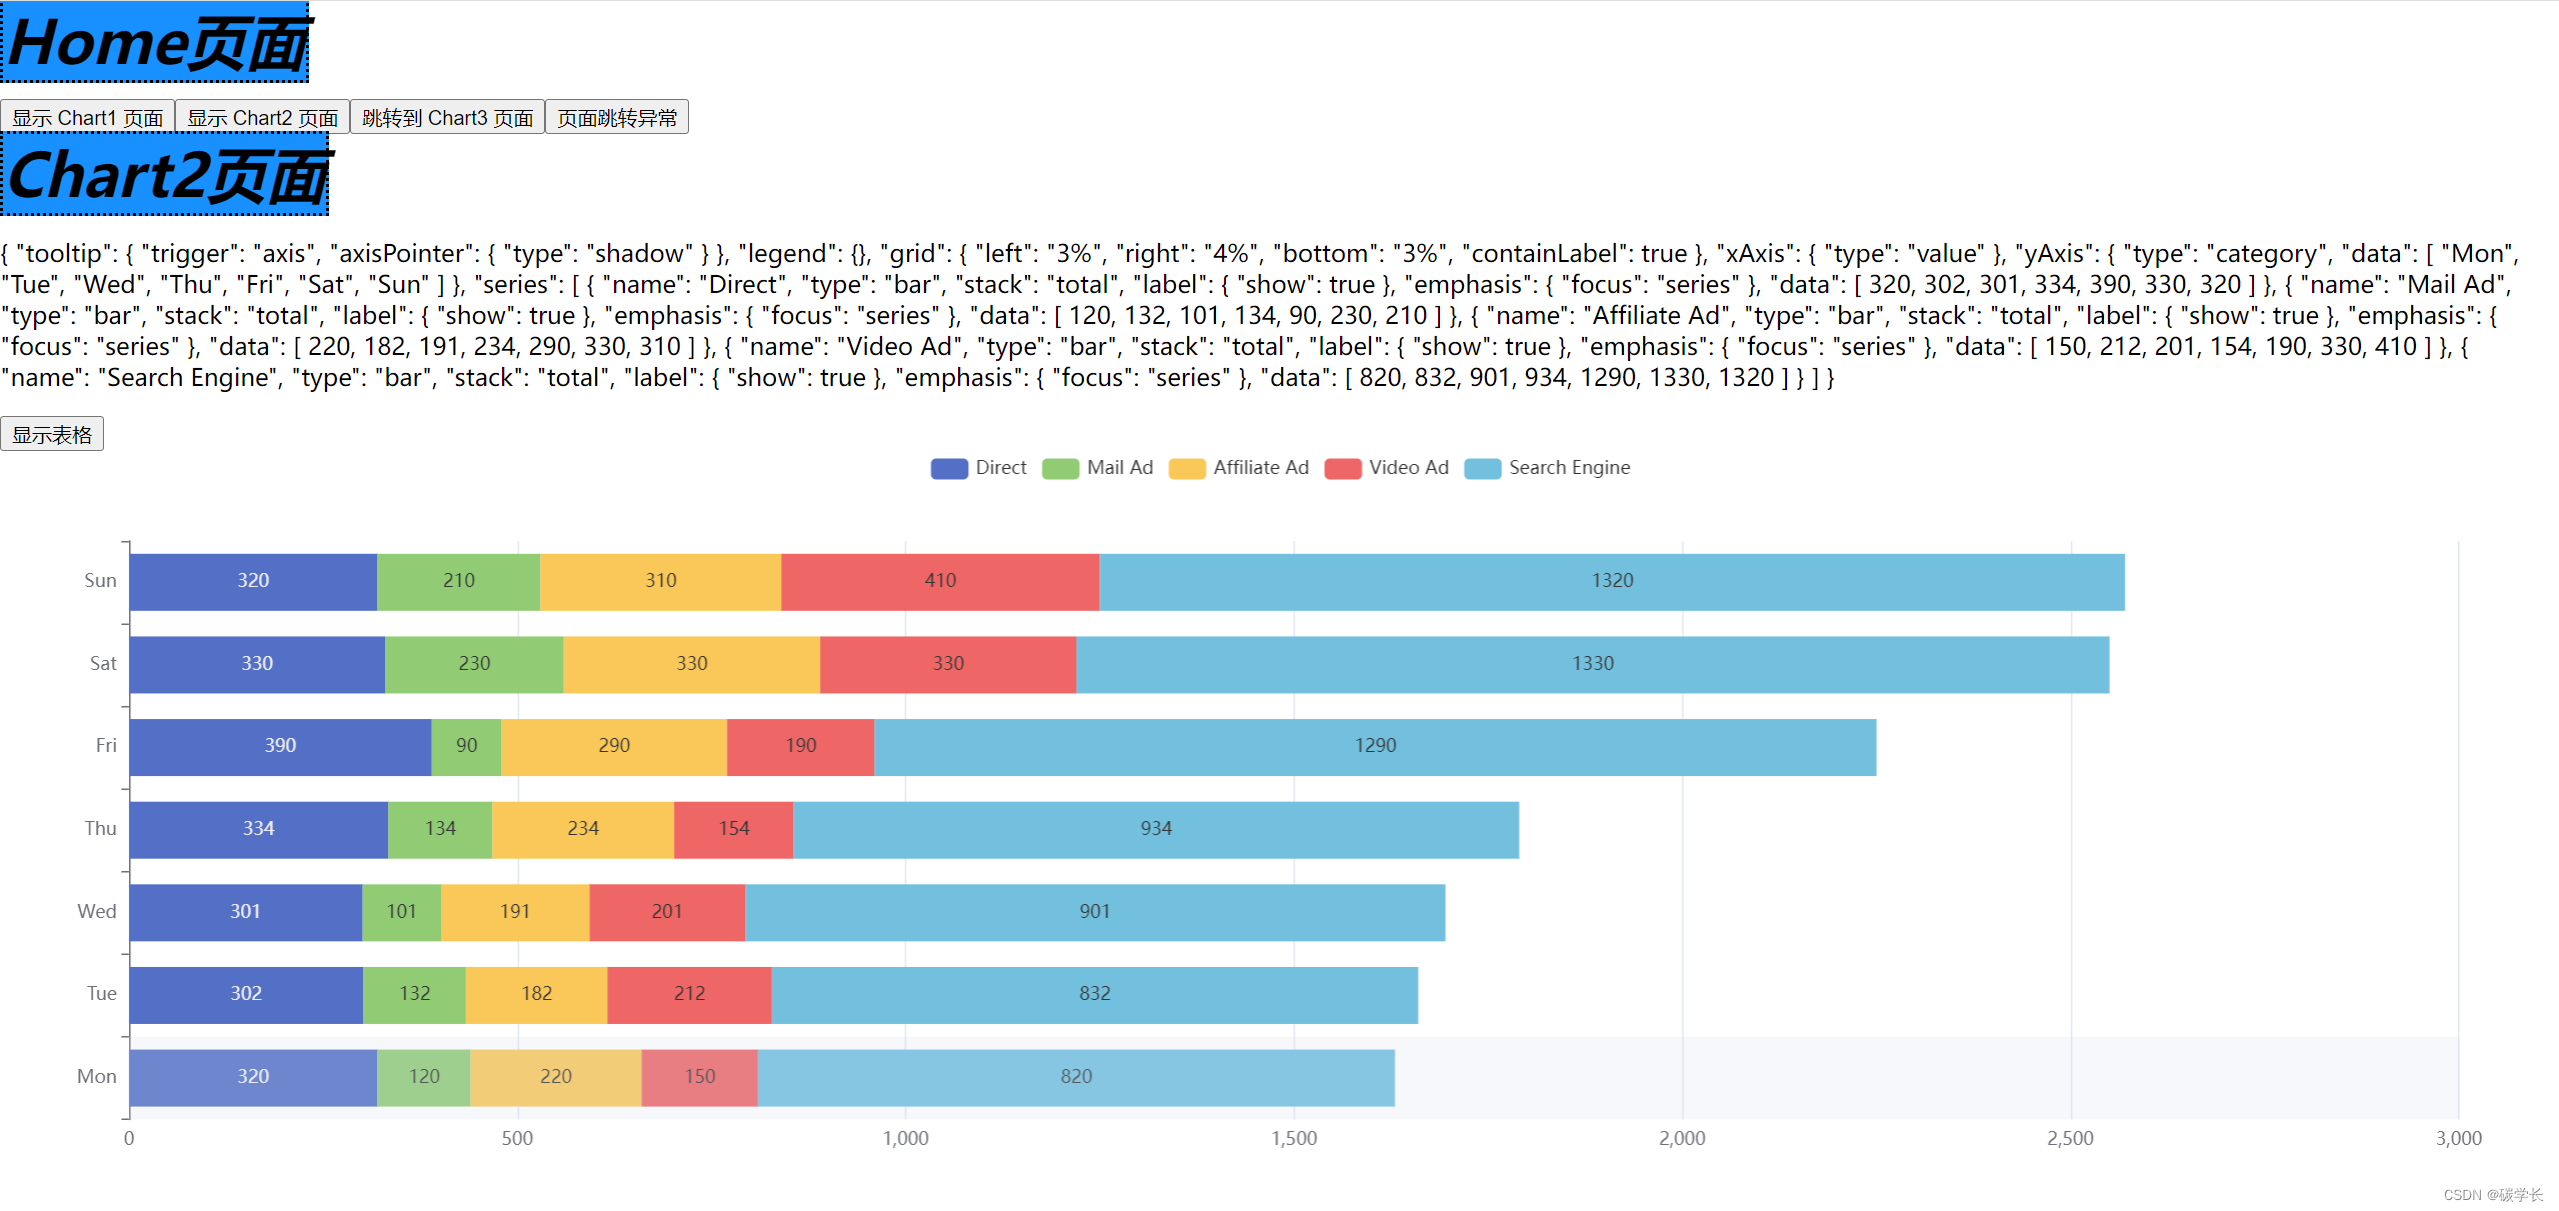
至此,echarts 的引入与使用就完成了。
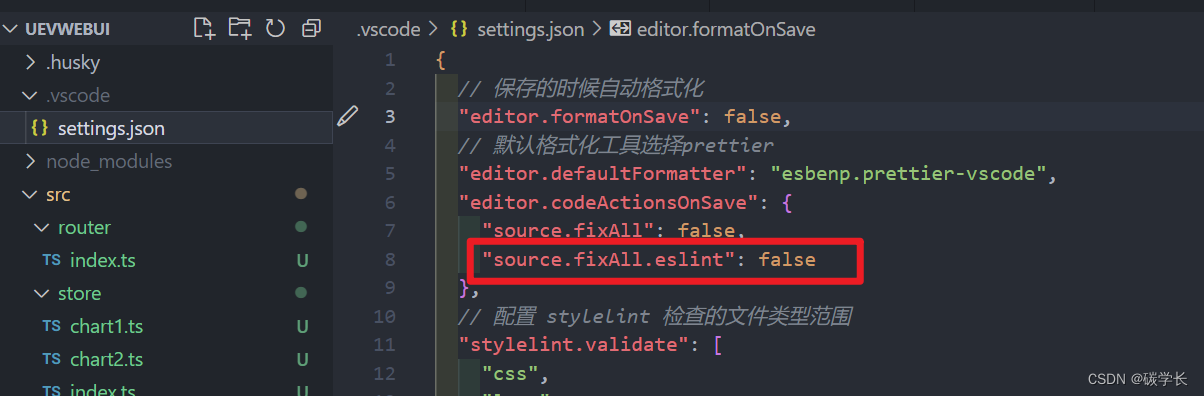
44、解决 Ctrl + S 自动保存时,保存过慢的问题
执行保存时,会有 from “Vetur” 等等提示,保存过程较慢,可以修改项目中的 .vscode 的 settings.json:
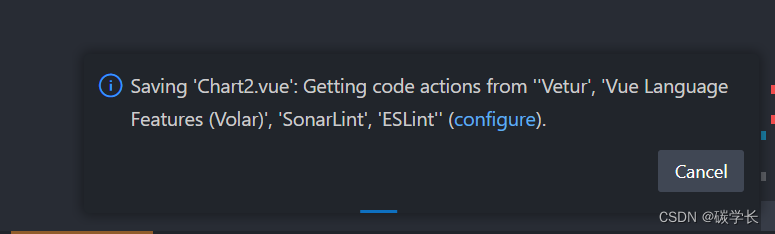
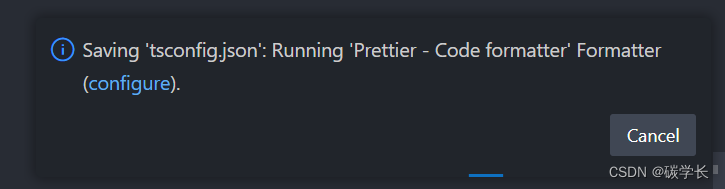
比如,source.fixAll.eslint 的值改为 false
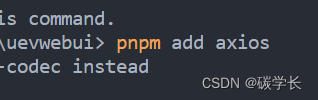
45、引入 axios
1、安装 axios
2、src 目录下新建 utils 文件夹及 customAxiosInstance.ts,简单封装 axios,具体如下:

import axios, {

     AxiosInstance } from "axios"

type CallbackFunctionVariadicAnyReturn = (...args: any[]) => any
interface IAxiosInstance extends AxiosInstance {


  errorHook?: CallbackFunctionVariadicAnyReturn
}
// axios 配置

// axios 实例
class CustomAxiosInstance {


  instance: IAxiosInstance
  errorHook: CallbackFunctionVariadicAnyReturn
  constructor(
    baseURL: string,
    TIMEOUT = 60000 * 30,
    errorHook: CallbackFunctionVariadicAnyReturn = () => {


      return ""
    }
  ) {


    if (baseURL && baseURL.length > 0) {


      this.instance = axios.create({


        baseURL: baseURL,
        timeout: TIMEOUT, // 支持半个小时 防止超时
        withCredentials: false
      })
    } else {


      this.instance = axios.create({


        timeout: TIMEOUT, // 支持半个小时 防止超时
        withCredentials: false
      })
    }
    // 请求错误 钩子 可以在外面注册错误回调处理
    this.errorHook = errorHook

    // query请求拦截器,针对form请求添加请求头
    this.instance.interceptors.request.use(
      (config) => {


        // if (config.data && config.data.isFormRequest) {


        //   config.headers["Content-Type"] = "application/x-www-form-urlencoded";
        //   delete config.data.isFormRequest;
        // }
        return config
      },
      (error) => {


        return Promise.reject(error)
      }
    )

    // query响应拦截器
    this.instance.interceptors.response.use(
      (response) => {


        const {

     status, data, headers } = response

        if (status === 200 || status === 201) {


          if (headers && headers["x-auth-token"]) {


            return Promise.resolve({

     data: data, headers: headers })
          } else {


            return Promise.resolve(data)
          }
        } else {


          return Promise.reject(data)
        }
      },
      (error) => {


        this.errorHook && this.errorHook(error)
        return Promise.reject(error)
      }
    )
  }

  // httpParams = { responseType: 'blob' } // 数据流形式
  IPOST(url: string, params = {

    }, httpParams = {

    }) {


    return new Promise((resolve, reject) => {


      this.instance
        .post(url, params, httpParams)
        .then((response) => {


          if (response) {


            if (response.data) {


              if (response.headers) {


                resolve(response) // 获取后台响应头 拿取 token 信息等
              } else {


                resolve(response.data)
              }
            } else {


              resolve(response)
            }
          }
          resolve(false)
        })
        .catch((error) => {


          if (error.response) {


            console.log("data错误", error.response.data)
            console.log("status错误", error.response.status)
            console.log("headers错误", error.response.headers)
            console.log("message描述错误", error.response.message)
          } else {


            if (error.request) {


              console.log("request错误", error.request)
            } else {


              console.log("message错误", error.message)
            }
          }
          console.log("conifg错误", error.config)

          reject(error)
        })
    })
  }

  IPUT(url: string, params = {

    }) {


    return new Promise((resolve, reject) => {


      this.instance
        .put(url, params)
        .then((response) => {


          if (response) {


            if (response.data) {


              resolve(response.data)
            } else {


              resolve(response)
            }
          }
          resolve(false)
        })
        .catch((err) => {


          console.log("请求失败", err)
          reject(err)
        })
    })
  }

  IDELETE(url: string, params = {

    }) {


    return new Promise((resolve, reject) => {


      this.instance
        .delete(url, params)
        .then((response) => {


          if (response) {


            if (response.data) {


              resolve(response.data)
            } else {


              resolve(response)
            }
          }
          resolve(false)
        })
        .catch((err) => {


          console.log("请求失败", err)
          reject(err)
        })
    })
  }

  IPATCH(url: string, params = {

    }) {


    return new Promise((resolve, reject) => {


      this.instance
        .patch(url, params)
        .then((response) => {


          if (response) {


            if (response.data) {


              resolve(response.data)
            } else {


              resolve(response)
            }
          }
          resolve(false)
        })
        .catch((err) => {


          console.log("请求失败", err)
          reject(err)
        })
    })
  }
  IGET(url: string, options = {

    }) {


    return new Promise((resolve, reject) => {


      this.instance
        .get(url, {


          // params: params,
          // headers: headers,
          ...options
        })
        .then((response) => {


          if (response) {


            if (response.data) {


              resolve(response.data)
            } else {


              resolve(response)
            }
          }
          resolve(false)
        })
        .catch((err) => {


          console.log("请求失败", err)
          reject(err)
        })
    })
  }
}

export {

     CustomAxiosInstance }
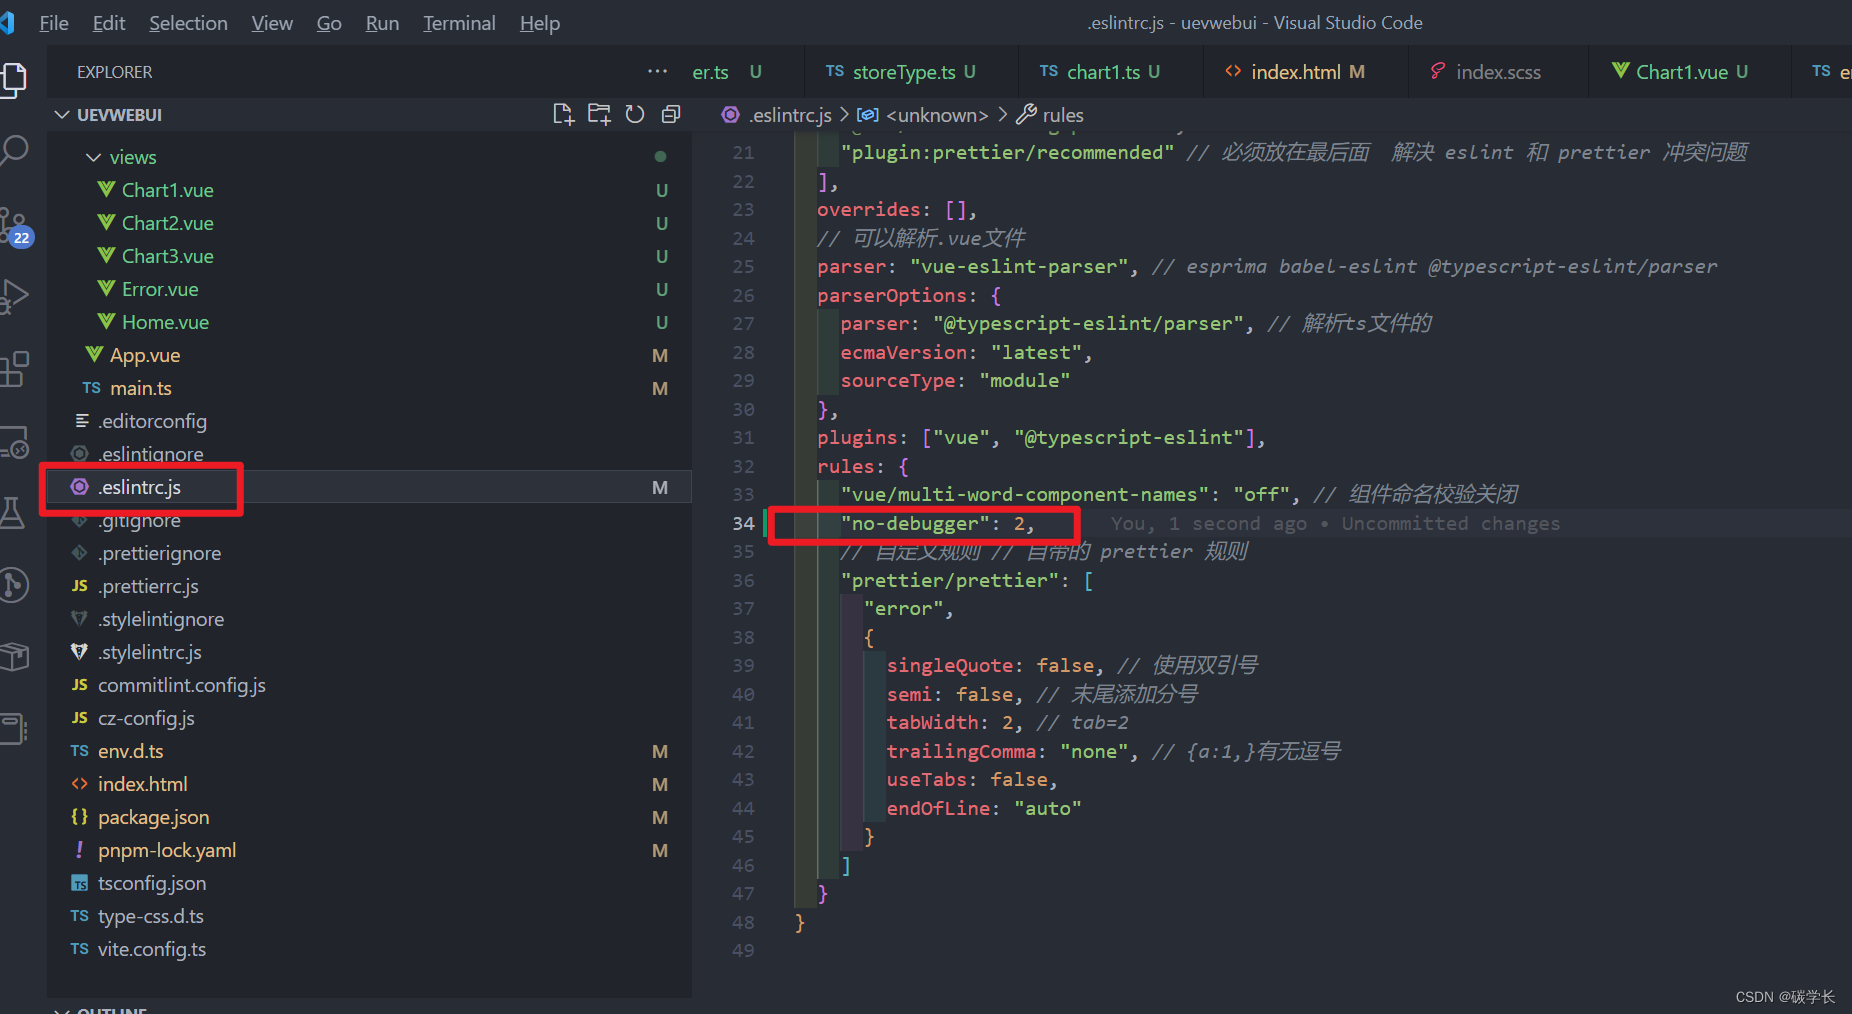
3、修改 .eslintrc.js 内容,新增 “no-debugger”:2,方便代码中添加 debugger 进行调试
4、根目录下新建 public/static/appConfig.hjson,用于配置文件
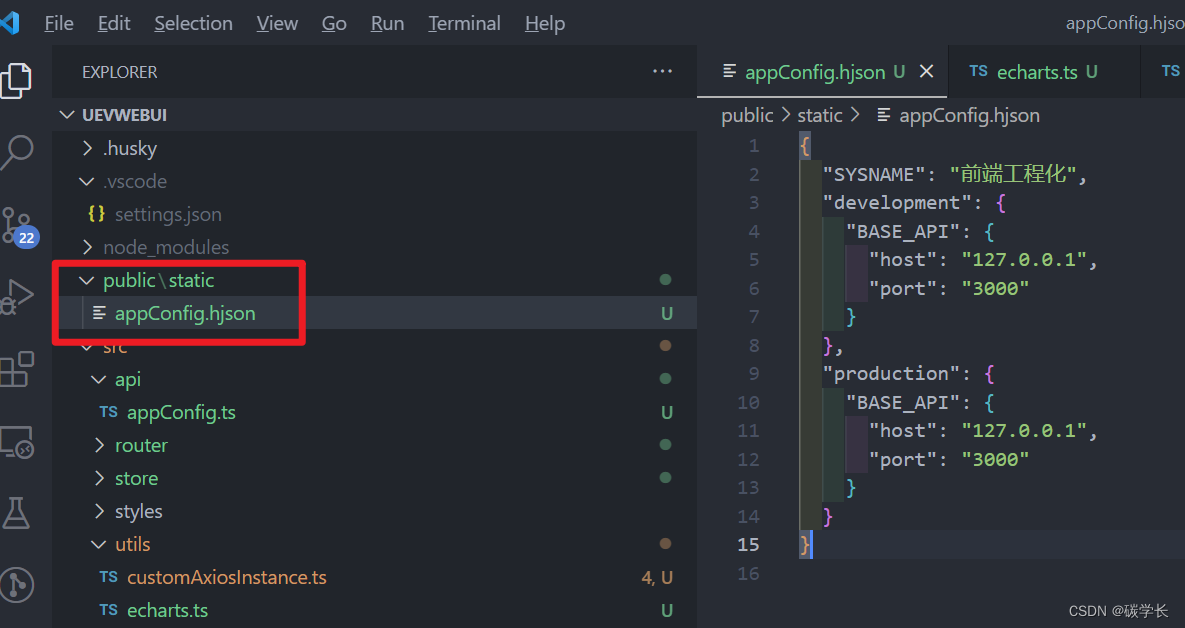
5、src 目录下新建 api 文件夹,添加 appConfig.ts 方法,用于获取 appConfig.hjson 内容
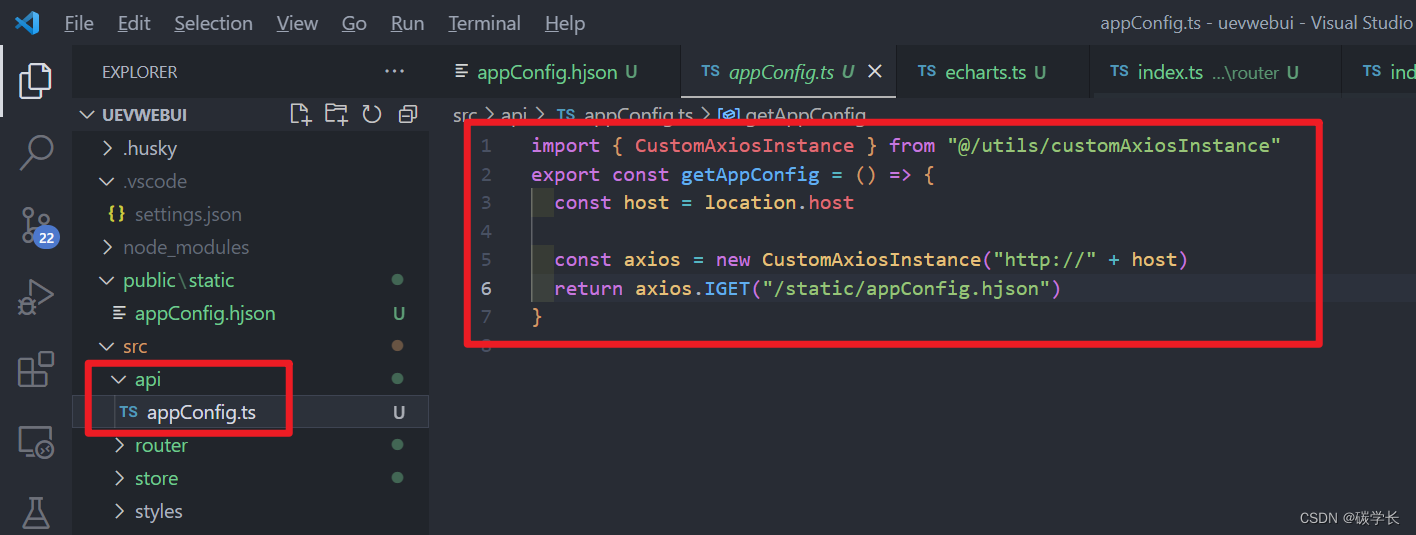
import {

     CustomAxiosInstance } from "@/utils/customAxiosInstance"
export const getAppConfig = () => {


  const host = location.host

  const axios = new CustomAxiosInstance("http://" + host)
  return axios.IGET("/static/appConfig.hjson")
}
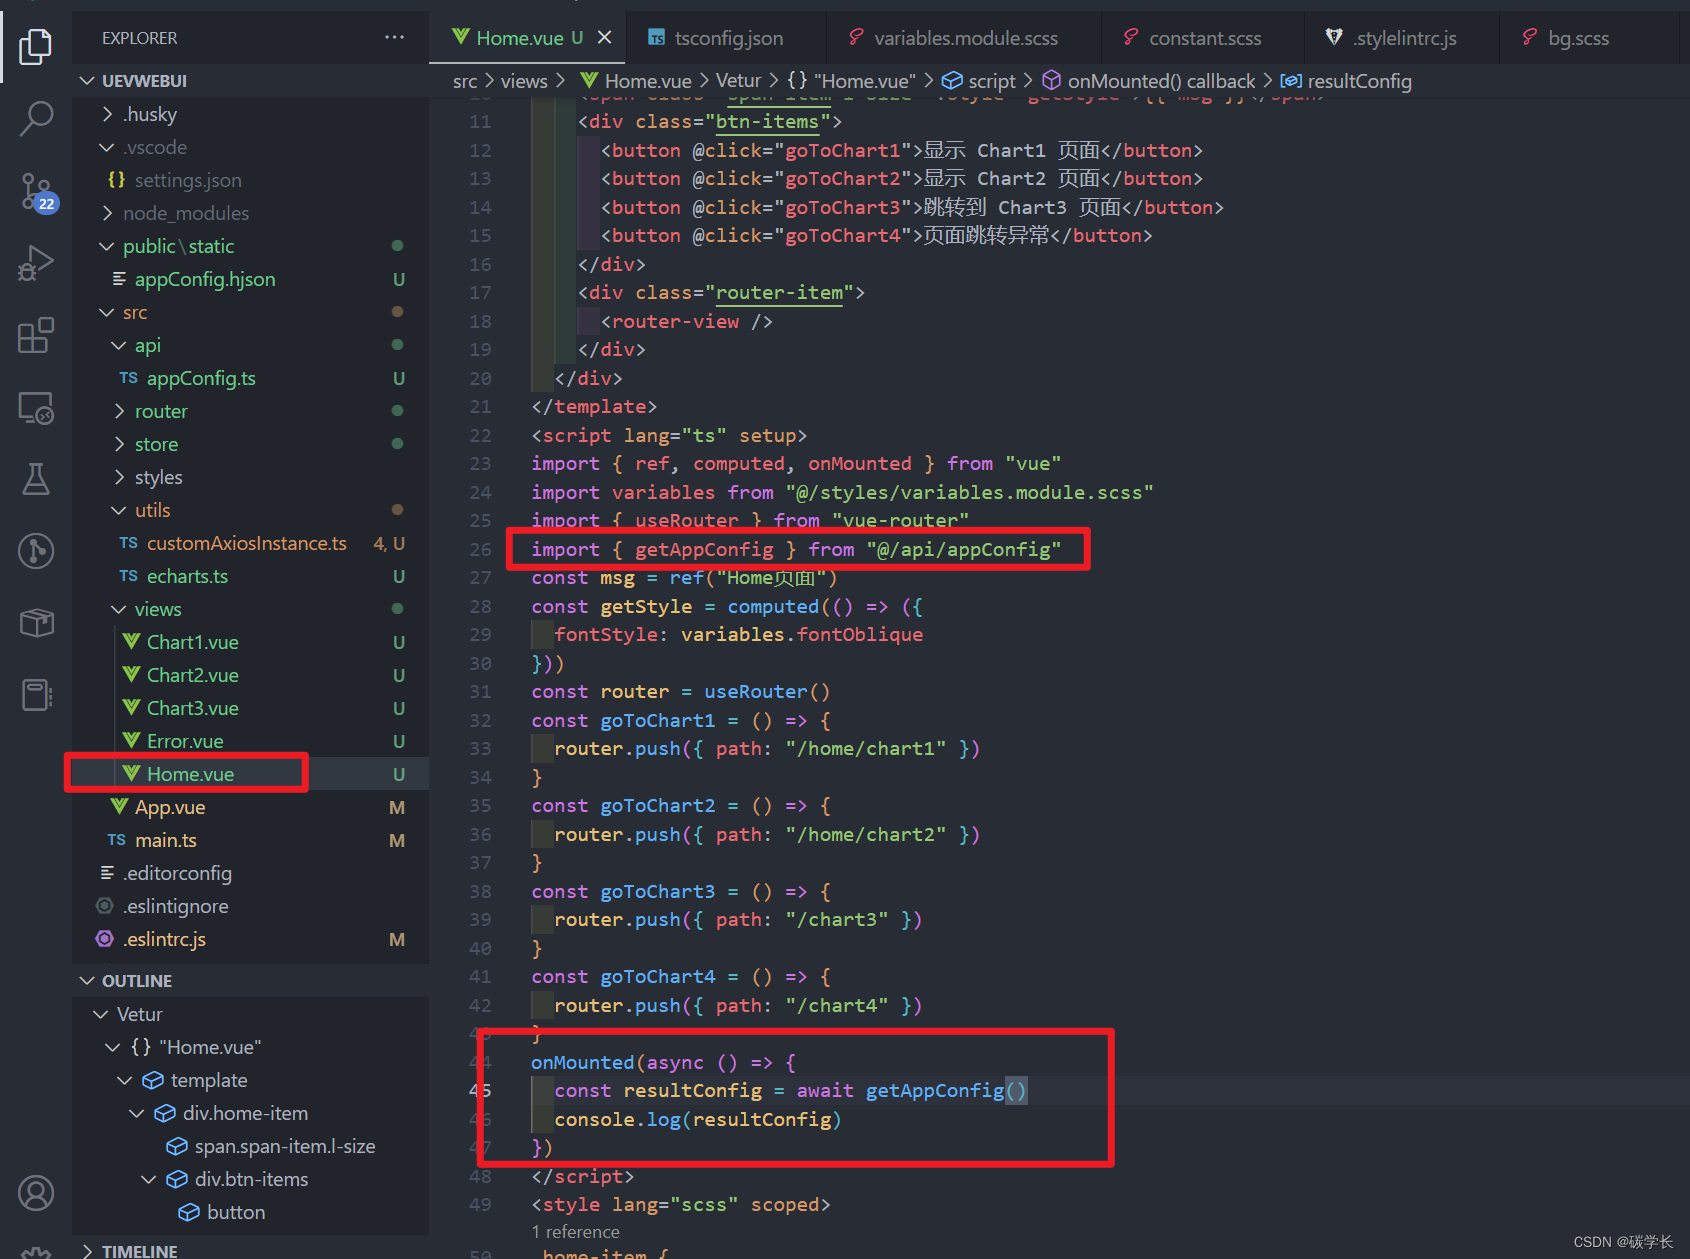
6、Home.vue 中调用读取 appConfig.hjson 并打印
<!--
* @Description:
* @Author: tianyw
* @Date: 2023-03-08 15:54:13
* @LastEditTime: 2023-03-09 20:43:59
* @LastEditors: tianyw
-->
<template>
<div class="home-item">
<span class="span-item l-size" :style="getStyle">{
{ msg }}</span>
<div class="btn-items">
<button @click="goToChart1">显示 Chart1 页面</button>
<button @click="goToChart2">显示 Chart2 页面</button>
<button @click="goToChart3">跳转到 Chart3 页面</button>
<button @click="goToChart4">页面跳转异常</button>
</div>
<div class="router-item">
<router-view />
</div>
</div>
</template>
<script lang="ts" setup>
import { ref, computed, onMounted } from "vue"
import variables from "@/styles/variables.module.scss"
import { useRouter } from "vue-router"
import { getAppConfig } from "@/api/appConfig"
const msg = ref("Home页面")
const getStyle = computed(() => ({
fontStyle: variables.fontOblique
}))
const router = useRouter()
const goToChart1 = () => {
router.push({ path: "/home/chart1" })
}
const goToChart2 = () => {
router.push({ path: "/home/chart2" })
}
const goToChart3 = () => {
router.push({ path: "/chart3" })
}
const goToChart4 = () => {
router.push({ path: "/chart4" })
}
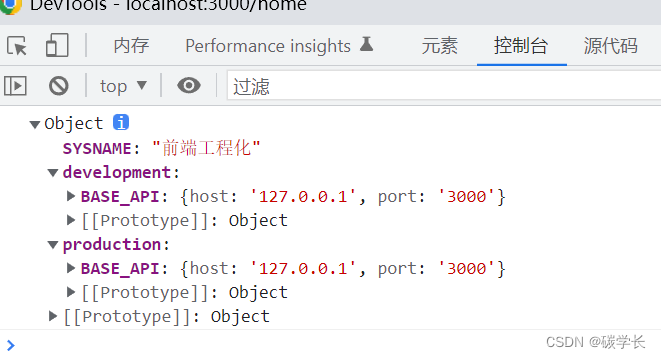
onMounted(async () => {
const resultConfig = await getAppConfig()
console.log(resultConfig)
})
</script>
<style lang="scss" scoped>
.home-item {
width: 100%;
height: 100%;
}
.span-item {
font-weight: bold;
border-style: $B-DOTTED;
border-width: 2px;
background: $BG-1890ff;
}
.btn-items {
margin-top: 0.8rem;
}
.router-item {
width: 100%;
height: 100%;
}
</style>
可以看到,运行后,正确打印了 appConfig.hjson 中的内容,至此 axios 的使用就完成了。
46、区分开发、测试、生产(线上)环境(nginx/tomcat、docker)
根据 Vite 的约定规则,只有以 “VITE_” 开头的变量才会在客户端被捕获,捕获方式为:import.meta.env.{参数名}。
至于非 “VITE_” 开头的变量属于私有属性,不会传递出去。假如你的项目包含此类敏感变量。应该将文件添加到你的 .gitignore 中,以避免它们被 git 检入。
除了私有属性外,不以 “VITE_” 开头的属性也可以定义,这样的情况下,我们的环境变量不仅仅是简单的字符串,而是通过vite 服务中二次计算才能得到最终结果,有点类似 Vue 中 computed 或 React 中 useMemo、useCallback 的效果。
像这类非静态的环境变量,我们需要借助插件能力来让它们也能够返回客户端,插件很多,这里推荐vite-plugin-environment,通过它就可以实现【透传环境变量】的效果。具体实现方式,这里不再赘述。
1、根目录下新建 .env 文件,具体如下:
这里新建了 .env.dev(开发环境)、.env.nginx(生产环境,部署到 nginx)、.env.prod(正常生产环境,直接打包为 dist,可部署到 docker 环境)、.env.test(测试环境)、.env.tomcat(生产环境,部署到 tomcat)
五个文件都具有以 VITE_ 开头的属性,具体每个文件的内容如下:
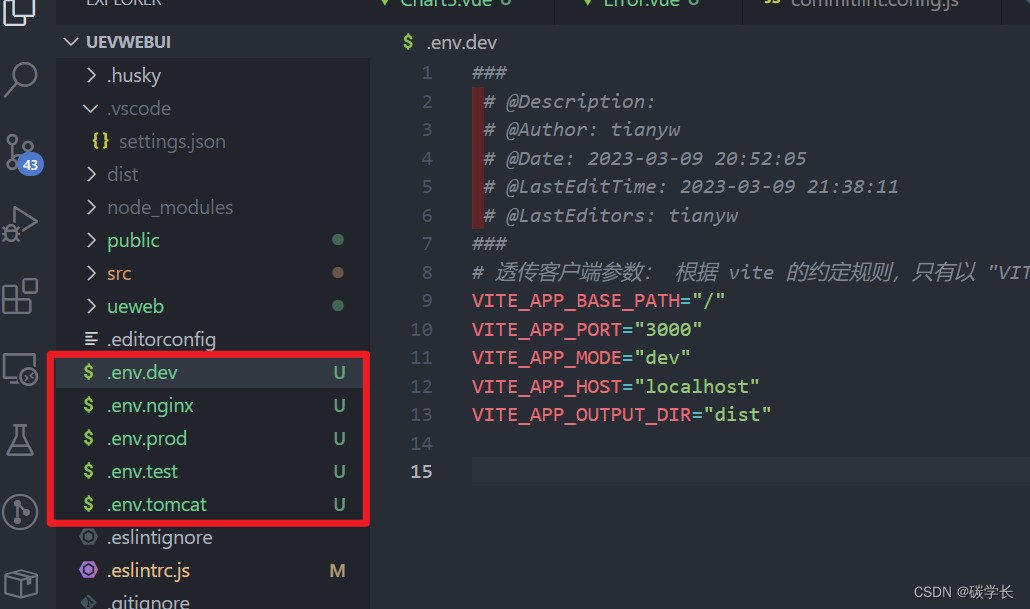
.env.dev 文件内容:
###
 # @Description:
 # @Author: tianyw
 # @Date: 2023-03-09 20:52:05
 # @LastEditTime: 2023-03-09 21:38:11
 # @LastEditors: tianyw
###
# 透传客户端参数: 根据 vite 的约定规则,只有以 "VITE_" 开头的变量才会在客户端被捕获,捕获方式为: import.meta.env.{参数名}
VITE_APP_BASE_PATH="/"
VITE_APP_PORT="3000"
VITE_APP_MODE="dev"
VITE_APP_HOST="localhost"
VITE_APP_OUTPUT_DIR="dist"
.env.nginx 文件内容:
###
 # @Description:
 # @Author: tianyw
 # @Date: 2023-03-09 22:10:25
 # @LastEditTime: 2023-03-09 22:16:50
 # @LastEditors: tianyw
###
# 透传客户端参数: 根据 vite 的约定规则,只有以 "VITE_" 开头的变量才会在客户端被捕获,捕获方式为: import.meta.env.{参数名}
VITE_APP_BASE_PATH="/"
VITE_APP_PORT="3000"
VITE_APP_MODE="nginx"
VITE_APP_HOST="localhost"
VITE_APP_OUTPUT_DIR="ueweb"
.env.prod 文件内容:
###
 # @Description:
 # @Author: tianyw
 # @Date: 2023-03-09 20:52:05
 # @LastEditTime: 2023-03-09 20:53:33
 # @LastEditors: tianyw
###
# 透传客户端参数: 根据 vite 的约定规则,只有以 "VITE_" 开头的变量才会在客户端被捕获,捕获方式为: import.meta.env.{参数名}
VITE_APP_BASE_PATH='/'
VITE_APP_PORT="3000"
VITE_APP_MODE="prod"
VITE_APP_HOST="172.20.25.155"
VITE_APP_OUTPUT_DIR="dist"
.env.test 文件内容:
###
 # @Description:
 # @Author: tianyw
 # @Date: 2023-03-09 20:52:05
 # @LastEditTime: 2023-03-09 22:01:23
 # @LastEditors: tianyw
###
# 透传客户端参数: 根据 vite 的约定规则,只有以 "VITE_" 开头的变量才会在客户端被捕获,捕获方式为: import.meta.env.{参数名}
VITE_APP_BASE_PATH='/'
VITE_APP_PORT="3000"
VITE_APP_MODE="test"
VITE_APP_HOST="172.20.25.155"
VITE_APP_OUTPUT_DIR="dist"
.env.tomcat 文件内容:
###
 # @Description:
 # @Author: tianyw
 # @Date: 2023-03-09 22:10:32
 # @LastEditTime: 2023-03-09 22:16:39
 # @LastEditors: tianyw
###
# 透传客户端参数: 根据 vite 的约定规则,只有以 "VITE_" 开头的变量才会在客户端被捕获,捕获方式为: import.meta.env.{参数名}
VITE_APP_BASE_PATH="/"
VITE_APP_PORT="3000"
VITE_APP_MODE="tomcat"
VITE_APP_HOST="localhost"
VITE_APP_OUTPUT_DIR="ueweb"
它们的主要区别在于 VITE_APP_MODE 和 VITE_APP_OUTPUT_DIR 的值不同,其中 .env.nginx 和 .env.tomcat 中的 VITE_APP_OUTPUT_DIR 的值为 ueweb(即打包后生成的文件夹为 ueweb),而其他三个的值为 dist(即打包后生成的文件夹为 dist)。
完成上述配置后,我们只需要在 package.json 增加对应的启动命令就可以让Vite获取哪个模式来运行项目了。
2、vite.config.ts 配置不同环境
这里主要通过 VITE_APP_MODE(打包命令的不同),来判断 base 值的不同(决定 router 的 base 值)
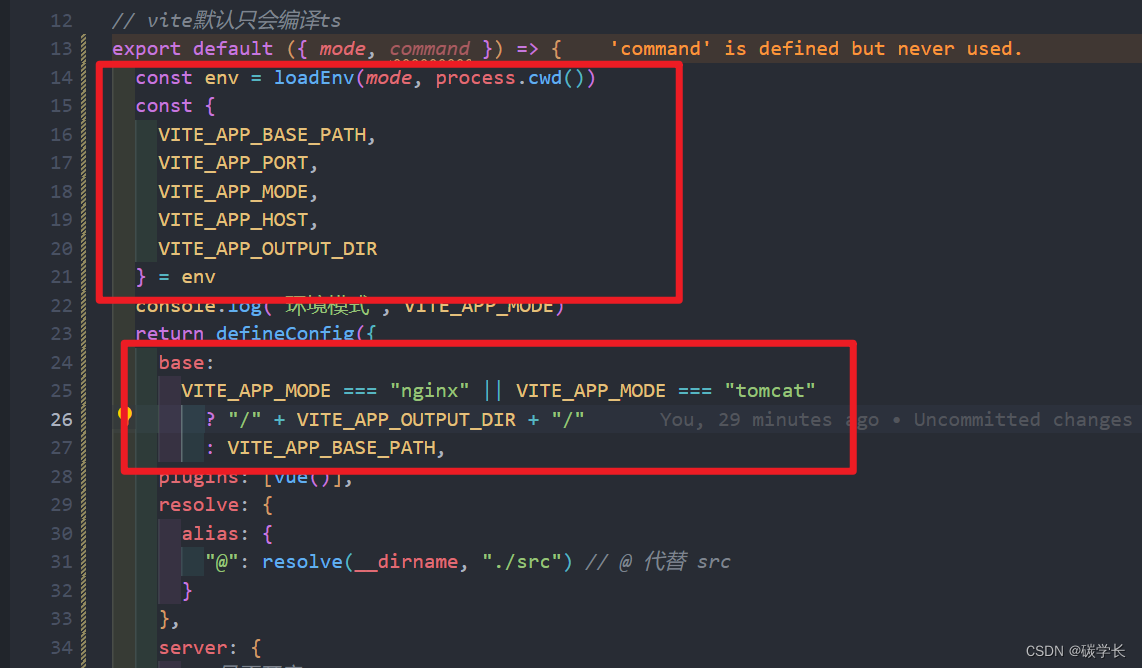
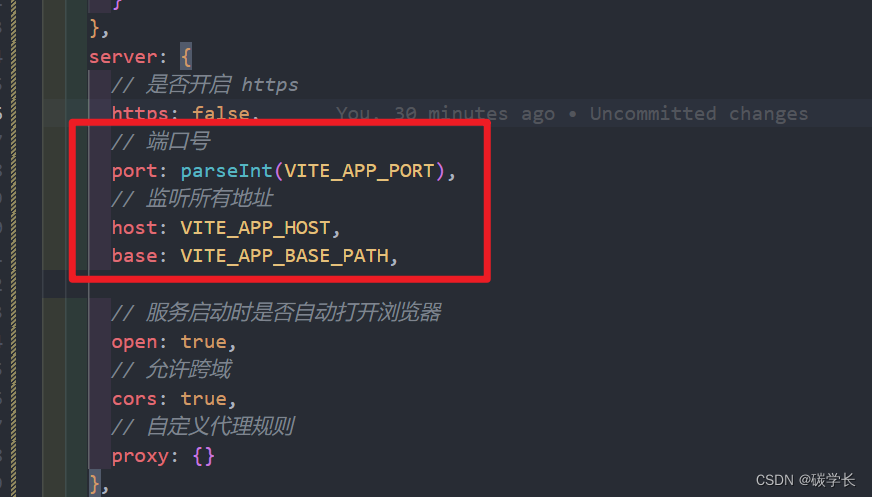
通过 VITE_APP_HOST 和 VITE_APP_BASE_PATH 来配置 server 的内容。
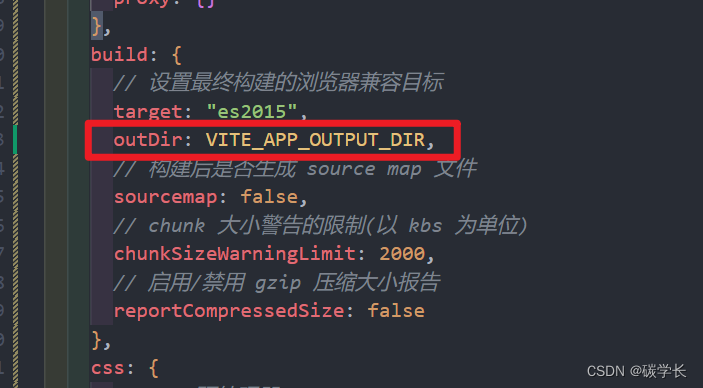
通过 VITE_APP_OUTPUT_DIR 来设置 outDir 的内容。
完整内容如下:
/*
 * @Description:
 * @Author: tianyw
 * @Date: 2023-03-07 13:58:36
 * @LastEditTime: 2023-03-09 22:41:48
 * @LastEditors: tianyw
 */
import {

     defineConfig, loadEnv } from "vite"
import vue from "@vitejs/plugin-vue" //解析.vue文件
import {

     resolve } from "path"

// vite默认只会编译ts
export default ({

     mode, command }) => {


  const env = loadEnv(mode, process.cwd())
  const {


    VITE_APP_BASE_PATH,
    VITE_APP_PORT,
    VITE_APP_MODE,
    VITE_APP_HOST,
    VITE_APP_OUTPUT_DIR
  } = env
  console.log("环境模式", VITE_APP_MODE)
  return defineConfig({


    base:
      VITE_APP_MODE === "nginx" || VITE_APP_MODE === "tomcat"
        ? "/" + VITE_APP_OUTPUT_DIR + "/"
        : VITE_APP_BASE_PATH,
    plugins: [vue()],
    resolve: {


      alias: {


        "@": resolve(__dirname, "./src") // @ 代替 src
      }
    },
    server: {


      // 是否开启 https
      https: false,
      // 端口号
      port: parseInt(VITE_APP_PORT),
      // 监听所有地址
      host: VITE_APP_HOST,
      base: VITE_APP_BASE_PATH,

      // 服务启动时是否自动打开浏览器
      open: true,
      // 允许跨域
      cors: true,
      // 自定义代理规则
      proxy: {

    }
    },
    build: {


      // 设置最终构建的浏览器兼容目标
      target: "es2015",
      outDir: VITE_APP_OUTPUT_DIR,
      // 构建后是否生成 source map 文件
      sourcemap: false,
      // chunk 大小警告的限制(以 kbs 为单位)
      chunkSizeWarningLimit: 2000,
      // 启用/禁用 gzip 压缩大小报告
      reportCompressedSize: false
    },
    css: {


      // css 预处理器
      preprocessorOptions: {


        scss: {


          // 引入 全局 scss
          additionalData: '@import "@/styles/index.scss";'
        }
      }
    }
  })
}
3、修改 router 跟随环境动态变动
这里就是修改 createWebHistory 函数的传参,使其为 viteconfig.ts 中 base 字段的值。
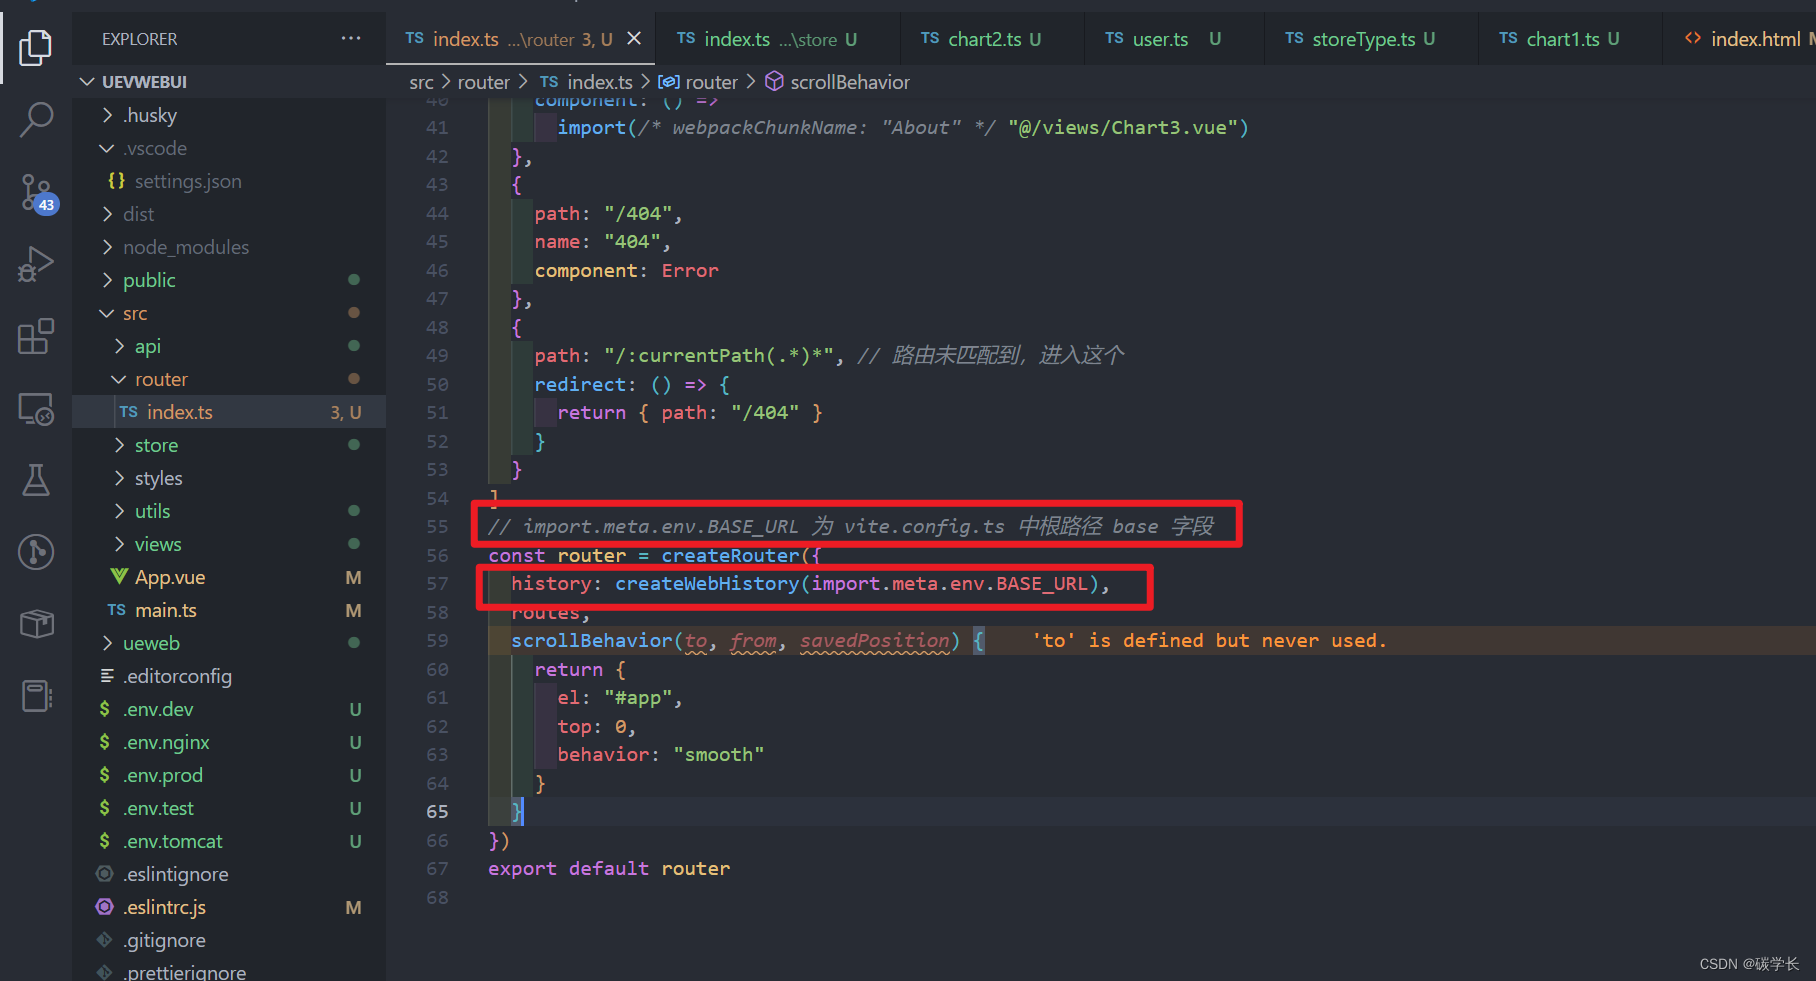
完整内容如下:
/*
 * @Description:
 * @Author: tianyw
 * @Date: 2023-03-08 15:52:12
 * @LastEditTime: 2023-03-09 22:33:54
 * @LastEditors: tianyw
 */
import {

     createRouter, createWebHistory, RouteRecordRaw } from "vue-router"
import Home from "@/views/Home.vue"
import Error from "@/views/Error.vue"

const routes: Array<RouteRecordRaw> = [
  {


    path: "",
    redirect: () => {


      return {

     path: "/home" }
    }
  },
  {


    path: "/home",
    name: "Home",
    component: Home,
    children: [
      {


        path: "chart1",
        name: "Chart1",
        component: () => import("@/views/Chart1.vue")
      },
      {


        path: "chart2",
        name: "Chart2",
        component: () =>
          import(/* webpackChunkName: "About" */ "@/views/Chart2.vue")
      }
    ]
  },
  {


    path: "/chart3",
    name: "Chart3",
    component: () =>
      import(/* webpackChunkName: "About" */ "@/views/Chart3.vue")
  },
  {


    path: "/404",
    name: "404",
    component: Error
  },
  {


    path: "/:currentPath(.*)*", // 路由未匹配到,进入这个
    redirect: () => {


      return {

     path: "/404" }
    }
  }
]
// import.meta.env.BASE_URL 为 vite.config.ts 中根路径 base 字段
const router = createRouter({


  history: createWebHistory(import.meta.env.BASE_URL),
  routes,
  scrollBehavior(to, from, savedPosition) {


    return {


      el: "#app",
      top: 0,
      behavior: "smooth"
    }
  }
})
export default router
解决 ts 中 使用 import.meta.env.VITE_APP_BASE_PATH 这样的使用时,需要修改 tsconfig.json 中的内容,最后修改的完整内容如下:
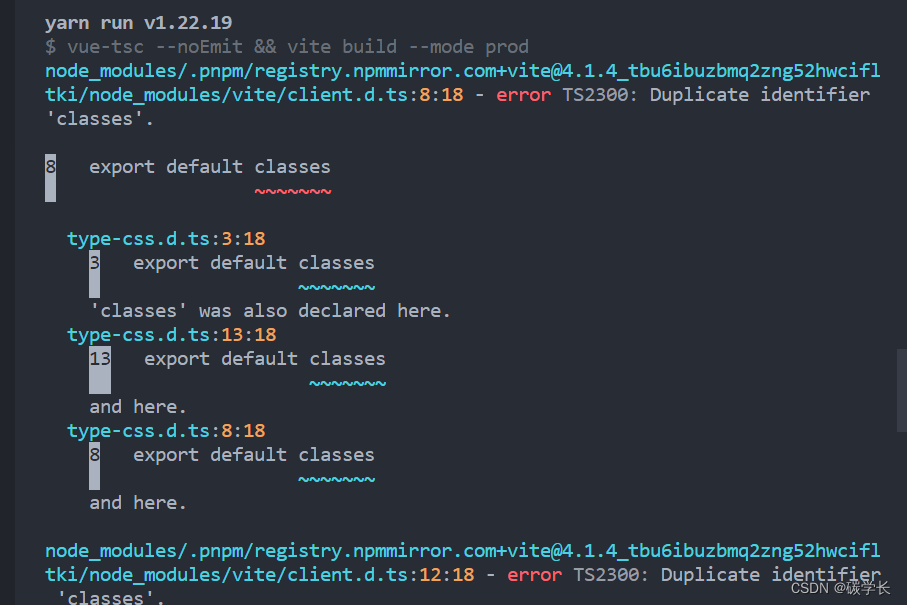
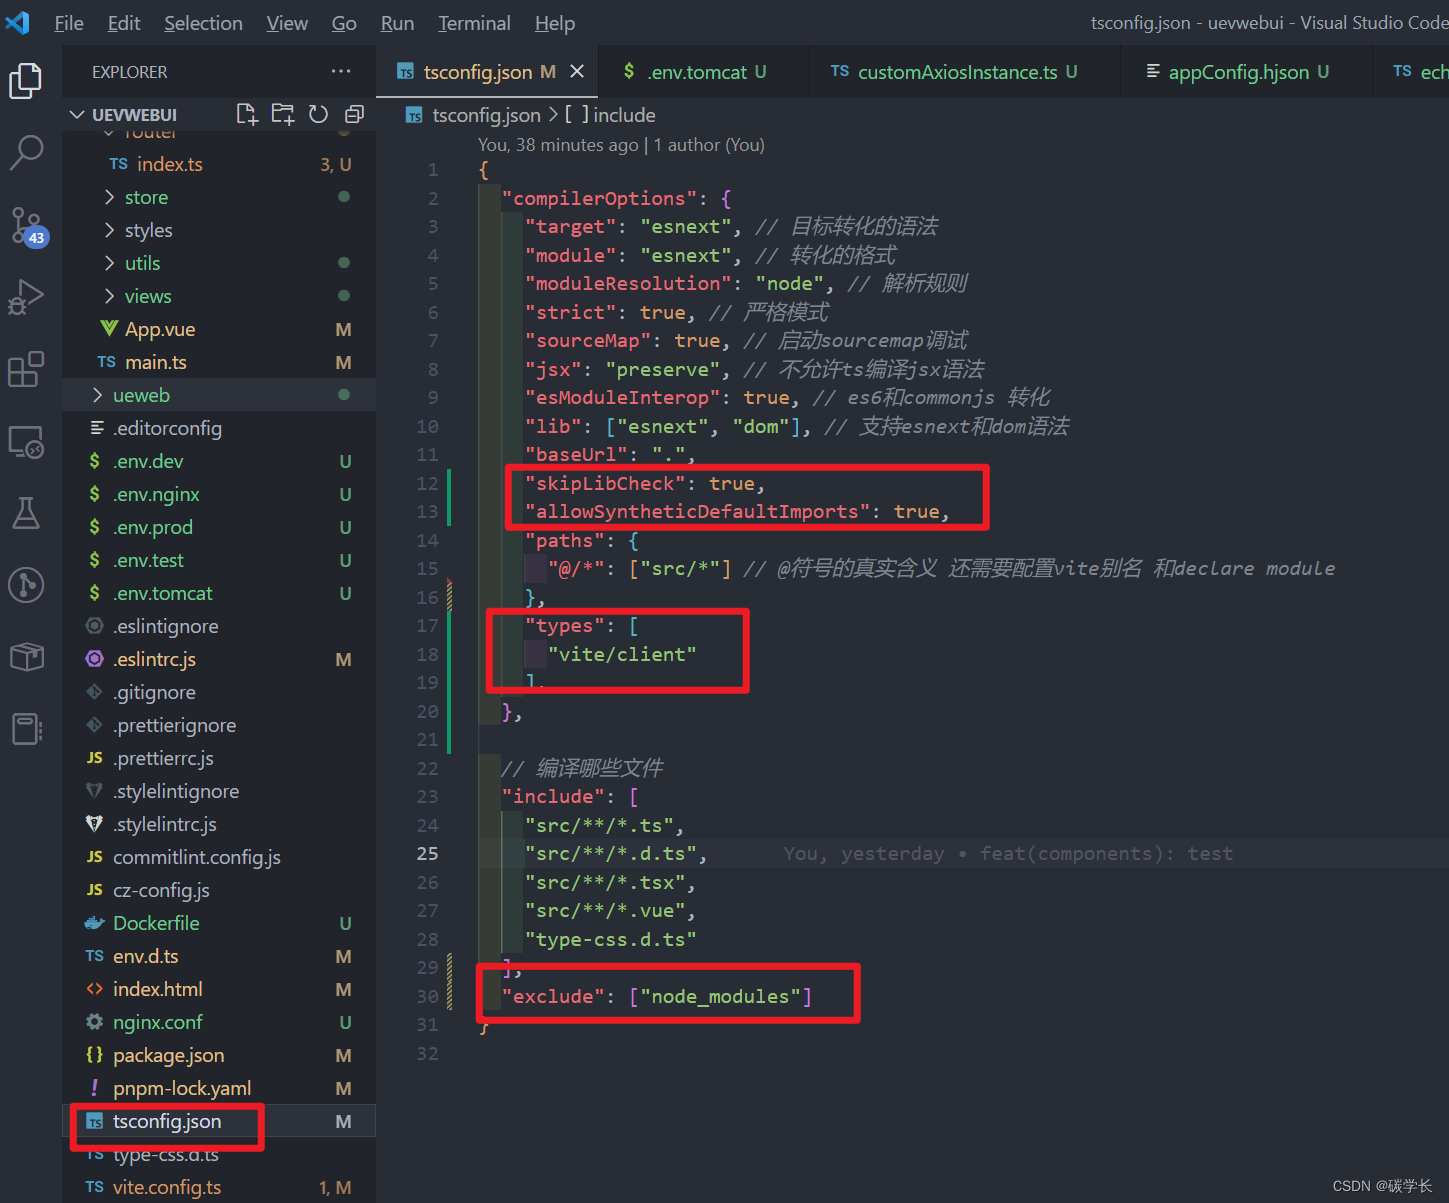
{


  "compilerOptions": {


    "target": "esnext", // 目标转化的语法
    "module": "esnext", // 转化的格式
    "moduleResolution": "node", // 解析规则
    "strict": true, // 严格模式
    "sourceMap": true, // 启动sourcemap调试
    "jsx": "preserve", // 不允许ts编译jsx语法
    "esModuleInterop": true, // es6和commonjs 转化
    "lib": ["esnext", "dom"], // 支持esnext和dom语法
    "baseUrl": ".",
    "skipLibCheck": true,
    "allowSyntheticDefaultImports": true,
    "paths": {


      "@/*": ["src/*"] // @符号的真实含义 还需要配置vite别名 和declare module
    },
    "types": [
      "vite/client"
    ],
  },

  // 编译哪些文件
  "include": [
    "src/**/*.ts",
    "src/**/*.d.ts",
    "src/**/*.tsx",
    "src/**/*.vue",
    "type-css.d.ts"
  ],
  "exclude": ["node_modules"]
}
4、修改 package.json,增加不同环境的命令
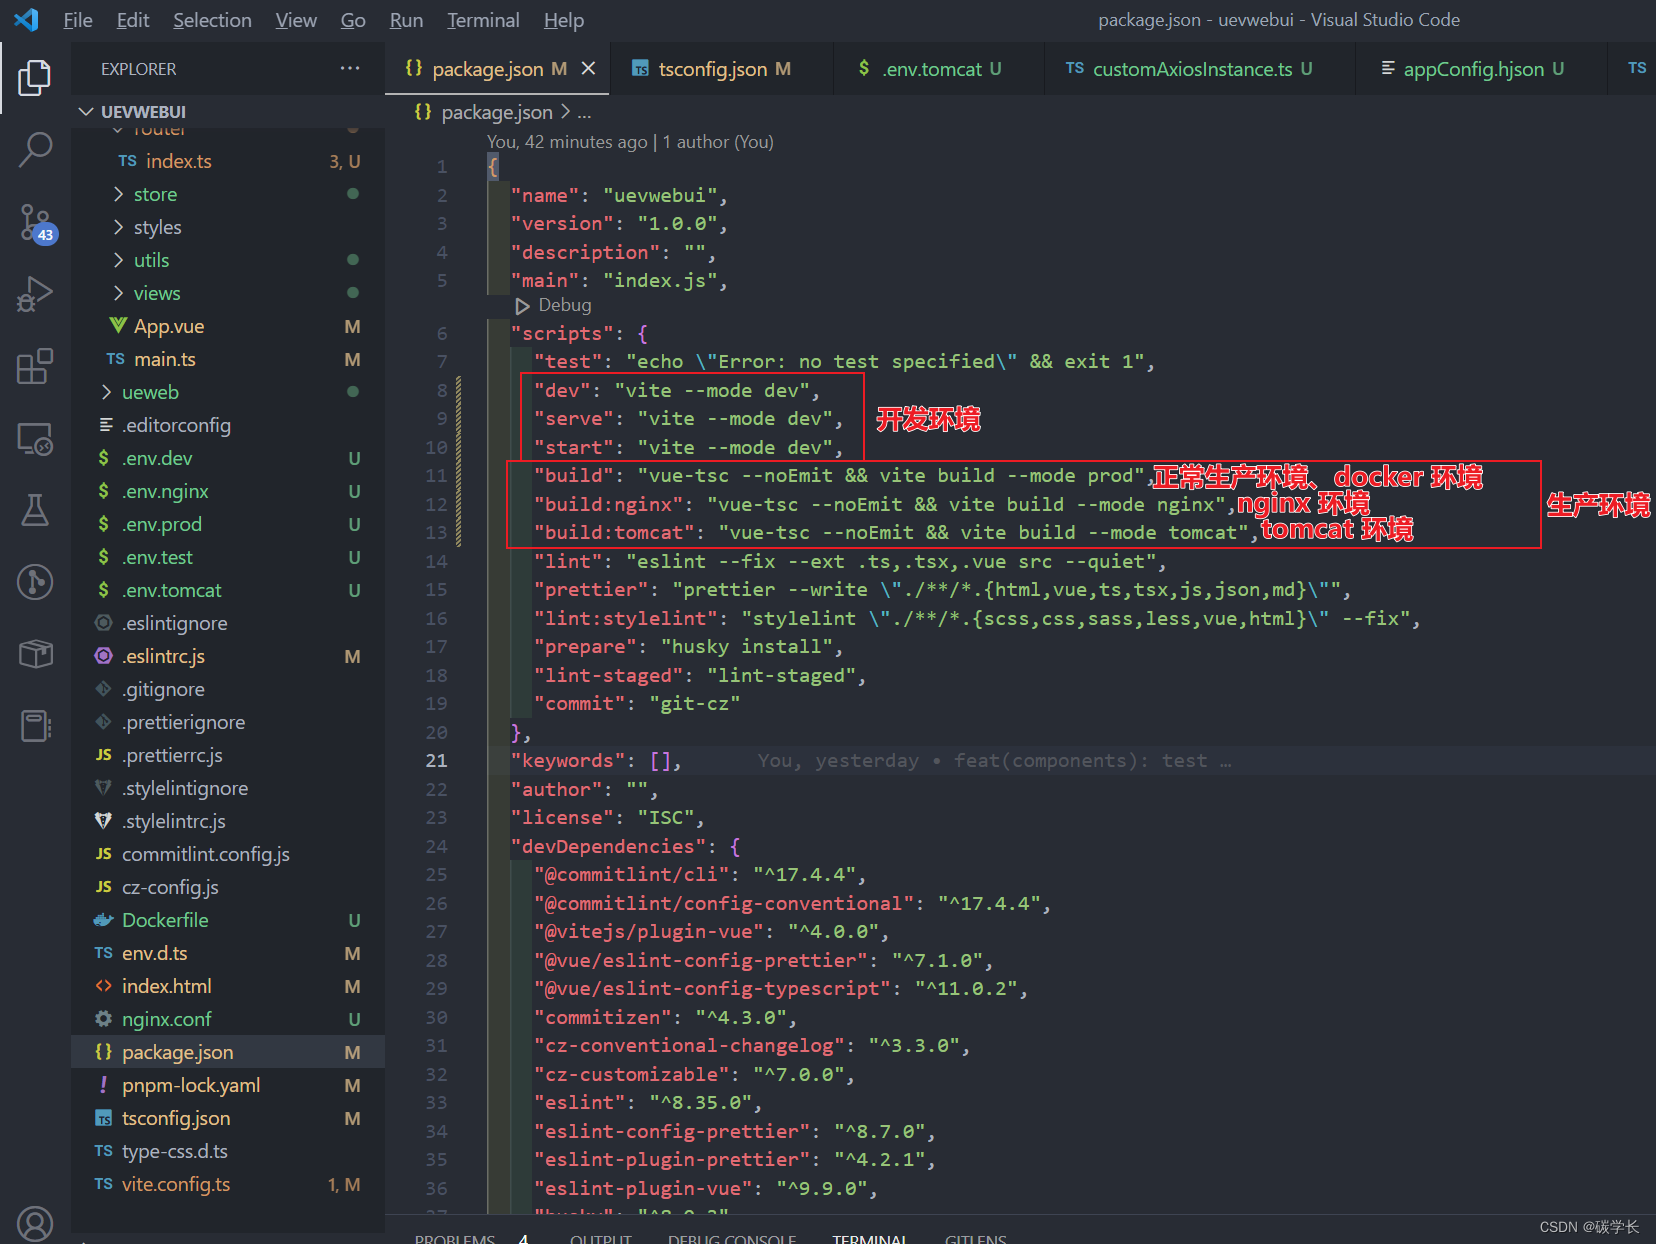
完整内容如下:
{


  "name": "uevwebui",
  "version": "1.0.0",
  "description": "",
  "main": "index.js",
  "scripts": {


    "test": "echo \"Error: no test specified\" && exit 1",
    "dev": "vite --mode dev",
    "serve": "vite --mode dev",
    "start": "vite --mode dev",
    "build": "vue-tsc --noEmit && vite build --mode prod",
    "build:nginx": "vue-tsc --noEmit && vite build --mode nginx",
    "build:tomcat": "vue-tsc --noEmit && vite build --mode tomcat",
    "lint": "eslint --fix --ext .ts,.tsx,.vue src --quiet",
    "prettier": "prettier --write \"./**/*.{html,vue,ts,tsx,js,json,md}\"",
    "lint:stylelint": "stylelint \"./**/*.{scss,css,sass,less,vue,html}\" --fix",
    "prepare": "husky install",
    "lint-staged": "lint-staged",
    "commit": "git-cz"
  },
  "keywords": [],
  "author": "",
  "license": "ISC",
  "devDependencies": {


    "@commitlint/cli": "^17.4.4",
    "@commitlint/config-conventional": "^17.4.4",
    "@vitejs/plugin-vue": "^4.0.0",
    "@vue/eslint-config-prettier": "^7.1.0",
    "@vue/eslint-config-typescript": "^11.0.2",
    "commitizen": "^4.3.0",
    "cz-conventional-changelog": "^3.3.0",
    "cz-customizable": "^7.0.0",
    "eslint": "^8.35.0",
    "eslint-config-prettier": "^8.7.0",
    "eslint-plugin-prettier": "^4.2.1",
    "eslint-plugin-vue": "^9.9.0",
    "husky": "^8.0.3",
    "lint-staged": "^13.1.2",
    "postcss": "^8.4.21",
    "postcss-html": "^1.5.0",
    "postcss-less": "^6.0.0",
    "postcss-sass": "^0.5.0",
    "postcss-scss": "^4.0.6",
    "prettier": "^2.8.4",
    "sass": "^1.58.3",
    "sass-loader": "^13.2.0",
    "stylelint": "^15.2.0",
    "stylelint-config-html": "^1.1.0",
    "stylelint-config-prettier": "^9.0.5",
    "stylelint-config-recommended-less": "^1.0.4",
    "stylelint-config-recommended-scss": "^9.0.1",
    "stylelint-config-recommended-vue": "^1.4.0",
    "stylelint-config-standard": "^30.0.1",
    "stylelint-config-standard-vue": "^1.0.0",
    "stylelint-less": "^1.0.6",
    "stylelint-order": "^6.0.2",
    "typescript": "^4.9.5",
    "vite": "^4.1.4",
    "vue-tsc": "^1.2.0"
  },
  "dependencies": {


    "@types/node": "^18.14.6",
    "axios": "^1.3.4",
    "echarts": "^5.4.1",
    "pinia": "^2.0.33",
    "vue": "^3.2.47",
    "vue-router": "^4.0.13"
  },
  "lint-staged": {


    "src/**/*.{js,ts,tsx,jsx,vue}": [
      "eslint --fix",
      "prettier --write",
      "git add"
    ],
    "scr/**/*.{scss,css,sass,less,vue,html}": [
      "yarn lint:stylelint",
      "git add"
    ],
    "package.json": [
      "prettier --write",
      "git add"
    ],
    "*.md": [
      "prettier --write",
      "git add"
    ]
  },
  "config": {


    "commitizen": {


      "path": "./node_modules/cz-customizable"
    },
    "cz-customizable": {


      "config": "cz-config.js"
    }
  }
}
这样,就可以通过 yarn dev 或 yarn start 或 yarn serve 启用开发环境,通过 yarn build 打包为 正常环境的 dist 包 或 Docker 环境的 dist 包,通过 yarn build:nginx 或 yarn build:tomcat 打包为 nginx 或 tomcat 的 ueweb 包。
5、配置 Docker 环境内容
1、根目录下新建 Dockerfile 文件
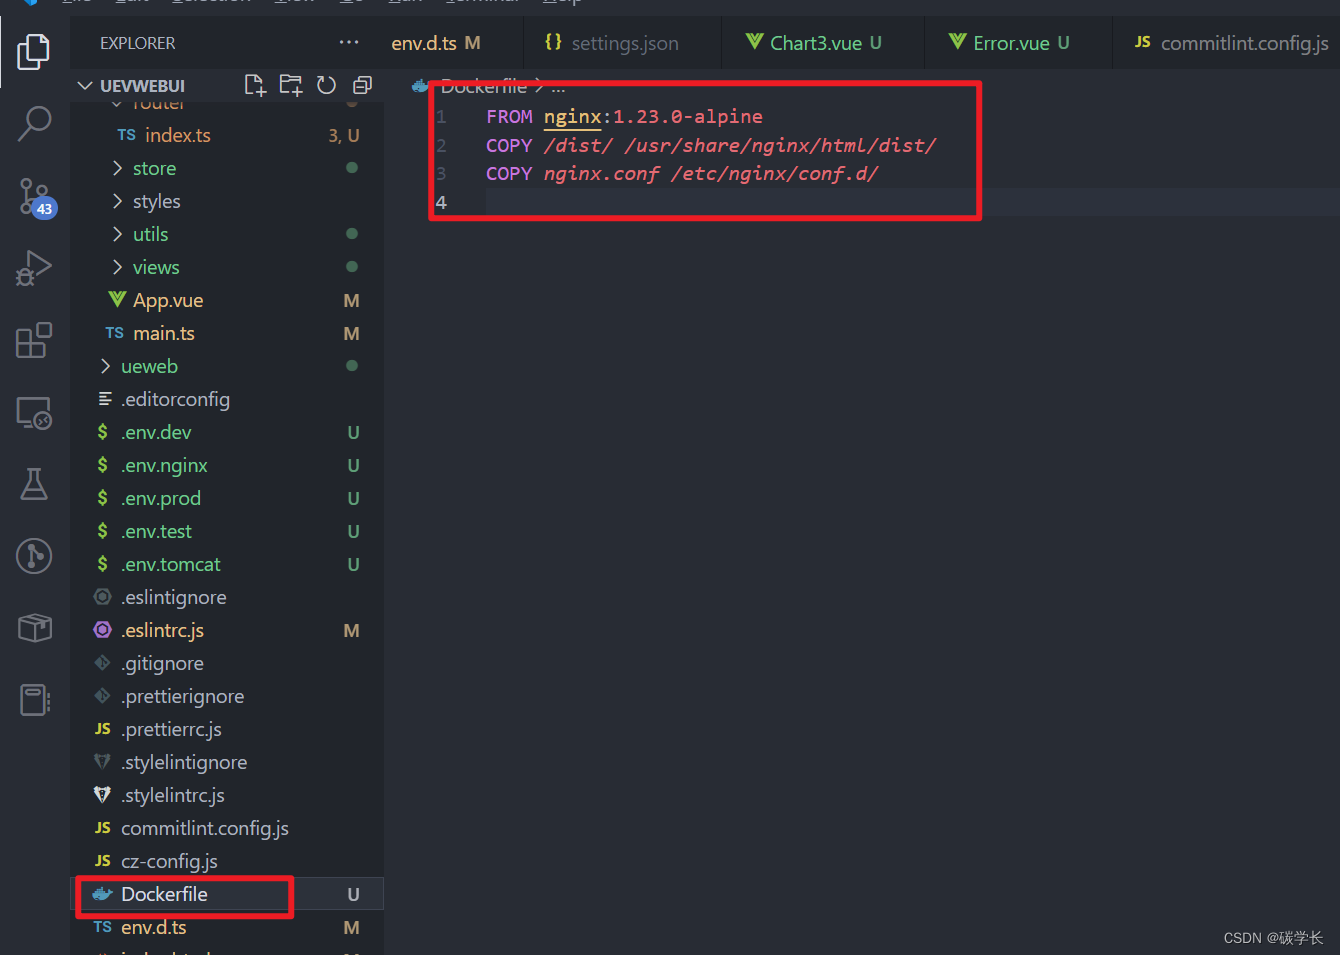
FROM nginx:1.23.0-alpine
COPY /dist/ /usr/share/nginx/html/dist/
COPY nginx.conf /etc/nginx/conf.d/
该文件的作用为:
- 自定义构建镜像的时候基于 Dockerfile 来构建。
FROM nginx命令的意思该镜像是基于 nginx:latest 镜像而构建的(这里为 FROM nginx:1.23.0-alpine,即基于 nginx 的 1.23.0 版本)。COPY dist/ /usr/share/nginx/html/dist 命令的意思是将项目根目录下dist文件夹下的所有文件复制到镜像中 /usr/share/nginx/html/dist 目录下。COPY nginx.conf /etc/nginx/conf.d/命令的意思是将 nginx 目录下的 nginx.conf 复制到 etc/nginx/conf.d/nginx.conf,用本地的 nginx.conf 配置来替换 nginx 镜像里的默认配置。
2、根目录下新建 nginx.conf 文件
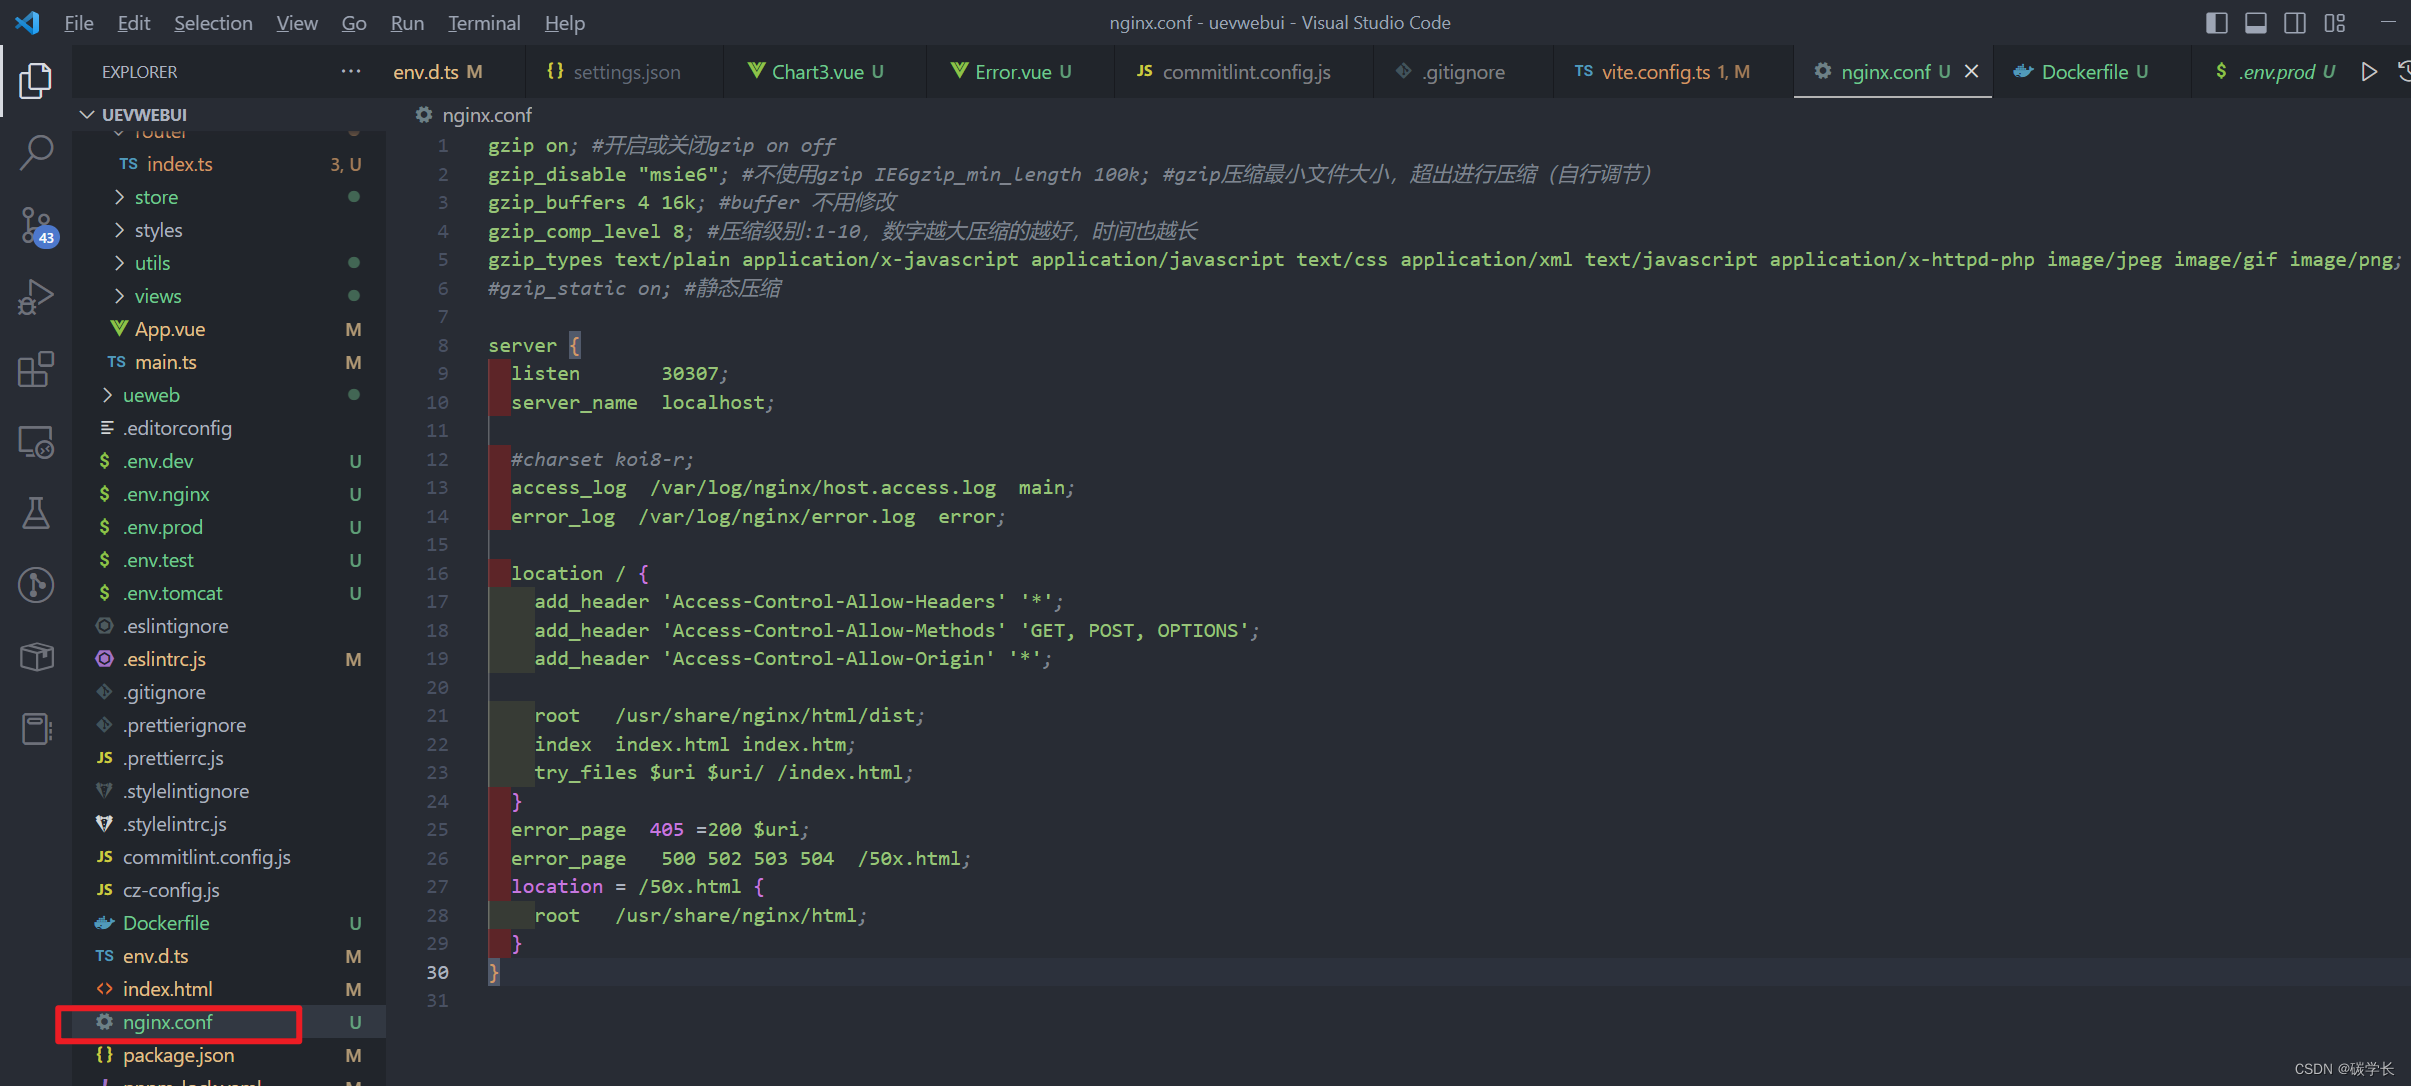
完整内容如下:这里的 listen 设置为了 30307,也可以是其他端口
gzip on; #开启或关闭gzip on off
gzip_disable "msie6"; #不使用gzip IE6gzip_min_length 100k; #gzip压缩最小文件大小,超出进行压缩(自行调节)
gzip_buffers 4 16k; #buffer 不用修改
gzip_comp_level 8; #压缩级别:1-10,数字越大压缩的越好,时间也越长
gzip_types text/plain application/x-javascript application/javascript text/css application/xml text/javascript application/x-httpd-php image/jpeg image/gif image/png; #  压缩文件类型
#gzip_static on; #静态压缩

server {
  listen       30307;
  server_name  localhost;

  #charset koi8-r;
  access_log  /var/log/nginx/host.access.log  main;
  error_log  /var/log/nginx/error.log  error;

  location / {
    add_header 'Access-Control-Allow-Headers' '*';
    add_header 'Access-Control-Allow-Methods' 'GET, POST, OPTIONS';
    add_header 'Access-Control-Allow-Origin' '*';

    root   /usr/share/nginx/html/dist;
    index  index.html index.htm;
    try_files $uri $uri/ /index.html;
  }
  error_page  405 =200 $uri;
  error_page   500 502 503 504  /50x.html;
  location = /50x.html {
    root   /usr/share/nginx/html;
  }
}
该配置文件定义了首页的指向为 /usr/share/nginx/html/dist/index.html, 所以我们可以一会把构建出来的 dist 文件夹(包)放到 /usr/share/nginx/html 目录下。
至此,不同环境的配置就已经结束了。接下来进行验证。
6、nginx 下的验证(tomcat 同理)
1、首先执行 yarn build:nginx ,打包项目,此时将会打包出 ueweb 文件夹(包)
2、将 ueweb 文件夹复制到 nginx 的 html 文件夹下
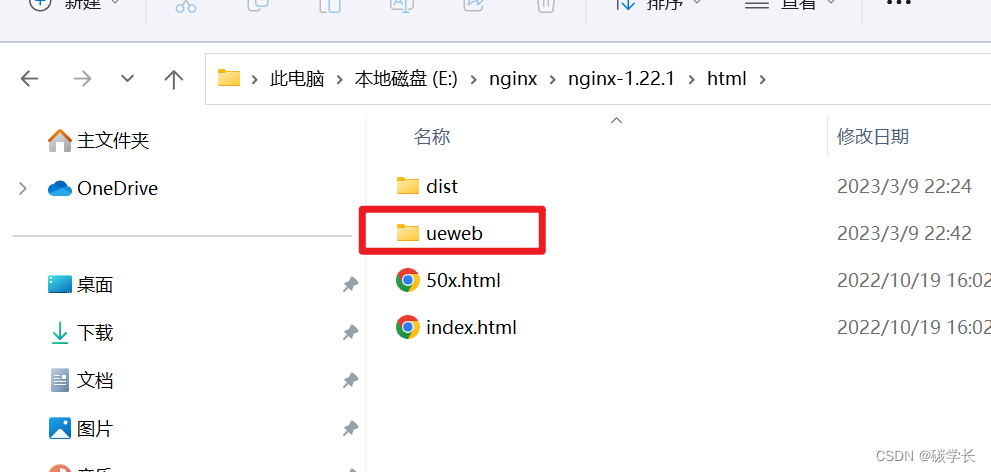
3、修改 nginx 里的 nginx.conf 如下:
这里 listen 端口设置为了 8028,也设置了 ueweb。
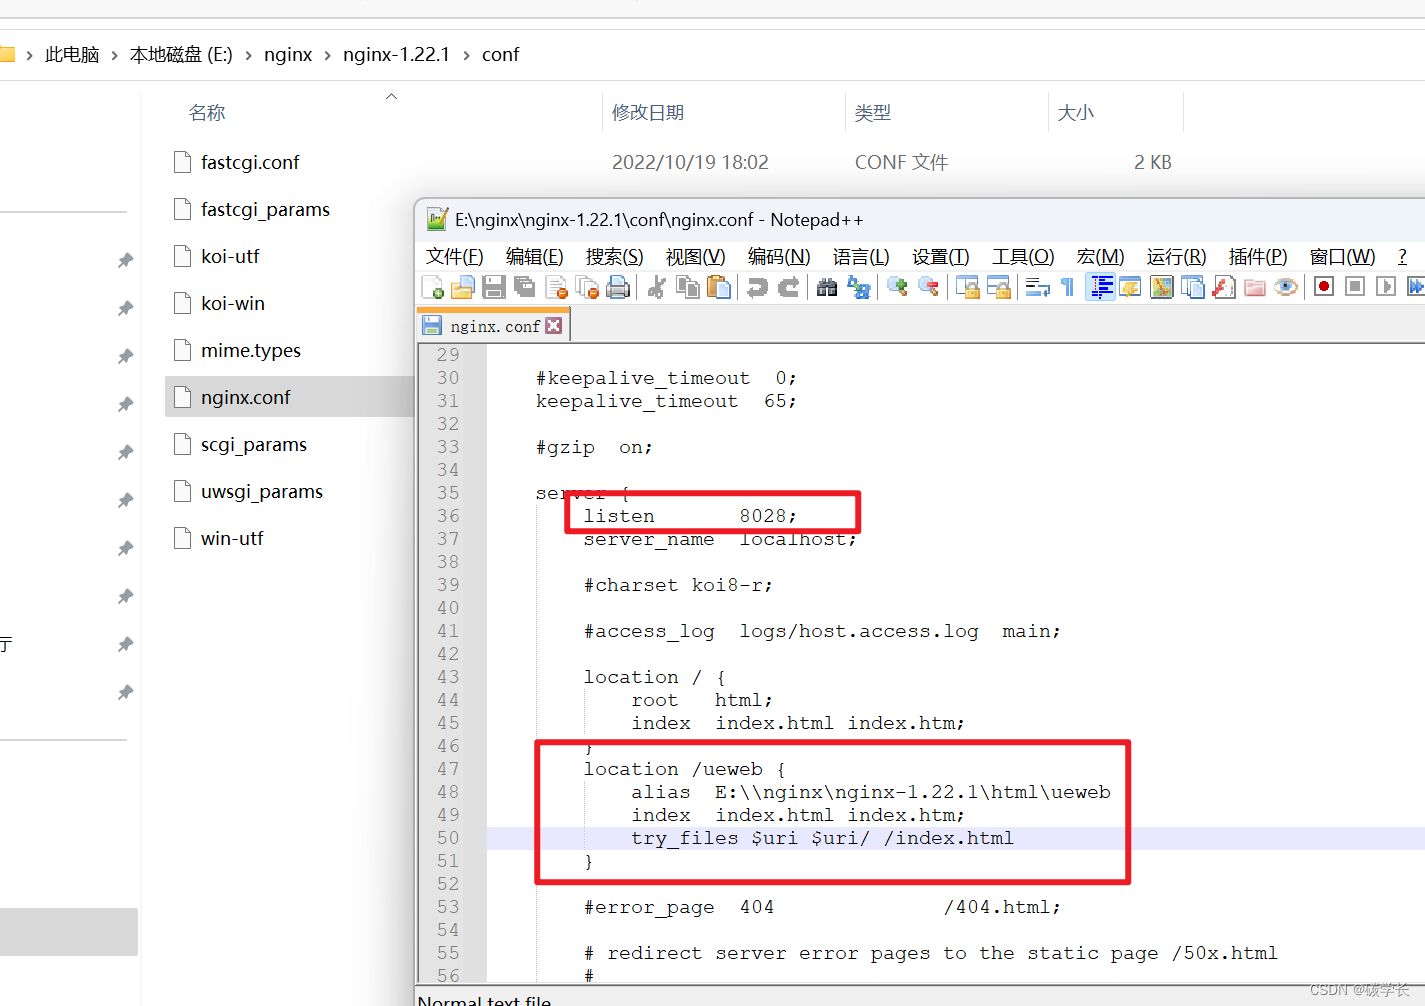
4、接下来输入 localhost:8028/ueweb
就可以看到,可以正常显示页面、正常跳转页面
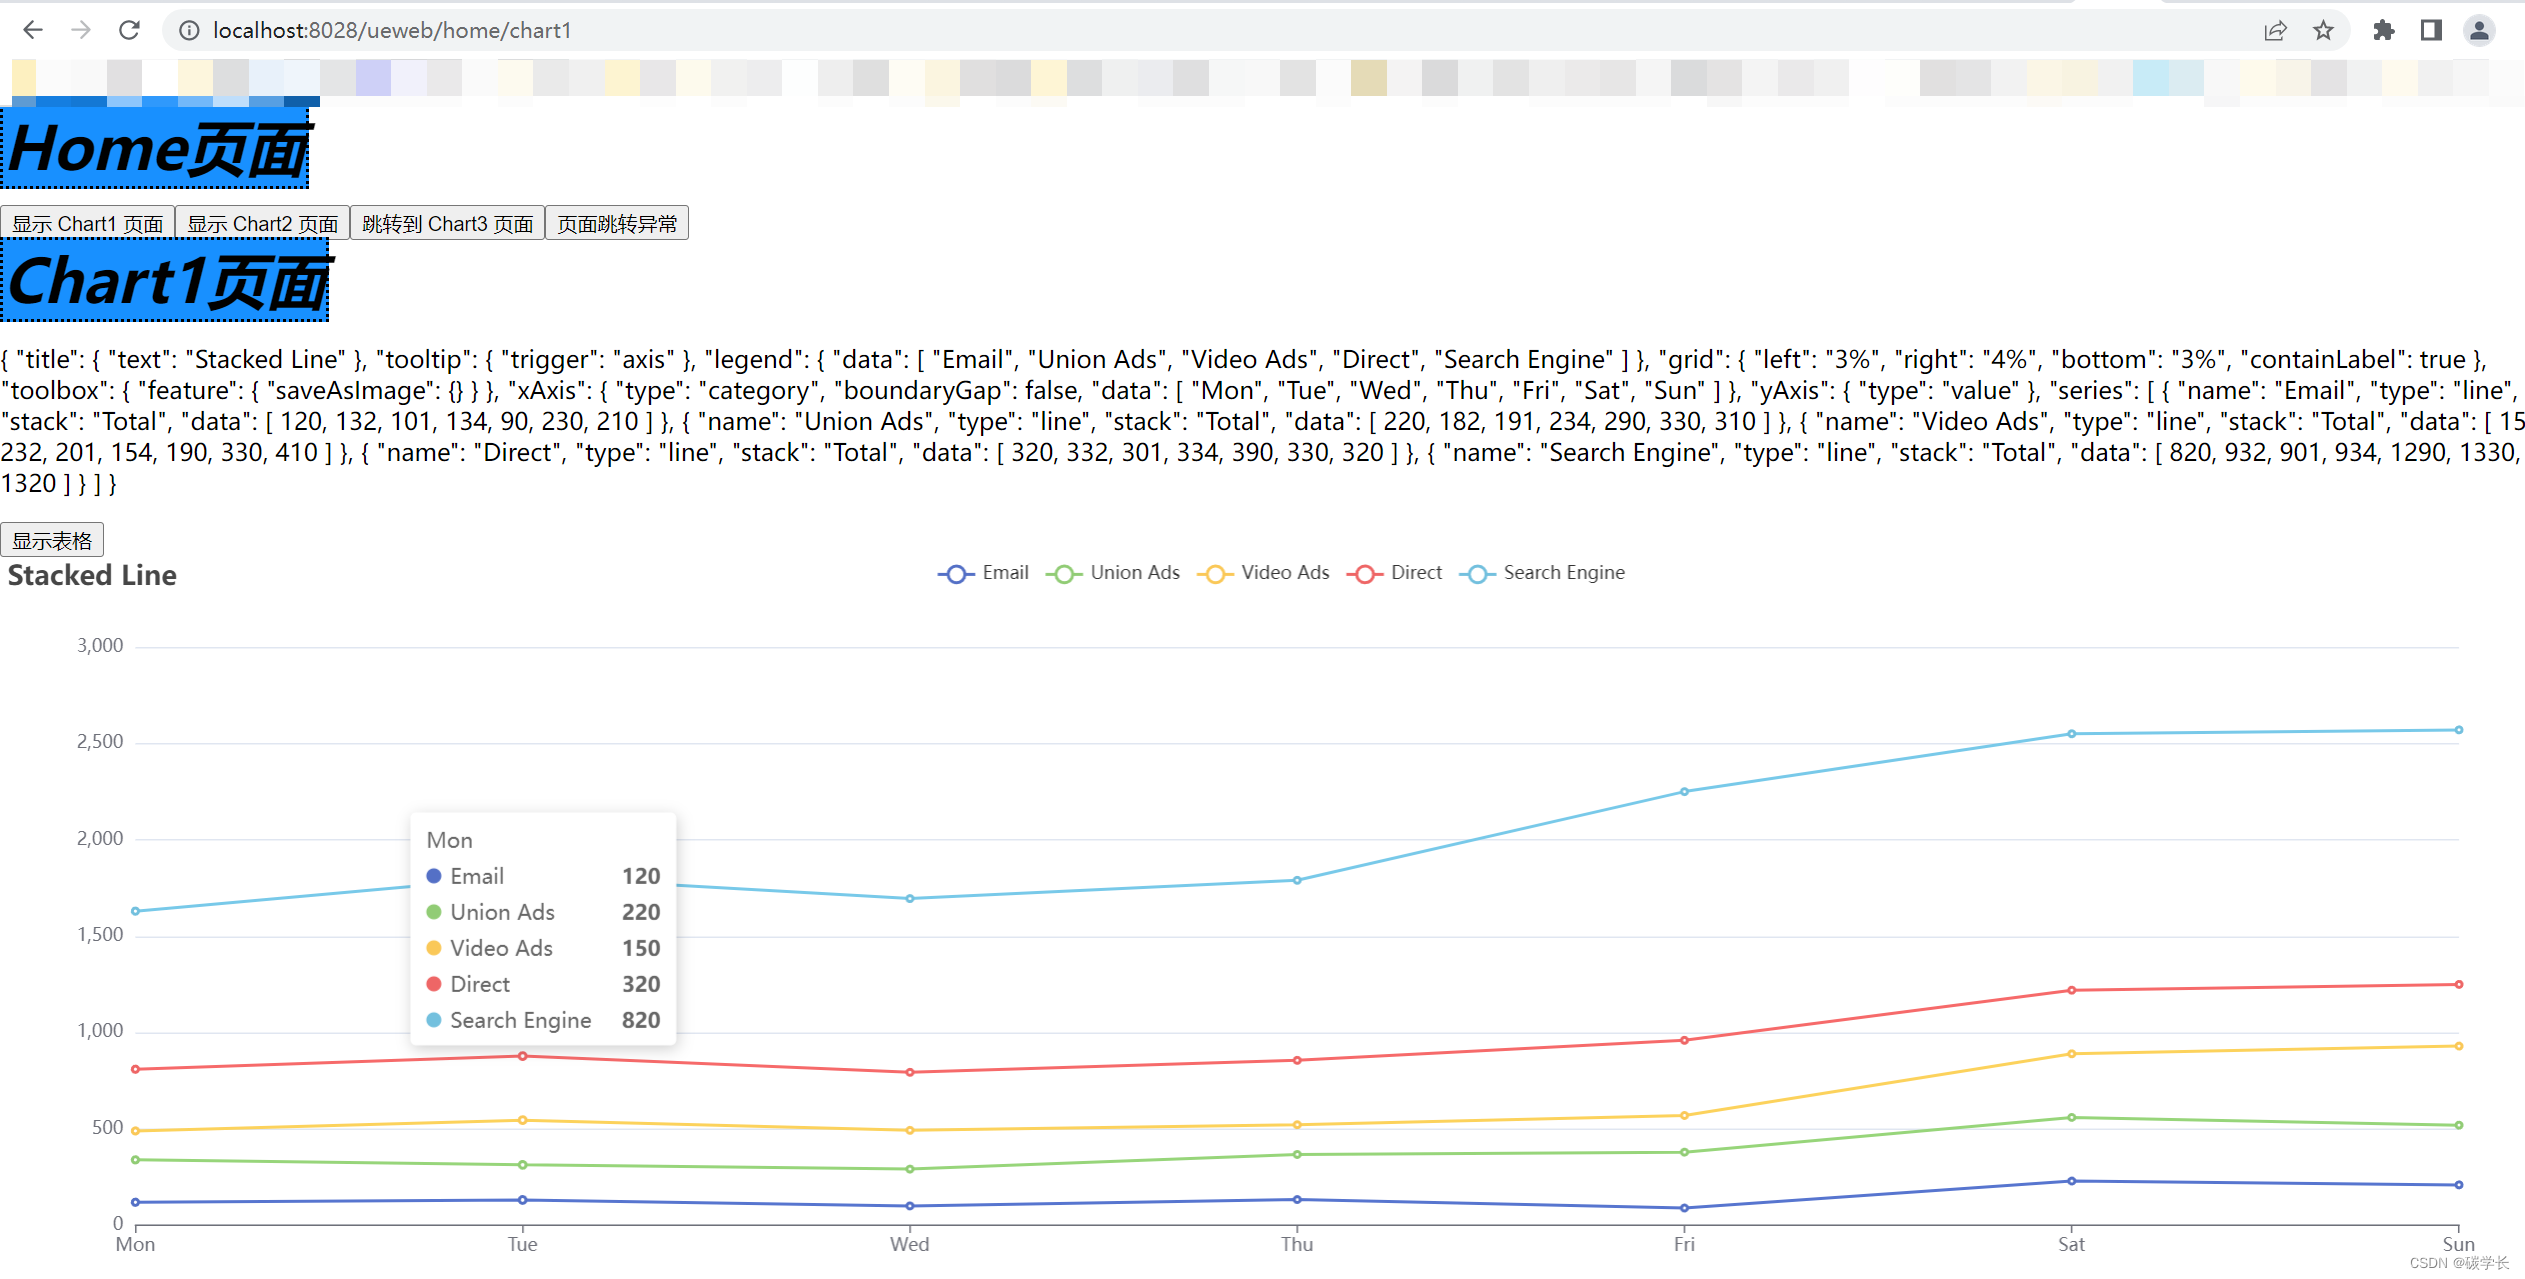
至此说明 yarn build:nginx 命令是可行的。
7、docker 下的验证
1、首先执行 yarn build 命令,此时会打包出 dist 文件夹
2、执行 docker builder -t uewebdocker . 命令,执行 docker 打包
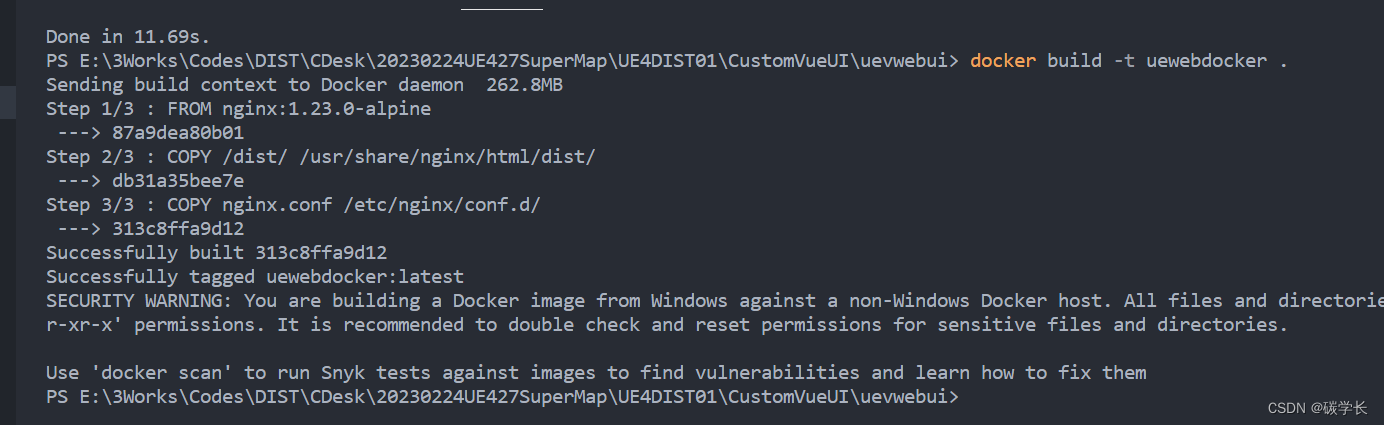
3、执行 docker run -p 30307:30307 --name uewebdockerRun uewebdocker 运行项目
docker run基于镜像启动一个容器- `-p 30307:830307 端口映射,将宿主的 30307 端口映射到容器的 30307 端口(对应根目录下 nginx.conf 文件中 listen 的端口)
--name容器名 查看 docker 进程
可以看到 网页中可以正常访问 localhost:30307,且路由跳转正常。
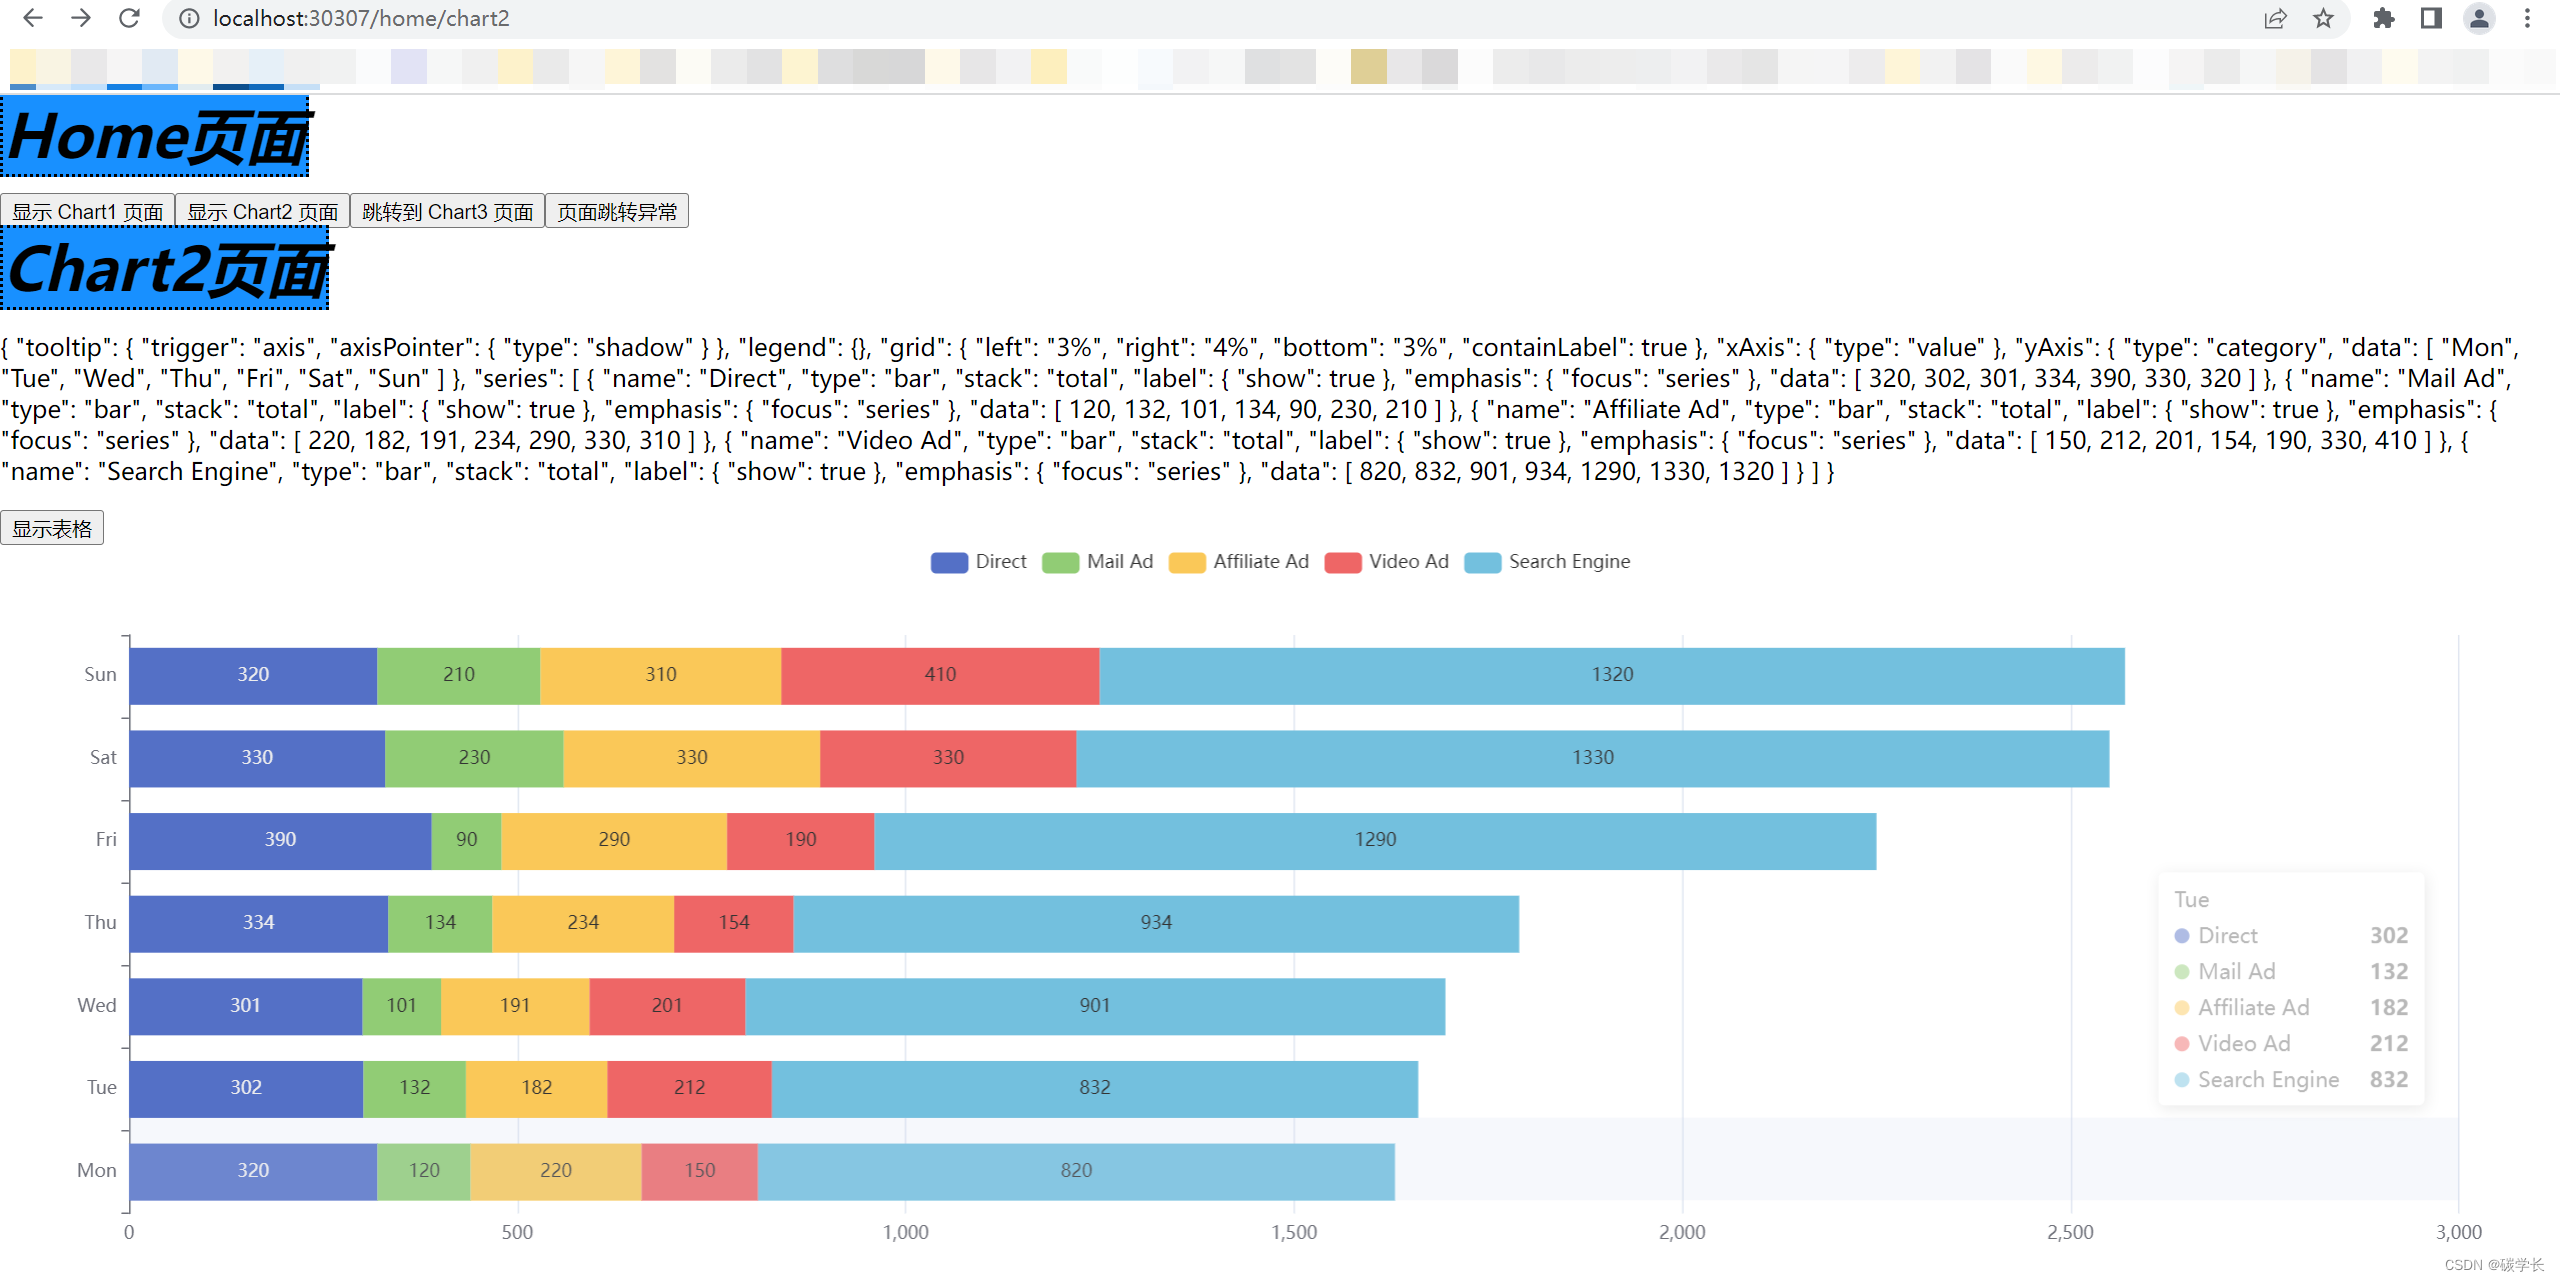
至此说明,yarn build 的 docker 环境的打包、部署、运行,都是正常的了。
至此 不同环境的区分、设置就完成了。
47、引入 tailwind.css
1、安装:pnpm add tailwindcss@latest postcss@latest autoprefixer@latest -D

2、执行:npx tailwindcss init -p
该命令会在根目录下生成初始化的 postcss.config.js 和 tailwind.config.js 文件
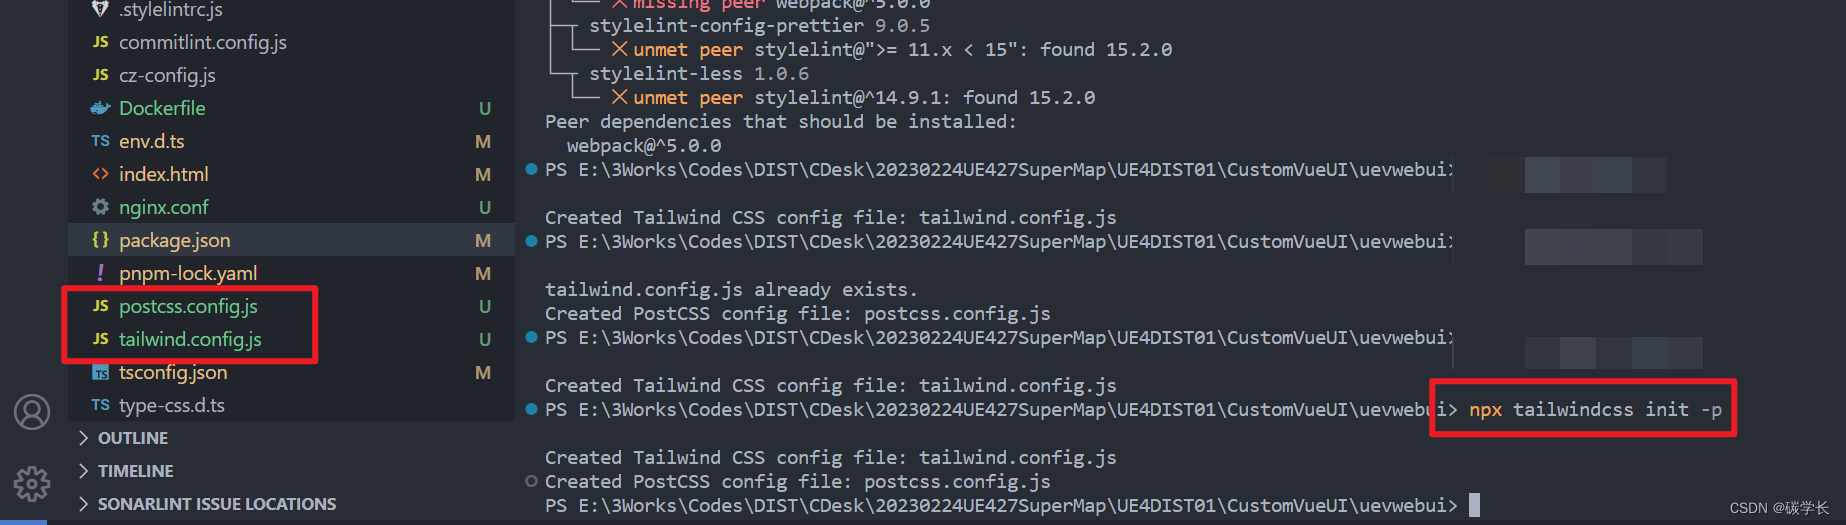
3、修改 tailwind.config.js 文件内容如下:
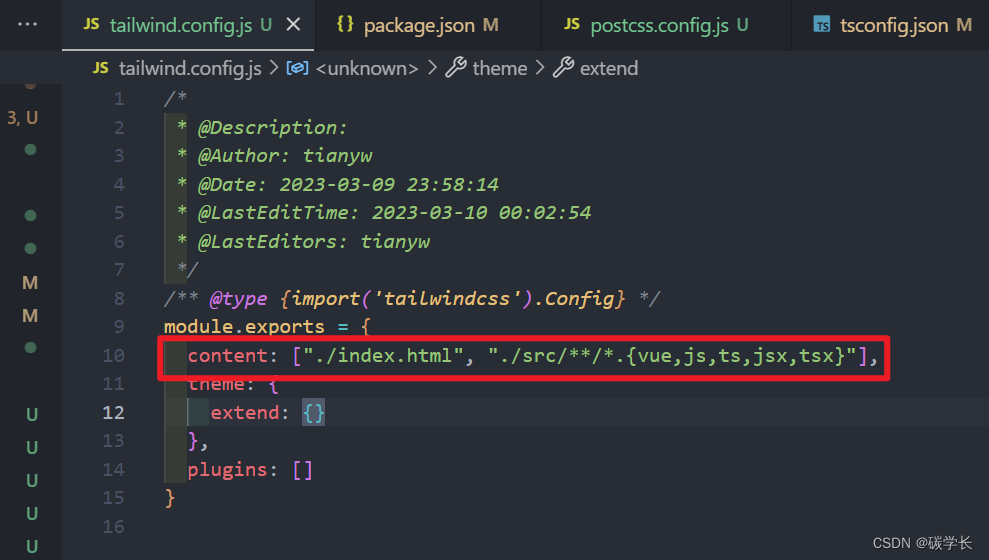
/*
 * @Description:
 * @Author: tianyw
 * @Date: 2023-03-09 23:58:14
 * @LastEditTime: 2023-03-10 00:02:54
 * @LastEditors: tianyw
 */
/** @type {import('tailwindcss').Config} */
module.exports = {


  content: ["./index.html", "./src/**/*.{vue,js,ts,jsx,tsx}"],
  theme: {


    extend: {

    }
  },
  plugins: []
}
4、修改 vite.config.ts:增加 postcss 配置,如下:
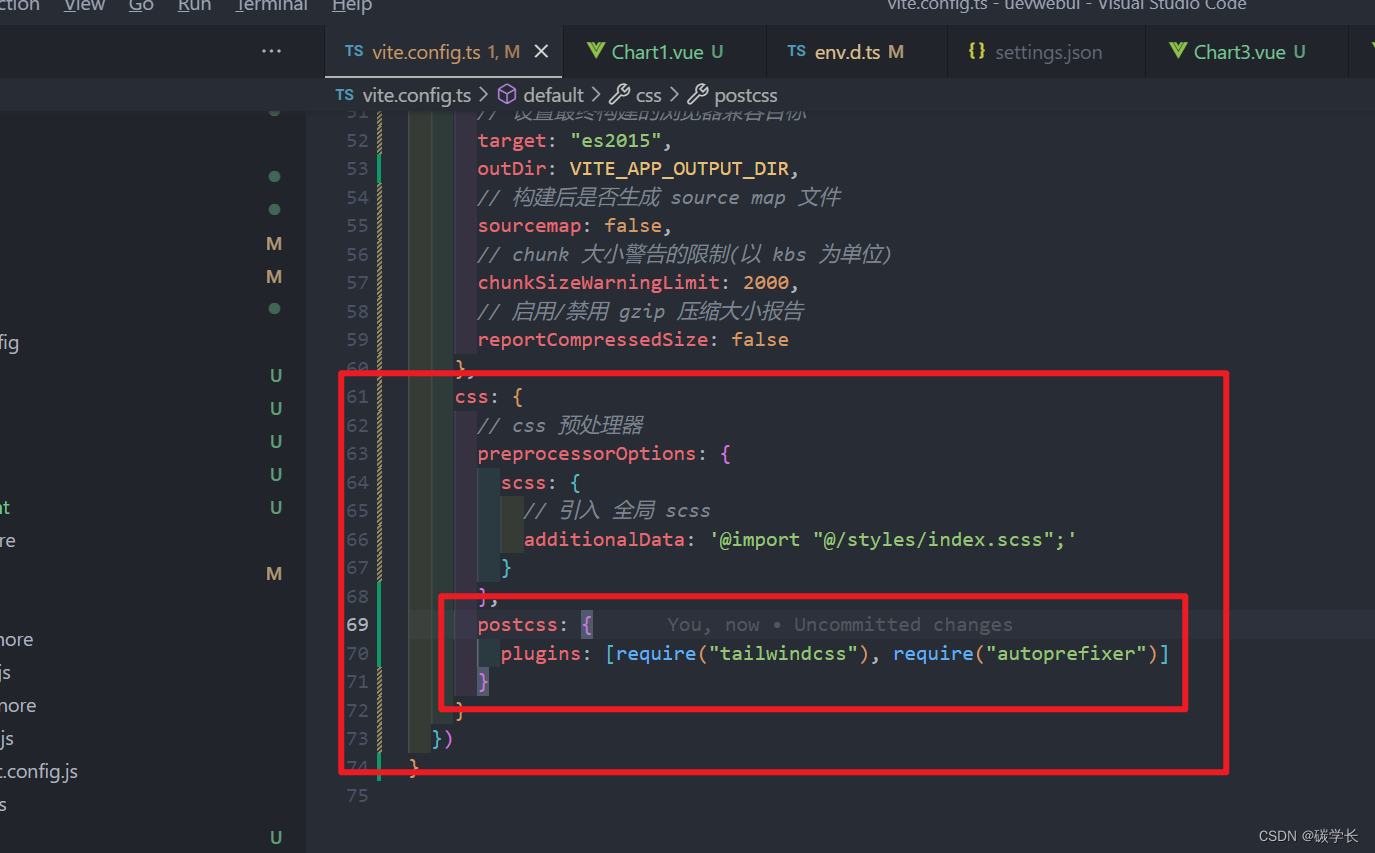
vite.config.ts 当前完整内容为:
/*
 * @Description:
 * @Author: tianyw
 * @Date: 2023-03-07 13:58:36
 * @LastEditTime: 2023-03-10 00:04:51
 * @LastEditors: tianyw
 */
import {

     defineConfig, loadEnv } from "vite"
import vue from "@vitejs/plugin-vue" //解析.vue文件
import {

     resolve } from "path"

// vite默认只会编译ts
export default ({

     mode, command }) => {


  const env = loadEnv(mode, process.cwd())
  const {


    VITE_APP_BASE_PATH,
    VITE_APP_PORT,
    VITE_APP_MODE,
    VITE_APP_HOST,
    VITE_APP_OUTPUT_DIR
  } = env
  console.log("环境模式", VITE_APP_MODE)
  return defineConfig({


    base:
      VITE_APP_MODE === "nginx" || VITE_APP_MODE === "tomcat"
        ? "/" + VITE_APP_OUTPUT_DIR + "/"
        : VITE_APP_BASE_PATH,
    plugins: [vue()],
    resolve: {


      alias: {


        "@": resolve(__dirname, "./src") // @ 代替 src
      }
    },
    server: {


      // 是否开启 https
      https: false,
      // 端口号
      port: parseInt(VITE_APP_PORT),
      // 监听所有地址
      host: VITE_APP_HOST,
      base: VITE_APP_BASE_PATH,

      // 服务启动时是否自动打开浏览器
      open: true,
      // 允许跨域
      cors: true,
      // 自定义代理规则
      proxy: {

    }
    },
    build: {


      // 设置最终构建的浏览器兼容目标
      target: "es2015",
      outDir: VITE_APP_OUTPUT_DIR,
      // 构建后是否生成 source map 文件
      sourcemap: false,
      // chunk 大小警告的限制(以 kbs 为单位)
      chunkSizeWarningLimit: 2000,
      // 启用/禁用 gzip 压缩大小报告
      reportCompressedSize: false
    },
    css: {


      // css 预处理器
      preprocessorOptions: {


        scss: {


          // 引入 全局 scss
          additionalData: '@import "@/styles/index.scss";'
        }
      },
      postcss: {


        plugins: [require("tailwindcss"), require("autoprefixer")]
      }
    }
  })
}
5、在 styles 下新建 index.css 和 tailwind.css,内容如下:
新建 tailwind.css,使用 @tailwind 指令注入 Tailwind 的基础 (base),组件 (components) 和功能 (utilities) 样式
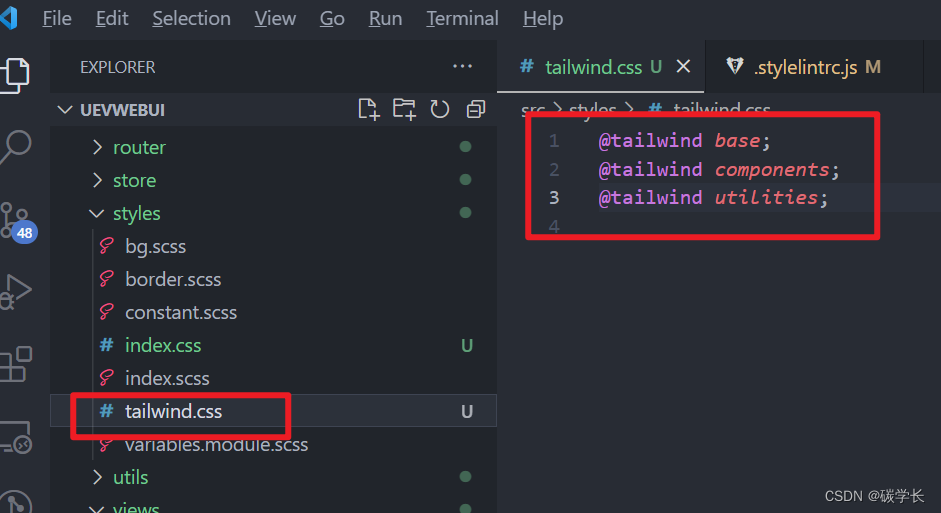
@tailwind base;
@tailwind components;
@tailwind utilities;
新建 index.css 作为所有 css 的入口,这里引入了 tailwind.css:
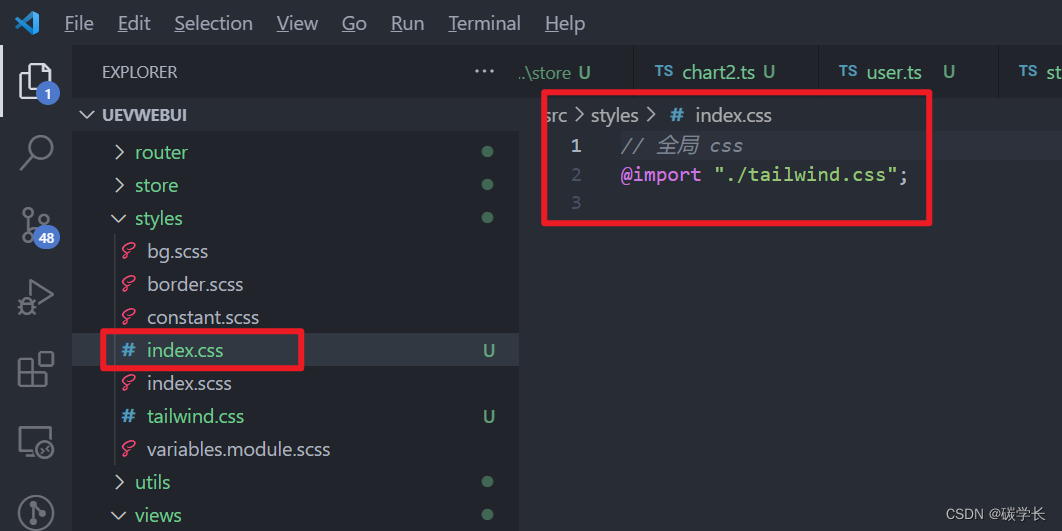
@import "./tailwind.css";
6、解决 @tailwind(scss/at-rule-no-unknown) 报错问题

需要修改 .stylelintrc.js 中的内容,添加相应 rule:
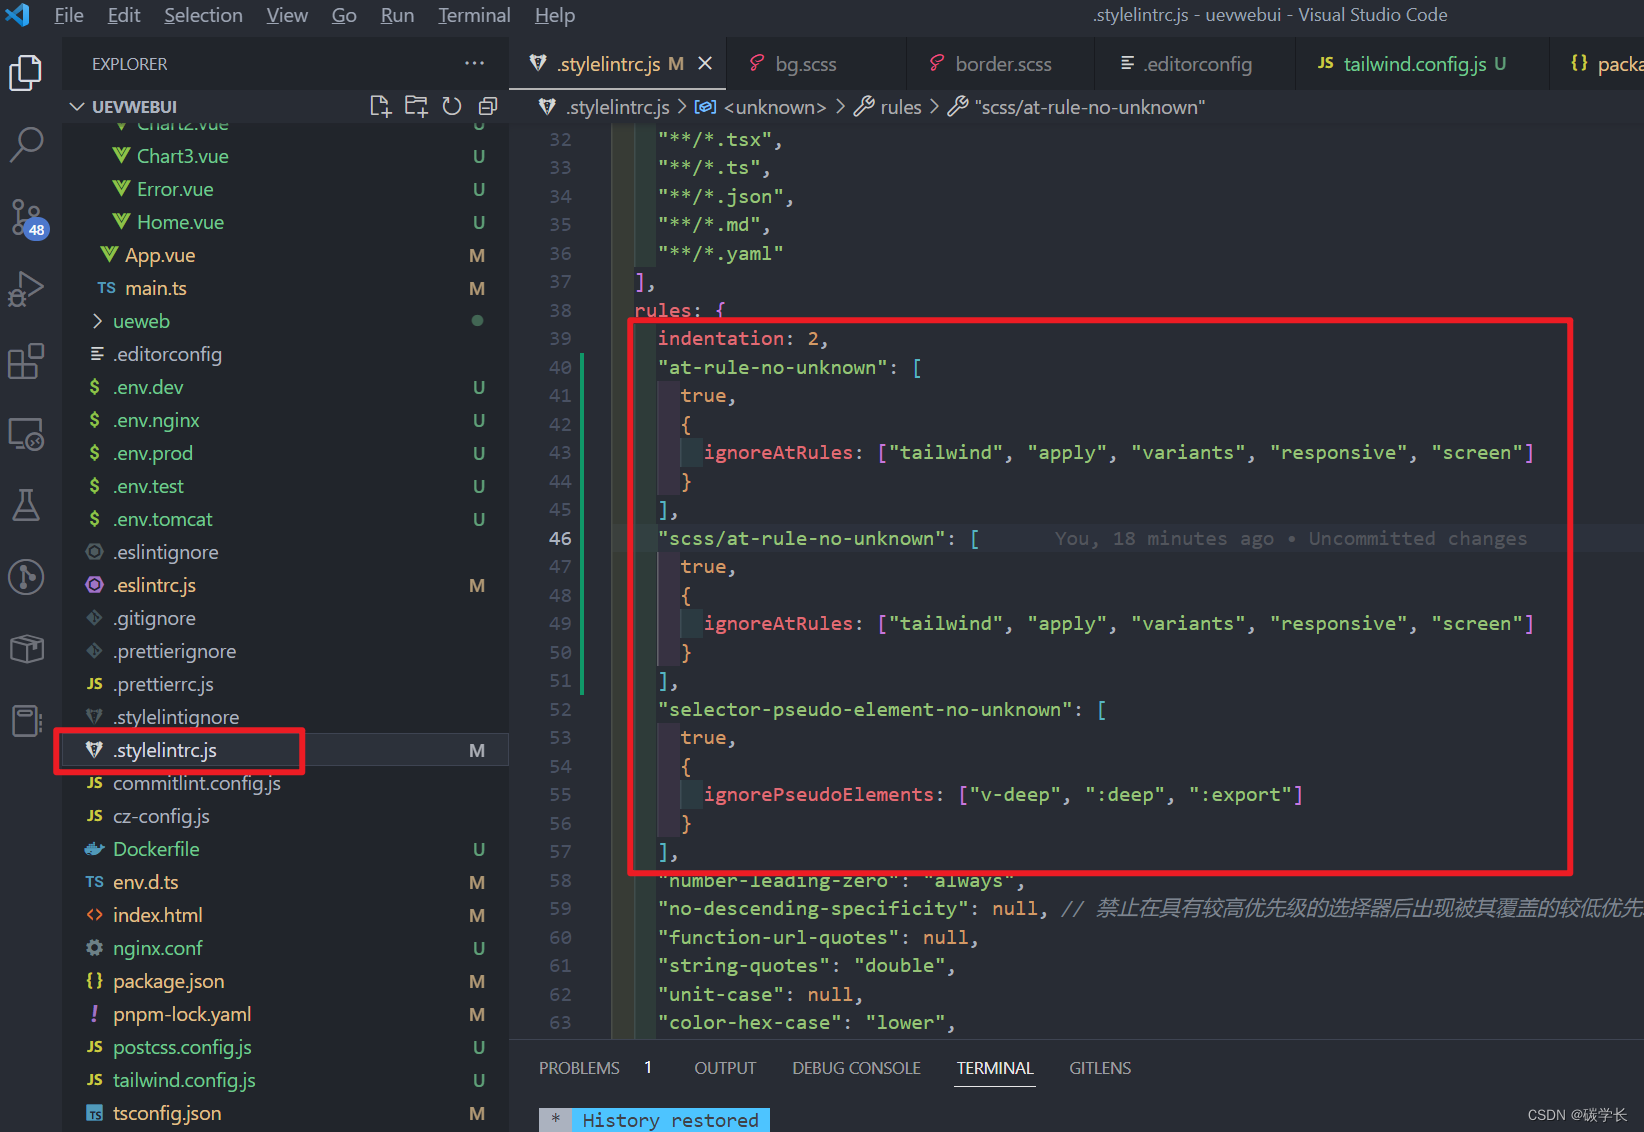
此时 .stylelintrc.js 完整内容如下:
module.exports = {


  extends: [
    "stylelint-config-standard",
    "stylelint-config-prettier",
    "stylelint-config-html/vue",
    "stylelint-config-recommended-vue/scss",
    "stylelint-config-recommended-less",
    "stylelint-config-recommended-scss"
  ],
  plugins: ["stylelint-order"],
  overrides: [
    {


      files: ["**/*.less"],
      customSyntax: "postcss-less"
    },
    {


      files: ["**/*.sass"],
      customSyntax: "postcss-sass"
    },
    {


      files: ["**/*.scss"],
      customSyntax: "postcss-scss"
    },
    {


      files: ["**/*.(html|vue)"],
      customSyntax: "postcss-html"
    }
  ],
  ignoreFiles: [
    "**/*.js",
    "**/*.jsx",
    "**/*.tsx",
    "**/*.ts",
    "**/*.json",
    "**/*.md",
    "**/*.yaml"
  ],
  rules: {


    indentation: 2,
    "at-rule-no-unknown": [
      true,
      {


        ignoreAtRules: ["tailwind", "apply", "variants", "responsive", "screen"]
      }
    ],
    "scss/at-rule-no-unknown": [
      true,
      {


        ignoreAtRules: ["tailwind", "apply", "variants", "responsive", "screen"]
      }
    ],
    "selector-pseudo-element-no-unknown": [
      true,
      {


        ignorePseudoElements: ["v-deep", ":deep", ":export"]
      }
    ],
    "number-leading-zero": "always",
    "no-descending-specificity": null, // 禁止在具有较高优先级的选择器后出现被其覆盖的较低优先级的选择器
    "function-url-quotes": null,
    "string-quotes": "double",
    "unit-case": null,
    "color-hex-case": "lower",
    "color-hex-length": "long",
    "rule-empty-line-before": "never",
    "font-family-no-missing-generic-family-keyword": null,
    "selector-type-no-unknown": null,
    "block-opening-brace-space-before": "always",
    "declaration-block-trailing-semicolon": null,
    "no-duplicate-selectors": null,
    "property-no-unknown": null,
    "no-empty-source": null,
    "selector-class-pattern": null,
    "keyframes-name-pattern": null,
    "import-notation": "string",
    "selector-pseudo-class-no-unknown": [
      true,
      {

     ignorePseudoClasses: ["global", "deep", ":export", "export"] }
    ],
    "function-no-unknown": null,
    // 指定样式的排序
    "order/properties-order": [
      "position",
      "top",
      "right",
      "bottom",
      "left",
      "z-index",
      "display",
      "justify-content",
      "align-items",
      "float",
      "clear",
      "overflow",
      "overflow-x",
      "overflow-y",
      "margin",
      "margin-top",
      "margin-right",
      "margin-bottom",
      "margin-left",
      "padding",
      "padding-top",
      "padding-right",
      "padding-bottom",
      "padding-left",
      "width",
      "min-width",
      "max-width",
      "height",
      "min-height",
      "max-height",
      "font-size",
      "font-family",
      "font-weight",
      "border",
      "border-style",
      "border-width",
      "border-color",
      "border-top",
      "border-top-style",
      "border-top-width",
      "border-top-color",
      "border-right",
      "border-right-style",
      "border-right-width",
      "border-right-color",
      "border-bottom",
      "border-bottom-style",
      "border-bottom-width",
      "border-bottom-color",
      "border-left",
      "border-left-style",
      "border-left-width",
      "border-left-color",
      "border-radius",
      "text-align",
      "text-justify",
      "text-indent",
      "text-overflow",
      "text-decoration",
      "white-space",
      "color",
      "background",
      "background-position",
      "background-repeat",
      "background-size",
      "background-color",
      "background-clip",
      "opacity",
      "filter",
      "list-style",
      "outline",
      "visibility",
      "box-shadow",
      "text-shadow",
      "resize",
      "transition"
    ]
  }
}
7、main.ts 中引入 css 入口文件 index.css
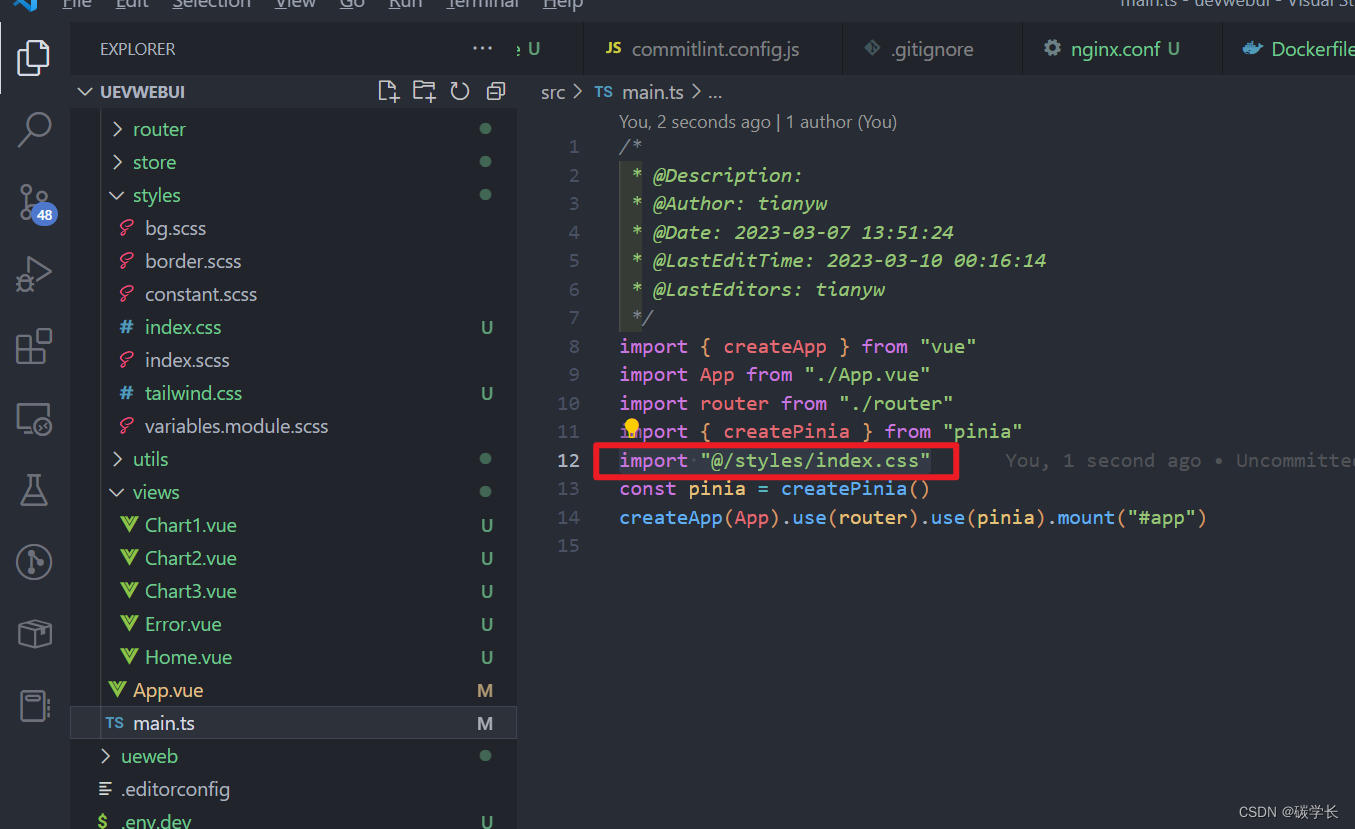
8、修改 tailwind.config.js,可为其增加/修改默认配置
/*
 * @Description:
 * @Author: tianyw
 * @Date: 2023-03-09 23:58:14
 * @LastEditTime: 2023-03-10 09:07:59
 * @LastEditors: tianyw
 */
/** @type {import('tailwindcss').Config} */

// eslint-disable-next-line @typescript-eslint/no-var-requires
const colors = require("tailwindcss/colors")

module.exports = {


  content: ["./index.html", "./src/**/*.{vue,js,ts,jsx,tsx}"],
  theme: {


    colors: {


      gray: colors.gray,
      blue: colors.sky,
      red: colors.rose,
      pink: colors.fuchsia
    },
    fontFamily: {


      sans: ["Graphik", "sans-serif"],
      serif: ["Merriweather", "serif"]
    },
    extend: {


      spacing: {


        128: "32rem",
        144: "36rem"
      },
      borderRadius: {


        "4xl": "2rem"
      }
    }
  },
  variants: {


    extend: {


      borderColor: ["focus-visible"],
      opacity: ["disabled"]
    }
  },
  plugins: []
}
Tailwind 的优点:
可定制化程度极高:
Tailwind 带有一个默认配置,你可以使用项目中的 “tailwind.config.js” 来覆盖默认配置。从颜色、间距大小到字体的所有内容都可以使用配置文件轻松定制。且配置文件的每个部分都是可选的,您只需指定要更改的内容,缺失的部分将使用 Tailwind 的默认配置。
减少为 class 取名字的苦恼。
无需切换上下文:Tailwind 提供了几乎所有需要的开箱即用,开发者不再需要数百次从 HTML 切换到 CSS 。
响应式设计:
Tailwind CSS 遵循移动优先的设计模式,断点系统很灵活。比如实现一个媒体查询,要求根据不同的屏幕宽度实现不同的图片宽度。传统写法如下:
@media only screen and (max-width:1280px) {


    .content {


         width:196px;
    }
}
@media only screen and (max-width: 760px) {


    .content {


        width:128px;
    }
}
在 Tailwind CSS 中表述如下:
<div class="w-16 md:w-32 lg:w-48" src="...">
不建议使用 @apply
Tailwind 是实用程序优先的框架,因此创建的组件将包含实用工具类的集合。这意味创建相同的组件时,将编写相同的实用工具类集。即当您想为该组件更改一个实用工具类时,就需要更改所有具有相同“意图”的组件。
为了克服这个问题,Tailwind 提供了一种解决方案,即“提取组件”。 Tailwind 提供了伪指令 @apply,它允许一次组合多个实用工具类。例如,您有一个按钮组件,其结构如下:
<button class="button">
    Button
</button>
<style>
.button {


  @apply bg-blue-600 text-white px-4 py-2 rounded;
}
</style>
从功能上来说,使用 @apply 生成新的功能类,会产生多余的 css,我们应尽量不使用它,这与 TailwindCss 设计背道而驰。
9、运行项目,查看样式
至此,tailwind.css 就已经在项目中生效了。
可以看到 button 的样式已经是 tailwind.css 的默认样式了
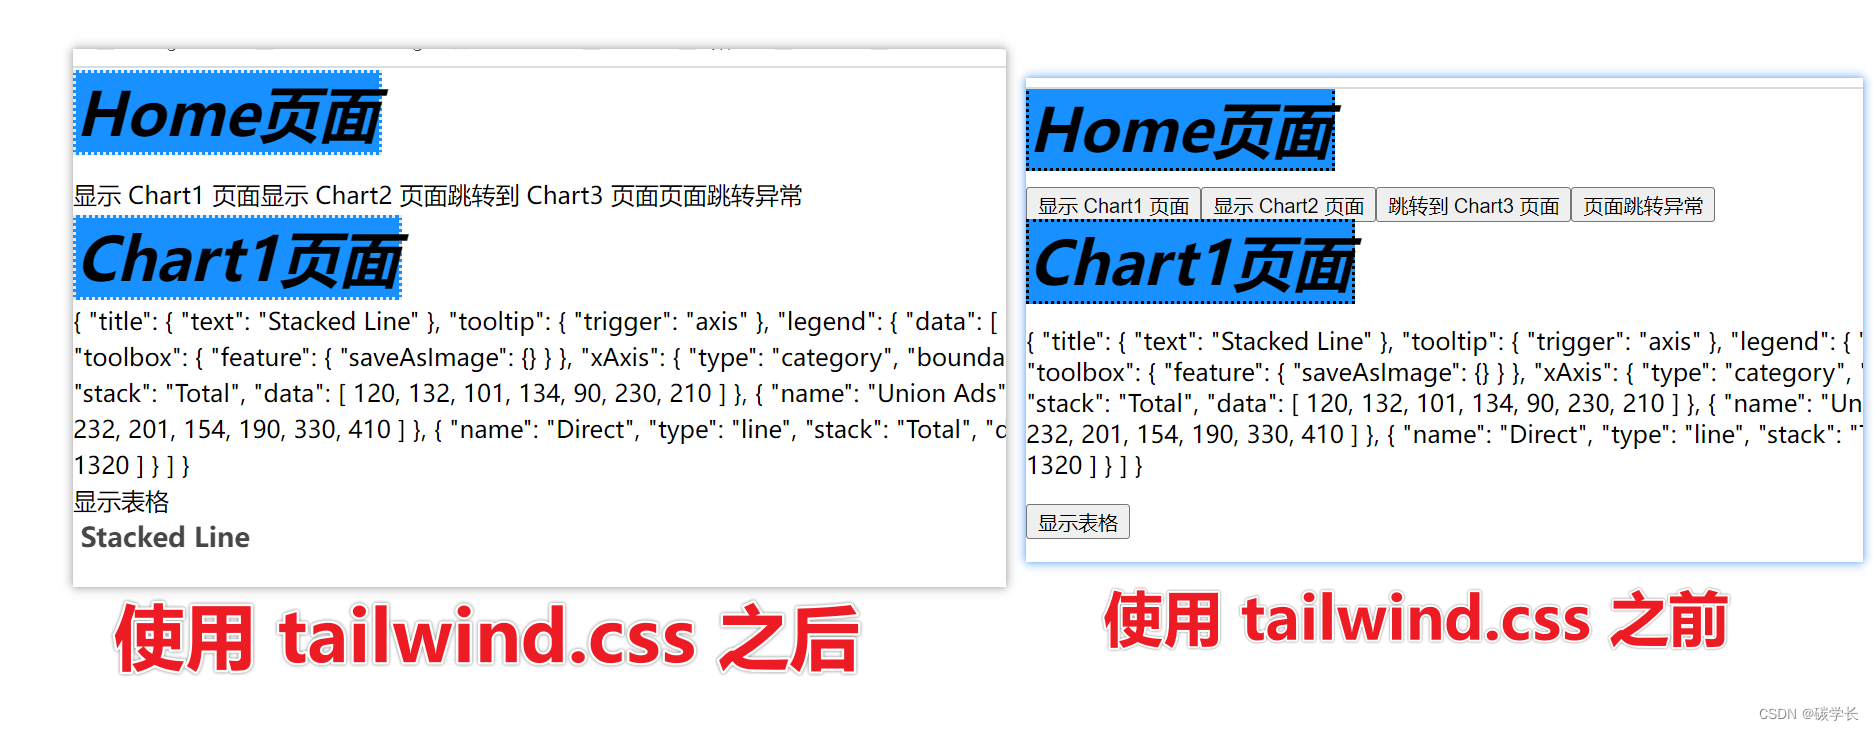
10、通过 tialwind.css 设置 button 样式
可以看到通过对从 chart2 的 显示表格 的 button 应用 tailwind.css 样式类后,样式生效了。

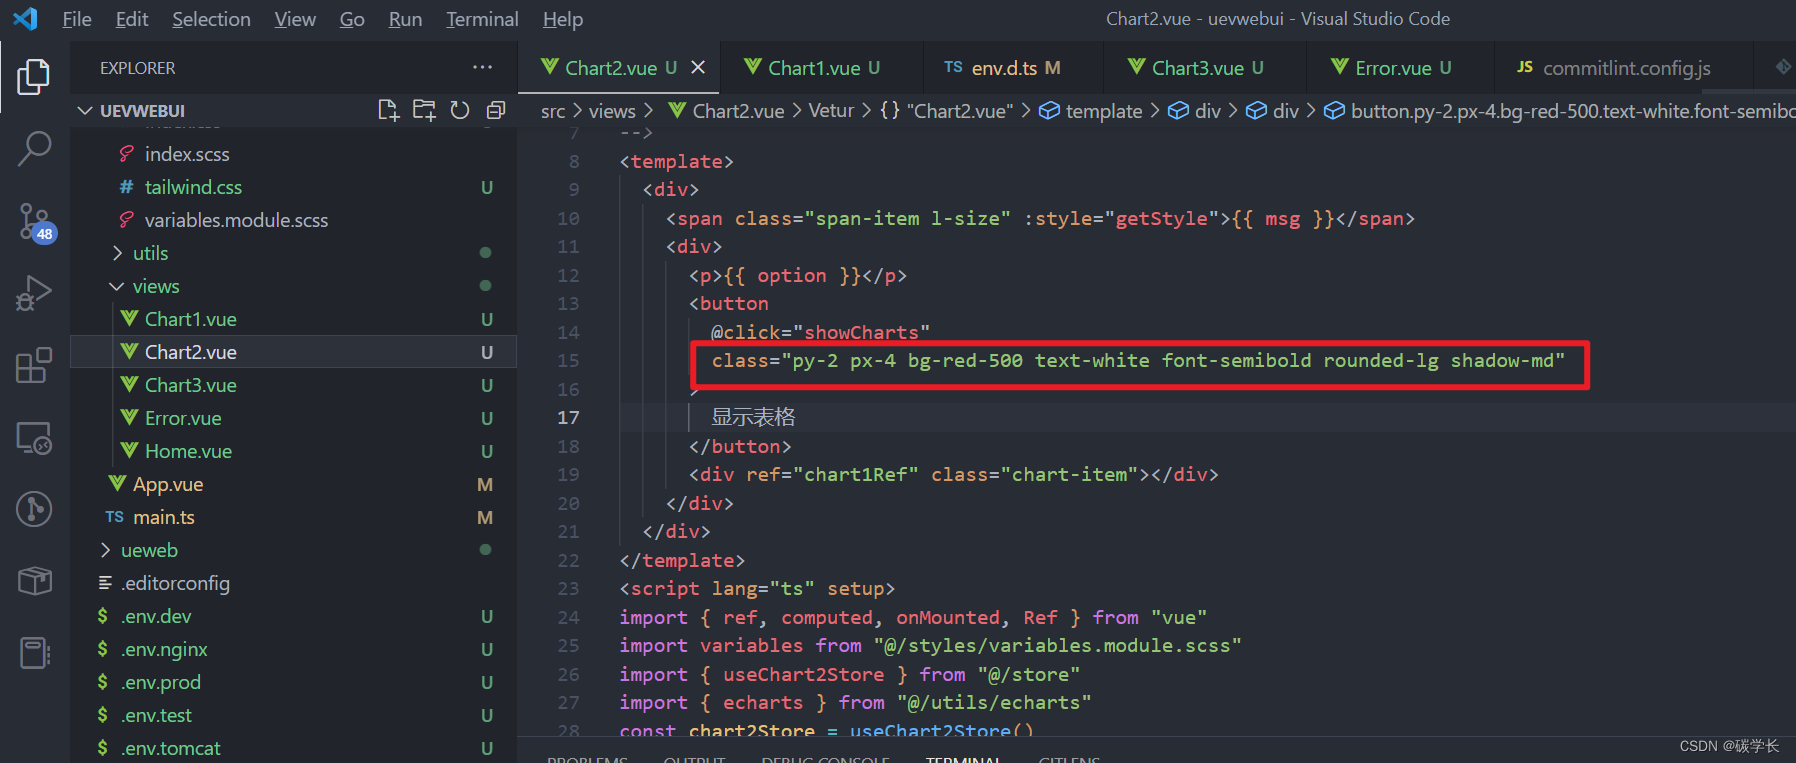
完整内容:
<!--
 * @Description:
 * @Author: tianyw
 * @Date: 2023-03-08 15:55:55
 * @LastEditTime: 2023-03-10 09:13:05
 * @LastEditors: tianyw
-->
<template>
  <div>
    <span class="span-item l-size" :style="getStyle">{

   { msg }}</span>
    <div>
      <p>{

   { option }}</p>
      <button
        @click="showCharts"
        class="py-2 px-4 bg-red-500 text-white font-semibold rounded-lg shadow-md"
      >
        显示表格
      </button>
      <div ref="chart1Ref" class="chart-item"></div>
    </div>
  </div>
</template>
<script lang="ts" setup>
import { ref, computed, onMounted, Ref } from "vue"
import variables from "@/styles/variables.module.scss"
import { useChart2Store } from "@/store"
import { echarts } from "@/utils/echarts"
const chart2Store = useChart2Store()
const msg = ref("Chart2页面")
const getStyle = computed(() => ({
  fontStyle: variables.fontOblique
}))
const option = chart2Store.option

const chart1Ref: Ref<HTMLElement | null> = ref(null)
onMounted(() => {
  console.log(chart1Ref.value)
})
const showCharts = () => {
  const chart1 = echarts.init(chart1Ref.value as HTMLElement)
  chart1.setOption(option)
}
</script>
<style lang="scss" scoped>
.span-item {
  font-weight: bold;
  border-style: $B-DOTTED;
  border-width: 2px;
  background: $BG-1890ff;
}
.chart-item {
  width: 100%;
  height: 30rem;
}
</style>
至此,tailwind.css 的引入与使用就完成了。
48、引入 View UI Plus (iview)
1、安装: pnpm add view-ui-plus --save
2、main.ts 中引入
这里需要注意:自定义引入的 tailwind.css 的引入需要放在 viewuiplus.css 之后。
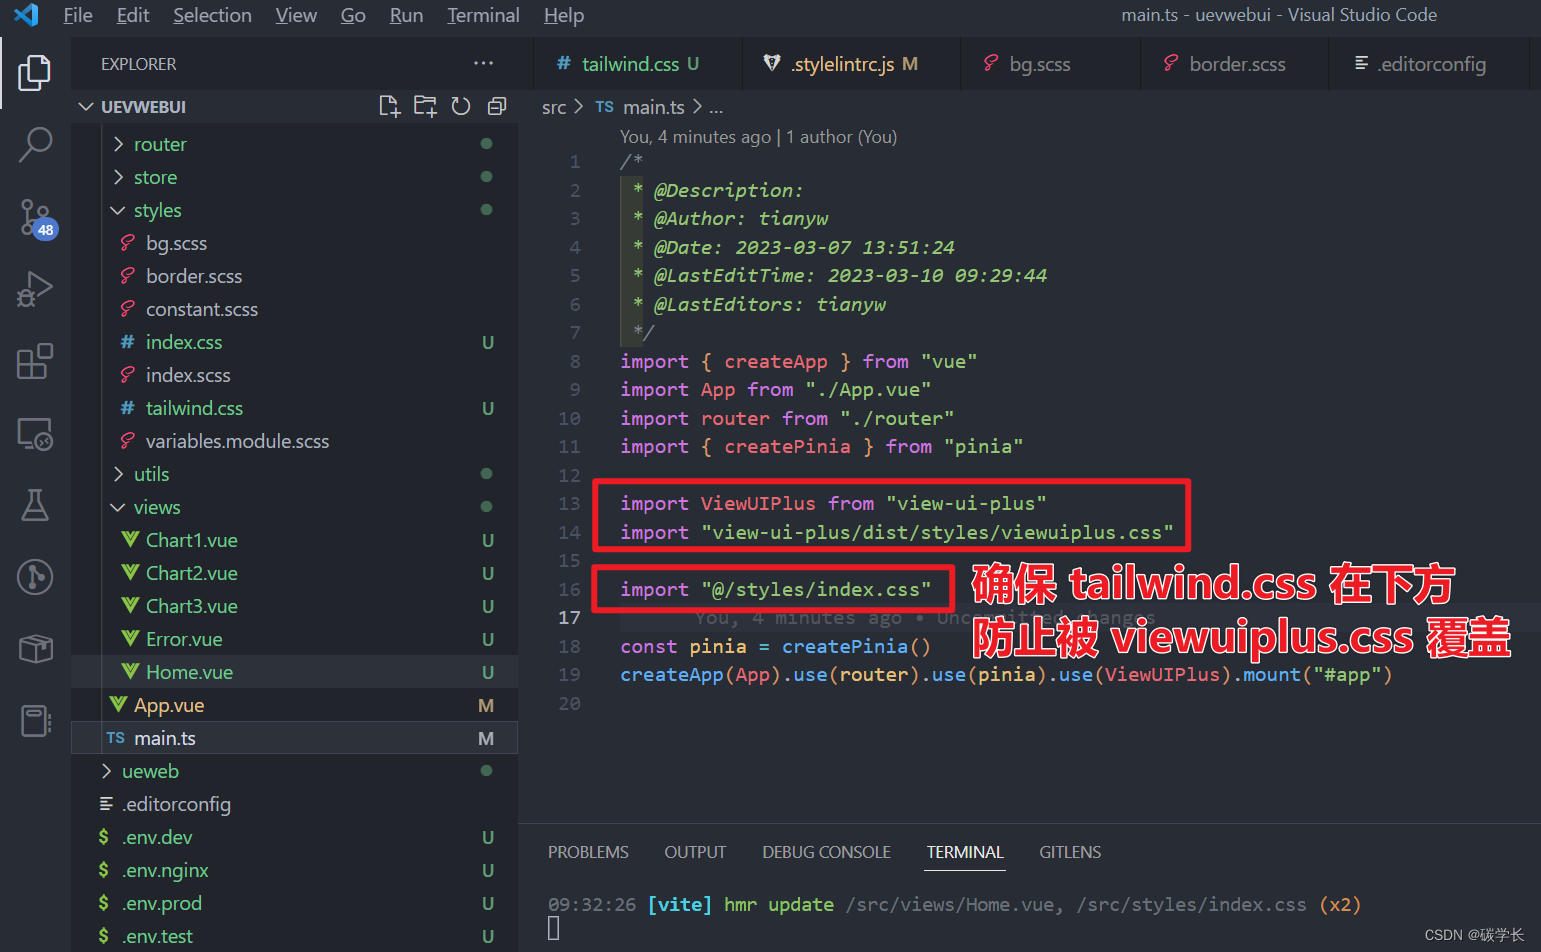
/*
 * @Description:
 * @Author: tianyw
 * @Date: 2023-03-07 13:51:24
 * @LastEditTime: 2023-03-10 09:29:44
 * @LastEditors: tianyw
 */
import {

     createApp } from "vue"
import App from "./App.vue"
import router from "./router"
import {

     createPinia } from "pinia"

import ViewUIPlus from "view-ui-plus"
import "view-ui-plus/dist/styles/viewuiplus.css"

import "@/styles/index.css"

const pinia = createPinia()
createApp(App).use(router).use(pinia).use(ViewUIPlus).mount("#app")
3、使用 view ui plus 组件
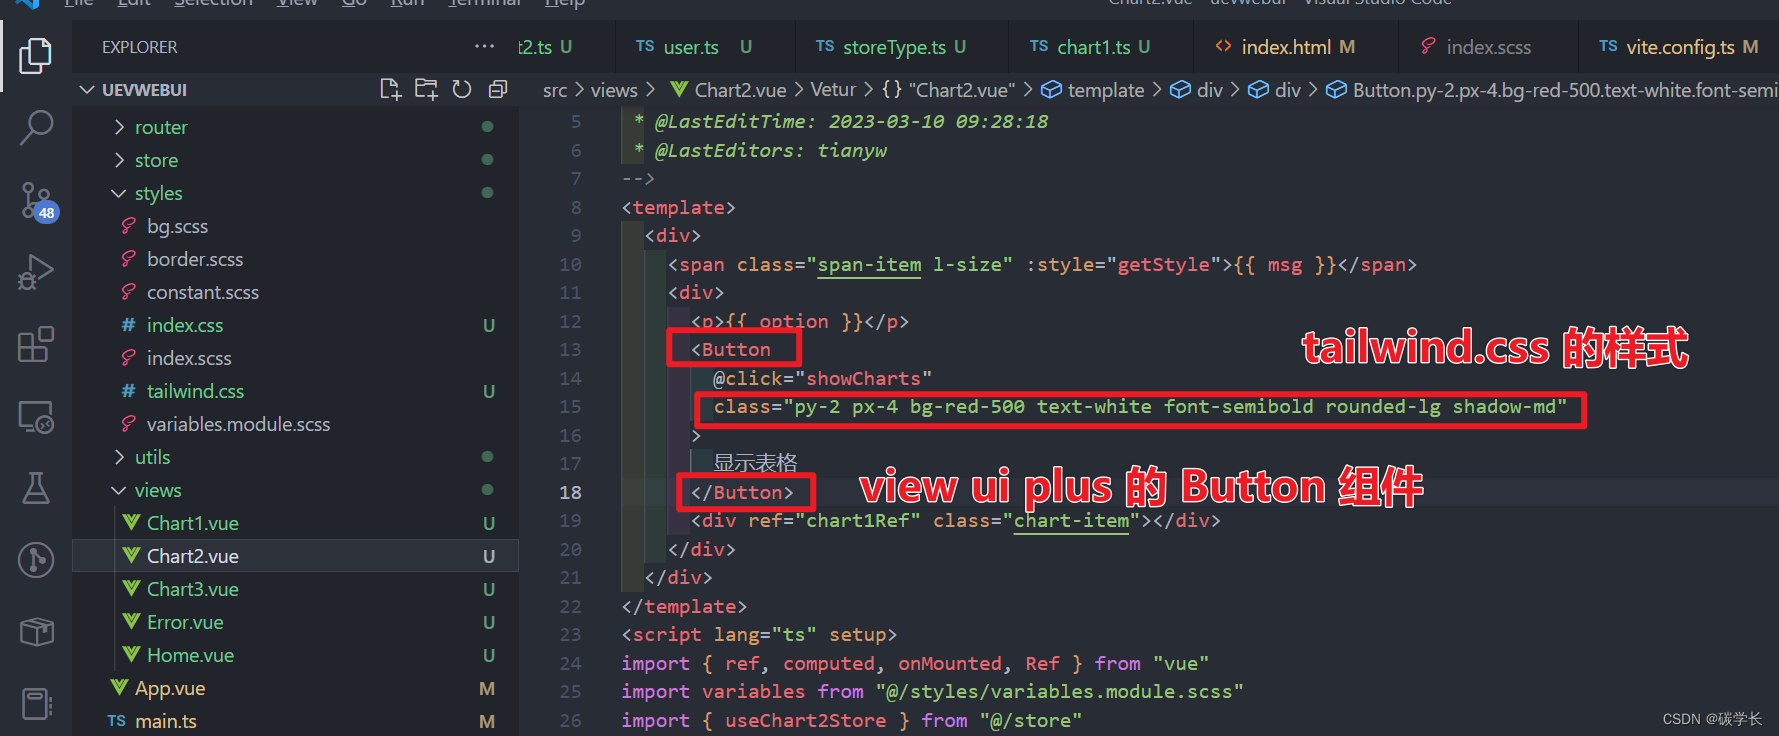
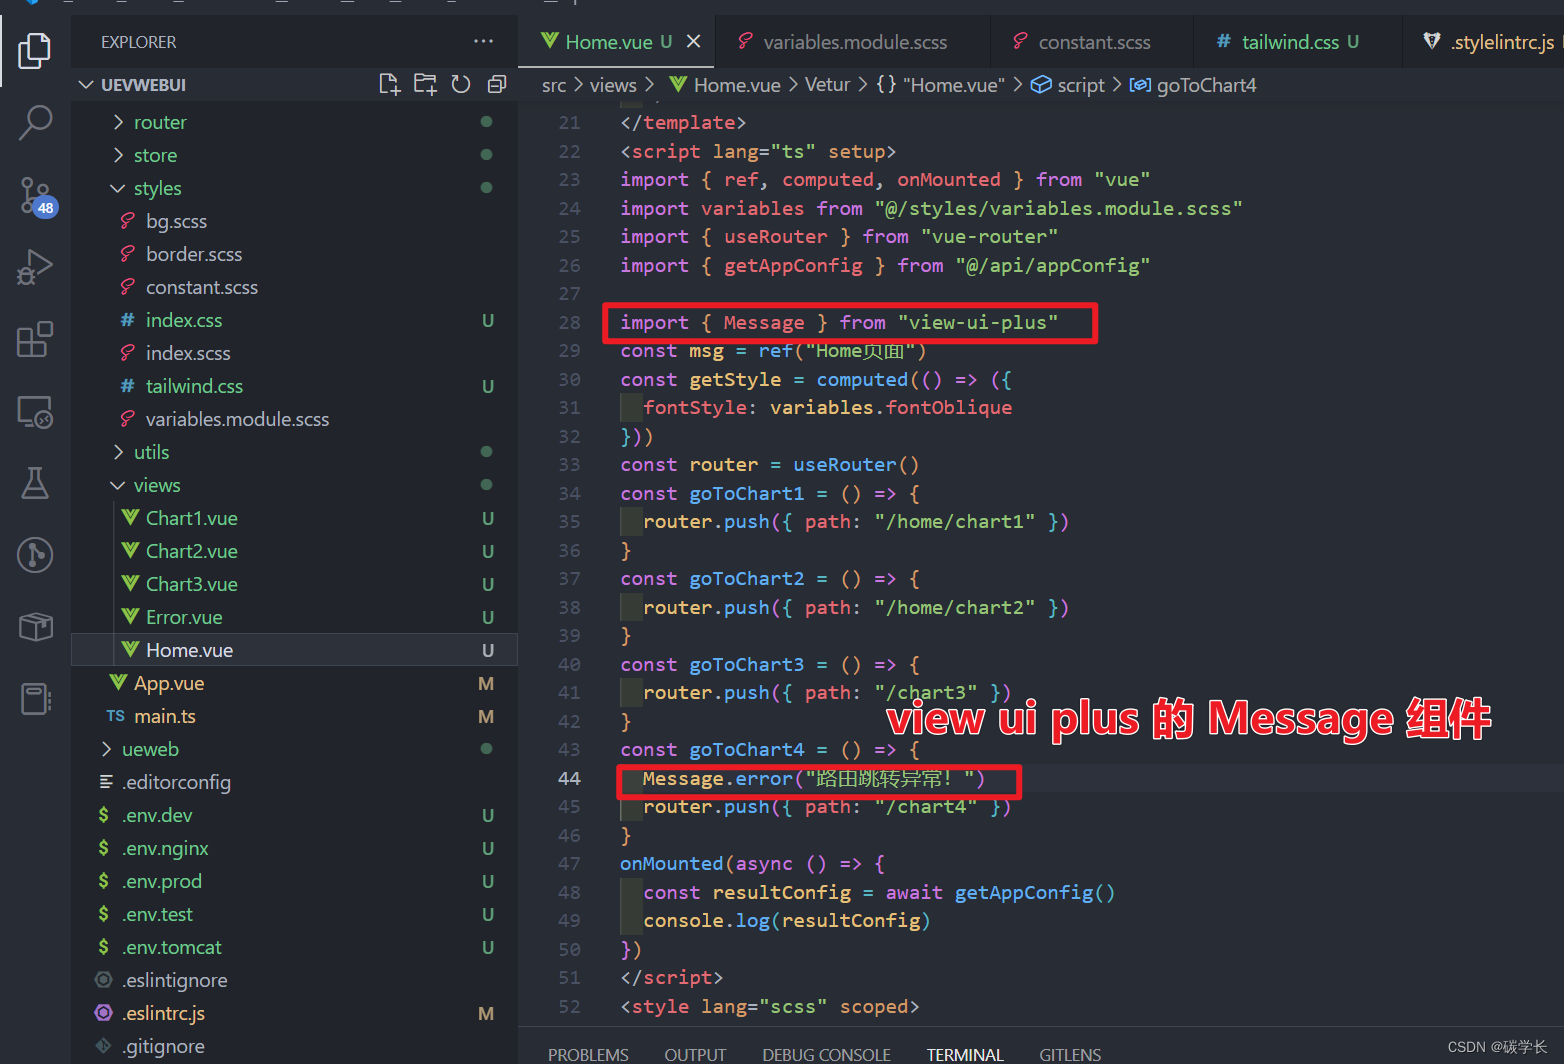
这里在 Chart2 中使用了 Button 组件,在 Home 中使用了 Message 组件。
完整代码内容如下:
Chart2.vue:
<!--
 * @Description:
 * @Author: tianyw
 * @Date: 2023-03-08 15:55:55
 * @LastEditTime: 2023-03-10 09:28:18
 * @LastEditors: tianyw
-->
<template>
  <div>
    <span class="span-item l-size" :style="getStyle">{

   { msg }}</span>
    <div>
      <p>{

   { option }}</p>
      <Button
        @click="showCharts"
        class="py-2 px-4 bg-red-500 text-white font-semibold rounded-lg shadow-md"
      >
        显示表格
      </Button>
      <div ref="chart1Ref" class="chart-item"></div>
    </div>
  </div>
</template>
<script lang="ts" setup>
import { ref, computed, onMounted, Ref } from "vue"
import variables from "@/styles/variables.module.scss"
import { useChart2Store } from "@/store"
import { echarts } from "@/utils/echarts"
const chart2Store = useChart2Store()
const msg = ref("Chart2页面")
const getStyle = computed(() => ({
  fontStyle: variables.fontOblique
}))
const option = chart2Store.option

const chart1Ref: Ref<HTMLElement | null> = ref(null)
onMounted(() => {
  console.log(chart1Ref.value)
})
const showCharts = () => {
  const chart1 = echarts.init(chart1Ref.value as HTMLElement)
  chart1.setOption(option)
}
</script>
<style lang="scss" scoped>
.span-item {
  font-weight: bold;
  border-style: $B-DOTTED;
  border-width: 2px;
  background: $BG-1890ff;
}
.chart-item {
  width: 100%;
  height: 30rem;
}
</style>
Home.vue:
<!--
 * @Description:
 * @Author: tianyw
 * @Date: 2023-03-08 15:54:13
 * @LastEditTime: 2023-03-09 20:43:59
 * @LastEditors: tianyw
-->
<template>
  <div class="home-item">
    <span class="span-item l-size" :style="getStyle">{

   { msg }}</span>
    <div class="btn-items">
      <button @click="goToChart1">显示 Chart1 页面</button>
      <button @click="goToChart2">显示 Chart2 页面</button>
      <button @click="goToChart3">跳转到 Chart3 页面</button>
      <button @click="goToChart4">页面跳转异常</button>
    </div>
    <div class="router-item">
      <router-view />
    </div>
  </div>
</template>
<script lang="ts" setup>
import { ref, computed, onMounted } from "vue"
import variables from "@/styles/variables.module.scss"
import { useRouter } from "vue-router"
import { getAppConfig } from "@/api/appConfig"

import { Message } from "view-ui-plus"
const msg = ref("Home页面")
const getStyle = computed(() => ({
  fontStyle: variables.fontOblique
}))
const router = useRouter()
const goToChart1 = () => {
  router.push({ path: "/home/chart1" })
}
const goToChart2 = () => {
  router.push({ path: "/home/chart2" })
}
const goToChart3 = () => {
  router.push({ path: "/chart3" })
}
const goToChart4 = () => {
  Message.error("路由跳转异常!")
  router.push({ path: "/chart4" })
}
onMounted(async () => {
  const resultConfig = await getAppConfig()
  console.log(resultConfig)
})
</script>
<style lang="scss" scoped>
.home-item {
  width: 100%;
  height: 100%;
}
.span-item {
  font-weight: bold;
  border-style: $B-DOTTED;
  border-width: 2px;
  background: $BG-1890ff;
}
.btn-items {
  margin-top: 0.8rem;
}
.router-item {
  width: 100%;
  height: 100%;
}
</style>
可以看到,Button 默认有 hover 样式,这是 view ui plus 默认样式带来的,同时 tailwind.css 设置的样式也生效了。
而 Message 组件也可以正常调用。
至此,view ui plus 的组件就可以正常使用了。
49、引入 animate.css
为了使得 组件、页面具有良好的动画效果,可以引入 animate.css。
1、安装:pnpm add animate.css --save
2、main.ts 中引入
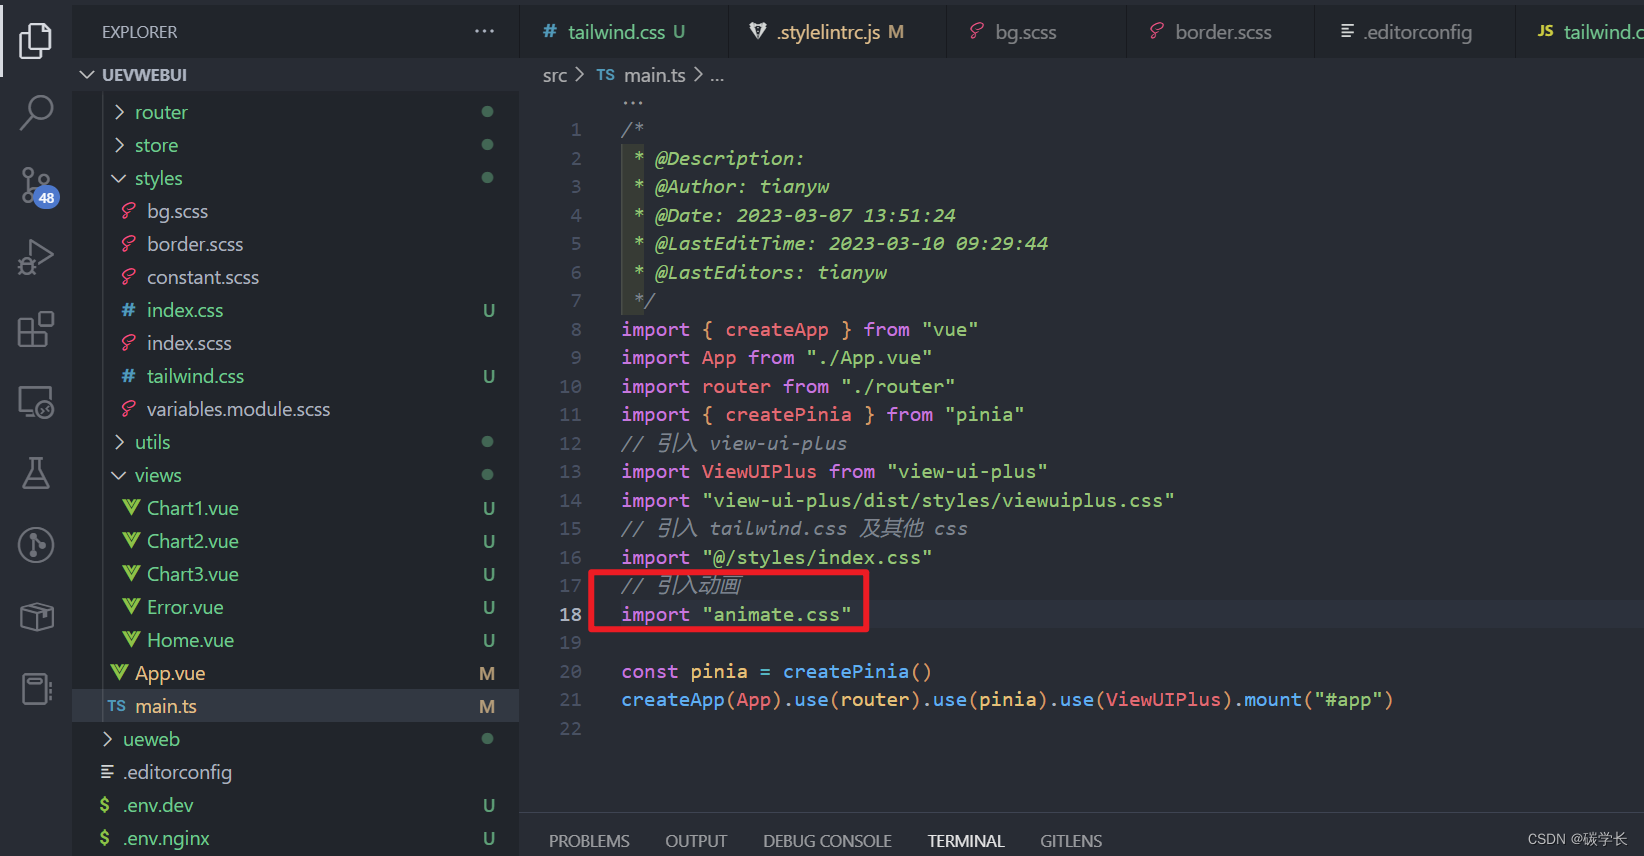
/*
 * @Description:
 * @Author: tianyw
 * @Date: 2023-03-07 13:51:24
 * @LastEditTime: 2023-03-10 09:46:15
 * @LastEditors: tianyw
 */
import {

     createApp } from "vue"
import App from "./App.vue"
import router from "./router"
import {

     createPinia } from "pinia"
// 引入 view-ui-plus
import ViewUIPlus from "view-ui-plus"
import "view-ui-plus/dist/styles/viewuiplus.css"
// 引入 tailwind.css 及其他 css
import "@/styles/index.css"
// 引入动画
import "animate.css"

const pinia = createPinia()
createApp(App).use(router).use(pinia).use(ViewUIPlus).mount("#app")
3、使用
使用方式可以参考官网:
这里对 Chart2 的 view ui plus 的 Button 设置了 animate.css 的动画样式,可以看到效果如下:
这里为 Button 添加了 持续 2秒的 bounce 动画:

<!--
 * @Description:
 * @Author: tianyw
 * @Date: 2023-03-08 15:55:55
 * @LastEditTime: 2023-03-10 09:48:05
 * @LastEditors: tianyw
-->
<template>
  <div>
    <span class="span-item l-size" :style="getStyle">{

   { msg }}</span>
    <div>
      <p>{

   { option }}</p>
      <Button
        @click="showCharts"
        class="py-2 px-4 bg-red-500 text-white font-semibold rounded-lg shadow-md btn-item-animate"
      >
        显示表格
      </Button>
      <div ref="chart1Ref" class="chart-item"></div>
    </div>
  </div>
</template>
<script lang="ts" setup>
import { ref, computed, onMounted, Ref } from "vue"
import variables from "@/styles/variables.module.scss"
import { useChart2Store } from "@/store"
import { echarts } from "@/utils/echarts"
const chart2Store = useChart2Store()
const msg = ref("Chart2页面")
const getStyle = computed(() => ({
  fontStyle: variables.fontOblique
}))
const option = chart2Store.option

const chart1Ref: Ref<HTMLElement | null> = ref(null)
onMounted(() => {
  console.log(chart1Ref.value)
})
const showCharts = () => {
  const chart1 = echarts.init(chart1Ref.value as HTMLElement)
  chart1.setOption(option)
}
</script>
<style lang="scss" scoped>
.span-item {
  font-weight: bold;
  border-style: $B-DOTTED;
  border-width: 2px;
  background: $BG-1890ff;
}
.chart-item {
  width: 100%;
  height: 30rem;
}
.btn-item-animate {
  animation: bounce; /* referring directly to the animation's @keyframe declaration */
  animation-duration: 2s; /* don't forget to set a duration! */
}
</style>
至此 animate.css 的引入与使用就完成了。
50、自定义 view-ui-plus 主题样式 及 less 的引入、使用
1、安装 less:pnpm add less -D
2、src/styles 目录下新建 index.less,作为 less 的入口,并配置 view-ui-plus 如下:
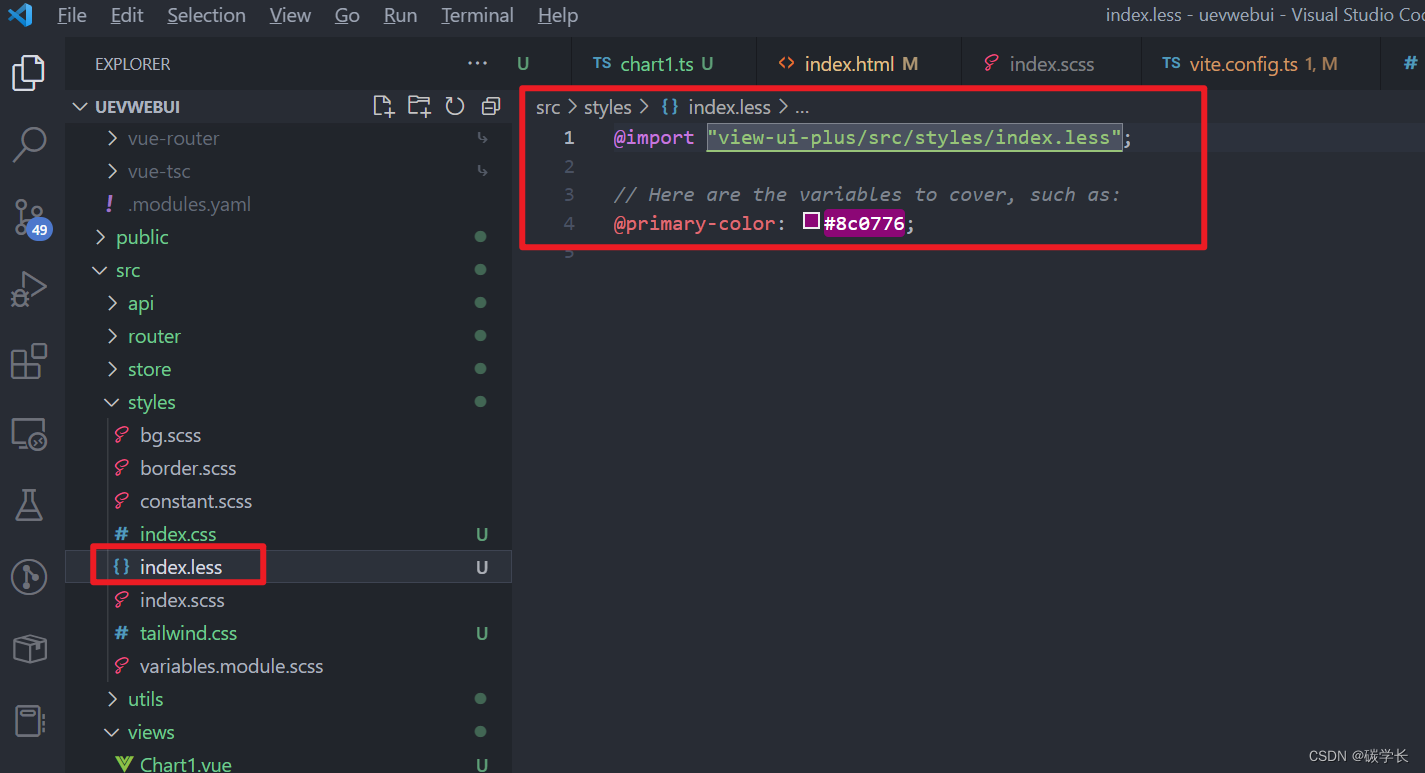
@import "view-ui-plus/src/styles/index.less";

// Here are the variables to cover, such as:
@primary-color: #8c0776;
3、解决报错
运行后会有:[less] Inline JavaScript is not enabled 的报错

此时需要在 vite.config.ts 添加如下配置:
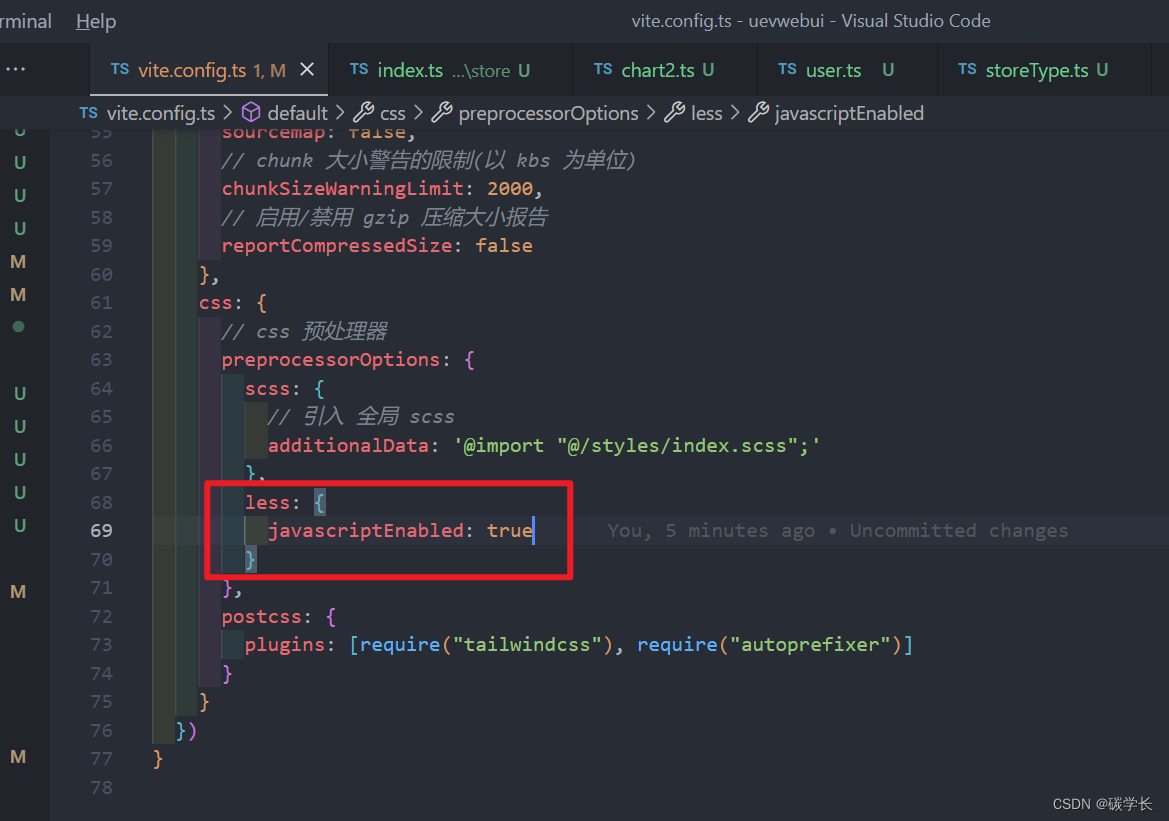
完整内容如下:
/*
 * @Description:
 * @Author: tianyw
 * @Date: 2023-03-07 13:58:36
 * @LastEditTime: 2023-03-10 10:03:08
 * @LastEditors: tianyw
 */
import {

     defineConfig, loadEnv } from "vite"
import vue from "@vitejs/plugin-vue" //解析.vue文件
import {

     resolve } from "path"

// vite默认只会编译ts
export default ({

     mode, command }) => {


  const env = loadEnv(mode, process.cwd())
  const {


    VITE_APP_BASE_PATH,
    VITE_APP_PORT,
    VITE_APP_MODE,
    VITE_APP_HOST,
    VITE_APP_OUTPUT_DIR
  } = env
  console.log("环境模式", VITE_APP_MODE)
  return defineConfig({


    base:
      VITE_APP_MODE === "nginx" || VITE_APP_MODE === "tomcat"
        ? "/" + VITE_APP_OUTPUT_DIR + "/"
        : VITE_APP_BASE_PATH,
    plugins: [vue()],
    resolve: {


      alias: {


        "@": resolve(__dirname, "./src") // @ 代替 src
      }
    },
    server: {


      // 是否开启 https
      https: false,
      // 端口号
      port: parseInt(VITE_APP_PORT),
      // 监听所有地址
      host: VITE_APP_HOST,
      base: VITE_APP_BASE_PATH,

      // 服务启动时是否自动打开浏览器
      open: true,
      // 允许跨域
      cors: true,
      // 自定义代理规则
      proxy: {

    }
    },
    build: {


      // 设置最终构建的浏览器兼容目标
      target: "es2015",
      outDir: VITE_APP_OUTPUT_DIR,
      // 构建后是否生成 source map 文件
      sourcemap: false,
      // chunk 大小警告的限制(以 kbs 为单位)
      chunkSizeWarningLimit: 2000,
      // 启用/禁用 gzip 压缩大小报告
      reportCompressedSize: false
    },
    css: {


      // css 预处理器
      preprocessorOptions: {


        scss: {


          // 引入 全局 scss
          additionalData: '@import "@/styles/index.scss";'
        },
        less: {


          javascriptEnabled: true
        }
      },
      postcss: {


        plugins: [require("tailwindcss"), require("autoprefixer")]
      }
    }
  })
}
4、运行、验证
可以看到,自定义主题后,Button 的 hover 效果和之前不一样了(生效了)。
这样可以通过自定义主题的方式,让默认的组件具有默认的样式行为(这样就不需要为大多数的组件额外设置覆盖样式了)
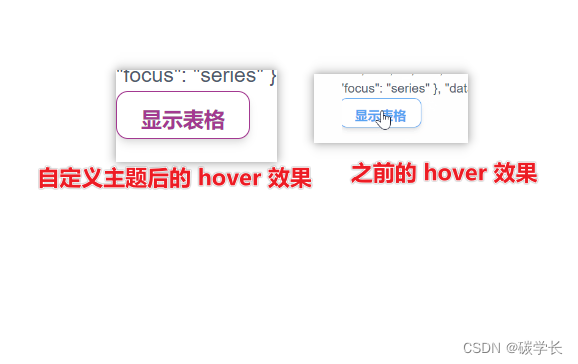
还有很多可以自定义的主题样式,可以参考以下内容,自行添加、设置即可。

至此,自定义 less 及 view-ui-plus 主题样式,就完成了。
51、初步引入微前端 qiankun 框架
使用 微前端 需要两个项目:一个作为主应用、一个作为子应用。
1、主应用
1、通过 vue create mainv 的方式创建一个名称为 mainv 的主应用(这里选择了 Vue2)
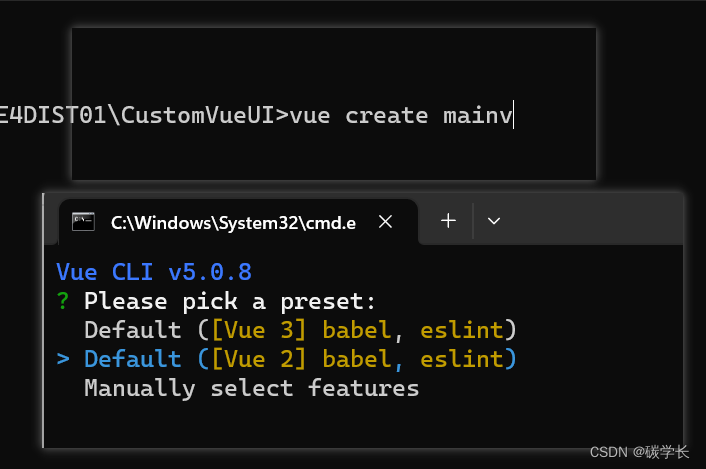
2、打开项目,执行 yarn install 命令,安装依赖
3、安装 qiankun
4、安装路由:yarn add vue-router 并进行配置
src 目录下新建 router 文件夹,其下新建 index.js ,用于设置路由:
router.js 完整内容:
/*
 * @Description:
 * @Author: tianyw
 * @Date: 2023-03-12 15:30:07
 * @LastEditTime: 2023-03-12 16:09:36
 * @LastEditors: tianyw
 */
import Vue from "vue";
import VueRouter from "vue-router";
import Home from "../components/Home.vue";
import Vite from "../components/Vite.vue";

Vue.use(VueRouter);

const routes = [
  {


    path: "/home",
    name: "home",
    component: Home
  },
  {


    path: "/uevwebuisystem/:home*",
    name: "uevwebuisystem",
    component: Vite
  },
  {


    path: "/",
    redirect: "/home"
  }
];

const router = new VueRouter({


  mode: "history",
  routes
});

export default router;
router.js 中定义的 uevwebuisystem 与 下面步骤中 main.js 中定义的 uevwebuisystem 是对应的。
这里 router.js 的 uevwebuisystem 的 component 为 Vite,意味着 uevwebuisystem 子应用在父应用中的加载位置为 Vite.vue。
5、定义 qiankun 相关的文件:main.js
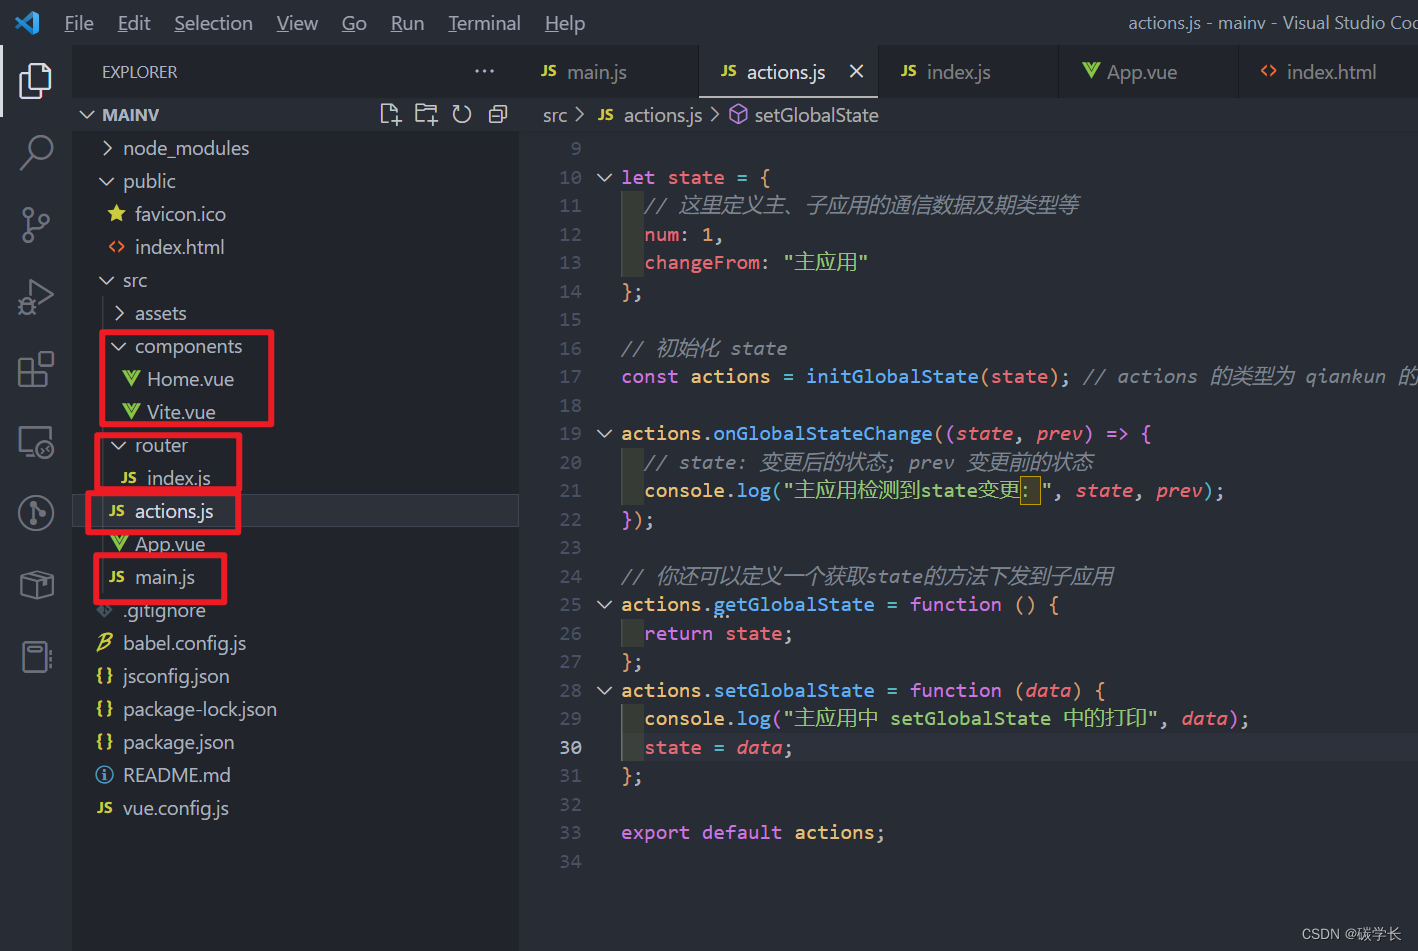
main.js 完整内容:
main.js 中定义了 子应用的参数以及 qiankun 的 registerMicroApps 方法 和 start 方法,子应用参数中的 parentActions 定义了 qiankun 的 父、子应用通信的通用方法,用于父、子应用的相互通信。
/*
 * @Description:
 * @Author: tianyw
 * @Date: 2023-03-12 15:22:04
 * @LastEditTime: 2023-03-12 20:37:17
 * @LastEditors: tianyw
 */
import Vue from "vue";
import App from "./App.vue";
import router from "./router/index";
import actions from "./actions";
Vue.config.productionTip = false;

import {


  addGlobalUncaughtErrorHandler,
  registerMicroApps,
  start
} from "qiankun";
const apps = [
  {


    name: "uevwebuisystem", // app name registered
    entry: "//localhost:3000/index.html", // 入口路径,开发时为微应用所启本地服务,上线时为微应用线上路径
    container: "#uevwebuisystem-container", // 微应用挂载的节点
    activeRule: "/uevwebuisystem", // 当访问路由为 /micro-vue 时加载微应用
    props: {


      parentActions: actions //  主应用向微应用传递参数
    }
  }
];
/**
 * 注册微应用
 * 第一个参数 - 微应用的注册信息
 * 第二个参数 - 全局生命周期钩子
 */
registerMicroApps(apps, {


  // qiankun 生命周期钩子 - 微应用加载前
  beforeLoad: (app) => {


    // 加载微应用前,加载进度条
    console.log("before load", app.name);
    return Promise.resolve();
  },
  // qiankun 生命周期钩子 - 微应用挂载后
  afterMount: (app) => {


    // 加载微应用前,进度条加载完成
    console.log("after mount", app.name);
    return Promise.resolve();
  }
});
/**
 * 添加全局的未捕获异常处理器
 */
addGlobalUncaughtErrorHandler((event) => {


  console.error("qiankun全局异常", event);
});

start();

new Vue({


  router,
  render: (h) => h(App)
}).$mount("#app");
这里定义了子应用 uevwebuisystem 的 container 为 src/components/Vite.vue 的 id 为 #uevwebuisystem-container 的 div。
在 src 目录下新建 actions.js,用于定义 qiankun 的父子应用的通信方法,actions.js 完整内容:
/*
 * @Description:
 * @Author: tianyw
 * @Date: 2023-03-12 20:54:37
 * @LastEditTime: 2023-03-12 21:10:59
 * @LastEditors: tianyw
 */
import {

     initGlobalState } from "qiankun";

let state = {


  // 这里定义主、子应用的通信数据及期类型等
  num: 1,
  changeFrom: "主应用"
};

// 初始化 state
const actions = initGlobalState(state); // actions 的类型为 qiankun 的 MicroAppStateActions

actions.onGlobalStateChange((state, prev) => {


  // state: 变更后的状态; prev 变更前的状态
  console.log("主应用检测到state变更:", state, prev);
});

// 你还可以定义一个获取state的方法下发到子应用
actions.getGlobalState = function () {


  return state;
};
actions.setGlobalState = function (data) {


  console.log("主应用中 setGlobalState 中的打印", data);
  state = data;
};

export default actions;
6、定义 Vue 文件内容
这里 App.vue 仅做路由入口:

这里 Home.vue 作为主应用的初始进入界面。
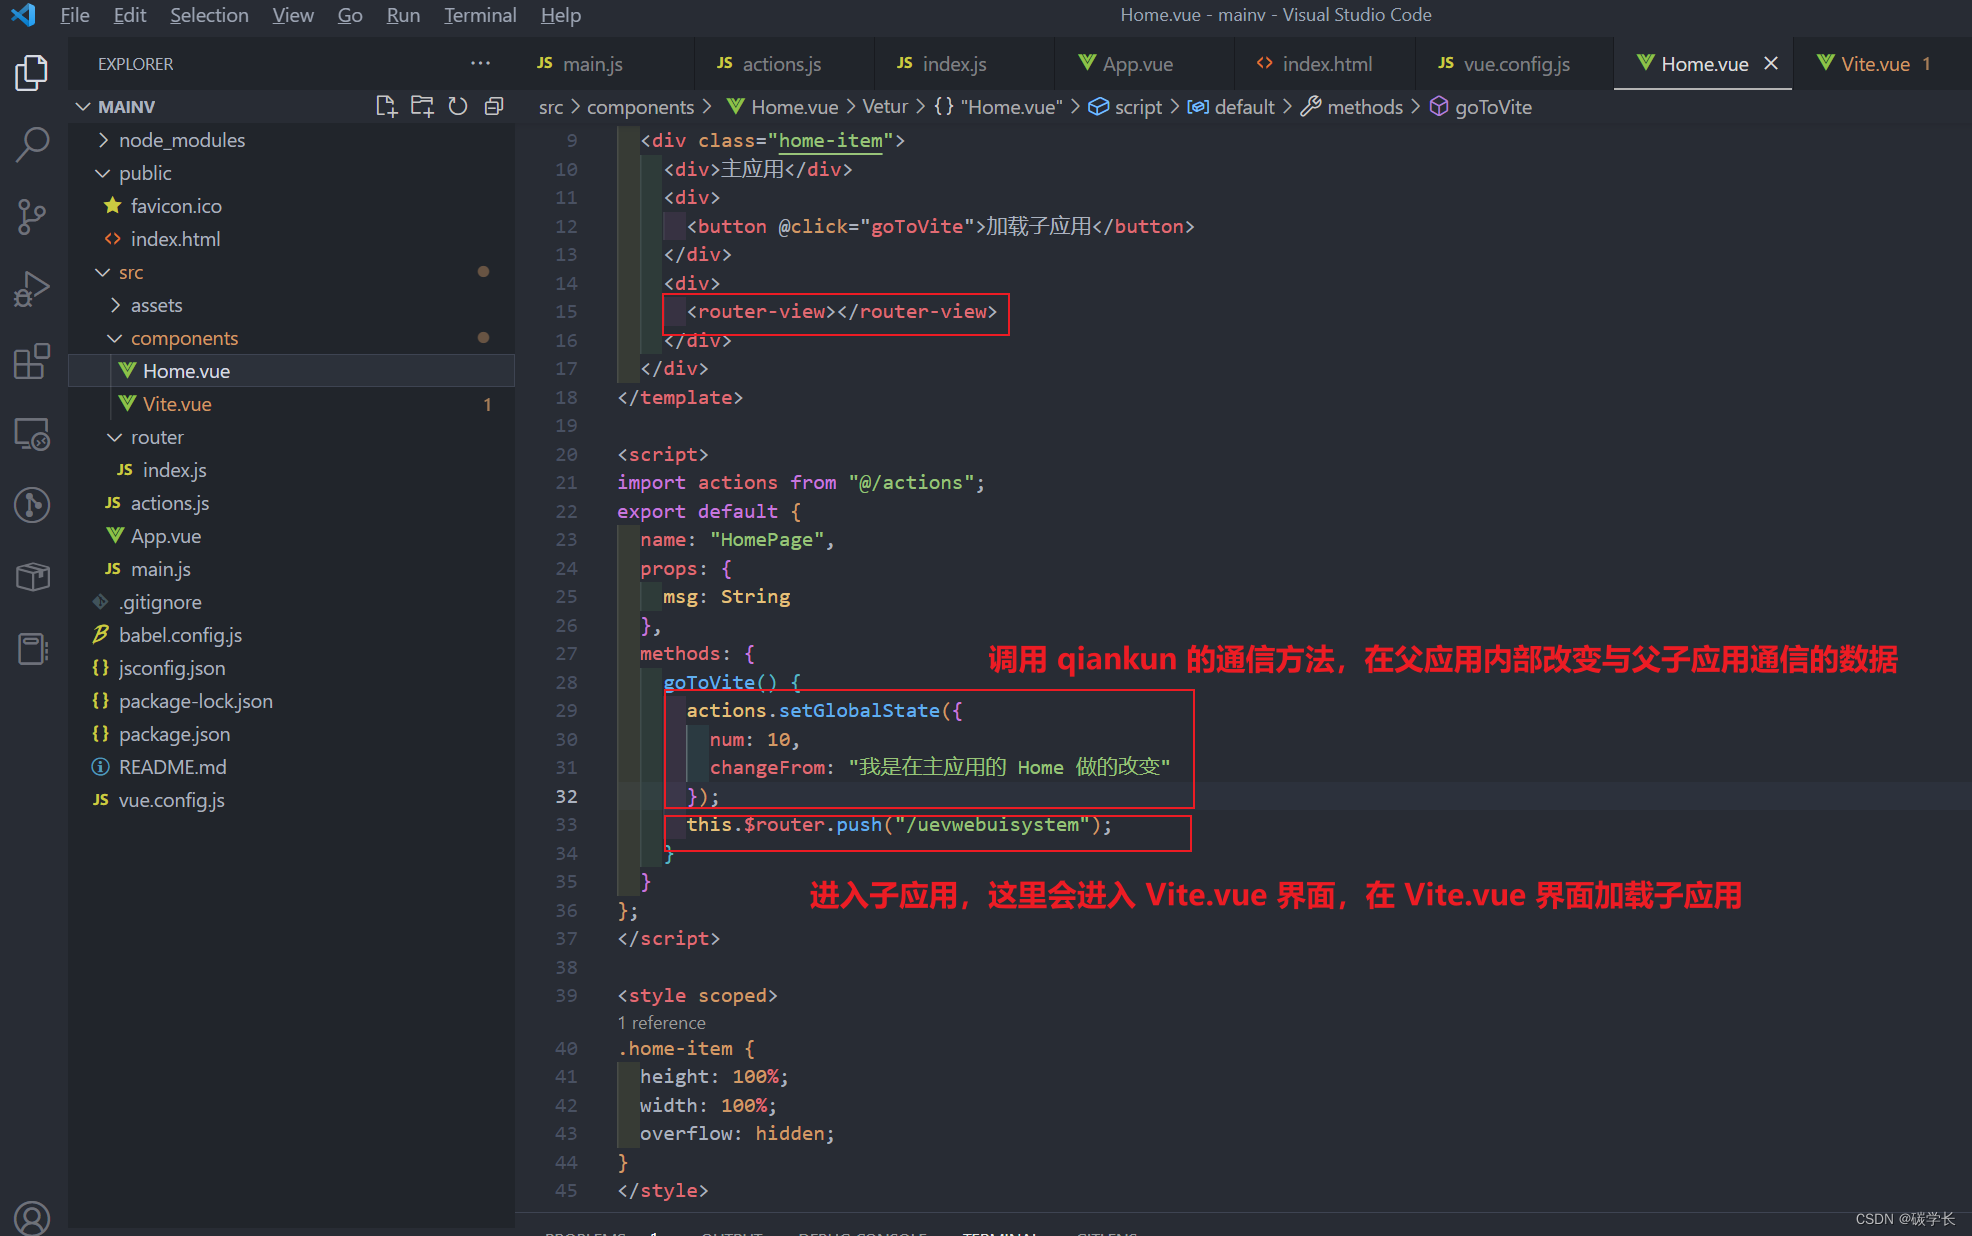
Home.vue 完整内容:
<!--
 * @Description:
 * @Author: tianyw
 * @Date: 2023-03-12 15:22:04
 * @LastEditTime: 2023-03-12 21:00:04
 * @LastEditors: tianyw
-->
<template>
  <div class="home-item">
    <div>主应用</div>
    <div>
      <button @click="goToVite">加载子应用</button>
    </div>
    <div>
      <router-view></router-view>
    </div>
  </div>
</template>

<script>
import actions from "@/actions";
export default {
  name: "HomePage",
  props: {
    msg: String
  },
  methods: {
    goToVite() {
      actions.setGlobalState({
        num: 10,
        changeFrom: "我是在主应用的 Home 做的改变"
      });
      this.$router.push("/uevwebuisystem");
    }
  }
};
</script>

<style scoped>
.home-item {
  height: 100%;
  width: 100%;
  overflow: hidden;
}
</style>
Vite.vue:
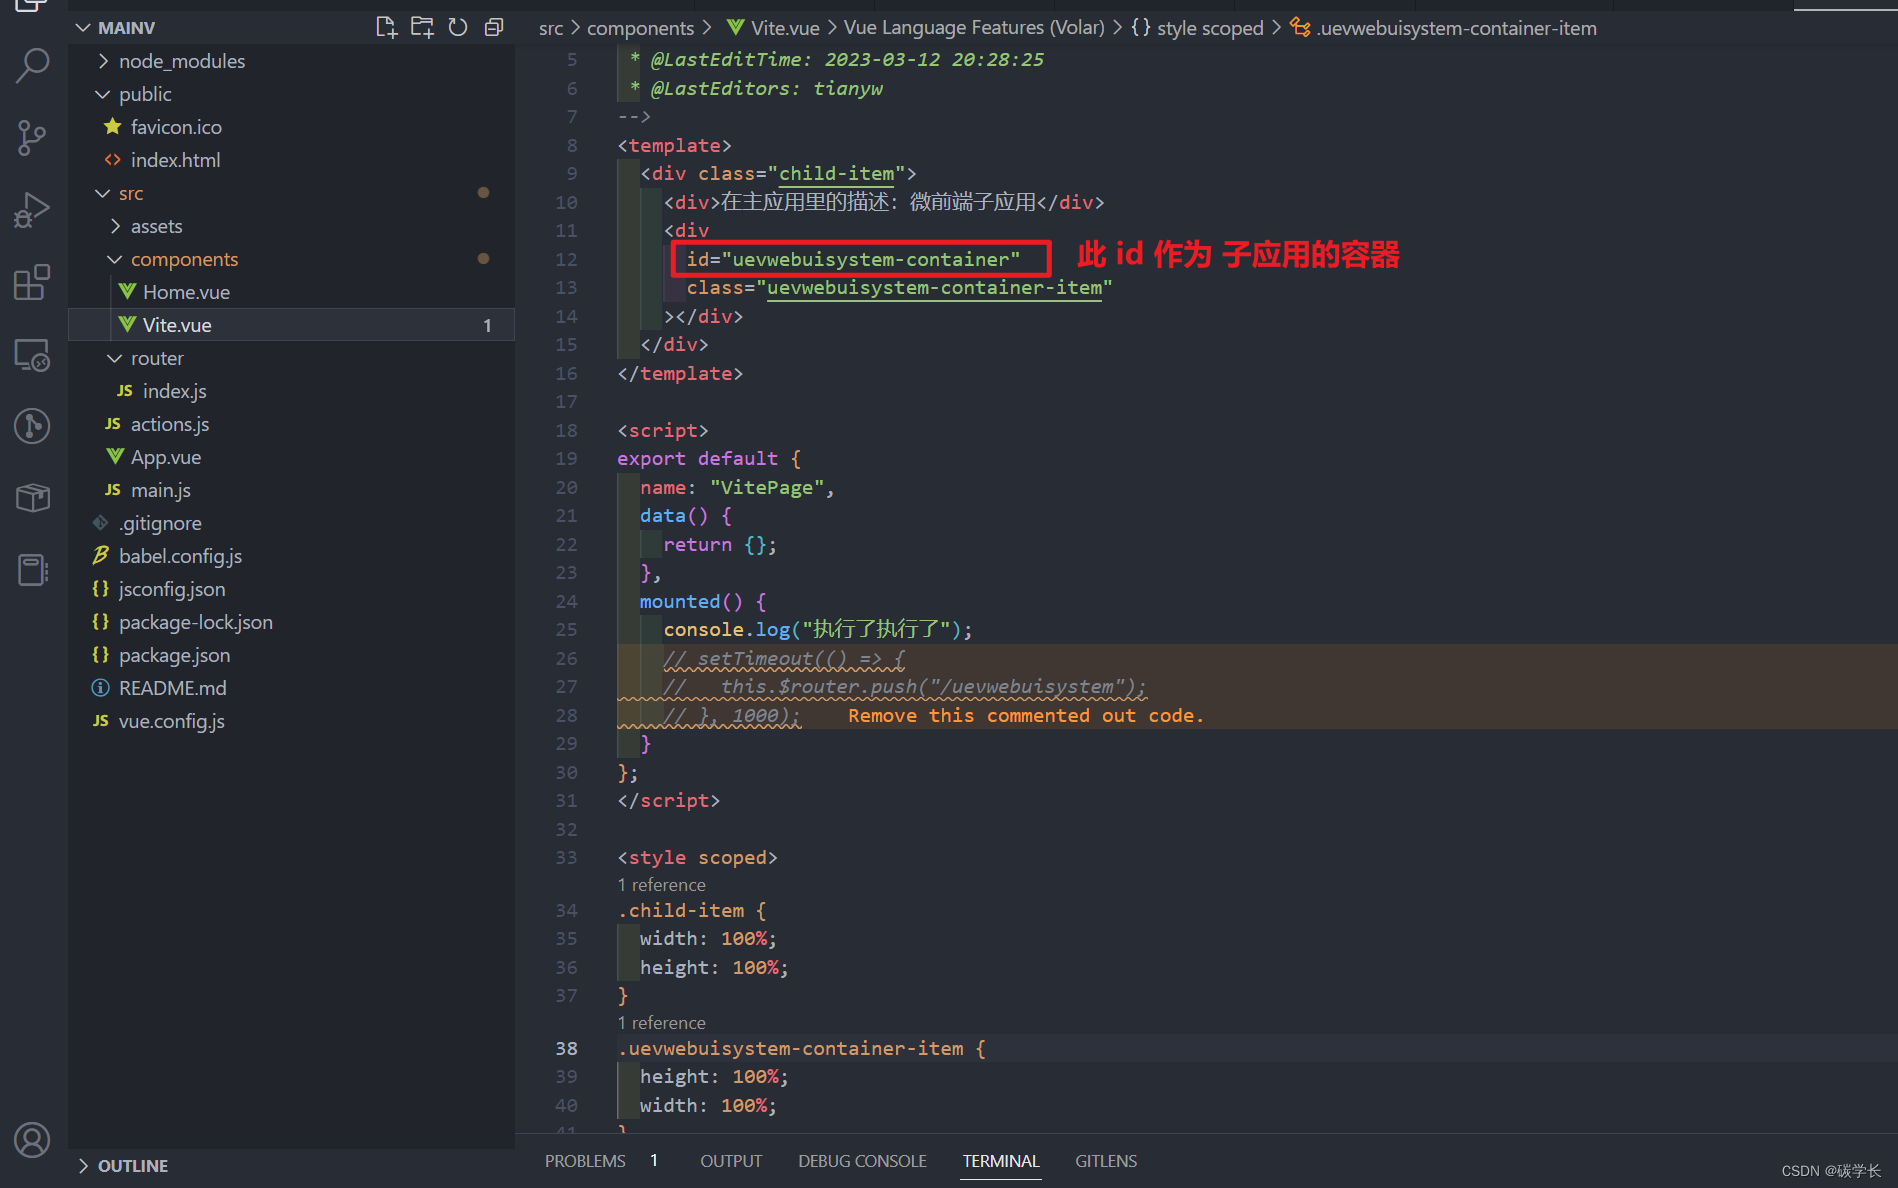
<!--
 * @Description:
 * @Author: tianyw
 * @Date: 2023-03-12 15:22:04
 * @LastEditTime: 2023-03-12 20:28:25
 * @LastEditors: tianyw
-->
<template>
  <div class="child-item">
    <div>在主应用里的描述:微前端子应用</div>
    <div
      id="uevwebuisystem-container"
      class="uevwebuisystem-container-item"
    ></div>
  </div>
</template>

<script>
export default {
  name: "VitePage",
  data() {
    return {};
  },
  mounted() {
    console.log("执行了执行了");
    // setTimeout(() => {
    //   this.$router.push("/uevwebuisystem");
    // }, 1000);
  }
};
</script>

<style scoped>
.child-item {
  width: 100%;
  height: 100%;
}
.uevwebuisystem-container-item {
  height: 100%;
  width: 100%;
}
</style>
至此,父应用关于 qiankun 的部分就定义完成了:配置了子应用的入口、名称等信息,定义了父子应用通信的方法,定义了在父应用更改父子应用通信的数据的方法等等。
2、子应用
这里用 uevwebui 作为子应用。
1、安装插件:vite-plugin-qiankun
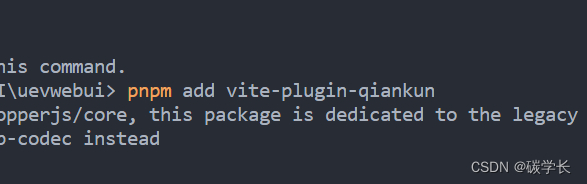
2、vite.config.ts 中配置 qiankun
主要是引入 qiankun 插件,需要确保微应用的名字的定义与在主应用定义要一致。
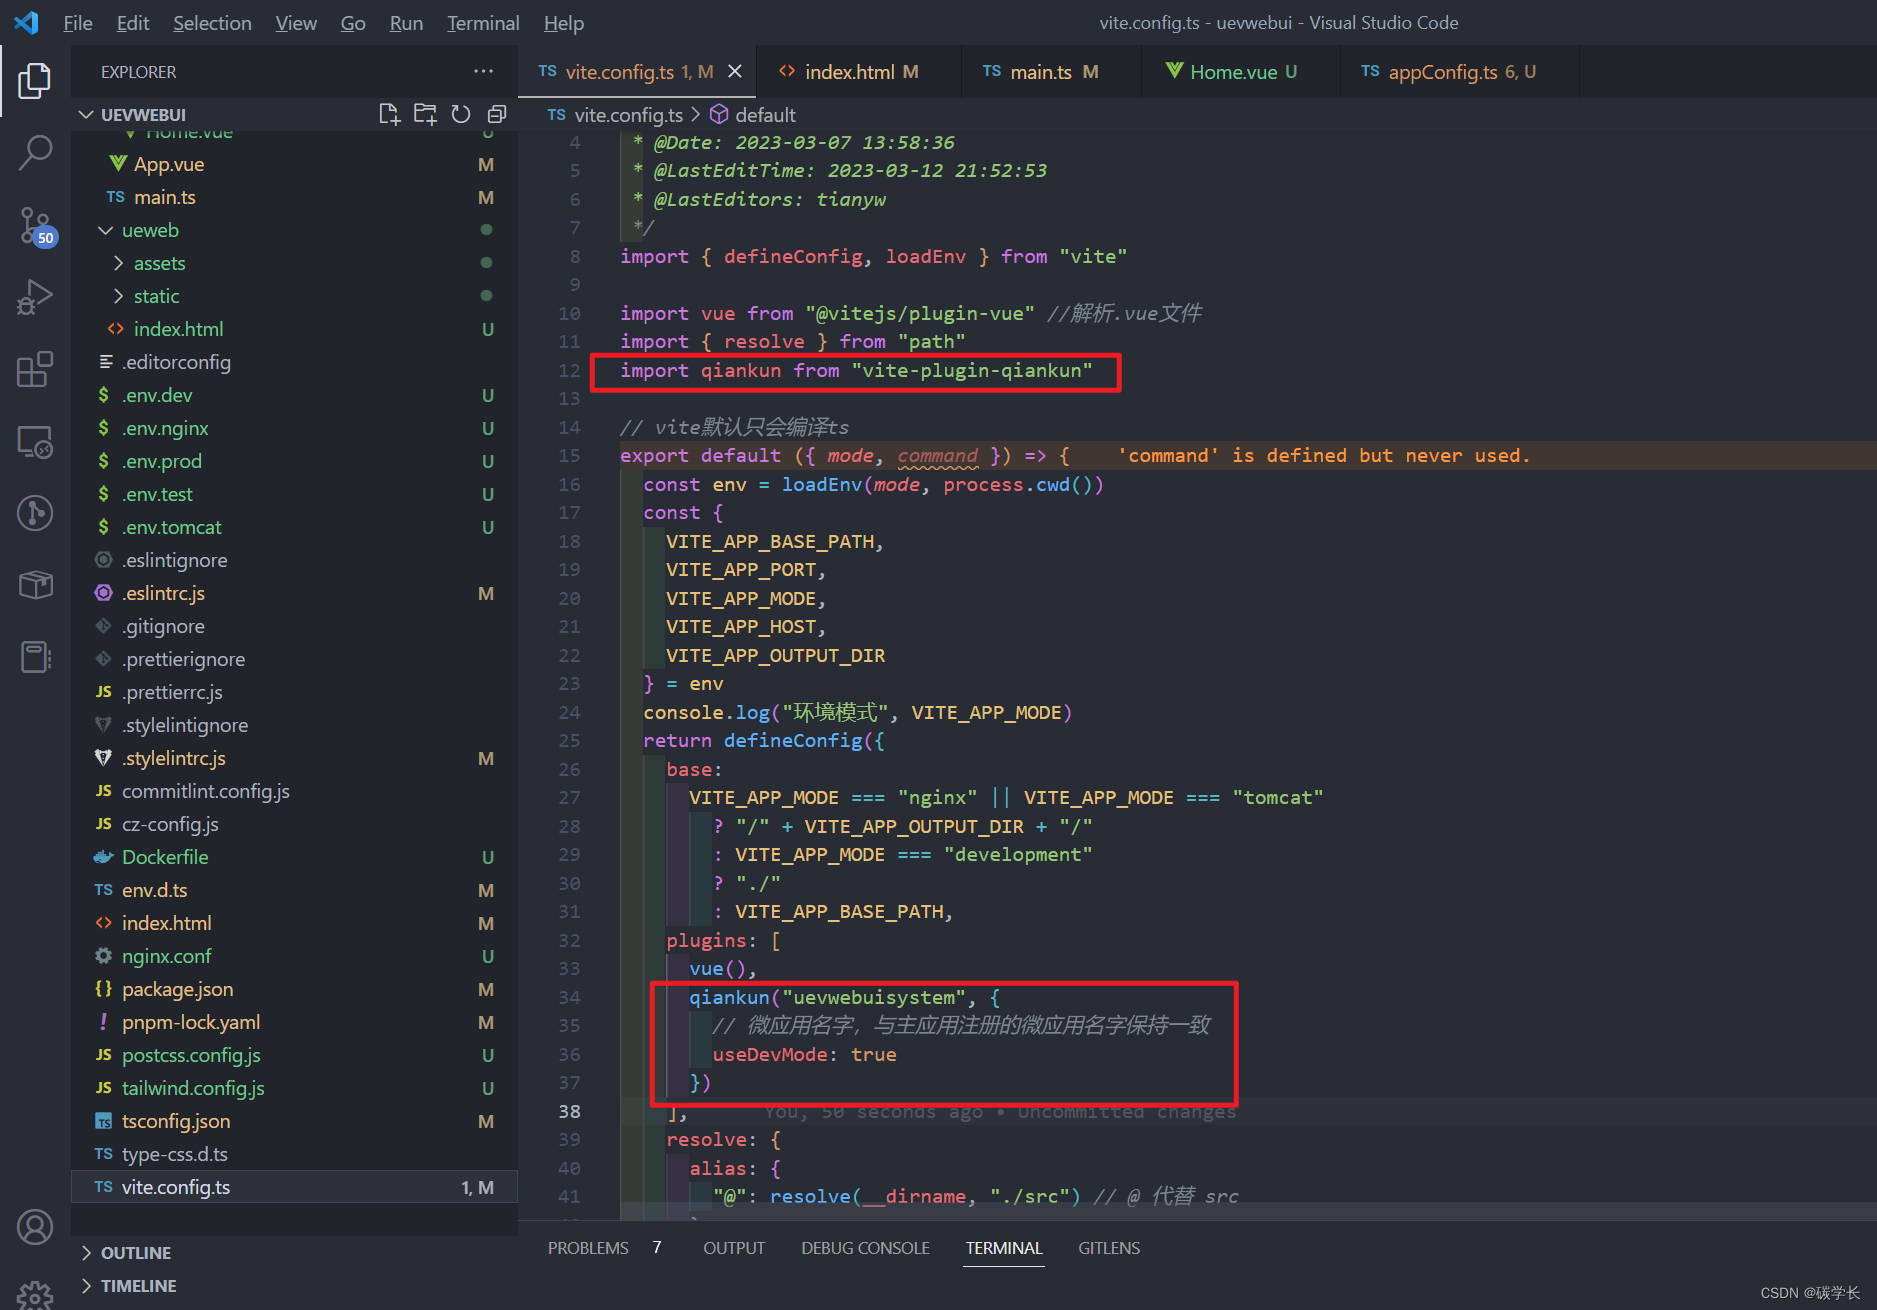
/*
 * @Description:
 * @Author: tianyw
 * @Date: 2023-03-07 13:58:36
 * @LastEditTime: 2023-03-12 21:52:53
 * @LastEditors: tianyw
 */
import {

     defineConfig, loadEnv } from "vite"

import vue from "@vitejs/plugin-vue" //解析.vue文件
import {

     resolve } from "path"
import qiankun from "vite-plugin-qiankun"

// vite默认只会编译ts
export default ({

     mode, command }) => {


  const env = loadEnv(mode, process.cwd())
  const {


    VITE_APP_BASE_PATH,
    VITE_APP_PORT,
    VITE_APP_MODE,
    VITE_APP_HOST,
    VITE_APP_OUTPUT_DIR
  } = env
  console.log("环境模式", VITE_APP_MODE)
  return defineConfig({


    base:
      VITE_APP_MODE === "nginx" || VITE_APP_MODE === "tomcat"
        ? "/" + VITE_APP_OUTPUT_DIR + "/"
        : VITE_APP_MODE === "development"
        ? "./"
        : VITE_APP_BASE_PATH,
    plugins: [
      vue(),
      qiankun("uevwebuisystem", {


        // 微应用名字,与主应用注册的微应用名字保持一致
        useDevMode: true
      })
    ],
    resolve: {


      alias: {


        "@": resolve(__dirname, "./src") // @ 代替 src
      }
    },
    server: {


      // 是否开启 https
      https: false,
      // 端口号 监听端口
      port: parseInt(VITE_APP_PORT),
      // 监听所有地址
      host: VITE_APP_HOST,
      base: VITE_APP_BASE_PATH,
      origin: `http://${

      VITE_APP_HOST}:${

      parseInt(VITE_APP_PORT)}`, // 项目 baseUrl,解决主应用中出现静态地址 404 问题
      // 服务启动时是否自动打开浏览器
      open: true,
      // 允许跨域
      cors: true,
      // 配置跨域请求头
      headers: {


        "Access-Control-Allow-Origin": "*"
      },
      // 自定义代理规则
      proxy: {

    }
    },
    build: {


      // 设置最终构建的浏览器兼容目标
      target: "es2015",
      outDir: VITE_APP_OUTPUT_DIR,
      // 构建后是否生成 source map 文件
      sourcemap: false,
      // chunk 大小警告的限制(以 kbs 为单位)
      chunkSizeWarningLimit: 2000,
      // 启用/禁用 gzip 压缩大小报告
      reportCompressedSize: false
    },
    css: {


      // css 预处理器
      preprocessorOptions: {


        scss: {


          // 引入 全局 scss
          additionalData: '@import "@/styles/index.scss";'
        },
        less: {


          javascriptEnabled: true
        }
      },
      postcss: {


        plugins: [require("tailwindcss"), require("autoprefixer")]
      }
    }
  })
}
3、main.ts 的配置
这里主要设置了 3 个内容:
1、路由创建需要判断是否是从主应用中通过 qiankun 的方式 还是子应用本身
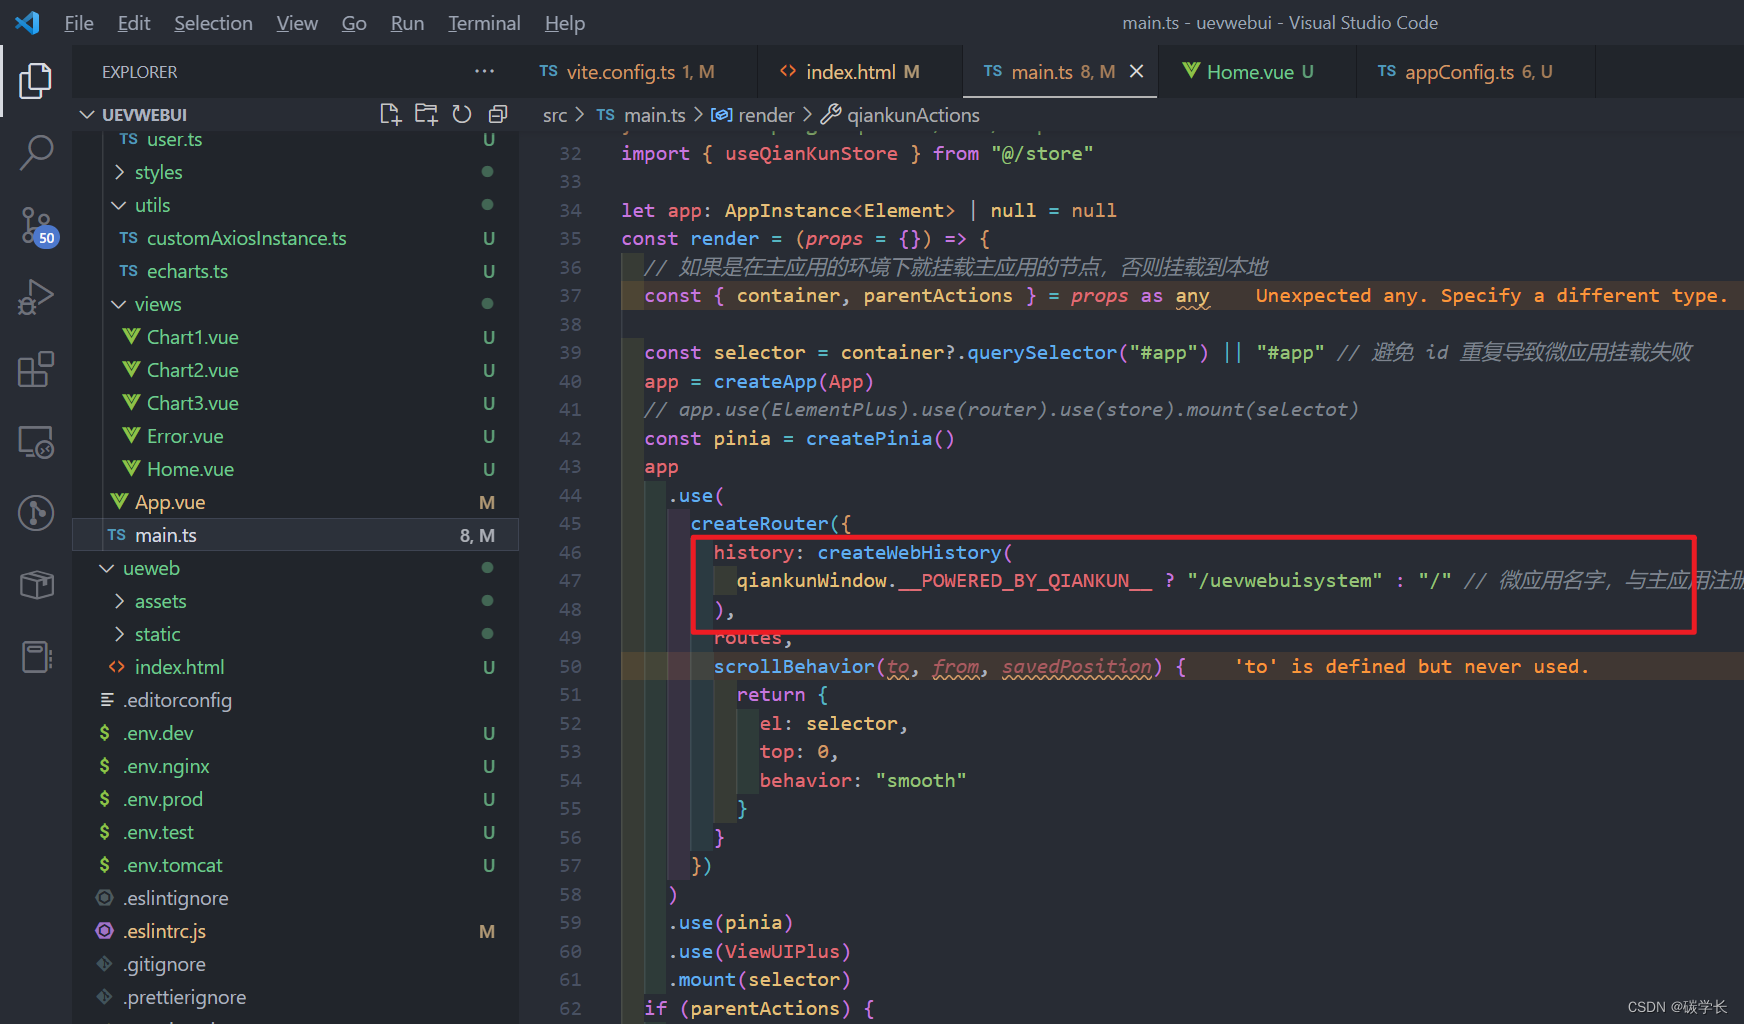
2、在子应用中获取 父应用传来的参数,用来进行父子应用的通信以及子应用内部全局通信参数的修改等

3、启用 qiankun 的方法以及 qiankun 声明周期函数的定义与使用等
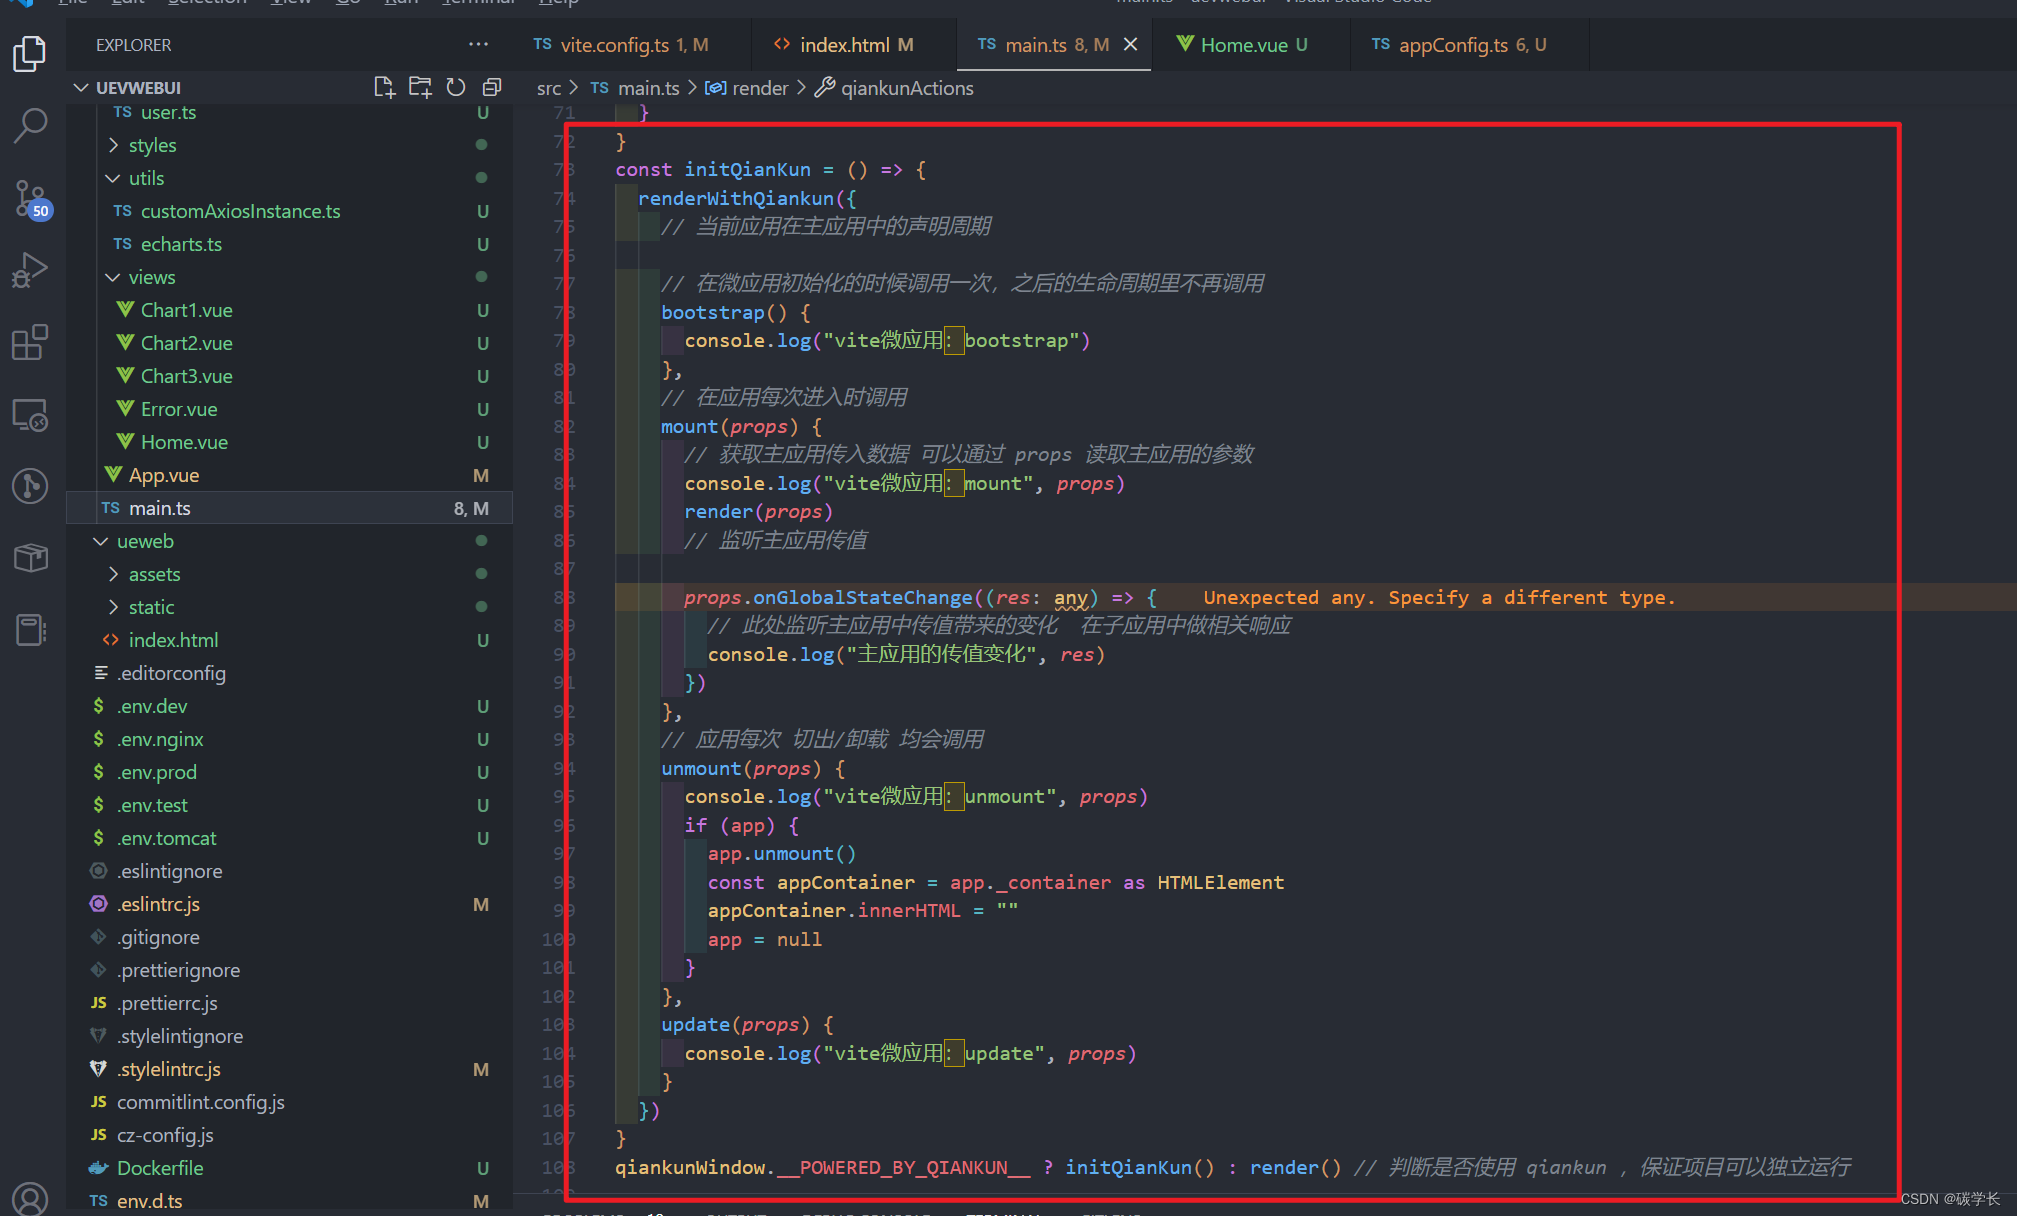
main.ts 的完整内容:
/*
 * @Description:
 * @Author: tianyw
 * @Date: 2023-03-07 13:51:24
 * @LastEditTime: 2023-03-12 21:48:50
 * @LastEditors: tianyw
 */

import {

     createApp, App as AppInstance } from "vue"
import {


  createRouter,
  createWebHistory,
  Router,
  RouterHistory,
  RouterOptions
} from "vue-router"
import App from "./App.vue"
import {

     routes } from "./router"
import {

     createPinia } from "pinia"
// 引入 view-ui-plus
import ViewUIPlus from "view-ui-plus"
import "view-ui-plus/dist/styles/viewuiplus.css"
// 引入 tailwind.css 及其他 css
import "@/styles/index.css"
// 引入动画
import "animate.css"
// 引入乾坤插件
import {


  renderWithQiankun,
  qiankunWindow
} from "vite-plugin-qiankun/dist/helper"
import {

     useQianKunStore } from "@/store"

let app: AppInstance<Element> | null = null
const render = (props = {

    }) => {


  // 如果是在主应用的环境下就挂载主应用的节点,否则挂载到本地
  const {

     container, parentActions } = props as any

  const selector = container?.querySelector("#app") || "#app" // 避免 id 重复导致微应用挂载失败
  app = createApp(App)
  // app.use(ElementPlus).use(router).use(store).mount(selectot)
  const pinia = createPinia()
  app
    .use(
      createRouter({


        history: createWebHistory(
          qiankunWindow.__POWERED_BY_QIANKUN__ ? "/uevwebuisystem" : "/" // 微应用名字,与主应用注册的微应用名字保持一致
        ),
        routes,
        scrollBehavior(to, from, savedPosition) {


          return {


            el: selector,
            top: 0,
            behavior: "smooth"
          }
        }
      })
    )
    .use(pinia)
    .use(ViewUIPlus)
    .mount(selector)
  if (parentActions) {


    // 主应用的通信方法 挂载到子应用的全局方法中 便于全局调用
    const qiankunStore = useQianKunStore()
    qiankunStore.setQianKun({


      isQianKun: true,
      qiankunProps: props,
      qiankunActions: parentActions
    })
    // 这里的 parentActions 定义了 getGlobalState、onGlobalStateChange、setGlobalState 等方法
  }
}
const initQianKun = () => {


  renderWithQiankun({


    // 当前应用在主应用中的声明周期

    // 在微应用初始化的时候调用一次,之后的生命周期里不再调用
    bootstrap() {


      console.log("vite微应用:bootstrap")
    },
    // 在应用每次进入时调用
    mount(props) {


      // 获取主应用传入数据 可以通过 props 读取主应用的参数
      console.log("vite微应用:mount", props)
      render(props)
      // 监听主应用传值

      props.onGlobalStateChange((res: any) => {


        // 此处监听主应用中传值带来的变化  在子应用中做相关响应
        console.log("主应用的传值变化", res)
      })
    },
    // 应用每次 切出/卸载 均会调用
    unmount(props) {


      console.log("vite微应用:unmount", props)
      if (app) {


        app.unmount()
        const appContainer = app._container as HTMLElement
        appContainer.innerHTML = ""
        app = null
      }
    },
    update(props) {


      console.log("vite微应用:update", props)
    }
  })
}
qiankunWindow.__POWERED_BY_QIANKUN__ ? initQianKun() : render() // 判断是否使用 qiankun ,保证项目可以独立运行
4、qiankun 通信的 pinia 定义
1、store 文件夹下新建 qiankun.ts,用于获取从父应用中传过来的参数
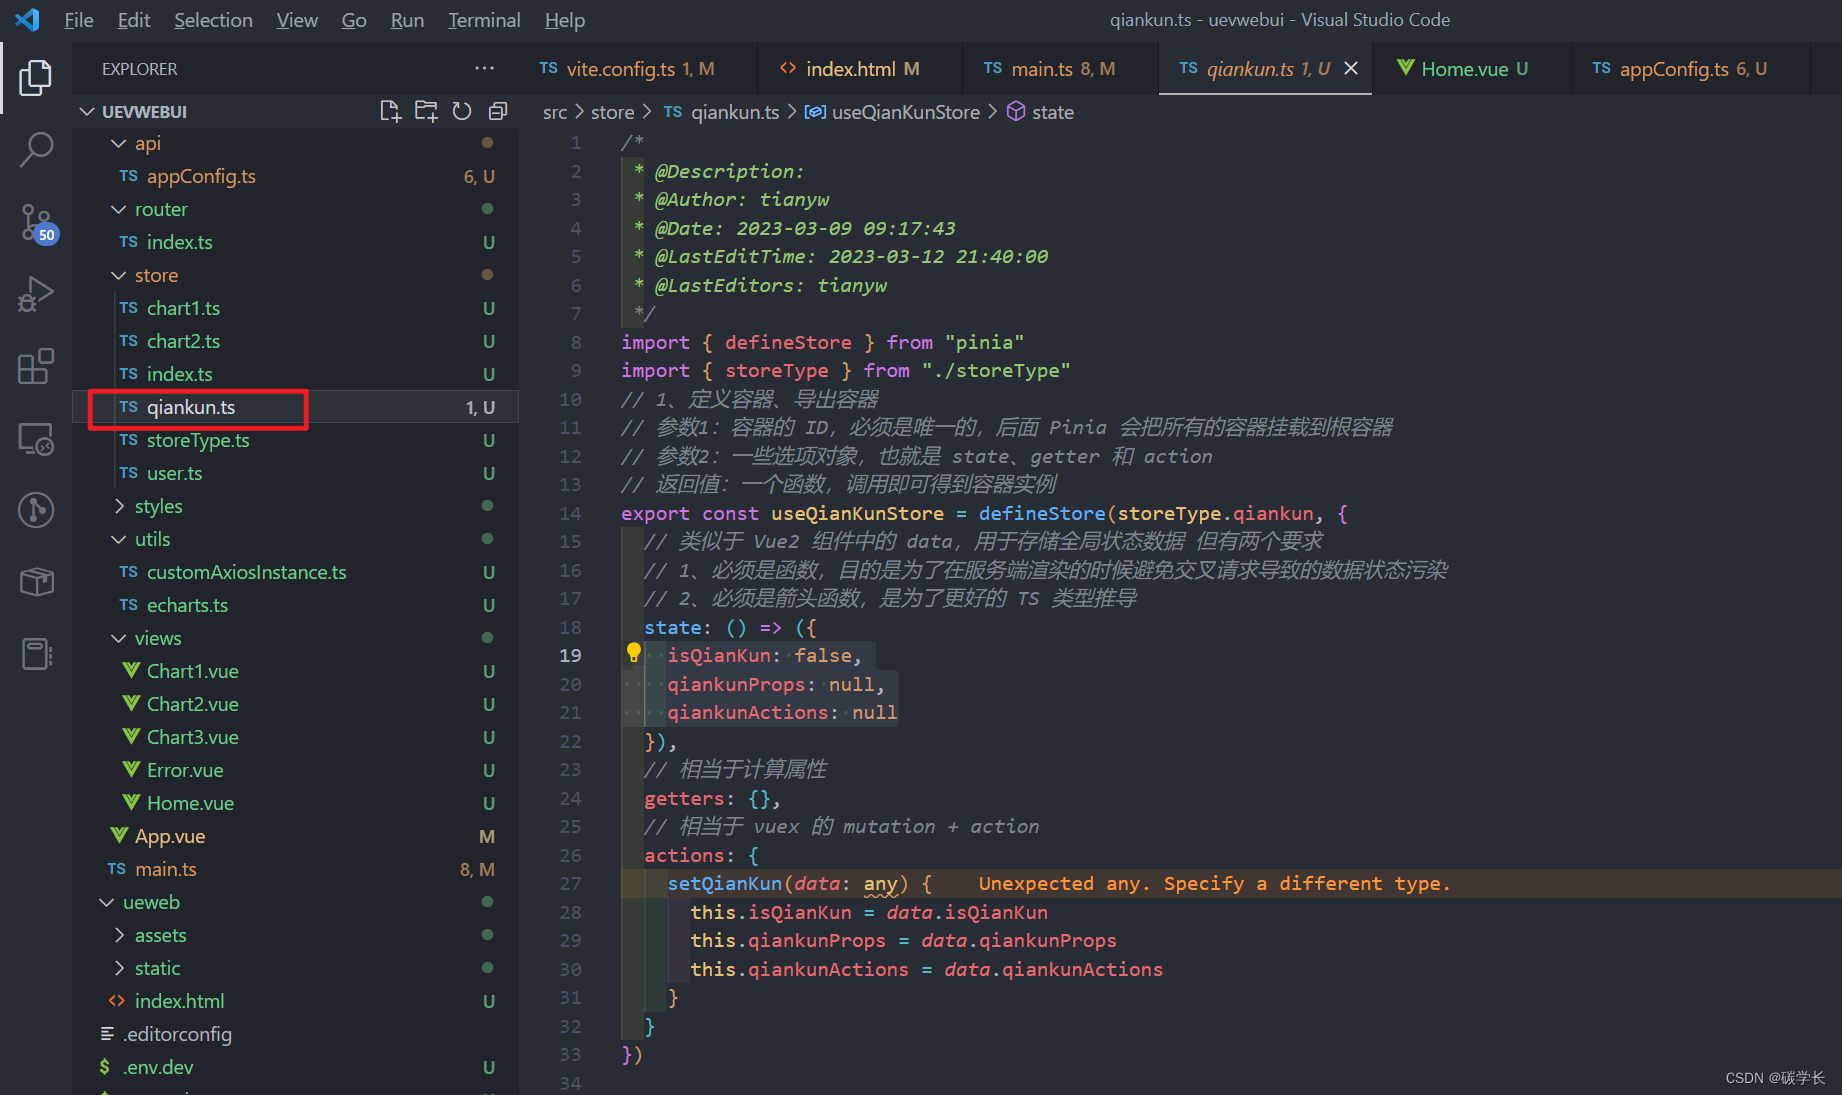
qiankun.ts 文件内容:
/*
 * @Description:
 * @Author: tianyw
 * @Date: 2023-03-09 09:16:19
 * @LastEditTime: 2023-03-12 21:44:25
 * @LastEditors: tianyw
 */
import {

     useUserStore } from "./user"
import {

     useChart1Store } from "./chart1"
import {

     useChart2Store } from "./chart2"
import {

     useQianKunStore } from "./qiankun"

export {

     useUserStore, useChart1Store, useChart2Store, useQianKunStore }
2、storeType.ts 新增 qiankun 类型,用于 pinia 的定义
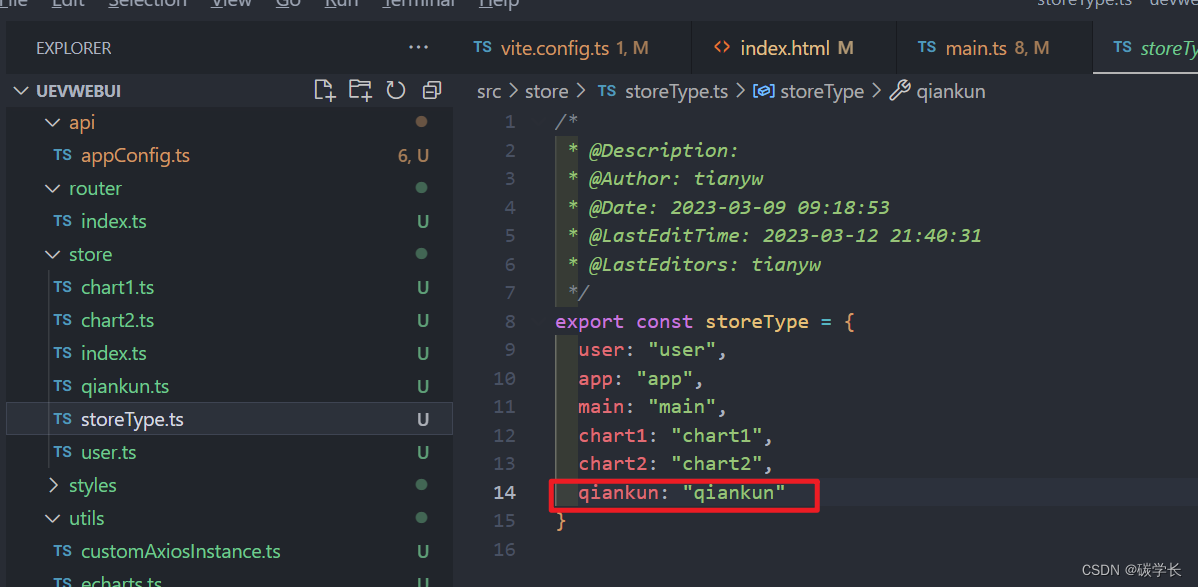
storeType.ts 文件内容:
/*
 * @Description:
 * @Author: tianyw
 * @Date: 2023-03-09 09:18:53
 * @LastEditTime: 2023-03-12 21:40:31
 * @LastEditors: tianyw
 */
export const storeType = {


  user: "user",
  app: "app",
  main: "main",
  chart1: "chart1",
  chart2: "chart2",
  qiankun: "qiankun"
}
3、在 store/index.ts 中定义 qiankun 的方法的暴露
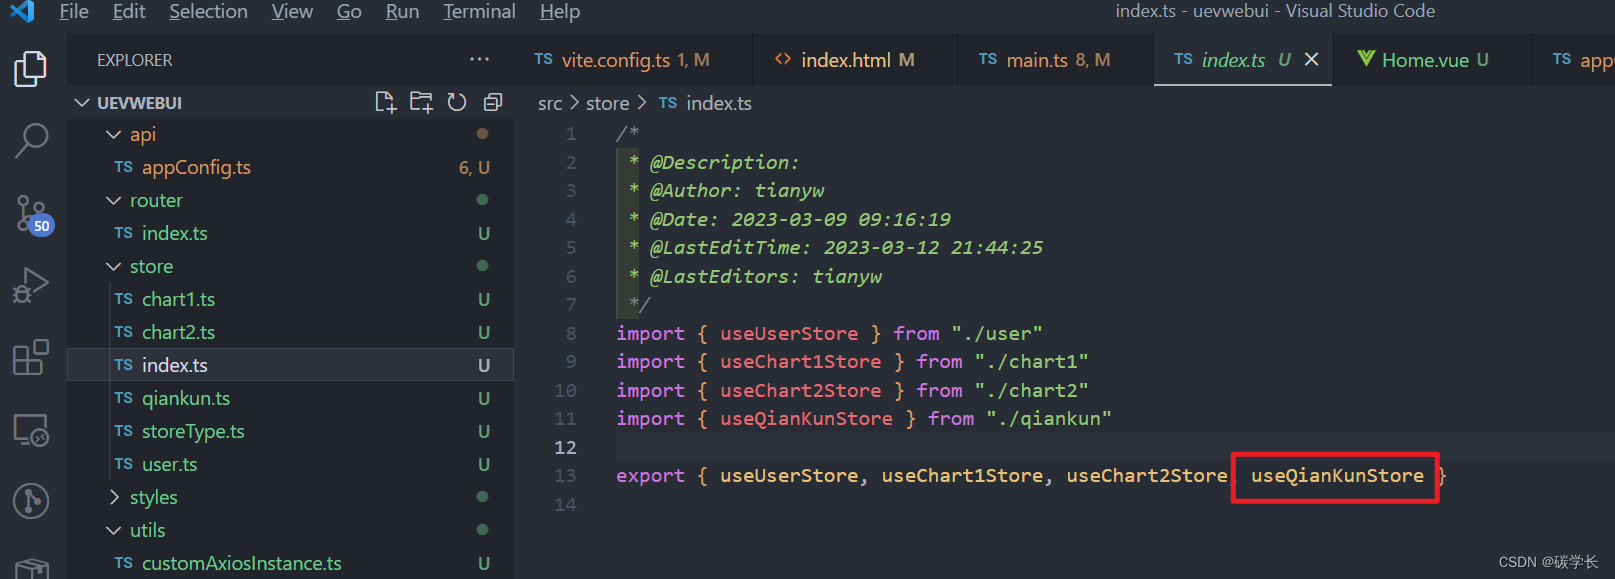
/*
 * @Description:
 * @Author: tianyw
 * @Date: 2023-03-09 09:16:19
 * @LastEditTime: 2023-03-12 21:44:25
 * @LastEditors: tianyw
 */
import { useUserStore } from "./user"
import { useChart1Store } from "./chart1"
import { useChart2Store } from "./chart2"
import { useQianKunStore } from "./qiankun"

export { useUserStore, useChart1Store, useChart2Store, useQianKunStore }
5、在子应用的 vue 界面中使用 通信方法
这里在 Home.vue 中定义了如何使用方法进行父子应用的全局通信、修改等
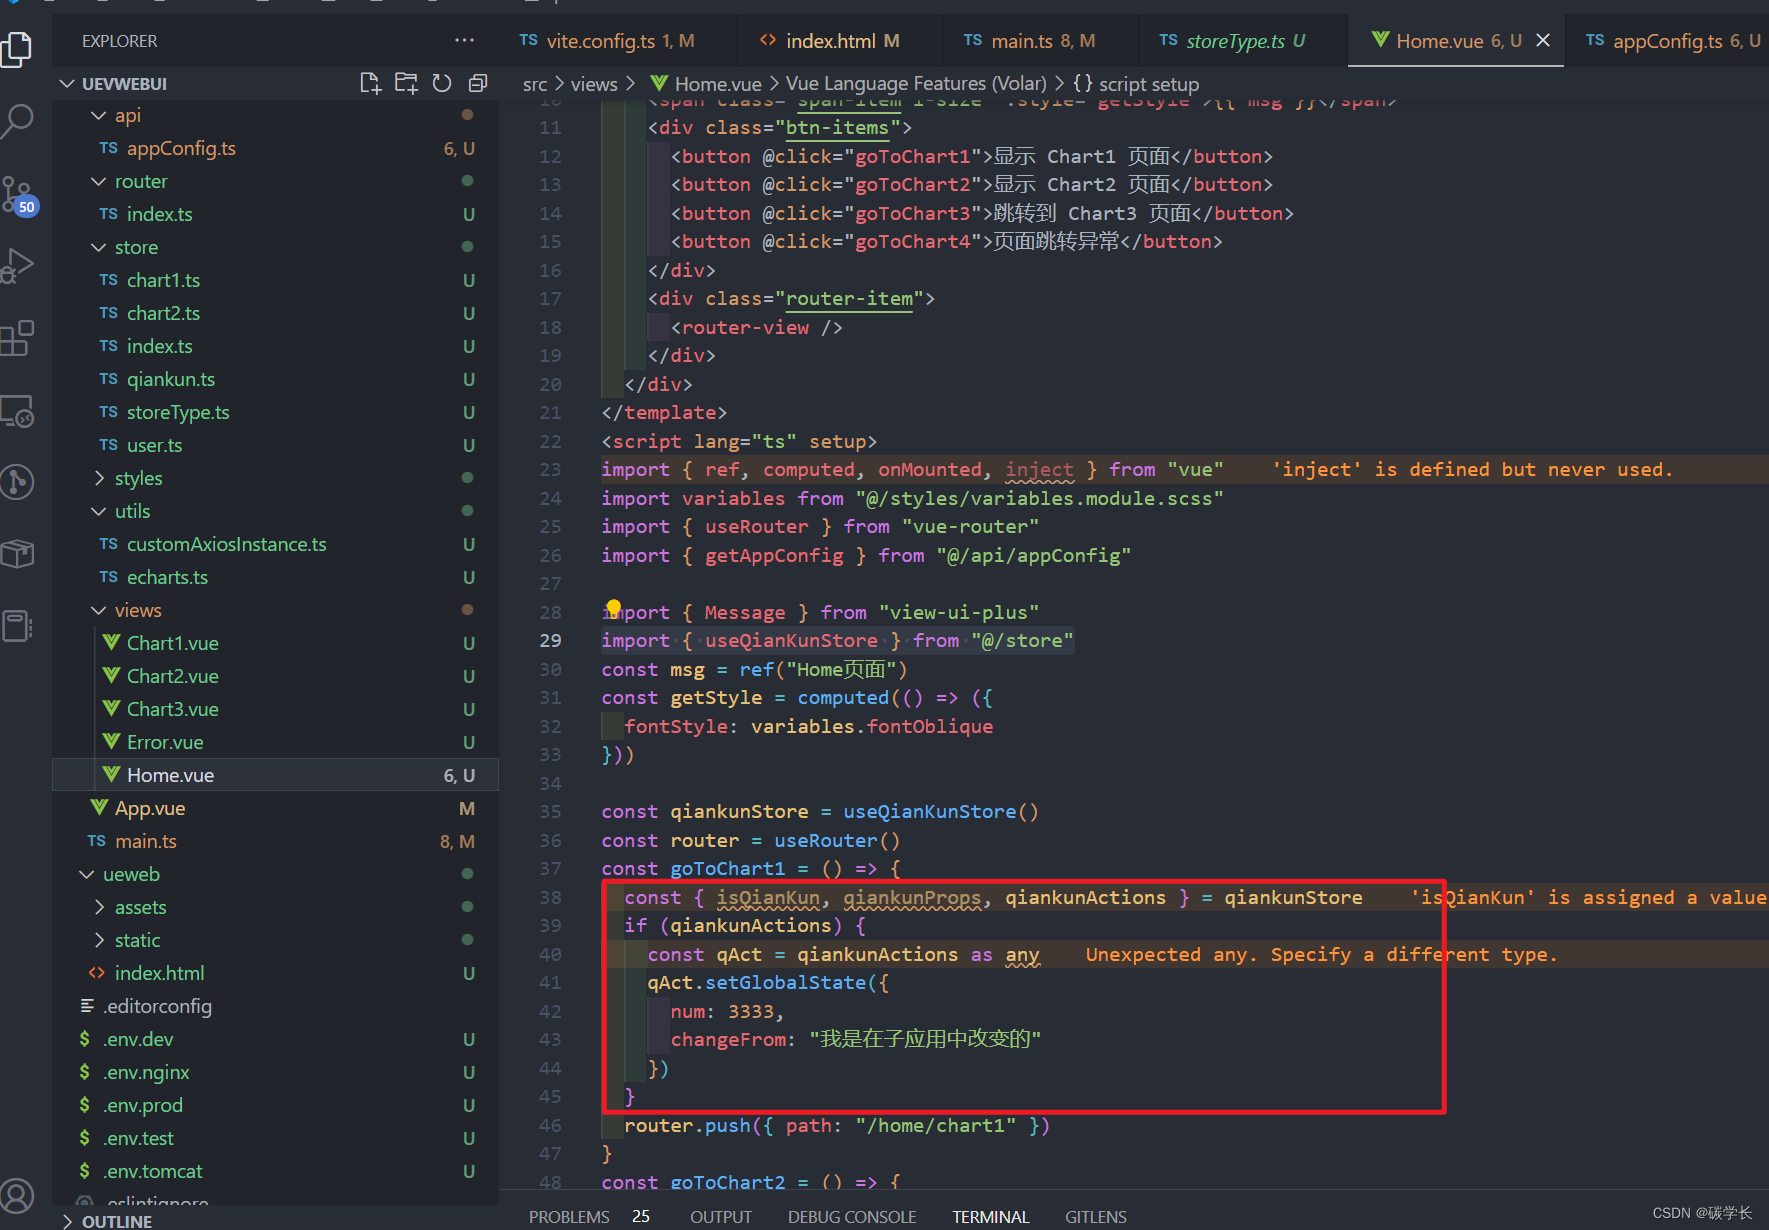
Home.vue 的完整内容:
<!--
 * @Description:
 * @Author: tianyw
 * @Date: 2023-03-08 15:54:13
 * @LastEditTime: 2023-03-12 21:47:15
 * @LastEditors: tianyw
-->
<template>
  <div class="home-item">
    <span class="span-item l-size" :style="getStyle">{

   { msg }}</span>
    <div class="btn-items">
      <button @click="goToChart1">显示 Chart1 页面</button>
      <button @click="goToChart2">显示 Chart2 页面</button>
      <button @click="goToChart3">跳转到 Chart3 页面</button>
      <button @click="goToChart4">页面跳转异常</button>
    </div>
    <div class="router-item">
      <router-view />
    </div>
  </div>
</template>
<script lang="ts" setup>
import { ref, computed, onMounted, inject } from "vue"
import variables from "@/styles/variables.module.scss"
import { useRouter } from "vue-router"
import { getAppConfig } from "@/api/appConfig"

import { Message } from "view-ui-plus"
import { useQianKunStore } from "@/store"
const msg = ref("Home页面")
const getStyle = computed(() => ({
  fontStyle: variables.fontOblique
}))

const qiankunStore = useQianKunStore()
const router = useRouter()
const goToChart1 = () => {
  const { isQianKun, qiankunProps, qiankunActions } = qiankunStore
  if (qiankunActions) {
    const qAct = qiankunActions as any
    qAct.setGlobalState({
      num: 3333,
      changeFrom: "我是在子应用中改变的"
    })
  }
  router.push({ path: "/home/chart1" })
}
const goToChart2 = () => {
  router.push({ path: "/home/chart2" })
}
const goToChart3 = () => {
  router.push({ path: "/chart3" })
}
const goToChart4 = () => {
  Message.error("路由跳转异常!")
  router.push({ path: "/chart4" })
}
onMounted(async () => {
  const resultConfig = await getAppConfig()
  console.log(resultConfig)
})
</script>
<style lang="scss" scoped>
.home-item {
  width: 100%;
  height: 100%;
}
.span-item {
  font-weight: bold;
  border-style: $B-DOTTED;
  border-width: 2px;
  background: $BG-1890ff;
}
.btn-items {
  margin-top: 0.8rem;
}
.router-item {
  width: 100%;
  height: 100%;
}
</style>
3、解决 qiankun 跳转导致的子应用中读取子应用 public/static 静态资源的问题
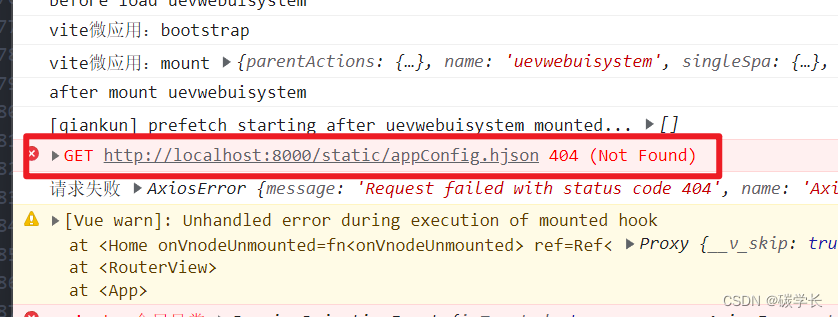
主要原因是获取资源的请求路径问题,需要判断是否是从主应用的 qiankun 的方法进入的子应用,修改如下:
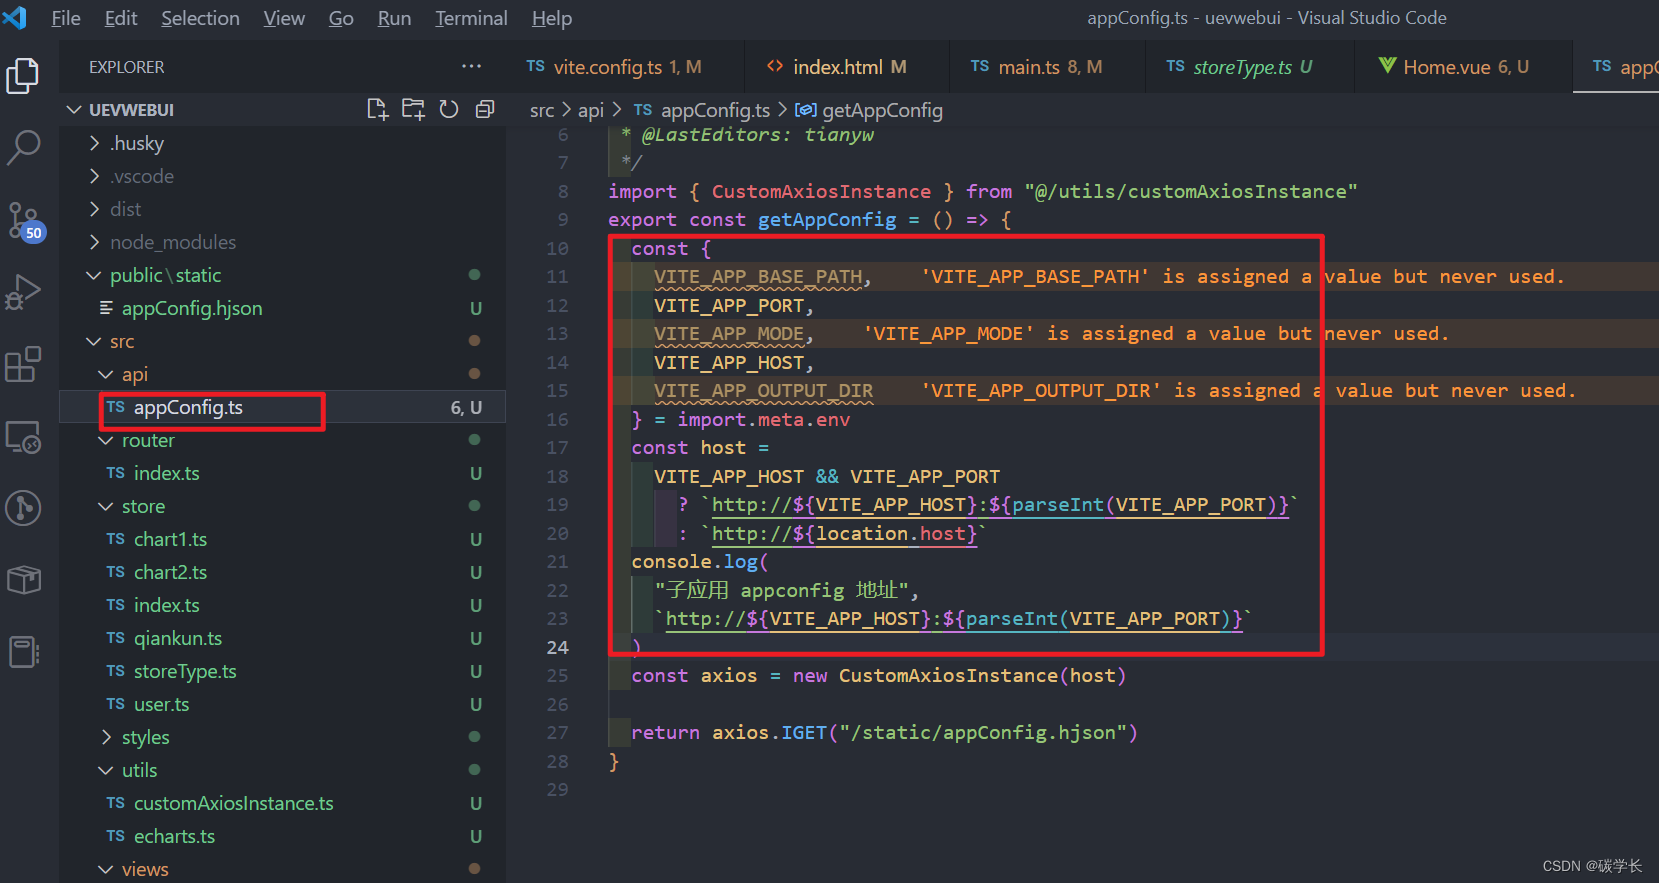
appConfig.ts 文件完整内容:
/*
 * @Description:
 * @Author: tianyw
 * @Date: 2023-03-09 20:23:19
 * @LastEditTime: 2023-03-12 21:56:48
 * @LastEditors: tianyw
 */
import {

     CustomAxiosInstance } from "@/utils/customAxiosInstance"
export const getAppConfig = () => {


  const {


    VITE_APP_BASE_PATH,
    VITE_APP_PORT,
    VITE_APP_MODE,
    VITE_APP_HOST,
    VITE_APP_OUTPUT_DIR
  } = import.meta.env
  const host =
    VITE_APP_HOST && VITE_APP_PORT
      ? `http://${

      VITE_APP_HOST}:${

      parseInt(VITE_APP_PORT)}`
      : `http://${

      location.host}`
  console.log(
    "子应用 appconfig 地址",
    `http://${

      VITE_APP_HOST}:${

      parseInt(VITE_APP_PORT)}`
  )
  const axios = new CustomAxiosInstance(host)

  return axios.IGET("/static/appConfig.hjson")
}
4、运行效果
可以看到:父应用可以正常加载子应用;父应用内部可以更改通信消息;子应用内部也可以更改通信消息;父、子应用的消息更改,两个应用都可以监听得到;子应用的样式、资源等都正常显示,没有确实、异常等。
至此,初步引入 qiankun 的完整流程就实现了。
52、静态资源引入与配置
1、src 目录下新建 assets,assets 下分别新建 fonts(存放字体文件)、images(存放图片)、jsons(存放 json 文件)、svgs (存放 svg)
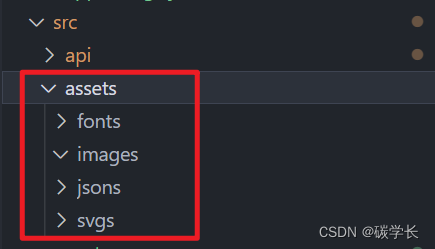
2、字体
1、在 iconfont 字体库 上下载一个或多个字体。
2、将字体文件放入 src/assets/fonts 对应的文件夹下
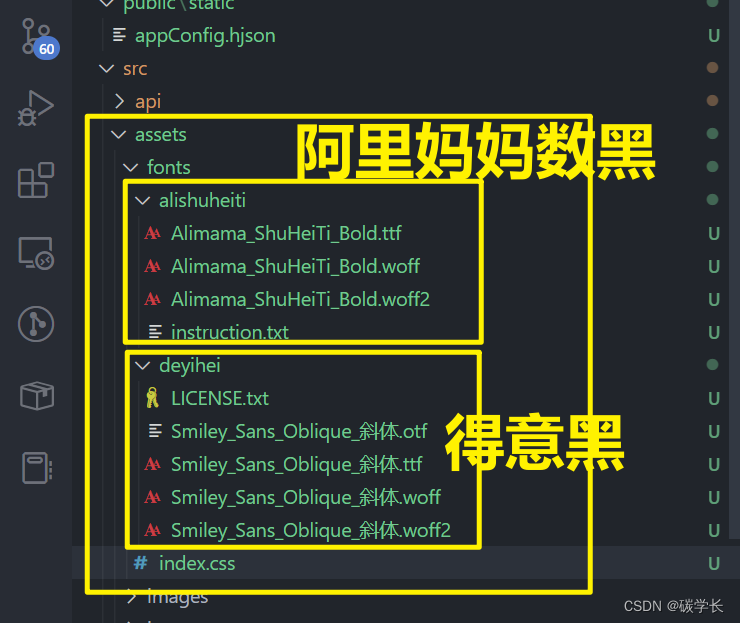
3、fonts 下新建 index.css 设置字体,作为字体的统一入口
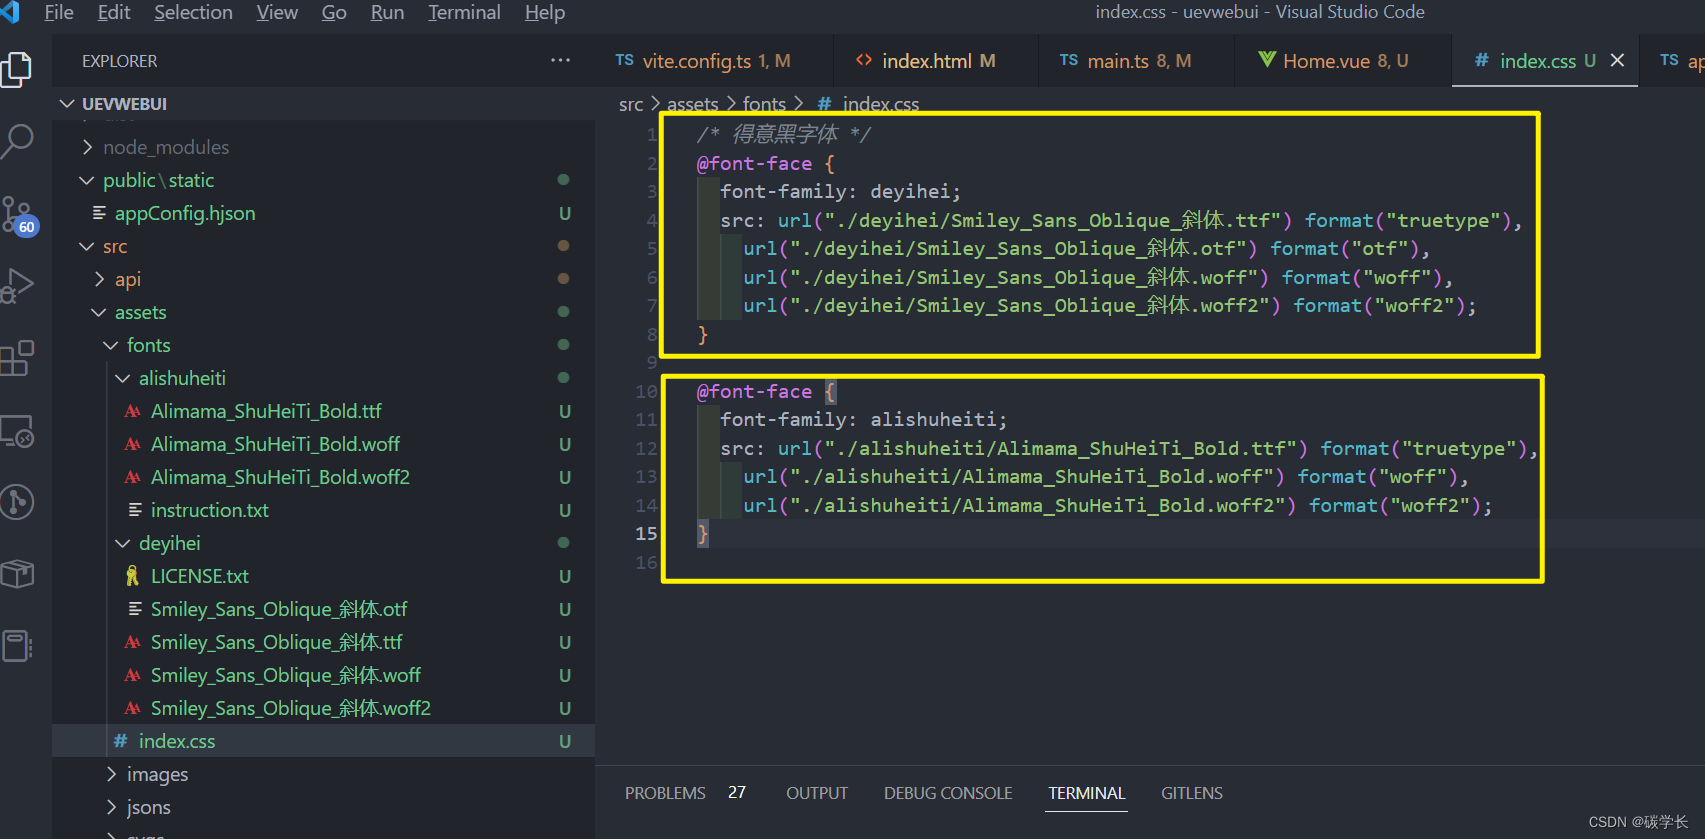
/* 得意黑字体 */
@font-face {


  font-family: deyihei;
  src: url("./deyihei/Smiley_Sans_Oblique_斜体.ttf") format("truetype"),
    url("./deyihei/Smiley_Sans_Oblique_斜体.otf") format("otf"),
    url("./deyihei/Smiley_Sans_Oblique_斜体.woff") format("woff"),
    url("./deyihei/Smiley_Sans_Oblique_斜体.woff2") format("woff2");
}

@font-face {


  font-family: alishuheiti;
  src: url("./alishuheiti/Alimama_ShuHeiTi_Bold.ttf") format("truetype"),
    url("./alishuheiti/Alimama_ShuHeiTi_Bold.woff") format("woff"),
    url("./alishuheiti/Alimama_ShuHeiTi_Bold.woff2") format("woff2");
}
4、main.ts 中 引入 字体的 index.css
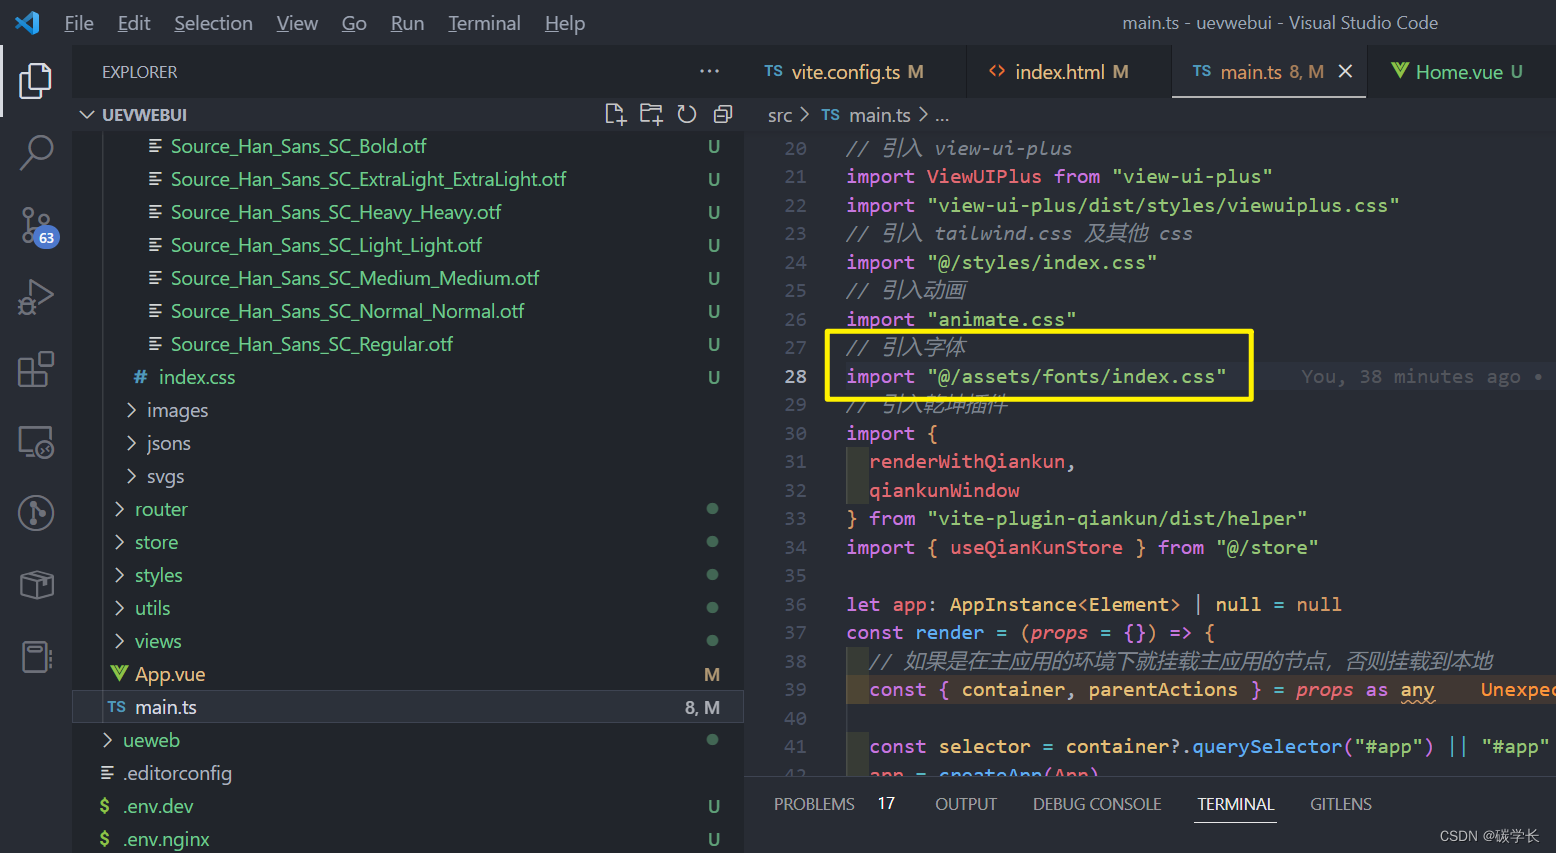
5、vue 文件中使用
这里在 Home.vue 中对两个 button 设置了字体
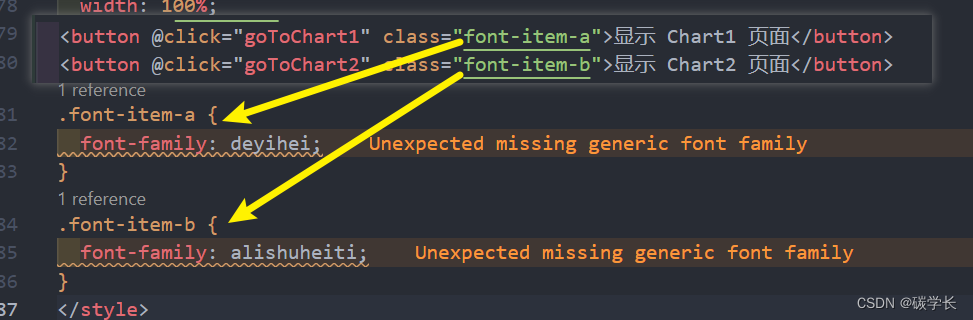
6、运行项目,查看效果
可以看到,两种字体都生效了。
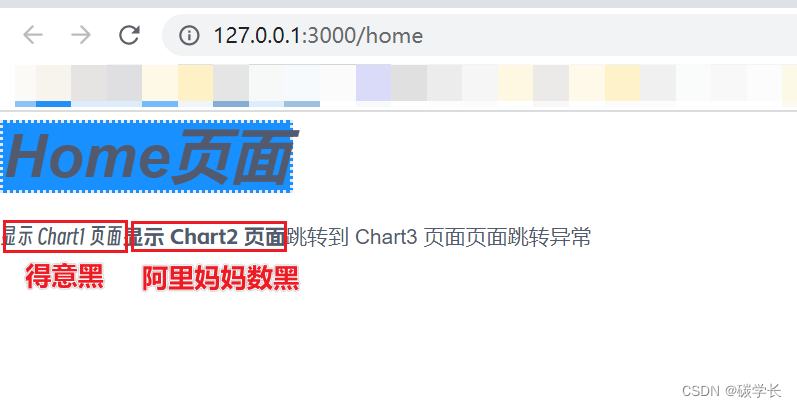
至此,字体的引入就实现了。
3、images、jsons
1、找几个图片放入 images,新建一个 json 文件放入 jsons 。
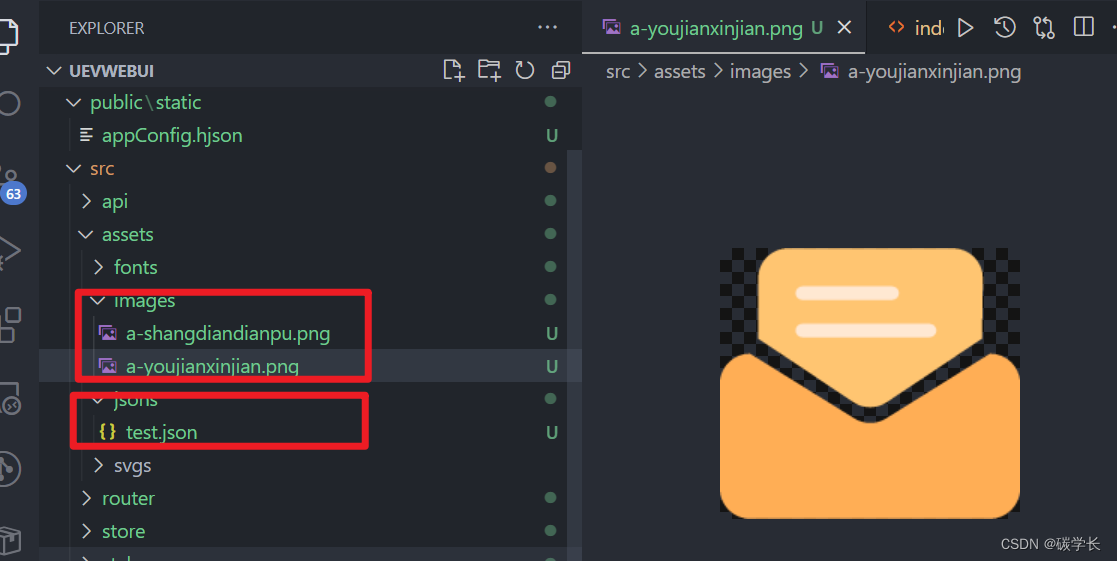
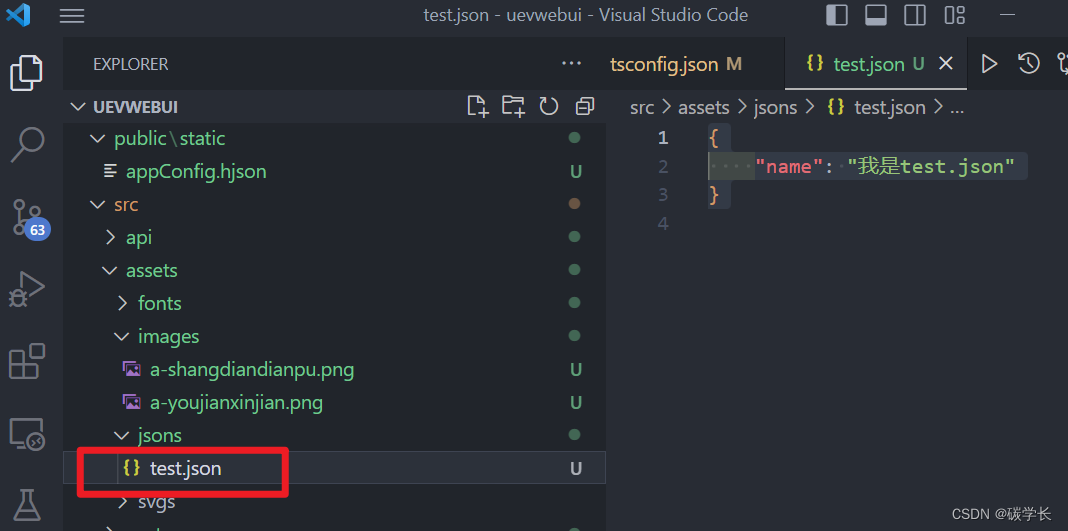
2、修改配置,支持相对路径引用
tsconfig.json 中新增 resolveJsonModule: true 和 “@assets/*” 的内容,具体如下:
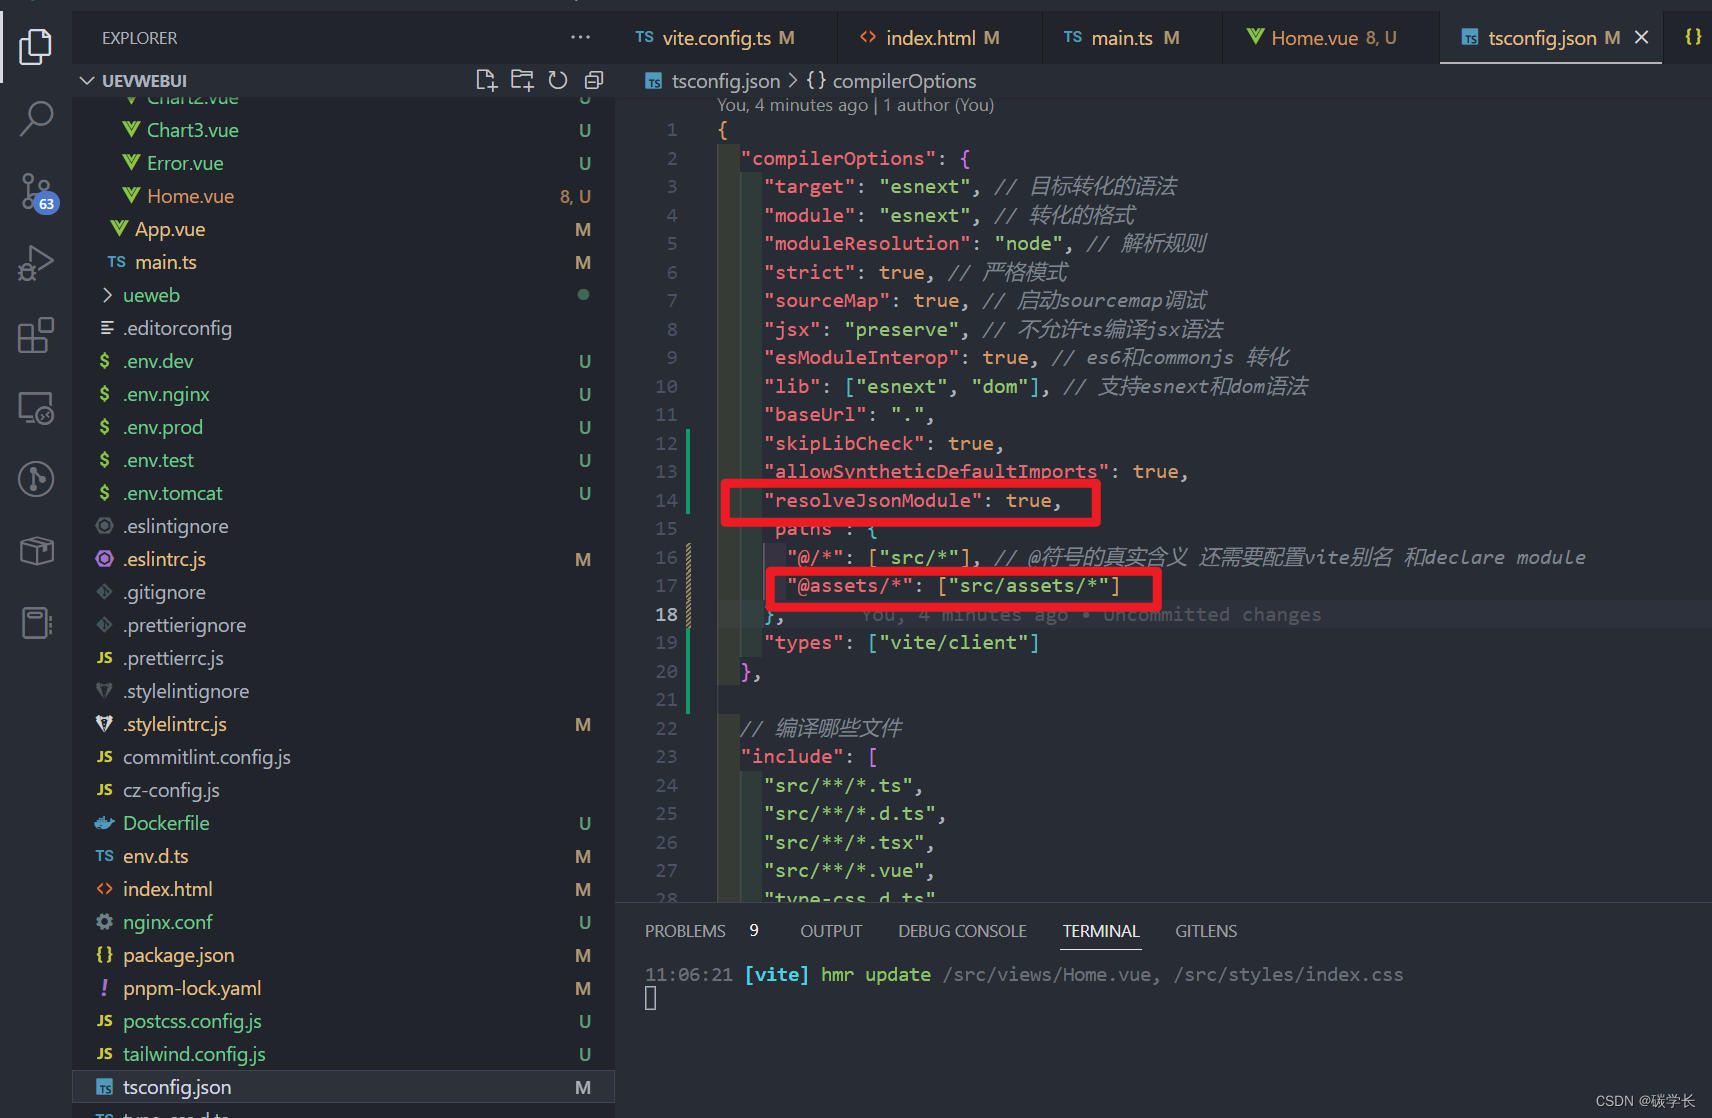
tsconfig.json 完整内容:
{


  "compilerOptions": {


    "target": "esnext", // 目标转化的语法
    "module": "esnext", // 转化的格式
    "moduleResolution": "node", // 解析规则
    "strict": true, // 严格模式
    "sourceMap": true, // 启动sourcemap调试
    "jsx": "preserve", // 不允许ts编译jsx语法
    "esModuleInterop": true, // es6和commonjs 转化
    "lib": ["esnext", "dom"], // 支持esnext和dom语法
    "baseUrl": ".",
    "skipLibCheck": true,
    "allowSyntheticDefaultImports": true,
    "resolveJsonModule": true,
    "paths": {


      "@/*": ["src/*"], // @符号的真实含义 还需要配置vite别名 和declare module
      "@assets/*": ["src/assets/*"]
    },
    "types": ["vite/client"]
  },

  // 编译哪些文件
  "include": [
    "src/**/*.ts",
    "src/**/*.d.ts",
    "src/**/*.tsx",
    "src/**/*.vue",
    "type-css.d.ts"
  ],
  "exclude": ["node_modules"]
}
vite.config.ts 中新增 @assets 配置,具体如下:
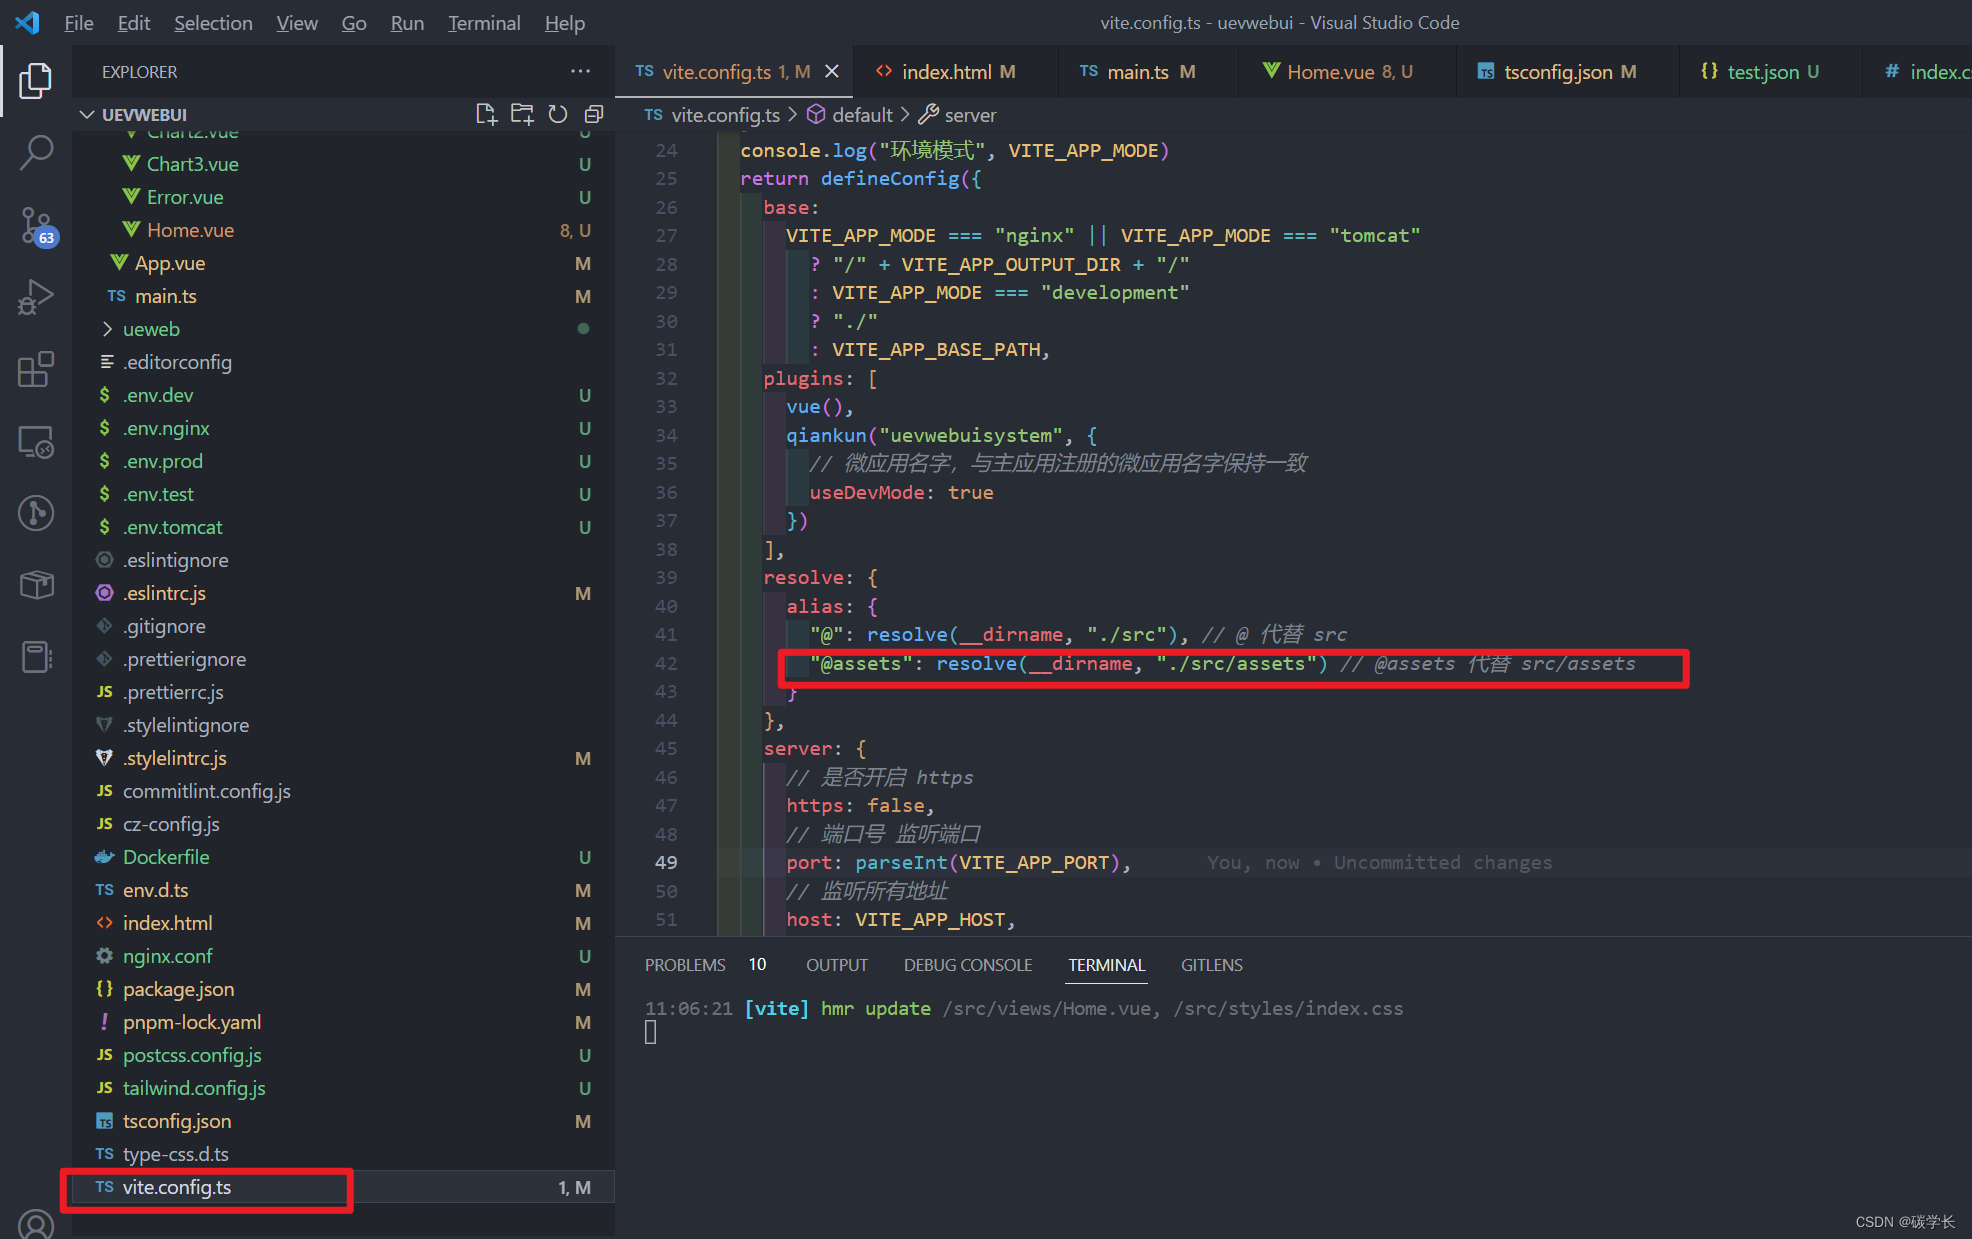
vite.config.ts 完整内容:
/*
 * @Description:
 * @Author: tianyw
 * @Date: 2023-03-07 13:58:36
 * @LastEditTime: 2023-03-13 10:35:54
 * @LastEditors: tianyw
 */
import {

     defineConfig, loadEnv } from "vite"

import vue from "@vitejs/plugin-vue" //解析.vue文件
import {

     resolve } from "path"
import qiankun from "vite-plugin-qiankun"

// vite默认只会编译ts
export default ({

     mode, command }) => {


  const env = loadEnv(mode, process.cwd())
  const {


    VITE_APP_BASE_PATH,
    VITE_APP_PORT,
    VITE_APP_MODE,
    VITE_APP_HOST,
    VITE_APP_OUTPUT_DIR
  } = env
  console.log("环境模式", VITE_APP_MODE)
  return defineConfig({


    base:
      VITE_APP_MODE === "nginx" || VITE_APP_MODE === "tomcat"
        ? "/" + VITE_APP_OUTPUT_DIR + "/"
        : VITE_APP_MODE === "development"
        ? "./"
        : VITE_APP_BASE_PATH,
    plugins: [
      vue(),
      qiankun("uevwebuisystem", {


        // 微应用名字,与主应用注册的微应用名字保持一致
        useDevMode: true
      })
    ],
    resolve: {


      alias: {


        "@": resolve(__dirname, "./src"), // @ 代替 src
        "@assets": resolve(__dirname, "./src/assets") // @assets 代替 src/assets
      }
    },
    server: {


      // 是否开启 https
      https: false,
      // 端口号 监听端口
      port: parseInt(VITE_APP_PORT),
      // 监听所有地址
      host: VITE_APP_HOST,
      base: VITE_APP_BASE_PATH,
      origin: `http://${

      VITE_APP_HOST}:${

      parseInt(VITE_APP_PORT)}`, // 项目 baseUrl,解决主应用中出现静态地址 404 问题
      // 服务启动时是否自动打开浏览器
      open: true,
      // 允许跨域
      cors: true,
      // 配置跨域请求头
      headers: {


        "Access-Control-Allow-Origin": "*"
      },
      // 自定义代理规则
      proxy: {

    }
    },
    build: {


      // 设置最终构建的浏览器兼容目标
      target: "es2015",
      outDir: VITE_APP_OUTPUT_DIR,
      // 构建后是否生成 source map 文件
      sourcemap: false,
      // chunk 大小警告的限制(以 kbs 为单位)
      chunkSizeWarningLimit: 2000,
      // 启用/禁用 gzip 压缩大小报告
      reportCompressedSize: false
    },
    css: {


      // css 预处理器
      preprocessorOptions: {


        scss: {


          // 引入 全局 scss
          additionalData: '@import "@/styles/index.scss";'
        },
        less: {


          javascriptEnabled: true
        }
      },
      postcss: {


        plugins: [require("tailwindcss"), require("autoprefixer")]
      }
    }
  })
}
3、vue 文件中使用,这里在 Home.vue 中进行使用,具体如下:
Vite 中已经内置了对于 JSON 文件的解析,底层使用 @rollup/pluginutils 的 dataToEsm 方法将 JSON 对象转换为一个包含各种具名导出的 ES 模块,使用如下:
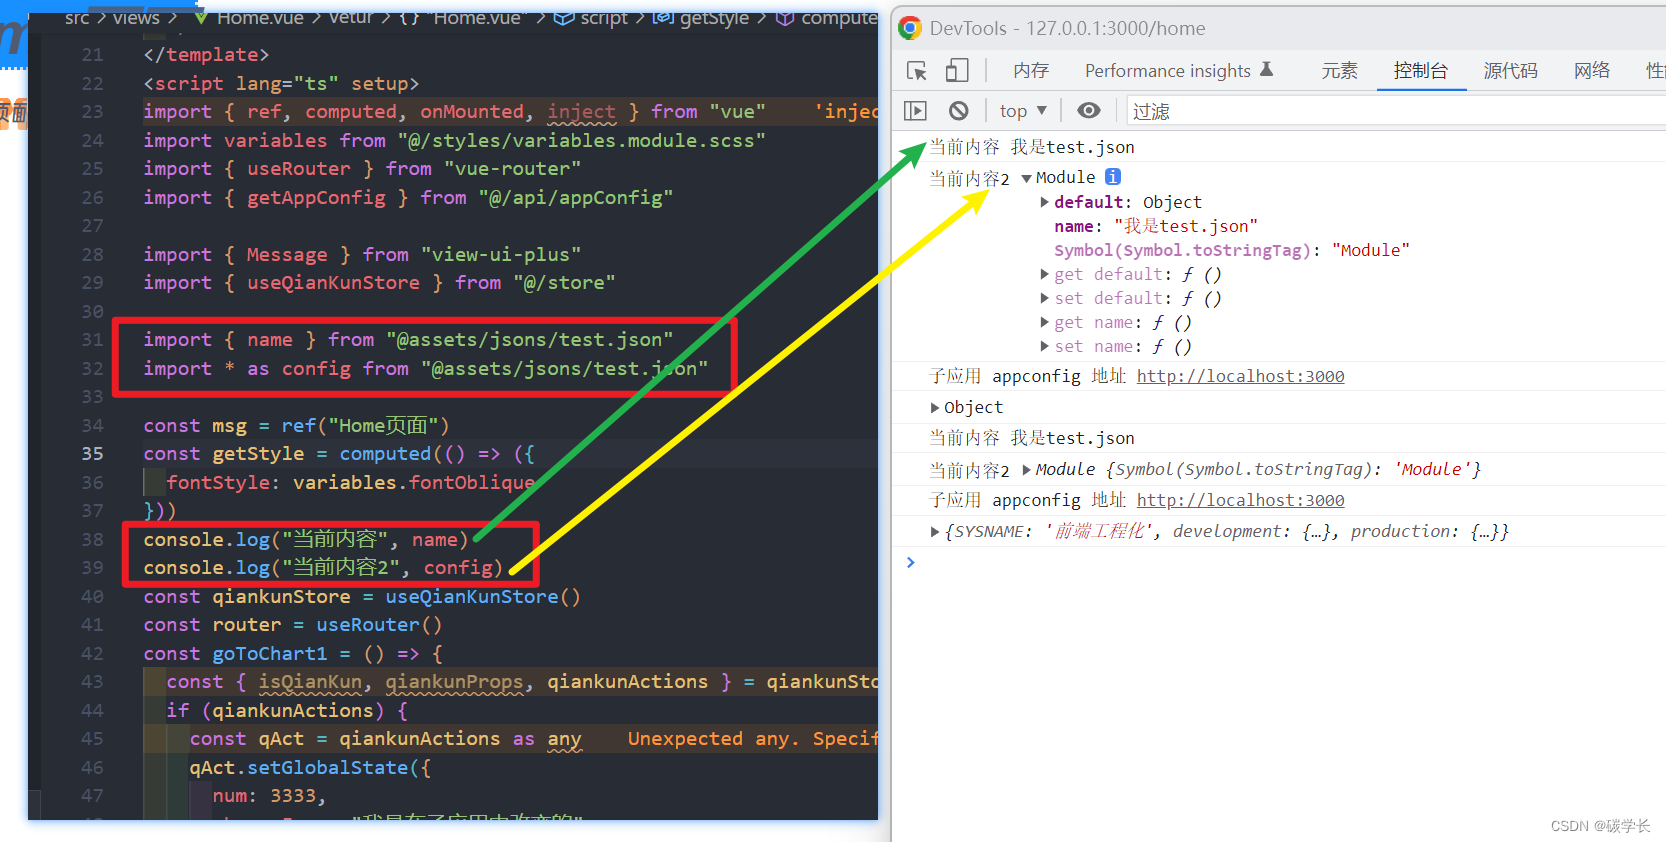
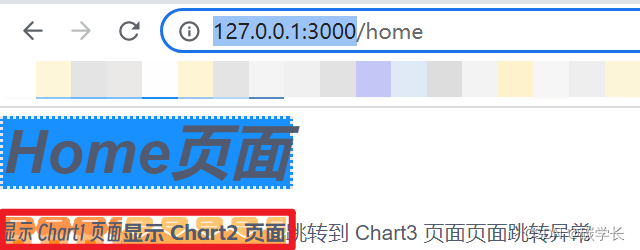
可以看到 json 和 图片都生效了。
Home.vue 完整内容如下:
<!--
 * @Description:
 * @Author: tianyw
 * @Date: 2023-03-08 15:54:13
 * @LastEditTime: 2023-03-13 11:05:25
 * @LastEditors: tianyw
-->
<template>
  <div class="home-item">
    <span class="span-item l-size" :style="getStyle">{

    {

     msg }}</span>
    <div class="btn-items">
      <button @click="goToChart1" class="font-item-a">显示 Chart1 页面</button>
      <button @click="goToChart2" class="font-item-b">显示 Chart2 页面</button>
      <button @click="goToChart3">跳转到 Chart3 页面</button>
      <button @click="goToChart4">页面跳转异常</button>
    </div>
    <div class="router-item">
      <router-view />
    </div>
  </div>
</template>
<script lang="ts" setup>
import {

     ref, computed, onMounted, inject } from "vue"
import variables from "@/styles/variables.module.scss"
import {

     useRouter } from "vue-router"
import {

     getAppConfig } from "@/api/appConfig"

import {

     Message } from "view-ui-plus"
import {

     useQianKunStore } from "@/store"

import {

     name } from "@assets/jsons/test.json"
import * as config from "@assets/jsons/test.json"

const msg = ref("Home页面")
const getStyle = computed(() => ({


  fontStyle: variables.fontOblique
}))
console.log("当前内容", name)
console.log("当前内容2", config)
const qiankunStore = useQianKunStore()
const router = useRouter()
const goToChart1 = () => {


  const {

     isQianKun, qiankunProps, qiankunActions } = qiankunStore
  if (qiankunActions) {


    const qAct = qiankunActions as any
    qAct.setGlobalState({


      num: 3333,
      changeFrom: "我是在子应用中改变的"
    })
  }
  router.push({

     path: "/home/chart1" })
}
const goToChart2 = () => {


  router.push({

     path: "/home/chart2" })
}
const goToChart3 = () => {


  router.push({

     path: "/chart3" })
}
const goToChart4 = () => {


  Message.error("路由跳转异常!")
  router.push({

     path: "/chart4" })
}
onMounted(async () => {


  const resultConfig = await getAppConfig()
  console.log(resultConfig)
})
</script>
<style lang="scss" scoped>
.home-item {


  width: 100%;
  height: 100%;
}
.span-item {


  font-weight: bold;
  border-style: $B-DOTTED;
  border-width: 2px;
  background: $BG-1890ff;
}
.btn-items {


  margin-top: 0.8rem;
}
.router-item {


  width: 100%;
  height: 100%;
}
.font-item-a {


  font-family: deyihei;
  background: url("@assets/images/a-shangdiandianpu.png");
  background-size: contain;
}
.font-item-b {


  font-family: alishuheiti;
  background: url("@assets/images/a-youjianxinjian.png");
  background-size: contain;
}
</style>
至此 images、jsons 就已经引入完成了。
4、svg
1、找几个 svg 放入 svgs 文件夹
SVG 组件加载在不同的前端框架中的实现不太相同,社区中也已经了有了对应的插件支持:
- Vue2 项目中可以使用 vite-plugin-vue2-svg 插件。
- Vue3 项目中可以引入 vite-svg-loader 。
- React 项目使用 vite-plugin-svgr 插件。
此处项目用的是 Vue3.
2、安装 svg 插件:vite-svg-loader
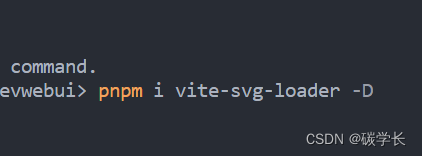
3、vite.config.ts 中配置 svg 插件
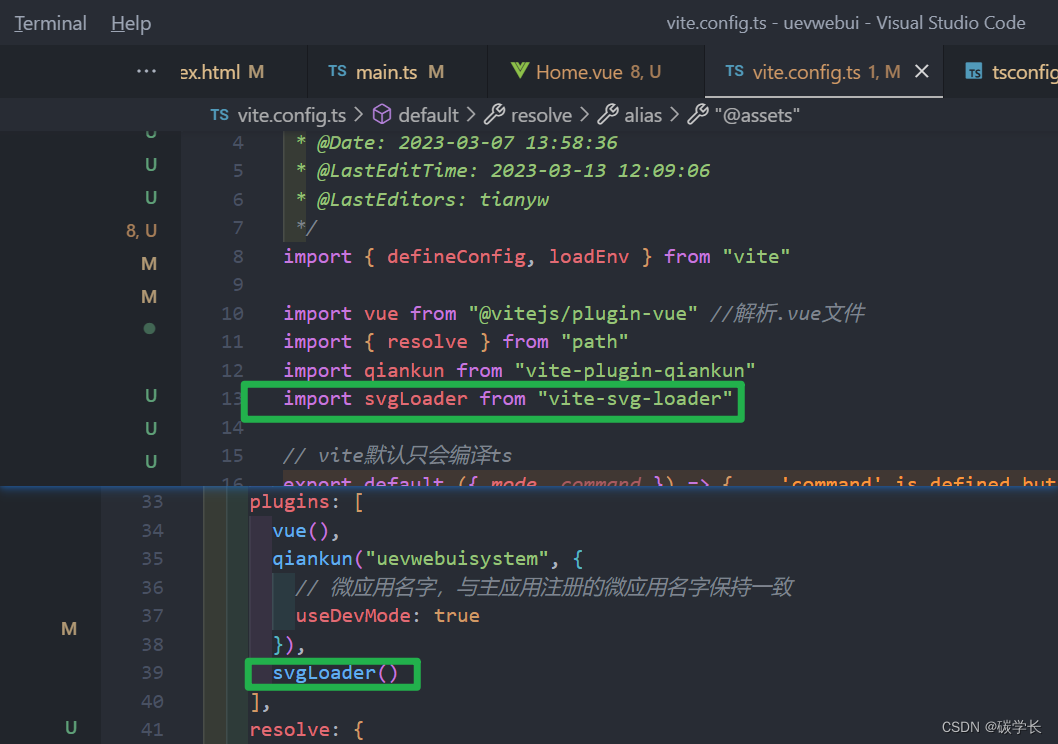
vite.config.ts 完整内容:
/*
 * @Description:
 * @Author: tianyw
 * @Date: 2023-03-07 13:58:36
 * @LastEditTime: 2023-03-13 12:09:06
 * @LastEditors: tianyw
 */
import {

     defineConfig, loadEnv } from "vite"

import vue from "@vitejs/plugin-vue" //解析.vue文件
import {

     resolve } from "path"
import qiankun from "vite-plugin-qiankun"
import svgLoader from "vite-svg-loader"

// vite默认只会编译ts
export default ({

     mode, command }) => {


  const env = loadEnv(mode, process.cwd())
  const {


    VITE_APP_BASE_PATH,
    VITE_APP_PORT,
    VITE_APP_MODE,
    VITE_APP_HOST,
    VITE_APP_OUTPUT_DIR
  } = env
  console.log("环境模式", VITE_APP_MODE)
  return defineConfig({


    base:
      VITE_APP_MODE === "nginx" || VITE_APP_MODE === "tomcat"
        ? "/" + VITE_APP_OUTPUT_DIR + "/"
        : VITE_APP_MODE === "development"
        ? "./"
        : VITE_APP_BASE_PATH,
    plugins: [
      vue(),
      qiankun("uevwebuisystem", {


        // 微应用名字,与主应用注册的微应用名字保持一致
        useDevMode: true
      }),
      svgLoader()
    ],
    resolve: {


      alias: {


        "@": resolve(__dirname, "./src"), // @ 代替 src
        "@assets": resolve(__dirname, "./src/assets") // @assets 代替 src/assets
      }
    },
    server: {


      // 是否开启 https
      https: false,
      // 端口号 监听端口
      port: parseInt(VITE_APP_PORT),
      // 监听所有地址
      host: VITE_APP_HOST,
      base: VITE_APP_BASE_PATH,
      origin: `http://${

      VITE_APP_HOST}:${

      parseInt(VITE_APP_PORT)}`, // 项目 baseUrl,解决主应用中出现静态地址 404 问题
      // 服务启动时是否自动打开浏览器
      open: true,
      // 允许跨域
      cors: true,
      // 配置跨域请求头
      headers: {


        "Access-Control-Allow-Origin": "*"
      },
      // 自定义代理规则
      proxy: {

    }
    },
    build: {


      // 设置最终构建的浏览器兼容目标
      target: "es2015",
      outDir: VITE_APP_OUTPUT_DIR,
      // 构建后是否生成 source map 文件
      sourcemap: false,
      // chunk 大小警告的限制(以 kbs 为单位)
      chunkSizeWarningLimit: 2000,
      // 启用/禁用 gzip 压缩大小报告
      reportCompressedSize: false
    },
    css: {


      // css 预处理器
      preprocessorOptions: {


        scss: {


          // 引入 全局 scss
          additionalData: '@import "@/styles/index.scss";'
        },
        less: {


          javascriptEnabled: true
        }
      },
      postcss: {


        plugins: [require("tailwindcss"), require("autoprefixer")]
      }
    }
  })
}
4、tsconfig.json 中增加 vite-svg-loader 的 types 配置,如下:
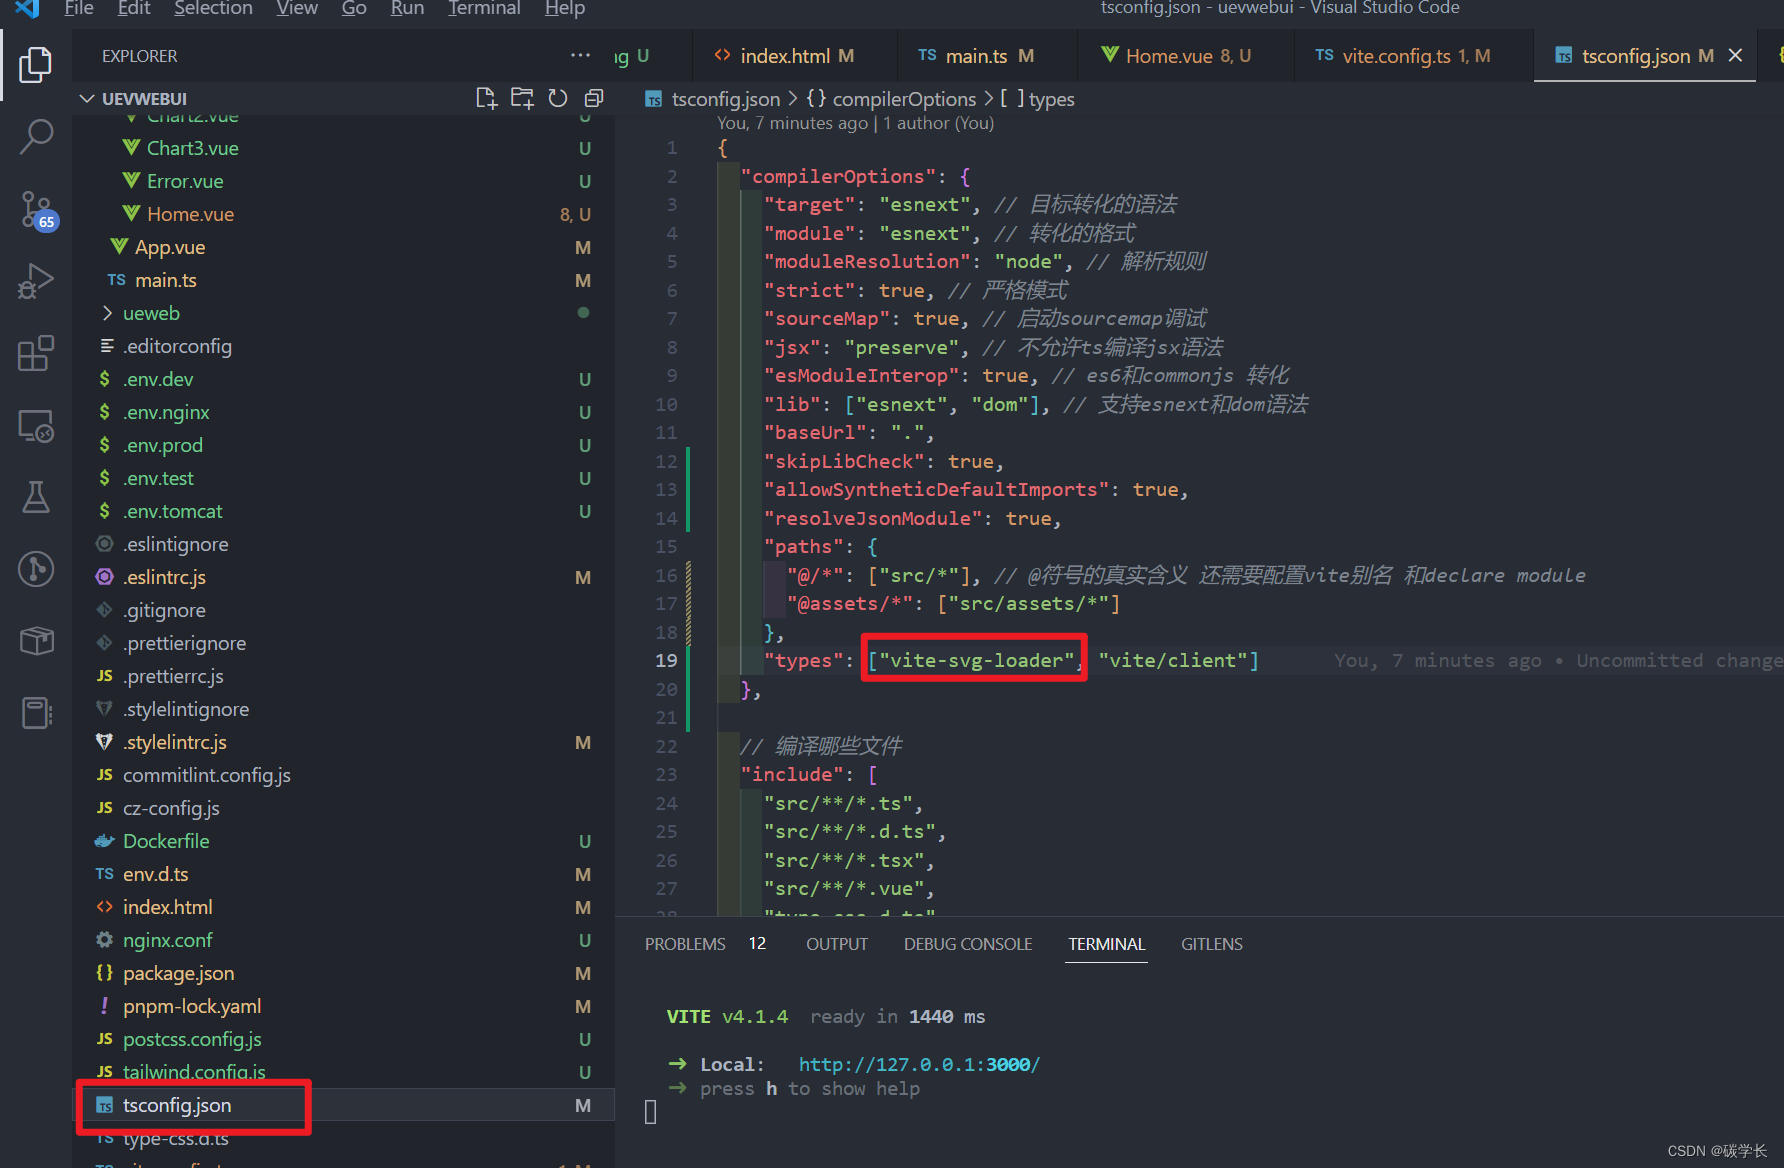
5、Home.vue 中使用 svg:
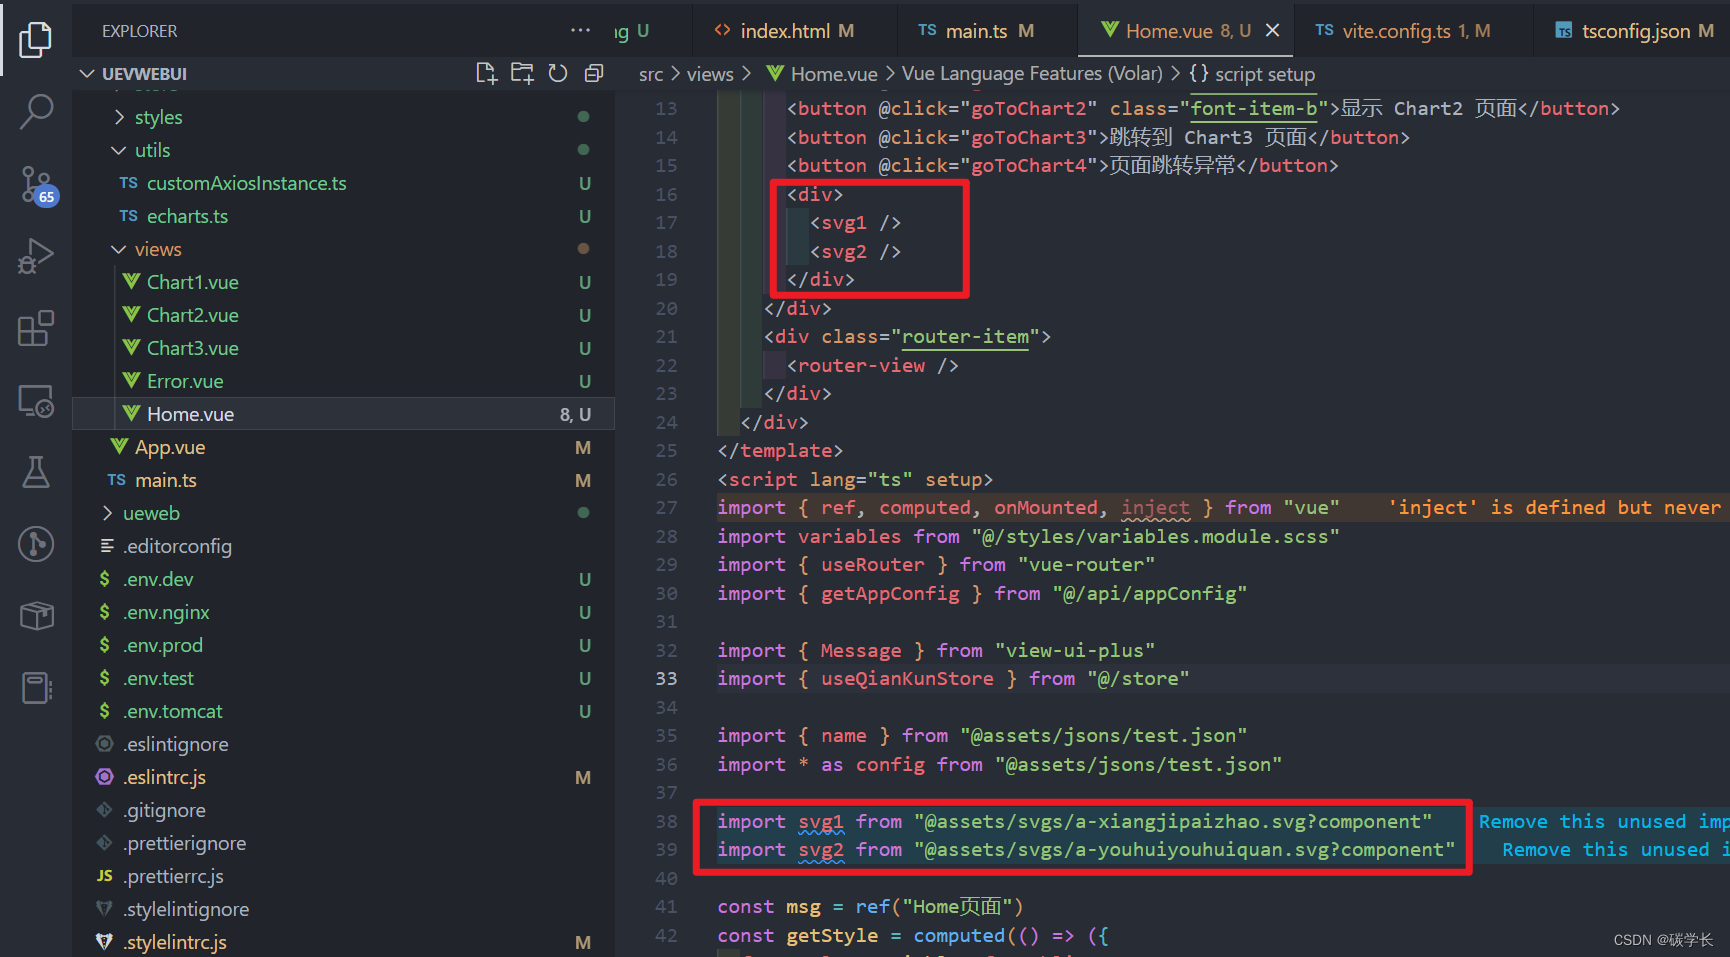
Home.vue 完整文件内容:
<!--
 * @Description:
 * @Author: tianyw
 * @Date: 2023-03-08 15:54:13
 * @LastEditTime: 2023-03-13 12:19:14
 * @LastEditors: tianyw
-->
<template>
  <div class="home-item">
    <span class="span-item l-size" :style="getStyle">{

   { msg }}</span>
    <div class="btn-items">
      <button @click="goToChart1" class="font-item-a">显示 Chart1 页面</button>
      <button @click="goToChart2" class="font-item-b">显示 Chart2 页面</button>
      <button @click="goToChart3">跳转到 Chart3 页面</button>
      <button @click="goToChart4">页面跳转异常</button>
      <div>
        <svg1 />
        <svg2 />
      </div>
    </div>
    <div class="router-item">
      <router-view />
    </div>
  </div>
</template>
<script lang="ts" setup>
import { ref, computed, onMounted, inject } from "vue"
import variables from "@/styles/variables.module.scss"
import { useRouter } from "vue-router"
import { getAppConfig } from "@/api/appConfig"

import { Message } from "view-ui-plus"
import { useQianKunStore } from "@/store"

import { name } from "@assets/jsons/test.json"
import * as config from "@assets/jsons/test.json"

import svg1 from "@assets/svgs/a-xiangjipaizhao.svg?component"
import svg2 from "@assets/svgs/a-youhuiyouhuiquan.svg?component"

const msg = ref("Home页面")
const getStyle = computed(() => ({
  fontStyle: variables.fontOblique
}))
console.log("当前内容", name)
console.log("当前内容2", config)
const qiankunStore = useQianKunStore()
const router = useRouter()
const goToChart1 = () => {
  const { isQianKun, qiankunProps, qiankunActions } = qiankunStore
  if (qiankunActions) {
    const qAct = qiankunActions as any
    qAct.setGlobalState({
      num: 3333,
      changeFrom: "我是在子应用中改变的"
    })
  }
  router.push({ path: "/home/chart1" })
}
const goToChart2 = () => {
  router.push({ path: "/home/chart2" })
}
const goToChart3 = () => {
  router.push({ path: "/chart3" })
}
const goToChart4 = () => {
  Message.error("路由跳转异常!")
  router.push({ path: "/chart4" })
}
onMounted(async () => {
  const resultConfig = await getAppConfig()
  console.log(resultConfig)
})
</script>
<style lang="scss" scoped>
.home-item {
  width: 100%;
  height: 100%;
}
.span-item {
  font-weight: bold;
  border-style: $B-DOTTED;
  border-width: 2px;
  background: $BG-1890ff;
}
.btn-items {
  margin-top: 0.8rem;
}
.router-item {
  width: 100%;
  height: 100%;
}
.font-item-a {
  font-family: deyihei;
  background: url("@assets/images/a-shangdiandianpu.png");
  background-size: contain;
}
.font-item-b {
  font-family: alishuheiti;
  background: url("@assets/images/a-youjianxinjian.png");
  background-size: contain;
}
</style>
6、效果
可以看到 下方紫色的两个 svg 已经生效、显示了。
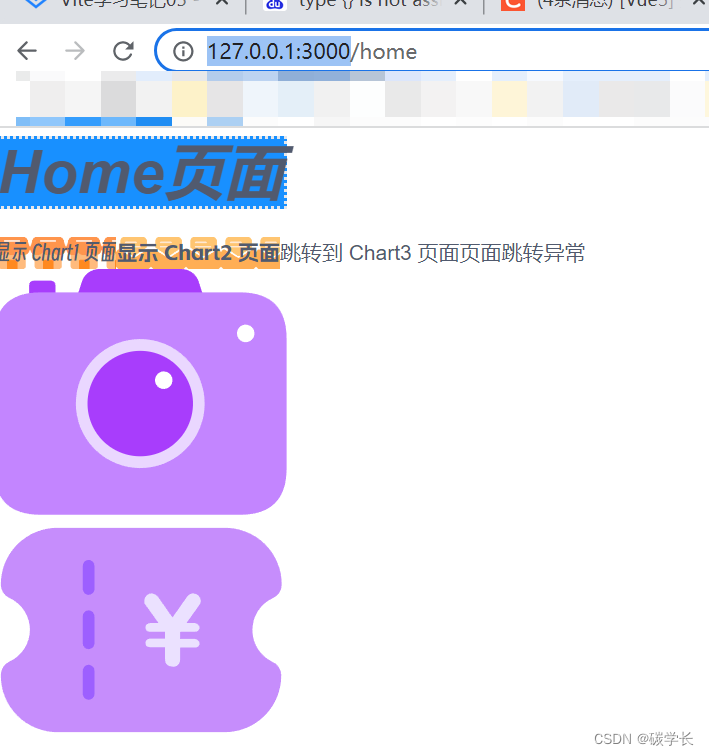
至此,svg 的引入就完成了。
53、Vite 应用 屏幕适应
这里采用简单的方法,直接在 index.html 中设置如下:
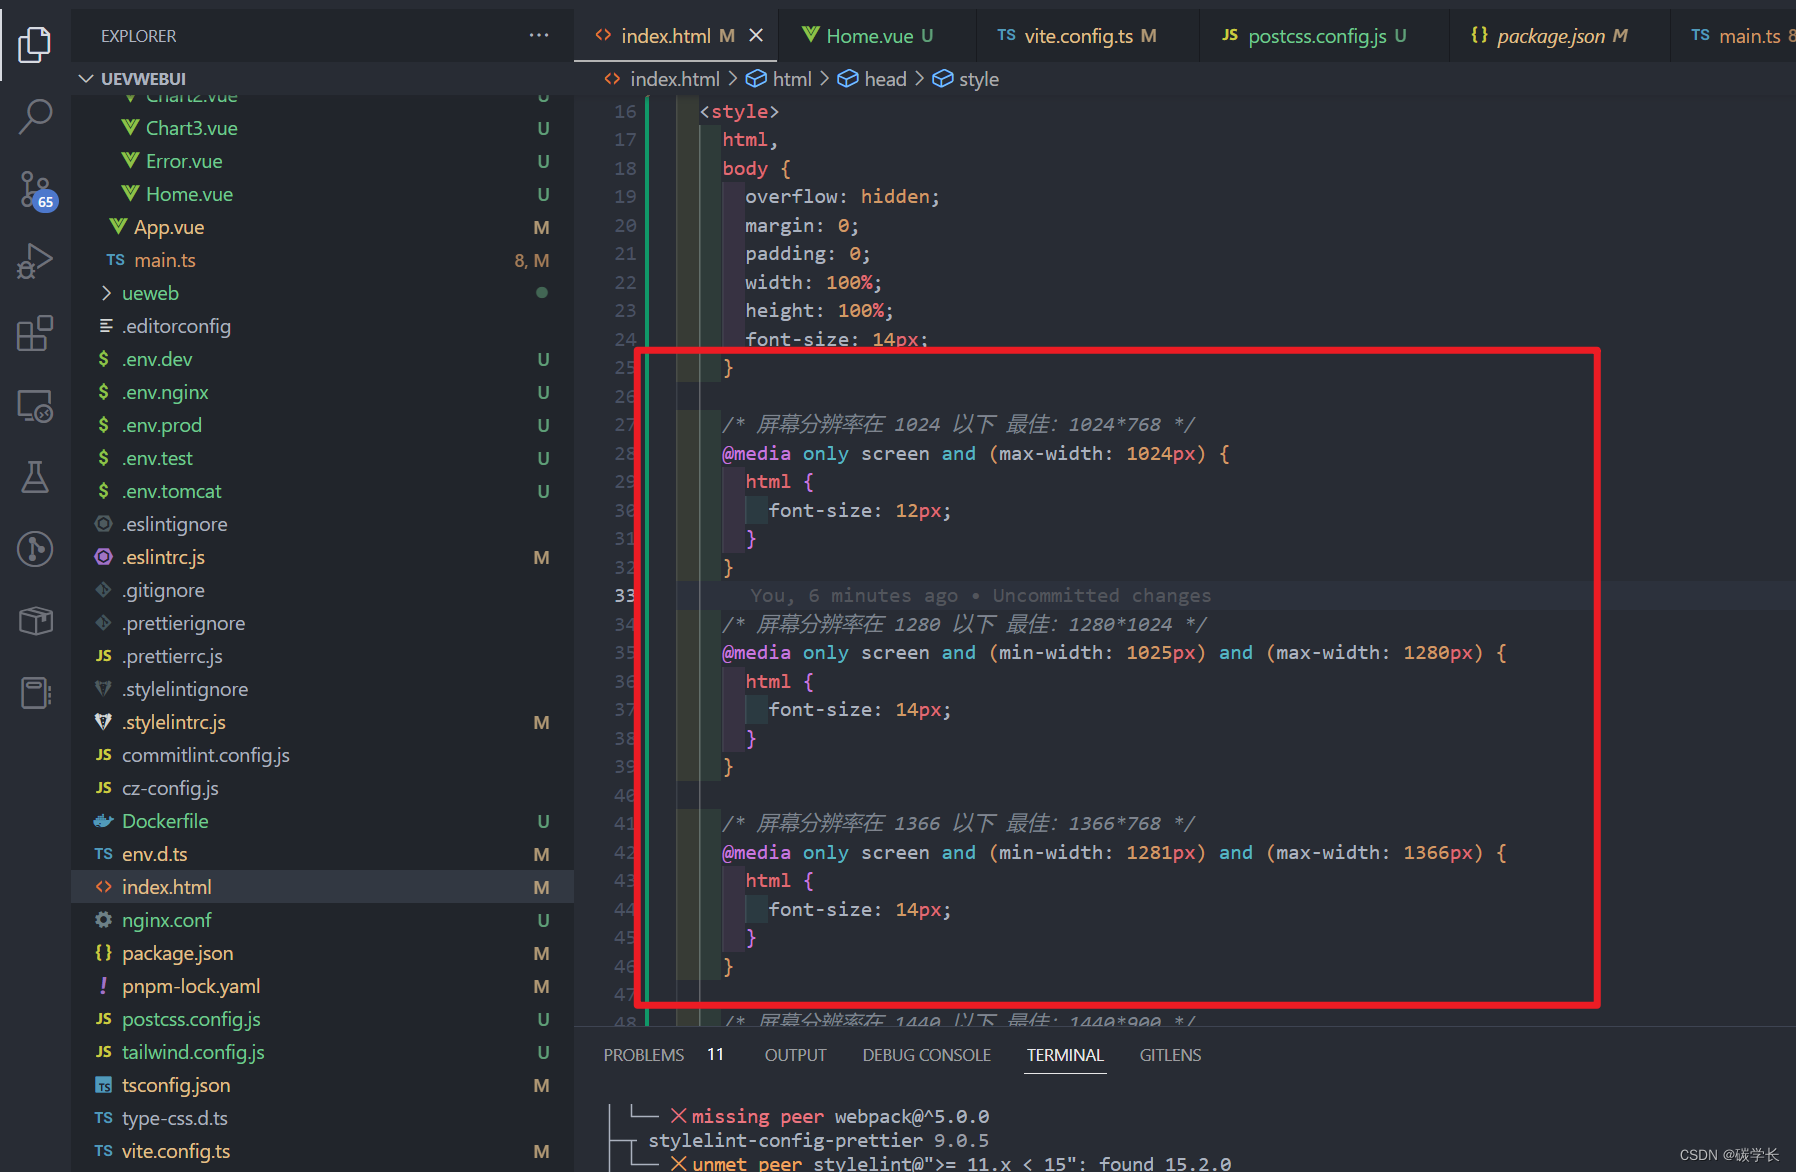
<!--
 * @Description:
 * @Author: tianyw
 * @Date: 2023-03-07 13:49:57
 * @LastEditTime: 2023-03-13 15:06:53
 * @LastEditors: tianyw
-->
<!DOCTYPE html>
<html lang="en">

<head>
  <meta charset="UTF-8" />
  <meta http-equiv="X-UA-Compatible" content="IE=edge" />
  <meta name="viewport" content="width=device-width, initial-scale=1.0" />
  <title>vite</title>
  <style>
    html,
    body {


      overflow: hidden;
      margin: 0;
      padding: 0;
      width: 100%;
      height: 100%;
      font-size: 14px;
    }

    /* 屏幕分辨率在 1024 以下 最佳:1024*768 */
    @media only screen and (max-width: 1024px) {


      html {


        font-size: 12px;
      }
    }

    /* 屏幕分辨率在 1280 以下 最佳:1280*1024 */
    @media only screen and (min-width: 1025px) and (max-width: 1280px) {


      html {


        font-size: 14px;
      }
    }

    /* 屏幕分辨率在 1366 以下 最佳:1366*768 */
    @media only screen and (min-width: 1281px) and (max-width: 1366px) {


      html {


        font-size: 14px;
      }
    }

    /* 屏幕分辨率在 1440 以下 最佳:1440*900 */
    @media only screen and (min-width: 1367px) and (max-width: 1440px) {


      html {


        font-size: 16px;
      }
    }

    /* 屏幕分辨率在 1680 以下 最佳:1680*1050 */
    @media only screen and (min-width: 1441px) and (max-width: 1680px) {


      html {


        font-size: 18px;
      }
    }

    /* 屏幕分辨率在 1920 以下 最佳:1920*1080 */
    @media only screen and (min-width: 1681px) and (max-width: 1920px) {


      html {


        font-size: 20px;
      }
    }

    /* 屏幕分辨率在 2560 以下 最佳:2560*1440 */
    @media only screen and (min-width: 1921px) and (max-width: 2560px) {


      html {


        font-size: 22px;
      }
    }

    /* 屏幕分辨率在 2560 以上 */
    @media only screen and (min-width: 2561px) {


      html {


        font-size: 24px;
      }
    }
  </style>
</head>

<body>
  <!-- 稍后vue项目挂载到这个元素上 -->
  <div id="app"></div>
  <!-- vite时基于esModule的 -->
  <script src="./src/main.ts" type="module">
  </script>
</body>

</html>
54、Vite 优化打包配置
vite 打包的底层是基于 rollup 实现的,因此可以进行 rollup 相关的配置
1、依赖文件分包
配置好后,执行打包,可以看到打包后的效果。
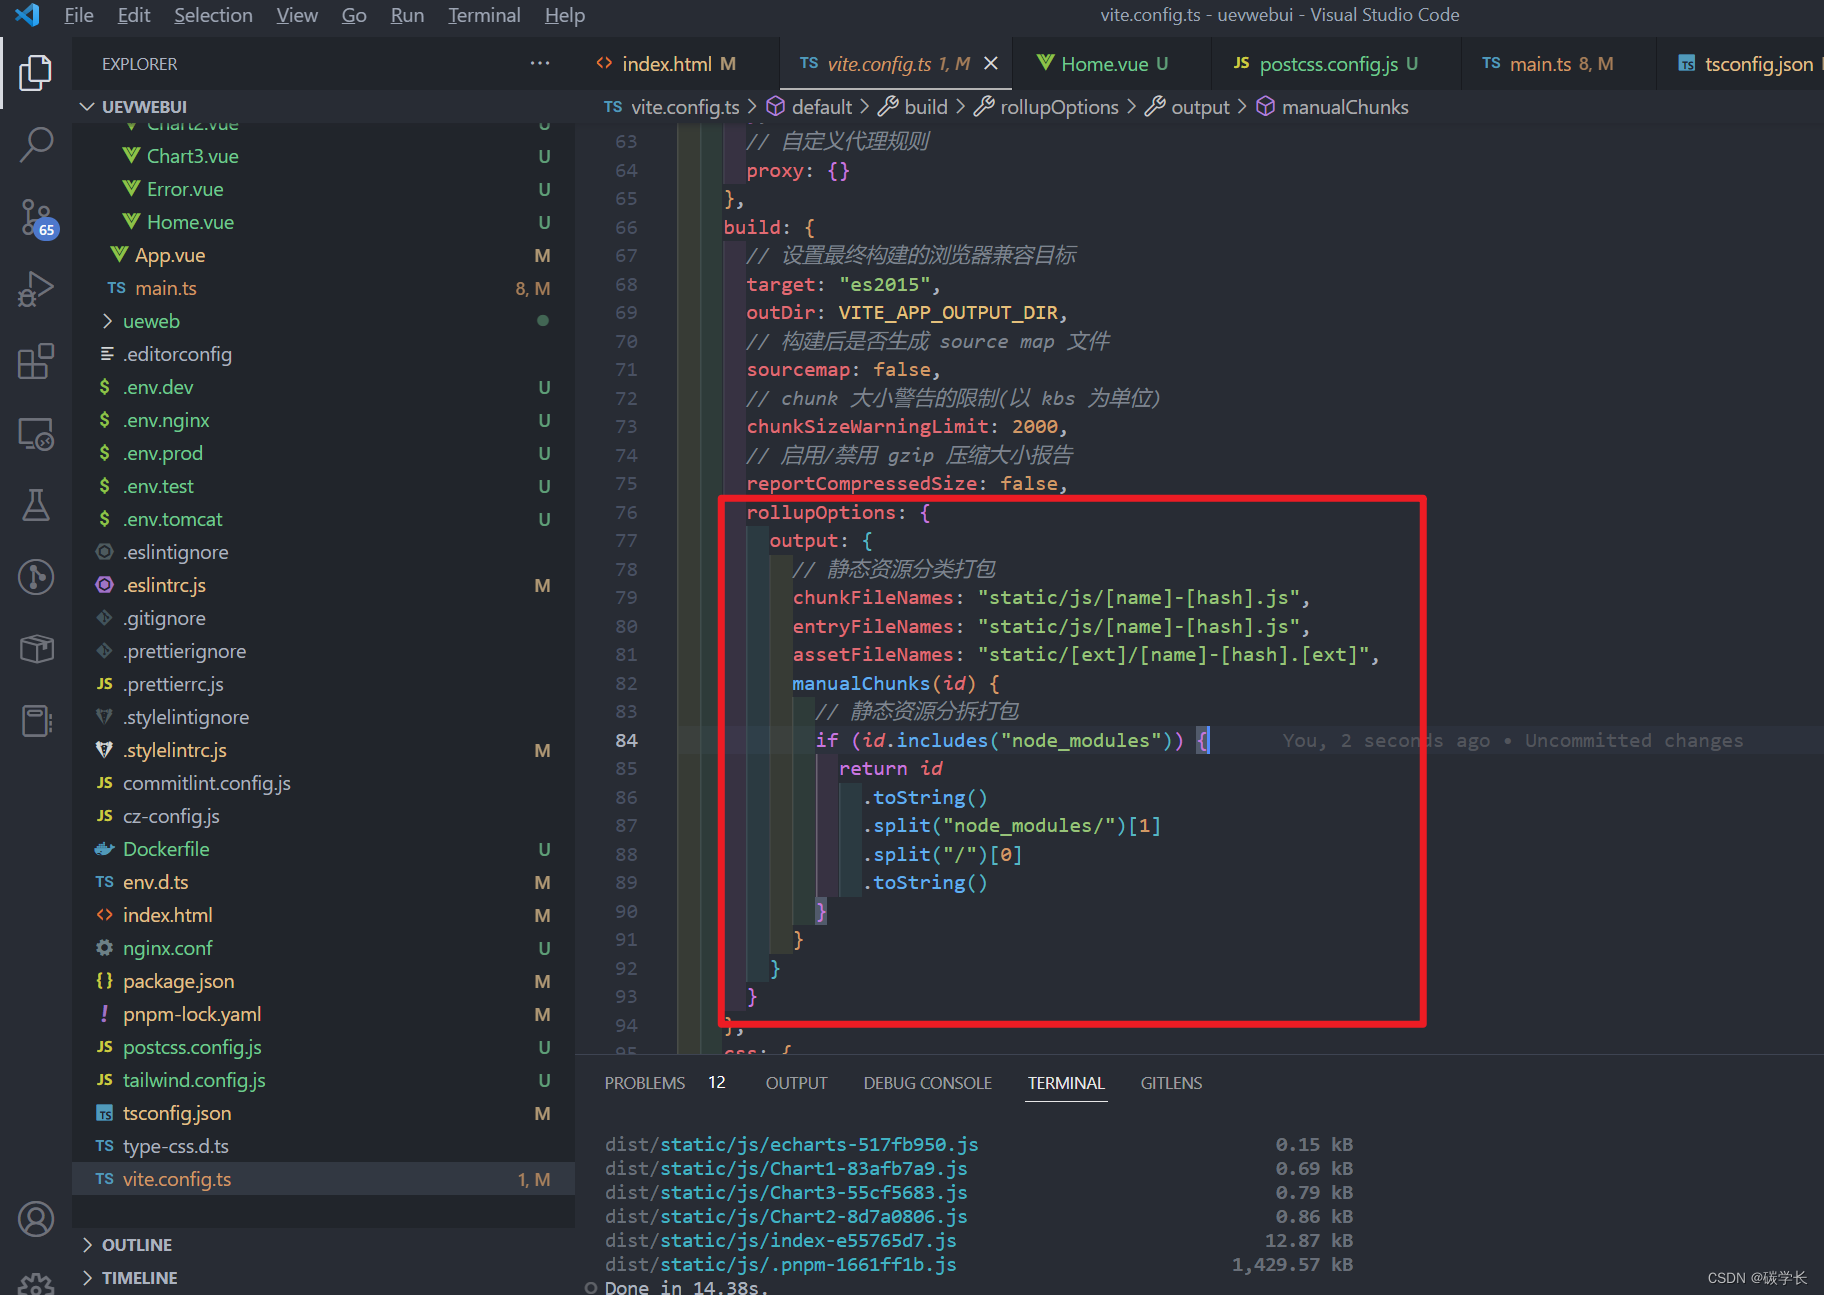
当前 vite.config.ts 完整文件内容:
/*
 * @Description:
 * @Author: tianyw
 * @Date: 2023-03-07 13:58:36
 * @LastEditTime: 2023-03-13 15:23:39
 * @LastEditors: tianyw
 */
import {

     defineConfig, loadEnv } from "vite"

import vue from "@vitejs/plugin-vue" //解析.vue文件
import {

     resolve } from "path"
import qiankun from "vite-plugin-qiankun"
import svgLoader from "vite-svg-loader"
// vite默认只会编译ts
export default ({

     mode, command }) => {


  const env = loadEnv(mode, process.cwd())
  const {


    VITE_APP_BASE_PATH,
    VITE_APP_PORT,
    VITE_APP_MODE,
    VITE_APP_HOST,
    VITE_APP_OUTPUT_DIR
  } = env
  console.log("环境模式", VITE_APP_MODE)
  return defineConfig({


    base:
      VITE_APP_MODE === "nginx" || VITE_APP_MODE === "tomcat"
        ? "/" + VITE_APP_OUTPUT_DIR + "/"
        : VITE_APP_MODE === "development"
        ? "./"
        : VITE_APP_BASE_PATH,
    plugins: [
      vue(),
      qiankun("uevwebuisystem", {


        // 微应用名字,与主应用注册的微应用名字保持一致
        useDevMode: true
      }),
      svgLoader()
    ],
    resolve: {


      alias: {


        "@": resolve(__dirname, "./src"), // @ 代替 src
        "@assets": resolve(__dirname, "./src/assets") // @assets 代替 src/assets
      }
    },
    server: {


      // 是否开启 https
      https: false,
      // 端口号 监听端口
      port: parseInt(VITE_APP_PORT),
      // 监听所有地址
      host: VITE_APP_HOST,
      base: VITE_APP_BASE_PATH,
      origin: `http://${

      VITE_APP_HOST}:${

      parseInt(VITE_APP_PORT)}`, // 项目 baseUrl,解决主应用中出现静态地址 404 问题
      // 服务启动时是否自动打开浏览器
      open: true,
      // 允许跨域
      cors: true,
      // 配置跨域请求头
      headers: {


        "Access-Control-Allow-Origin": "*"
      },
      // 自定义代理规则
      proxy: {

    }
    },
    build: {


      // 设置最终构建的浏览器兼容目标
      target: "es2015",
      outDir: VITE_APP_OUTPUT_DIR,
      // 构建后是否生成 source map 文件
      sourcemap: false,
      // chunk 大小警告的限制(以 kbs 为单位)
      chunkSizeWarningLimit: 2000,
      // 启用/禁用 gzip 压缩大小报告
      reportCompressedSize: false,
      rollupOptions: {


        output: {


          // 静态资源分类打包
          chunkFileNames: "static/js/[name]-[hash].js",
          entryFileNames: "static/js/[name]-[hash].js",
          assetFileNames: "static/[ext]/[name]-[hash].[ext]",
          manualChunks(id) {


            // 静态资源分拆打包
            if (id.includes("node_modules")) {


              return id
                .toString()
                .split("node_modules/")[1]
                .split("/")[0]
                .toString()
            }
          }
        }
      }
    },
    css: {


      // css 预处理器
      preprocessorOptions: {


        scss: {


          // 引入 全局 scss
          additionalData: '@import "@/styles/index.scss";'
        },
        less: {


          javascriptEnabled: true
        }
      },
      postcss: {


        plugins: [require("tailwindcss"), require("autoprefixer")]
      }
    }
  })
}
2、开启 gzip 压缩(需要服务器开启 gzip 服务)
GZIP 最早由 Jean-loup Gailly 和 Mark Adler 创建,用于 UNⅨ 系统的文件压缩。我们在 Linux 中经常会用到后缀为 .gz 的文件,它们就是 GZIP 格式的。现今已经成为 Internet 上使用非常普遍的一种数据压缩格式,或者说一种文件格式。
HTTP 协议上的 GZIP 编码是一种用来改进 WEB 应用程序性能的技术。大流量的 WEB 站点常常使用 GZIP 压缩技术来让用户感受更快的速度。这一般是指 WWW 服务器中安装的一个功能,当有人来访问这个服务器中的网站时,服务器中的这个功能就将网页内容压缩后传输到来访的电脑浏览器中显示出来。一般对纯文本内容可压缩到原大小的 40% 。这样传输就快了,效果就是你点击网址后会很快的显示出来.当然这也会增加服务器的负载。一般服务器中都安装有这个功能模块的。
1、安装插件:pnpm add vite-plugin-compression -D
2、vite.config.ts 中配置:

当前 vite.config.ts 文件内容:
/*
 * @Description:
 * @Author: tianyw
 * @Date: 2023-03-07 13:58:36
 * @LastEditTime: 2023-03-13 15:30:41
 * @LastEditors: tianyw
 */
import {

     defineConfig, loadEnv } from "vite"

import vue from "@vitejs/plugin-vue" //解析.vue文件
import {

     resolve } from "path"
import qiankun from "vite-plugin-qiankun"
import svgLoader from "vite-svg-loader"
import viteCompression from "vite-plugin-compression"
// vite默认只会编译ts
export default ({

     mode, command }) => {


  const env = loadEnv(mode, process.cwd())
  const {


    VITE_APP_BASE_PATH,
    VITE_APP_PORT,
    VITE_APP_MODE,
    VITE_APP_HOST,
    VITE_APP_OUTPUT_DIR
  } = env
  console.log("环境模式", VITE_APP_MODE)
  return defineConfig({


    base:
      VITE_APP_MODE === "nginx" || VITE_APP_MODE === "tomcat"
        ? "/" + VITE_APP_OUTPUT_DIR + "/"
        : VITE_APP_MODE === "development"
        ? "./"
        : VITE_APP_BASE_PATH,
    plugins: [
      vue(),
      qiankun("uevwebuisystem", {


        // 微应用名字,与主应用注册的微应用名字保持一致
        useDevMode: true
      }),
      svgLoader(),
      viteCompression({


        verbose: true, //是否在控制台输出压缩结果
        disable: false, //是否禁用,相当于开关在这里
        threshold: 10240, //体积大于 threshold 才会被压缩,单位 b,1b=8B, 1B=1024KB  那我们这里相当于 9kb多吧,就会压缩
        algorithm: "gzip", //压缩算法,可选 [ 'gzip' , 'brotliCompress' ,'deflate' , 'deflateRaw']
        ext: ".gz" //文件后缀
      })
    ],
    resolve: {


      alias: {


        "@": resolve(__dirname, "./src"), // @ 代替 src
        "@assets": resolve(__dirname, "./src/assets") // @assets 代替 src/assets
      }
    },
    server: {


      // 是否开启 https
      https: false,
      // 端口号 监听端口
      port: parseInt(VITE_APP_PORT),
      // 监听所有地址
      host: VITE_APP_HOST,
      base: VITE_APP_BASE_PATH,
      origin: `http://${

      VITE_APP_HOST}:${

      parseInt(VITE_APP_PORT)}`, // 项目 baseUrl,解决主应用中出现静态地址 404 问题
      // 服务启动时是否自动打开浏览器
      open: true,
      // 允许跨域
      cors: true,
      // 配置跨域请求头
      headers: {


        "Access-Control-Allow-Origin": "*"
      },
      // 自定义代理规则
      proxy: {

    }
    },
    build: {


      // 设置最终构建的浏览器兼容目标
      target: "es2015",
      outDir: VITE_APP_OUTPUT_DIR,
      // 构建后是否生成 source map 文件
      sourcemap: false,
      // chunk 大小警告的限制(以 kbs 为单位)
      chunkSizeWarningLimit: 2000,
      // 启用/禁用 gzip 压缩大小报告
      reportCompressedSize: false,
      rollupOptions: {


        output: {


          // 静态资源分类打包
          chunkFileNames: "static/js/[name]-[hash].js",
          entryFileNames: "static/js/[name]-[hash].js",
          assetFileNames: "static/[ext]/[name]-[hash].[ext]",
          manualChunks(id) {


            // 静态资源分拆打包
            if (id.includes("node_modules")) {


              return id
                .toString()
                .split("node_modules/")[1]
                .split("/")[0]
                .toString()
            }
          }
        }
      }
    },
    css: {


      // css 预处理器
      preprocessorOptions: {


        scss: {


          // 引入 全局 scss
          additionalData: '@import "@/styles/index.scss";'
        },
        less: {


          javascriptEnabled: true
        }
      },
      postcss: {


        plugins: [require("tailwindcss"), require("autoprefixer")]
      }
    }
  })
}
至此,打包优化的部分就完成了。
55、开发、生产环境(nginx/tomcat、docker)验证
经过以上步骤,我们使用了:Vite + Vue3 + Typescript + axios + echarts + pinia + view-ui-plus + vue-router + less + sass + scss + css + tailwindcss + animate.css + vite-svg-loader + postcss + stylelint + eslint + prettier + autoprefixer + commitizen + commitlint + vite-plugin-compression + vite-plugin-qiankun + Docker + nginx.conf… 等等插件和配置,实现了整个前端工程化的完整流程。
最后,我们需要进行调整,使得在开发环境、nginx/tomcat 部署环境、Docker 容器化环境这三种环境,都可以正常运行,这里包括:
1、主应用可以单独访问
2、子应用可以单独访问
3、可以通过主应用访问子应用
4、主、子应用分别单独访问的 http 请求、静态资源请求正常
5、通过主应用访问子应用的 http 请求、静态资源请求正常
这里更改的配置,及注意事项如下:
1、主应用
1、引入 .env.docker 用于 docker 环境
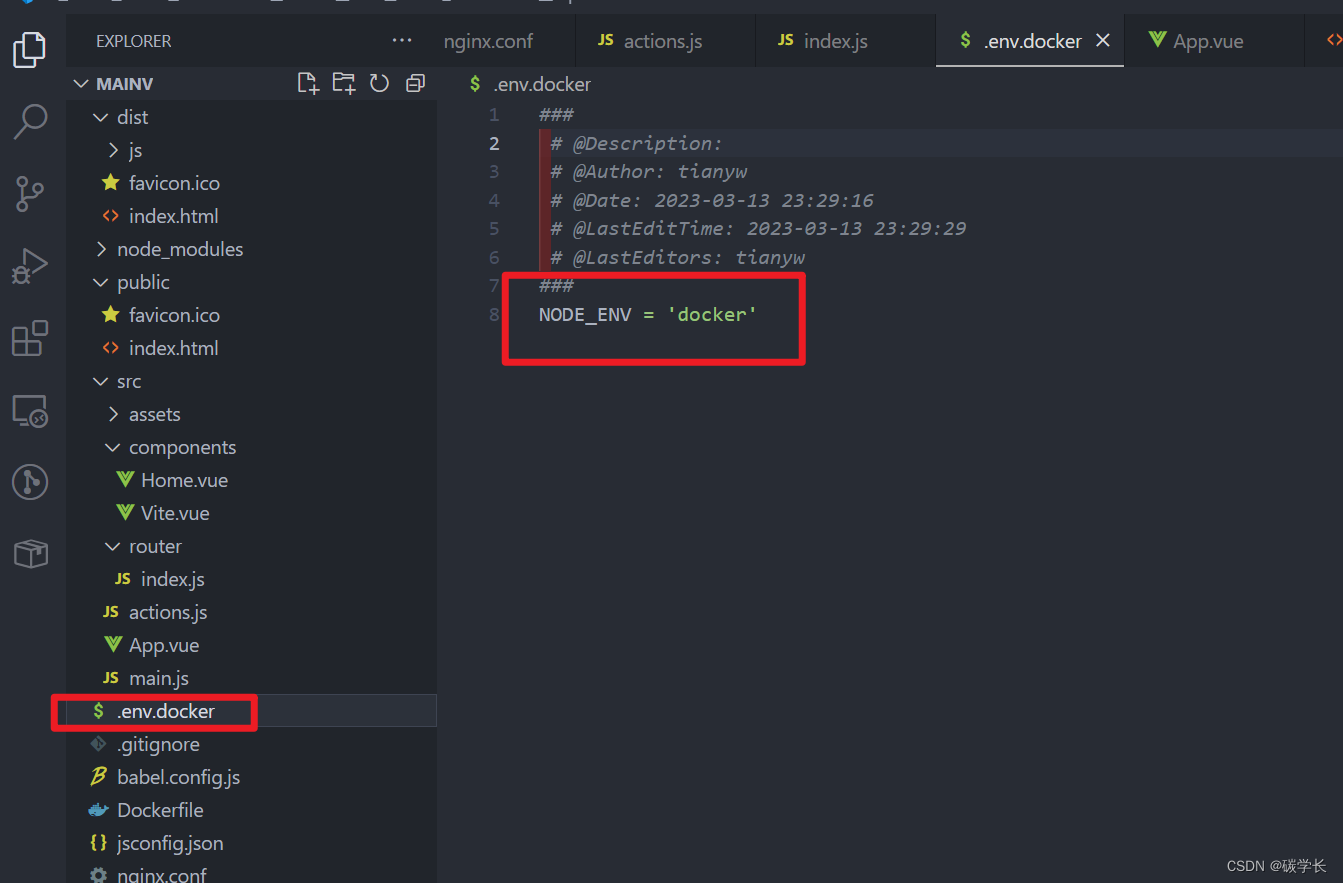
2、package.json 中配置 docker 打包命令,用于区分判断 是 docker 环境打包还是其他环境
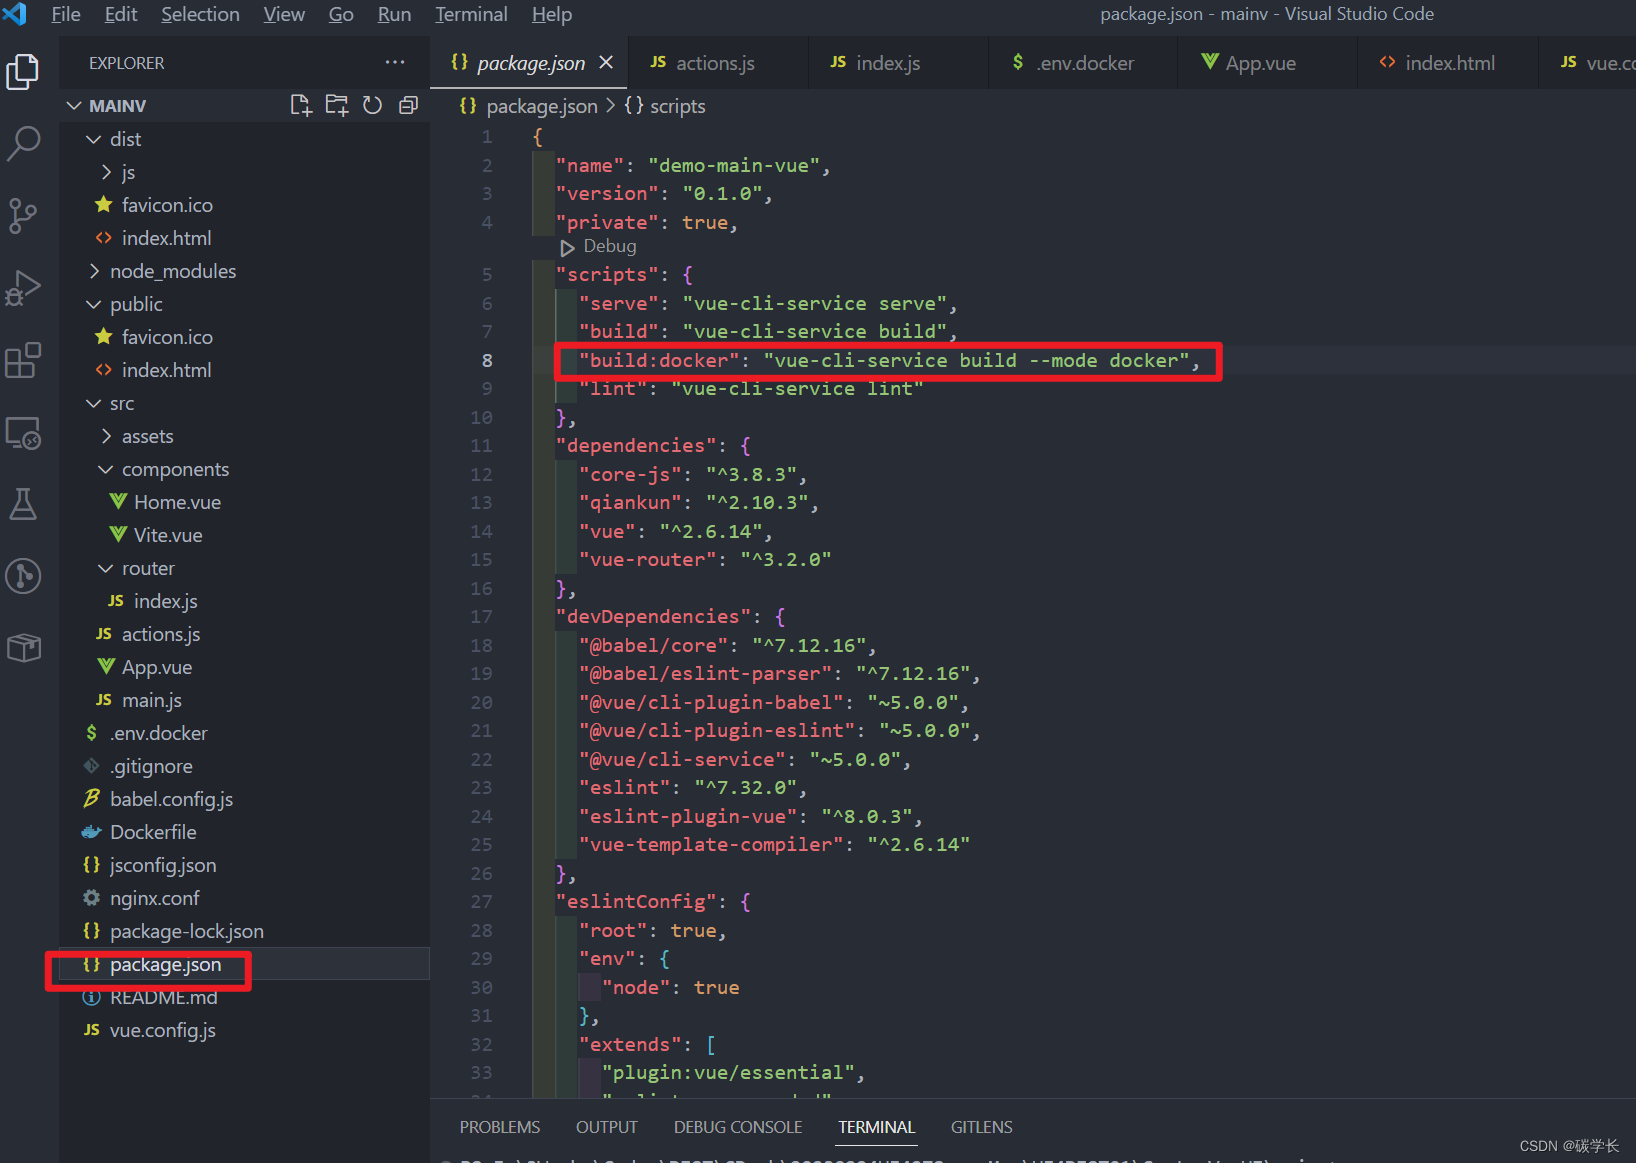
3、设置主应用路由以及引入子应用路由,这里子路由的 path 为 /uevwebuisystem,通过 NODE_ENV 判断打包环境
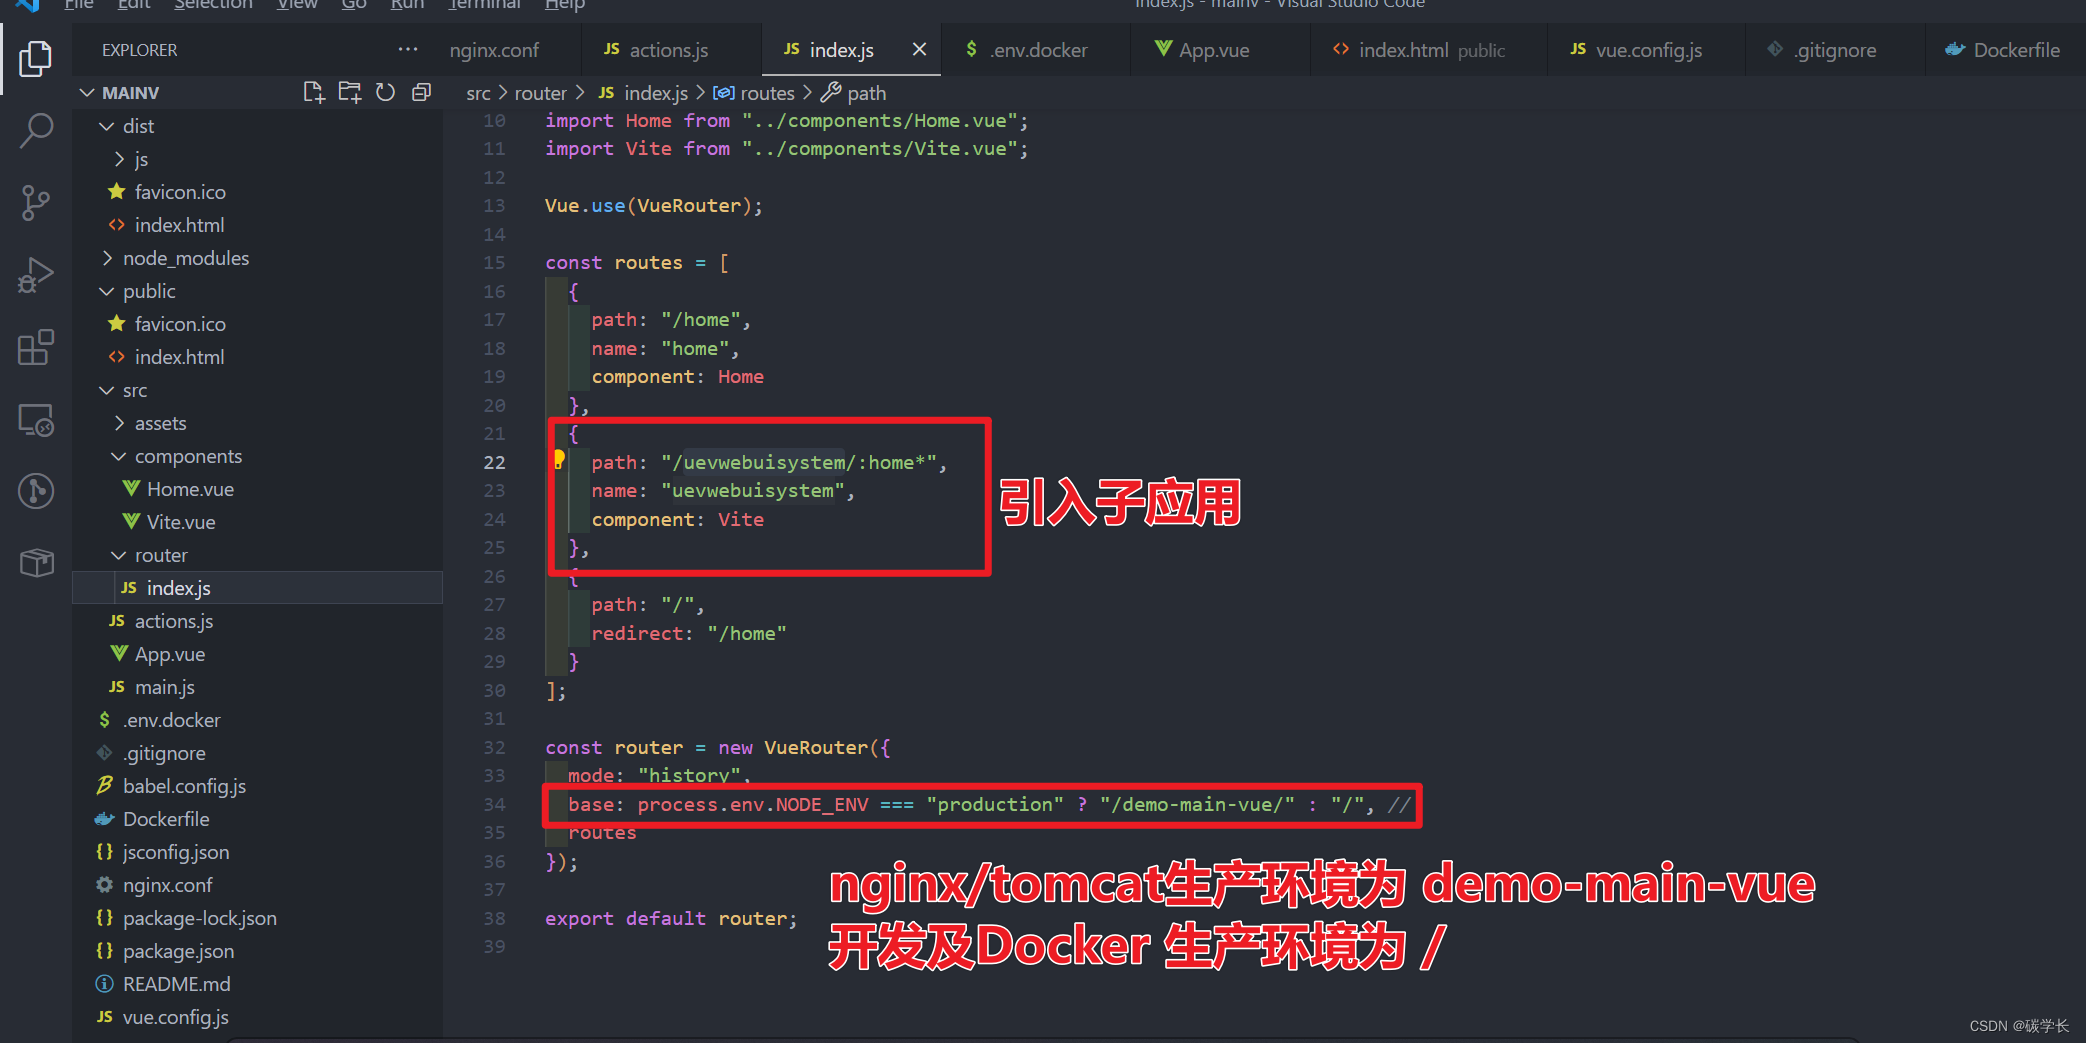
4、根据不同环境,判断、设置子应用的 entry,这里子应用名称为 uevwebuistystem,这需要和子应用注册 qiankun 时保持一致。
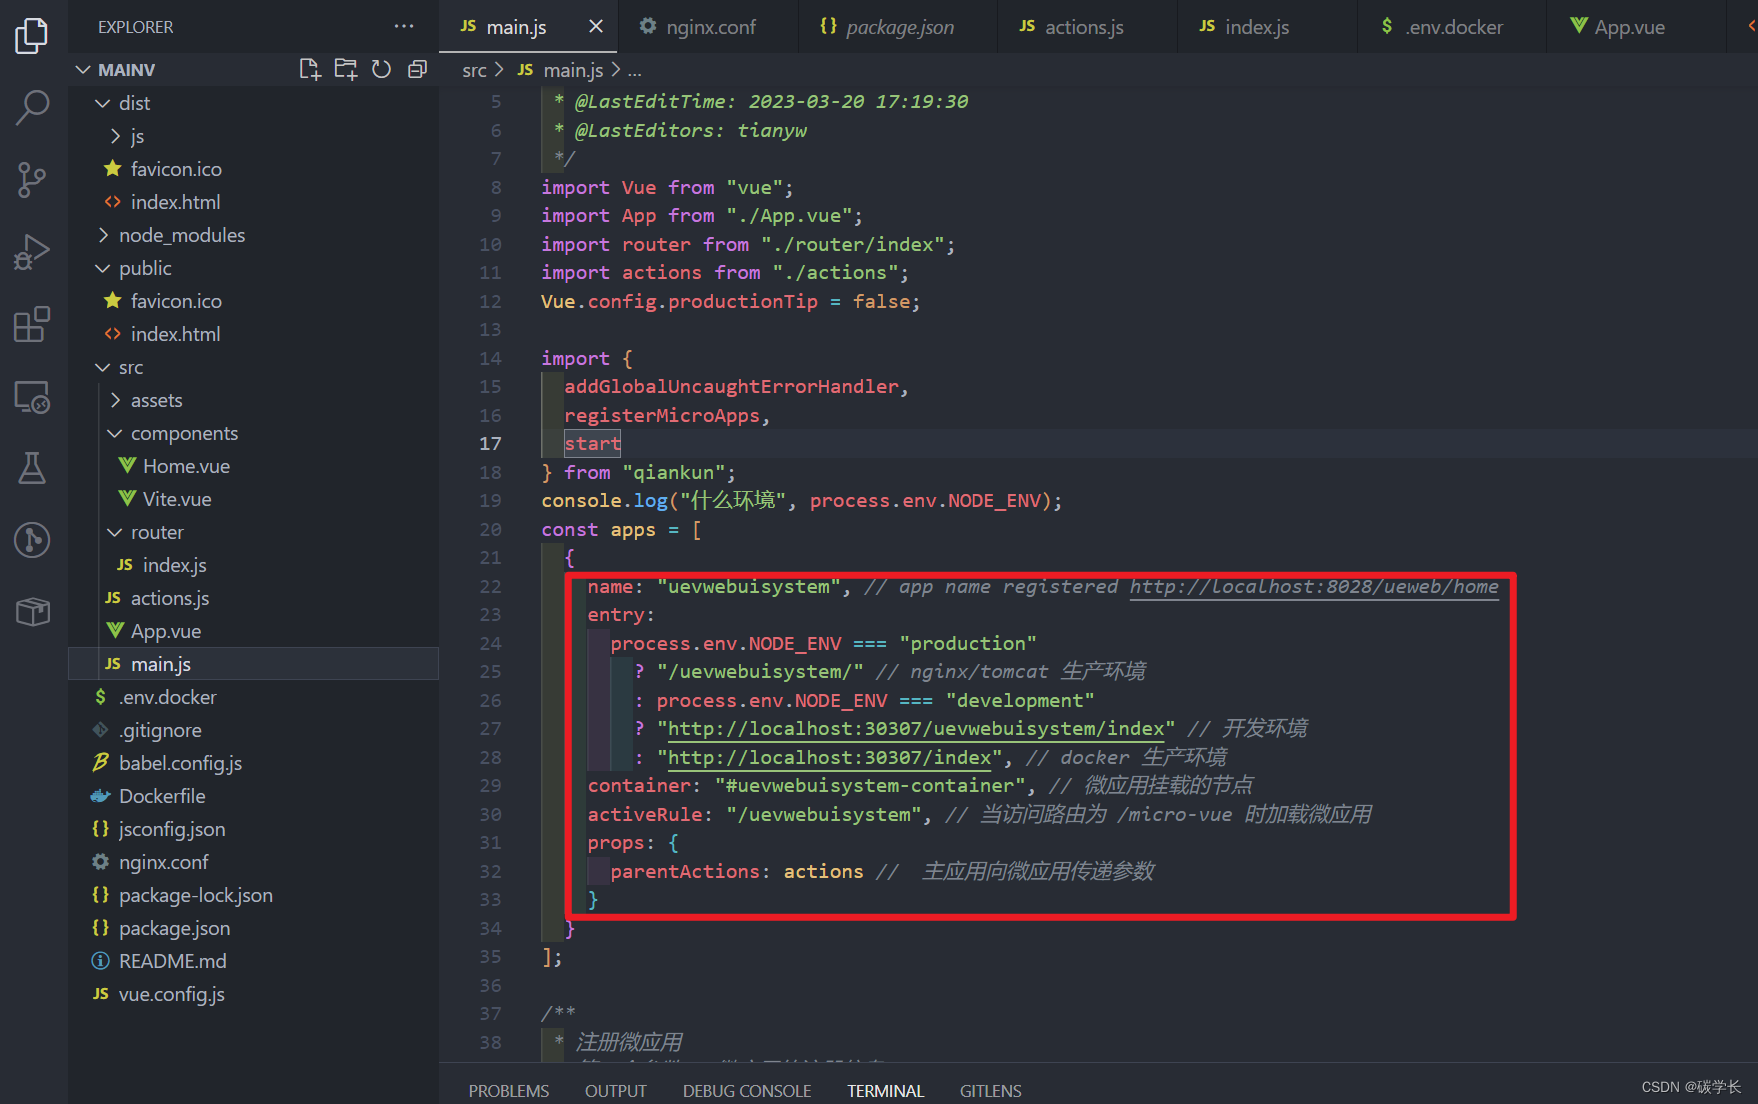
4、配置 Dockerfile 和 nginx.conf 接口
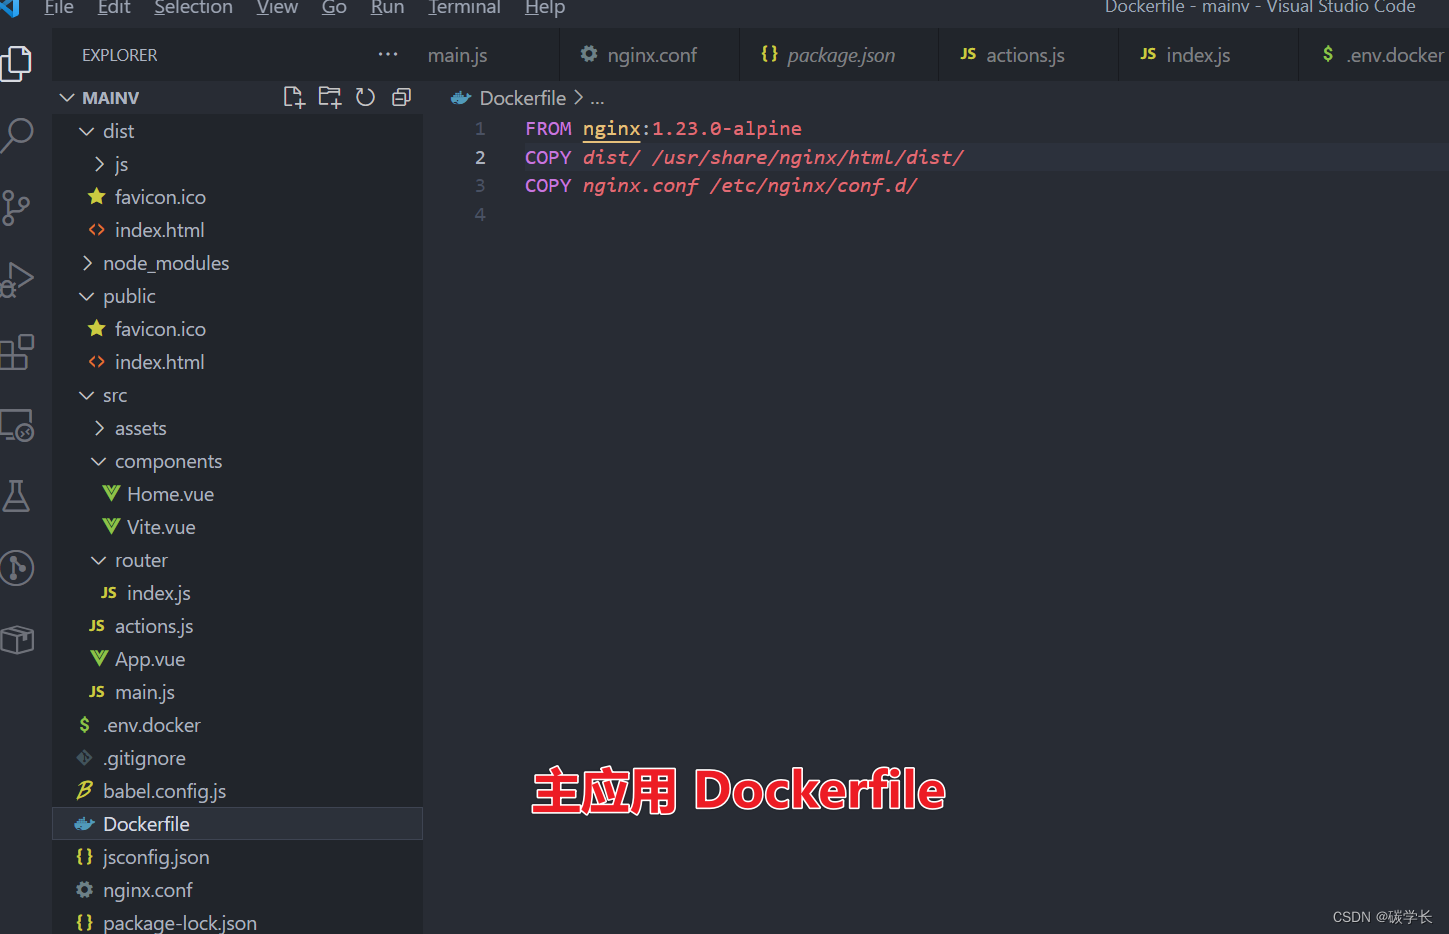
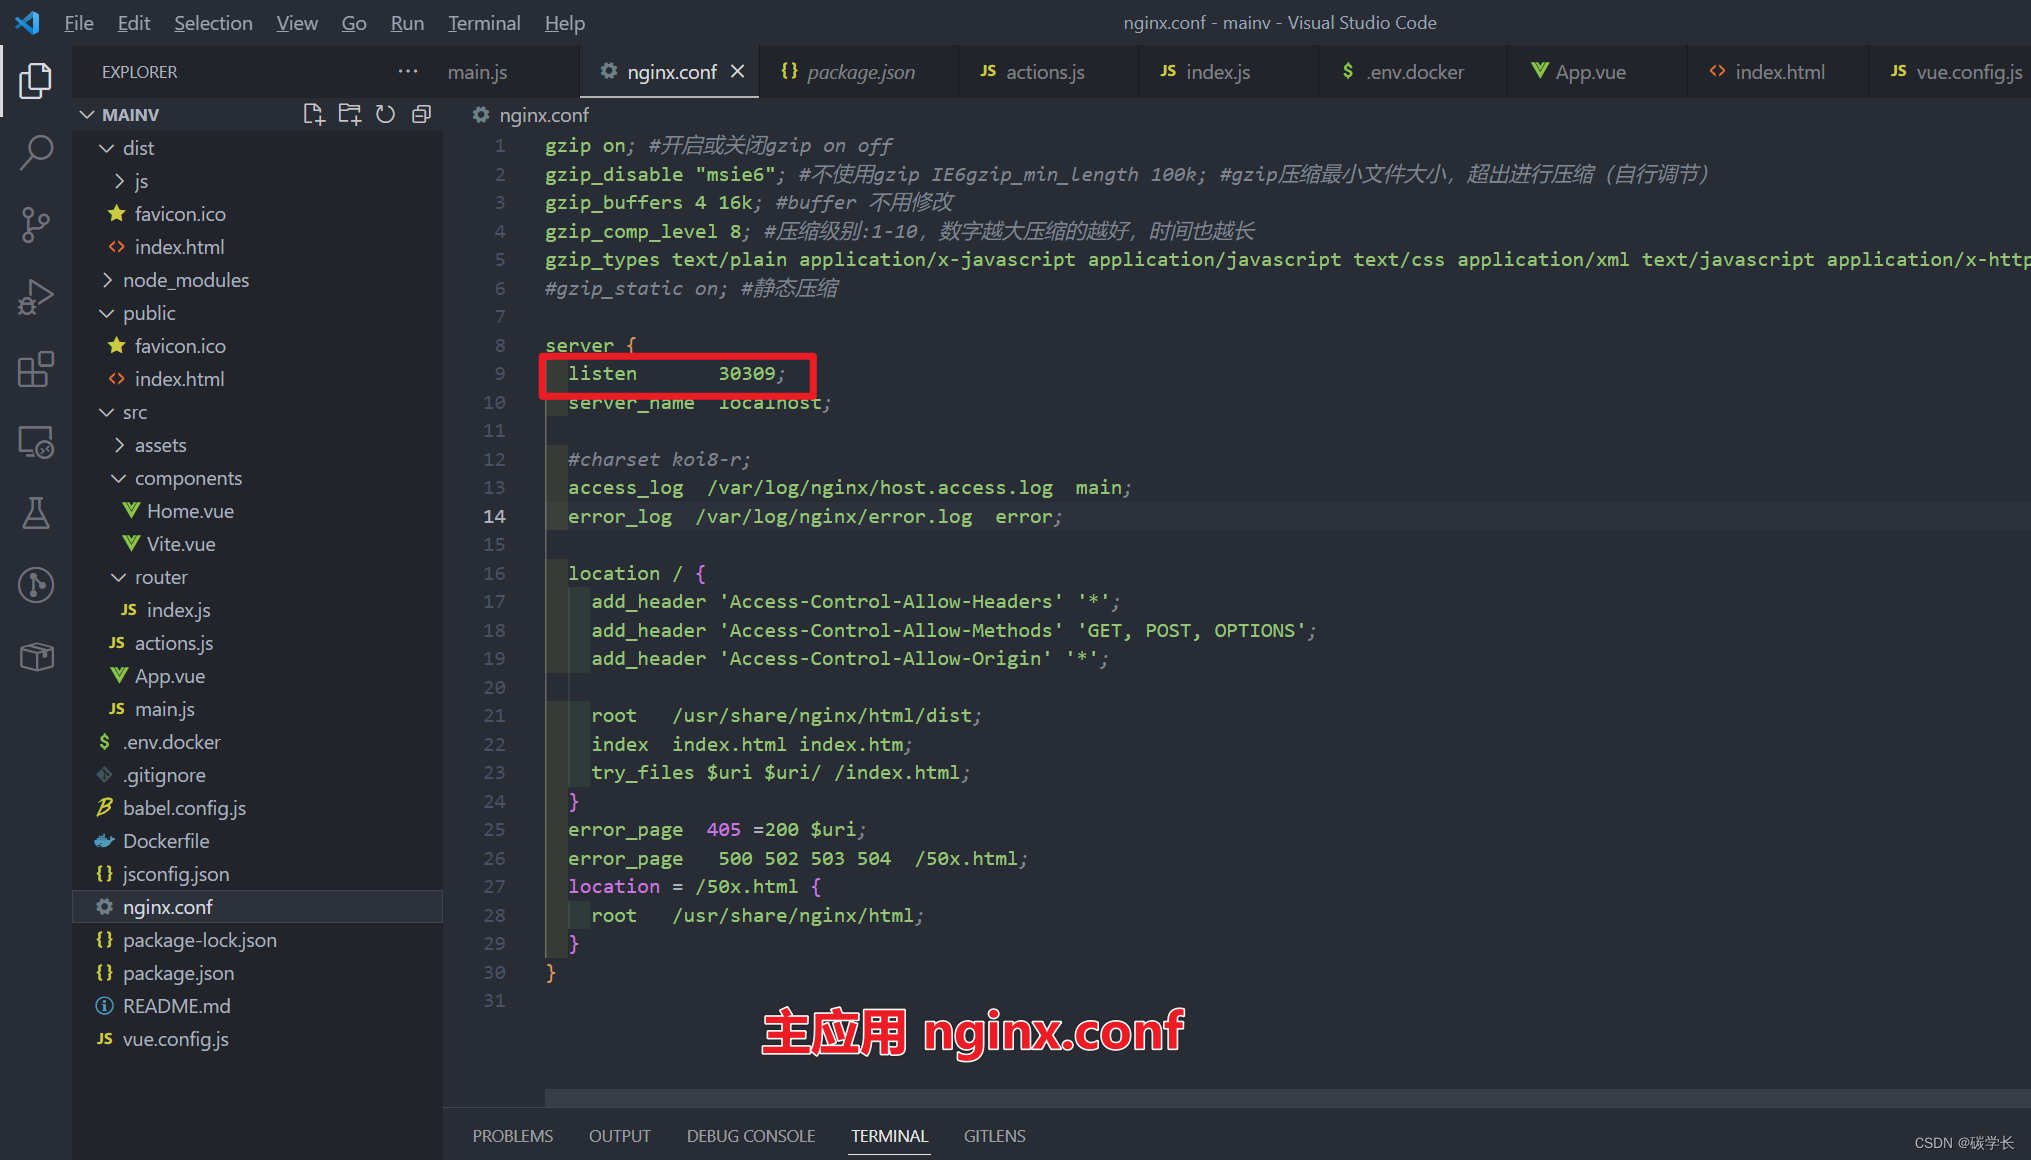
5、配置 vue.config.js 生产环境、开发环境的 publicPath

2、子应用
1、配置不同环境的 .env:原则是 nginx/tomcat 打包时,打包的文件夹名称为 uevwebuisystem,其他都为 dist,且都配置了 HOST 和 PORT(地址和端口,需要根据实际的生产环境修改 .env.prod 的内容,这里是本地部署所以 HOST 为 localhost,端口为 30307)
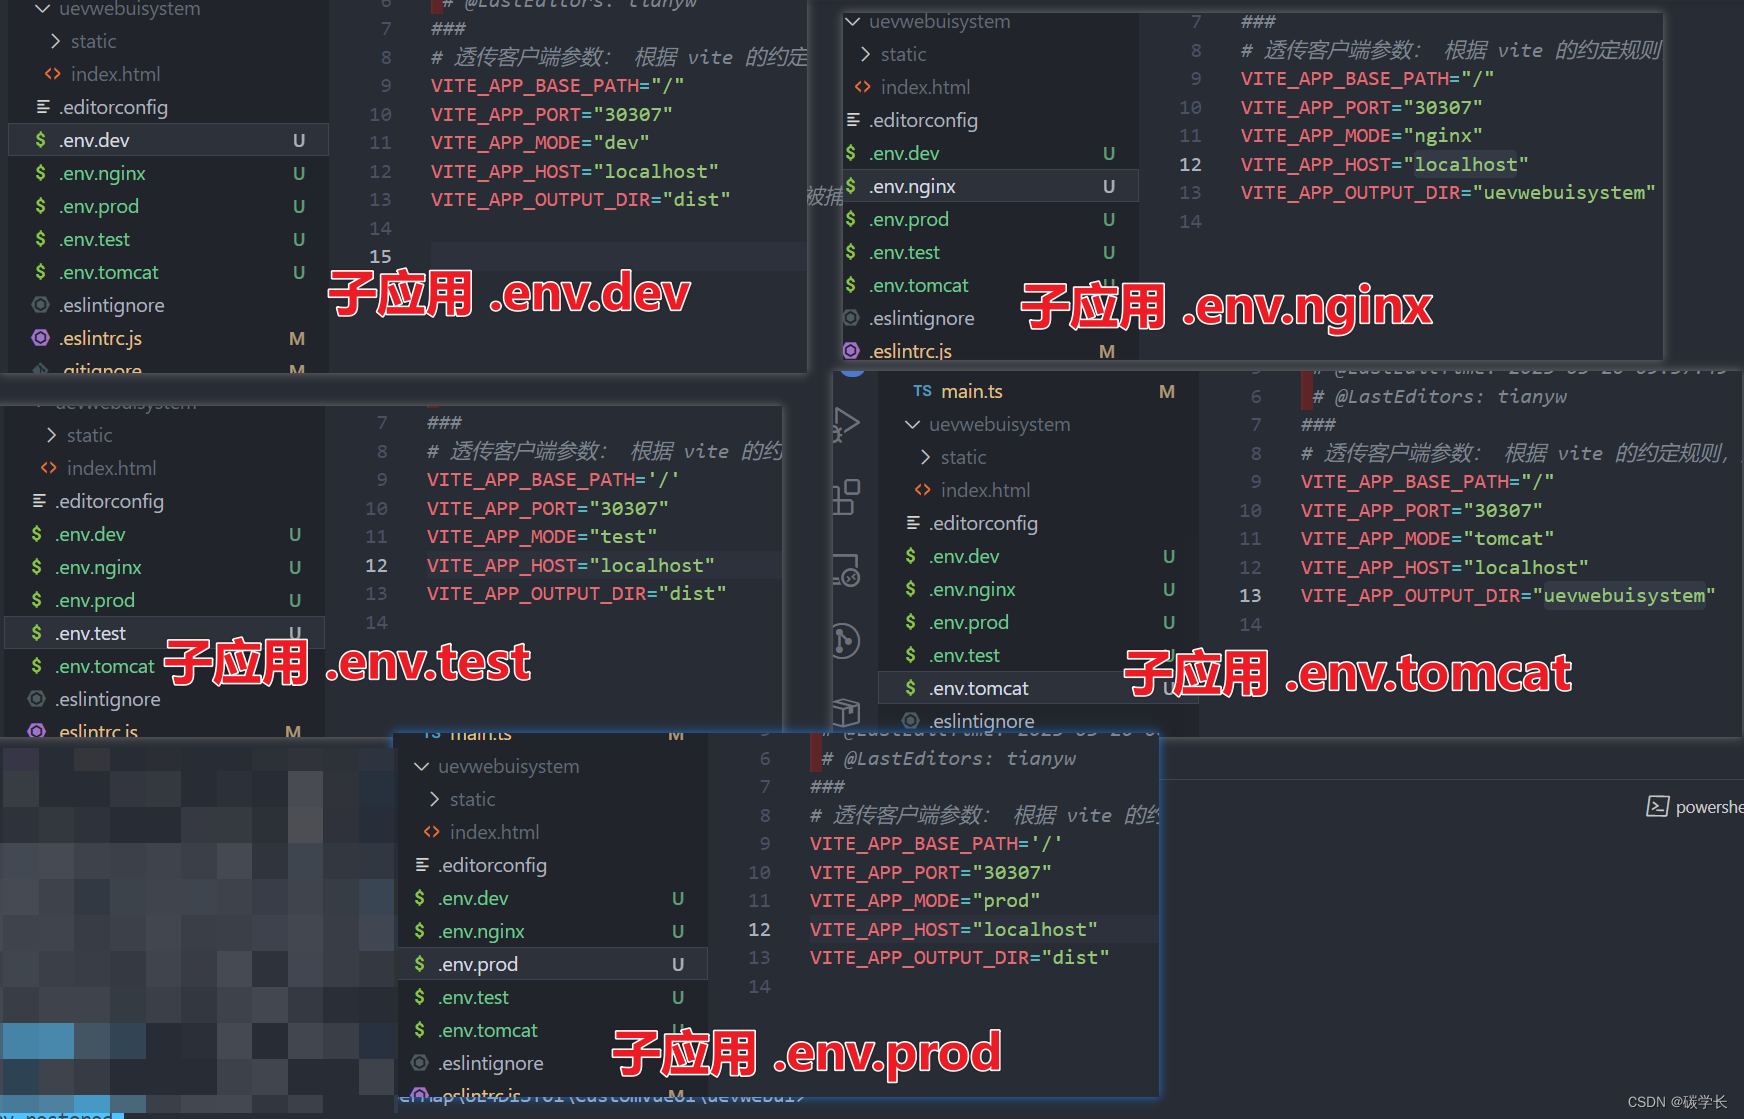
2、配置 package.json 打包命令:正常生产环境和 Docker 环境用 yarn/pnpm build 即可,nginx 和 tomcat 生产环境用 yarn/pnpm build:nginx/tomcat
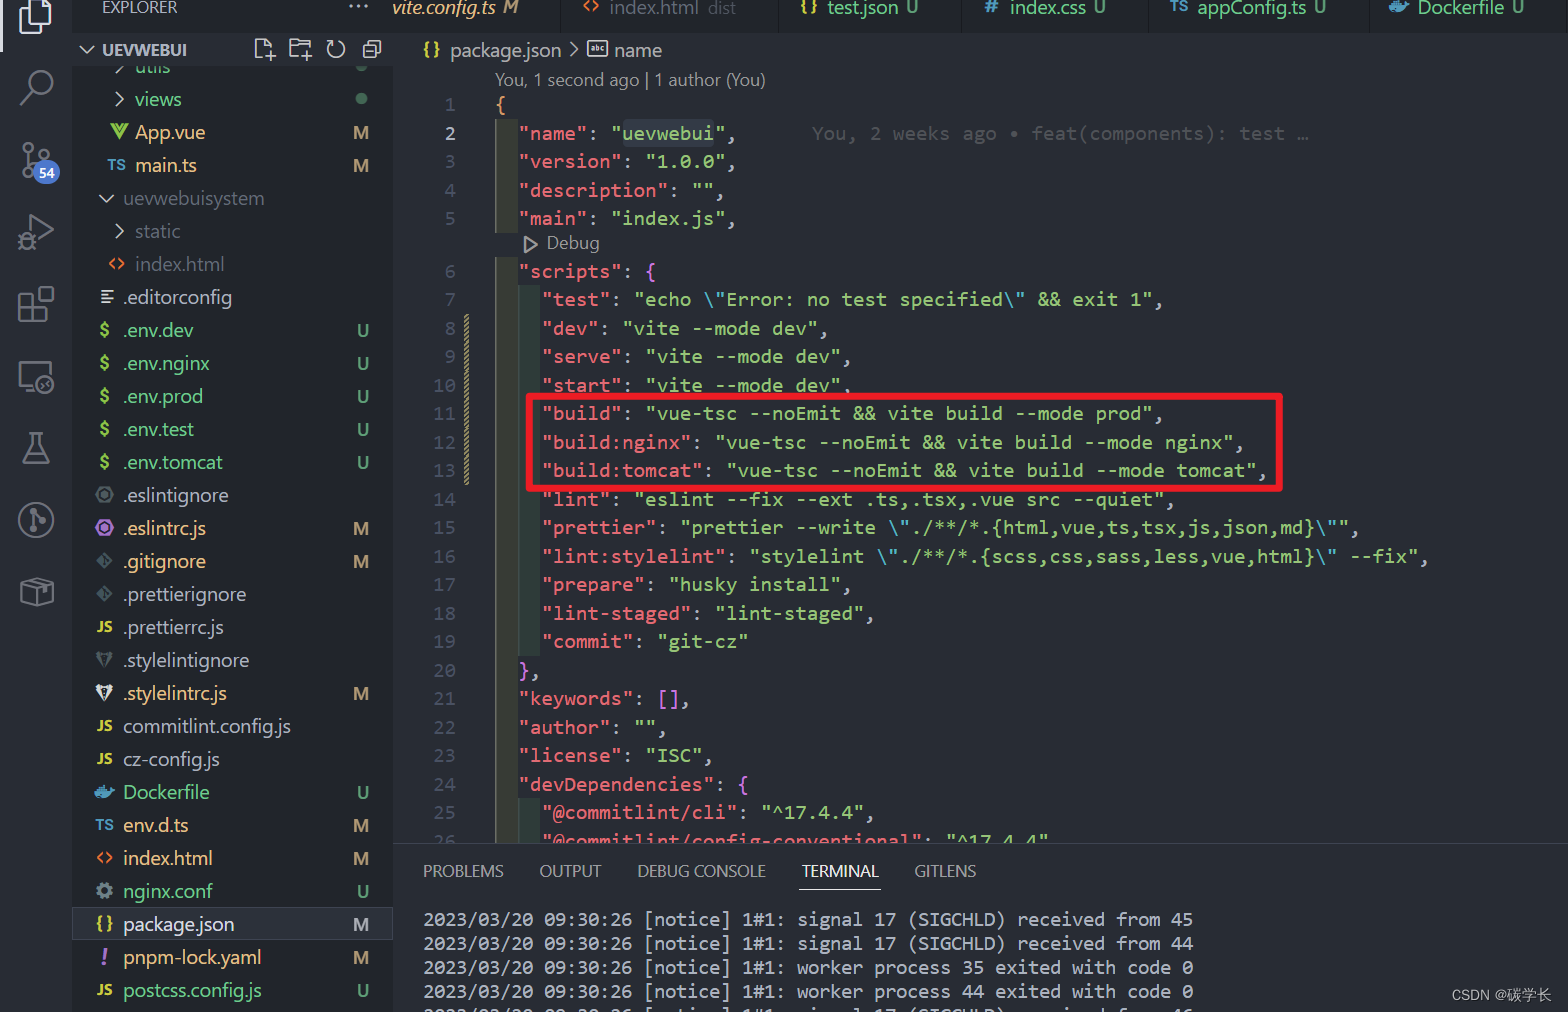
3、vite.config.ts 中配置 base 路径(生产环境需要配置真实的 HOST 和 PORT 地址)以及注册 qiankun
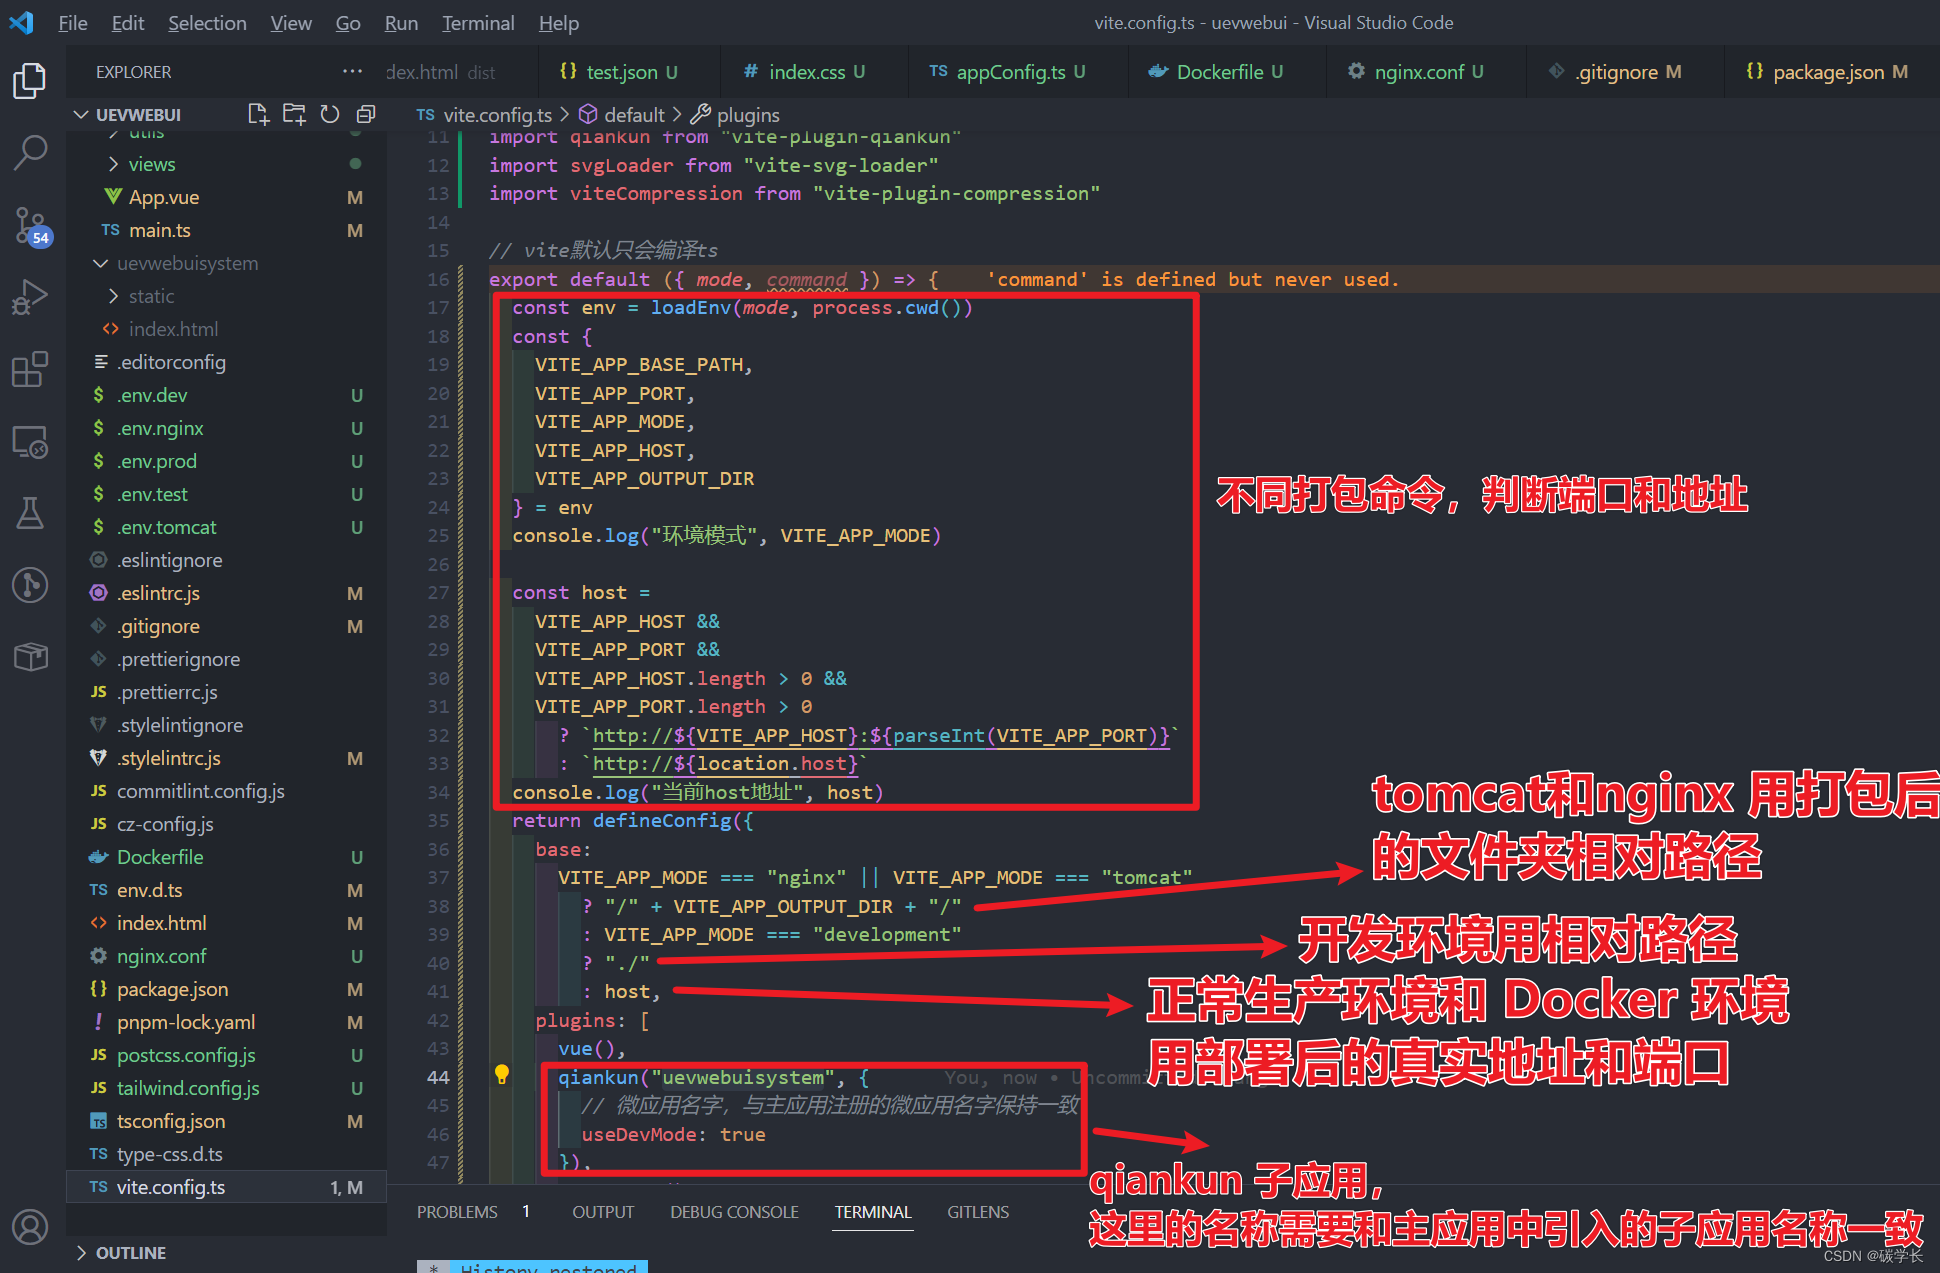
4、配置子应用创建路由时的路径问题:通过 qiankun 访问子应用时,通过 /uevwebuisystem/ 方式,独立访问时需要判断是 nginx、tomcat 环境还是开发环境
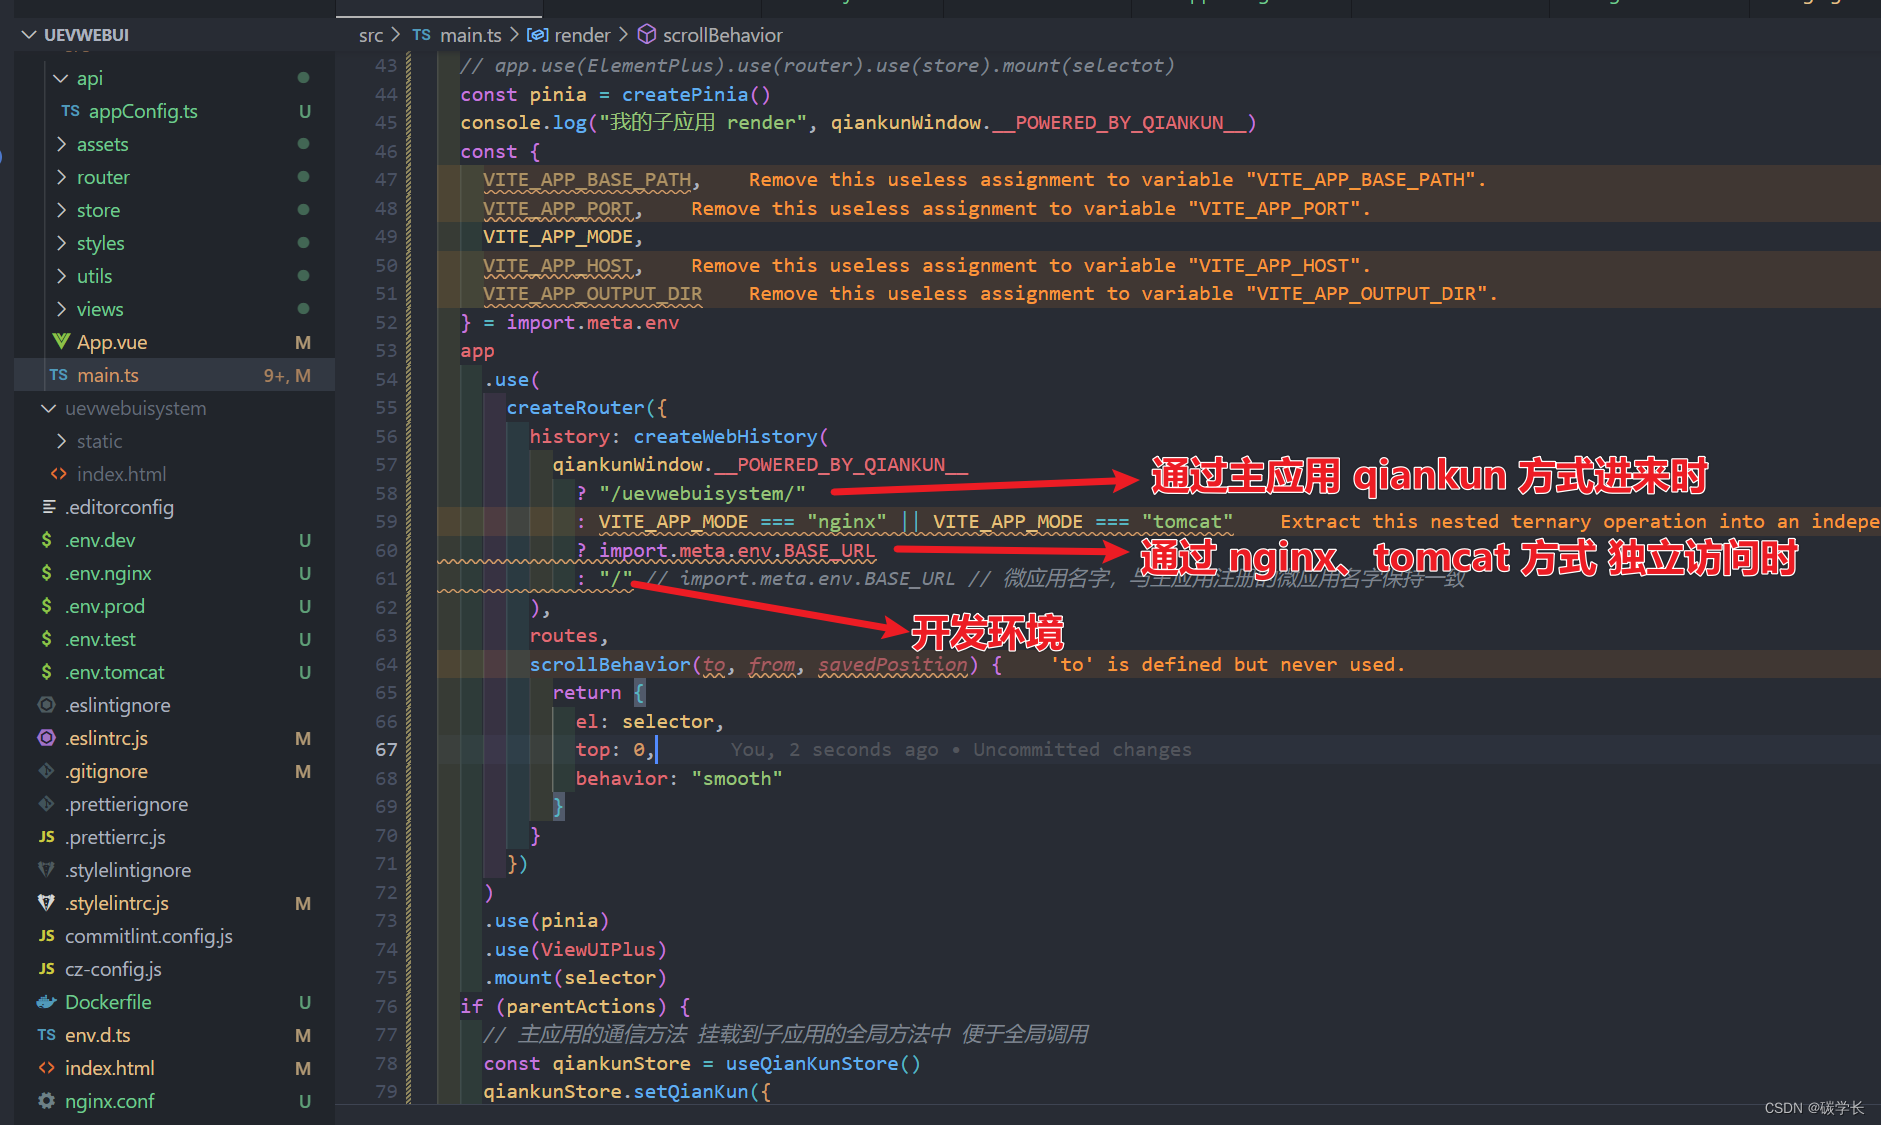
5、处理静态资源网络请求:当请求 public/static 下内容时,需要判断不同环境下的请求路径,防止从主应用访问子应用时,请求不到问题
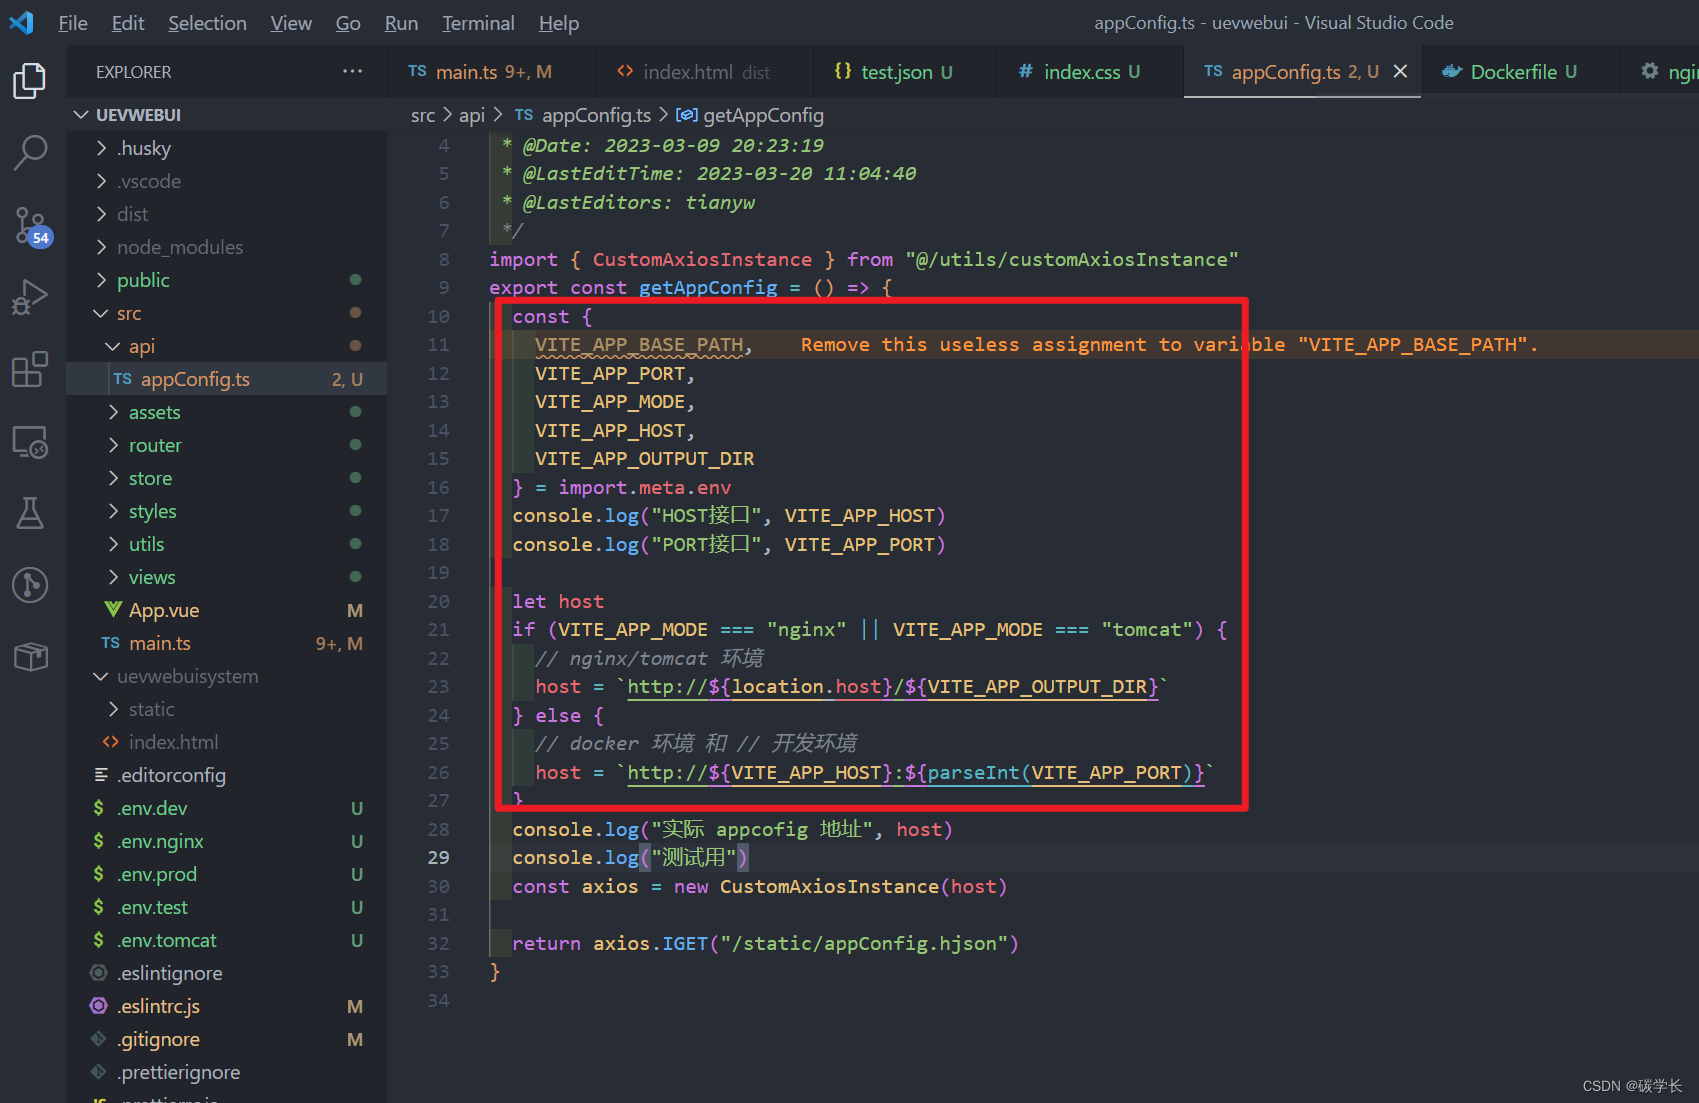
3、nginx、tomcat 环境的打包命令及 nginx 的配置
这里以 nginx 的部署为例:
主应用的打包命令为: yarn build 或 pnpm build,则此时主应用路径下会产生名为 dist 的文件夹,因为我们在主应用中设置的 为 demo-main-vue ,所以需要 dist 文件夹复制到 nginx 的 html 文件夹下,且重命名为 demo-main-vue。
子应用的打包命令为: yarn build:nginx 或 pnpm build:nginx,则此时主应用路径下回产生名为 uevwebuisystem 的文件夹,将其复制到 nginx 的 html 文件夹下即可。
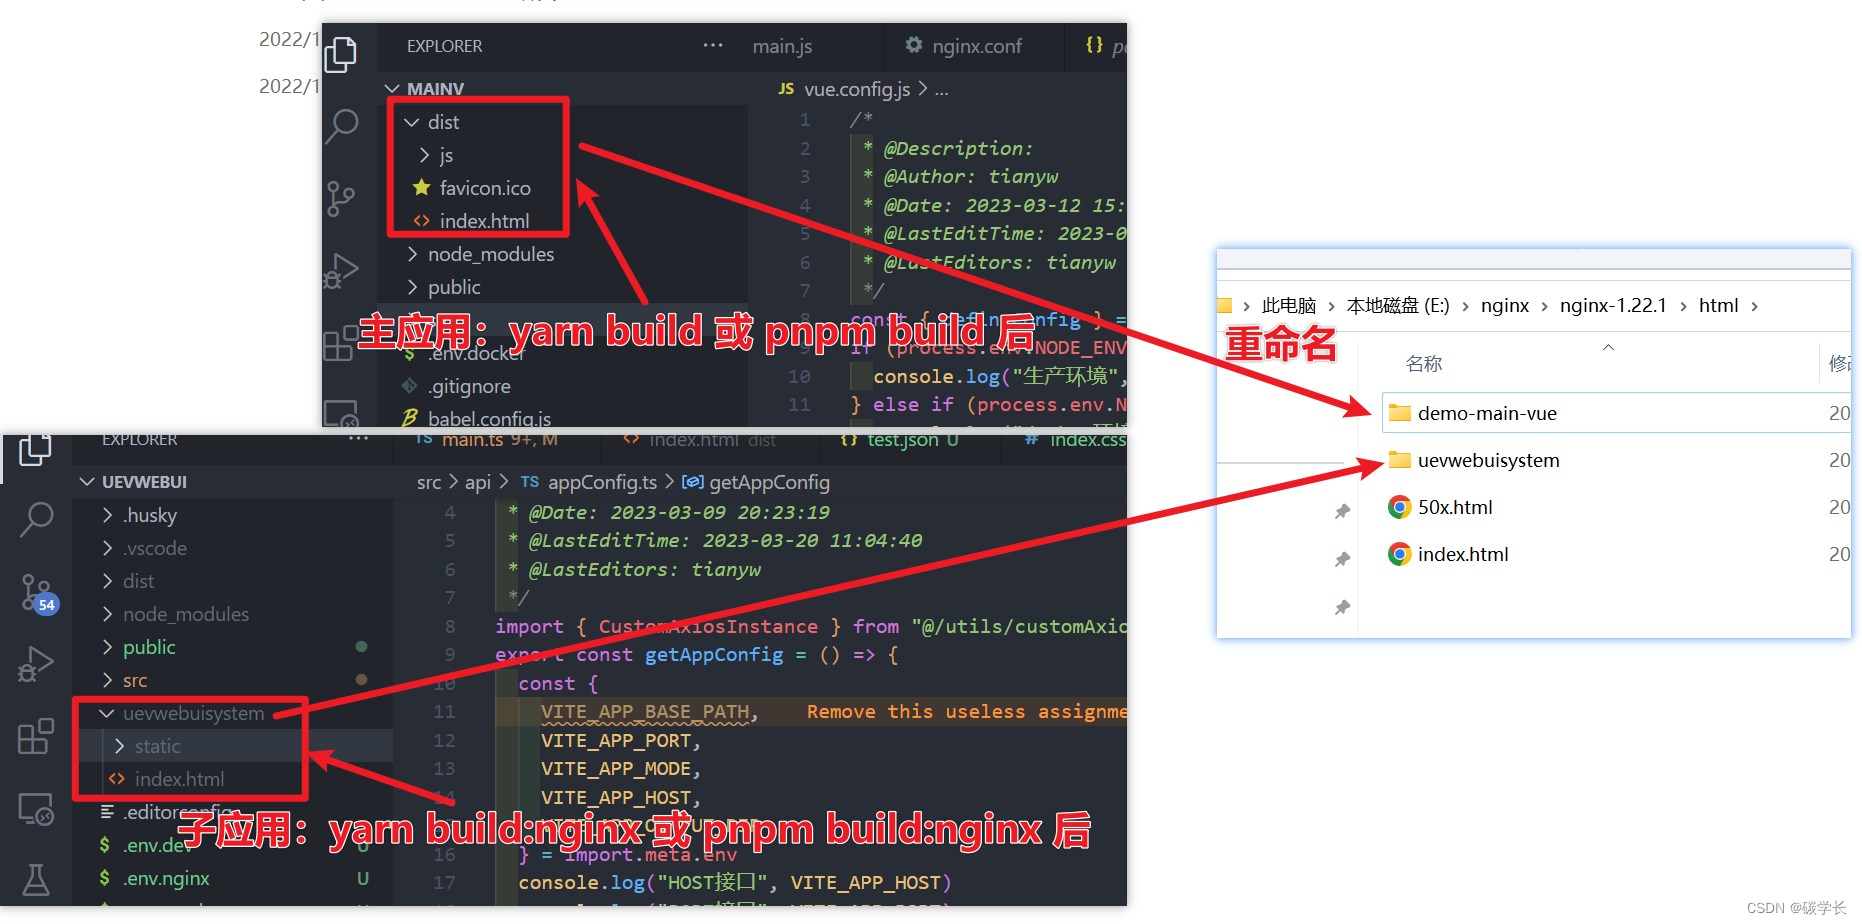
接下来,需要配置 nginx 的 nginx.conf,配置如下:
这里配置的端口为 8028,这主应用的访问地址为:http://localhost:8028/demo-main-vue
子应用的访问地址为:http://localhost:8028/uevwebuisystem

启动 nginx.exe 后,可以正常访问主、子应用,且子应用的样式、appconfig.hjson 请求也正常。
4、Docker 环境的打包命令
主应用:在执行了 yarn build:docker 或 pnpm build:docker 后,执行 docker build -t demo-main-vue .
之后再执行 docker run -p 30309:30309 --name demo-main-vueRun demo-main-vue,即可打包、运行该主应用。
子应用:在执行了 yarn build 或 pnpm build 后,执行 docker build -t uevwebuisystem .
之后再执行 docker run -p 30307:30307 --name uevwebuisystemRun uevwebuisystem,即可打包、运行该子应用。
至此,各个环境均可正常运行了,效果如下:
至此,整个前端工程化的所有流程就基本都完成了。
项目完整地址:https://github.com/tian666666/vitevueqiankun
项目完整地址2:https://gitee.com/tian666/vitevueqiankun
二、参考资料
种子项目:Vite 搭建 Vue3 + TypeScript 项目
Vue 3.x + Typescript + Vite 踩坑指南
vue3+vite+ts+eslint+prettier踩坑日记
Vue3 + Vite2 + Typescript + vue-router4 + sass + vuex4 + Element-plus(最新的技术,最详细的搭建)
2022 Stylelint 配置详细步骤(css、less、sass、vue适用)
使用vite-plugin-qiankun插件, 将应用快速接入乾坤(vue3 vite)
解决Cannot find module ‘./index.module.scss‘ or its corresponding type declarations.ts(2307)
Vite+Vue3+TypeScript+Husky+Lint-staged 搭建企业级轻量框架实践
husky v8+prettier+lint-staged+commitlint配置
新版husky8.0配合commitlint,规范我们的git的提交记录
husky + lint-staged + commitizen 配置提交代码规范
15分钟快速配置eslint,prettier,lint-staged,husky,commitizen实现前端项目代码规范化
将Vue项目部署在Nginx,解决前端路由、反向代理和静态资源问题
vue-router路由history模式+nginx部署项目到非根目录下(实践版)
手摸手 撸一个 vue3.0 history 模式配合 nginx 多 location 配置
TS2300: Duplicate identifier问题的解决
vue3 + Tailwind Css + Vite 搭建快速开发前端样式环境
定制一个 Vue 3 模板 - 集成 Vite, Pinia, Vue Router 与 Tailwind CSS
如何解决出现Unknown at rule @applyscss(unknownAtRules)警告?
bezierEasingMixin(); Inline JavaScript is not enabled. Is it set in your options
使用 vite2 + vue3 + ant-design-vue2 报错:[vite] Internal server error: Inline JavaScript is not enabled.
vite vue3.0 单个使用svg图标 vite-svg-loader
vue3-vite下配置 postcss-pxtorem 进行移动端适配
浅析Vue移动端/PC端的两种适配解决方案:amfe-flexible+postcss-pxtorem 与 postcss-px-to-viewport 及其在vite中如何配置
vite3+vue3 打包优化实战;history404、视图分析、分解分包
搭建一个微前端应用 vue3 + vite + qiankun
[qiankun 报错:Target container with #container not existed while xxx mounting!](https://www.cnblogs.com/ly0612/p/15433982.html)
微前端qiankun接入Vite子应用含Vue3和React18
微前端之qiankun 分别引入两种子应用 – react && vue + vite
操纵浏览器历史记录 : popstate() 、 history.pushState() 、 window.history.pushState()