QT入门第十四天 串口通信【QT入门第十四天 串口通信协议+收发数据+波特率+数据位+停止位+奇偶校验+串口识别射频RFID的卡号
第一章 常见的硬件通信接口协议
【1】硬件通信接口协议

很多硬件传感器需要用到如下的通信协议
串口(上层应用的串口代码编写,不是底层的串口代码编写)
SPI(外设串口通信,没有直接跟CPU通信,效果好)
IIC
CAN
USB
Uart
I2C
【2】使用串口的传感器
串口蓝牙,串口wifi
开发板跟电脑
第二章 串口通信的代码实现
常见的硬件校验算法有哪些?算法原理是怎么样?
CRC校验 --》循环冗余校验
哈希校验
【1】QT和Linux串口通信的比较
QT中的串口编程(既可以在window上运行,也能在ARM平台,linux平台都能运行)
linux中的串口编程(只能在ARM平台,linux平台运行)
波特率: 串口传输数据的速度  115200表示每一秒钟传输115200个比特位
数据位:串口传输一帧数据的位数
奇偶校验:校验--》检查数据收发是否发生了错误
奇校验
偶校验
停止位:标记数据的结尾
流控: 当数据的接收端无法收到数据的时候,会通知发送端停止发送
【2】QT中的串口编程
类和方法
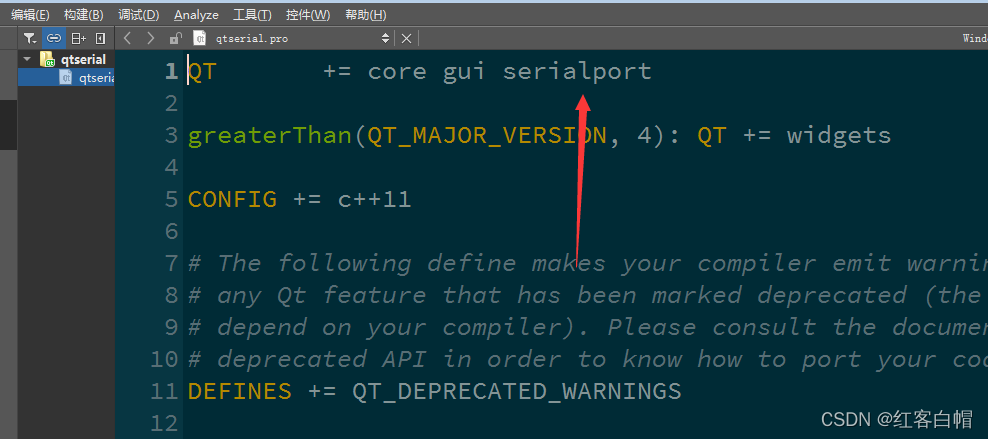
添加的库:  serialport
QSerialPortInfo      //获取当前系统中所有的串口信息
QSerialPort           //表示串口
(1)代码思路
第一步:获取当前系统所有的串口信息
[static] QList<QSerialPortInfo> QSerialPortInfo::availablePorts()
返回值:  QList存放的就是所有的串口信息
QString QSerialPortInfo::description() const
返回:串口的描述信息
QString QSerialPortInfo::portName() const
返回:串口的名字
第二步:创建QSerialPort 串口对象,配置串口的参数
QSerialPort::QSerialPort(const QString &name)
参数:name --》串口的名字
bool setBaudRate(qint32 baudRate)
参数:baudRate --》你要设置的波特率  QSerialPort::Baud115200
bool setDataBits(QSerialPort::DataBits dataBits)
参数:dataBits --》QSerialPort::Data8   8位数据位
bool setParity(QSerialPort::Parity parity)
参数:parity --》QSerialPort::NoParity  无奇偶校验
QSerialPort::EvenParity   偶校验
QSerialPort::OddParity    奇校验
bool setStopBits(QSerialPort::StopBits stopBits)
参数:stopBits --》QSerialPort::OneStop   1位停止位
QSerialPort::OneAndHalfStop   1.5位停止位
bool setFlowControl(QSerialPort::FlowControl flowControl)
参数:flowControl --》QSerialPort::NoFlowControl   无流控
QSerialPort::HardwareControl   硬件流控
QSerialPort::SoftwareControl    软件流控
第三步:打开串口
bool QSerialPort::open(QIODevice::OpenMode mode)
第四步:读写串口数据

读串口--》接收对方从串口发送过来的数据
[signal] void QIODevice::readyRead()  //关联这个信号,在槽函数中读取数据
read/readAll
写串口--》你把数据从串口发送给对方
write
第五步:关闭串口
void QSerialPort::close()
【3】实际开发使用串口的时候,参数究竟配置成什么样??
答案:认真阅读传感器厂家提供的使用说明书–》清楚地告诉你串口该如何配置
第三章 linux中串口编程
【1】重要的结构体
struct termios
{


   //里面都是标志位,用来设置串口参数
   c_cflag   //控制模式标志位

}
【2】思路和方法【打开串口的驱动、配置串口】
第一步:打开串口的驱动
连接电脑        --》/dev/ttySAC0
右上角第一排 --》/dev/ttySAC1
右上角第二排 --》/dev/ttySAC2
右上角第三排 --》/dev/ttySAC3
open()
第二步:配置串口
#include <termios.h>
#include <unistd.h>
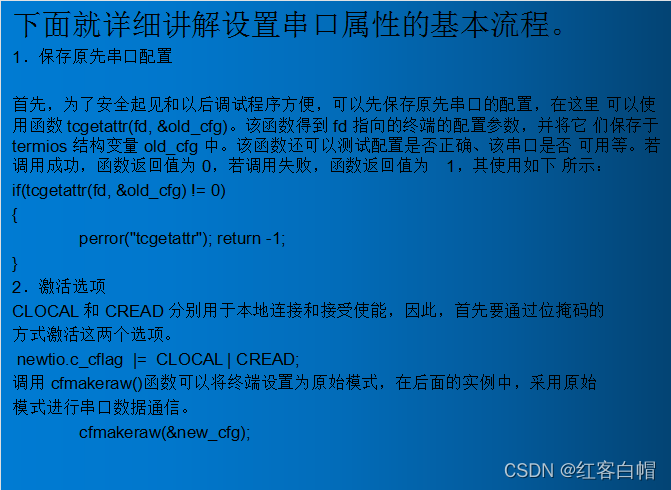
int tcgetattr(int fd, struct termios *termios_p); //获取当前串口的配置信息
参数: fd --》串口的文件描述符
termios_p --》结构体指针,用来保存串口配置信息
(1)设置串口工作在原始模式(串口只用于数据的收发,不用做其它功能)
struct termios  myios;
bzero(&myios,sizeof(myios));
myios.c_cflag |=  CLOCAL | CREAD;
void cfmakeraw(struct termios *termios_p);
(2)设置波特率,数据位,停止位,奇偶校验…

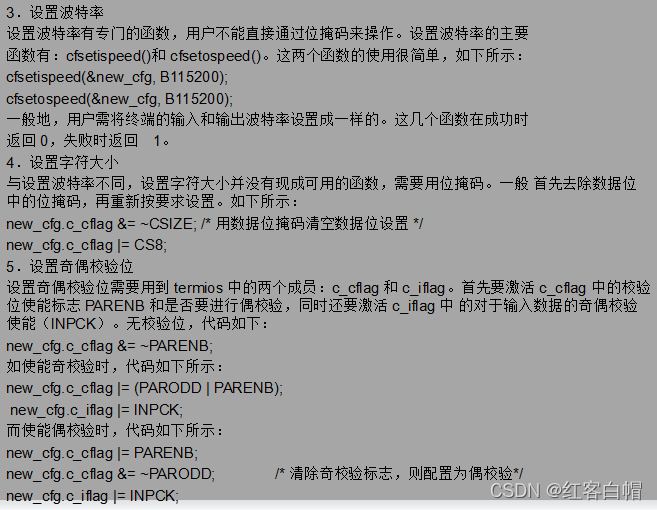
波特率:
int cfsetispeed(struct termios *termios_p, speed_t speed);
int cfsetospeed(struct termios *termios_p, speed_t speed);
        参数:speed --》你要设置的波特率B115200      B数字(就是波特率)
数据位:
myios.c_cflag &= ~CSIZE; /* 用数据位掩码清空数据位设置 */
myios.c_cflag |= CS8;  //CS5    CS6    CS7    CS8
奇偶校验:
奇校验
myios.c_cflag |= (PARODD | PARENB);
myios.c_iflag |= INPCK;
偶校验
myios.c_cflag |= PARENB;
myios.c_cflag &= ~PARODD;	/* 清除奇校验标志,则配置为偶校验*/
myios.c_iflag |= INPCK;
无校验
myios.c_cflag &= ~PARENB; //使能 --》开启 失能 --》关闭
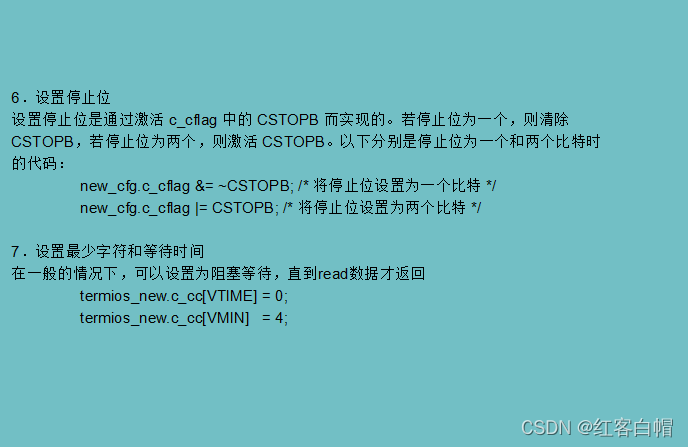
停止位
myios.c_cflag &= ~CSTOPB; 1位停止位
myios.c_cflag |= CSTOPB; 2位停止位
设置最少读取的字符数量和最长等待时间
myiosc_cc[VTIME] = 0;
myios.c_cc[VMIN] = 4;
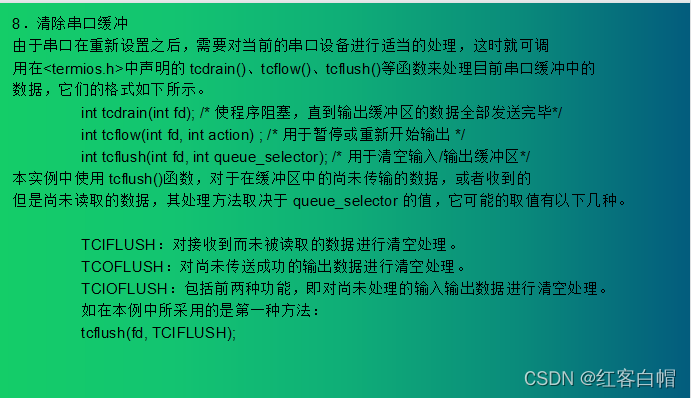
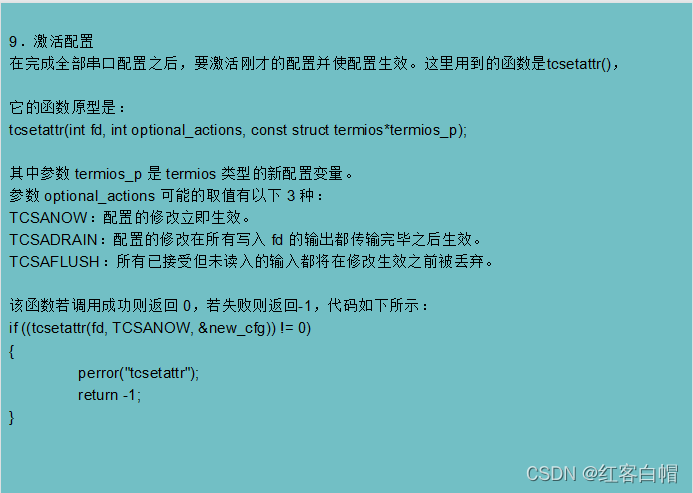
让刚才的设置生效(激活配置)
int tcflush(int fd, int queue_selector);]
参数: fd --》串口的文件描述符
queue_selector --》TCIOFLUSH 刷新串口的输入输出缓冲区
tcsetattr(int fd, int optional_actions, const struct termios*termios_p);
参数: fd --》串口的文件描述符
optional_actions --》TCSANOW 设置立即生效
第三步:收发数据
发送 write()
接收 read()
第四步:关闭串口
close()
第四章 串口的应用–》通过串口读写获取RFID的卡号
【1】分析RFID的通信协议

通信协议:硬件传感器依照什么样的数据格式去发送/接收数据
类似于tcp通信发送字符串/发送表情包
【2】分析ISO14443A命令
A命令(请求): 激活RFID读卡模块,使之能够对外发射电磁场,当有卡靠近模块的时候,模块能够感应到卡的存在
char  abuf[7];
abuf[0]=0x07;  //帧长
abuf[1]=0x02;  //ISO14443A
abuf[2]='A';  // A命令
abuf[3]=0x01; //信息长度
abuf[4]=0x52; //ALL模式
abuf[5]=校验和;
abuf[6]=0x03;  //帧结束标记
//发送A命令给模块
write(fd,abuf,7);  //串口发送A命令给RFID读卡模块       主机--》从机    命令
//接收模块回复的应答信息
char rbuf[8];
read(fd,rbuf,8);                                                               从机--》主机    状态
//判断接收的应答信息是否正确
if(rbuf[2]==0x00)  //应答成功
        printf("A命令发送成功了!\n");
else
        printf("A命令没有发送成功了!\n");
B命令(防碰撞):  防止多张卡同时进入磁场范围,出现读写冲突的问题(只会挑选其中一张来读写)
char  bbuf[8];
bbuf[0]=0x08;  //帧长
bbuf[1]=0x02;  //ISO14443A
bbuf[2]='B';  // B命令
bbuf[3]=0x02; //信息长度
bbuf[4]=0x93; //一级防碰撞
bbuf[5]=0x00;
bbuf[6]=校验和;
bbuf[7]=0x03;  //帧结束标记
//发送B命令给模块
write(fd,bbuf,8);  //串口发送B命令给RFID读卡模块       主机--》从机    命令
//接收模块回复的应答信息
char rbuf[10];
read(fd,rbuf,10);                                                               从机--》主机    状态
//判断接收的应答信息是否正确
if(rbuf[2]==0x00)  //应答成功
        printf("B命令发送成功了,同时得到了序列号!\n"); //卡的序列号 rbuf[4]rbuf[5]rbuf[6]rbuf[7]
else
        printf("B命令没有发送成功了!\n");
参考代码:
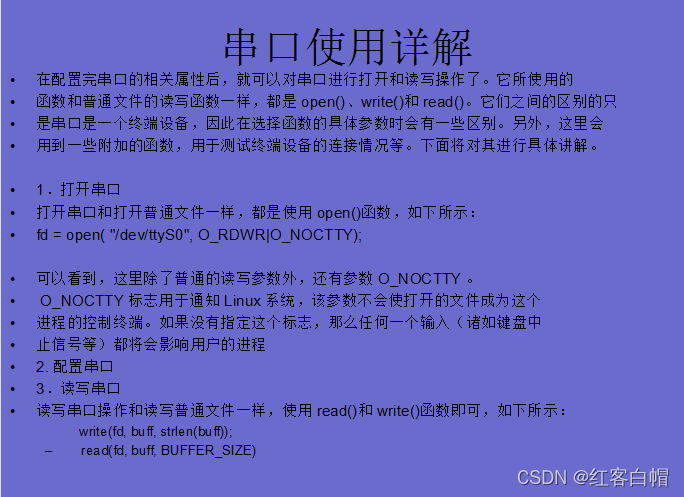
第一个:以非阻塞的方式打开串口(无论串口是否有数据可读,read去读取串口数据的时候都不会阻塞)
fd = open("/dev/ttySAC1", O_RDWR | O_NOCTTY | O_NONBLOCK);
第二个:使用了多路复用监测串口是否有数据可读(可读就调用read去读取模块的响应信息)
第三个:延时–》while(1)执行速度太快了,串口的读写速度跟不上,所以适当延时一下

第五章 跟我一起学写代码
【1】QT实现串口编写
main.cpp
#include "mainwindow.h"

#include <QApplication>

int main(int argc, char *argv[])
{


    QApplication a(argc, argv);
    MainWindow w;
    w.show();
    return a.exec();
}
mainwindow.h
#ifndef MAINWINDOW_H
#define MAINWINDOW_H

#include <QMainWindow>
#include <QSerialPort>
#include <QSerialPortInfo>
QT_BEGIN_NAMESPACE
namespace Ui {

     class MainWindow; }
QT_END_NAMESPACE

class MainWindow : public QMainWindow
{


    Q_OBJECT

public:
    MainWindow(QWidget *parent = nullptr);
    ~MainWindow();

private slots:
    void on_openbt_clicked();

    void on_portbox_activated(const QString &arg1);

    void on_bardbox_activated(const QString &arg1);

    void on_databox_activated(const QString &arg1);

    void on_jobox_activated(const QString &arg1);

    void on_stopbox_activated(const QString &arg1);

private:
    Ui::MainWindow *ui;
    QString portstr;  //端口名称
    QString bardstr; //波特率
    QString datastr;  //数据位
    QString jostr;    //奇偶校验
    QString stopstr; //停止位
    QSerialPort *myport;
};
#endif // MAINWINDOW_H
mainwindow.cpp
#include "mainwindow.h"
#include "ui_mainwindow.h"
#include <QList>
MainWindow::MainWindow(QWidget *parent)
    : QMainWindow(parent)
    , ui(new Ui::MainWindow)
{


    ui->setupUi(this);
    //获取当前系统所有可以使用的串口信息
    QList<QSerialPortInfo> mylist=QSerialPortInfo::availablePorts();
    for(auto &x:mylist)
        ui->portbox->addItem(x.portName());

    //初始化波特率
    ui->bardbox->addItem("9600");
    ui->bardbox->addItem("115200");

    //初始化数据位
    ui->databox->addItem("5");
    ui->databox->addItem("6");
    ui->databox->addItem("7");
    ui->databox->addItem("8");

    //初始化停止位
    ui->stopbox->addItem("1");
    ui->stopbox->addItem("1.5");
    ui->stopbox->addItem("2");

    //初始化奇偶校验
    ui->jobox->addItem("none");
    ui->jobox->addItem("odd");
    ui->jobox->addItem("even");

}

MainWindow::~MainWindow()
{


    delete ui;
}

//打开串口
void MainWindow::on_openbt_clicked()
{


    //初始化串口对象
    myport=new QSerialPort(portstr);
    //获取串口配置信息
    if(bardstr=="115200")
        myport->setBaudRate(QSerialPort::Baud115200);
    if(datastr=="8")
        myport->setDataBits(QSerialPort::Data8);
    if(jostr=="none")
        myport->setParity(QSerialPort::NoParity);
    if(stopstr=="1")
        myport->setStopBits(QSerialPort::OneStop);

    myport->setFlowControl(QSerialPort::NoFlowControl);

    //打开串口
    myport->open(QIODevice::ReadWrite);
}

void MainWindow::on_portbox_activated(const QString &arg1)
{


    portstr=arg1;
}

void MainWindow::on_bardbox_activated(const QString &arg1)
{


    bardstr=arg1;
}

void MainWindow::on_databox_activated(const QString &arg1)
{


    datastr=arg1;
}

void MainWindow::on_jobox_activated(const QString &arg1)
{


    jostr=arg1;
}

void MainWindow::on_stopbox_activated(const QString &arg1)
{


    stopstr=arg1;
}
mainwindow.ui
<?xml version="1.0" encoding="UTF-8"?>
<ui version="4.0">
 <class>MainWindow</class>
 <widget class="QMainWindow" name="MainWindow">
  <property name="geometry">
   <rect>
    <x>0</x>
    <y>0</y>
    <width>800</width>
    <height>600</height>
   </rect>
  </property>
  <property name="windowTitle">
   <string>MainWindow</string>
  </property>
  <widget class="QWidget" name="centralwidget">
   <widget class="QComboBox" name="portbox">
    <property name="geometry">
     <rect>
      <x>100</x>
      <y>30</y>
      <width>161</width>
      <height>31</height>
     </rect>
    </property>
   </widget>
   <widget class="QLabel" name="label">
    <property name="geometry">
     <rect>
      <x>20</x>
      <y>40</y>
      <width>31</width>
      <height>16</height>
     </rect>
    </property>
    <property name="text">
     <string>端口</string>
    </property>
   </widget>
   <widget class="QLabel" name="label_2">
    <property name="geometry">
     <rect>
      <x>20</x>
      <y>76</y>
      <width>51</width>
      <height>20</height>
     </rect>
    </property>
    <property name="text">
     <string>波特率</string>
    </property>
   </widget>
   <widget class="QComboBox" name="bardbox">
    <property name="geometry">
     <rect>
      <x>100</x>
      <y>70</y>
      <width>161</width>
      <height>31</height>
     </rect>
    </property>
   </widget>
   <widget class="QComboBox" name="databox">
    <property name="geometry">
     <rect>
      <x>100</x>
      <y>120</y>
      <width>161</width>
      <height>31</height>
     </rect>
    </property>
   </widget>
   <widget class="QComboBox" name="jobox">
    <property name="geometry">
     <rect>
      <x>100</x>
      <y>170</y>
      <width>161</width>
      <height>31</height>
     </rect>
    </property>
   </widget>
   <widget class="QLabel" name="label_3">
    <property name="geometry">
     <rect>
      <x>20</x>
      <y>180</y>
      <width>81</width>
      <height>16</height>
     </rect>
    </property>
    <property name="text">
     <string>奇偶校验</string>
    </property>
   </widget>
   <widget class="QLabel" name="label_4">
    <property name="geometry">
     <rect>
      <x>20</x>
      <y>230</y>
      <width>61</width>
      <height>16</height>
     </rect>
    </property>
    <property name="text">
     <string>停止位</string>
    </property>
   </widget>
   <widget class="QComboBox" name="stopbox">
    <property name="geometry">
     <rect>
      <x>100</x>
      <y>220</y>
      <width>161</width>
      <height>31</height>
     </rect>
    </property>
   </widget>
   <widget class="QLabel" name="label_5">
    <property name="geometry">
     <rect>
      <x>20</x>
      <y>130</y>
      <width>51</width>
      <height>16</height>
     </rect>
    </property>
    <property name="text">
     <string>数据位</string>
    </property>
   </widget>
   <widget class="QCheckBox" name="checkBox">
    <property name="geometry">
     <rect>
      <x>370</x>
      <y>50</y>
      <width>71</width>
      <height>16</height>
     </rect>
    </property>
    <property name="text">
     <string>DTR/DSR</string>
    </property>
   </widget>
   <widget class="QLabel" name="label_6">
    <property name="geometry">
     <rect>
      <x>370</x>
      <y>20</y>
      <width>31</width>
      <height>16</height>
     </rect>
    </property>
    <property name="text">
     <string>流控</string>
    </property>
   </widget>
   <widget class="QCheckBox" name="checkBox_2">
    <property name="geometry">
     <rect>
      <x>370</x>
      <y>80</y>
      <width>71</width>
      <height>16</height>
     </rect>
    </property>
    <property name="text">
     <string>RTS/CTS</string>
    </property>
   </widget>
   <widget class="QCheckBox" name="checkBox_3">
    <property name="geometry">
     <rect>
      <x>370</x>
      <y>110</y>
      <width>71</width>
      <height>16</height>
     </rect>
    </property>
    <property name="text">
     <string>XON/XOFF</string>
    </property>
   </widget>
   <widget class="QPushButton" name="openbt">
    <property name="geometry">
     <rect>
      <x>20</x>
      <y>280</y>
      <width>241</width>
      <height>41</height>
     </rect>
    </property>
    <property name="text">
     <string>打开串口</string>
    </property>
   </widget>
  </widget>
  <widget class="QMenuBar" name="menubar">
   <property name="geometry">
    <rect>
     <x>0</x>
     <y>0</y>
     <width>800</width>
     <height>22</height>
    </rect>
   </property>
  </widget>
  <widget class="QStatusBar" name="statusbar"/>
 </widget>
 <resources/>
 <connections/>
</ui>
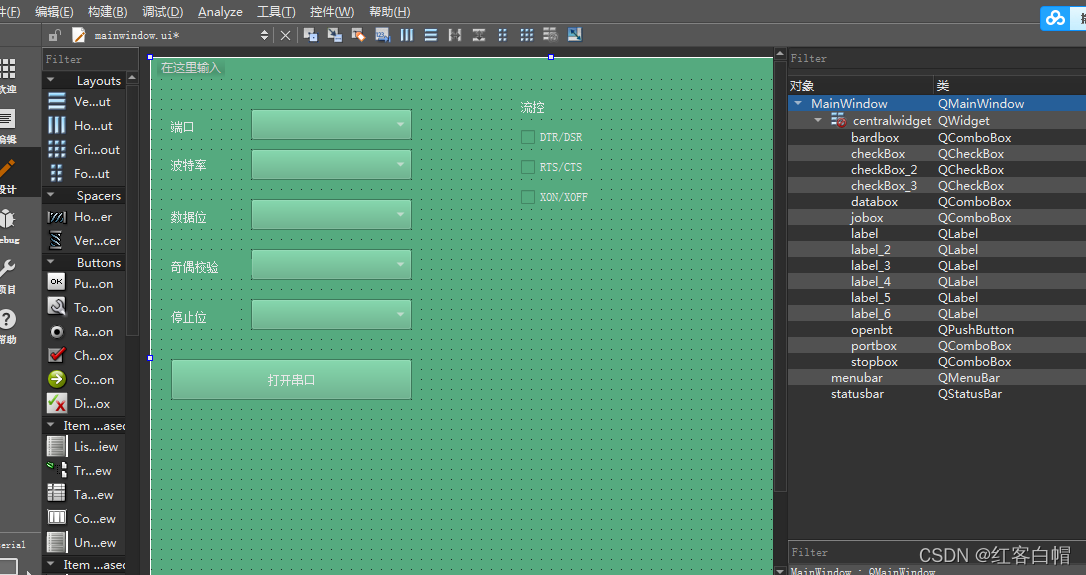
界面设计:
【2】串口通信应用领域
串口概述
常见的数据通信的基本方式可分为并行通信与串行通信两种。

并行通信是指:利用多条数据传输线将一个字数据的各比特位同时传送。
它的特点是传输速度快,适用于传输距离短且传输速度较高的通信。

串行通信是指:利用一条传输线将数据以比特位为单位顺序传送。
特点是通信 线路简单,利用简单的线缆就可实现通信,降低成本,适用于传输距离长且传输速度较慢的通信。
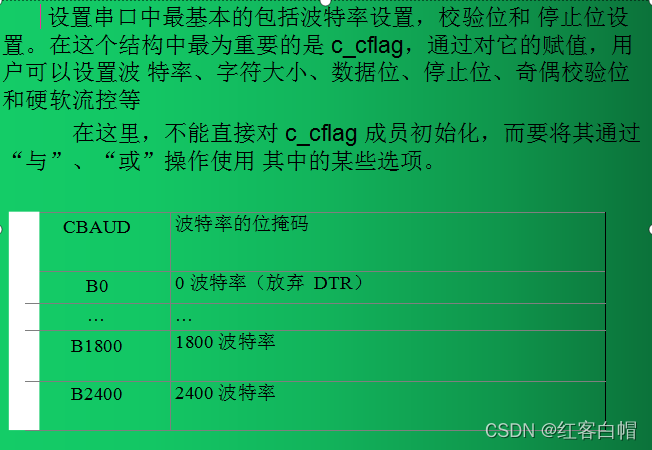
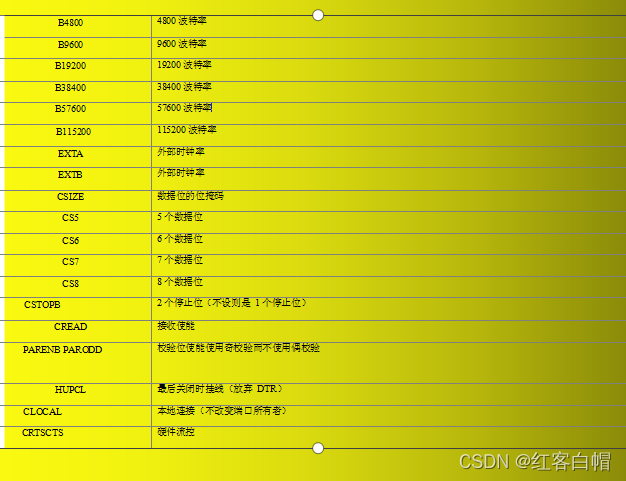
串口设置详解
串口参数的配置读者在配置SecurCRT也已经接触过,一般包括波特率、起始位比特数、数据位比特数、停止位比特数和流控模式。在此,可以将其配置 为波特率 115200、起始位 1b、数据位 8b、停止位 1b 和无流控模式。
串口的设置主要是设置 struct termios 结构体的各成员值

#include<termios.h>
struct termios
{


	unsigned short	c_iflag;		/* 输入模式标志 */
	unsigned short	c_oflag;		/* 输出模式标志 */
	unsigned short	c_cflag;		/* 控制模式标志*/
	unsigned short	c_lflag;		/* 本地模式标志 */
	 unsigned char	c_line;		/* 线路规程 */
	unsigned char	c_cc[NCC];	/* 控制特性 */
	speed_t	c_ispeed;			/* 输入速度 */
	speed_t	c_ospeed;		/* 输出速度 */
};
termios 是在 POSIX 规范中定义的标准接口,表示终端设备(包括虚拟终端、串 口等)。口是一种终端设备,一般通过终端编程接口对其进行配置和控制。在具体讲 解串口相关编程之前,先了解一下终端相关知识。
终端 有 3  种 工 作 模 式 ,分 别为 规 范模 式 ( canonical  mode )、 非规 范模 式
(non-canonical mode)和原始模式(raw mode)。


在 非规 范模 式 下, 对 参 数 MIN ( c_cc[VMIN] )和 TIME
(c_cc[VTIME])的设置决定 read()函数的调用方式。设置可以有 4 种不同的情况。
	MIN = 0 和 TIME = 0:read()函数立即返回。若有可读数据,则读取数据并 返回被读取的字节数,否则读取失败并返回 0。
	MIN > 0 和 TIME = 0:read()函数会被阻塞直到 MIN 个字节数据可被读取。
	MIN = 0 和 TIME > 0:只要有数据可读或者经过 TIME 个十分之一秒的时间, read()函数则立即返回,返回值为被读取的字节数。如果超时并且未读到数 据,则 read()函数返回 0。
	MIN > 0 和 TIME > 0:当有 MIN 个字节可读或者两个输入字符之间的时间 间隔超过 TIME 个十分之一秒时,read()函数才返回。因为在输入第一个字符 之后系统才会启动定时器,所以在这种情况下,read()函数至少读取一个字 节之后才返回。

按照严格意义来讲,原始模式是一种特殊的非规范模式。在原始模式下,所有的 输入数据以字节为单位被处理。在这个模式下,终端是不可回显的,而且所有特定的 终端输入/输出控制处理不可用。通过调用 cfmakeraw()函数可以将终端设置为原始模 式
第六章 往期内容你复习了吗?
第六期 QTmplayer视频播放器+列表框+交叉编译QT程序+QT控制硬件+多进程
第七期 QTwindows打包QT工程+多线程QThread+菜单栏+打包QT程序
第八期 QT网络编程TCP/IP/UDP+Http和JSON解析+qt事件软键盘
第十一期 QT安装和使用alsa库和jpeg库实现音视频录制
第十二期 QT实现计划及函数指针+指针函数+函数数组指针+笔试题分析+软键盘的隐藏和显示
第十三期 QT嵌入式数据库sqlite3介绍移植教程和使用SQL语句【插入,查询,删除,修改】
