centos8 安装LNMP,逐步安装,基于docker安装centos8镜像,在安装lnmp环境!!!
1.安装nginx:
sudo yum install nginx
默认安装的是1.14版本;
升级到最新版,操作如下
1).添加中科大的镜像
sudo vim /etc/yum.repos.d/nginx.repo
2)写入以下指令并保存:
[nginx-mainline]
name=nginx mainline repo
baseurl=http://mirrors.ustc.edu.cn/nginx/mainline/centos/$releasever/$basearch/
gpgcheck=0
enabled=1
module_hotfixes=true
3).执行更新yum
sudo yum update
4)更新完毕后查看nginx版本:
nginx -v #1.21
2.安装PHP8(仅安装8.0版本),使用remi安装,依次执行:
sudo dnf -y install https://dl.fedoraproject.org/pub/epel/epel-release-latest-8.noarch.rpm
sudo dnf -y install https://rpms.remirepo.net/enterprise/remi-release-8.rpm
sudo dnf -y install yum-utils
sudo dnf module reset php
sudo dnf module install php:remi-8.0 -y
sudo dnf install php -y
安装完成后查看php版本:
php --version #php8
执行systemctl start php-fpm启动php8报错:
Job for php-fpm.service failed because the control process exited with error code.
See "systemctl status php-fpm.service" and "journalctl -xe" for details.
执行journalctl -xe 发现详细错误中有:
ERROR: [pool www] failed to read the ACL of the socket '/run/php-fpm/www.sock': Operation
ERROR: FPM initialization failed
执行以下替换命令后成功启动php-fpm:
sed -i 's/listen.acl_users/;listen.acl_users/g' /etc/php-fpm.d/www.conf
sed -i 's/listen.acl_groups/;listen.acl_groups/g' /etc/php-fpm.d/www.conf
启动php-fpm后,配置nginx,发现无法访问,可能报错:404,500, 502,file not find等错误;
通过监听nginx错误日志查看原因:
tail -f /var/log/nginx/error.log
报错:*1342 recv() failed (104: Connection reset by peer) while reading response header from upstream, client: 127.0.0.1, server: localhost, request: "GET /index.php HTTP/1.0", upstream: "http://127.0.0.1:80/index.php", host: "127.0.0.1",;排查后。php-fpm虽然已启动,但非9000端口。将php-fpm 改为socket配置
报错: *3574 socket() failed (24: Too many open files) while connecting to upstream, client: 127.0.0.1, server: localhost, request: "GET /index.php HTTP/1.0", upstream: "http://127.0.0.1:80/index.php", host: "127.0.0.1",删除 /etc/nginx/conf.d/ 其中一个配置文件,保留一个即可,原因9000和socket冲突,并且更改目标目录;
报错: connect() to unix:/run/php-fpm/www.sock failed (13: Permission denied) while connecting to upstream, client: 172.17.0.1, server: localhost, request: "GET /index.php HTTP/1.1", upstream: "fastcgi://unix:/run/php-fpm/www.sock:", host: "localhost:8082";通过更改用户分组,分别保证: /etc/nginx/nginx.conf, /etc/php-fpm.d/www.conf 文件中用户分组一致;
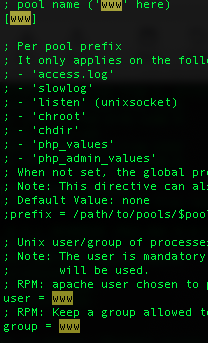
并且给对应的网站目录文件/var/www/html/和sock启动项目录/run/php-fpm/www.sock给到nginx和php-fpm的用户的读写权限:chown -R www:www 对应目录
附/etc/nginx/conf.d/default.conf 配置:
server {


    listen       80;
    server_name  localhost 127.0.0.1;

    #access_log  /var/log/nginx/host.access.log  main;

    root   /var/www/html;

    location / {


        index  index.html index.php;
    }

    #error_page  404              /404.html;

    # redirect server error pages to the static page /50x.html
    #
    error_page   500 502 503 504  /50x.html;
    location = /50x.html {


        root   /usr/share/nginx/html;
    }

    # proxy the PHP scripts to Apache listening on 127.0.0.1:80
    #
    #location ~ \.php$ {


    #    proxy_pass   http://127.0.0.1;
    #}

    # pass the PHP scripts to FastCGI server listening on 127.0.0.1:9000
    #
    location ~* \.php$ {


        #fastcgi_pass   127.0.0.1:9000;
        fastcgi_pass   unix:/run/php-fpm/www.sock;
        fastcgi_index  index.php;
        fastcgi_split_path_info  ^((?U).+\.php)(/?.+)$;
        #fastcgi_param  SCRIPT_FILENAME  /scripts$fastcgi_script_name;
        fastcgi_param  SCRIPT_FILENAME $document_root$fastcgi_script_name;
        include        fastcgi_params;
    }

    # deny access to .htaccess files, if Apache's document root
    # concurs with nginx's one
    #
    #location ~ /\.ht {


    #    deny  all;
    #}
}
3.安装mysql8.0
1).安装Yum Repository
wget https://repo.mysql.com//mysql80-community-release-el8-1.noarch.rpm
2).yum安装mysql服务
yum install mysql-server
3).设置开机自启动mysql:
systemctl enable mysqld.service
4).检查mysql是否为开机自启动:
systemctl list-unit-files|grep mysqld
5).启动MySQL
systemctl start mysqld.service #8.0.21
修改mysql中root 账户的密码:
在MySQL 8.04前,执行:SET PASSWORD=PASSWORD(‘[新密码]’);但是MySQL8.0.4开始,这样默认是不行的。因为之前,MySQL的密码认证插件是“mysql_native_password”,而现在使用的是“caching_sha2_password”。
登入mysql:
mysql -uroot
选择database
use mysql;
修改root账户密码为123456:
ALTER USER 'root'@'localhost' IDENTIFIED WITH mysql_native_password BY '123456';
刷新缓存:
FLUSH PRIVILEGES;
退出数据库:
quit
使用密码登录数据库
mysql -uroot -p123456
设置 MySQL 8 允许远程访问
配置 /etc/my.cnf
vim /etc/my.cnf
添加如下内容:
bind-address=0.0.0.0
连接到MySQL,创建用户server密码123456的用户
CREATE USER 'server'@'%' IDENTIFIED BY '123456';
设置server用户任何主机都可以连接本主机mysql服务
GRANT ALL PRIVILEGES ON *.* TO 'server'@'%'WITH GRANT OPTION;
清除缓存退出并且重启MySQL服务,完成!
4.其他,可能用到的命令
需要安装的扩展包:
yum -y install sudo #安装sudo
yum -y install vim* #安装vim
yum -y install net-tools #安装ifconfig ping
yum install initscripts -y #安装service
yum -y install wget #安装wget
yum -y install lsof #查端口
添加用户分组:
groupadd www
useradd -g www www
5.安装最新版的swoole
yum install php-devel php-pear httpd-devel #安装pecl扩展

systemctl restart php-fpm #重启php-fpm

chown -R www:www /run/php-fpm #设置php-fpm权限

echo "extension=swoole.so" >> /etc/php.ini #配置php.ini

php -m #查看是否成功,并且重启php-fpm