封装我们的核心TCP库
TCP库封装
本篇教你如何快速的创建一个属于自己的TCP库 可以在任意项目( Unity,其他VS项目 )灵活的引入调用
首先你需要知道如何创建一个DLL项目 并成功进入代码编辑界面
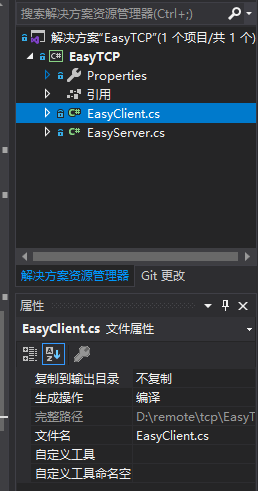
项目结构图
TCP的三次握手

然后创建我们的TCP服务端模块
上代码
using System;
using System.Net;
using System.Net.Sockets;
using System.Text;
using System.Threading;

namespace EasyTCP
{


    public class EasyServer
    {


        #region private

        /// <summary> 唯一套接字 </summary>
        static Socket p_server = null;
        /// <summary> 不允许用户自己创建 </summary>
        private EasyServer( ) {

     }


        #endregion


        #region public
        /// <summary> 编码格式 </summary>
        public static Encoding bufferEncoder = Encoding.Default;

        public delegate bool onMsgProc( Socket arg0, string arg1 );
        /// <summary> 当有接收到新的数据时调用 </summary>
        public static onMsgProc onDataReceivedCallback;
        /// <summary> 当新增客户端连接时调用 </summary>
        public static Action<Socket> onClientLinkCallback;
        /// <summary> 当客户端断开连接时调用 </summary>
        public static Action<Socket> onClientLogoutCallback;
        /// <summary> 当客户端意外掉线时调用 </summary>
        public static Action<Socket> onClientLostConnectionCallback;

        /// <summary> 共享Socket 不允许修改 </summary>
        public static Socket shareSocketInstance {

     get {

     return p_server; } }

        /// <summary> 启动服务器 </summary>
        public static void Start( string port, int maxListenCount )
        {


            p_server = new Socket( AddressFamily.InterNetwork, SocketType.Stream, ProtocolType.Tcp );
            var endPoint = new IPEndPoint( IPAddress.Any, Convert.ToInt32( port ) );

            try
            {


                p_server.Bind( endPoint );
                p_server.Listen( maxListenCount );

                var T1 = new Thread( ( ) =>
                {


                    while ( true )
                    {


                        var newAccept = p_server.Accept( );//阻塞接收新的客户端接入
                        Console.WriteLine( $"ip: {

      newAccept.RemoteEndPoint.ToString( )} Linked......" );
                        onClientLinkCallback?.Invoke( newAccept );//新客户端连接

                        var T2 = new Thread( ( ) =>
                        {


                            byte[] buffer = new byte[1024 * 1024];
                            bool runState = true;

                            try
                            {


                                while ( runState )
                                {


                                    int len = newAccept.Receive( buffer, 0, buffer.Length, SocketFlags.None );
                                    //客户端正常退出
                                    if ( len == 0 )
                                    {


                                        Console.WriteLine( $"ip: {

      newAccept.RemoteEndPoint.ToString( )} Logout......" );
                                        onClientLogoutCallback?.Invoke( newAccept );
                                        return;
                                    }

                                    runState = onDataReceivedCallback( newAccept, bufferEncoder.GetString( buffer, 0, len ) );
                                }
                            }
                            catch
                            {


                                //掉线
                                Console.WriteLine( $"ip: {

      newAccept.RemoteEndPoint.ToString( )} lost connection......" );
                                onClientLostConnectionCallback?.Invoke( newAccept );
                            }

                        } );
                        T2.IsBackground = true;
                        T2.Start( );
                    }

                } );
                T1.IsBackground = true;
                T1.Start( );

            }
            catch ( SocketException e )
            {


                Console.WriteLine( e.StackTrace );
            }
            catch ( Exception e )
            {


                Console.WriteLine( e.StackTrace );
            }
        }

        /// <summary> 向指定客户端发送消息 </summary>
        public static void Send(Socket caller,string data )
        {


            caller.Send( bufferEncoder.GetBytes( data ) );
        }
        #endregion

    }

}
然后创建我们的TCP客户端模块
上代码
using System;
using System.Net;
using System.Net.Sockets;
using System.Text;
using System.Threading;

namespace EasyTCP
{


    public class EasyClient
    {


        #region preivate
        /// <summary> 不允许用户自己创建 </summary>
        private EasyClient( ) {

     }
        /// <summary> 唯一实例 </summary>
        static EasyClient p_instance = null;
        /// <summary> 唯一套接字 </summary>
        static Socket p_client = null;
        #endregion


        #region publish
        /// <summary> 编码格式 </summary>
        public static Encoding bufferEncoder = Encoding.Default;
        /// <summary> 共享Socket 不允许修改 </summary>
        public static Socket shareSocketInstance {

     get {

     return p_client; } }


        /// <summary> 当有接收到新的数据时调用 </summary>
        public static Action<string> onDataReceivedCallback;
        /// <summary> 当连接服务器成功时调用 </summary>
        public static Action onConnectServerSucceed;
        /// <summary> 当连接服务器失败时调用 </summary>
        public static Action onConnectServerFaild;
        /// <summary> 共享示例 不允许用户自行创建 </summary>
        public static EasyClient shareInstance
        {


            get
            {


                if ( p_instance == null )
                    p_instance = new EasyClient( );
                return p_instance;
            }
        }
        /// <summary> 启动客户端 ip格式案例: 127.0.0.1:5566 </summary>
        public static void Launch( string ip )
        {


            try
            {


                string[] address = ip.Split( ':' );
                IPEndPoint ep = new IPEndPoint( IPAddress.Parse( address[0] ), Convert.ToInt32( address[1] ) );

                p_client = new Socket( AddressFamily.InterNetwork, SocketType.Stream, ProtocolType.Tcp );
                p_client.Connect( ep );

                //服务器连接成功
                onConnectServerSucceed?.Invoke( );

                var T1 = new Thread( ( ) =>
                {


                    byte[] buffer = new byte[1024 * 1024];
                    while ( true )
                    {


                        int len = p_client.Receive( buffer, 0, buffer.Length, SocketFlags.None );
                        onDataReceivedCallback?.Invoke( bufferEncoder.GetString( buffer, 0, len ) );
                    }
                } );
                T1.IsBackground = true;
                T1.Start( );
            }
            catch ( Exception e )
            {


                Console.WriteLine( e.StackTrace );
                onConnectServerFaild?.Invoke( );
            }
        }
        /// <summary> 向服务器发送消息</summary>
        public static void Send(string data )
        {


            if(p_client.Connected) p_client.Send( bufferEncoder.GetBytes( data ) );
        }
        #endregion


    }

}
生成DLL

生成路径

调用DLL里的方法
c#案例

浏览本地DLL

找到刚生成的DLL文件

引入命名空间
using EasyTCP;
初始化我们的服务端
  			EasyServer.bufferEncoder = Encoding.UTF8;
            EasyServer.onClientLinkCallback += onClientLink;
            EasyServer.onClientLogoutCallback += onClientLogout;
            EasyServer.onClientLostConnectionCallback += onClientLostConnection;
            EasyServer.onDataReceivedCallback += onDataReceived;
			//开启服务器 公网或者局域网IP  我的服务器地址就不告诉你们了 怕你们炸鱼塘
            EasyServer.Start( "47.103.3.114","8080" ) );
初始化我们的客户端
  				EasyClient.bufferEncoder = Encoding.UTF8;
                EasyClient.onConnectServerSucceed += delegate
                {


                    //服务器连接成功后的回调
                };
                EasyClient.onDataReceivedCallback += onDataReceived;
                //连接服务器
                EasyClient.Launch( $"{

      ip}:{

      port}" );
下章开启如何封装tcp协议
    [Serializable]
    public enum MsgType
    {


        Login = 0,
        Register, //首次登录
        FriendEvent, //成员列表
        Logout,
        LostConnection, //掉线
        LostReconnect, //掉线 重新连接
        Chat,
    }


    [Serializable]
    public class MsgData
    {


        public string caller {

     get; set; }  //ID
        public string[] receiver {

     get; set; }//接收者
        public MsgType type {

     get; set; } //类型
        public string data {

     get; set; } //数据流
    }
在这之前你需要准备好 Newtonsoft.Json
安装方法:


安装 两种方法:
- PM> install-package newtonsoft.json
- PM> install-package newtonsoft.json 项目名
卸载
PM> uninstall-package newtonsoft.json 项目名
Thank for you watching!!!