1、前言
在《限流概念、基于Guava RateLimiter的客户端限流》中,学习了分布式限流的概念、常见算法和基于Guava RateLimiter客户端限流的实现,这里将继续学习另外的限流方案:基于Nginx的网关限流和基于Redis的中间件限流。关于限流组件的使用,请参考《Spring Cloud Alibaba入门之分布式系统的流量防卫兵Sentinel》相关内容。
2、基于Nginx实现的网关限流
Nginx按照请求速率限流使用的是漏桶算法,前面已经学习过了,漏桶算法可以保证请求的实时处理速度不会超过设置的阈值。
Nginx提供了基于请求和连接数两种限流方式:
- limit_req_zone 用来限制单位时间内的请求数,即速率限流,采用的漏桶算法。
- limit_conn_zone 用来限制同一时间连接数,即并发限制。
2.1、基于请求的IP限流
使用Nginx进行限流,主要是修改Nginx的配置文件,我们这里先演示一下基于请求的IP限流。首先,提供了一个api接口,用于测试,比较简单,如下:
@RestController
public class NginxController {


    @GetMapping("nginx")
    public String nginx(){


        return "success!";
    }
}
然后,开始修改Nginx的配置文件nginx.conf。添加限流规则,如下:
limit_req_zone $binary_remote_addr zone=iplimit:20m rate=1r/s;
其中,
- 第一个参数:$binary_remote_addr 表示通过remote_addr这个标识来做限制(即IP限流),“binary_”的目的是缩写内存占用量,是限制同一客户端ip地址。
- 第二个参数:zone=iplimit:10m表示生成一个大小为10M,名字为iplimit的内存区域(该名字可以自定义),用来存储访问的频次信息。
- 第三个参数:rate=1r/s表示允许相同标识的客户端的访问频次,这里限制的是每秒1次,还可以有比如30r/m的。
添加限流规则后,开始应用该限流规则,即在对应的location中进行配置,如下:
location / {


	proxy_pass  http://127.0.0.1:8080/;

	limit_req zone=iplimit burst=2 nodelay;

	# 异常情况,返回504(默认是503),根据error_page配置,可能直接调整到错误页面
    limit_req_status 504;
}
主要是配置了limit_req 语句,其中:
- 第一个参数:zone=iplimit 设置使用哪个配置区域来做限制,与前面limit_req_zone 里的name对应。
- 第二个参数:burst=2,这个配置的意思是设置一个大小为2的缓冲区,当有大量请求过来时,超过了访问频次限制的请求可以先放到这个缓冲区内。
- 第三个参数:nodelay,如果设置,超过访问频次而且缓冲区也满了的时候就会直接返回503,如果没有设置,则所有请求会等待排队。
完成上述配置后,重新刷新Nginx配置文件:
#nginx目录下执行
nginx.exe -s reload
刷新配置后,连续快速的访问http://localhost/nginx, 中间会出现错误提示如下,说明限流生效了。
基于请求的其他限流
除了基于IP的限流,还可以基于服务器的限流、基于特定UA的限流等。
- 基于服务器的限流配置如下:
# 根据服务器级别做限流
limit_req_zone $server_name zone=serverlimit:10m rate=2r/s;

location / {


	# 省略其他配置……

	# 基于服务器级别的限制
	limit_req zone=serverlimit burst=1 nodelay;
}
- 基于特定UA的限流
limit_req_zone $anti_spider zone=anti_spider:60m rate=200r/m;
#某个server中
limit_req zone=anti_spider burst=5 nodelay;
if ($http_user_agent ~* "baiduspider") {


	set $anti_spider $http_user_agent;
}
详细请参考《nginx禁止特定UA访问》、《死磕nginx系列–nginx 限流配置》。
2.2、基于连接数的限流
# 基于连接数的配置
limit_conn_zone $binary_remote_addr zone=perip:20m;
limit_conn_zone $server_name zone=perserver:20m;

#某个server中

# 每个server最多保持100个连接
limit_conn perserver 100;
# 每个IP地址最多保持1个连接
limit_conn perip 5;
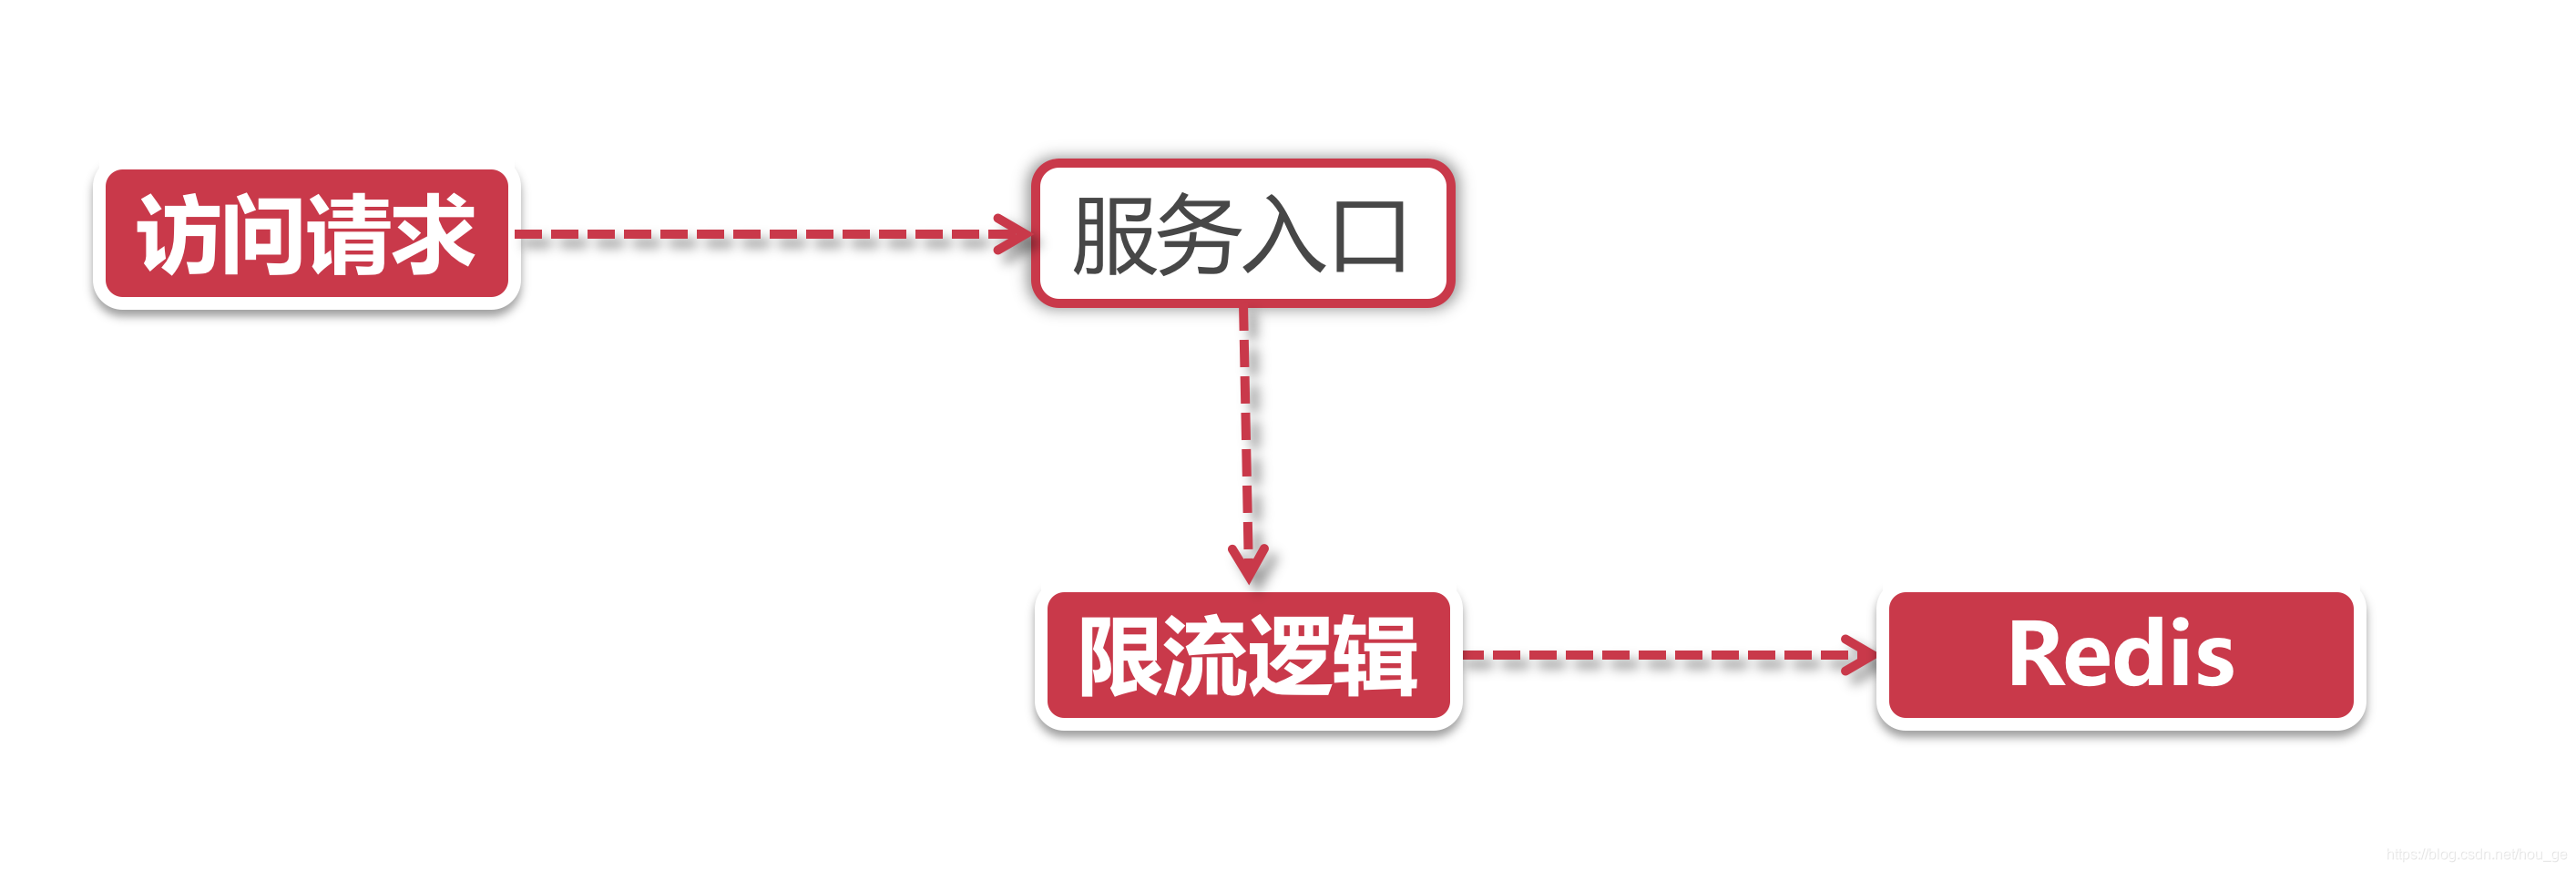
3、基于Redis的中间件限流
我们这里尝试使用Redis + Lua实现限流方案。选择Redis的理由是:限流服务需要承接超高QPS,还需要保证限流逻辑的执行层面具备线程安全的特性。而Redis正好具备这些特性,既能保证线程安全,也能保持良好的性能。
为什么又要使用Lua脚本呢?主要就是为了把限流逻辑和Redis放到一起,这样既可以减少网络开销,还可以保证多个Redis操作的原子性,而Lua脚本正好具备这种特性。
下面,我们将基于Lua+Redis实现一个限流方法,为了方便使用,我们这里将限流方法封装成了一个AccessLimiter注解。具体实现如果如下:
3.1、创建Lua脚本ratelimiter-counter.lua
这里主要实现了基于计数器算法的限流,后续将会考虑尝试实现一个基于令牌桶算法的实现。
-- 基于计数器算法实现的限流


-- 获取限流的Key
local methodKey = KEYS[1]
redis.log(redis.LOG_DEBUG, 'key is', methodKey)
-- 获取限流的大小
local limit = tonumber(ARGV[1])
redis.log(redis.LOG_DEBUG, 'limit is', limit)
local outtime = tonumber(ARGV[2])
redis.log(redis.LOG_DEBUG, 'outtime is', outtime)
-- 获取当前流量大小
local count = tonumber(redis.call('get', methodKey) or "0")

-- 判断是否超出限流阈值
if count + 1 > limit then
    -- -1,拒绝服务访问
    return -1
else
    -- 没有超过阈值
    -- 设置当前访问的数量+1
    local num = tonumber(redis.call("INCRBY", methodKey, 1))
    -- 设置过期时间
    redis.call("EXPIRE", methodKey, outtime)
    -- 放行
    return num
end
3.2、引入依赖
<dependency>
     <groupId>org.springframework.boot</groupId>
     <artifactId>spring-boot-starter-data-redis</artifactId>
 </dependency>

 <dependency>
     <groupId>org.springframework.boot</groupId>
     <artifactId>spring-boot-starter-aop</artifactId>
 </dependency>

 <dependency>
     <groupId>com.google.guava</groupId>
     <artifactId>guava</artifactId>
     <version>30.1-jre</version>
 </dependency>
3.3、配置Redis,加载Lua脚本
/**
 * Redis配置
 */
@Configuration
public class RedisConfiguration {


    @Bean
    public RedisTemplate<String, String> redisTemplate(RedisConnectionFactory factory) {


        return new StringRedisTemplate(factory);
    }

    /**
     * 加载lua脚本
     * @return
     */
    @Bean
    public DefaultRedisScript loadRedisScript() {


        DefaultRedisScript redisScript = new DefaultRedisScript();
        redisScript.setLocation(new ClassPathResource("ratelimiter/ratelimiter-counter.lua"));
        redisScript.setResultType(Long.class);
        return redisScript;
    }
}
3.4、定义注解
/**
 * 限流注解
 */
@Target({

    ElementType.METHOD})
@Retention(RetentionPolicy.RUNTIME)
@Documented
public @interface AccessLimiter {


    /**
     * 限流数
     * @return
     */
    int limit();

    /**
     * 限流的key
     * @return
     */
    String methodKey() default "";

    /**
     * 限流过期时间,秒
     * @return
     */
    int timeout() default 30;

}
3.5、定义切面类
/**
 * 建立切面,拦截并处理限流注解
 */
@Aspect
@Component
public class AccessLimiterAspect {


    @Autowired
    private StringRedisTemplate stringRedisTemplate;

    @Autowired
    private RedisScript<Long> rateLimitLua;

    @Pointcut("@annotation(AccessLimiter)")
    public void cut() {


    }

    @Before("cut()")
    public void before(JoinPoint joinPoint) {


        // 1. 获得方法签名,作为method Key
        MethodSignature signature = (MethodSignature) joinPoint.getSignature();
        Method method = signature.getMethod();

        AccessLimiter annotation = method.getAnnotation(AccessLimiter.class);
        if (annotation == null) {


            return;
        }
        //获取注解的属性值
        String key = annotation.methodKey();
        Integer limit = annotation.limit();
        Integer timeout = annotation.timeout();

        // 如果没设置methodkey, 从调用方法签名生成自动一个key
        if (StringUtils.isEmpty(key)) {


            Class[] type = method.getParameterTypes();
            key = method.getClass() + method.getName();
            if (type != null) {


                String paramTypes = Arrays.stream(type)
                        .map(Class::getName)
                        .collect(Collectors.joining(","));
                key += "#" + paramTypes;
            }
        }

        // 2. 调用Redis
        Long flag = stringRedisTemplate.execute(
                rateLimitLua, // Lua 脚本
                Lists.newArrayList(key), // Lua脚本中的Key列表,即限流的key
                limit.toString(), // Lua脚本Value列表,即限流的阈值
                timeout.toString() //超期时间
        );

        if (flag == -1) {


            throw new RuntimeException("Your access is blocked");
        }
    }

}
3.6、测试接口
@RestController
public class RedisController {


    @GetMapping("redis")
    @AccessLimiter(limit = 2, methodKey = "redis", timeout = 30)
    public String redis() throws InterruptedException {


        Thread.sleep(1000 * 2);
        return "success!";
    }

}
3.7、启动并验证
SpringBoot启动类省略了,直接启动,然后访问http://localhost/redis,进行测试。连续快速访问,后台会抛出阻塞异常,即表示限流成功(这里没有做细化处理,应该提示被限流)。