Android 入门第五讲01-Fragment(Fragment介绍,创建,生命周期,逻辑操作(静态引入+动态添加),Fragment之间的跳转,Fragment跳Activity)
Android 入门第四讲03-列表RecyclerView(RecyclerView使用步骤(详),RecyclerView指定一行item的数目+指定一行item的数量,并且设置列表方向)
Fragment出现的背景(魔幻介绍)
在很久很久以前,那个时候还在安卓3.0时代,安卓大军有两大阵营,分别是黑玫将军率领的平板军队和白瑰将军率领的手机军队,但是安卓黑玫将军想在3.0时代独自建立平板王朝,但是白瑰将军在4.0时代以后,他的手机军队越来越强大,屏幕越来越大,黑玫将军失败了,黑玫将军和白瑰将军协商之后,再度联手,合二为一统一建设安卓真正的王朝,而今天我们要讲的是在安卓3.0时代出现的一位枭雄,他的名字叫弗兰格曼-Fragment
1.Fragment介绍(与activity类似)
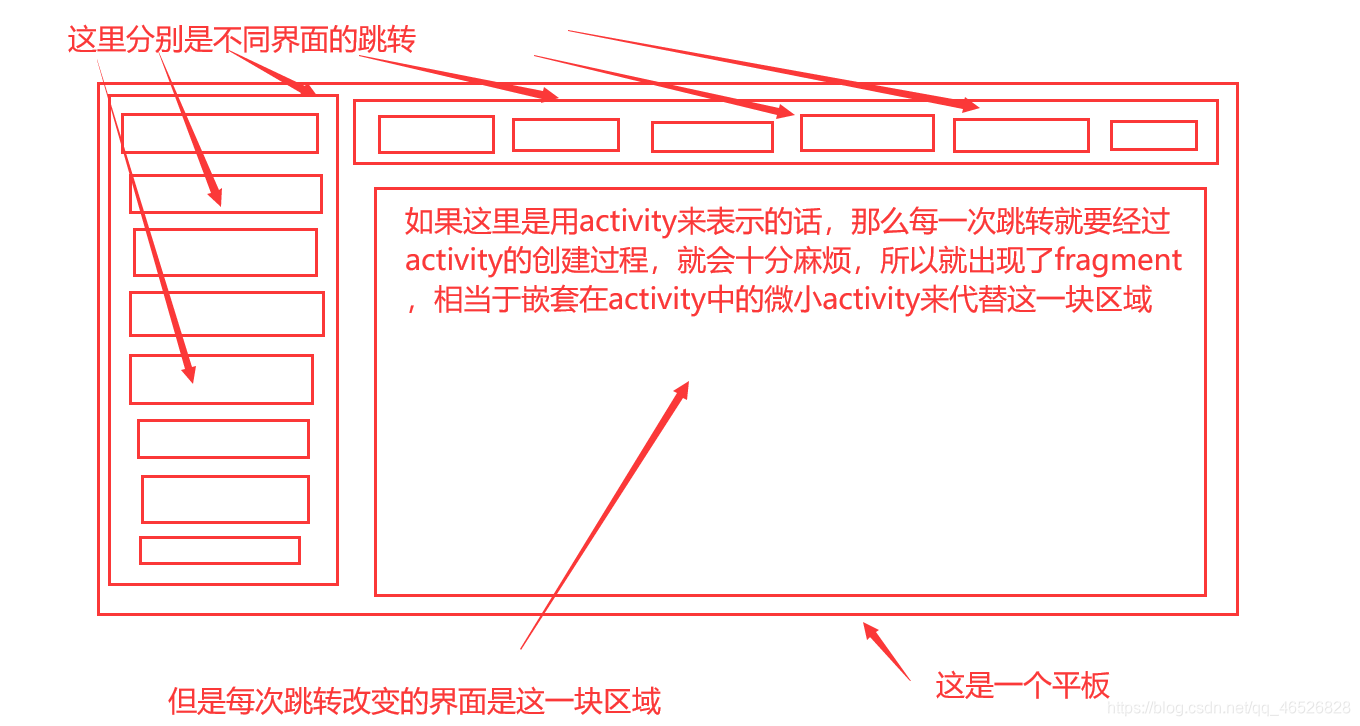
Fragment的出现是为了适应平板屏幕大,但是在某些情况下在同一页面多次跳转的问题,如图讲解,
fragment的出现,实现了在一个activity里面,仍然可以实现多个页面跳转的技术
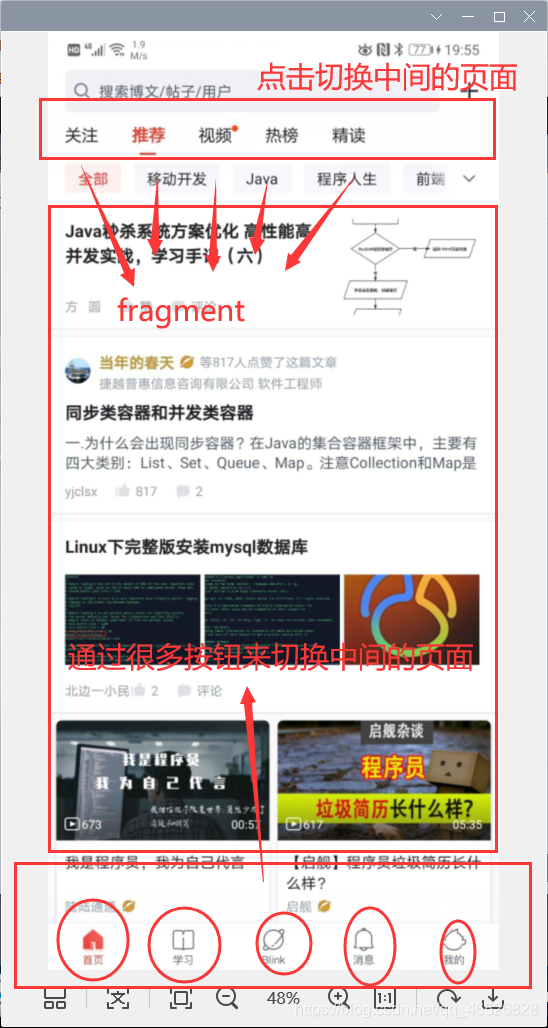
手机Fragment案例
2.Fragment创建
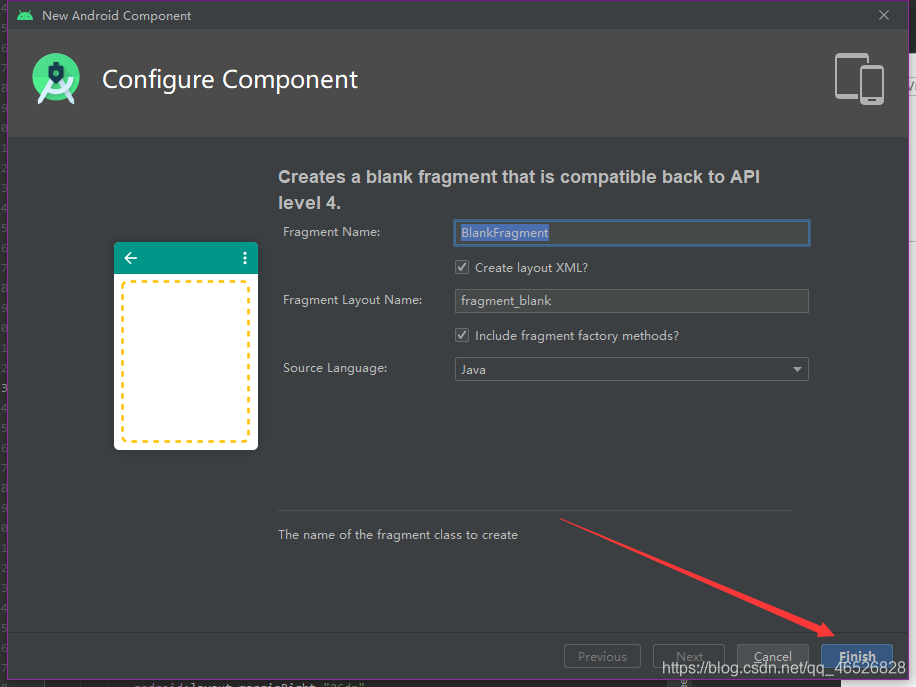
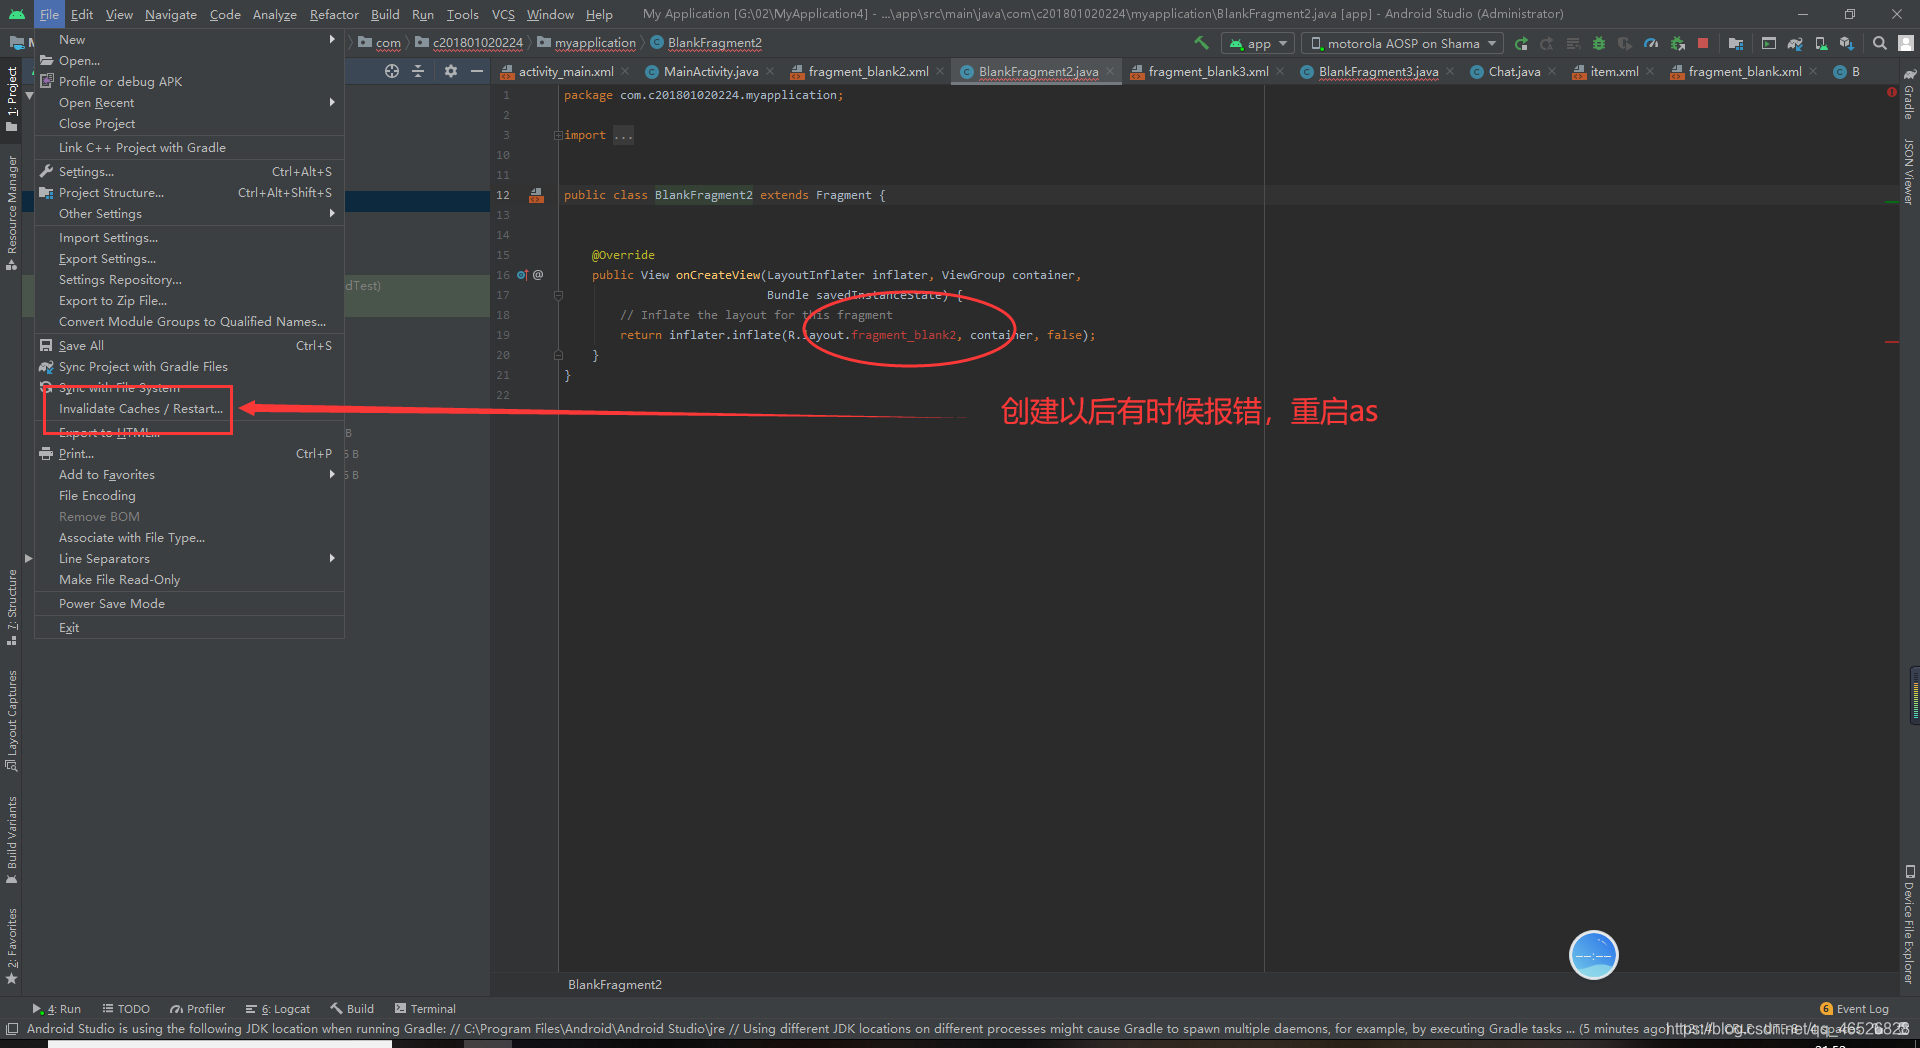
第一步,创建Fragment

然后finish
因为Fragment是activity的一部分,所以对比activity,Fragment只会生成java文件和对应的xml布局文件,不会在manifests里生成注册的代码,
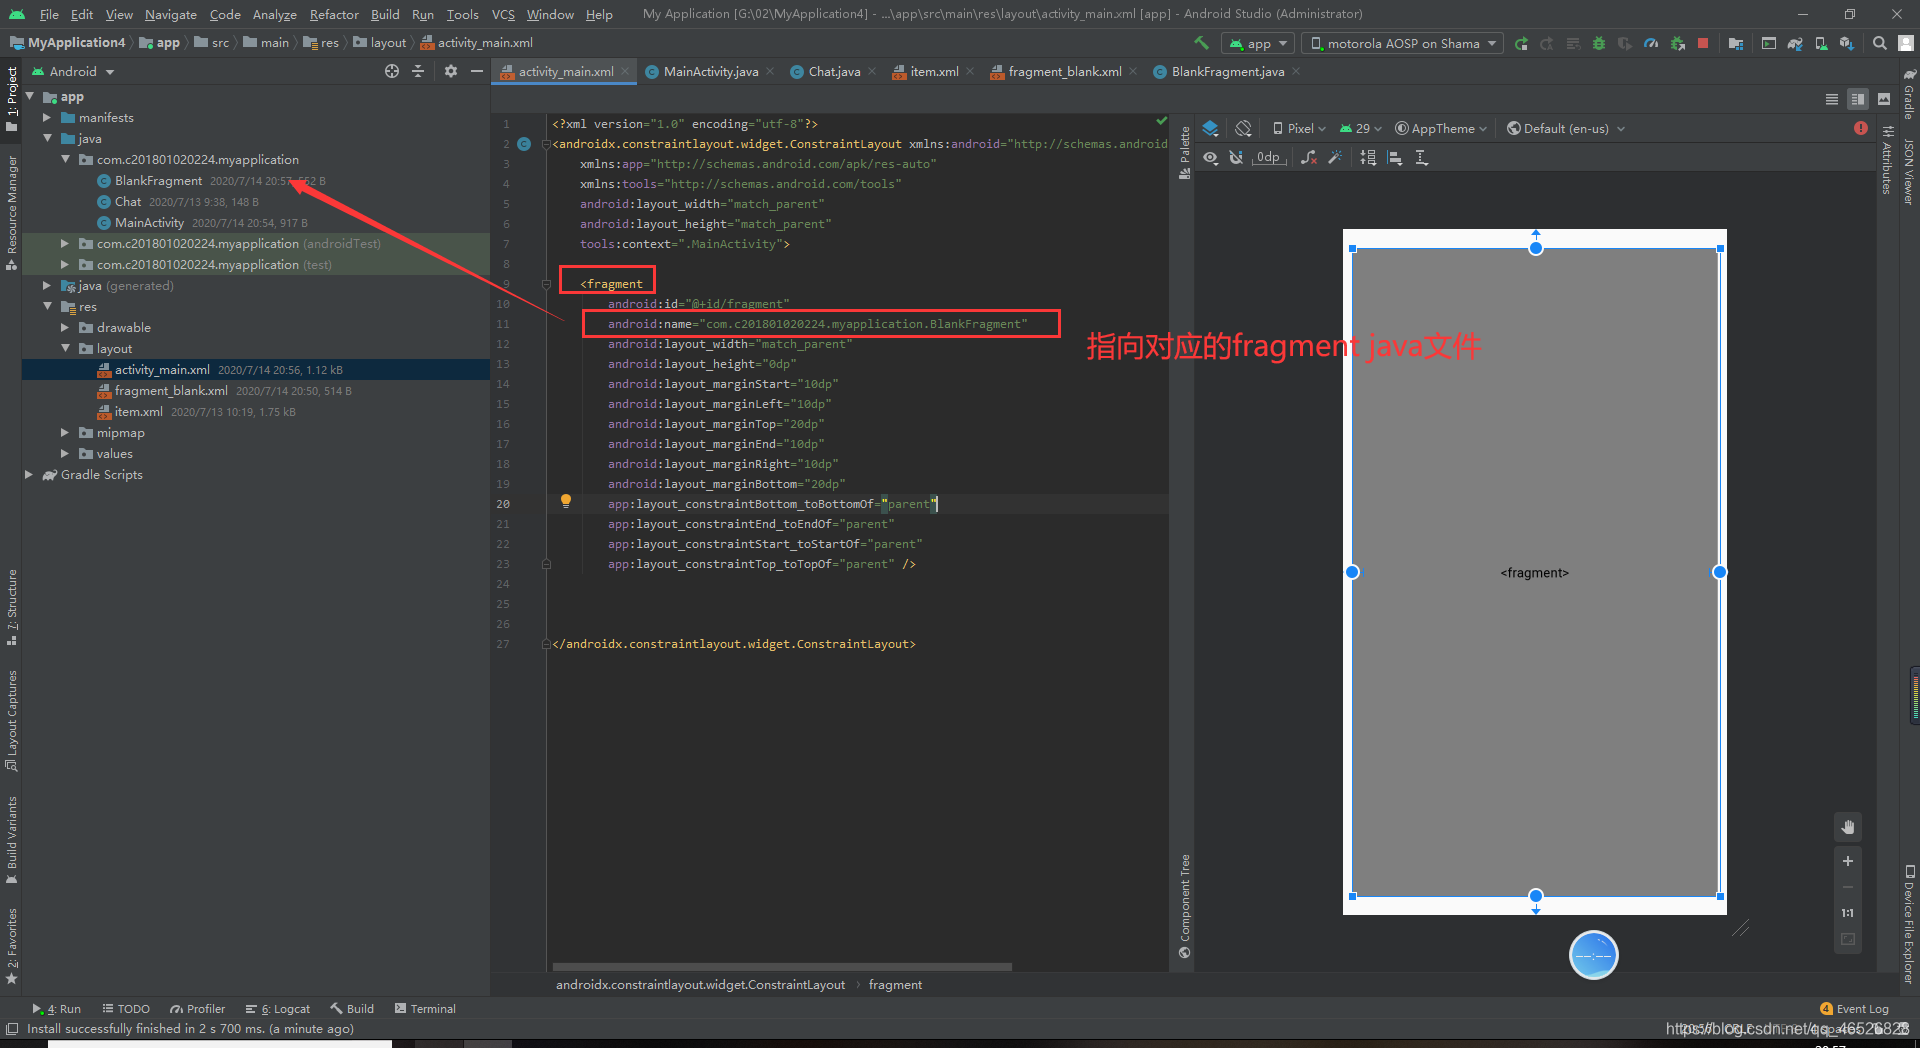
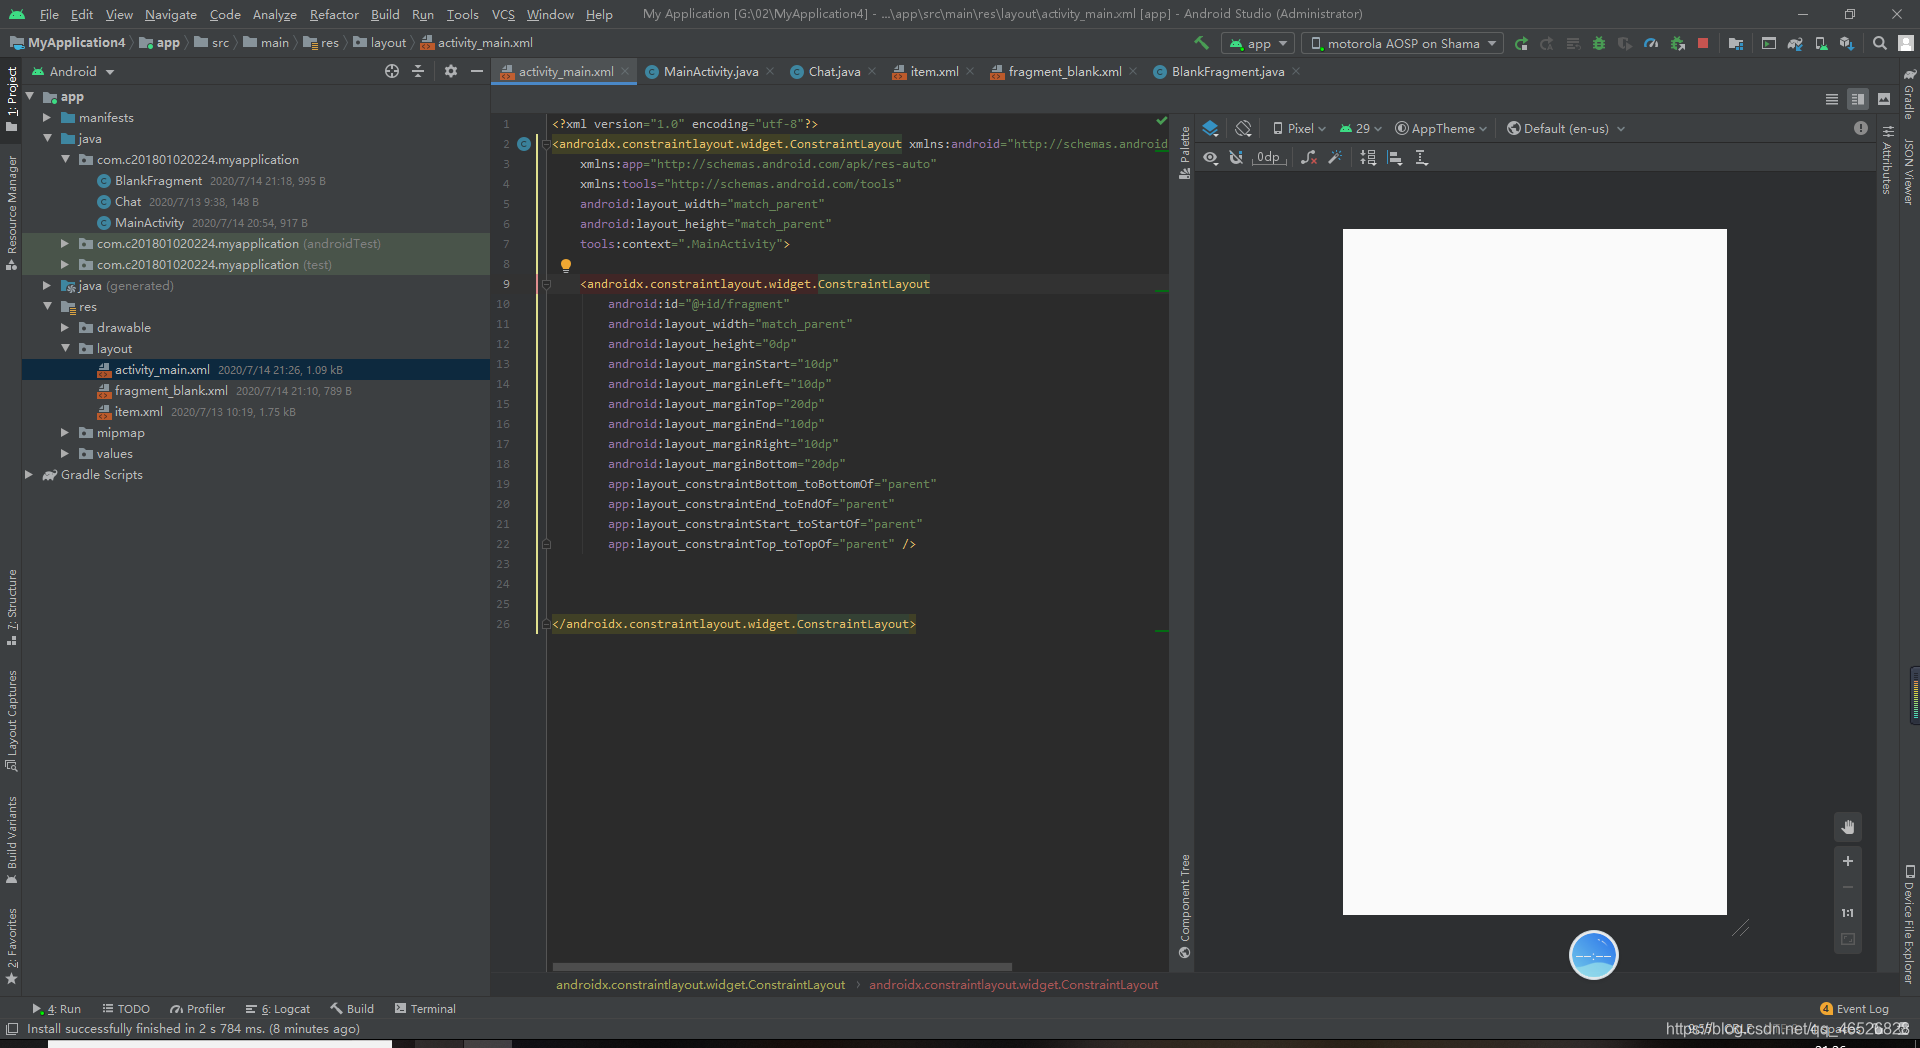
第二步,Fragment不能单独存在,我们需要Fragment嵌套到activity里面,所以我们需要在activity布局文件里加入Fragment
如图
代码(可根据自己需求来设定)
<?xml version="1.0" encoding="utf-8"?>
<androidx.constraintlayout.widget.ConstraintLayout xmlns:android="http://schemas.android.com/apk/res/android"
    xmlns:app="http://schemas.android.com/apk/res-auto"
    xmlns:tools="http://schemas.android.com/tools"
    android:layout_width="match_parent"
    android:layout_height="match_parent"
    tools:context=".MainActivity">

    <fragment
        android:id="@+id/fragment"
        android:name="com.c201801020224.myapplication.BlankFragment"
        android:layout_width="match_parent"
        android:layout_height="0dp"
        android:layout_marginStart="10dp"
        android:layout_marginLeft="10dp"
        android:layout_marginTop="20dp"
        android:layout_marginEnd="10dp"
        android:layout_marginRight="10dp"
        android:layout_marginBottom="20dp"
        app:layout_constraintBottom_toBottomOf="parent"
        app:layout_constraintEnd_toEndOf="parent"
        app:layout_constraintStart_toStartOf="parent"
        app:layout_constraintTop_toTopOf="parent" />


</androidx.constraintlayout.widget.ConstraintLayout>
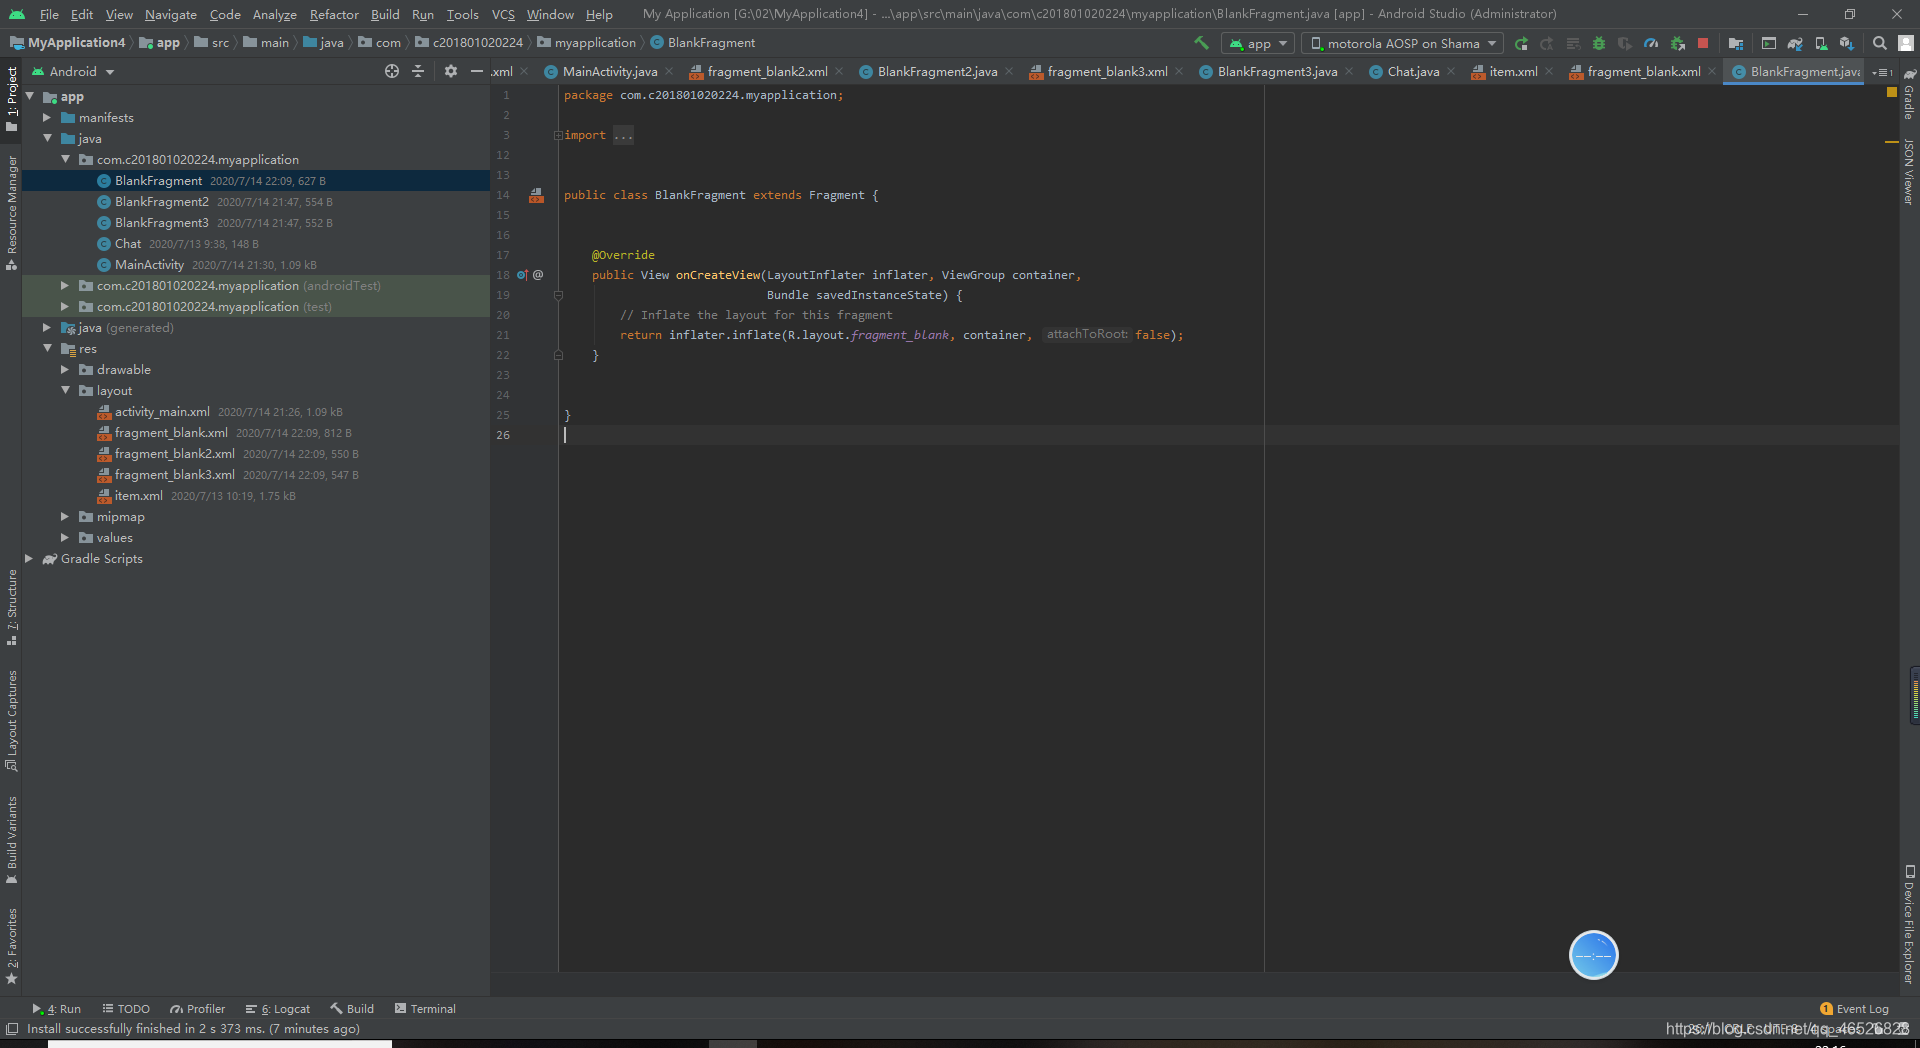
对于Fragment的java文件,只需要保留onCreateView()方法,其他方法全删掉
如图
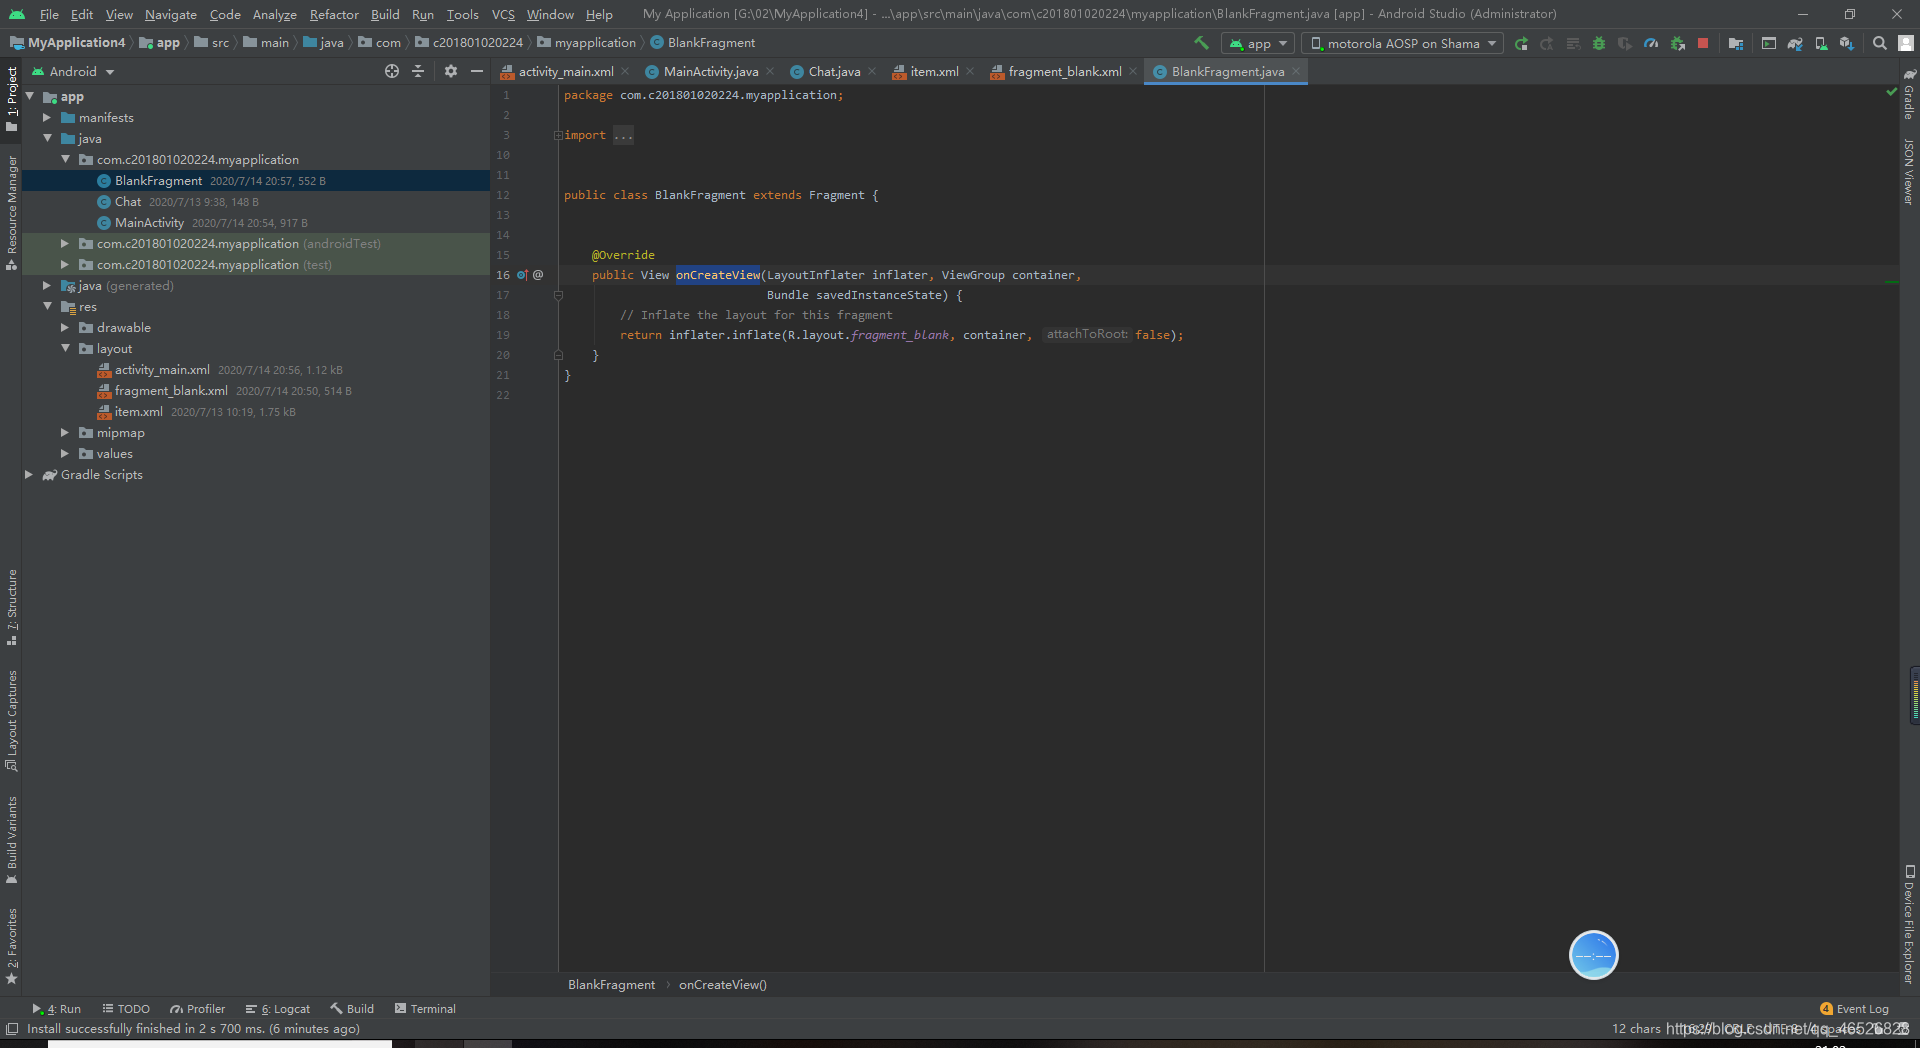
代码
public class BlankFragment extends Fragment {


    @Override
    public View onCreateView(LayoutInflater inflater, ViewGroup container,
                             Bundle savedInstanceState) {
        // Inflate the layout for this fragment
        return inflater.inflate(R.layout.fragment_blank, container, false);
    }
}
3.Fragment的生命周期
Fragment的生命周期和activity类似,不过多了几个方法
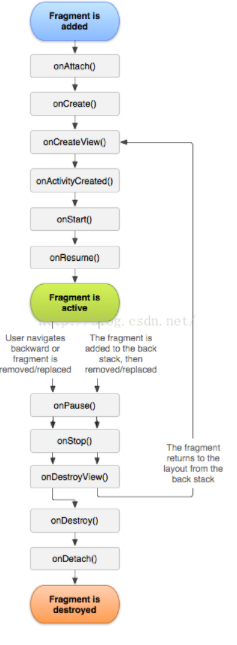
- onAttach():执行该方法时,Fragment与Activity已经完成绑定,该方法有一个Activity类型的参数,代表绑定的Activity,这时候你可以执行诸如mActivity = activity的操作。
- onCreate():初始化Fragment,可通过参数savedInstanceState获取之前保存的值。
- onCreateView():初始化Fragment的布局。加载布局和findViewById的操作通常在此函数内完成,但是不建议执行耗时的操作,比如读取数据库数据列表。
- onActivityCreated():执行该方法时,与Fragment绑定的Activity的onCreate方法已经执行完成并返回,在该方法内可以进行与Activity交互的UI操作,所以在该方法之前Activity的onCreate方法并未执行完成,如果提前进行交互操作,会引发空指针异常。
- onStart():执行该方法时,Fragment由不可见变为可见状态。
- onResume():执行该方法时,Fragment处于活动状态,用户可与之交互。
- onPause():执行该方法时,Fragment处于暂停状态,但依然可见,用户不能与之交互。
- onStop():执行该方法时,Fragment完全不可见。
- onDestroyView():销毁与Fragment有关的视图,但未与Activity解除绑定,依然可以通过onCreateView方法重新创建视图。通常在ViewPager+Fragment的方式下会调用此方法。
- onDestroy():销毁Fragment。通常按Back键退出或者Fragment被回收时调用此方法。
- onDetach():解除与Activity的绑定。在onDestroy方法之后调用。
4.Fragment的逻辑操作
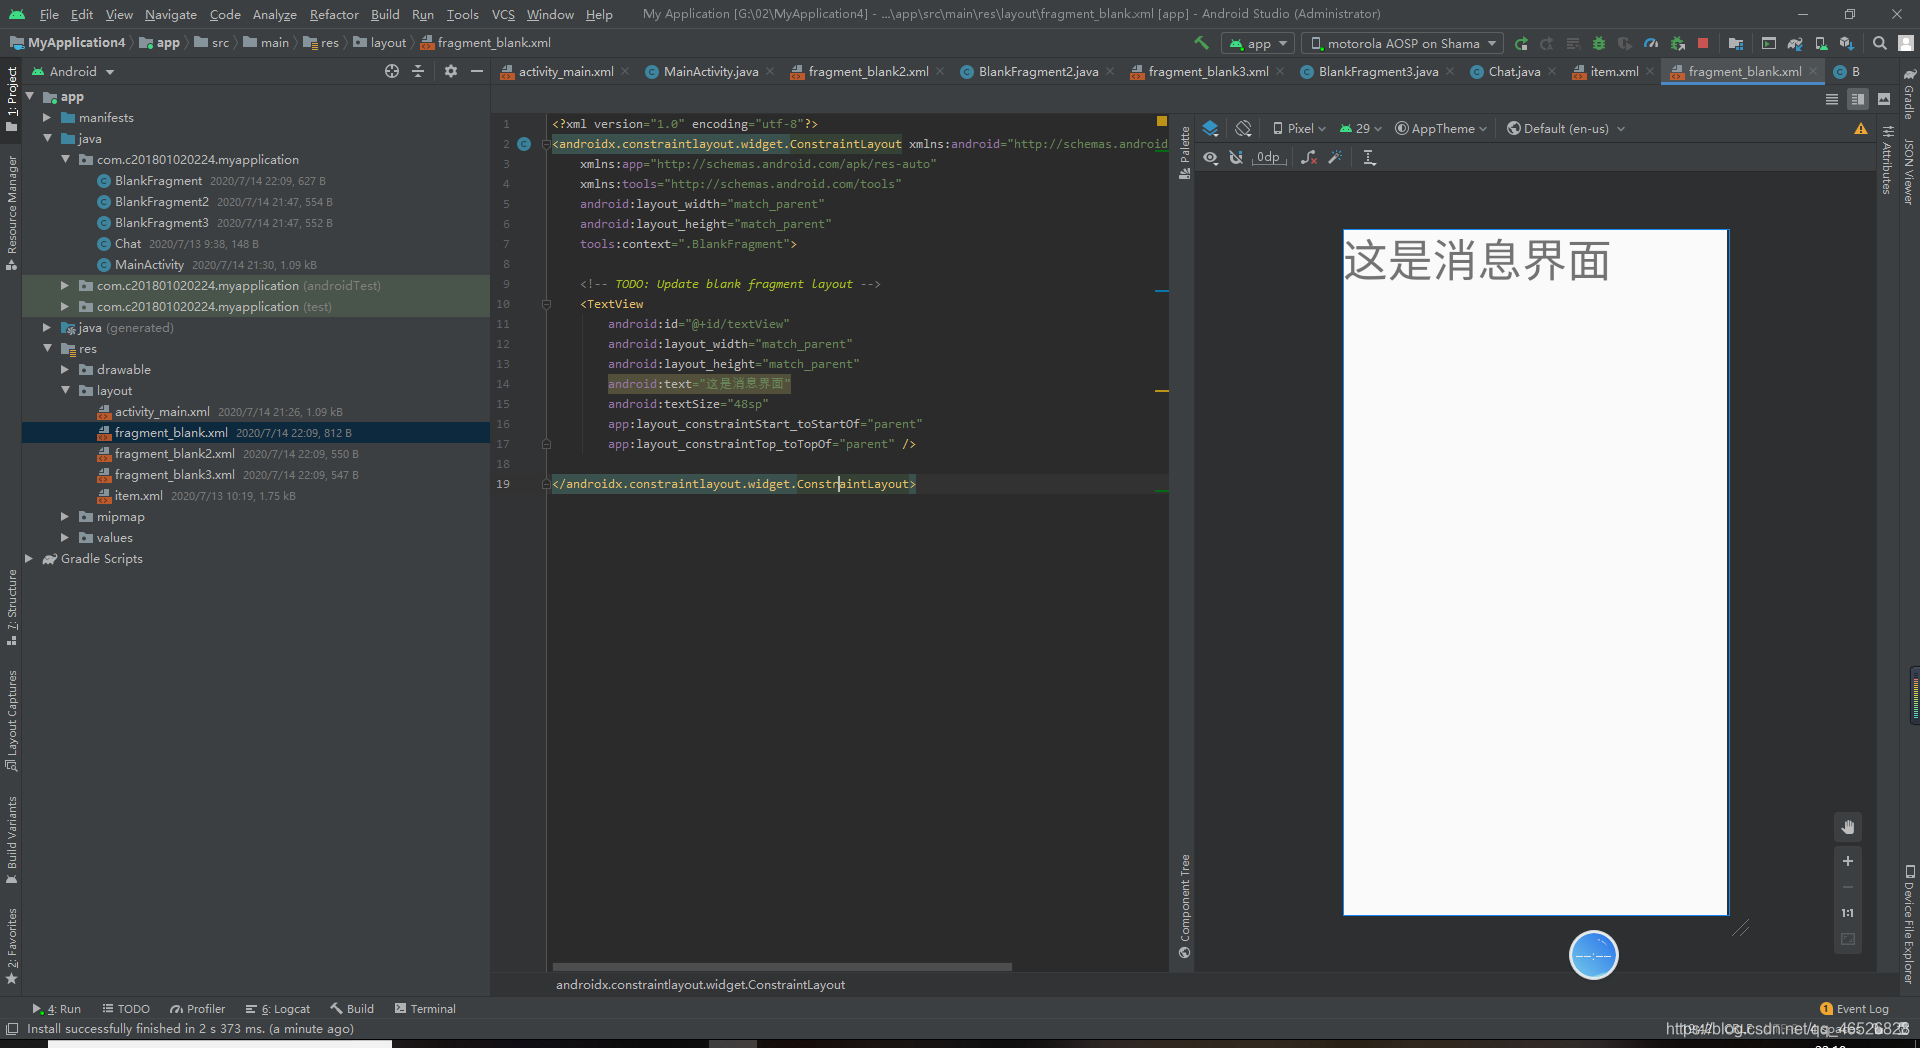
1.静态引入Fragment(对文本进行设置)
第一步,我们先在Fragment布局文件里创建文本框,Fragment默认的是FrameLayout(帧布局),我们改一下,改为约束布局会好一些
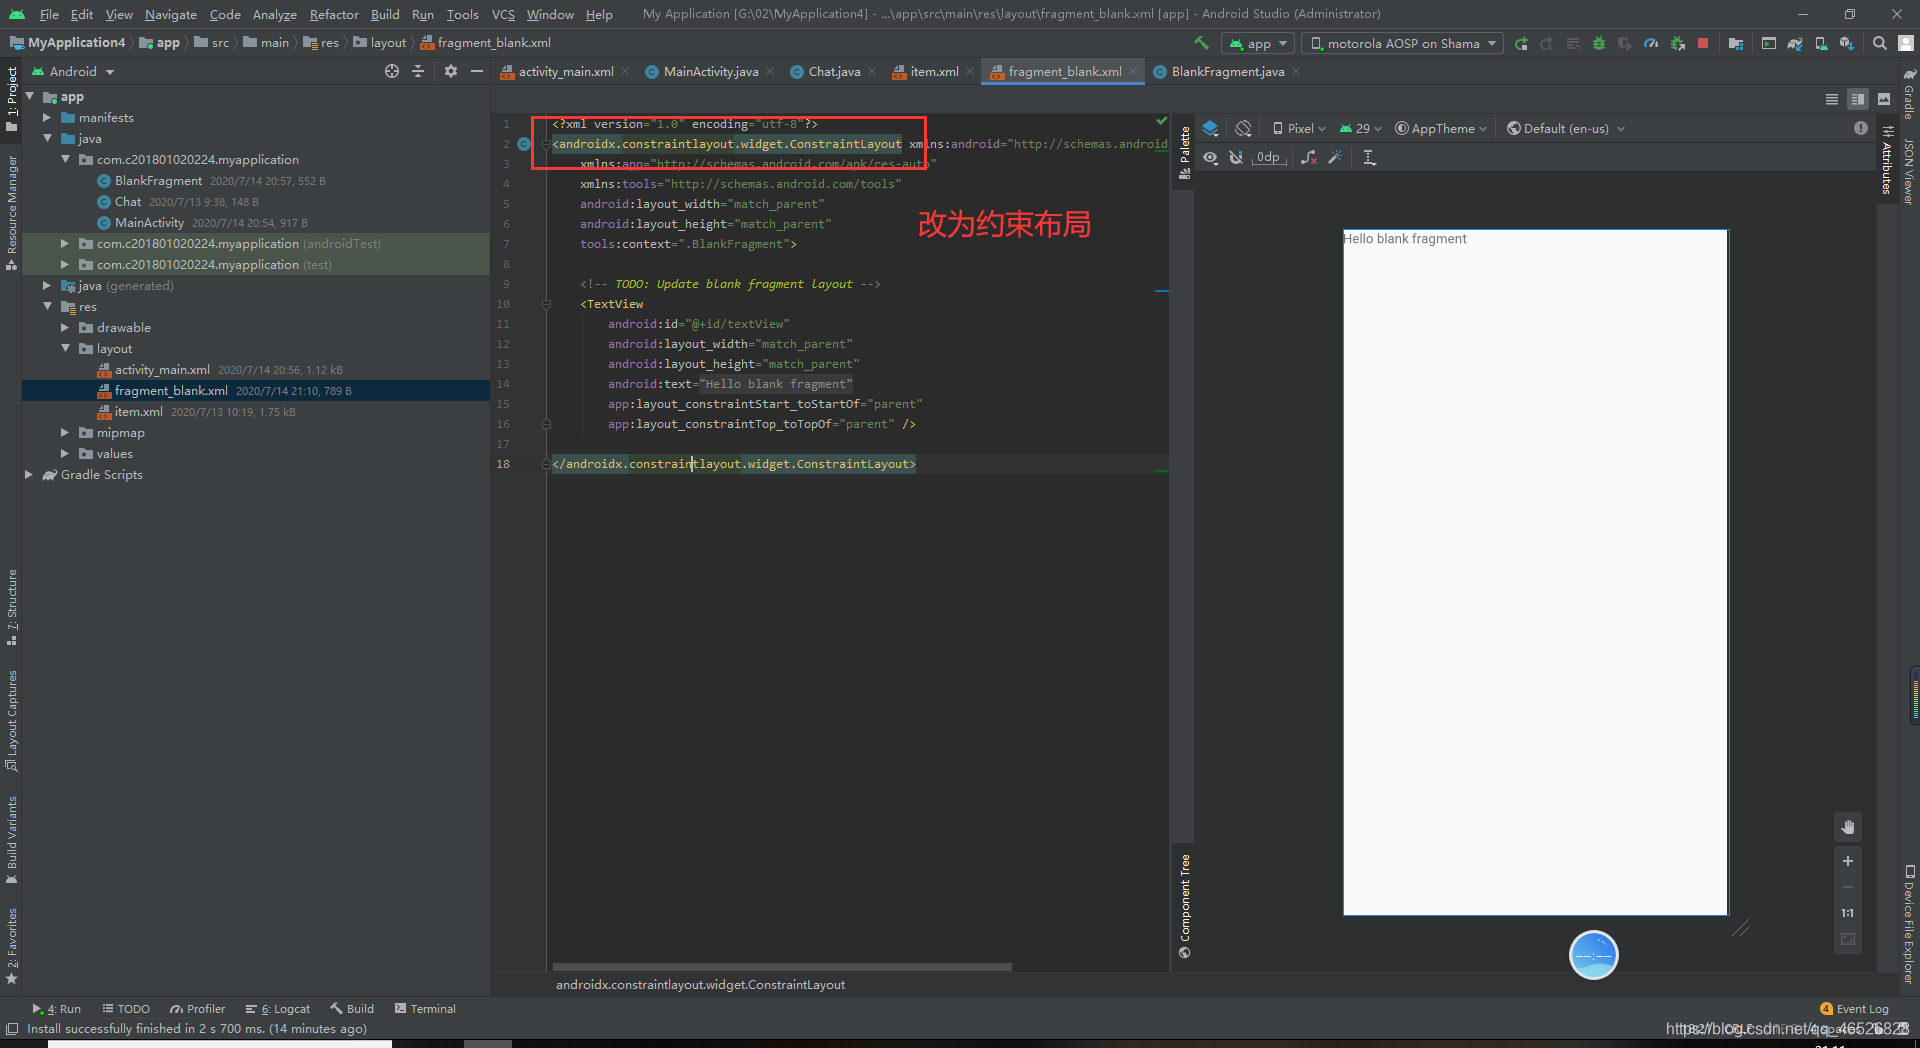
代码
<?xml version="1.0" encoding="utf-8"?>
<androidx.constraintlayout.widget.ConstraintLayout xmlns:android="http://schemas.android.com/apk/res/android"
    xmlns:app="http://schemas.android.com/apk/res-auto"
    xmlns:tools="http://schemas.android.com/tools"
    android:layout_width="match_parent"
    android:layout_height="match_parent"
    tools:context=".BlankFragment">

    <!-- TODO: Update blank fragment layout -->
    <TextView
        android:id="@+id/textView"
        android:layout_width="match_parent"
        android:layout_height="match_parent"
        android:text="@string/hello_blank_fragment"
        app:layout_constraintStart_toStartOf="parent"
        app:layout_constraintTop_toTopOf="parent" />

</androidx.constraintlayout.widget.ConstraintLayout>
第二步,我们要拿到Fragment布局文件中文本的引用,先需要在Fragment java文件中重写一个onActivityCreated()方法,然后在onActivityCreated()方法里面拿到控件的引用。
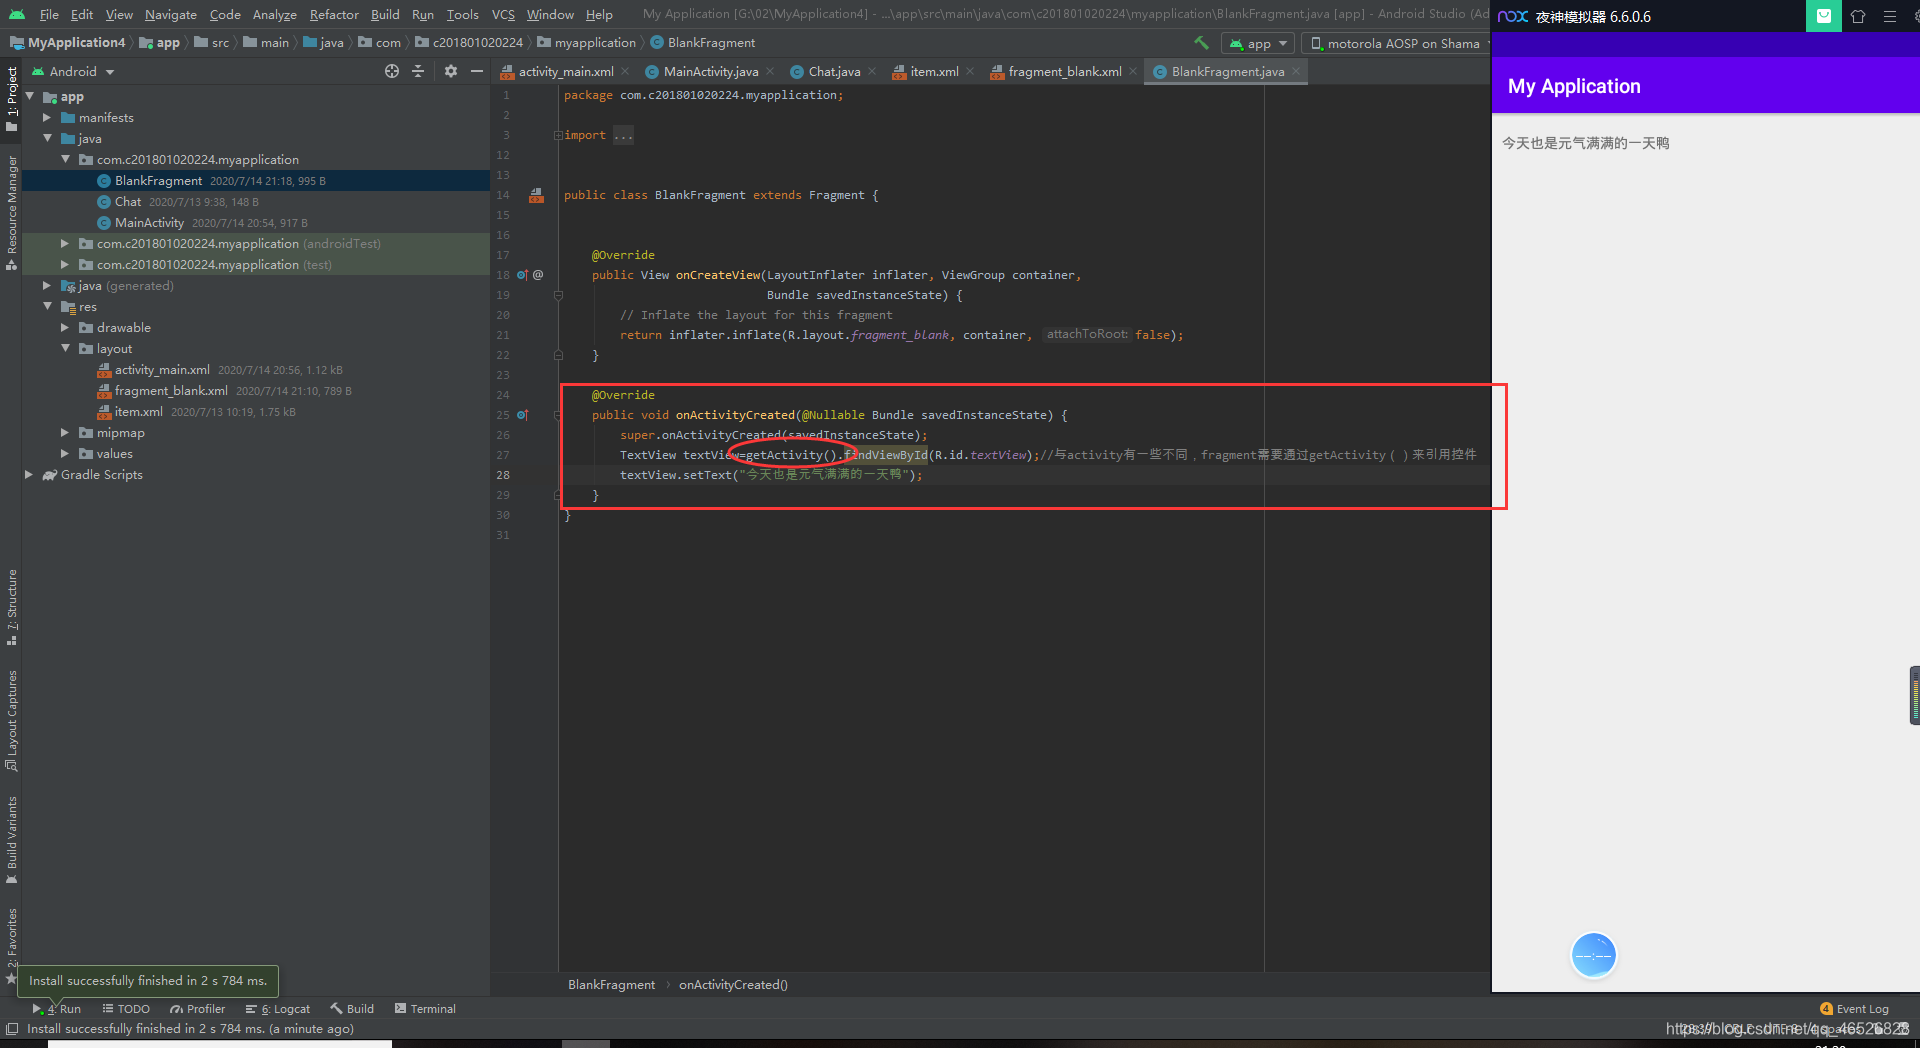
代码
public class BlankFragment extends Fragment {


    @Override
    public View onCreateView(LayoutInflater inflater, ViewGroup container,
                             Bundle savedInstanceState) {
        // Inflate the layout for this fragment
        return inflater.inflate(R.layout.fragment_blank, container, false);
    }

    @Override
    public void onActivityCreated(@Nullable Bundle savedInstanceState) {
        super.onActivityCreated(savedInstanceState);
        TextView textView=getActivity().findViewById(R.id.textView);//与activity有一些不同,fragment需要通过getActivity()来引用控件
        textView.setText("今天也是元气满满的一天鸭");
    }
}
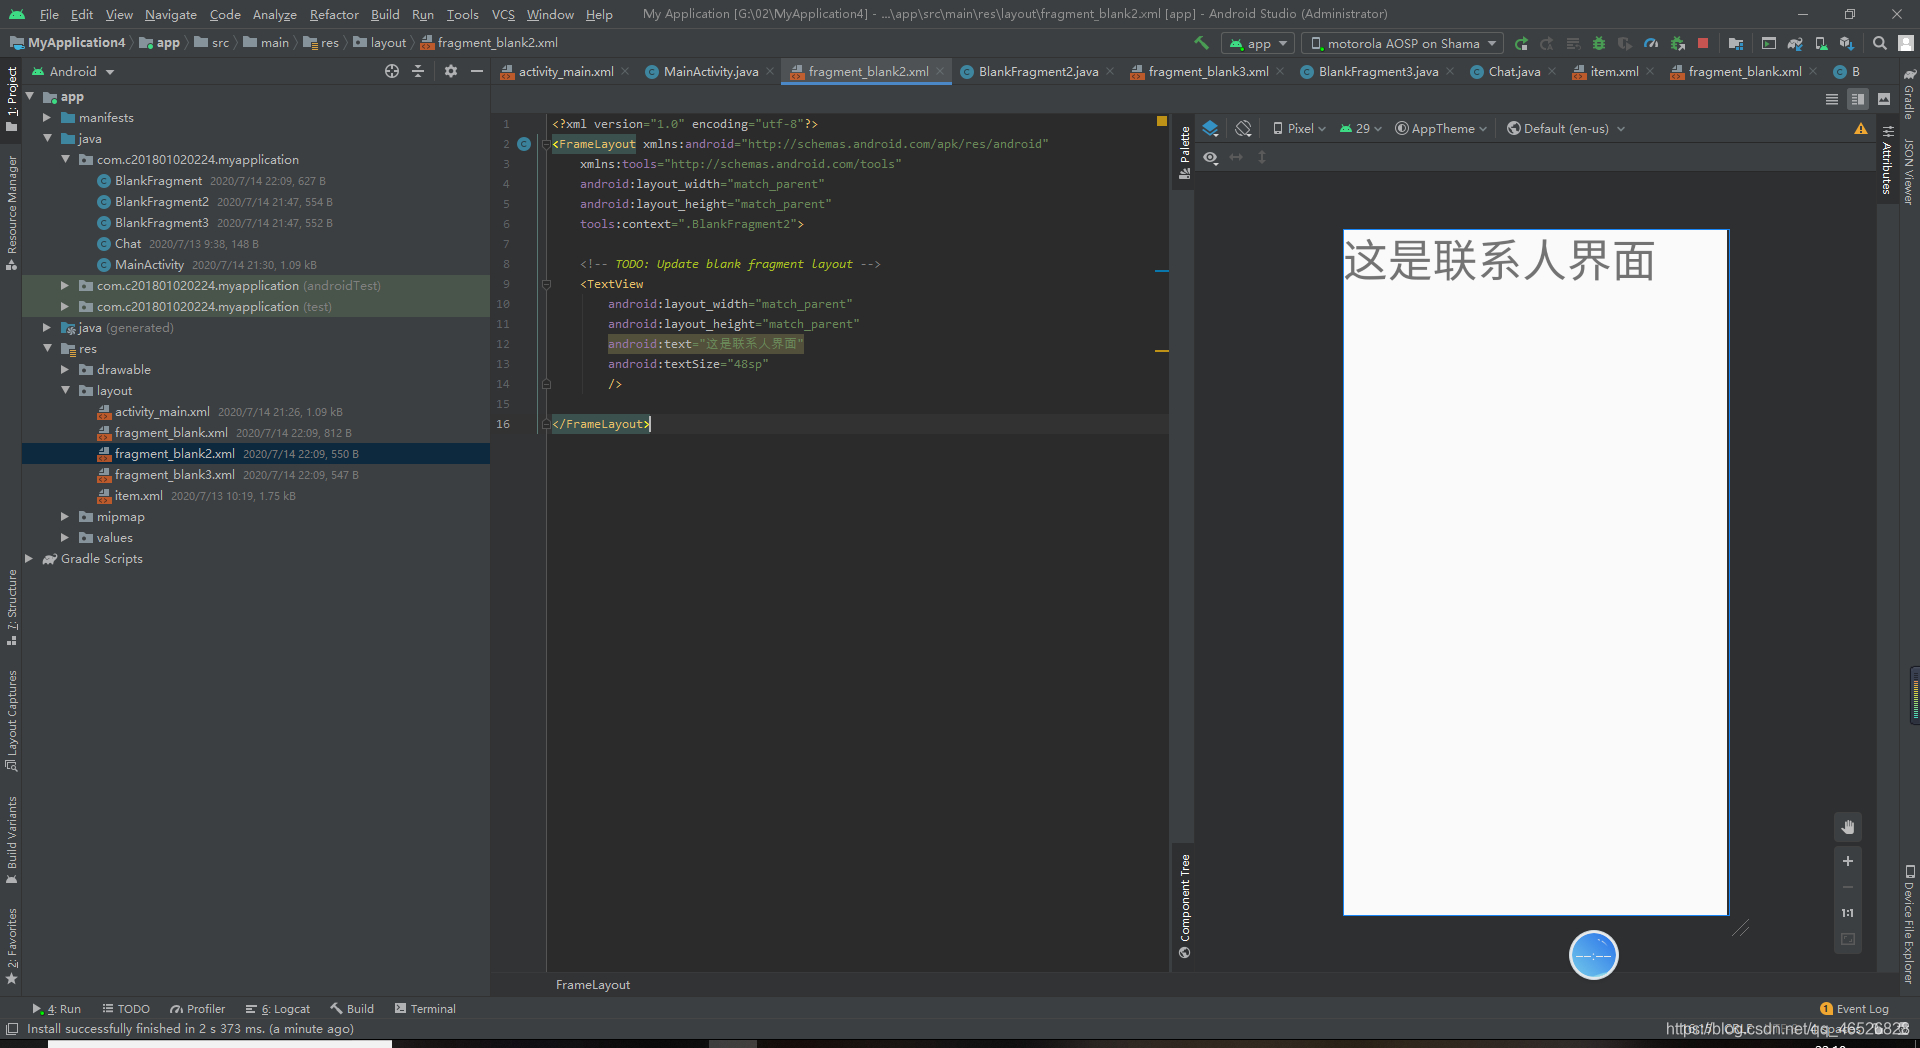
2.动态添加Fragment
第一步,去掉activity布局文件中fragment的name属性,并且把fragment改为任意一种布局,

如图
代码
<?xml version="1.0" encoding="utf-8"?>
<androidx.constraintlayout.widget.ConstraintLayout xmlns:android="http://schemas.android.com/apk/res/android"
    xmlns:app="http://schemas.android.com/apk/res-auto"
    xmlns:tools="http://schemas.android.com/tools"
    android:layout_width="match_parent"
    android:layout_height="match_parent"
    tools:context=".MainActivity">

    <androidx.constraintlayout.widget.ConstraintLayout
        android:id="@+id/fragment"
        android:layout_width="match_parent"
        android:layout_height="0dp"
        android:layout_marginStart="10dp"
        android:layout_marginLeft="10dp"
        android:layout_marginTop="20dp"
        android:layout_marginEnd="10dp"
        android:layout_marginRight="10dp"
        android:layout_marginBottom="20dp"
        app:layout_constraintBottom_toBottomOf="parent"
        app:layout_constraintEnd_toEndOf="parent"
        app:layout_constraintStart_toStartOf="parent"
        app:layout_constraintTop_toTopOf="parent" />


</androidx.constraintlayout.widget.ConstraintLayout>
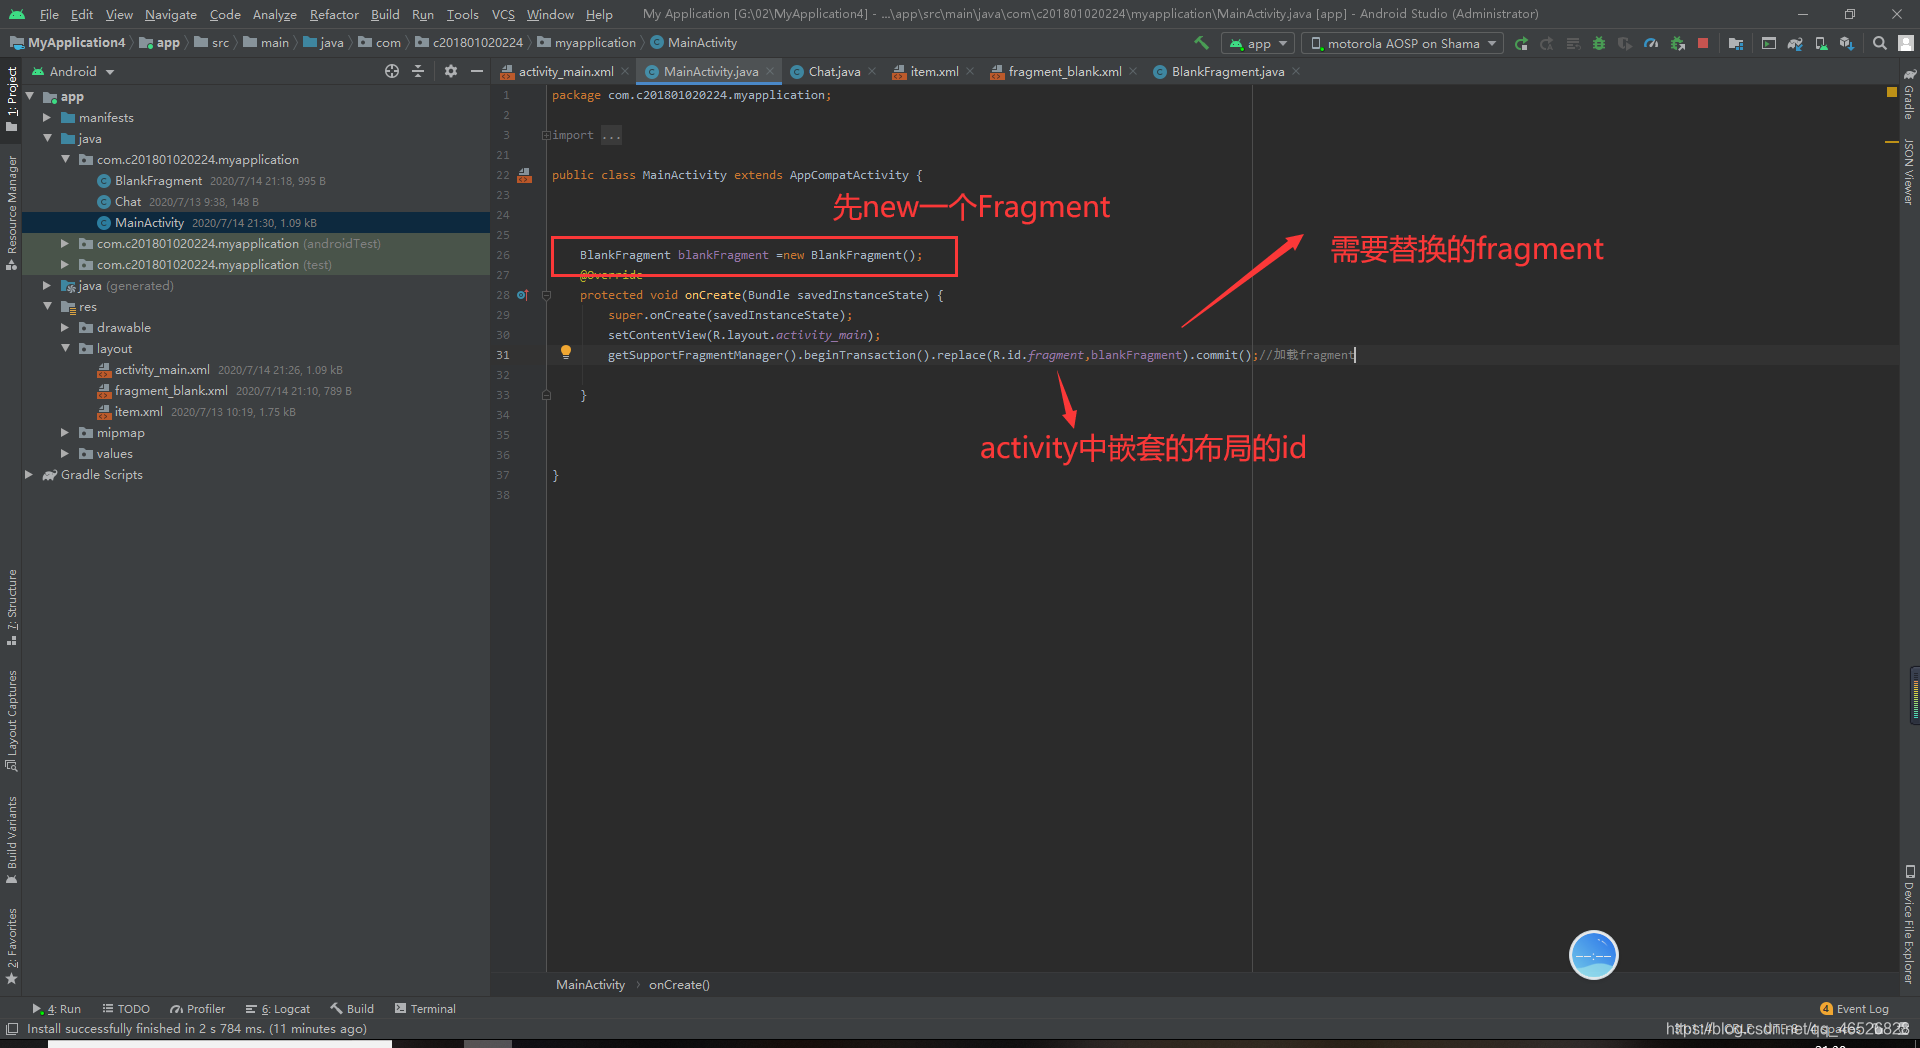
第二步,在activity的java文件中用代码加载Fragment
运行结果(显示的是Fragment里面的内容)
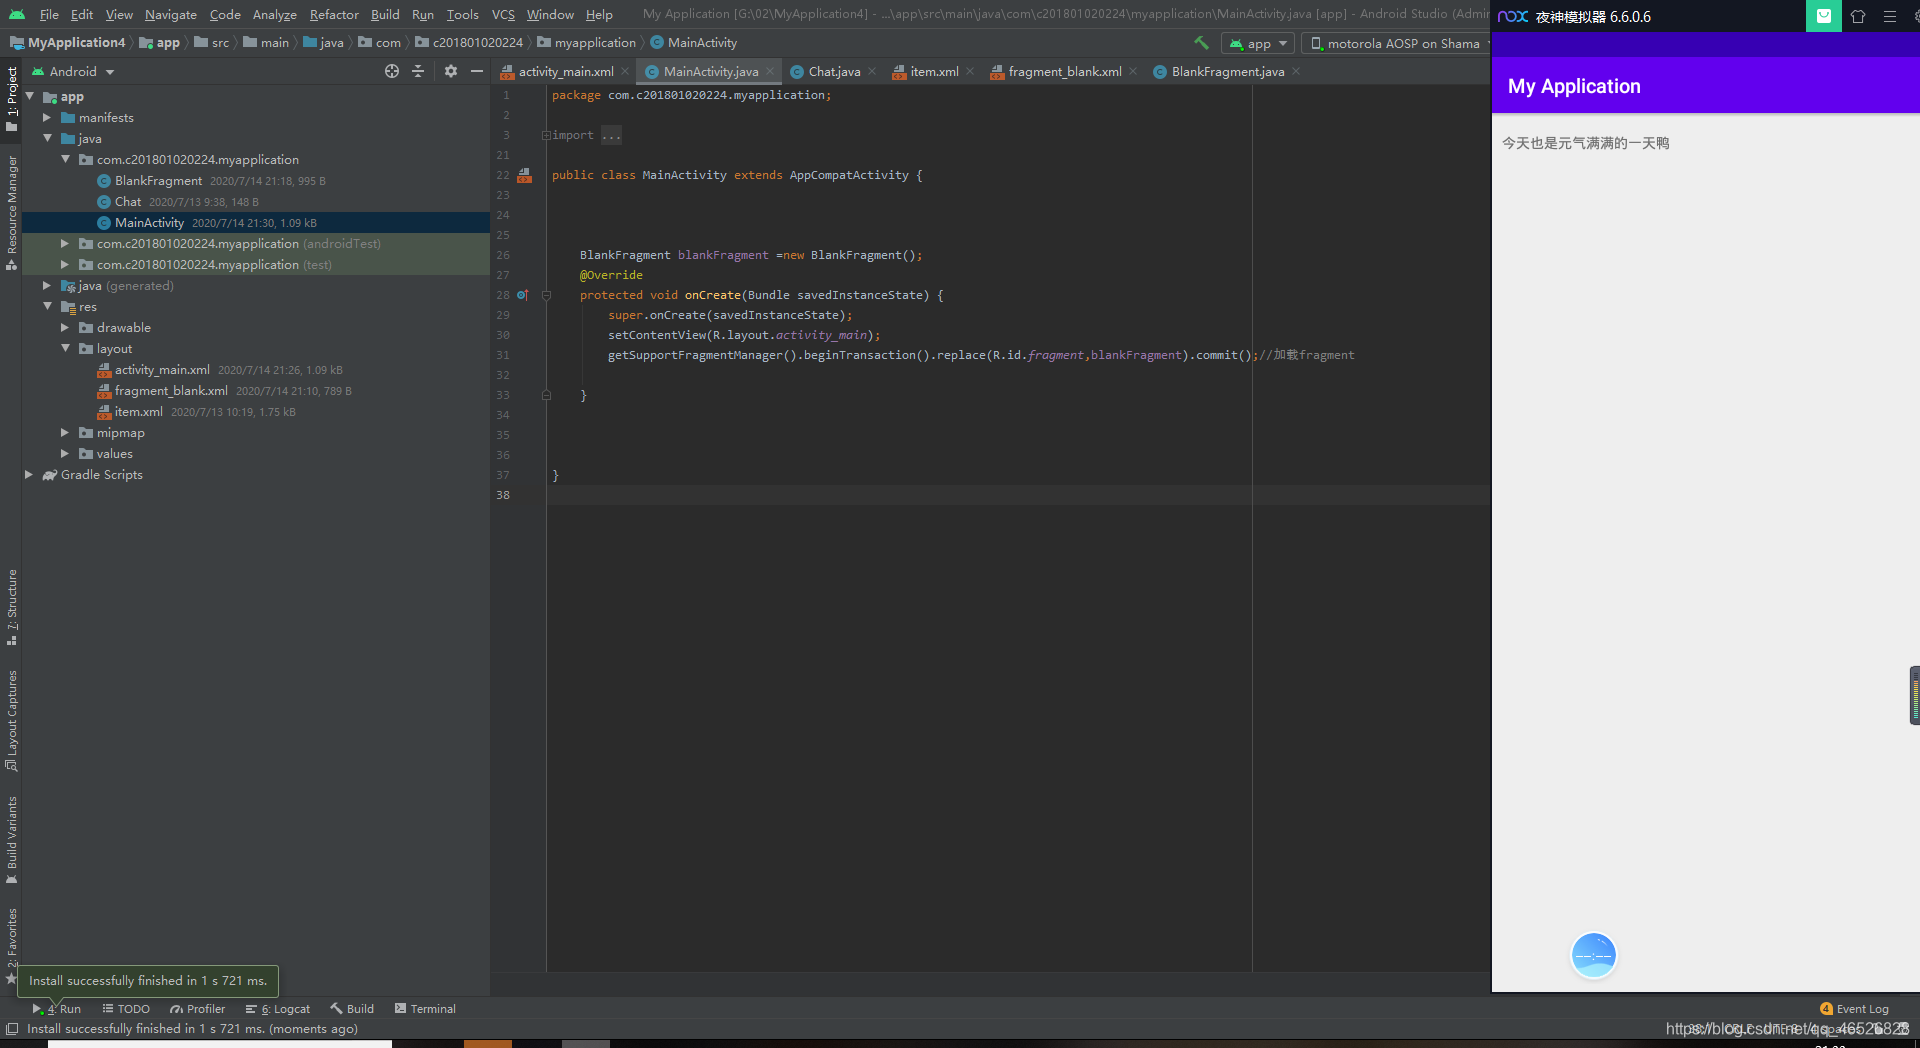
activity代码
public class MainActivity extends AppCompatActivity {

    BlankFragment blankFragment =new BlankFragment();

    @Override
    protected void onCreate(Bundle savedInstanceState) {
        super.onCreate(savedInstanceState);
        setContentView(R.layout.activity_main);
        getSupportFragmentManager().beginTransaction().replace(R.id.fragment,blankFragment).commit();//加载fragment

    }
}
5.Fragment之间的跳转(参考qq案例demo)
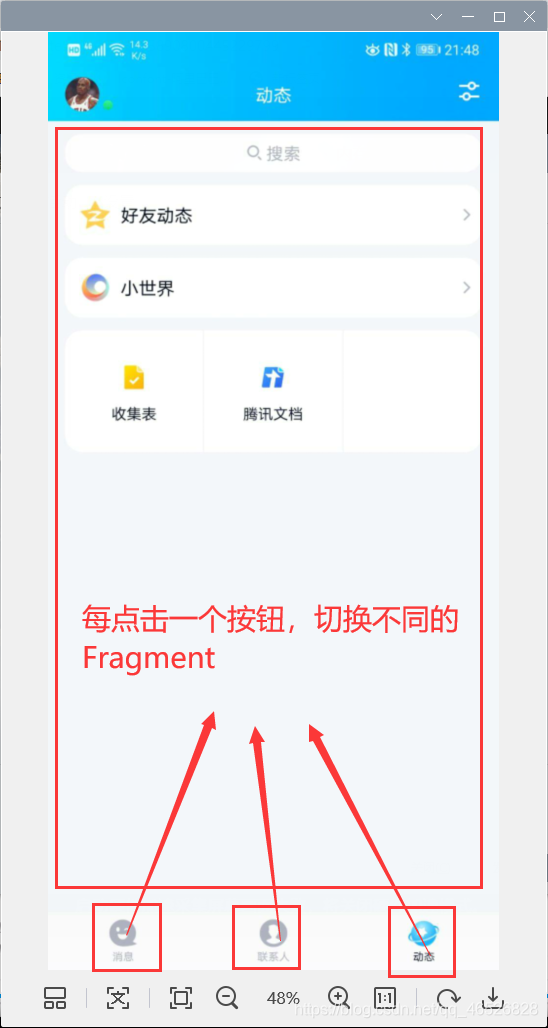
第一步,先创建三个Fragment,
这里我把第一个Fragment讲详细一点,其他两个参照就ok
第一个Fragment的布局文件(其他两个都可参考这个)
代码
<?xml version="1.0" encoding="utf-8"?>
<androidx.constraintlayout.widget.ConstraintLayout xmlns:android="http://schemas.android.com/apk/res/android"
xmlns:app="http://schemas.android.com/apk/res-auto"
xmlns:tools="http://schemas.android.com/tools"
android:layout_width="match_parent"
android:layout_height="match_parent"
tools:context=".BlankFragment">
<!-- TODO: Update blank fragment layout -->
<TextView
android:id="@+id/textView"
android:layout_width="match_parent"
android:layout_height="match_parent"
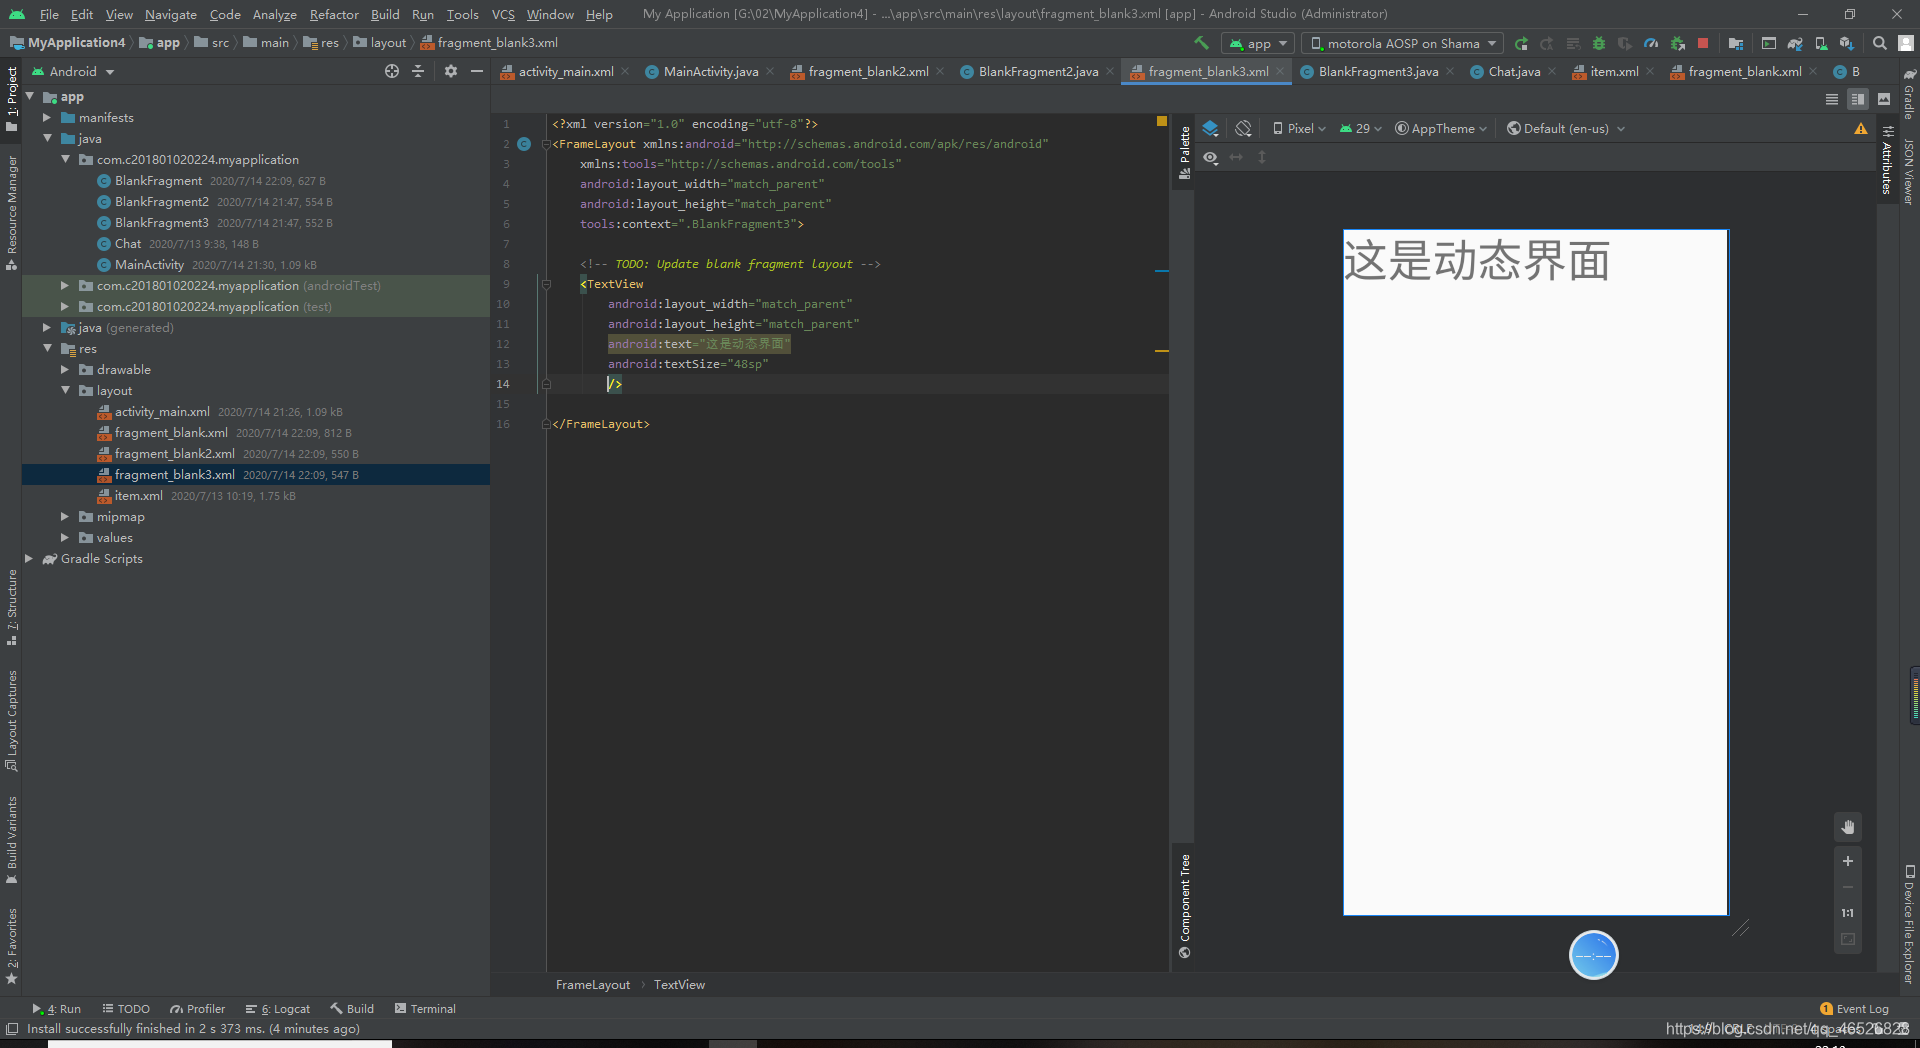
android:text="这是消息界面"
android:textSize="48sp"
app:layout_constraintStart_toStartOf="parent"
app:layout_constraintTop_toTopOf="parent" />
</androidx.constraintlayout.widget.ConstraintLayout>
第一个Fragment的java文件
代码
public class BlankFragment extends Fragment {


    @Override
    public View onCreateView(LayoutInflater inflater, ViewGroup container,
                             Bundle savedInstanceState) {
        // Inflate the layout for this fragment
        return inflater.inflate(R.layout.fragment_blank, container, false);
    }


}
第二个Fragment的布局文件
第三个Fragment的布局文件
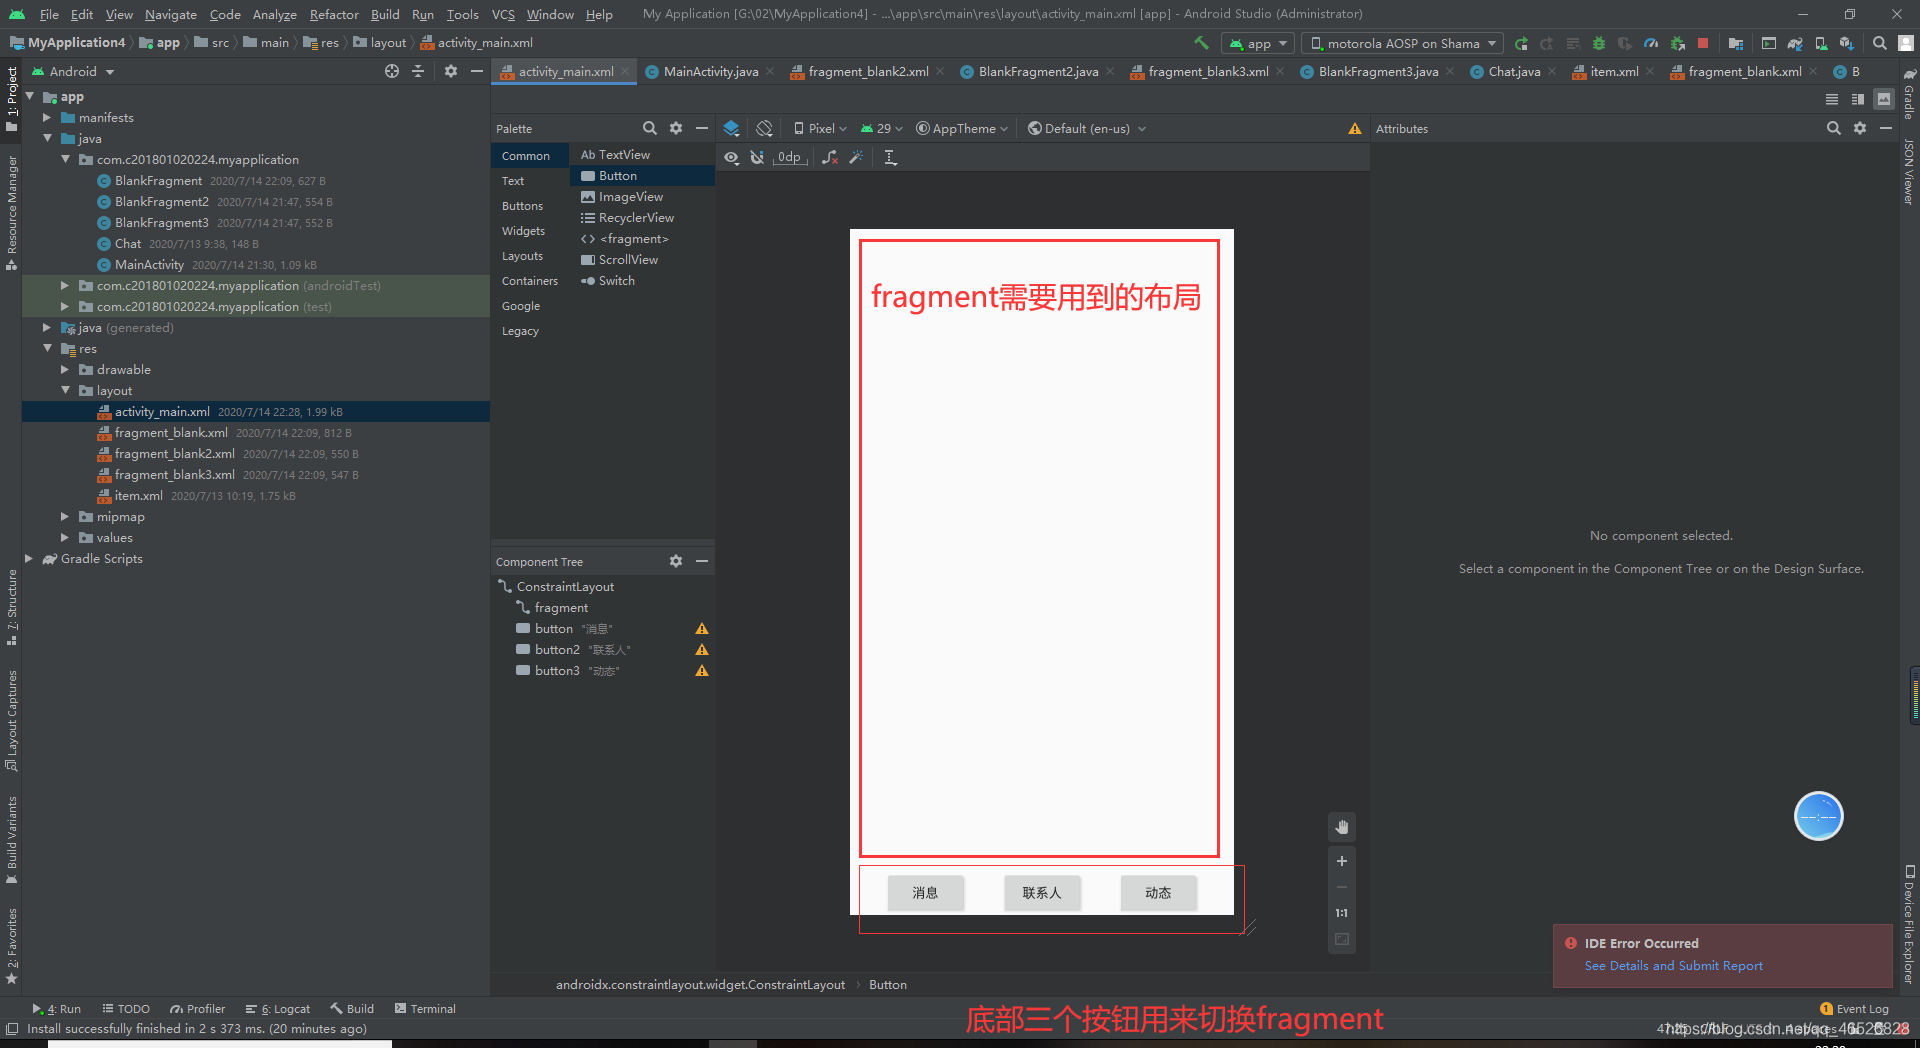
接下来是大重点,activity的代码
首先是布局文件
代码
<?xml version="1.0" encoding="utf-8"?>
<androidx.constraintlayout.widget.ConstraintLayout xmlns:android="http://schemas.android.com/apk/res/android"
    xmlns:app="http://schemas.android.com/apk/res-auto"
    xmlns:tools="http://schemas.android.com/tools"
    android:layout_width="match_parent"
    android:layout_height="match_parent"
    tools:context=".MainActivity">

    <androidx.constraintlayout.widget.ConstraintLayout
        android:id="@+id/fragment"
        android:layout_width="match_parent"
        android:layout_height="0dp"

       app:layout_constraintBottom_toTopOf="@id/button3"

        app:layout_constraintTop_toTopOf="parent">


    </androidx.constraintlayout.widget.ConstraintLayout>


    <Button
        android:id="@+id/button"
        android:layout_width="wrap_content"
        android:layout_height="wrap_content"
        android:text="消息"
        app:layout_constraintEnd_toStartOf="@+id/button2"
        app:layout_constraintHorizontal_bias="0.5"
        app:layout_constraintStart_toStartOf="parent"
        app:layout_constraintBottom_toBottomOf="parent"
        />

    <Button
        android:id="@+id/button2"
        android:layout_width="wrap_content"
        android:layout_height="wrap_content"
        android:text="联系人"
        app:layout_constraintEnd_toStartOf="@+id/button3"
        app:layout_constraintHorizontal_bias="0.5"
        app:layout_constraintStart_toEndOf="@+id/button"
        app:layout_constraintTop_toTopOf="@+id/button" />

    <Button
        android:id="@+id/button3"
        android:layout_width="wrap_content"
        android:layout_height="wrap_content"
        android:text="动态"
        app:layout_constraintEnd_toEndOf="parent"
        app:layout_constraintHorizontal_bias="0.5"
        app:layout_constraintStart_toEndOf="@+id/button2"
        app:layout_constraintTop_toTopOf="@+id/button2" />
</androidx.constraintlayout.widget.ConstraintLayout>
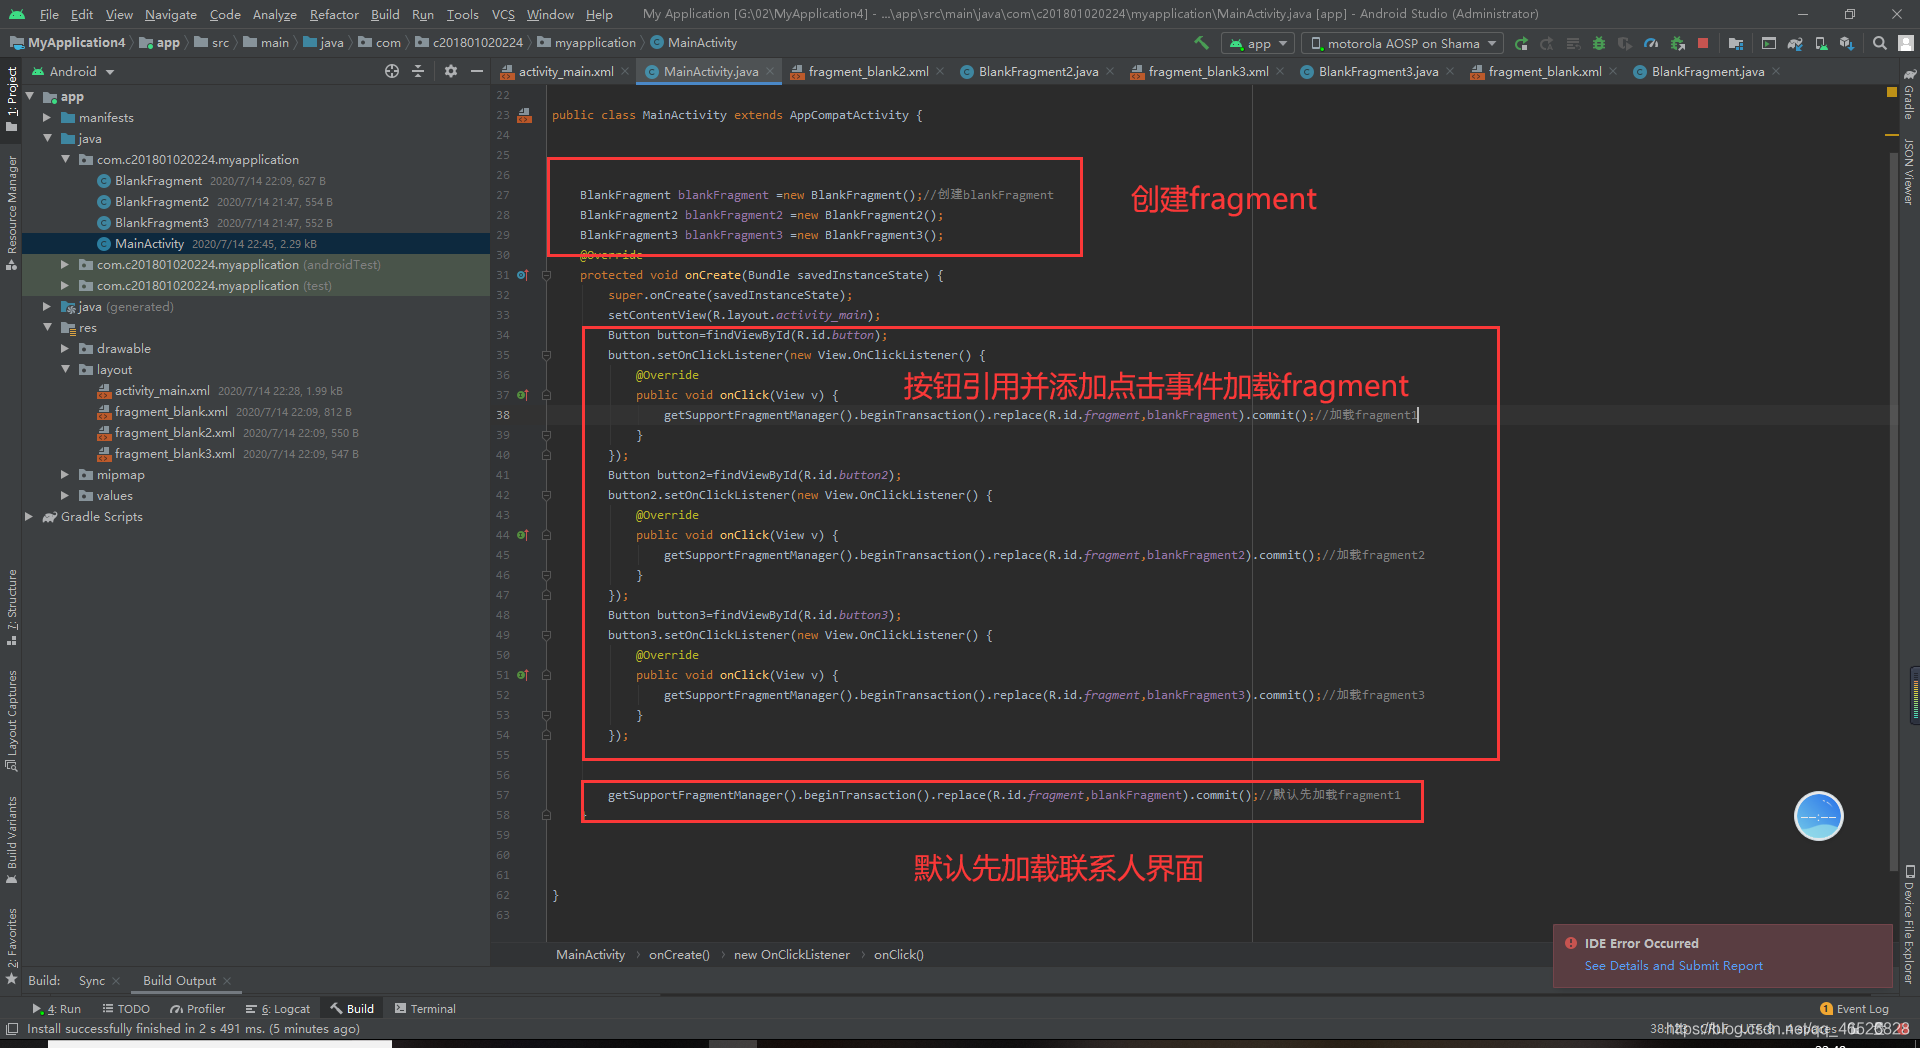
然后就是activity的java文件,首先我们要拿到三个button的引用,然后添加点击事件,点击按钮切换到相应的fragment,并且这里我们默认先加载联系人界面的fragment
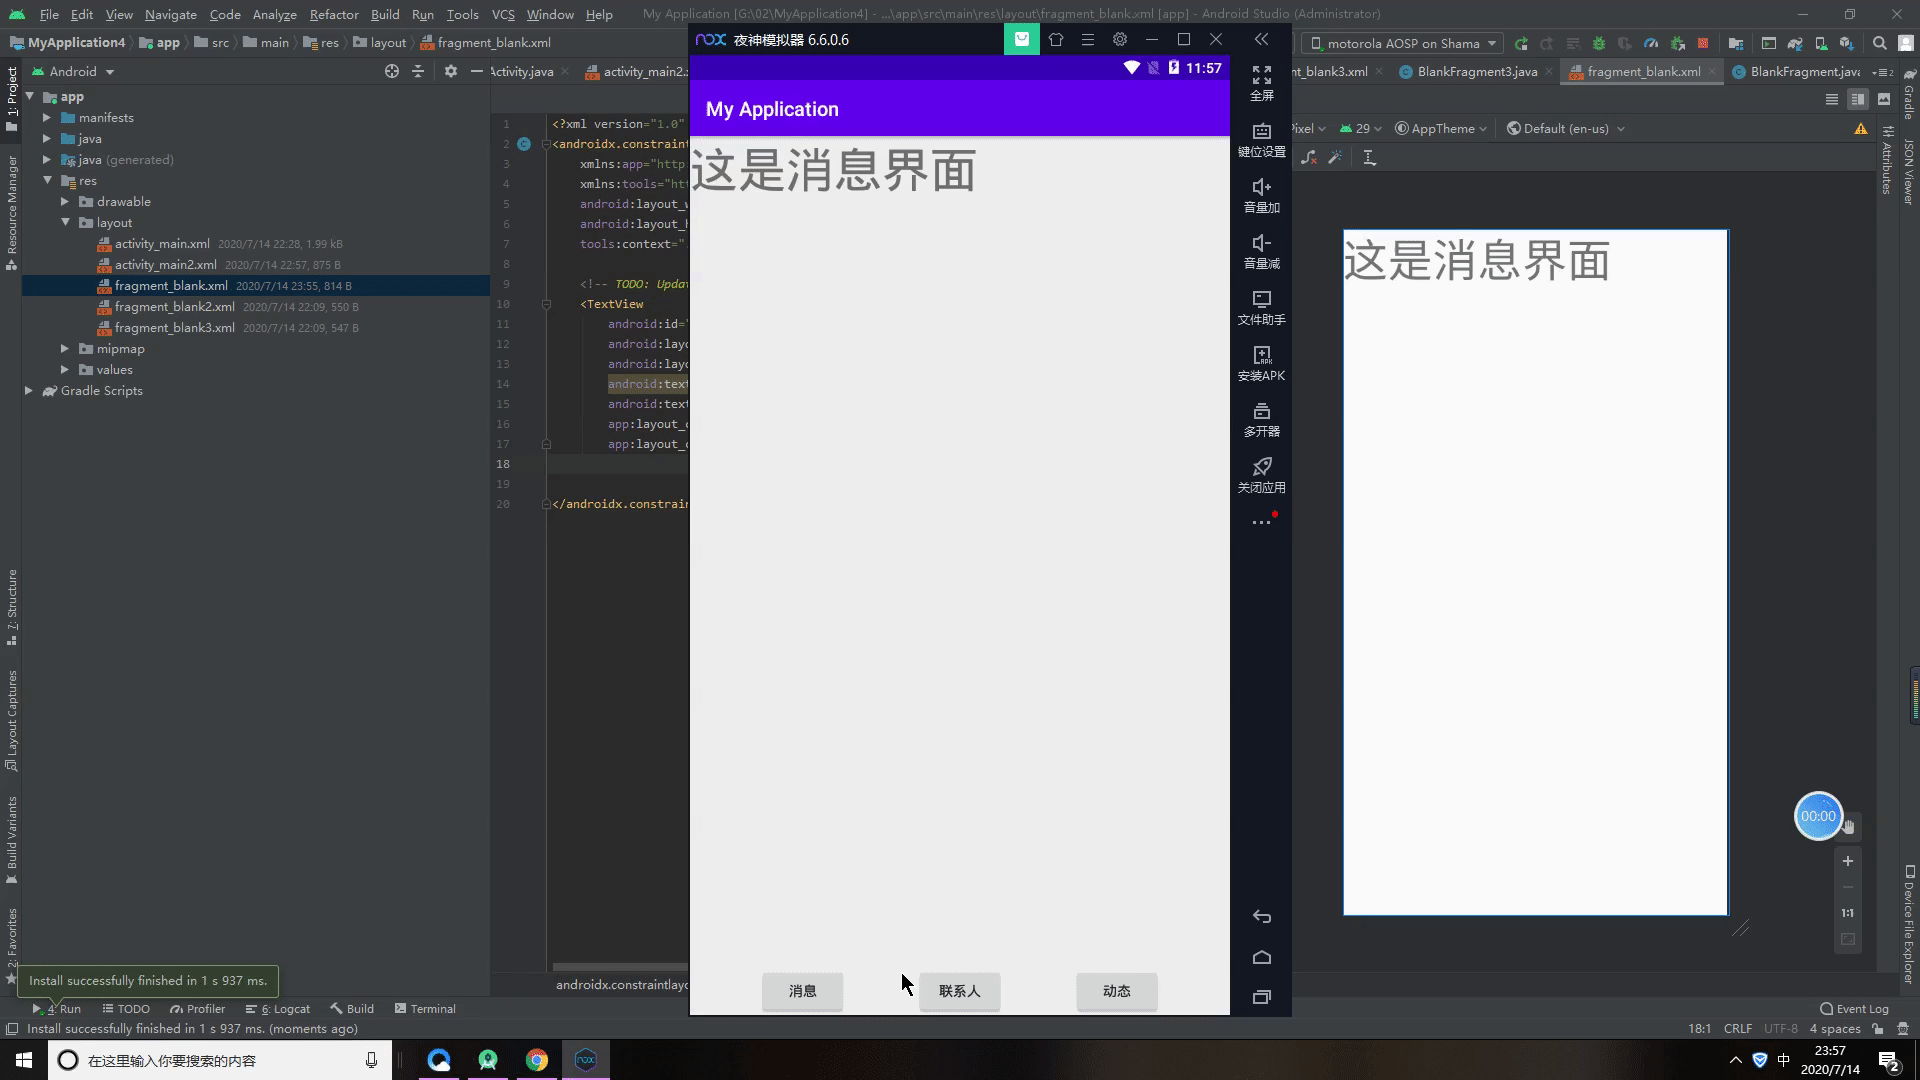
运行结果
代码
public class MainActivity extends AppCompatActivity {


    BlankFragment blankFragment =new BlankFragment();//创建blankFragment
    BlankFragment2 blankFragment2 =new BlankFragment2();
    BlankFragment3 blankFragment3 =new BlankFragment3();
    @Override
    protected void onCreate(Bundle savedInstanceState) {
        super.onCreate(savedInstanceState);
        setContentView(R.layout.activity_main);
        Button button=findViewById(R.id.button);
        button.setOnClickListener(new View.OnClickListener() {
            @Override
            public void onClick(View v) {
                getSupportFragmentManager().beginTransaction().replace(R.id.fragment,blankFragment).commit();//加载fragment1
            }
        });
        Button button2=findViewById(R.id.button2);
        button2.setOnClickListener(new View.OnClickListener() {
            @Override
            public void onClick(View v) {
                getSupportFragmentManager().beginTransaction().replace(R.id.fragment,blankFragment2).commit();//加载fragment2
            }
        });
        Button button3=findViewById(R.id.button3);
        button3.setOnClickListener(new View.OnClickListener() {
            @Override
            public void onClick(View v) {
                getSupportFragmentManager().beginTransaction().replace(R.id.fragment,blankFragment3).commit();//加载fragment3
            }
        });


        getSupportFragmentManager().beginTransaction().replace(R.id.fragment,blankFragment).commit();//默认先加载fragment1
    }


}
6.Fragment跳Activity
第一步,先创建一个activity2

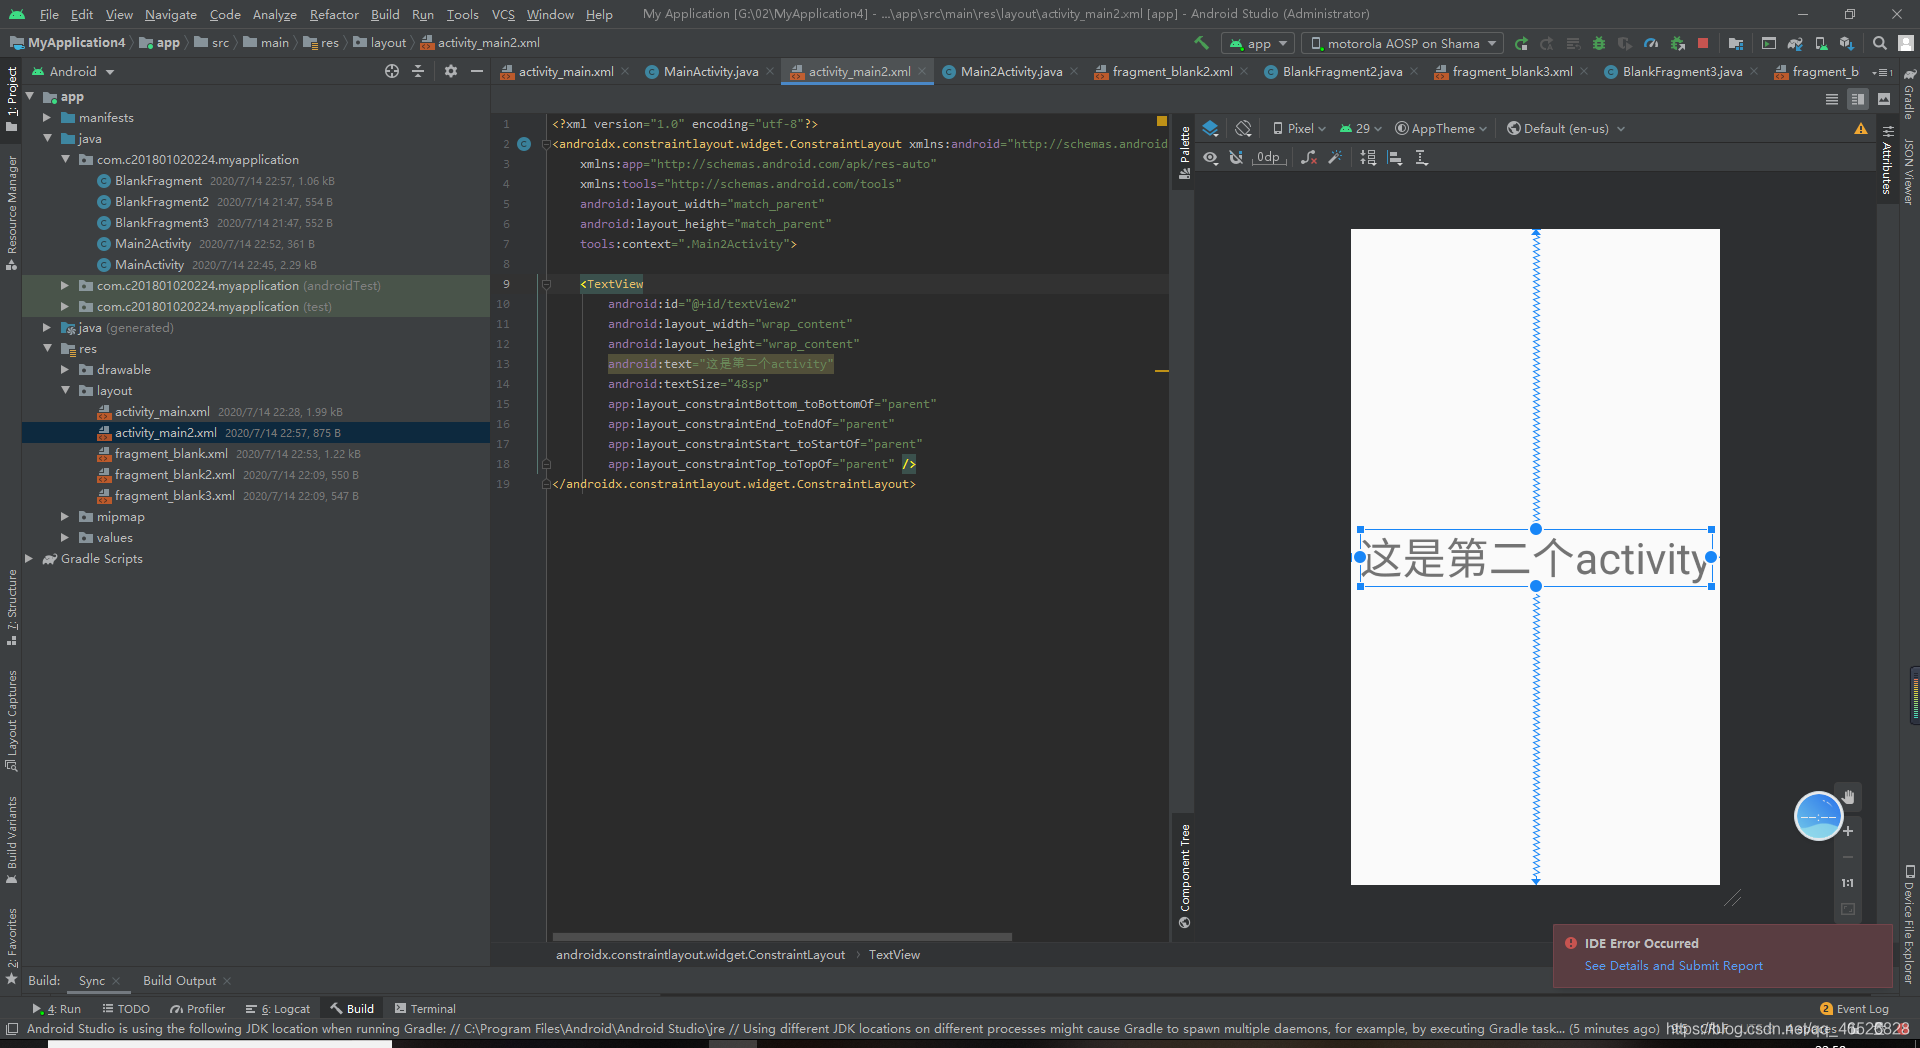
第二步,在fragment布局文件中加一个按钮button
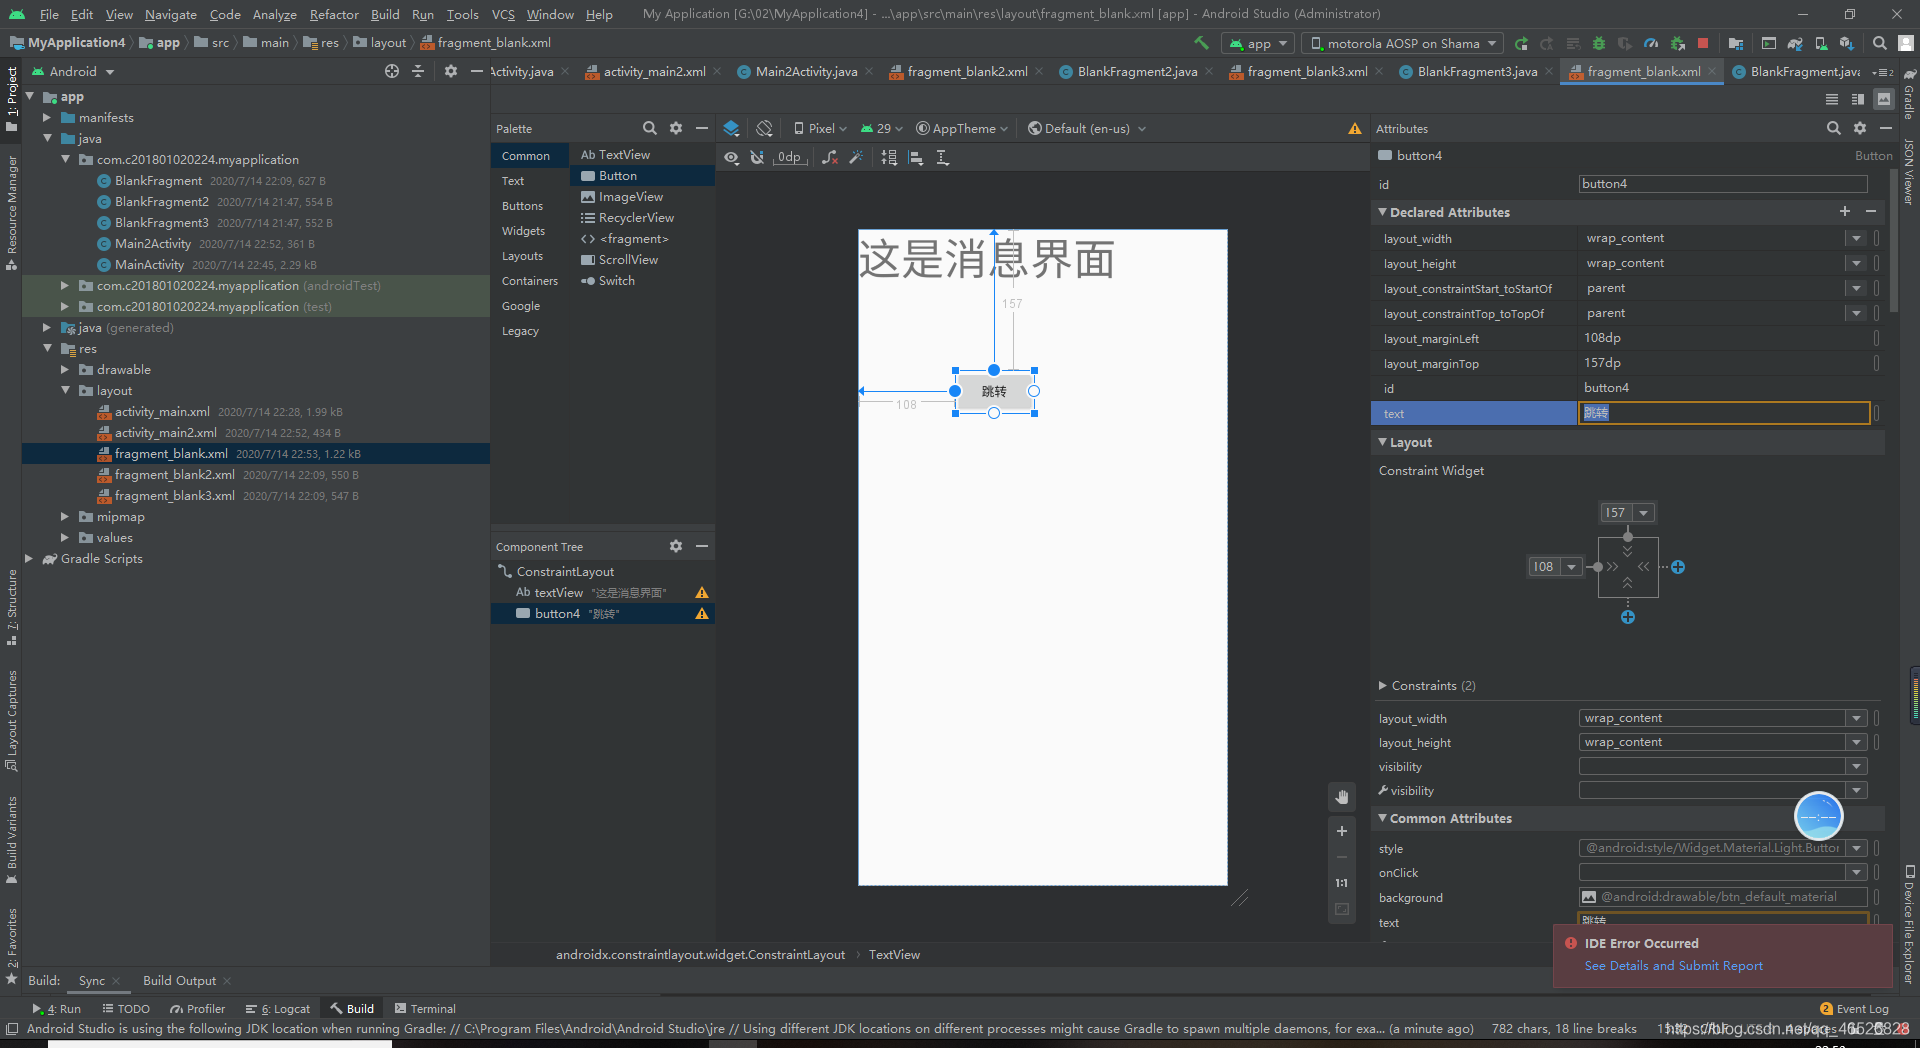
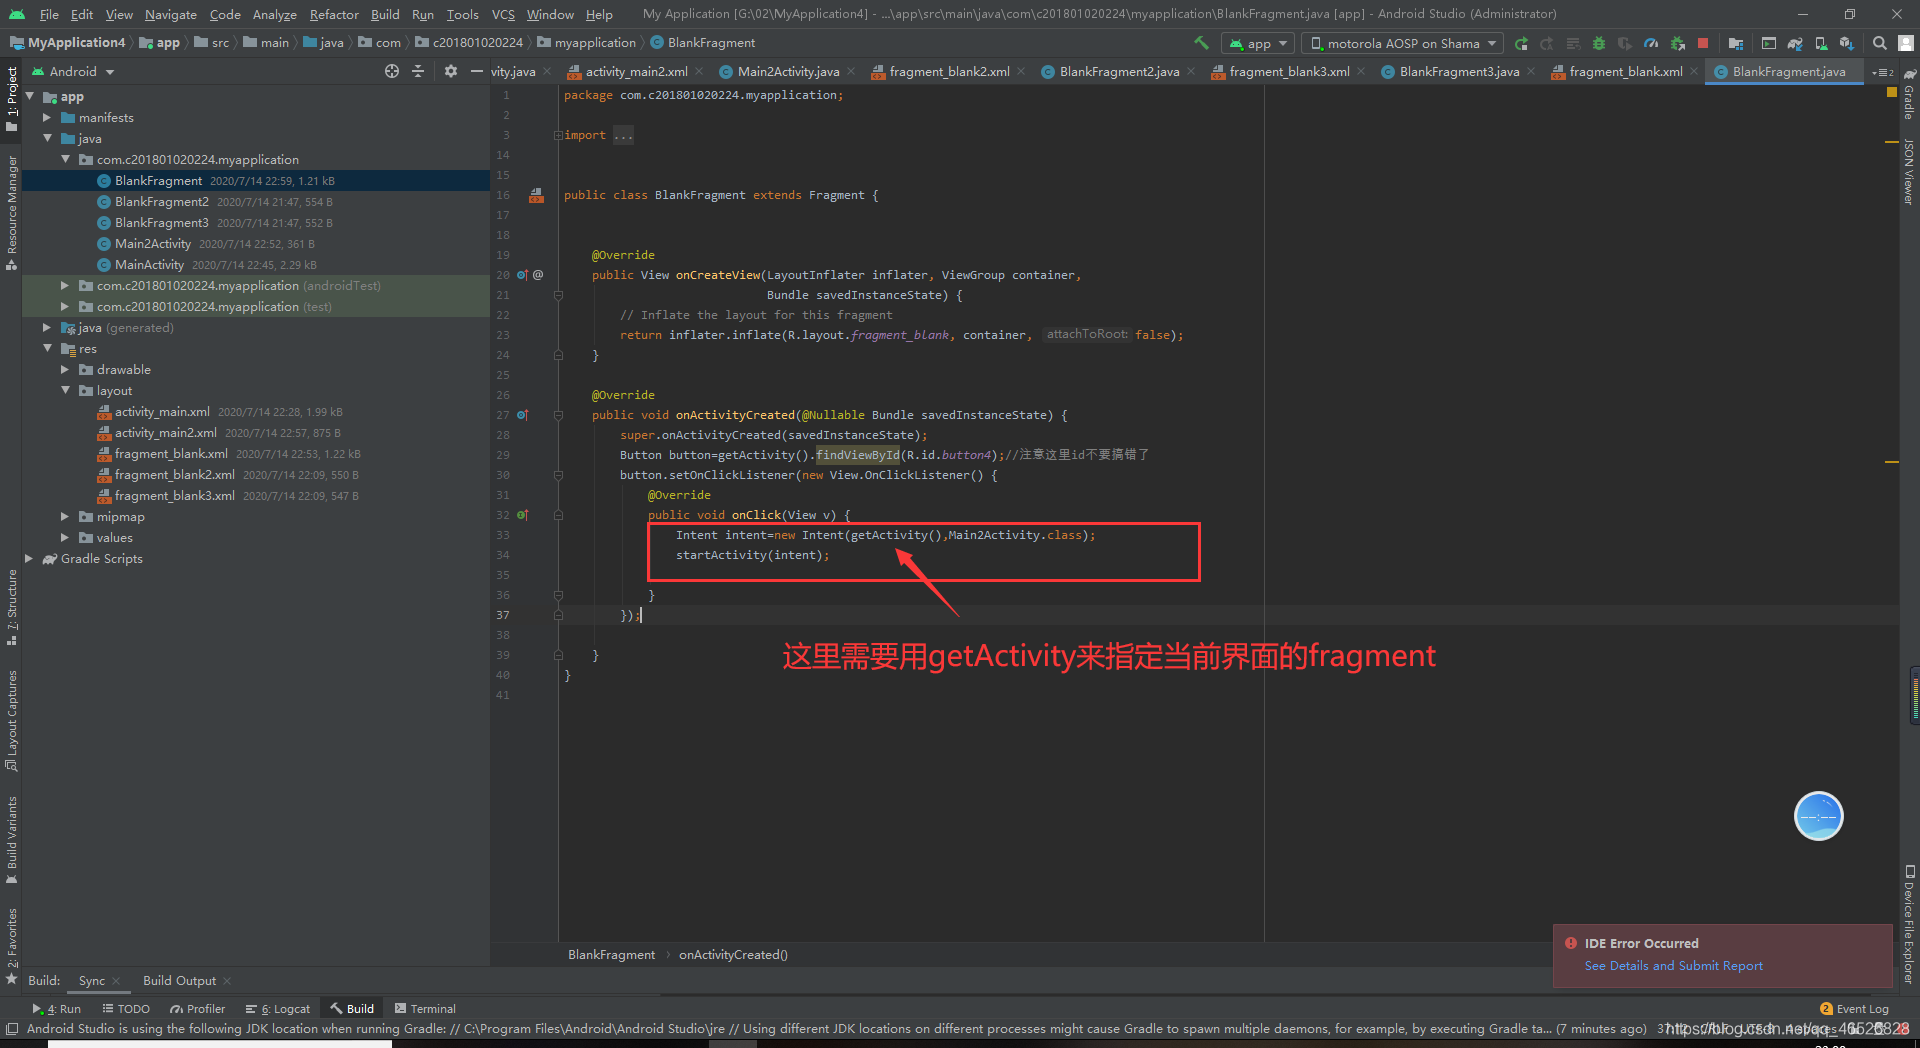
第三步,在fragment的java文件中给button添加点击事件
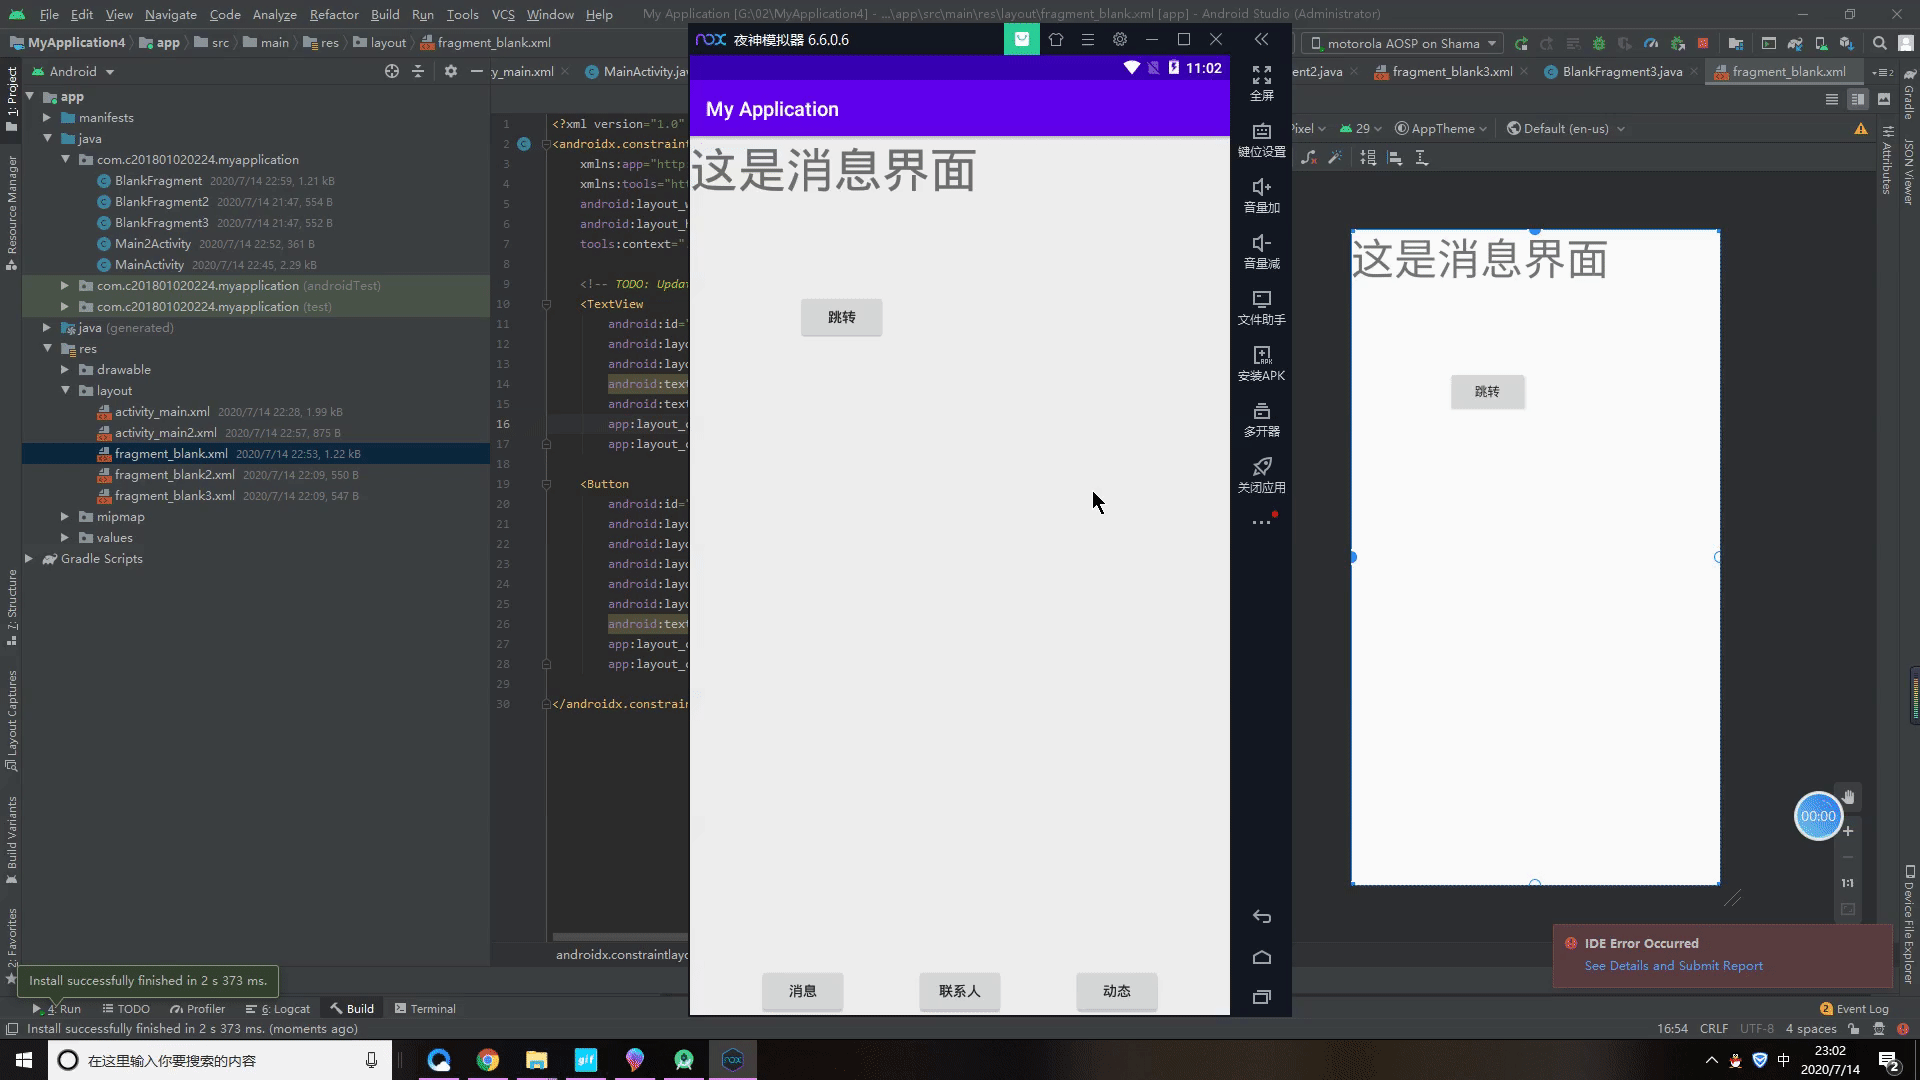
运行结果
fragment代码
public class BlankFragment extends Fragment {


    @Override
    public View onCreateView(LayoutInflater inflater, ViewGroup container,
                             Bundle savedInstanceState) {
        // Inflate the layout for this fragment
        return inflater.inflate(R.layout.fragment_blank, container, false);
    }

    @Override
    public void onActivityCreated(@Nullable Bundle savedInstanceState) {
        super.onActivityCreated(savedInstanceState);
        Button button=getActivity().findViewById(R.id.button4);//注意这里id不要搞错了
        button.setOnClickListener(new View.OnClickListener() {
            @Override
            public void onClick(View v) {
                Intent intent=new Intent(getActivity(),Main2Activity.class);
                startActivity(intent);

            }
        });

    }
}
今天的知识就到这里啦,如果小伙伴你有什么问题或者不懂的都可以到下方评论或者私信我,当然我也希望能收到更好的建议,我们互相学习互相进步,谢谢您的阅读,下一讲我们讲一个小实验RecyclerView和Fragment的初次邂逅。
Android 入门第五讲02-QQ主界面demo(内附免费源码)(网络图片,圆形图片,RecyclerView点击事件,下拉刷新,上拉加载,开源控件的使用,底部按钮的样式切换)