文章目录
一、 GPU 过度绘制优化总结
前两篇博客回顾 :
【Android 性能优化】布局渲染优化 ( 过渡绘制 | 自定义控件过渡绘制 | 布局文件层次深 | GPU 过渡绘制调试工具 | 背景过度绘制 ) 讲解的是布局文背景设置 , 导致的 GPU 渲染过程中过度绘制 , 如何调试 GPU 渲染 , 主题背景与布局背景设置造成的过度绘制 , 及推荐处理方案 , 删除主题背景 ;
【Android 性能优化】布局渲染优化 ( 过渡绘制 | 背景设置产生的过度绘制 | Android 系统的渲染优化 | 自定义布局渲染优化 ) 博客中讲解了布局文件中的背景如何处理 , 自定义组件在 GPU 渲染过程中过度绘制如何进行处理 ; 还有 Android 系统针对 CPU 传递数据到 GPU 进行的优化 ;
耗时操作总结 :
在 【Android 性能优化】布局渲染优化 ( CPU 与 GPU 架构分析 | 安卓布局显示流程 | 视觉与帧率分析 | 渲染超时卡顿分析 | 渲染过程与优化 ) 博客中分析了图像渲染的 16 毫秒过程中
- CPU 渲染
- CPU 传递数据到 GPU
- GPU 渲染
是三大耗时操作 , 之前的两篇博客针对 GPU 渲染中的过度绘制 , 如何调试 , 如何优化 , 进行了简要介绍 ; CPU 传递数据到 GPU 过程是 Android 自己优化的 , 不需要开发者干预 ;
本篇博客开始针对 CPU 渲染过程进行详细讲解 , CPU 渲染优化 , 主要是提升 CPU 渲染的速度 , 即减少布局的嵌套 ;
上述优化过程中 , 需求是第一位的 , 不能为了优化而优化 , 假如需求就是这种要求 , 那只能尽最大可能进行 GPU 渲染优化 , 不要盲目追求 区域过度绘制 ;
二、 CPU 渲染过程
CPU 渲染过程 , 就是将 UI 组件转换成多维向量图像 ( 多边形或纹理数据 ) ;
CPU 渲染过程细节 : UI 组件 -> 纹理 流程 , 根据该组件的位置 , 大小 , 形状 , 颜色 等生成纹理数据 ;
① 加载内存 : 将 UI 组件加载到内存中 ;
② 调用 UI 组件的 invalidate 方法 ;
③ 测量 : 调用 onMeasure 方法 , 测量布局组件 ;
④ 摆放 : 调用 onLayout 方法 , 摆放组件 ;
⑤ 图像转换 : 将测量摆放好的图像 , 展示出来 , 转为多维向量图像 , 传递给 GPU ;
三、 CPU 渲染性能调试工具 Layout Inspector
在之前调试 GPU 渲染新能时 , 使用了手机开发者模式下的 “调试 GPU 过度绘制” 工具 , CPU 渲染使用下面介绍的 “Layout Inspector” 工具 ;
老版本的 Android Studio 中还可以使用 Hierarchy Viewer 工具 , 新版本的 Android Studio 已不支持该工具 , 使用 Layout Inspector 替代 ;
CPU 渲染性能调试工具 :
① 工具选择 : 优化 CPU 渲染情况 , 需要先知道 CPU 渲染的当前性能 , 原来使用的是 Hierarchy Viewer 工具 ( 目前已不支持 ) , 现在使用 Layout Inspector 工具 ;
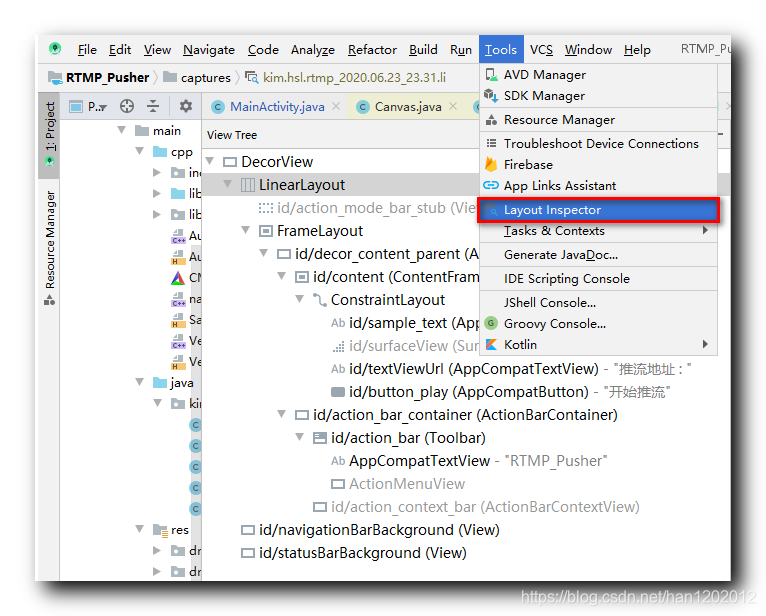
② 打开 Layout Inspector 工具 : 在 Android Studio 中 , 点击菜单栏 “Tool” , 选择 “Layout Inspector” 工具 , 即可打开该工具 ;
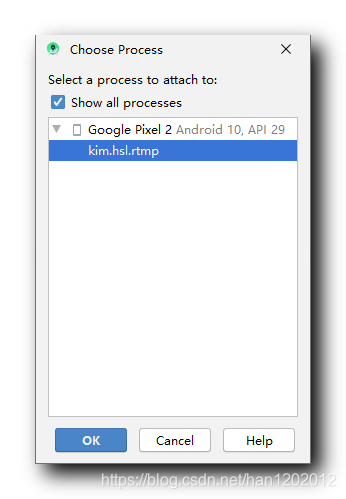
③ 选择进程 : 在弹出的 “Choose Process” 对话框中 , 选择要分析的 UI 布局所在的进程 ;
④ Layout Inspector 工具截图 :
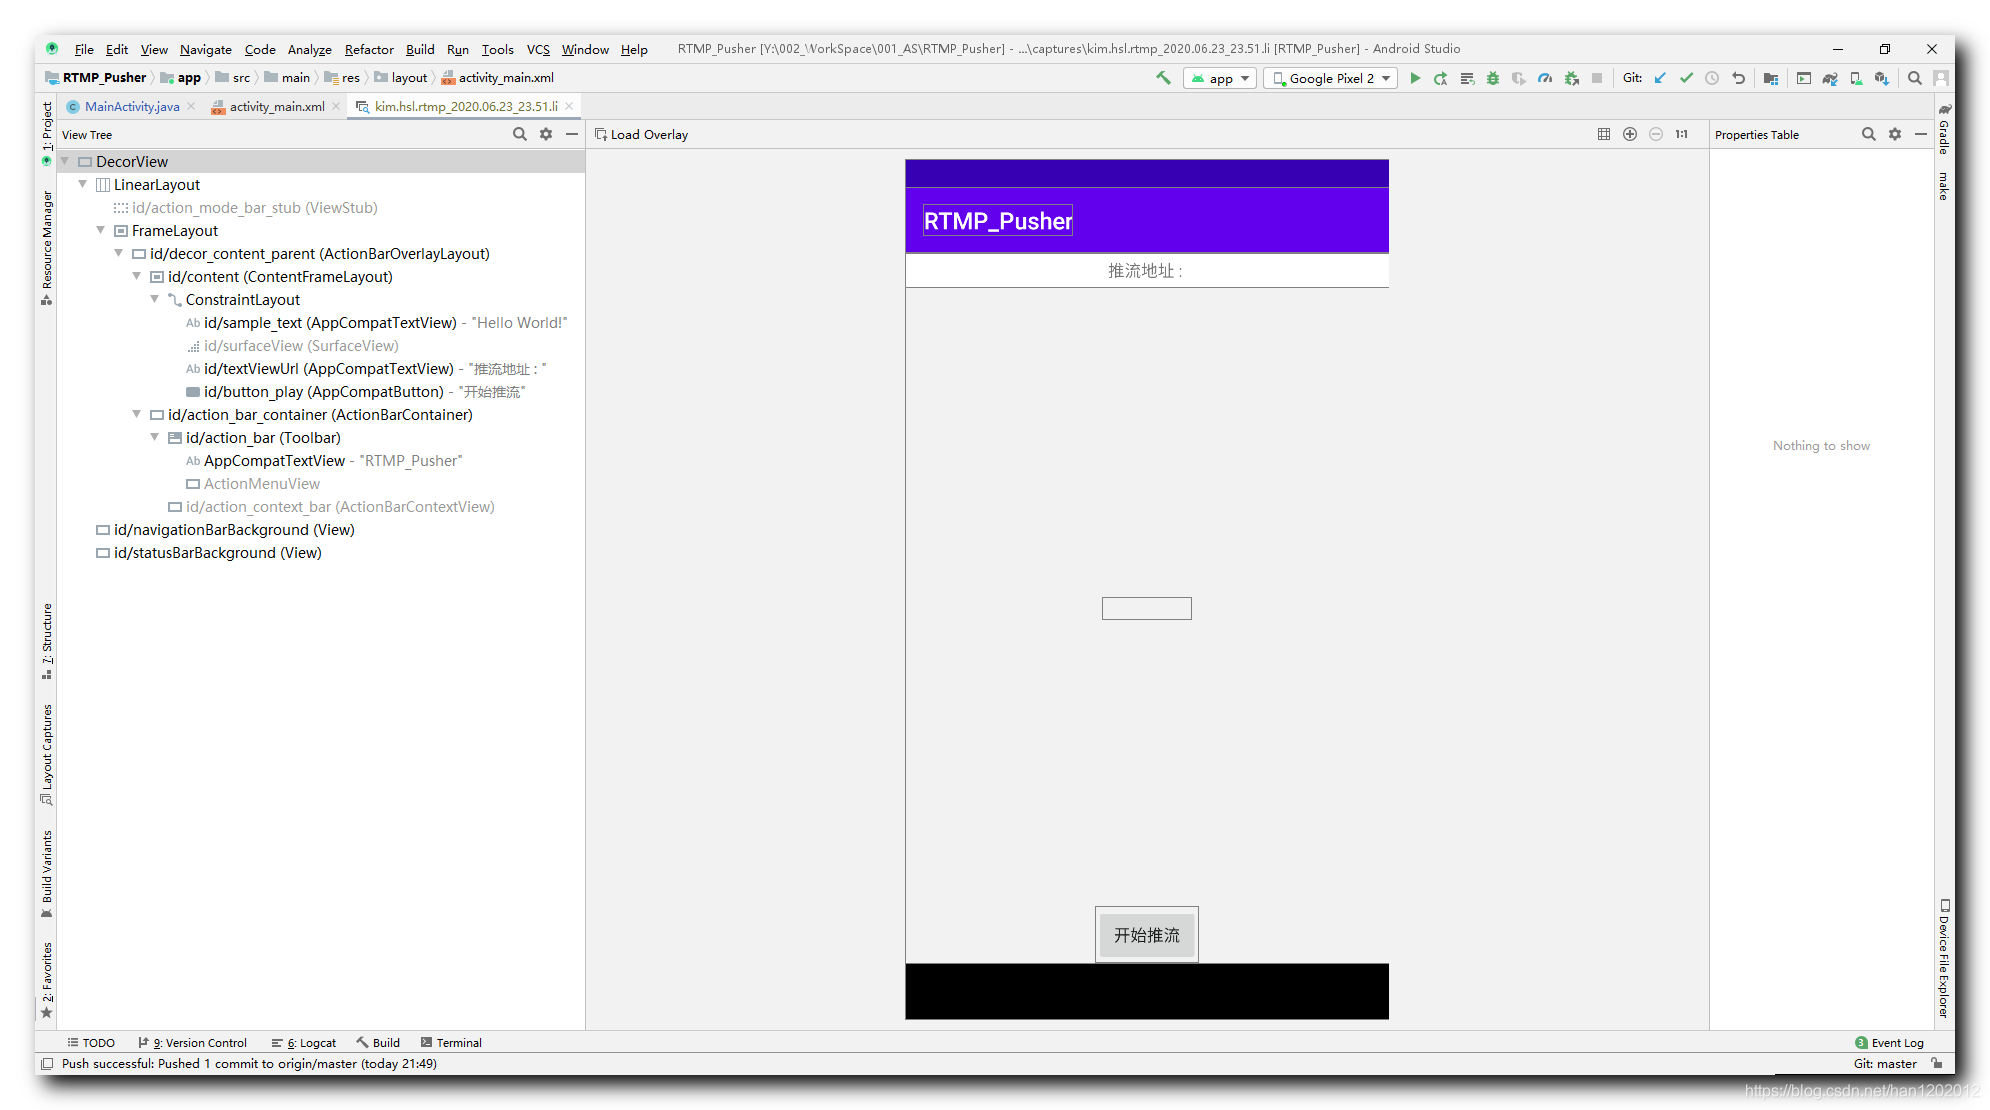
⑤ 左侧 View Tree 组件树视图 : 这是组件树视图 , 该视图中可以清晰看到布局的层级 ;
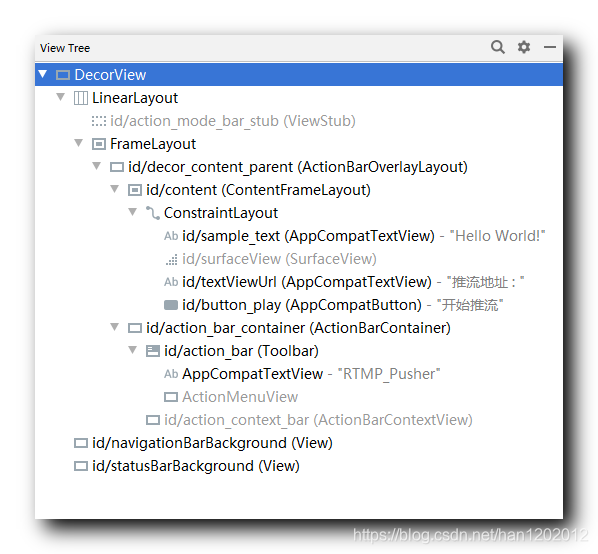
四、 Layout Inspector 组件树 DecorView 分析
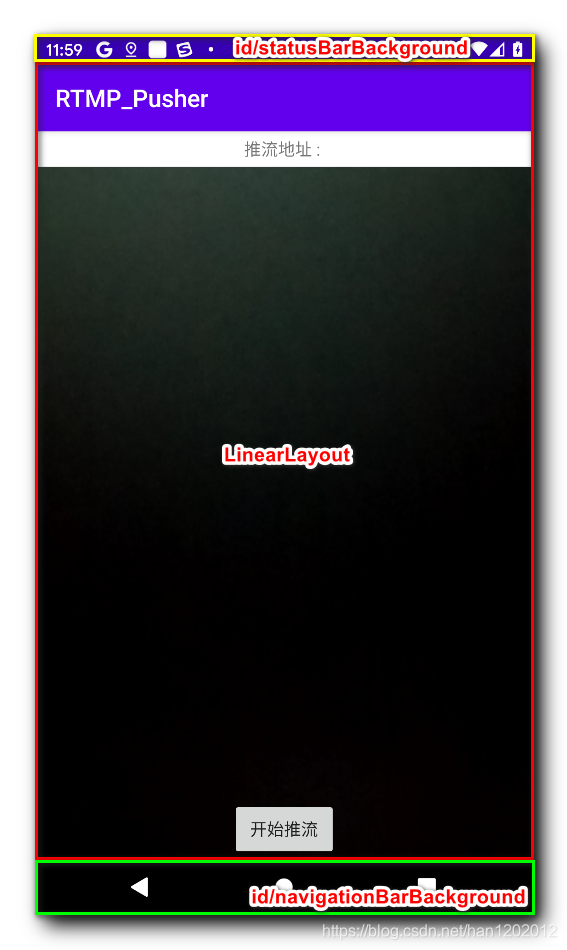
手机界面窗口 : DecorView 是手机界面布局中的根布局 , 代表了手机屏幕窗口 ;
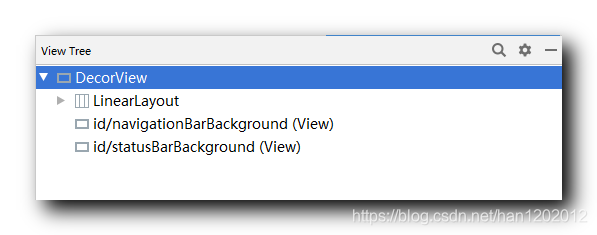
① 界面内容 : LinearLayout 代表了显示的内容 ;
② 导航栏 : id/navigationBarBackground 代表了底部的 回退键 , Home 键 , 菜单键 按钮的导航栏布局 ;
③ 状态栏 : id/statusBarBackground 代表了状态栏布局 ;
五、 实际的界面 UI 布局组件层级分析
1 . Layout Inspector 中查看实际的 UI 布局层次 : 图中蓝色被选中的部分是开发者定义的布局组件 , 其它都是系统自动生成的 ;
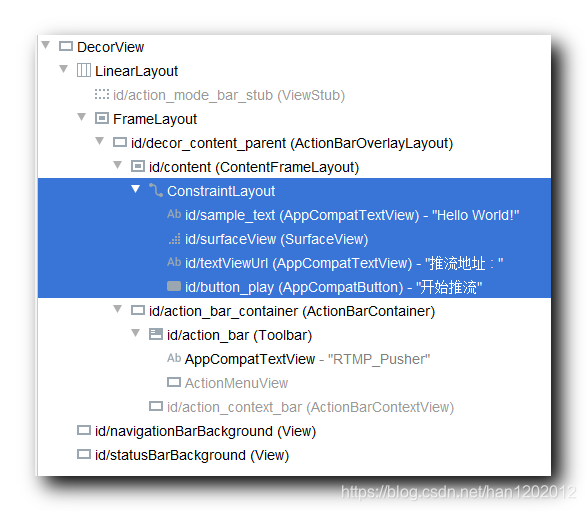
2 . UI 布局代码 : 该布局使用了约束布局 , 只嵌套了 层
<?xml version="1.0" encoding="utf-8"?>
<androidx.constraintlayout.widget.ConstraintLayout
	xmlns:android="http://schemas.android.com/apk/res/android"
    xmlns:app="http://schemas.android.com/apk/res-auto"
    xmlns:tools="http://schemas.android.com/tools"
    android:layout_width="match_parent"
    android:layout_height="match_parent"
    tools:context=".MainActivity">

    <TextView
        android:id="@+id/sample_text"
        android:layout_width="wrap_content"
        android:layout_height="wrap_content"
        android:text="Hello World!"
        app:layout_constraintBottom_toBottomOf="parent"
        app:layout_constraintLeft_toLeftOf="parent"
        app:layout_constraintRight_toRightOf="parent"
        app:layout_constraintTop_toTopOf="parent" />

    <!-- 预览 Camera 采集的图像数据 -->
    <SurfaceView
        android:id="@+id/surfaceView"
        android:layout_width="match_parent"
        android:layout_height="match_parent" />

    <TextView
        android:id="@+id/textViewUrl"
        android:layout_width="match_parent"
        android:layout_height="wrap_content"
        android:background="#FFFFFF"
        android:text="推流地址 : "
        android:padding="5dip"
        android:gravity="center"
        app:layout_constraintBottom_toBottomOf="parent"
        app:layout_constraintLeft_toLeftOf="parent"
        app:layout_constraintRight_toRightOf="parent"
        app:layout_constraintTop_toTopOf="parent"
        app:layout_constraintVertical_bias="0"/>

    <Button
        android:id="@+id/button_play"
        android:layout_width="wrap_content"
        android:layout_height="wrap_content"
        android:text="开始推流"
        app:layout_constraintBottom_toBottomOf="parent"
        app:layout_constraintLeft_toLeftOf="parent"
        app:layout_constraintRight_toRightOf="parent"
        app:layout_constraintTop_toTopOf="parent"
        app:layout_constraintVertical_bias="1"/>

</androidx.constraintlayout.widget.ConstraintLayout>