【项目源码】
链接:https://pan.baidu.com/s/1r0Mje3Xnh8x4F1HyG4aQTA
提取码:n6ol
目 录
3.1.4.3、复制结构(在需要使用轮播图的地方,复制如下结构)
3、轮播组件
- vue-awesome-swiper
Vue版本文档地址:https://github.com/surmon-china/vue-awesome-swiper
3.1、使用
3.1.1、安装依赖


 npm install swiper vue-awesome-swiper --save
// 第一种不行的话,可以 用 第二种!
cnpm install swiper vue-awesome-swiper --save
3.1.2、安装依赖包“cnpm i”---处理缓存
cnpm i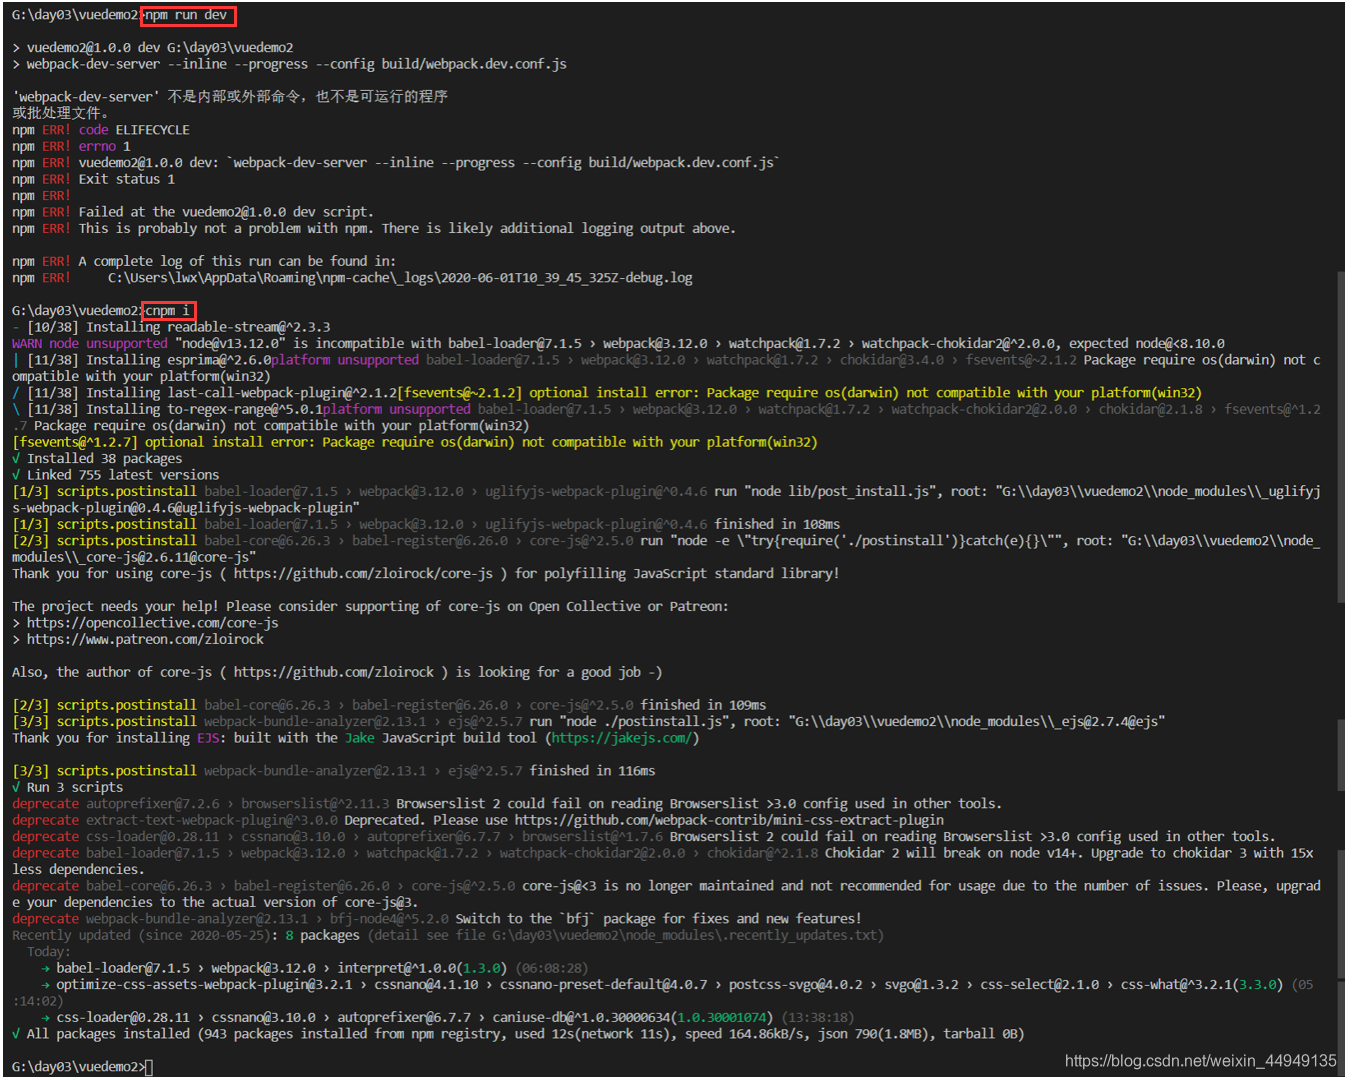
3.1.3、重启项目

npm run dev此时,包 已经 引入 到了 项目 中 。---【环境-OK】

3.1.4、在需要使用轮播的页面,做如下操作:
3.1.4.1、引入轮播组件和其样式


import { Swiper, SwiperSlide, directive } from 'vue-awesome-swiper'
import 'swiper/css/swiper.css'
3.1.4.2、给组件添加一些配置信息

export default {
    ...
    components: {
        Swiper,
        SwiperSlide
    },
    directives: {
        swiper: directive
    }
}
3.1.4.3、复制结构(在需要使用轮播图的地方,复制如下结构)
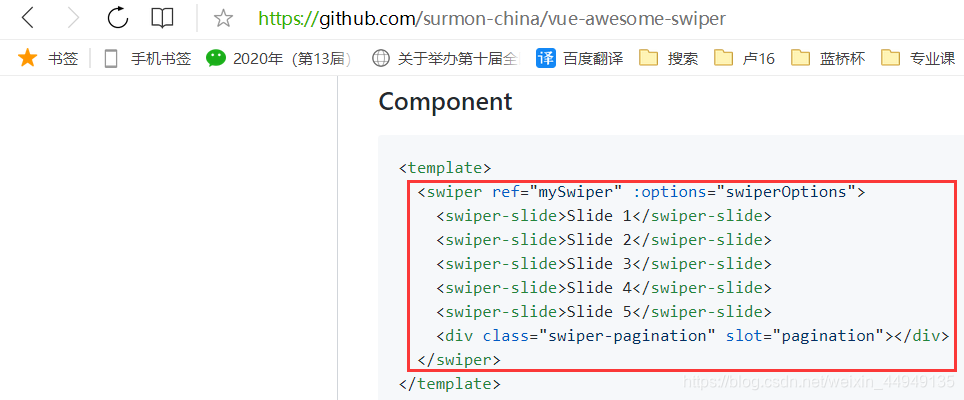
<swiper ref="mySwiper" :options="swiperOptions">
    <swiper-slide>内容1</swiper-slide>
    <swiper-slide>内容2</swiper-slide>
    <swiper-slide>内容3</swiper-slide>
    <swiper-slide>内容4</swiper-slide>
    <div class="swiper-pagination" slot="pagination"></div>
</swiper>
3.1.4.4、在组件data中添加上配置选项

data() {
    return {
        swiperOptions: {  // 轮播的配置信息
            pagination: {
                el: '.swiper-pagination'
            },
            // Some Swiper option/callback...
        }
    }
}
3.1.4.5、添加信息(四步骤)一览图

3.2、轮播图实例展示


3.3、Swiper-API

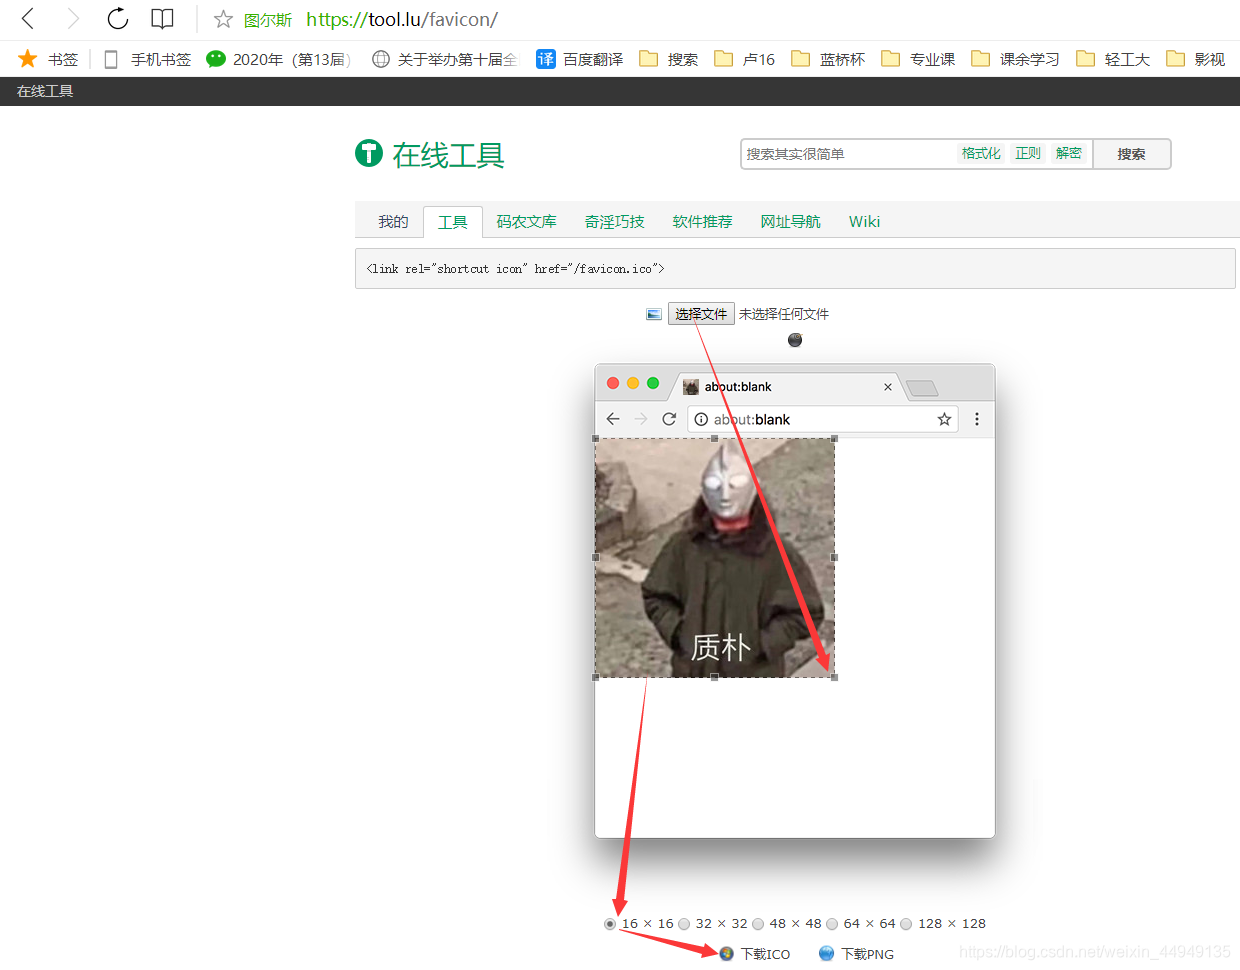
4、favicon制作
选择图片,选择生成16*16的 favicon
将生成的favicon.ico文件放在static目录
在index.html中加入下面代码
<link rel="shortcut icon" href="./static/favicon.ico">