
单机版Eureka配置
一. 创建EUREKA服务注册中心
1.创建工程模块cloud-eureka-server7001
2.添加pom.xml依赖包
<dependencies>
        <!--eureka server-->
        <dependency>
            <groupId>org.springframework.cloud</groupId>
            <artifactId>spring-cloud-starter-netflix-eureka-server</artifactId>
        </dependency>
        <!--引入自己定义的api通用包,可以使用payment支付Entity-->
        <dependency>
            <groupId>com.iyoker.springcloud</groupId>
            <artifactId>cloud-api-commons</artifactId>
            <version>${project.version}</version>
        </dependency>
        <!--boot web actuator-->
        <dependency>
            <groupId>org.springframework.boot</groupId>
            <artifactId>spring-boot-starter-web</artifactId>
        </dependency>
        <dependency>
            <groupId>org.springframework.boot</groupId>
            <artifactId>spring-boot-starter-actuator</artifactId>
        </dependency>
        <!--一般通用配置-->
        <dependency>
            <groupId>org.springframework.boot</groupId>
            <artifactId>spring-boot-devtools</artifactId>
            <scope>runtime</scope>
            <optional>true</optional>
        </dependency>
        <dependency>
            <groupId>org.projectlombok</groupId>
            <artifactId>lombok</artifactId>
        </dependency>
        <dependency>
            <groupId>org.springframework.boot</groupId>
            <artifactId>spring-boot-starter-test</artifactId>
            <scope>test</scope>
        </dependency>
        <dependency>
            <groupId>junit</groupId>
            <artifactId>junit</artifactId>
        </dependency>
    </dependencies>
3.修改application.yml配置文件
server:
  port: 7001
eureka:
  instance:
    hostname: localhost #eureka服务端的实例名称
  client:
    #false表示不向注册中心注册自己
    register-with-eureka: false
    #false表示自己端就是注册中心,我的职责就是维护服务实例,并不需要去检索服务
    fetch-registry: false
    service-url:
      #设置与Eureka Server交互的地址查询服务和注册服务都需要依赖这个地址
      defaultZone: http://${eureka.instance.hostname}:${server.port}/eureka/
4.创建主启动类EurekaMain7001
注意添加@EnableEurekaServer注解
@SpringBootApplication
@EnableEurekaServer
public class EurekaMain7001 {
     public static void main(String[] args) {
             SpringApplication.run(EurekaMain7001.class, args);
         }
}
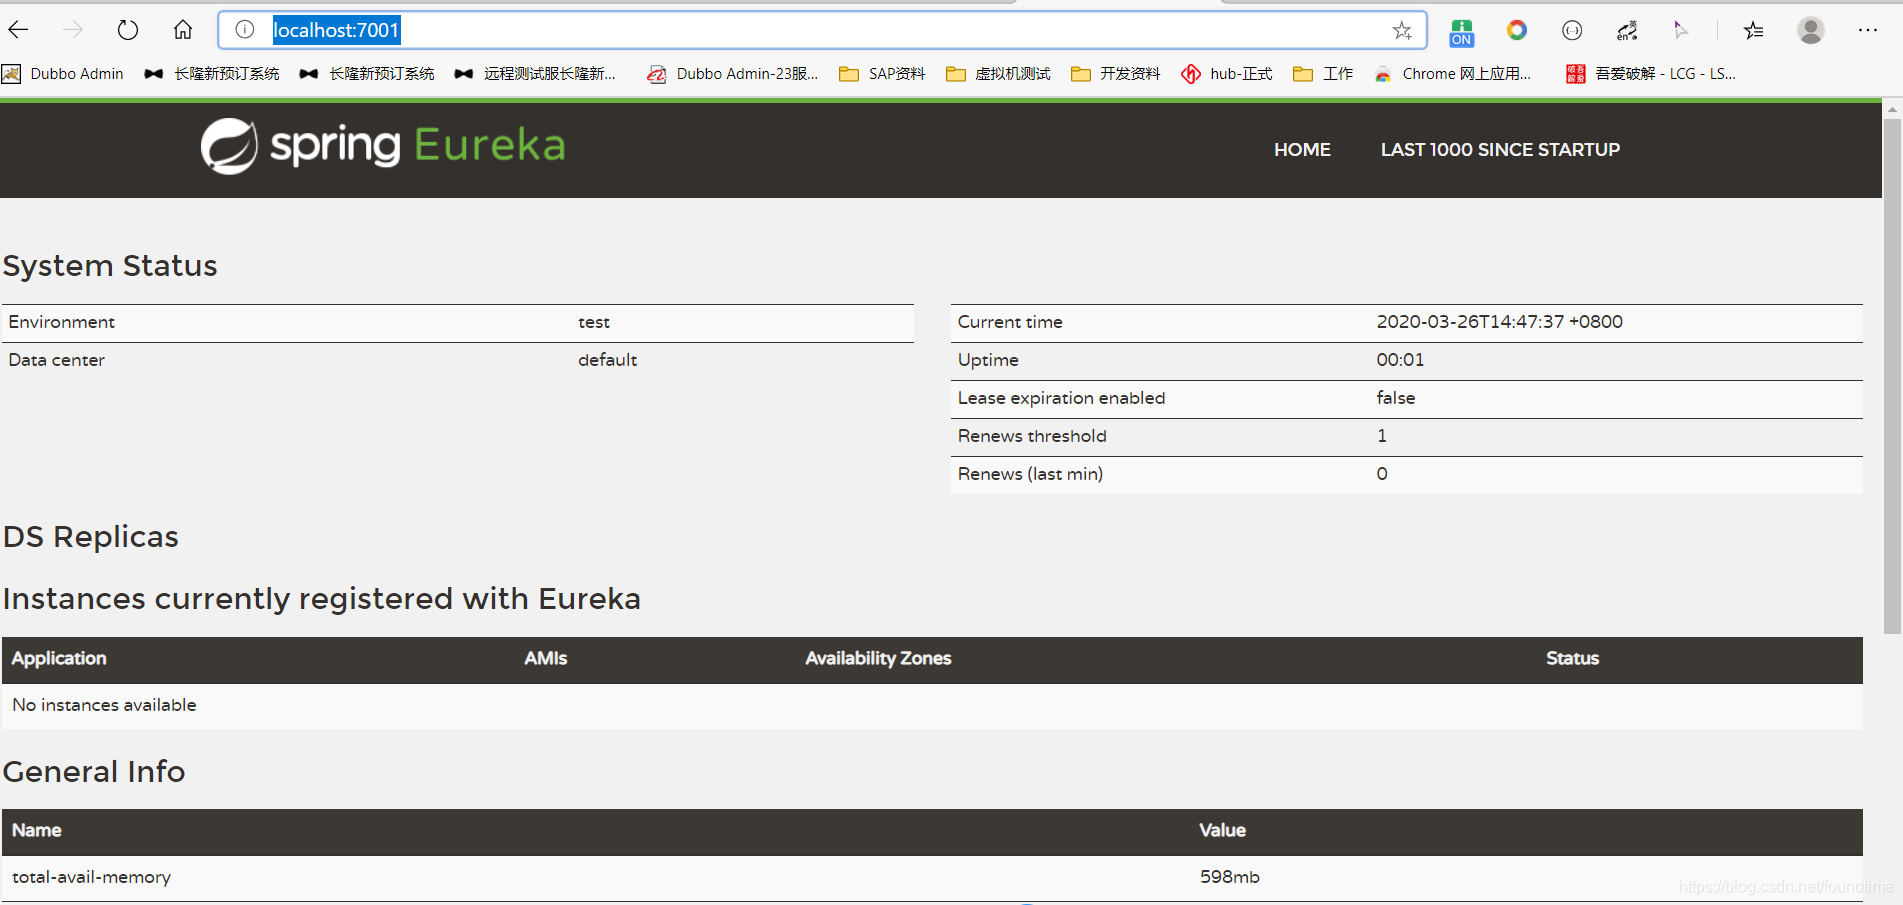
5.测试http://localhost:7001/
二. 将其它模块添加入Eureka服务注册中心
1. pom.xml文件新增Eureka客户端依赖
 <!--   引入eureka客户端     -->
        <dependency>
            <groupId>org.springframework.cloud</groupId>
            <artifactId>spring-cloud-starter-netflix-eureka-client</artifactId>
        </dependency>
2. 修改application.yml文件
注意yml的层次结构书写
eureka:
  client:
    #表示是否将自己注册进EurekaServer默认为true
    register-with-eureka: true
    #是否从EurekaServer抓取已有的注册信息,默认为true。单节点无所谓,集群必须设置为true才能配合ribbon使用负载均衡
    fetch-registry: true
    service-url:
      defaultZone: http://localhost:7001/eureka
3.修改主启动程序,添加相应注解@EnableEurekaClient
@SpringBootApplication
@EnableEurekaClient
public class PaymentMain8001 {
     public static void main(String[] args) {
             SpringApplication.run(PaymentMain8001.class, args);
         }
}
4.各模块启动后,查看Eureka注册中心,成功