一、前言
Elasticsearch是一个底层基于Lucene的分布式搜索服务 且提供了Restful风格的API 采用多shard(分片)的方式保证数据安全 还提供了自动resharding的功能
Elasticsearch可以快速存储 搜索和分析海量数据
SpringBoot默认支持两种技术来和Elasticsearch进行交互:Jest和Spring Data Elasticsearch
SpringBoot默认使用Spring Data Elasticsearch模块来进行操作
二、使用
Jest是个很流行的Elasticsearch客户端工具 使用Http和客户端进行交互
Jest默认是不生效的 若要生效 需导入Jest工具包(io.searchbox.client.JestClient)
1、使用Jest进行操作
首先 是导入Jest的依赖:
注:依赖的版本和Elasticsearch的版本对应
比如 我是6.x版本的Elasticsearch 那就用6.x版本的Jest
<dependency>
	<groupId>io.searchbox</groupId>
	<artifactId>jest</artifactId>
	<version>6.3.1</version>
</dependency>
Elasticsearch的版本可以通过访问ip:9200后返回的数据中看到:

然后 配置参数:
URI底层默认的是本机的9200端口
spring.elasticsearch.jest.uris=http://111.111.111.111:9200
注:配置URI的时候要带上http请求方式 并不能仅仅ip:端口 否则会报错Illegal character in scheme name

连接成功
给实体类的主键属性加上@JestId注解:
public class Student {

    // 用@JestId注解来标明主键 标注之后 存入Elasticsearch的id值就采用该属性的值了
    @JestId
    private Integer id;
    private String name;
    private String hobby;
    private String introduce;

    [getter和setter...]
}
接下来就是调用了:
给类中注入JestClient:
@Autowired
JestClient jestClient;
给Elasticsearch中索引一个文档:
Student student=new Student();
student.setId(1);
student.setName("陈涛");
student.setHobby("swimming");
student.setIntroduce("Hello World");

// 构建一个索引
// index(索引名).type(类型名)
// 还可通过id(id值)来设置id 因为id已经有了 就不设置了
Index index = new Index.Builder(student).index("zjitc").type("student").build();

try {
    // 执行该索引
    jestClient.execute(index);
} catch (IOException e) {
    e.printStackTrace();
}
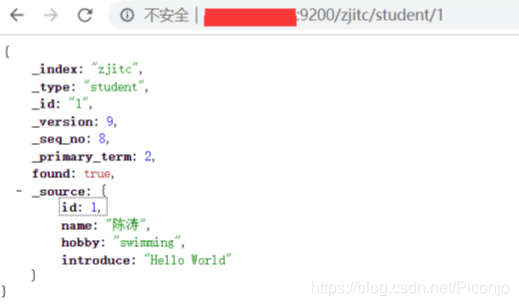
索引成功
全文搜索:
只需要传入JSON格式的搜索表达式即可
// 定义搜索表达式
String json="{\n" +
        "    \"query\" : {\n" +
        "        \"match\" : {\n" +
        "            \"introduce\" : \"Hello\"\n" +
        "        }\n" +
        "    }\n" +
        "}";

// 构建搜索
Search search = new Search.Builder(json).addIndex("zjitc").addType("student").build();

try {
    // 执行该索引
    SearchResult result = jestClient.execute(search);
    // 输出JSON格式的结果
    System.out.println(result.getJsonString());
} catch (IOException e) {
    e.printStackTrace();
}
关于搜索表达式的介绍请看鄙人的另一篇博客:Elasticsearch搜索中间件的Docker环境下安装和基本使用操作(增删改查、条件搜索、全文搜索、短语搜索、高亮搜索)
官方文档:Elasticsearch: 权威指南
2、使用Spring Data Elasticsearch进行操作
Spring Boot通过整合Spring Data Elasticsearch提供了非常便捷的检索功能支持
首先还是导入依赖:
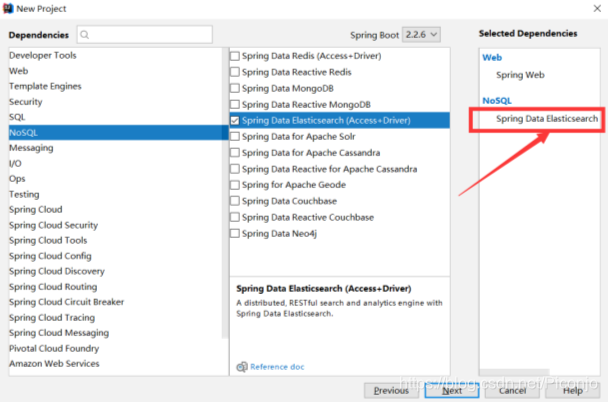
如果用SpringBoot Initializer创建项目的话 选择Spring Data Elasticsearch模块:
如果不是用向导创建的项目 则需要手动导入SpringDataElasticsearch的依赖:
<dependency>
	<groupId>org.springframework.boot</groupId>
	<artifactId>spring-boot-starter-data-elasticsearch</artifactId>
</dependency>
然后是配置参数:
Spring Data Elasticsearch默认已经自动配置了TransportClient客户端
需要配置clusterNodes集群节点信息:clusterName
节点名称也可以通过访问ip:9200后返回的数据中看到:
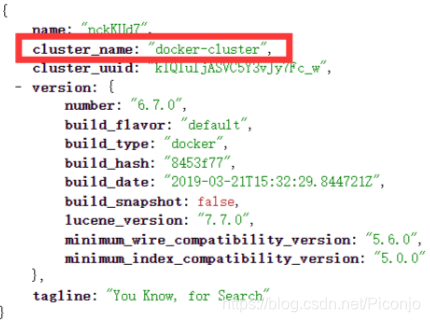
配置:
# 节点名称
spring.data.elasticsearch.cluster-name=docker-cluster
# 使用的是9300端口 并不是使用Http的9200端口通信的
spring.data.elasticsearch.cluster-nodes=111.111.111.111:9300

连接成功
注:若启动不成功 可能是SpringDataElasticsearch和Elasticsearch的版本不适配
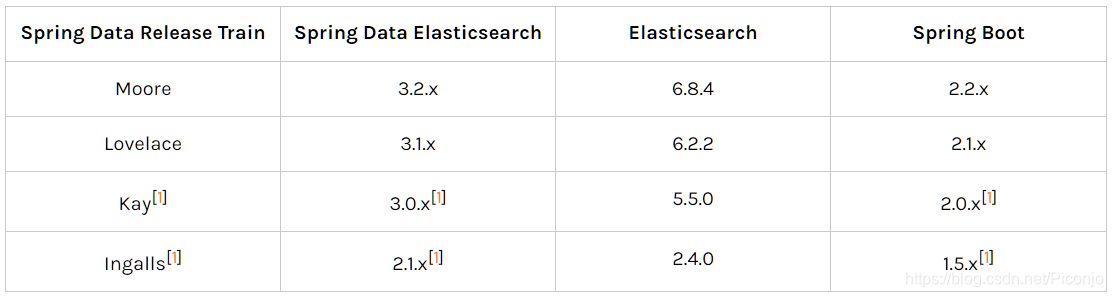
解决方法:
1、升级SpringBoot版本
2、安装对应版本的Elasticsearch
给实体类加上@Document注解来指定索引名和类型名:
// 用@Document注解来指定索引名和类型名
@Document(indexName = "ciczjitc",type = "book")
public class Book {
    private Integer id;
    private String name;
    private String author;

    [getter和setter...]
}
Spring Data Elasticsearch还启用了ElasticsearchRepository接口 该接口定义了很多操作Elasticsearch的方法
只要继承该接口即可
编写一个ElasticsearchRepository的子接口来操作:
//ElasticsearchRepository泛型:<要存储的类型,主键的类型>
public interface BookRepository extends ElasticsearchRepository<Book,Integer> {
}
最后 是使用:
给类中注入ElasticsearchRepository:
@Autowired
StudentRepository studentRepository;
给Elasticsearch中索引一个文档:
Book book=new Book();
book.setId(1);
book.setName("My life");
book.setAuthor("张涛");
bookRepository.index(book);
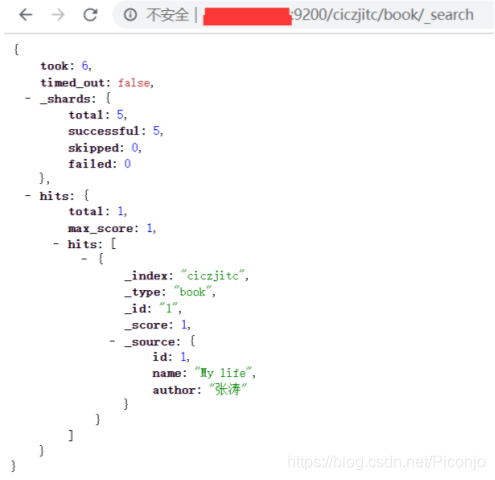
索引成功
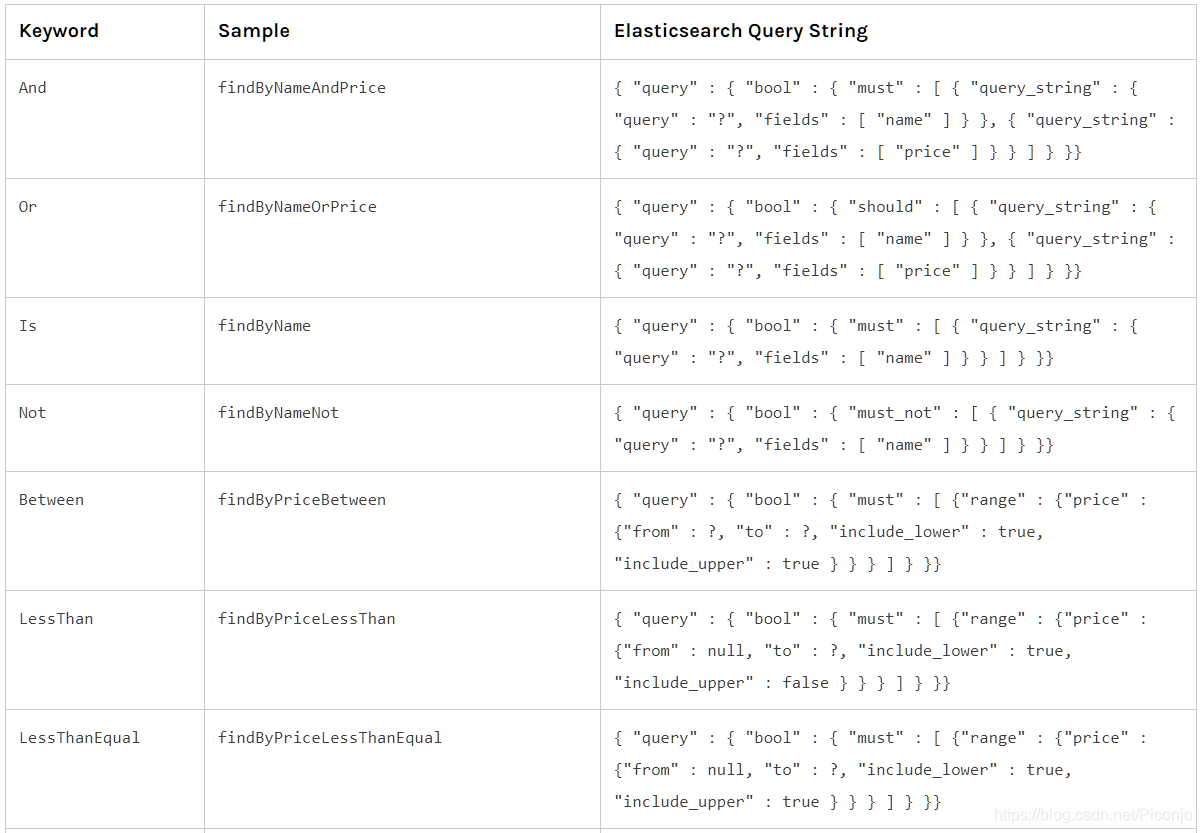
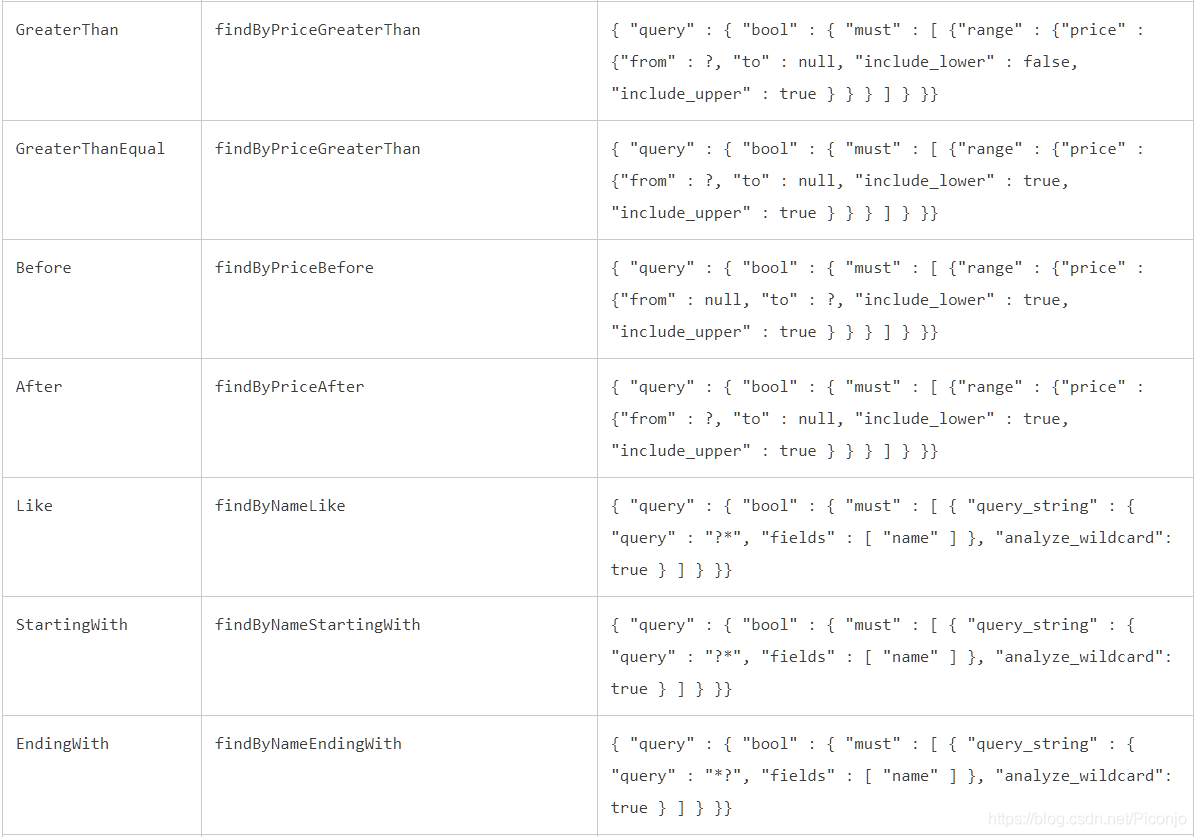
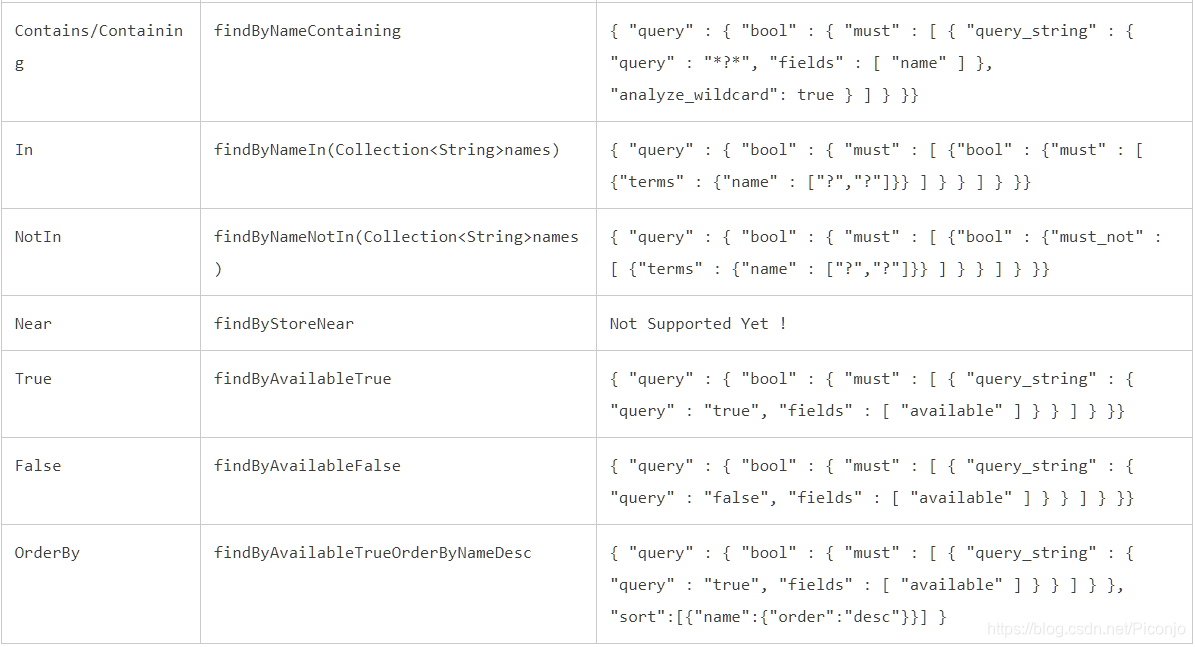
还支持模糊查询:
给继承了ElasticsearchRepository接口的接口加一个方法:
public interface BookRepository extends ElasticsearchRepository<Book,Integer> {

    public List<Book> findByNameLike(String name);
}
测试:
List<Book> books = bookRepository.findByNameLike("life");
for (Book b:books)
{
    System.out.println(b);
}

查询成功
更多方法 请参照官方文档:官方文档