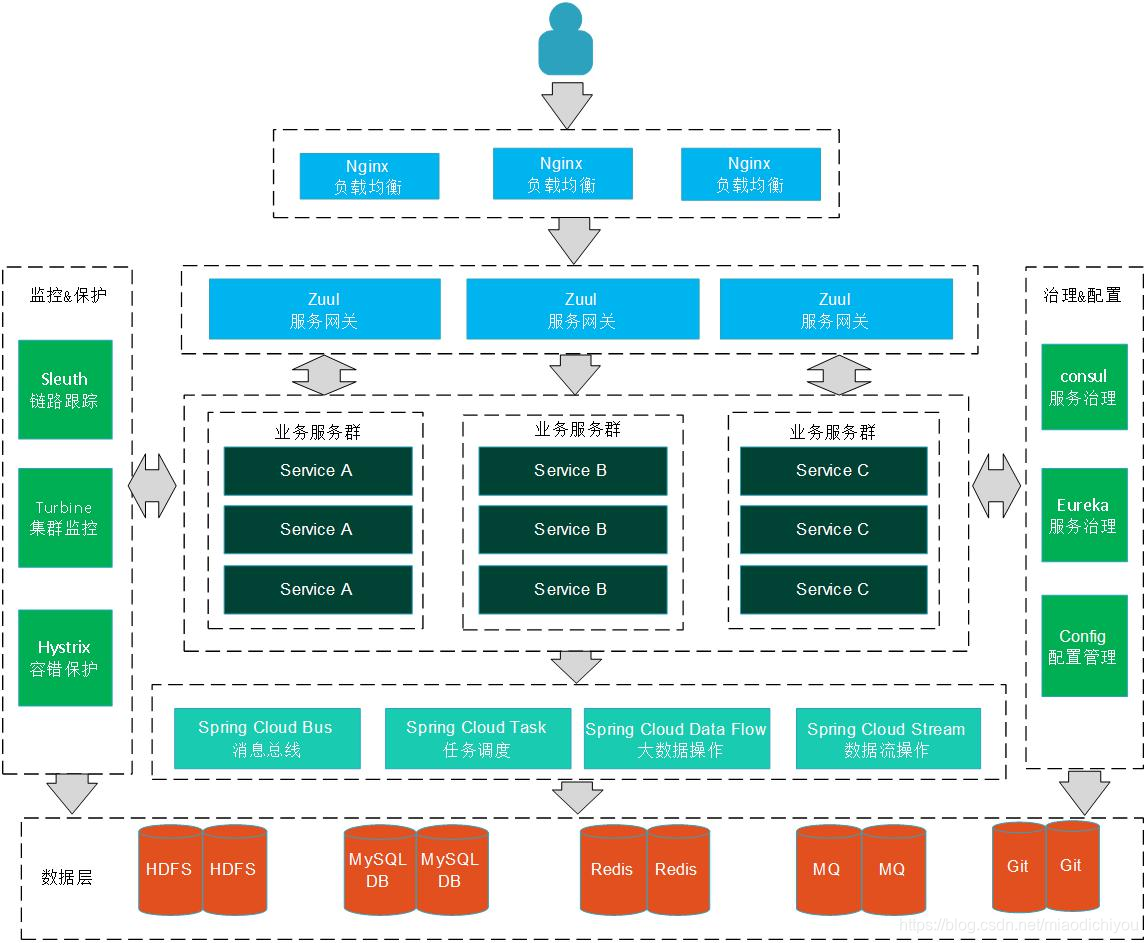
springcloud是微服务架构的集大成者,基于springboot构建,将一系列优秀的组件进行了整合。
中文文档:https://springcloud.cc/
官方文档:http://projects.spring.io/spring-cloud/#quick-start
构建环境
请一定要注意spring boot版本和spring cloud版本的匹配关系:https://spring.io/projects/spring-cloud
| 软件 | 版本 |
|---|---|
| SpringCloud | Hoxton.RELEASE |
| Spring Boot | 2.2.4.RELEASE |
| Jdk | 1.8 |
| Maven | 3.6 |
一、创建注册中心

编写POM文件添加Spring-Cloud基本应用包
<?xml version="1.0" encoding="UTF-8"?>
<project xmlns="http://maven.apache.org/POM/4.0.0" xmlns:xsi="http://www.w3.org/2001/XMLSchema-instance" xsi:schemaLocation="http://maven.apache.org/POM/4.0.0 http://maven.apache.org/xsd/maven-4.0.0.xsd">
  <!-- 模型版本。maven2.0必须是这样写,现在是maven2唯一支持的版本 -->
  <modelVersion>4.0.0</modelVersion>
  <!-- 项目的的唯一标识符,并且配置时生成的路径也是由此生成,maven会将该项目打成的jar包放本地路径:/com/springcloud -->
  <groupId>com.springcloud</groupId>
  <!-- 构件的标识符,它和group ID一起唯一标识一个构件,一个groupId下面可能多个项目,就是靠artifactId来区分的。
  Maven为项目产生的构件包括:JARs,源码,二进制发布和WARs等 -->
  <artifactId>springcloud-root</artifactId>
  <!-- 项目当前版本号,格式为:主版本.次版本.增量版本-限定版本号 -->
  <version>0.0.1-SNAPSHOT</version>
  <!-- 项目产生的构件类型,如pom,jar, maven-plugin, ejb, war, ear, rar, par,默认为jar -->
  <packaging>pom</packaging>
  <!-- 项目的名称, Maven产生的文档用 -->
  <name>spring-cloud</name>
  <!-- 项目主页的URL, Maven产生的文档用 -->
  <url>http://maven.apache.org</url>

  <properties>
    <project.build.sourceEncoding>UTF-8</project.build.sourceEncoding>
  </properties>

  <!-- 父项目的坐标。如果项目中没有规定某个元素的值,那么父项目中的对应值即为项目的默认值。坐标包括group ID,artifact ID和 version。 -->
  <parent>
    <!-- 被继承的父项目的唯一标识符 -->
    <groupId>org.springframework.boot</groupId>
    <!-- 被继承的父项目的构件标识符 -->
    <artifactId>spring-boot-starter-parent</artifactId>
    <!-- 被继承的父项目的版本 -->
    <version>2.2.4.RELEASE</version>
  </parent>
  <modules>
    <!--注册中心项目-->
    <module>spring-register</module>
    <module>springcloud-eureka</module>
    <module>springcloud-common</module>
    <module>springcloud-zuul</module>
    <module>springcloud-eureka-cluster</module>
  </modules>

  <!-- 该元素描述了项目相关的所有依赖。 这些依赖组成了项目构建过程中的一个个环节。自动从项目定义的仓库中下载。-->
  <dependencyManagement>
    <dependencies>
      <dependency>
        <!-- 依赖的group ID -->
        <groupId>org.springframework.cloud</groupId>
        <!-- 依赖的artifact ID -->
        <artifactId>spring-cloud-dependencies</artifactId>
        <!-- 依赖的版本号。 在Maven 2里, 可以配置成版本号的范围。 -->
        <version>Hoxton.RELEASE</version>
        <!-- 依赖类型。 -->
        <type>pom</type>
        <!-- 依赖范围。在项目发布过程中,帮助决定哪些构件被包括进来
           - compile :默认范围,用于编译
           - provided:类似于编译,但支持你期待jdk或者容器提供,类似于classpath
           - runtime: 在执行时需要使用
           - test: 用于test任务时使用
           - system: 需要外在提供相应的元素。通过systemPath来取得
           - systemPath: 仅用于范围为system。提供相应的路径
           - optional: 当项目自身被依赖时,标注依赖是否传递。用于连续依赖时使用 -->
        <scope>import</scope>
      </dependency>
    </dependencies>
  </dependencyManagement>
  <!--使用aliyun镜像-->
  <repositories>
    <repository>
      <id>alimaven</id>
      <name>Maven Aliyun Mirror</name>
      <url>http://maven.aliyun.com/nexus/content/repositories/central/</url>
      <releases>
        <enabled>true</enabled>
      </releases>
      <snapshots>
        <enabled>false</enabled>
      </snapshots>
    </repository>
  </repositories>
  <dependencies>
    <dependency>
      <groupId>junit</groupId>
      <artifactId>junit</artifactId>
      <scope>test</scope>
    </dependency>
  </dependencies>
</project>
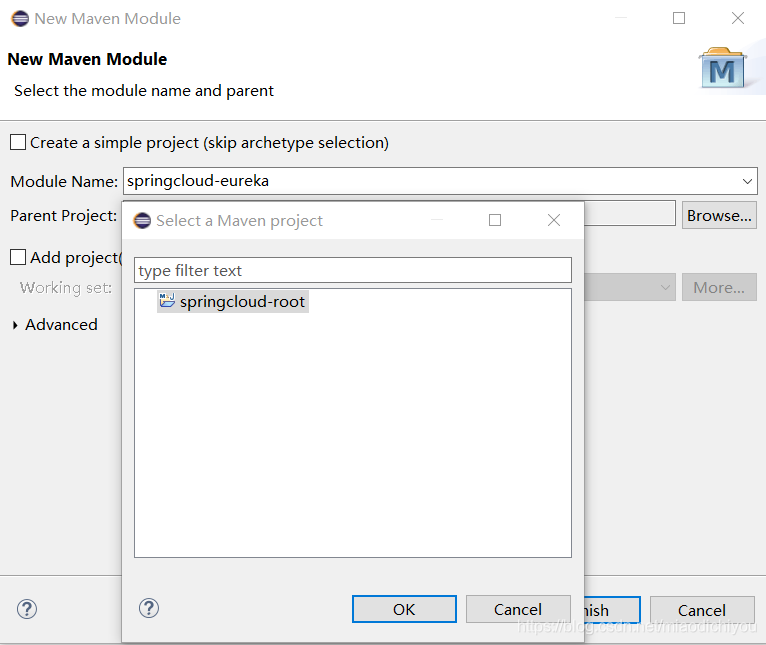
二、创建注册中心项目springcloud-eureka
微服务架构中最核心的部分是服务治理,服务治理最基础的组件是注册中心。Spring Cloud支持了Zookeeper、Consul和Eureka,官方推荐Eureka。
创建一个maven-module,通过maven指定父类目录
添加依赖包文件POM.xml
<?xml version="1.0" encoding="UTF-8"?>
<project xsi:schemaLocation="http://maven.apache.org/POM/4.0.0 http://maven.apache.org/xsd/maven-4.0.0.xsd" xmlns="http://maven.apache.org/POM/4.0.0"
    xmlns:xsi="http://www.w3.org/2001/XMLSchema-instance">
  <modelVersion>4.0.0</modelVersion>
  <parent>
    <groupId>com.springcloud</groupId>
    <artifactId>springcloud-root</artifactId>
    <version>0.0.1-SNAPSHOT</version>
  </parent>
  <artifactId>springcloud-eureka</artifactId>
  <name>springcloud-eureka</name>
  <url>http://maven.apache.org</url>
  <properties>
    <project.build.sourceEncoding>UTF-8</project.build.sourceEncoding>
  </properties>
  <dependencies>
    <dependency>
      <groupId>org.springframework.cloud</groupId>
      <artifactId>spring-cloud-starter-netflix-eureka-server</artifactId>
      <version>2.2.1.RELEASE</version>
    </dependency>
    <dependency>
      <groupId>org.springframework.boot</groupId>
      <artifactId>spring-boot-starter-webflux</artifactId>
      <version>2.2.4.RELEASE</version>
    </dependency>
    <dependency>
      <groupId>junit</groupId>
      <artifactId>junit</artifactId>
      <version>3.8.1</version>
      <scope>test</scope>
    </dependency>
  </dependencies>
</project>
spring-cloud-starter-eureka-server:jar is missing 错误
Project build error: 'dependencies.dependency.version' for org.springframework.cloud:spring-cloud-starter-eureka-server:jar is missing.
change: spring-cloud-starter-eureka-server to spring-cloud-starter-netflix-eureka-server
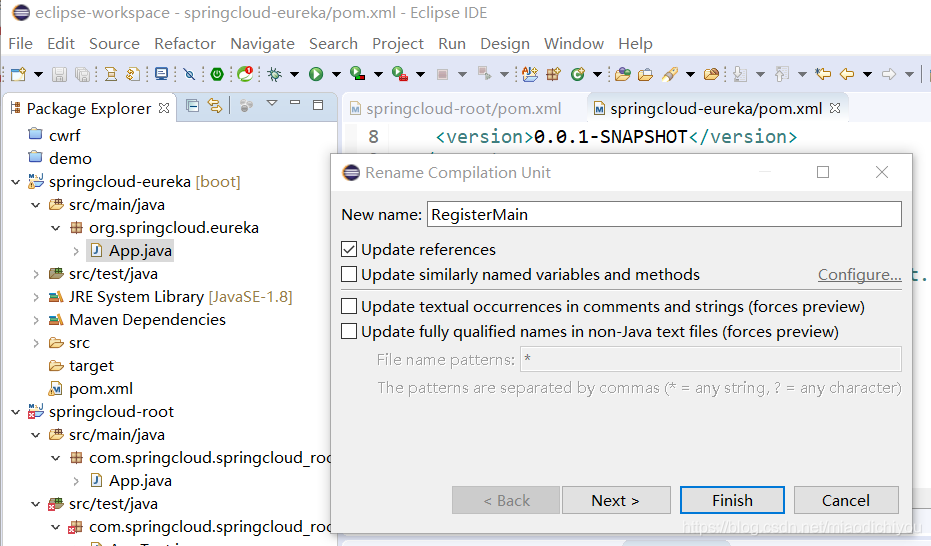
添加注册中心启动类
package org.springcloud.eureka;

import org.springframework.boot.SpringApplication;
import org.springframework.boot.autoconfigure.SpringBootApplication;
import org.springframework.cloud.netflix.eureka.server.EnableEurekaServer;

@SpringBootApplication //spring-boot 启动注解
@EnableEurekaServer // spring-cloud 服务注解

public class RegisterMain
{
    public static void main( String[] args )
    {
    	SpringApplication.run(RegisterMain.class, args);
    }
}
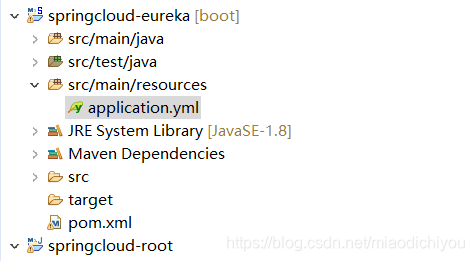
配置application.yml文件
spring:
  application:
    # 当前服务名
    name: springcloud-eureka
  freemarker:
    prefer-file-system-access: false
server:
  # 端口号
  port: 8899
---
eureka:
  instance:
    hostname: localhost
  client:
    # 检索服务
    fetch-registry: false
    # 是否将自己注册到eureka
    register-with-eureka: false
    # 客户端默认去这个地址找注册中心
    service-url:
      defaultZone: http://${eureka.instance.hostname}:${server.port}/eureka/
  server:
    # 当eureka启动时,不能从集群节点中获取到instance注册信息,应该等多久
    wait-time-in-ms-when-sync-empty: 0
    enable-self-preservation: true
    # eureka多长时间更新一次数据
    peer-eureka-nodes-update-interval-ms: 100000
ERROR org.springframework.boot.SpringApplication - Application run failed 错误
15:02:33.112 [main] ERROR org.springframework.boot.SpringApplication - Application run failed
java.lang.NoSuchMethodError: org.springframework.boot.builder.SpringApplicationBuilder.<init>([Ljava/lang/Object;)V
	at org.springframework.cloud.bootstrap.BootstrapApplicationListener.bootstrapServiceContext(BootstrapApplicationListener.java:157)
	at org.springframework.cloud.bootstrap.BootstrapApplicationListener.onApplicationEvent(BootstrapApplicationListener.java:98)
	at org.springframework.cloud.bootstrap.BootstrapApplicationListener.onApplicationEvent(BootstrapApplicationListener.java:64)
	at org.springframework.context.event.SimpleApplicationEventMulticaster.doInvokeListener(SimpleApplicationEventMulticaster.java:172)
	at org.springframework.context.event.SimpleApplicationEventMulticaster.invokeListener(SimpleApplicationEventMulticaster.java:165)
	at org.springframework.context.event.SimpleApplicationEventMulticaster.multicastEvent(SimpleApplicationEventMulticaster.java:139)
	at org.springframework.context.event.SimpleApplicationEventMulticaster.multicastEvent(SimpleApplicationEventMulticaster.java:127)
	at org.springframework.boot.context.event.EventPublishingRunListener.environmentPrepared(EventPublishingRunListener.java:76)
	at org.springframework.boot.SpringApplicationRunListeners.environmentPrepared(SpringApplicationRunListeners.java:53)
	at org.springframework.boot.SpringApplication.prepareEnvironment(SpringApplication.java:345)
	at org.springframework.boot.SpringApplication.run(SpringApplication.java:308)
	at org.springframework.boot.builder.SpringApplicationBuilder.run(SpringApplicationBuilder.java:140)
	at org.springcloud.eureka.RegisterMain.main(RegisterMain.java:16)
spring boot版本兼容性导致的,在pom.xml中修改配置文件,将springcloud的版本与springboot的版本对应起来即可解决。
spring boot版本和spring cloud版本的匹配关系:
https://spring.io/projects/spring-cloud
| Spring Cloud | Spring Boot |
|---|---|
| Hoxton | 2.2.x |
| Greenwich | 2.1.x |
| Finchley | 兼容Spring Boot 2.0.x,不兼容Spring Boot 1.5.x |
| Dalston和Edgware | 兼容Spring Boot 1.5.x,不兼容Spring Boot 2.0.x |
| Camden | 兼容Spring Boot 1.4.x,也兼容Spring Boot 1.5.x |
| Brixton | 兼容Spring Boot 1.3.x,也兼容Spring Boot 1.4.x |
APPLICATION FAILED TO START 错误
***************************
APPLICATION FAILED TO START
***************************

Description:

An attempt was made to call a method that does not exist. The attempt was made from the following location:

    org.springframework.cloud.client.discovery.health.DiscoveryCompositeHealthIndicator.<init>(DiscoveryCompositeHealthIndicator.java:41)

The following method did not exist:

    org.springframework.boot.actuate.health.CompositeHealthIndicator.<init>(Lorg/springframework/boot/actuate/health/HealthAggregator;)V

The method's class, org.springframework.boot.actuate.health.CompositeHealthIndicator, is available from the following locations:

    jar:file:/E:/SpringBoot/Maven-Repository/org/springframework/boot/spring-boot-actuator/2.2.4.RELEASE/spring-boot-actuator-2.2.4.RELEASE.jar!/org/springframework/boot/actuate/health/CompositeHealthIndicator.class

It was loaded from the following location:

    file:/E:/SpringBoot/Maven-Repository/org/springframework/boot/spring-boot-actuator/2.2.4.RELEASE/spring-boot-actuator-2.2.4.RELEASE.jar
将springcloud的版本与springboot的版本对应起来即可解决。
Unable to start reactive web server 错误
org.springframework.context.ApplicationContextException: Unable to start reactive web server; nested exception is org.springframework.context.ApplicationContextException: Unable to start ReactiveWebApplicationContext due to missing ReactiveWebServerFactory bean.
	at org.springframework.boot.web.reactive.context.ReactiveWebServerApplicationContext.onRefresh(ReactiveWebServerApplicationContext.java:81) ~[spring-boot-2.2.4.RELEASE.jar:2.2.4.RELEASE]
	at org.springframework.context.support.AbstractApplicationContext.refresh(AbstractApplicationContext.java:544) ~[spring-context-5.2.3.RELEASE.jar:5.2.3.RELEASE]
	at org.springframework.boot.web.reactive.context.ReactiveWebServerApplicationContext.refresh(ReactiveWebServerApplicationContext.java:66) ~[spring-boot-2.2.4.RELEASE.jar:2.2.4.RELEASE]
	at org.springframework.boot.SpringApplication.refresh(SpringApplication.java:747) ~[spring-boot-2.2.4.RELEASE.jar:2.2.4.RELEASE]
	at org.springframework.boot.SpringApplication.refreshContext(SpringApplication.java:397) ~[spring-boot-2.2.4.RELEASE.jar:2.2.4.RELEASE]
	at org.springframework.boot.SpringApplication.run(SpringApplication.java:315) ~[spring-boot-2.2.4.RELEASE.jar:2.2.4.RELEASE]
	at org.springframework.boot.builder.SpringApplicationBuilder.run(SpringApplicationBuilder.java:140) [spring-boot-2.2.4.RELEASE.jar:2.2.4.RELEASE]
	at org.springcloud.eureka.RegisterMain.main(RegisterMain.java:15) [classes/:na]
Caused by: org.springframework.context.ApplicationContextException: Unable to start ReactiveWebApplicationContext due to missing ReactiveWebServerFactory bean.
	at org.springframework.boot.web.reactive.context.ReactiveWebServerApplicationContext.getWebServerFactoryBeanName(ReactiveWebServerApplicationContext.java:100) ~[spring-boot-2.2.4.RELEASE.jar:2.2.4.RELEASE]
	at org.springframework.boot.web.reactive.context.ReactiveWebServerApplicationContext.createWebServer(ReactiveWebServerApplicationContext.java:88) ~[spring-boot-2.2.4.RELEASE.jar:2.2.4.RELEASE]
	at org.springframework.boot.web.reactive.context.ReactiveWebServerApplicationContext.onRefresh(ReactiveWebServerApplicationContext.java:78) ~[spring-boot-2.2.4.RELEASE.jar:2.2.4.RELEASE]
添加webflux的依赖
<dependency>
  <groupId>org.springframework.boot</groupId>
  <artifactId>spring-boot-starter-webflux</artifactId>
  <version>2.2.4.RELEASE</version>
</dependency>
运行启动类,访问http://localhost:8899即可,如下图

注册中心已经完成。
三、注册中心密码配置
在POM.xml中增加:
   <dependency>
      <groupId>org.springframework.boot</groupId>
      <artifactId>spring-boot-starter-security</artifactId>
      <version>2.2.4.RELEASE</version>
    </dependency>
版本可以在此网站查询:
https://mvnrepository.com/artifact/org.springframework.boot/spring-boot-starter-security
application.yml 文件中增加配置
spring:
  application:
    name: springcloud-eureka
  freemarker:
    prefer-file-system-access: false
  security:
    basic:
      enable: true
    user:
      name: admin
      password: 123456
server:
  port: 8899
---
eureka:
  instance:
    hostname: localhost
  client:
    fetch-registry: false
    register-with-eureka: false
    service-url:
      defaultZone: http://${security.user.name}:${security.user.password}@${eureka.instance.hostname}:${server.port}/eureka/
  server:
    wait-time-in-ms-when-sync-empty: 0
    enable-self-preservation: true
    peer-eureka-nodes-update-interval-ms: 100000
再次启动后访问http://localhost:8899,如下图
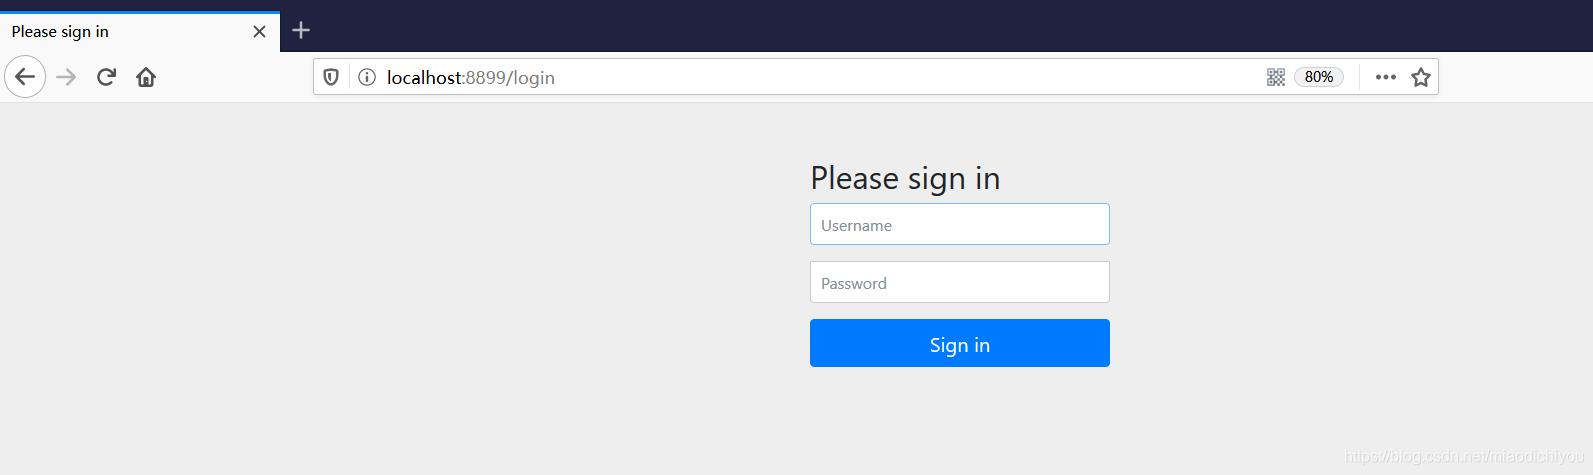
输入用户名密码后,进入页面
四、创建服务注册到注册中心
创建一个maven module 项目
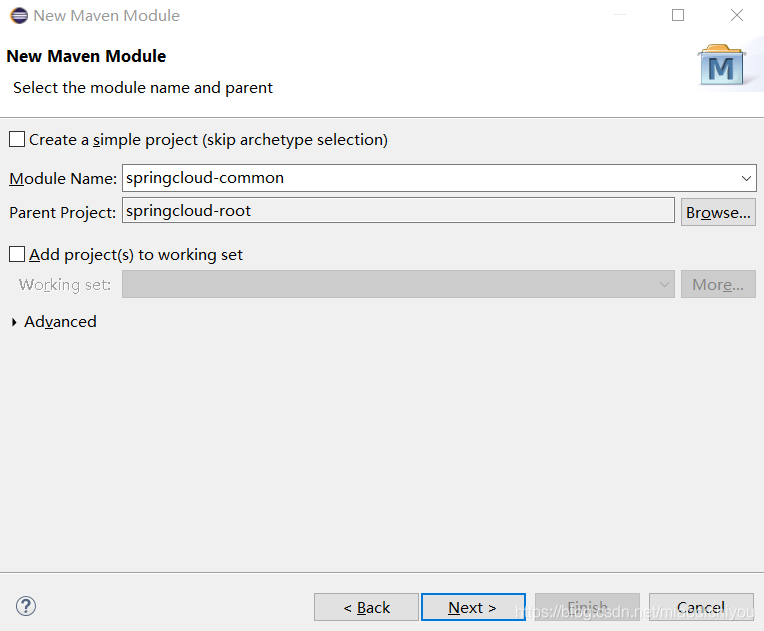
添加依赖包文件POM.xml
<?xml version="1.0"?>
<project xsi:schemaLocation="http://maven.apache.org/POM/4.0.0 http://maven.apache.org/xsd/maven-4.0.0.xsd" xmlns="http://maven.apache.org/POM/4.0.0"
    xmlns:xsi="http://www.w3.org/2001/XMLSchema-instance">
  <modelVersion>4.0.0</modelVersion>
  <parent>
    <groupId>com.springcloud</groupId>
    <artifactId>springcloud-root</artifactId>
    <version>0.0.1-SNAPSHOT</version>
  </parent>
  <artifactId>springcloud-common</artifactId>
  <name>springcloud-common</name>
  <url>http://maven.apache.org</url>
  <properties>
    <project.build.sourceEncoding>UTF-8</project.build.sourceEncoding>
  </properties>
  <dependencies>
    <dependency>
      <groupId>org.springframework.cloud</groupId>
      <artifactId>spring-cloud-starter-netflix-eureka-server</artifactId>
      <version>2.2.1.RELEASE</version>
    </dependency>
    <dependency>
      <groupId>org.springframework.boot</groupId>
      <artifactId>spring-boot-starter-webflux</artifactId>
      <version>2.2.4.RELEASE</version>
    </dependency>
    <dependency>
      <groupId>junit</groupId>
      <artifactId>junit</artifactId>
      <version>3.8.1</version>
      <scope>test</scope>
    </dependency>
  </dependencies>
</project>
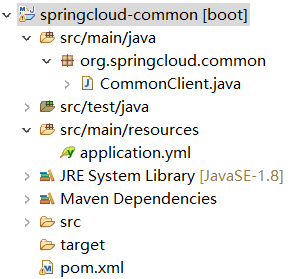
添加客户端启动类
package org.springcloud.common;

import org.springframework.boot.SpringApplication;
import org.springframework.boot.autoconfigure.SpringBootApplication;
import org.springframework.cloud.netflix.eureka.EnableEurekaClient;

@SpringBootApplication
@EnableEurekaClient //Eureka Client

public class CommonClient
{
    public static void main( String[] args )
    {
    	SpringApplication.run(CommonClient.class, args);
    }
}
配置application.yml文件
spring:
  application:
    name: springcloud-common
  freemarker:
    prefer-file-system-access: false
  security:
    user:
      name: admin
      password: 123456

server:
  port: 8001

eureka:
  instance:
    hostname: localhost
  client:
    service-url:
      defaultZone: http://${spring.security.user.name}:${spring.security.user.password}@${eureka.instance.hostname}:8899/eureka/
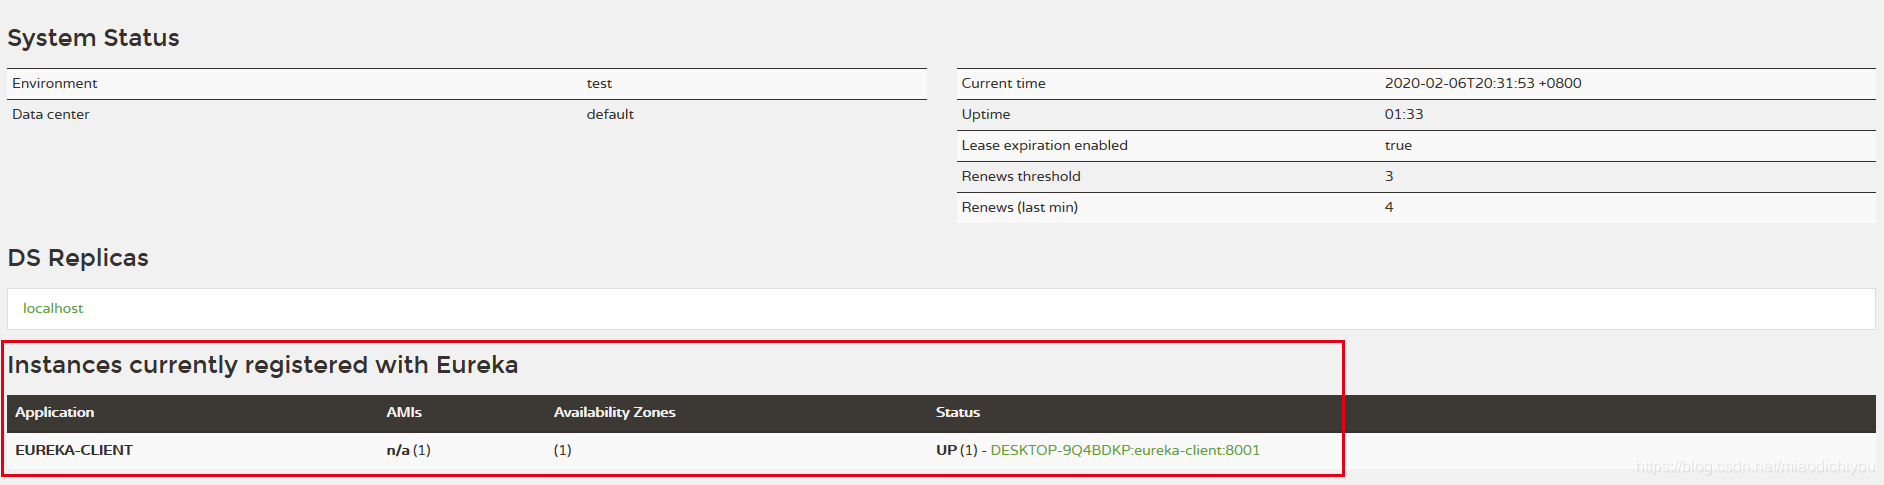
运行客户端启动类,可以看到该客户端已经被注册到服务端,如下图
cannot execute any request on any know server 错误
在eurka服务中添加一个安全认证类
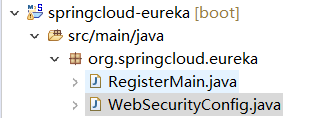
package org.springcloud.eureka;

import org.springframework.context.annotation.Configuration;
import org.springframework.security.config.annotation.web.builders.HttpSecurity;
import org.springframework.security.config.annotation.web.configuration.EnableWebSecurity;
import org.springframework.security.config.annotation.web.configuration.WebSecurityConfigurerAdapter;
import org.springframework.security.config.http.SessionCreationPolicy;

@EnableWebSecurity
@Configuration
public class WebSecurityConfig extends WebSecurityConfigurerAdapter {
    @Override
    protected void configure(HttpSecurity http) throws Exception {
        // Configure HttpSecurity as needed (e.g. enable http basic).
        http.sessionManagement().sessionCreationPolicy(SessionCreationPolicy.NEVER);
        http.csrf().disable();
        //为了可以使用 http://${user}:${password}@${host}:${port}/eureka/ 这种方式登录,所以必须是httpBasic,
        http.authorizeRequests().anyRequest().authenticated().and().httpBasic();
    }
}
重新运行即可。
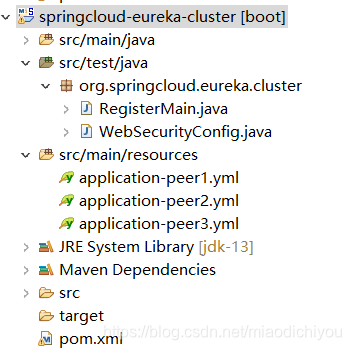
五、Eureka高可用集群
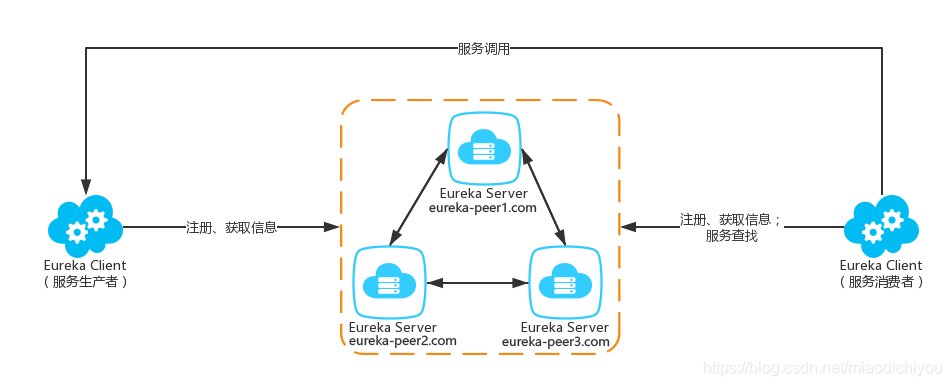
将 application.yml 文件复制三分:application-peer1.yml,application-peer2.yml,application-peer3.yml。
分别添加配置项如下:
- application-peer1.yml
spring:
  application:
    name: springcloud-eureka-cluster
  freemarker:
    prefer-file-system-access: false
  security:
    user:
      name: admin
      password: 123456
server:
  port: 8897
---
eureka:
  instance:
    hostname: eureka-peer1.com
    instance-id: eureka-peer1
  client:
    fetch-registry: true
    register-with-eureka: true
    service-url:
      defaultZone: http://${spring.security.user.name}:${spring.security.user.password}@eureka-peer2.com:8898/eureka/,http://${spring.security.user.name}:${spring.security.user.password}@eureka-peer3.com:8899/eureka/
- application-peer2.yml
spring:
  application:
    name: springcloud-eureka-cluster
  freemarker:
    prefer-file-system-access: false
  security:
    user:
      name: admin
      password: 123456
server:
  port: 8898
---
eureka:
  instance:
    hostname: eureka-peer2.com
    instance-id: eureka-peer2
  client:
    fetch-registry: true
    register-with-eureka: true
    service-url:
      defaultZone: http://${spring.security.user.name}:${spring.security.user.password}@eureka-peer1.com:8897/eureka/,http://${spring.security.user.name}:${spring.security.user.password}@eureka-peer3.com:8899/eureka/
- application-peer3.yml
spring:
  application:
    name: springcloud-eureka-cluster
  freemarker:
    prefer-file-system-access: false
  security:
    user:
      name: admin
      password: 123456
server:
  port: 8899
---
eureka:
  instance:
    hostname: eureka-peer3.com
    instance-id: eureka-peer3
  client:
    fetch-registry: true
    register-with-eureka: true
    service-url:
      defaultZone: http://${spring.security.user.name}:${spring.security.user.password}@eureka-peer1.com:8897/eureka/,http://${spring.security.user.name}:${spring.security.user.password}@eureka-peer2.com:8898/eureka/
修改C:\Windows\System32\drivers\etc\hosts
127.0.0.1 eureka-peer1.com eureka-peer2.com eureka-peer3.com
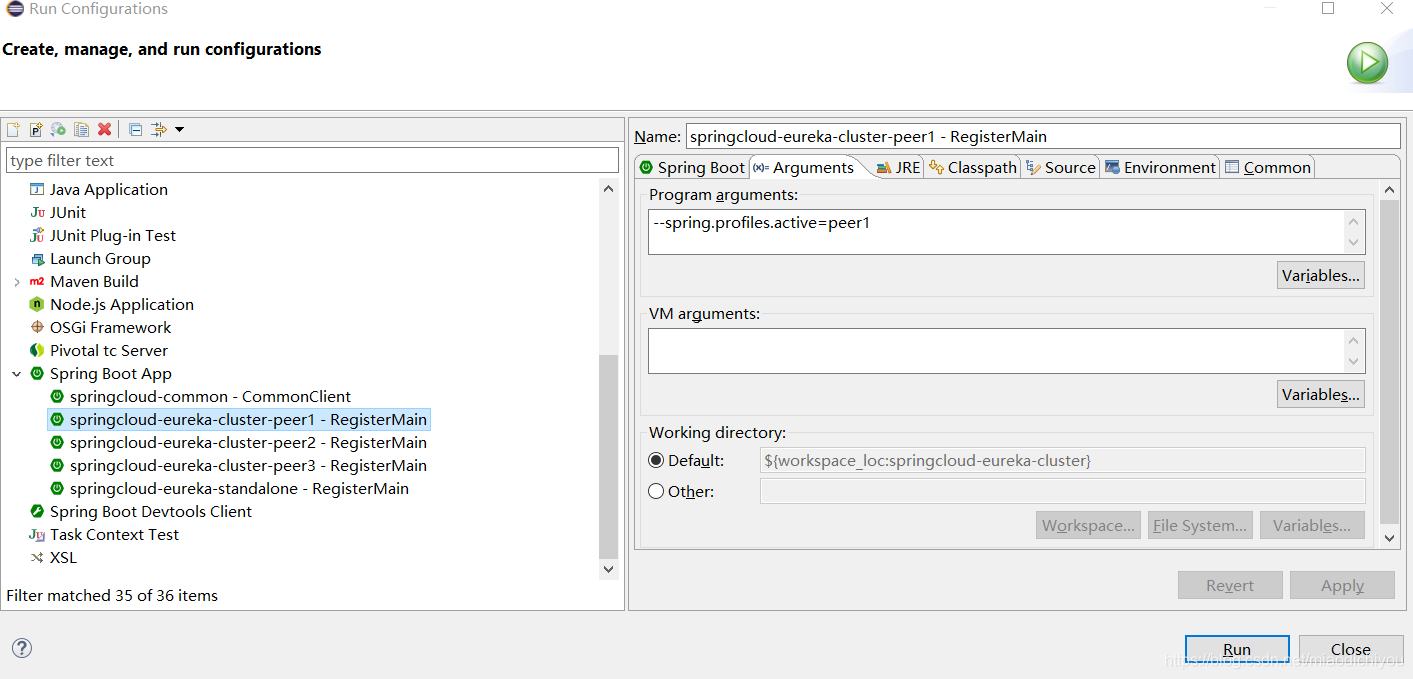
maven install生成jar包,通过 spring.profiles.active 属性来分别启动三台服务器:
cd E:\SpringBoot\SpringCloud\springcloud-root\springcloud-eureka-cluster\target
java -jar springcloud-eureka-cluster-0.0.1-SNAPSHOT.jar --spring.profiles.active=peer1
java -jar springcloud-eureka-cluster-0.0.1-SNAPSHOT.jar --spring.profiles.active=peer2
java -jar springcloud-eureka-cluster-0.0.1-SNAPSHOT.jar --spring.profiles.active=peer3
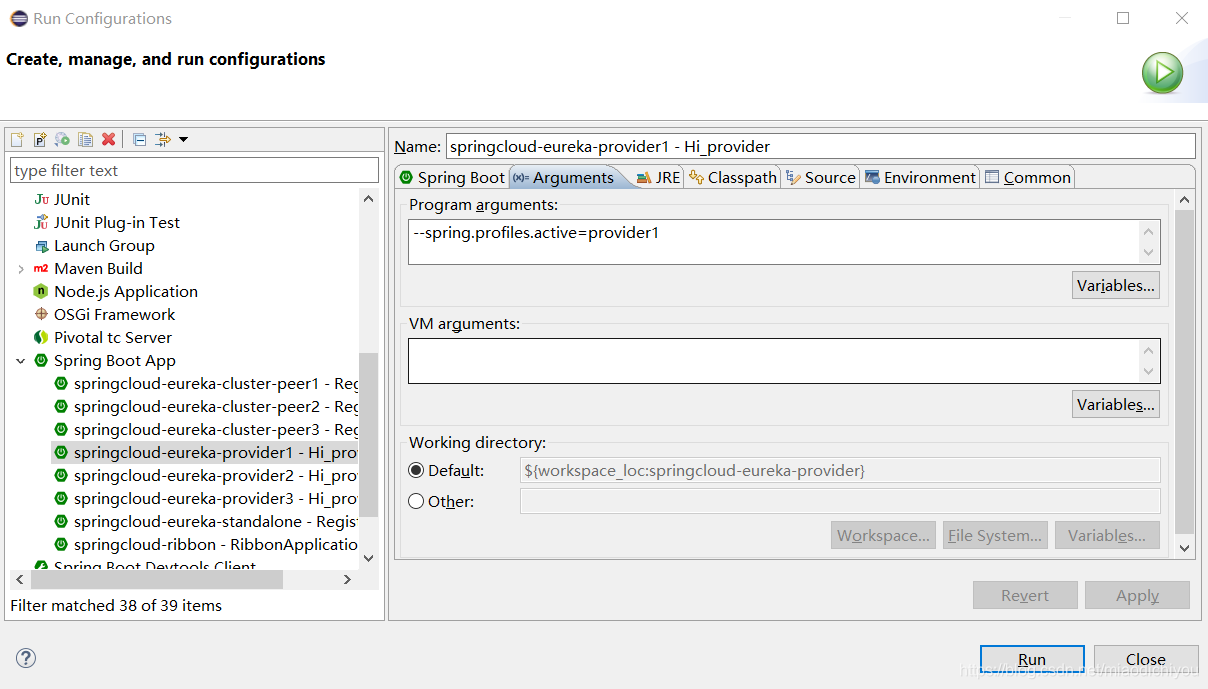
也可通过Run Configurations配置启动
-
访问 http://eureka-peer1.com:8897/
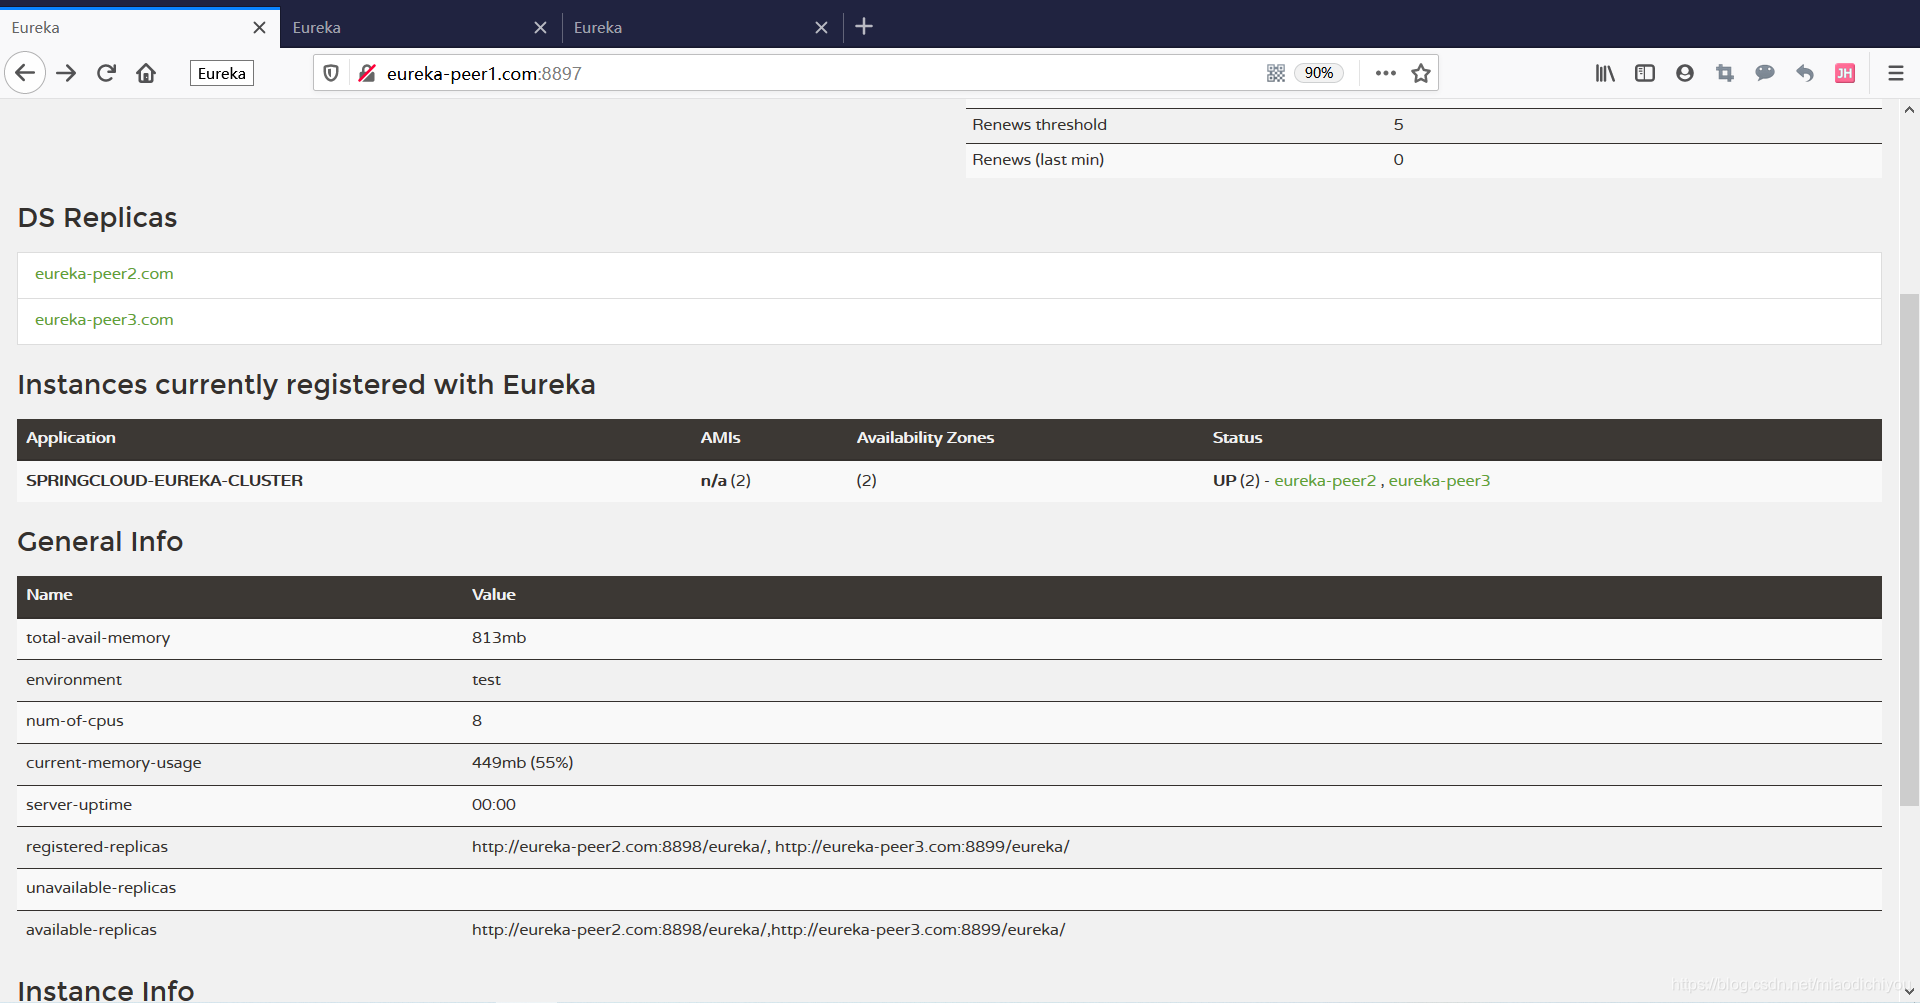
-
访问 http://eureka-peer2.com:8898/

-
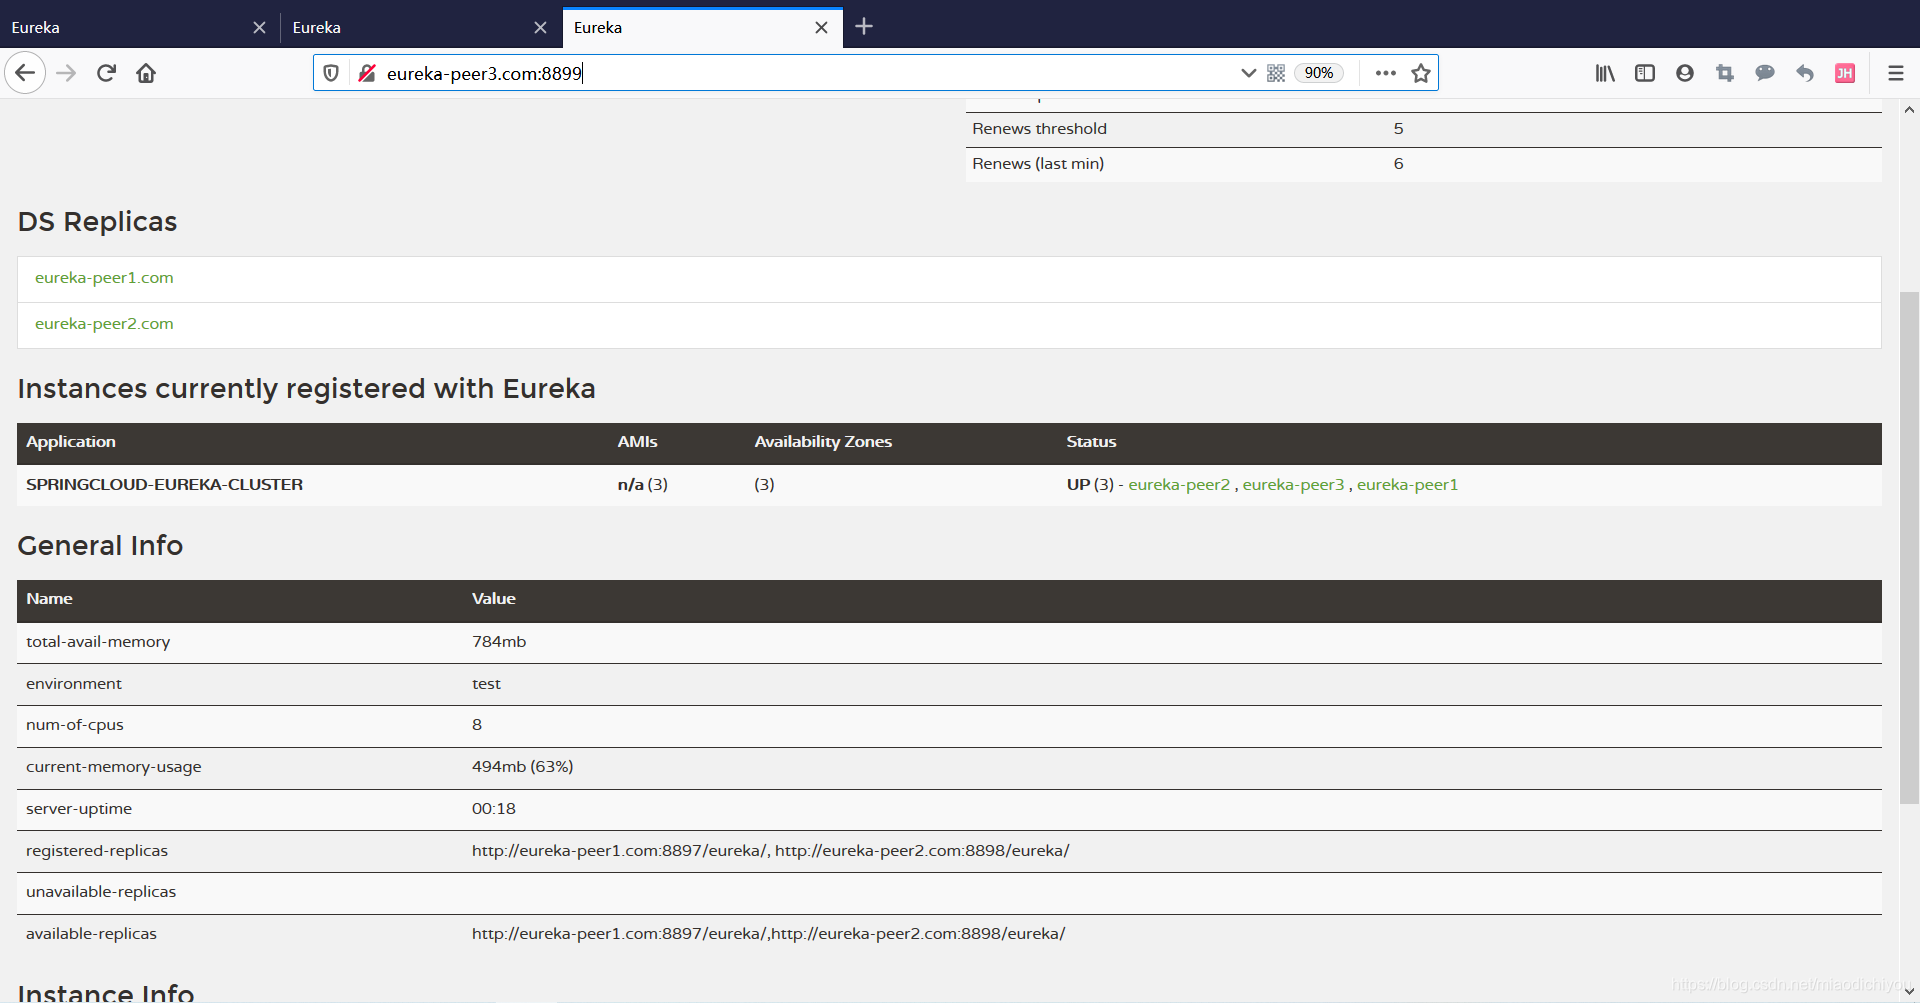
访问http://eureka-peer3.com:8899/
Eureka服务注册集群各节点均在unavailable-replicas下错误
- 各个节点application名字要保持一致
- 本地测试时各个节点都在同一台机器,hostname需要在本地host中填写,各个节点使用自己的host
- prefer-ip-address设置为true或者默认不填写。
- register-with-eureka和fetch-registry都为true
- defaultZone不能使用localhost,需要使用自己在host中配置的域名,配置项为除自己以外的集群中所有节点。
No compiler is provided in this environment. Perhaps you are running on a JRE rather than a JDK?错误
https://blog.csdn.net/lslk9898/article/details/73836745
六、启动多个服务提供者实例
启动多个springcloud-eureka-provider实例,端口分别为8001,8002和8003
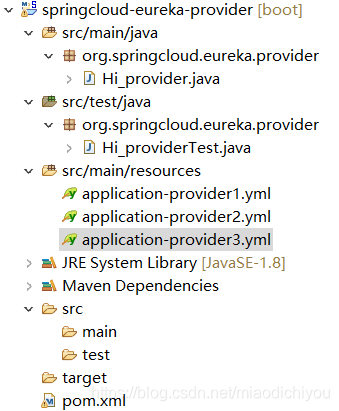
- application-provider1.yml
spring:
  application:
    name: springcloud-eureka-provider
  freemarker:
    prefer-file-system-access: false
  security:
    user:
      name: admin
      password: 123456

server:
  port: 8001

eureka:
  instance:
    hostname: eureka-provider1.com
    instance-id: eureka-provider1
  client:
    service-url:
      defaultZone: http://${spring.security.user.name}:${spring.security.user.password}@eureka-peer1.com:8897/eureka/,http://${spring.security.user.name}:${spring.security.user.password}@eureka-peer2.com:8898/eureka/,http://${spring.security.user.name}:${spring.security.user.password}@eureka-peer3.com:8899/eureka/
- application-provider2.yml
spring:
  application:
    name: springcloud-eureka-provider
  freemarker:
    prefer-file-system-access: false
  security:
    user:
      name: admin
      password: 123456

server:
  port: 8002

eureka:
  instance:
    hostname: eureka-provider2.com
    instance-id: eureka-provider2
  client:
    service-url:
      defaultZone: http://${spring.security.user.name}:${spring.security.user.password}@eureka-peer1.com:8897/eureka/,http://${spring.security.user.name}:${spring.security.user.password}@eureka-peer2.com:8898/eureka/,http://${spring.security.user.name}:${spring.security.user.password}@eureka-peer3.com:8899/eureka/
- application-provider3.yml
spring:
  application:
    name: springcloud-eureka-provider
  freemarker:
    prefer-file-system-access: false
  security:
    user:
      name: admin
      password: 123456

server:
  port: 8003

eureka:
  instance:
    hostname: eureka-provider3.com
    instance-id: eureka-provider3
  client:
    service-url:
      defaultZone: http://${spring.security.user.name}:${spring.security.user.password}@eureka-peer1.com:8897/eureka/,http://${spring.security.user.name}:${spring.security.user.password}@eureka-peer2.com:8898/eureka/,http://${spring.security.user.name}:${spring.security.user.password}@eureka-peer3.com:8899/eureka/
修改C:\Windows\System32\drivers\etc\hosts
127.0.0.1 eureka-provider1.com eureka-provider2.com eureka-provider3.com
通过Run Configurations配置启动
查看Eureka注册中心
http://eureka-peer1.com:8897/
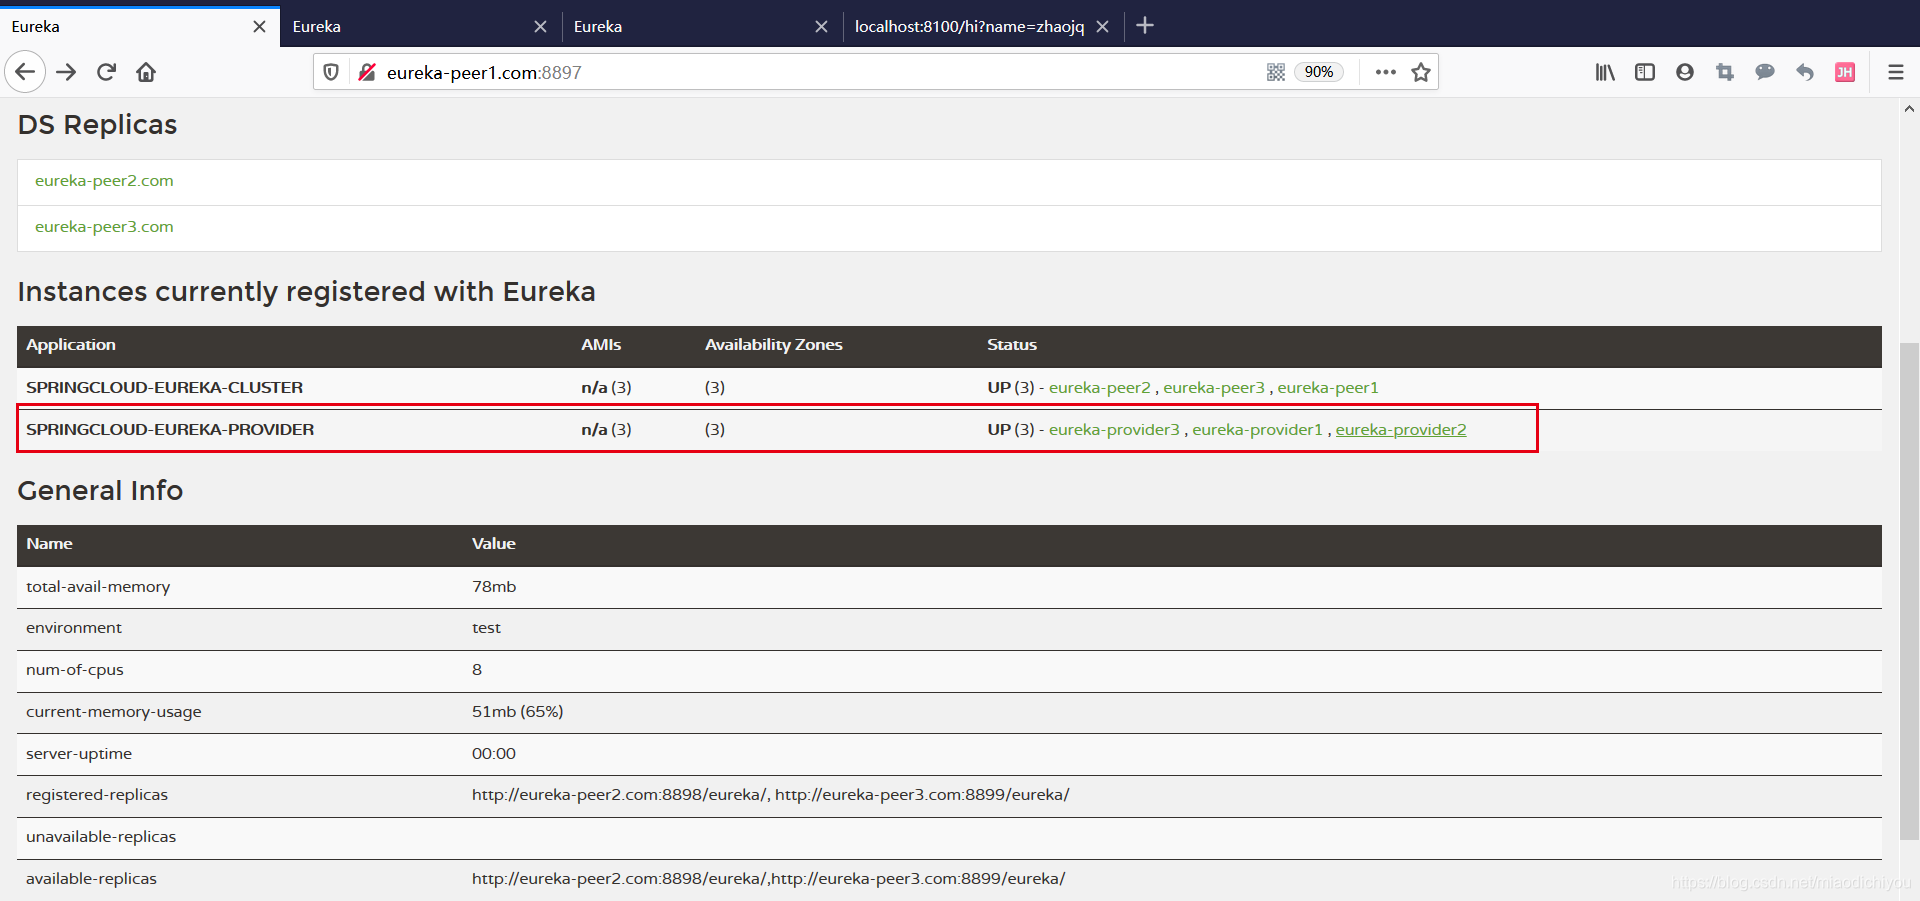
http://eureka-peer2.com:8898/,http://eureka-peer3.com:8899/ 结果同上。
三个服务提供者实例已成功注册。
