最近の休日は、残りの時間は、プレイするための小さなプログラムを書くことを忘れませんでした。
手動で友人と一緒にプロジェクトを行う必要がある場合、私はこの小さなプロジェクトでそれを行うことができます。
任意何をすべきか。母週が行います。
***
開発環境
- JDK1.8
- JetBrain InteliJ
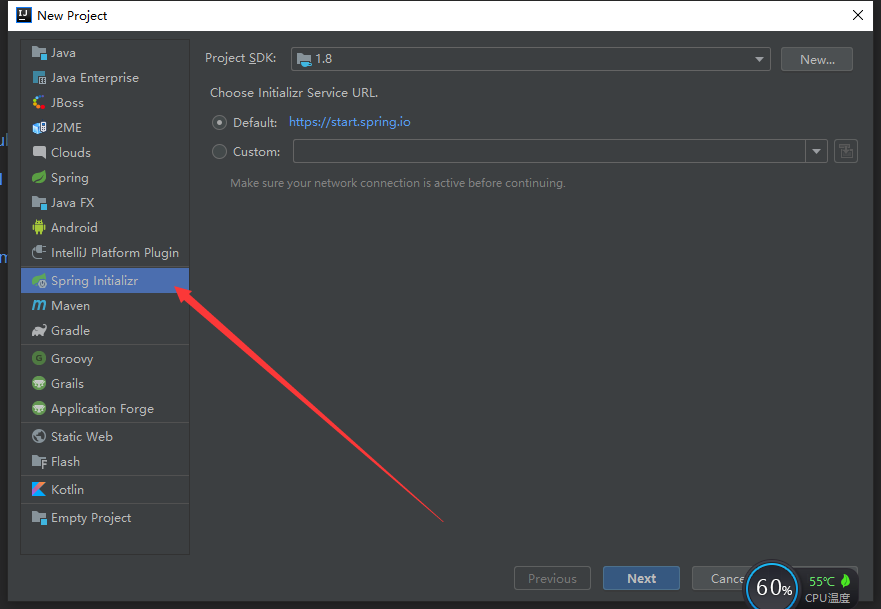
フールスタートプロジェクト
NewProjectは、[開く]をクリックし、次の春Initializrれて
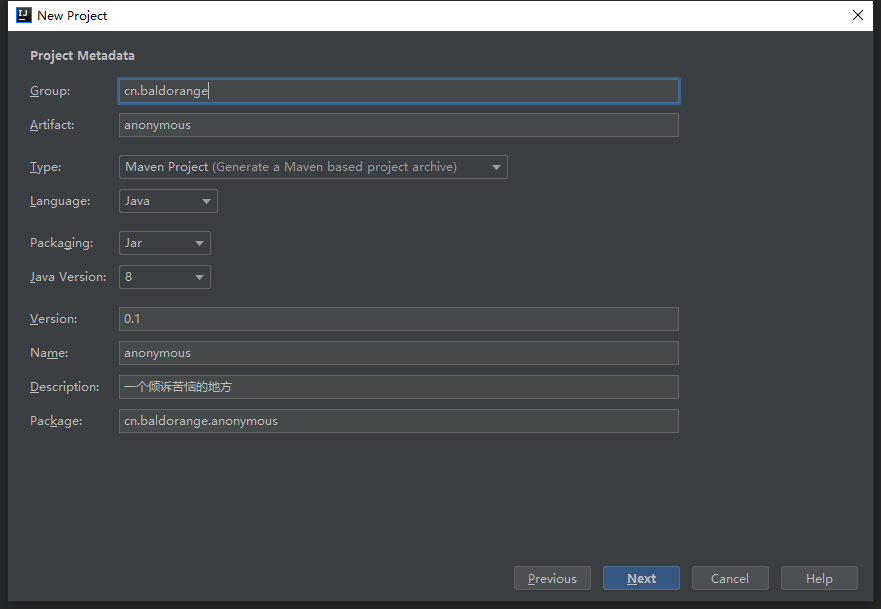
ここでは、クラスのパッケージ名が良いかを決定
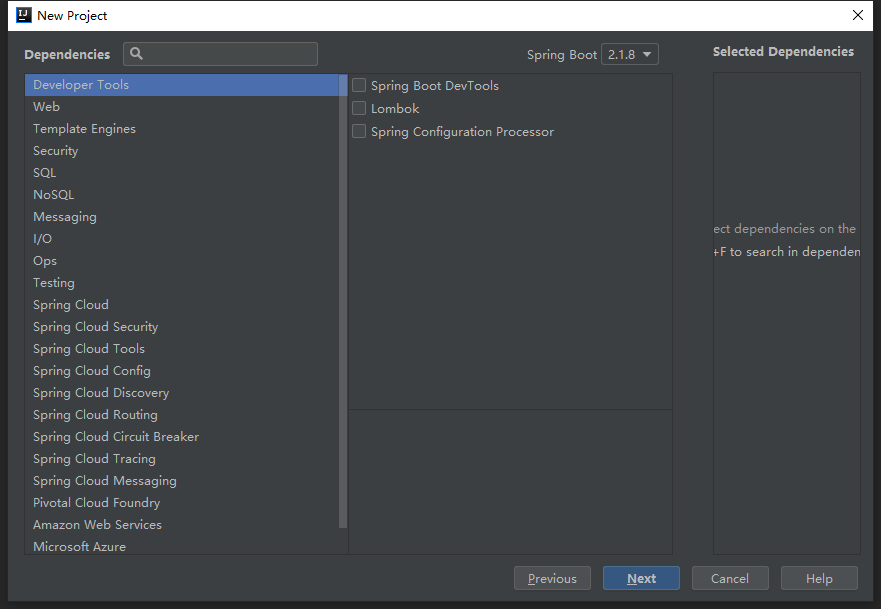
こちらをクリックして直接次のリストに、何も行きません
ここでは、構築プロジェクトを見ることができます。
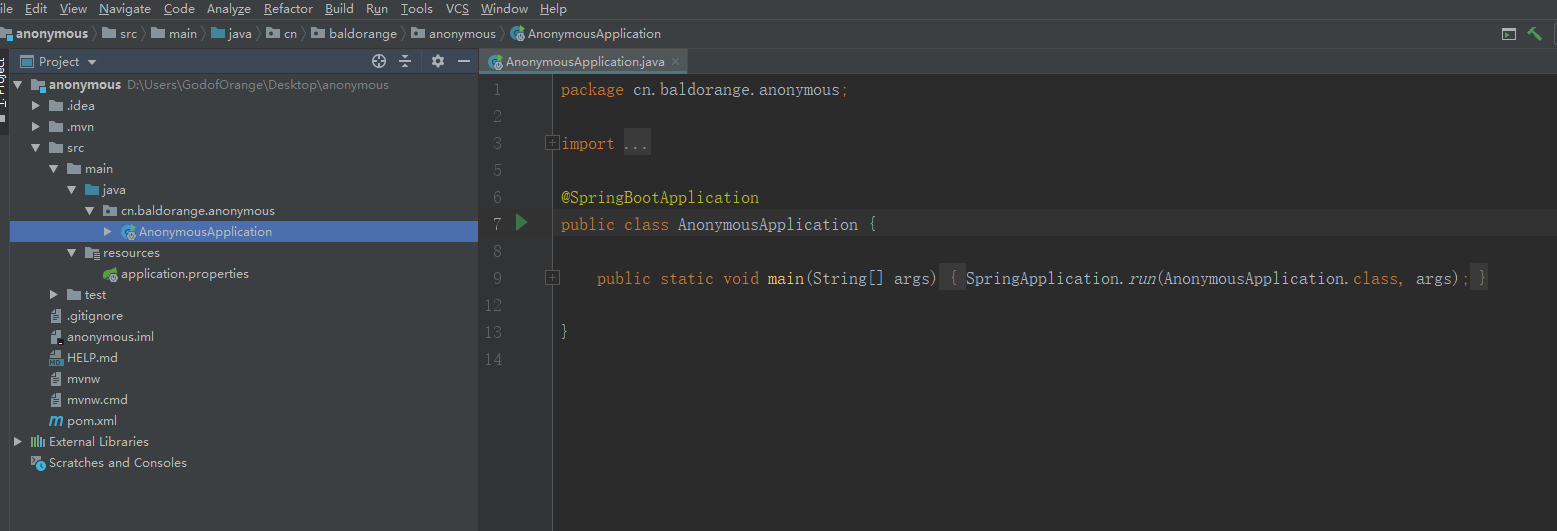
私たちは、あなたが稼働して投影することができるようになります、ポイントの開始を指示します。
OK、今、私たちはビルドするSpringBootを持っていました。
私は、オープンソースは、私たちは、上記の本プロジェクトのGithubを配置する必要があります。

まず、それを共有
し、直感的にダウンしているポイント。
このプロジェクトのアドレスにします。https://github.com/GodofOrange/anonymous
私は記事を更新していきます。
興味のある学生は、星を与えることができる場合
プロジェクトの要件
私は、実際には、全体的なアイデアは、実装が非常に簡単である匿名のトラブルAPPの外に注ぐ作るためにナショナルデーを利用したいのですが、あなただけのMySQLを使用している場合、それは意味がありませんので、私はJPAを使用します+ Redisのは+カフカ+ ngnixは、高可用性を組み立てバックエンド。
プロジェクト全体では、私は内部のプロジェクトに統合少しずつアジャイル開発手法を、使用する予定。
行うにはSpringBoot + JPA永続
(ノートORM技術は、テーブルを作成していない)MYSQL環境は、私たちはあるだろうと信じて、それは私に直接データシートを提供します
| ID | タイトル | コンテンツ | 更新 | 概要 | ホット |
|---|---|---|---|---|---|
| BIGINT | VARCHAR(255) | LONGTEXT | TIMESTAMP | テキスト | BIGINT |
データベース作成スクリプト:
CREATE DATABASE anonymous DEFAULT CHARSET utf8mb4;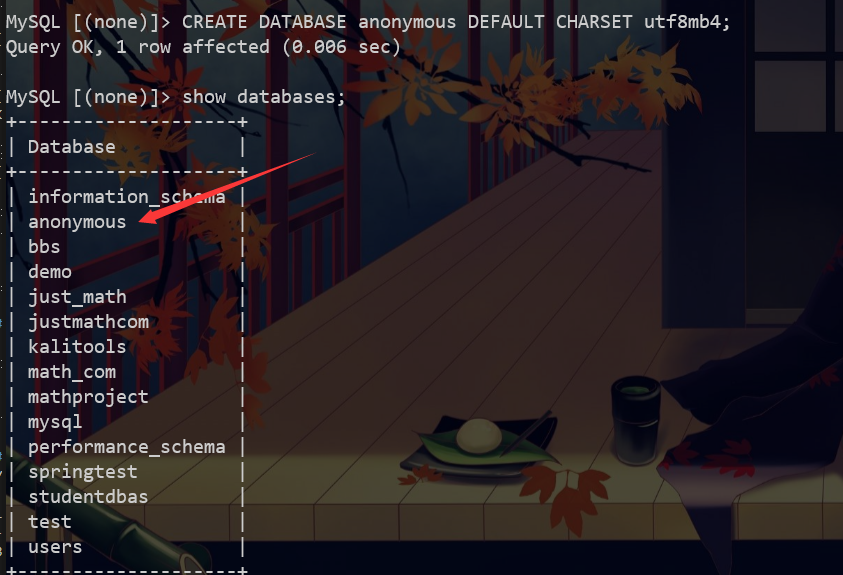
OK、これで、データベースが構築されています。だから我々は、JPAをインポートするには、それに依存しようとしています。
ポンポンファイルに以下のファイルを紹介します。
        <dependency>
            <groupId>org.springframework.boot</groupId>
            <artifactId>spring-boot-starter-data-jpa</artifactId>
        </dependency>
        <dependency>
            <groupId>com.alibaba</groupId>
            <artifactId>druid-spring-boot-starter</artifactId>
            <version>1.1.10</version>
        </dependency>
        <dependency>
            <groupId>mysql</groupId>
            <artifactId>mysql-connector-java</artifactId>
        </dependency>
次に、設定ファイルを変更します。
spring.datasource.url=jdbc:mysql://127.0.0.1:3306/anonymous?serverTimezone=UTC&useSSL=true&allowMultiQueries=true&characterEncoding=utf8
spring.datasource.username=root
spring.datasource.password=123456
spring.jpa.show-sql=true
spring.jpa.database=mysql
spring.jpa.hibernate.ddl-auto=update
spring.jpa.database-platform=org.hibernate.dialect.MySQL57InnoDBDialect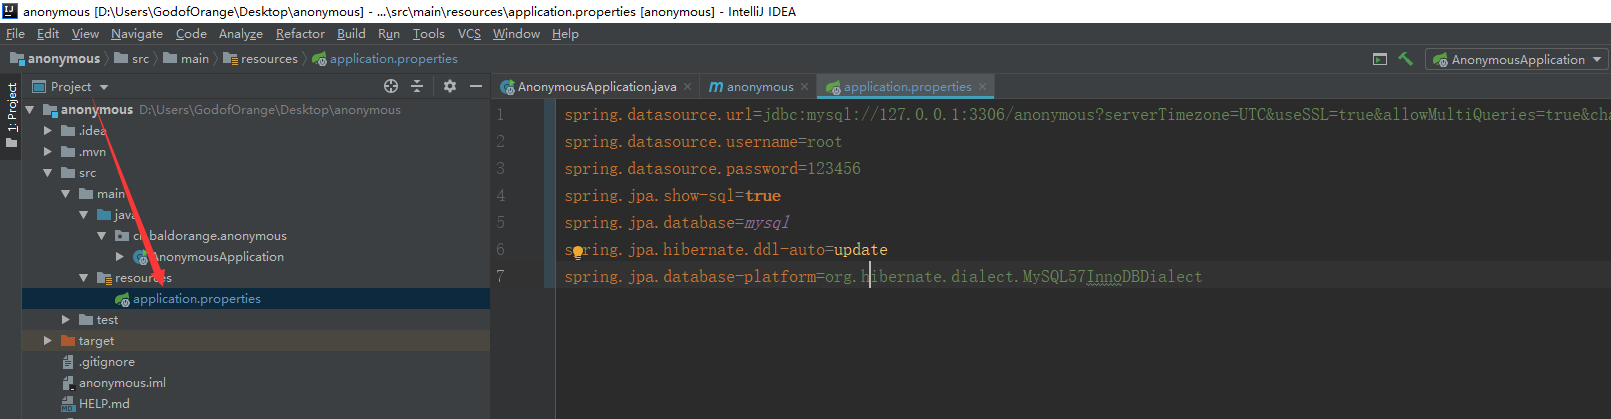
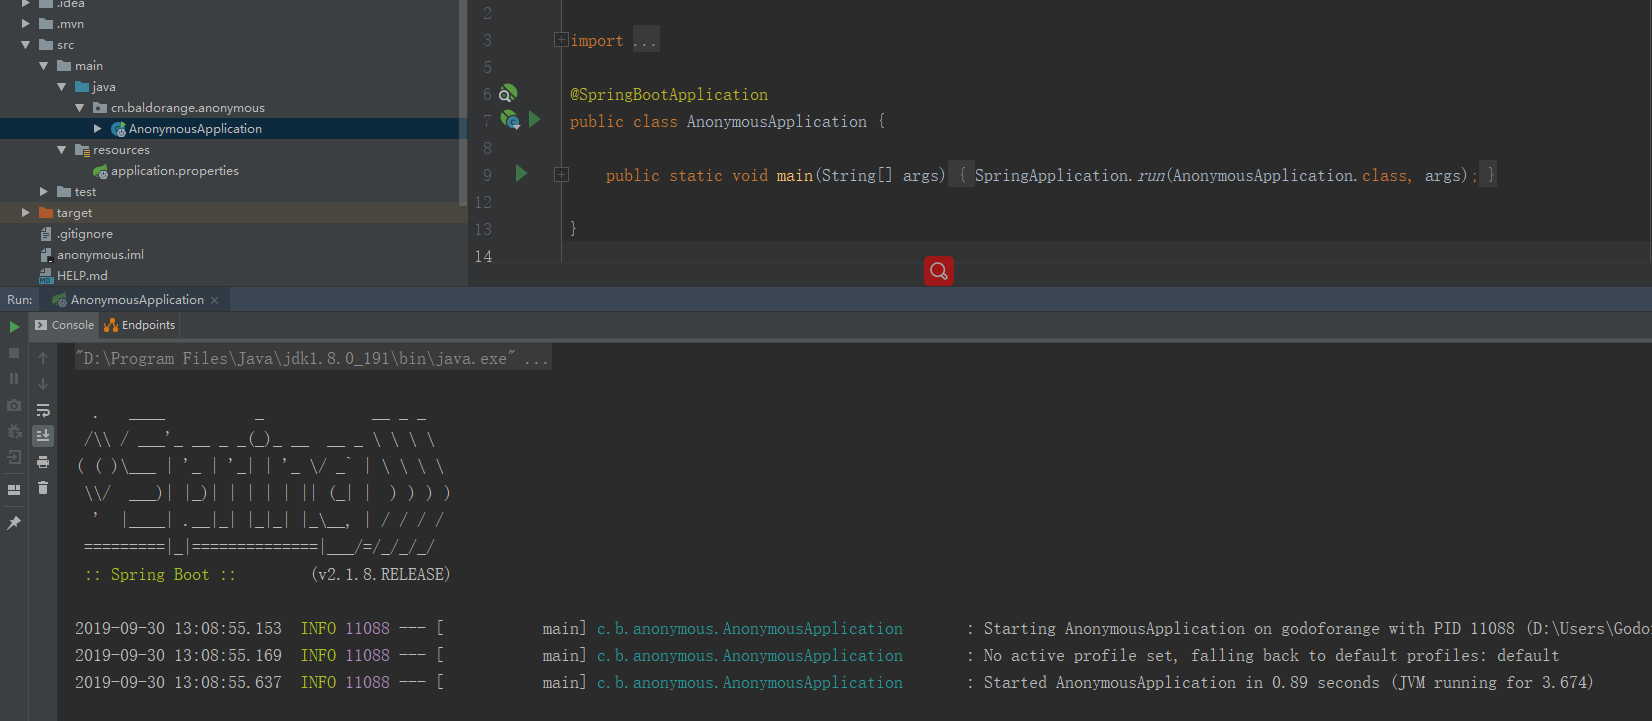
その後、エラーかどうかを確認するために開始します。

エラーがない場合、それはすべてOK、正常終了となります。
テーブルを作成してみましょう
新しいクラスWall.java
package cn.baldorange.anonymous.entity;

import javax.persistence.*;
import java.util.Date;

@Entity(name = "wall")
public class Wall {
    public Wall(){

    }
    public Wall(String title, String content, Date up_time, String summary, String hot) {
        this.title = title;
        this.content = content;
        this.up_time = up_time;
        this.summary = summary;
        this.hot = hot;
    }

    @Id
    @GeneratedValue(strategy = GenerationType.IDENTITY)
    @Column(name = "id",columnDefinition="BIGINT COMMENT '主键,自动生成'")
    private String id;
    @Column(name = "title",columnDefinition="VARCHAR(255)")
    private String title;
    @Column(name = "content",columnDefinition="LONGTEXT")
    private String content;
    @Column(name = "up_time",columnDefinition="TIMESTAMP")
    private Date up_time;
    @Column(name = "summary",columnDefinition="TEXT")
    private String summary;
    @Column(name = "hot",columnDefinition = "BIGINT")
    private String hot;

    public String getId() {
        return id;
    }

    public void setId(String id) {
        this.id = id;
    }

    public String getTitle() {
        return title;
    }

    public void setTitle(String title) {
        this.title = title;
    }

    public String getContent() {
        return content;
    }

    public void setContent(String content) {
        this.content = content;
    }

    public Date getUp_time() {
        return up_time;
    }

    public void setUp_time(Date up_time) {
        this.up_time = up_time;
    }

    public String getSummary() {
        return summary;
    }

    public void setSummary(String summary) {
        this.summary = summary;
    }

    public String getHot() {
        return hot;
    }

    public void setHot(String hot) {
        this.hot = hot;
    }

    @Override
    public String toString() {
        return "Wall{" +
                "id='" + id + '\'' +
                ", title='" + title + '\'' +
                ", content='" + content + '\'' +
                ", up_time=" + up_time +
                ", summary='" + summary + '\'' +
                ", hot='" + hot + '\'' +
                '}';
    }
}
新しいインターフェイス
package cn.baldorange.anonymous.repository;

import cn.baldorange.anonymous.entity.Wall;
import org.springframework.data.jpa.repository.JpaRepository;

public interface WallRepo extends JpaRepository<Wall,String> {

}
SpringTestファイル
package cn.baldorange.anonymous;

import cn.baldorange.anonymous.entity.Wall;
import cn.baldorange.anonymous.repository.WallRepo;
import org.junit.Test;
import org.junit.runner.RunWith;
import org.springframework.beans.factory.annotation.Autowired;
import org.springframework.boot.test.context.SpringBootTest;
import org.springframework.test.context.junit4.SpringRunner;

import java.util.Date;

@RunWith(SpringRunner.class)
@SpringBootTest
public class AnonymousApplicationTests {
    @Autowired
    WallRepo wallRepo;
    @Test
    public void contextLoads() {
        wallRepo.save(new Wall("测试","文章",new Date(),"摘要","0"));
       System.out.println(wallRepo.findById("1"));
    }

}
実行結果は以下の通りであります:
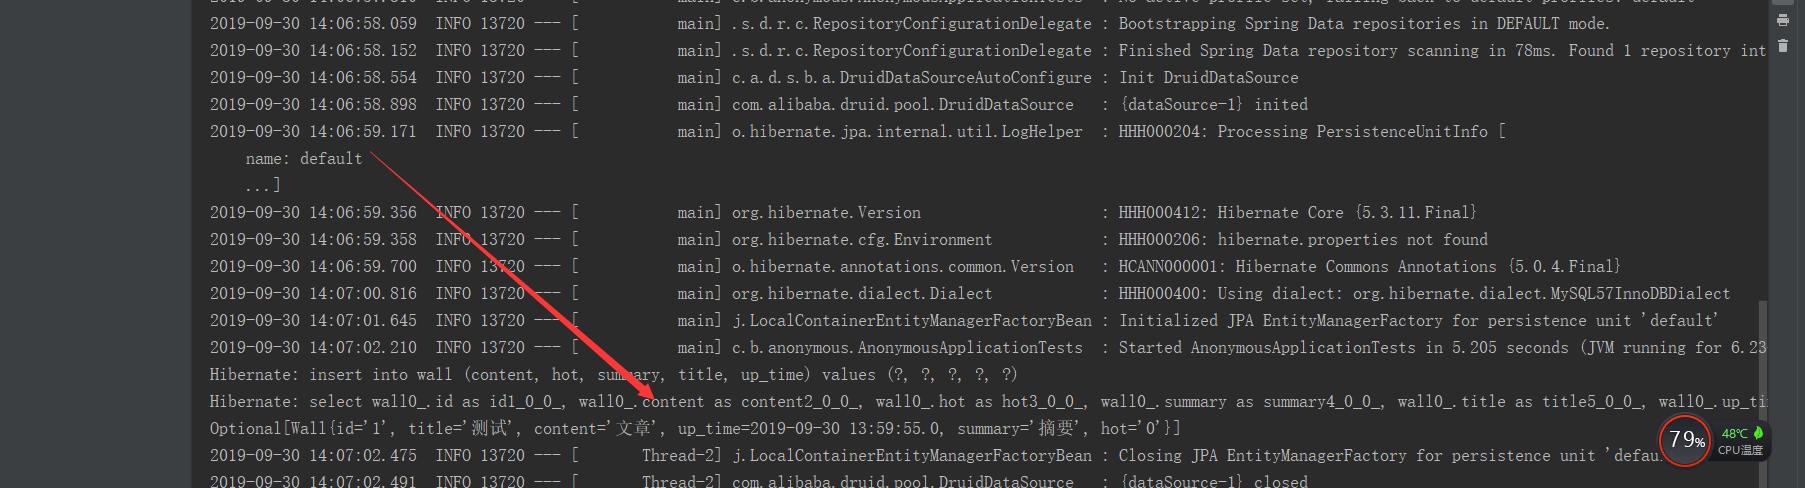
DAO層、このオーバー。
私たちは、直接の後にコミット押し上げ
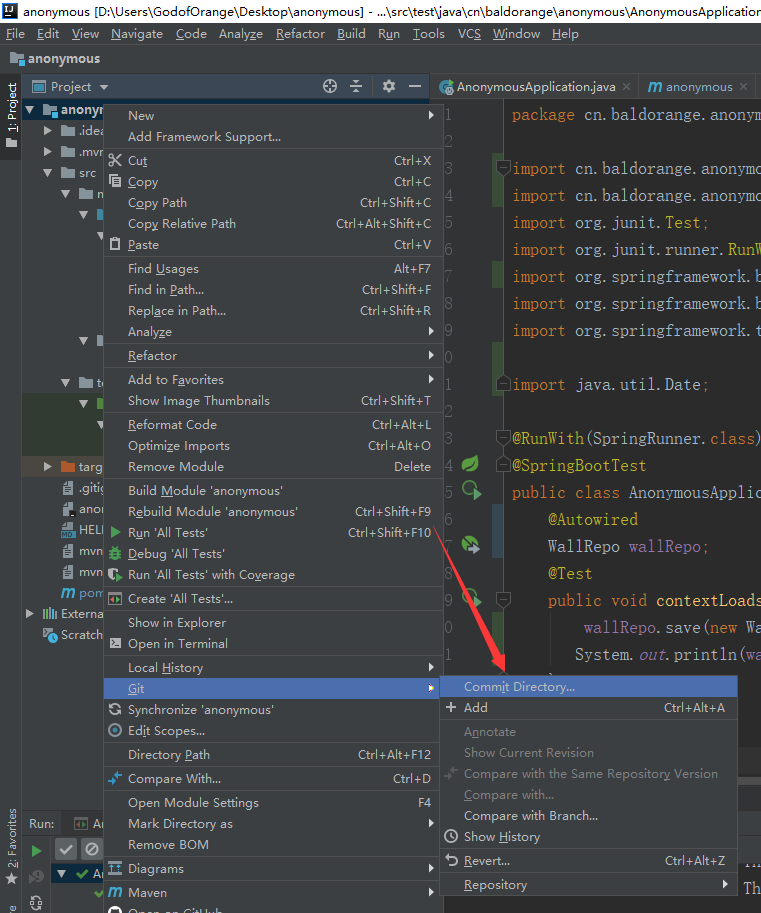
これは、一度提出されたコードを完了します
ここでSpringBootソリューションに他のプロジェクトに統合されています。参照することにより拡張することができるように
闊歩導入
闊歩闊歩は0構成に合わせてインターフェースを開発することができ、ツール・インタフェースのドキュメントです。注意は、しかし、闊歩を開発ベースSpringBoot1.47バージョンですが、SpringBootは今、基本的2+です。
あなたは安らかなサポートを選択したい場合は、唯一のSpringBoot 1+バージョンを撤回します。
***
Mavenの導入
<dependency>
    <groupId>io.springfox</groupId>
    <artifactId>springfox-swagger2</artifactId>
    <version>2.9.2</version>
</dependency>
<dependency>
    <groupId>io.springfox</groupId>
    <artifactId>springfox-swagger-ui</artifactId>
    <version>2.9.2</version>
</dependency>
闊歩コンフィギュレーションマニュアル
import org.springframework.context.annotation.Bean;
import org.springframework.context.annotation.Configuration;
import springfox.documentation.builders.ApiInfoBuilder;
import springfox.documentation.builders.PathSelectors;
import springfox.documentation.builders.RequestHandlerSelectors;
import springfox.documentation.spi.DocumentationType;
import springfox.documentation.spring.web.plugins.Docket;
import springfox.documentation.swagger2.annotations.EnableSwagger2;

@Configuration
@EnableSwagger2
public class swaggerConfig {
    @Bean
    Docket docket(){
        return new Docket(DocumentationType.SWAGGER_2)
                .select()
                .apis(RequestHandlerSelectors.any())
                .paths(PathSelectors.any())
                .build()
                .apiInfo(new ApiInfoBuilder().description("项目").build());
    }
}
インターフェイスの設定
import io.swagger.annotations.Api;
import io.swagger.annotations.ApiOperation;
import org.just.computer.mathproject.Entity.Advertisement;
import org.just.computer.mathproject.Service.AdvertisementService;
import org.springframework.beans.factory.annotation.Autowired;
import org.springframework.web.bind.annotation.GetMapping;
import org.springframework.web.bind.annotation.RequestMapping;
import org.springframework.web.bind.annotation.RequestParam;
import org.springframework.web.bind.annotation.RestController;

import java.util.List;

@RestController
@Api(tags ="广告")
@RequestMapping("/Advertisement/")
public class AdvertisementController {
    @Autowired
    AdvertisementService advertisementService;

    @ApiOperation(value ="获得所有广告")
    @GetMapping("/getAllAdvertisement")
    public List<Advertisement> getAllAdvertisement(){
        return advertisementService.getAllAdvertisement();
    }
    @ApiOperation(value = "添加广告")
    @GetMapping("/addAdvertisement")
    public Boolean getAllAdvertisement(@RequestParam String img, @RequestParam String href){
        try {
            advertisementService.addAdvertisement(img,href);
            return true;
        }catch (Exception e){
            return false;
        }
    }

    @ApiOperation(value = "删除广告")
    @GetMapping("/deleteAdvertisement")
    public Boolean deleteAdvertisementById(Integer id){
       try{
           advertisementService.deleteAdvertisementById(id);
           return true;
       }catch (Exception e){
           return false;
       }
    }
}
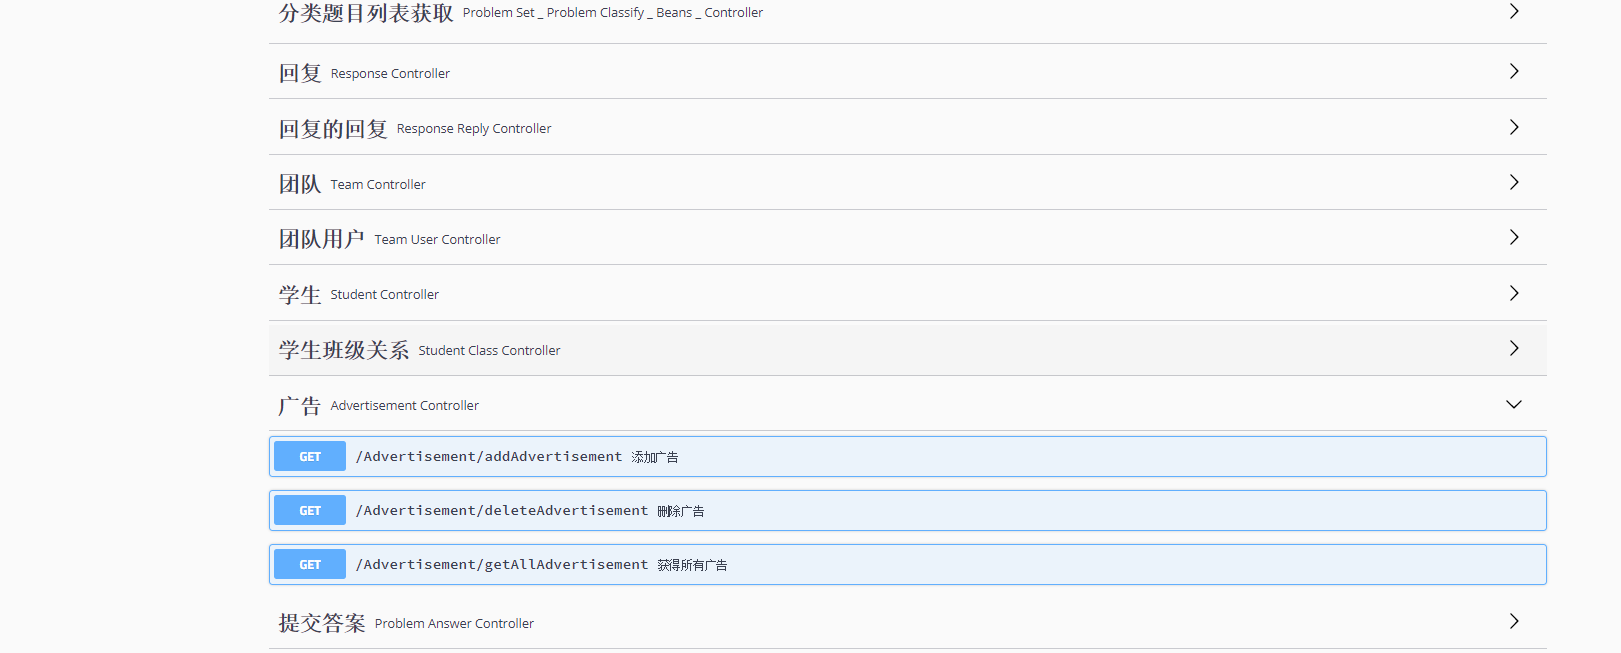
ローカルで実行するために訪問した後、ここに訪問する
ポート/swagger-ui.html:またはIPする
結果は以下の通りであります
SpringBoot導入のWebSocket
Mavenの依存性
<dependency>
            <groupId>org.springframework.boot</groupId>
            <artifactId>spring-boot-starter-websocket</artifactId>
</dependency>
WebSocketConfigプロフィール
import org.springframework.context.annotation.Configuration;
import org.springframework.messaging.simp.config.MessageBrokerRegistry;
import org.springframework.web.socket.config.annotation.EnableWebSocketMessageBroker;
import org.springframework.web.socket.config.annotation.StompEndpointRegistry;
import org.springframework.web.socket.config.annotation.WebSocketMessageBrokerConfigurer;

@Configuration
@EnableWebSocketMessageBroker
public class WebSocketConfig implements WebSocketMessageBrokerConfigurer {
    @Override
    public void configureMessageBroker(MessageBrokerRegistry config){
        config.enableSimpleBroker("/topic");
        config.setApplicationDestinationPrefixes("/app");
    }
    @Override
    public void registerStompEndpoints(StompEndpointRegistry registry){
        registry.addEndpoint("/chat").setAllowedOrigins("*").withSockJS();
    }
}
設定した後、基本的には他の構成行わない
クロスドメインのsetAllowedOrigins()関数を
そして、コントローラ
import org.just.computer.mathproject.Bean.Message;
import org.springframework.messaging.handler.annotation.MessageMapping;
import org.springframework.messaging.handler.annotation.SendTo;
import org.springframework.stereotype.Controller;

import java.security.Principal;
import java.util.Date;

@Controller
public class GreetingController {
    @MessageMapping("/hello")
    @SendTo("/topic/greetings")
    public Message greeting(String content, Principal pl) throws Exception{
        Message message = new Message();
        message.setContent(content.substring(1,content.length()-1));
        message.setData(new Date().toString());
        message.setName(pl.getName());
        return message;
    }
}
セッションを介してユーザ名を取得するためにSpringSecurity知識はこちら校長。
これまでのところ、SpringBoot構成がなくなってきました
stompClientによってVueがWebSocketを使います
package.json
"dependencies": {
    "@tinymce/tinymce-vue": "^3.0.1",
    "axios": "^0.19.0",
    "echarts": "^4.2.1",
    "element-ui": "^2.11.1",
    "net": "^1.0.2",
    "nprogress": "^0.2.0",
    "sockjs-client": "^1.4.0",
    "stompjs": "^2.3.3",
    "tinymce": "^4.8.5",
    "tinymce-vue": "^1.0.0",
    "vue": "^2.5.2",
    "vue-axios": "^2.1.4",
    "vue-echarts": "^4.0.3",
    "vue-router": "^3.0.1",
    "vue-stomp": "0.0.5"
  }
充填VUE-ストンプsockjs-クライアントは、これらの三つのstompjs持って必ず
所定の場所に直接使用します。
import SockJS from 'sockjs-client'
import Stomp from 'webstomp-client'
完全なコードVUE以下
<template>
  <div>
    <input type="text" v-model="text">
    <button @click="sendMessage">发送消息</button>
    <div class="bubble">
    </div>
    <div>
      <div v-for="(data,key) in datas" :key="key">
        {{data.content}}
      </div>
    </div>
  </div>
</template>
<script>
import SockJS from 'sockjs-client'
import Stomp from 'webstomp-client'
export default {
  name: 'ChatRoom',
  data () {
    return {
      text: '',
      datas: [],
      stompClient: null
    }
  },
  mounted () {
    if ('WebSocket' in window) {
      this.initWebSocket()
    } else {
      alert('当前浏览器 Not support websocket')
    }
  },
  methods: {
    sendMessage () {
      this.stompClient.send('/app/hello', JSON.stringify(this.text), {})
    },
    initWebSocket () {
      this.connection()
    },
    connection () {
      const socket = new SockJS(this.$baseUrl + '/chat')
      this.stompClient = Stomp.over(socket)
      this.stompClient.connect({}, (frame) => {
        this.stompClient.subscribe('/topic/greetings', (greeting) => {
          console.log(JSON.parse(greeting.body))
          this.datas.push(JSON.parse(greeting.body))
        })
      })
    }
  }
}
</script>

<style scoped>
</style>
コードthis.stompClient.send( '/アプリ/ハロー'のこの行にように注意し 、JSON.stringify(this.text)、{}){} の位置、いくつかのバージョンを逆にしてもよいです。
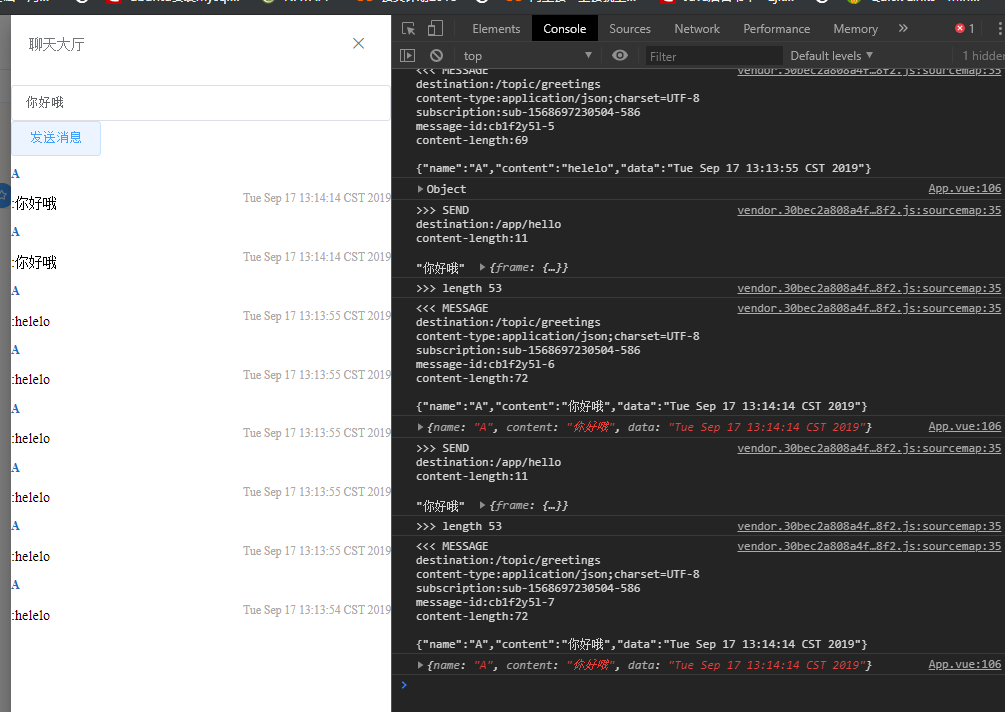
実行結果を以下に示します