本明細書中に参照を書くことは多くのオンラインブログ、再びおかげで、下記に記載されているブログへの参照、Pytorchが達成紙グローブ原則、純粋なPython実装、コンパイルされた公式のC言語、および後で学ぶために子供の靴を容易にするために、記録を使用するための簡単な方法かもしれません。
論文住所:グローブ:ワード、株式会社フリー表現参加のためのベクター
紙が読みました:
- 理解と実践手袋モデル
- 詳細な手袋
- 論文シェア - >手袋:Wordの表現のためのグローバル・ベクトル
- グローブトレーニング中国のコーパスを使用します
- 中国のセンチメント分析手袋+ LSTM
- 実際のエントリ+パイソンgensim単語ベクトルグローブチュートリアル
- ミニマリストの使用︱Glove-pythonのトレーニングと単語ベクトルの使用
- どのようにgensimロードされた手袋トレーニング語ベクトル
コード達成するために: - pytorchコードの実装
- Pythonのコードの実装
- 説明を達成するためPythonコード
- スタンフォード大学の公式トレーニンググローブコード
コアコード実装のPythonバージョン
完全なコード手袋-pythonのを参照してください。
def build_vocab(corpus):
    """
    Build a vocabulary with word frequencies for an entire corpus.

    Returns a dictionary `w -> (i, f)`, mapping word strings to pairs of
    word ID and word corpus frequency.
    """

    logger.info("Building vocab from corpus")

    vocab = Counter()
    for line in corpus:
        tokens = line.strip().split()
        vocab.update(tokens)

    logger.info("Done building vocab from corpus.")
    #{词:(id,词频)} e.g:{'human': (0, 2), 'interface': (1, 3),}
    return {word: (i, freq) for i, (word, freq) in enumerate(vocab.items())}


@listify
def build_cooccur(vocab, corpus, window_size=10, min_count=None):
    """
    Build a word co-occurrence list for the given corpus.

    This function is a tuple generator, where each element (representing
    a cooccurrence pair) is of the form

        (i_main, i_context, cooccurrence)

    where `i_main` is the ID of the main word in the cooccurrence and
    `i_context` is the ID of the context word, and `cooccurrence` is the
    `X_{ij}` cooccurrence value as described in Pennington et al.
    (2014).

    If `min_count` is not `None`, cooccurrence pairs where either word
    occurs in the corpus fewer than `min_count` times are ignored.

    a vocabulary (mapping words to integer word IDs), a corpus (a simple
    iterator over sentences), and some optional parameters: a context window
    size and a minimum count (used to drop rare word co-occurrence pairs).
    """

    vocab_size = len(vocab)
    # {词:(id,词频)} e.g:{'human': (0, 2), 'interface': (1, 3),}->{(id,word)}
    id2word = dict((i, word) for word, (i, _) in vocab.items())

    # Collect cooccurrences internally as a sparse matrix for passable
    # indexing speed; we'll convert into a list later
    #lil_matrix:List of Lists format,使用两个列表保留非零元素。参看https://blog.csdn.net/nkwangjie/article/details/17502443
    #lil_matrix使用两个列表保存非零元素。data保存每行中的非零元素,rows保存非零元素所在的列。这种格式也很适合逐个添加元素,并且能快速获取行相关的数据。
    cooccurrences = sparse.lil_matrix((vocab_size, vocab_size),
                                      dtype=np.float64)

    for i, line in enumerate(corpus):
        if i % 1000 == 0:  #每处理1000行预料,打印一次日志
            logger.info("Building cooccurrence matrix: on line %i", i)

        tokens = line.strip().split()
        # vocab:{词:(id,词频)} e.g:{'human': (0, 2), 'interface': (1, 3),}->{(id,word)}
        #对于语料库每一行,练成一个wordID列表
        token_ids = [vocab[word][0] for word in tokens]
        #or each word ID ii in the sentence, we’ll extract a window of context words to the left of the word
        #对于列表中的每一个wordID i,提取该词左侧window_size范围内词的ID
        for center_i, center_id in enumerate(token_ids):
            # Collect all word IDs in left window of center word
            context_ids = token_ids[max(0, center_i - window_size) : center_i]
            contexts_len = len(context_ids)

            #对于中心词i上下文中的每一个词j,将1/d的权重增加进Xij
            #left_i为context_ids中的索引序号,从0开始,left_id为context_ids[left_i]
            for left_i, left_id in enumerate(context_ids):
                # Distance from center word
                distance = contexts_len - left_i    #d

                # Weight by inverse of distance between words
                increment = 1.0 / float(distance)   #权重1/d

                # Build co-occurrence matrix symmetrically (pretend we
                # are calculating right contexts as well)
                #左右对称的稀疏矩阵
                cooccurrences[center_id, left_id] += increment
                cooccurrences[left_id, center_id] += increment

    # Now yield our tuple sequence (dig into the LiL-matrix internals to
    # quickly iterate through all nonzero cells)
    #data保存每行中的非零元素,rows保存非零元素所在的列。
    for i, (row, data) in enumerate(zip(cooccurrences.rows,cooccurrences.data)):
        if min_count is not None and vocab[id2word[i]][1] < min_count:  #词频小于min_count的不予考虑
            continue

        for data_idx, j in enumerate(row):  #data_idx,j循环矩阵中每一行和列
            if min_count is not None and vocab[id2word[j]][1] < min_count:
                continue
            #i:行,j:列,data[data_idx]:大于min_count的Xij值
            yield i, j, data[data_idx]
コアコード実装のPytorchバージョン
from nltk.tokenize import word_tokenize
from torch.autograd import Variable
import matplotlib
import matplotlib.pyplot as plt
import numpy as np
import torch
import torch.optim as optim


# 参数设置
context_size = 3  # 设置窗口的大小
embed_size = 2  # 词嵌入的维度
xmax = 2
alpha = 0.75   # 以上两个参数是定义权重函数是所需要的 可以自己随意设定
batch_size = 20
l_rate = 0.001
num_epochs = 10

# 打开文件 读取语料
fr = open('short_story.txt', 'r')
text = fr.read().lower()
fr.close()

# print(text)


# 建立词表
word_list = word_tokenize(text)   # 分词
vocab = np.unique(word_list)    # 去重后的词表
w_list_size = len(word_list)   # 语料中词的个数
vocab_size = len(vocab)   # 词表的大小

# 词到id的映射
w_to_i = {word: ind for ind, word in enumerate(vocab)}
# print(w_to_i)

comat = np.zeros((vocab_size, vocab_size))
for i in range(w_list_size):
    for j in range(1, context_size+1):
        ind = w_to_i[word_list[i]]  # 将语料中每次词拿出来  转为id
        if i - j > 0:    # 找去窗口内的左边词汇id
            lind = w_to_i[word_list[i-j]]
            comat[ind, lind] += 1.0/j   # 考虑的权重  你若越远 这个权重越低  你若越近 权重越高
        if i + j < w_list_size:    # 找去窗口内的左边词汇id
            rlid = w_to_i[word_list[i+j]]
            comat[ind, rlid] += 1.0/j

print(comat)

# np.nonzero()  输出为一个元组  第一个元组是非零元素所在的行  第二个元素是非零元素所在的列
coocs = np.transpose(np.nonzero(comat))    # 现在 coocs的每一行就是非零元素所在的坐标


# 权重函数
def wf(x):
    if x < xmax:
        return (x/xmax) ** alpha
    return 1


# 设定词向量 和 偏置项
l_embed, r_embed = [
    [Variable(torch.from_numpy(np.random.normal(0, 0.01, (embed_size, 1))),
              requires_grad=True) for j in range(vocab_size)] for i in range(2)]

l_biases, r_biases = [
    [Variable(torch.from_numpy(np.random.normal(0, 0.01, 1)),
              requires_grad=True) for j in range(vocab_size)] for i in range(2)]

# 设定优化器
optimizer = optim.Adam(l_embed + r_embed + l_biases + r_biases, lr=l_rate)


# 产生批数据
def gen_batch():
    sample = np.random.choice(np.arange(len(coocs)), size=batch_size, replace=False)   # 从中选取batch_size条数据
    l_vecs, r_vecs, covals, l_v_bias, r_v_bias = [], [], [], [], []
    for chosen in sample:
        ind = tuple(coocs[chosen])   # 取出当前所选样本的坐标
        l_vecs.append(l_embed[ind[0]])
        r_vecs.append(r_embed[ind[1]])
        covals.append(comat[ind])
        l_v_bias.append(l_biases[ind[0]])
        r_v_bias.append(r_biases[ind[1]])
    return l_vecs, r_vecs, covals, l_v_bias, r_v_bias


# 模型的训练
for epoch in range(num_epochs):
    num_batches = int(w_list_size/batch_size)   # 看一下一批需去多少数据
    avg_loss = 0.0
    for batch in range(num_batches):
        optimizer.zero_grad()
        l_vecs, r_vecs, covals, l_v_bias, r_v_bias = gen_batch()
        # 定义损失函数
        # For pytorch v2 use, .view(-1) in torch.dot here. Otherwise, no need to use .view(-1).
        loss = sum([torch.mul((torch.dot(l_vecs[i].view(-1), r_vecs[i].view(-1))
                               + l_v_bias[i] + r_v_bias[i] - np.log(covals[i]))**2, wf(covals[i])) for i in range(batch_size)])

        avg_loss += loss.data[0]/num_batches
        loss.backward()   # 反向传播
        optimizer.step()
    print("per epoch average loss:"+str(epoch+1)+": ", avg_loss)

# 这里设置的嵌入维度是2  可以进行可视化
if embed_size == 2:
    # 从词表中随机选取10个词
    word_inds = np.random.choice(np.arange(len(vocab)), size=10, replace=False)
    for word_ind in word_inds:
        # Create embedding by summing left and right embeddings
        w_embed = (l_embed[word_ind].data + r_embed[word_ind].data).numpy()
        x, y = w_embed[0][0], w_embed[1][0]
        plt.scatter(x, y)
        plt.annotate(vocab[word_ind], xy=(x, y), xytext=(5, 2), textcoords='offset points', ha='right', va='bottom')
    plt.savefig("glove.png")
コードの公式をコンパイル手袋
コンパイラ
Linuxでコンパイルする必要があり、私がここで使用Ubuntu18.04であります
- 手袋、コマンドを取得します:wgetのhttp://www-nlp.stanford.edu/software/GloVe-1.2.zipを
- 解凍:解凍GloVe-1.2.zip
- CDグローブ1.2
- 作る
ため、私のLinux環境に、このようなISO C90など、多くのことを示唆、ISO C90およびC ++ 98であることに注意してくださいISO C90とCにlong long型を見てXXXなど、オンライン検索をサポートしていません++ 98を添加しました。
ここではCFLAGSのMakefileで-std =のC99に参加する、インターネットは、GCC> 3.0のサポートC99は語りました。
II。グローブトレーニング中国語の単語ベクトル
jiebaワードた後、ストップワードを除去した後、最新の中国の百科事典Wikipediaのテキストを使用して
参照して、特定の操作:中国のウィキペディアを使用して手袋実験した、Linuxでの手袋のインストールと使用
1.ダウンロード中国のコーパス
中国語資料ウィキペディアからダウンロードすることができ、コーパスは、頻繁に更新され、ダウンロード、私は2019年6月4日、サイズ1.636ギガバイトにリリースされましたここからダウンロード。
2.データの抽出
#程序名:process_wiki.py
# -*- coding:utf-8 -*-
# Author:cskywit
import logging
import os.path
import six
import sys
import warnings

warnings.filterwarnings(action='ignore', category=UserWarning, module='gensim')
from gensim.corpora import WikiCorpus

if __name__ == '__main__':
 program = os.path.basename(sys.argv[0])
 logger = logging.getLogger(program)
 logging.basicConfig(format='%(asctime)s: %(levelname)s: %(message)s')
 logging.root.setLevel(level=logging.INFO)
 logger.info("running %s" % ' '.join(sys.argv))
 # check and process input arguments
 if len(sys.argv) != 3:
     print("Using: python process_wiki.py enwiki.xxx.xml.bz2 wiki.en.text")
     sys.exit(1)
 inp, outp = sys.argv[1:3]
 space = " "
 i = 0
 output = open(outp, 'w',encoding='utf-8')
 wiki = WikiCorpus(inp, lemmatize=False, dictionary={})
 for text in wiki.get_texts():
     output.write(space.join(text) + "\n")
     i=i+1
     if (i%10000==0):
         logger.info("Saved " + str(i) + " articles")
 output.close()
 logger.info("Finished Saved " + str(i) + " articles")
コマンドラインを実行します。python process_wiki.py zhwiki-latest-pages-articles.xml.bz wiki.zh.text
3.文字変換
openccツールをダウンロードし、opencc-1.0.1-Win64のコマンドラインで解凍し、次のコマンドを入力します。
opencc -i wiki.zh.txt -o wiki.zh.jianti.txt -c t2s.json
4.クリーニングコーパス
文書の英語の後、汚れた多くの情報が残っています。このような数字、句読点、および他の非中国語の文字、文書として、文章訓練にワープロの必要性を使用することはできません。だから、非中国人だけでなく、単語の文字列をクリアするためにコードを記述します。このブログはしているストップワードを整理します。Wordやテキストクリーンなコードは、次のようにここでjiebaセグメンテーションツールを使用します。各文書を作用し、各文書は、単語の多くの組み合わせに分割され、スペースで区切られています。ここで私は繰り返し、これらのファイルの「zh_simplify」フォルダと呼ばれるファイル、ストア内のいくつかのテキストファイル、コードを作成し、コーパスは、最終文書に格納されています。全体のクリーンアッププロセスは約40分。
#程序名:clean_jieba.py
import jieba
import os
import codecs
from tqdm import tqdm


class MySentences(object):
     def __init__(self, dirname):
        self.dirname = dirname
     def __iter__(self):
        for fname in os.listdir(self.dirname):
            for line in open(os.path.join(self.dirname, fname),'rb'):
                if len(line) > 0:
                    yield [segment.strip() for segment in jieba.cut(line.strip(), cut_all=False)
                           if segment not in stoplist and len(segment) > 0]

def is_ustr(instr):
    out_str = ''
    for index in range(len(instr)):
        if is_uchar(instr[index]):
            out_str = out_str + instr[index].strip()
    return out_str


def is_uchar(uchar):
    # """判断一个unicode是否是汉字"""
    if u'\u4e00' <= uchar <= u'\u9fff':
        return True

if __name__ == '__main__':
    #待分词文件夹
    dirname = 'zh_simplify'
    #用户词典
    user_dict = 'userdict.txt'
    # 读取停用词;
    stop_f = codecs.open('stopwords.txt', 'r', encoding='utf-8')
    stoplist = {}.fromkeys([line.strip() for line in stop_f])
    #加载用户词典
    jieba.load_userdict(user_dict)
    # 进行jieba分词
    sentences = MySentences(dirname)
    # 分词结果写入文件
    f = codecs.open('wiki_jieba.txt', 'w', encoding='utf-8')
    i = 0
    j = 0
    w = tqdm(sentences, desc=u'分词句子')
    for sentence in w:
        if len(sentence) > 0:
            output = " "
            for d in sentence:
                # 去除停用词;
                if d not in stoplist:
                    output += is_ustr(d).strip() + " "
            f.write(output.strip())
            f.write('\r\n')
            i += 1
            if i % 10000 == 0:
                j += 1
                w.set_description(u'已分词: %s万个句子'%j)
    f.close()
5.あなた自身のトレーニングコーパスを使用します
あなたはdemo.shを変更することができます。
#if [ ! -e text8 ]; then
#  if hash wget 2>/dev/null; then
#    wget http://mattmahoney.net/dc/text8.zip
#  else
#    curl -O http://mattmahoney.net/dc/text8.zip
#  fi
#  unzip text8.zip
#  rm text8.zip
#fi
//下面为Glove的相关参数
CORPUS=wiki_jieba.txt            // 这里是已经分好词的文件路径
VOCAB_FILE=vocab.txt    //#输出的字典
COOCCURRENCE_FILE=cooccurrence.bin
COOCCURRENCE_SHUF_FILE=cooccurrence.shuf.bin
BUILDDIR=build
SAVE_FILE=vectors
VERBOSE=2
MEMORY=4.0
VOCAB_MIN_COUNT=5
VECTOR_SIZE=100        //  词向量维度
MAX_ITER=15
WINDOW_SIZE=15      // 窗口大小
BINARY=2           //生成二进制文件
NUM_THREADS=8
X_MAX=100
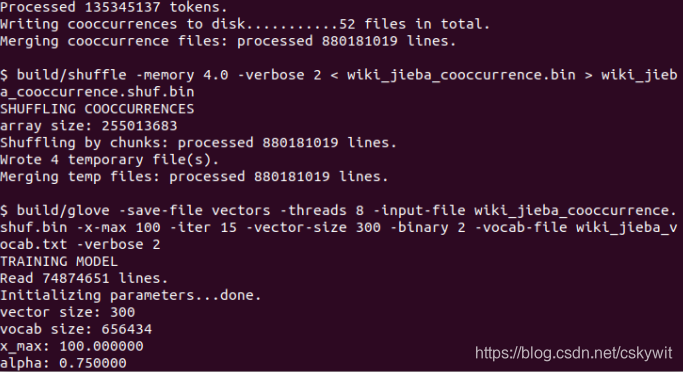
トレーニングが完了した後、我々はvectors.txtで得られた訓練単語ベクトルの結果を見ることができます。
6.ロードされ、gesimで使用されます
このファイルのみvectors.txtほとんどの冒頭に違いword2Vec、グローブ単語ベクトルファイルは、ベクトルの総数を示す第1の数は、二番目の数字の各ベクトルがどのように多くのことを示し、2つの数値を追加することをここで注意してくださいビクトリアは、あなたが直接word2vecロードされたロード機能を使用することができます。この変換が達成されたglove2word2vecにGesim
#coding=utf8
import gensim
from gensim.test.utils import datapath, get_tmpfile
from gensim.models  import KeyedVectors
from gensim.scripts.glove2word2vec import glove2word2vec
# 输入文件
glove_file = "G:\\development_workspace\\vscode_workspace\\glove使用\\vectors.txt"
# 输出文件
tmp_file = get_tmpfile("G:\\development_workspace\\vscode_workspace\\glove使用\\Wikiglove_word2vec.txt")

# call glove2word2vec script
# default way (through CLI): python -m gensim.scripts.glove2word2vec --input <glove_file> --output <w2v_file>
# 开始转换
glove2word2vec(glove_file, tmp_file)
# 加载转化后的文件
#Linux下训练的词向量,在Windows下使用,不加encoding='utf-8', unicode_errors='ignore'会报错
model = KeyedVectors.load_word2vec_format(tmp_file,encoding='utf-8', unicode_errors='ignore')
model.save("Wikiglove_word2vec.model")
word1 = u'阿鲁举'
if word1 in model:
    print (u"'%s'的词向量为: " % word1)
    print (model[word1])
else:
    print (u'单词不在字典中!')
次元縮小を示し7.TSNE
# encoding:utf8
import gensim
import numpy as np
from sklearn.manifold import TSNE
import matplotlib.pyplot as plt
from matplotlib.font_manager import *
from gensim.models  import KeyedVectors

plt.rcParams['font.sans-serif']=['SimHei'] #用来正常显示中文标签
plt.rcParams['axes.unicode_minus']=False #用来正常显示负号

w2v_modelName = 'Wikiglove_word2vec.model'

def loadVectors(w2v_modelName,word,top_n):
    model =  gensim.models.Word2Vec.load(w2v_modelName)
    if word in model:
        # print (u"'%s'的词向量为: " % word)
        # print (model[word])
        wordList=[]
        vectorList=[]
        result = model.most_similar(word,topn=top_n)
        print(u"\n与'%s'最相似的词为:\n" % word)
        for e in result:
            print ('%s\t\t相似度概率:%f' % (e[0], e[1]))
        for e in result:
            wordList.append(e[0])
            vectorList.append(model.wv[e[0]])
        wordList.append(word)
        vectorList.append(model.wv[word])
        return wordList,vectorList
    else:
        print (u'单词不在字典中!')
        return None


def draw_picture(wordList,vectorList,n_components=2):
    tsne = TSNE(n_components=n_components)
    x_tsne = tsne.fit_transform(vectorList)
    embedding = tsne.embedding_
    print(embedding.shape)
    plt.figure(figsize=(16,16))
    plt.scatter(embedding[:,0],embedding[:,1])
    for i in range(len(x_tsne)):
        x = x_tsne[i][0]
        y = x_tsne[i][1]
        plt.text(x,y,wordList[i])
    plt.show()

if __name__ == '__main__':
    wordList,vectorList = loadVectors(w2v_modelName,u'阿鲁',50)
    draw_picture(wordList,vectorList)
グローブのpython
参照GitHubのを比較的単純な、使用して、参照-pythonのミニマリストの使用を︱Glove訓練と単語ベクトルの使用を