UE4バージョン4.26に基づく
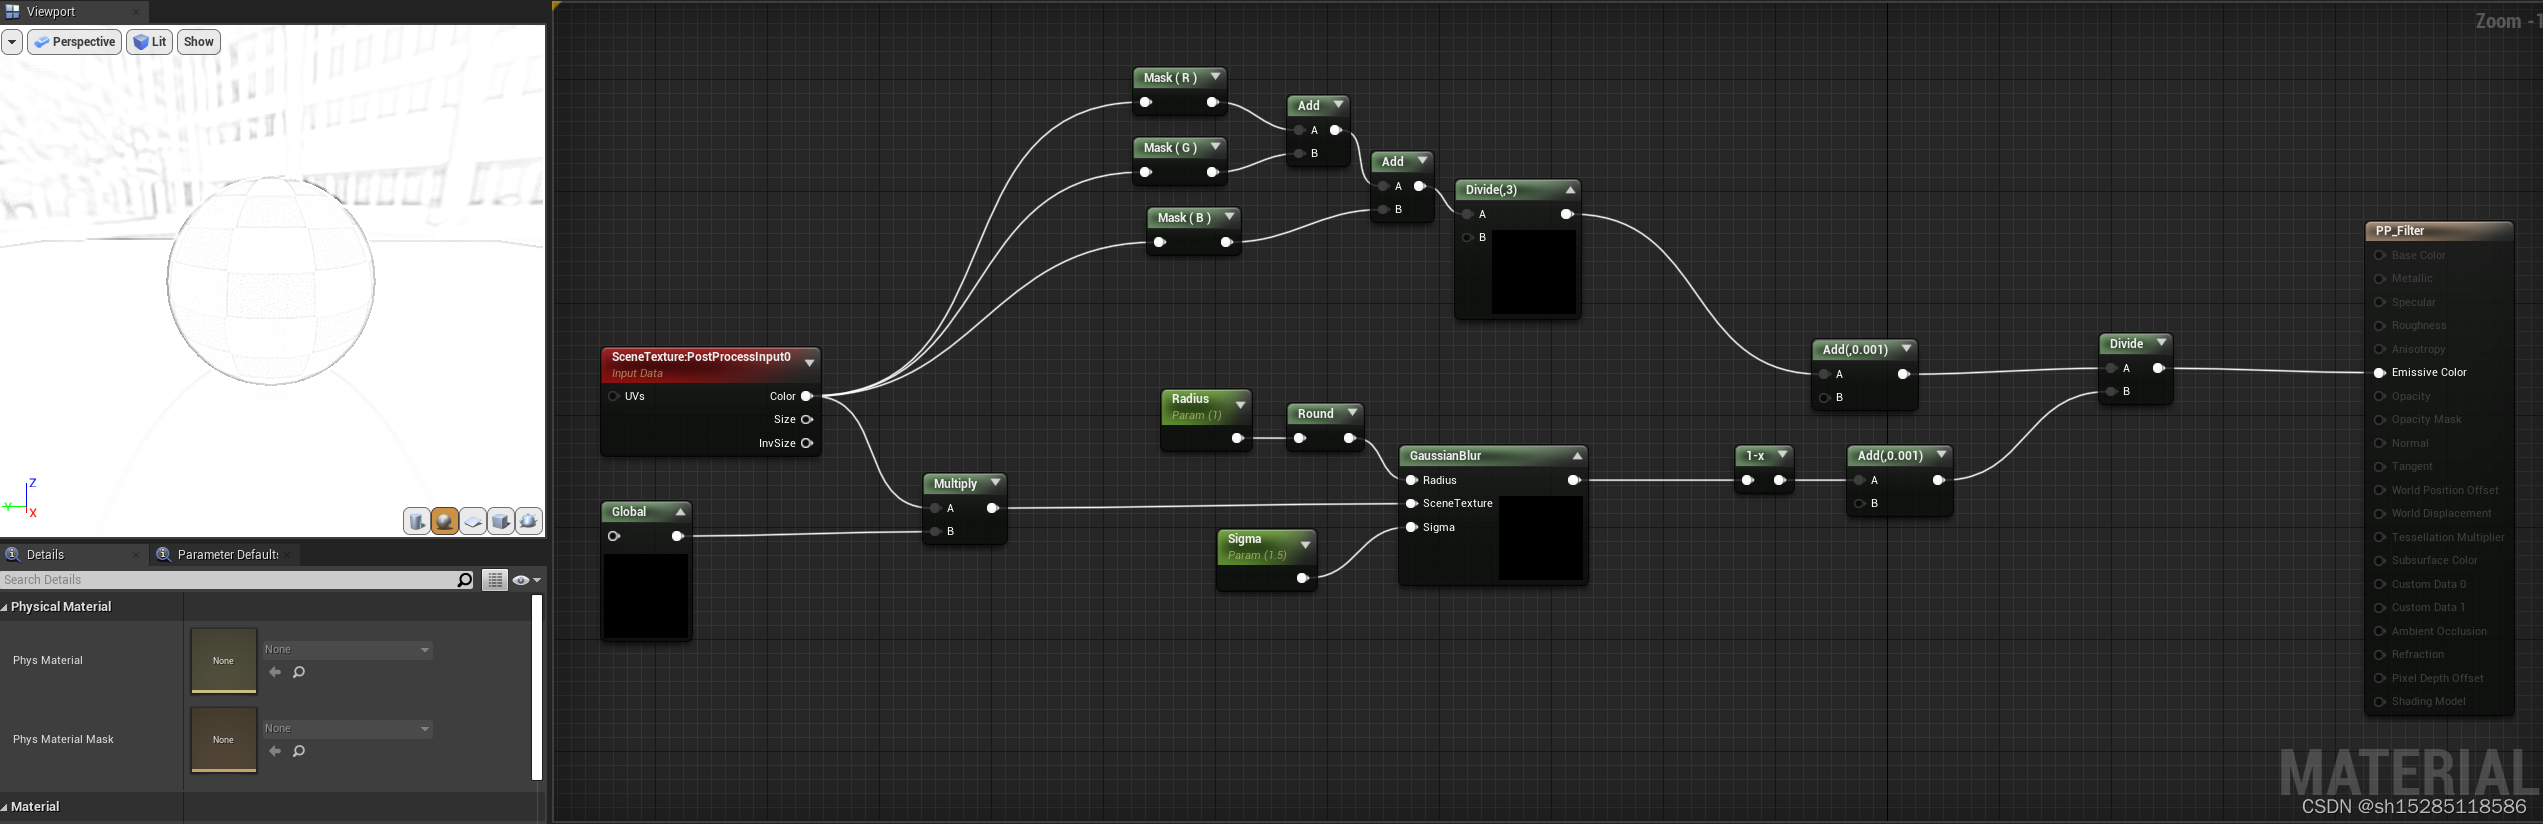
シェーダー構成:
書き込まれたシェーダーはエンジンのこの位置に配置され、マテリアルの設計図で直接使用できます。

スケッチアルゴリズム:
- 入力画像は、背景画像Bとしてグレースケールで処理されます。
- 背景画像B、反転B、およびガウスぼかしをコピーして、前景画像Aを取得します。
- 前景画像Aと背景画像Bは、カラー覆い焼きレイヤーのブレンドを行います。
アルゴリズムの実装:
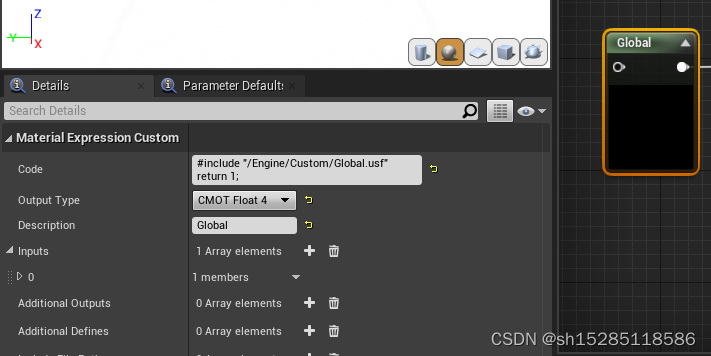

Global.usf
    return 1;
}

float4 GetKernelMeanAndVariance(float2 UV, float4 Range, float2x2 RotationMatrix)
{
    float2 TexelSize = View.BufferSizeAndInvSize.zw;
    float3 Mean = float3(0, 0, 0);
    float3 Variance = float3(0, 0, 0);
    float Samples = 0;

    for (int x = Range.x; x <= Range.y; x++)
    {
        for (int y = Range.z; y <= Range.w; y++)
        {
            float2 Offset = mul(float2(x, y) * TexelSize, RotationMatrix);
            float3 PixelColor = SceneTextureLookup(UV + Offset, 14, false).rgb;
            Mean += PixelColor;
            Variance += PixelColor * PixelColor;
            Samples++;
        }
    }

    Mean /= Samples;
    Variance = Variance / Samples - Mean * Mean;
    float TotalVariance = Variance.r + Variance.g + Variance.b;
    return float4(Mean.r, Mean.g, Mean.b, TotalVariance);
}

float Calculate1DGaussian(float x)
{
    return exp(-0.5 * pow(3.141 * (x), 2));
}

float Calculate2DGaussian(float x, float y, float sigma)
{
    float part1 = 1.0 / (2.0 * PI * sigma * sigma);
    float part2 = exp(-(x * x + y * y) / (2.0 * sigma * sigma));
    return part1 * part2;
}

float GetPixelAngle(float2 UV)
{
    float2 TexelSize = View.BufferSizeAndInvSize.zw;
    float GradientX = 0;
    float GradientY = 0;
    float SobelX[9] = {-1, -2, -1, 0, 0, 0, 1, 2, 1};
    float SobelY[9] = {-1, 0, 1, -2, 0, 2, -1, 0, 1};
    int i = 0;

    for (int x = -1; x <= 1; x++)
    {
        for (int y = -1; y <= 1; y++)
        {
            // 1
            float2 Offset = float2(x, y) * TexelSize;
            float3 PixelColor = SceneTextureLookup(UV + Offset, 14, false).rgb;
            float PixelValue = dot(PixelColor, float3(0.3,0.59,0.11));

            // 2
            GradientX += PixelValue * SobelX[i];
            GradientY += PixelValue * SobelY[i];
            i++;
        }
    }

    return atan(GradientY / GradientX);
GaussianBlur.usf
static const int SceneTextureId = 14;
float2 TexelSize = View.ViewSizeAndInvSize.zw;
float2 UV = GetDefaultSceneTextureUV(Parameters, SceneTextureId);
float3 PixelSum = float3(0, 0, 0);
float WeightSum = 0;

for (int x = -Radius; x <= Radius; x++)
{
    for (int y = -Radius; y <= Radius; y++)
    {
        float2 Offset = float2(x, y) * TexelSize;
        float3 PixelColor = SceneTextureLookup(UV + Offset, 14, 0).rgb;
        float AverageColor = (PixelColor.r + PixelColor.g + PixelColor.b)/3.0;
        PixelColor.r = 1-  AverageColor;
        PixelColor.g = 1- AverageColor;
        PixelColor.b = 1- AverageColor;
        // float Weight = Calculate1DGaussian(x / Radius) * Calculate1DGaussian(y / Radius);
        float Weight = Calculate2DGaussian(x, y, Sigma);
        PixelSum += PixelColor * Weight;
        WeightSum += Weight;
    }
}
return PixelSum / WeightSum;
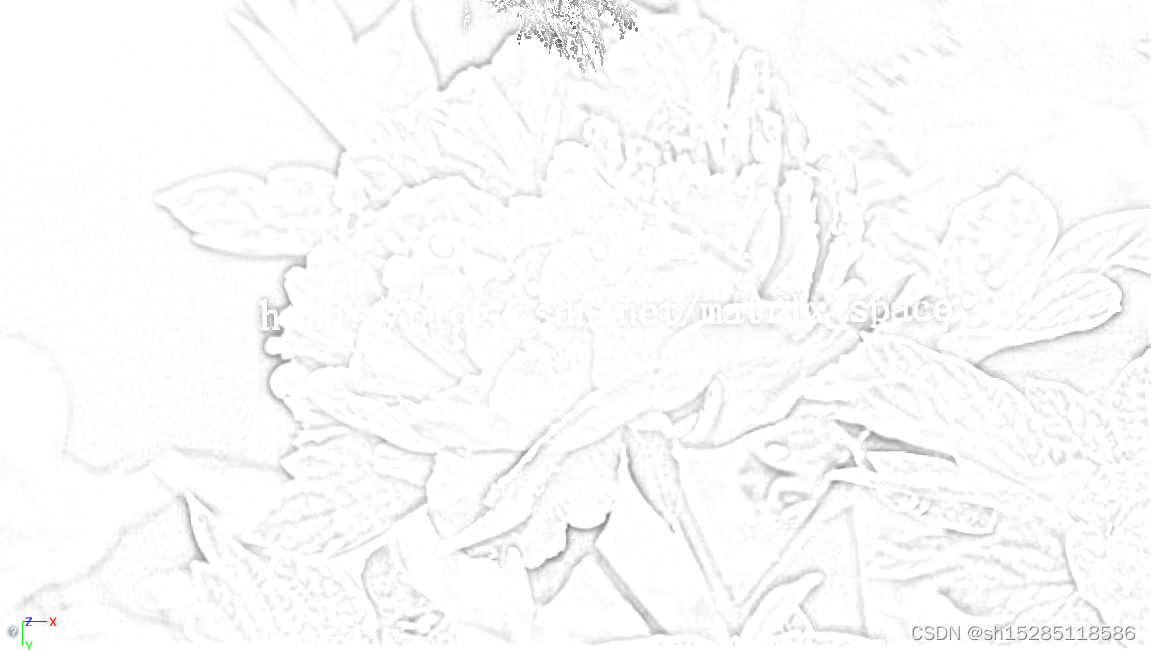
スケッチ効果:
参考記事:
![]() PSレイヤーブレンディングアルゴリズムの1つ(不透明度、乗算、カラーバーン、カラー覆い焼き)PSフィルター-スケッチアルゴリズム(1)
PSレイヤーブレンディングアルゴリズムの1つ(不透明度、乗算、カラーバーン、カラー覆い焼き)PSフィルター-スケッチアルゴリズム(1)この記事では、Pythonを使用してPSフィルターにスケッチ効果を実装します。特定のアルゴリズムの原則と効果については、前のブログを参照してください:http://blog.csdn.net/matrix_space/article / details / 38687427from skimage import img_as_floatimport matplotlib.pyplot as pltfrom skimage import iofrom skim https://chenjunkai。 blog.csdn.net/article/details/78345460 PSフィルター-スケッチアルゴリズム(2)_Matrix_11のブログ-CSDN Blog_スケッチ効果アルゴリズムは、別のアルゴリズムを使用してスケッチ効果の生成を完了します。https://chenjunkai.blog.csdn.net/article/details/38709605ガウスぼかしアルゴリズム-RuanYifengのネットワークログ
![]() http://www.ruanyifeng.com/blog/2012/11/gaussian_blur.htmlガウスぼかしとPythonコードの実装 https://blog.csdn.net/jkhere/article/details/9464701
http://www.ruanyifeng.com/blog/2012/11/gaussian_blur.htmlガウスぼかしとPythonコードの実装 https://blog.csdn.net/jkhere/article/details/9464701