1. Centosをシャットダウンし、仮想マシン設定、ハードディスクの編集を選択し、ユーティリティで
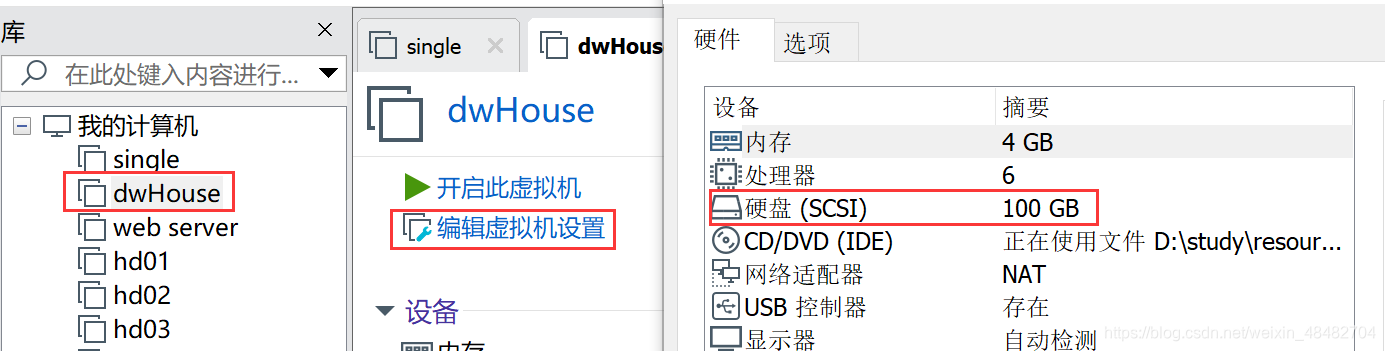
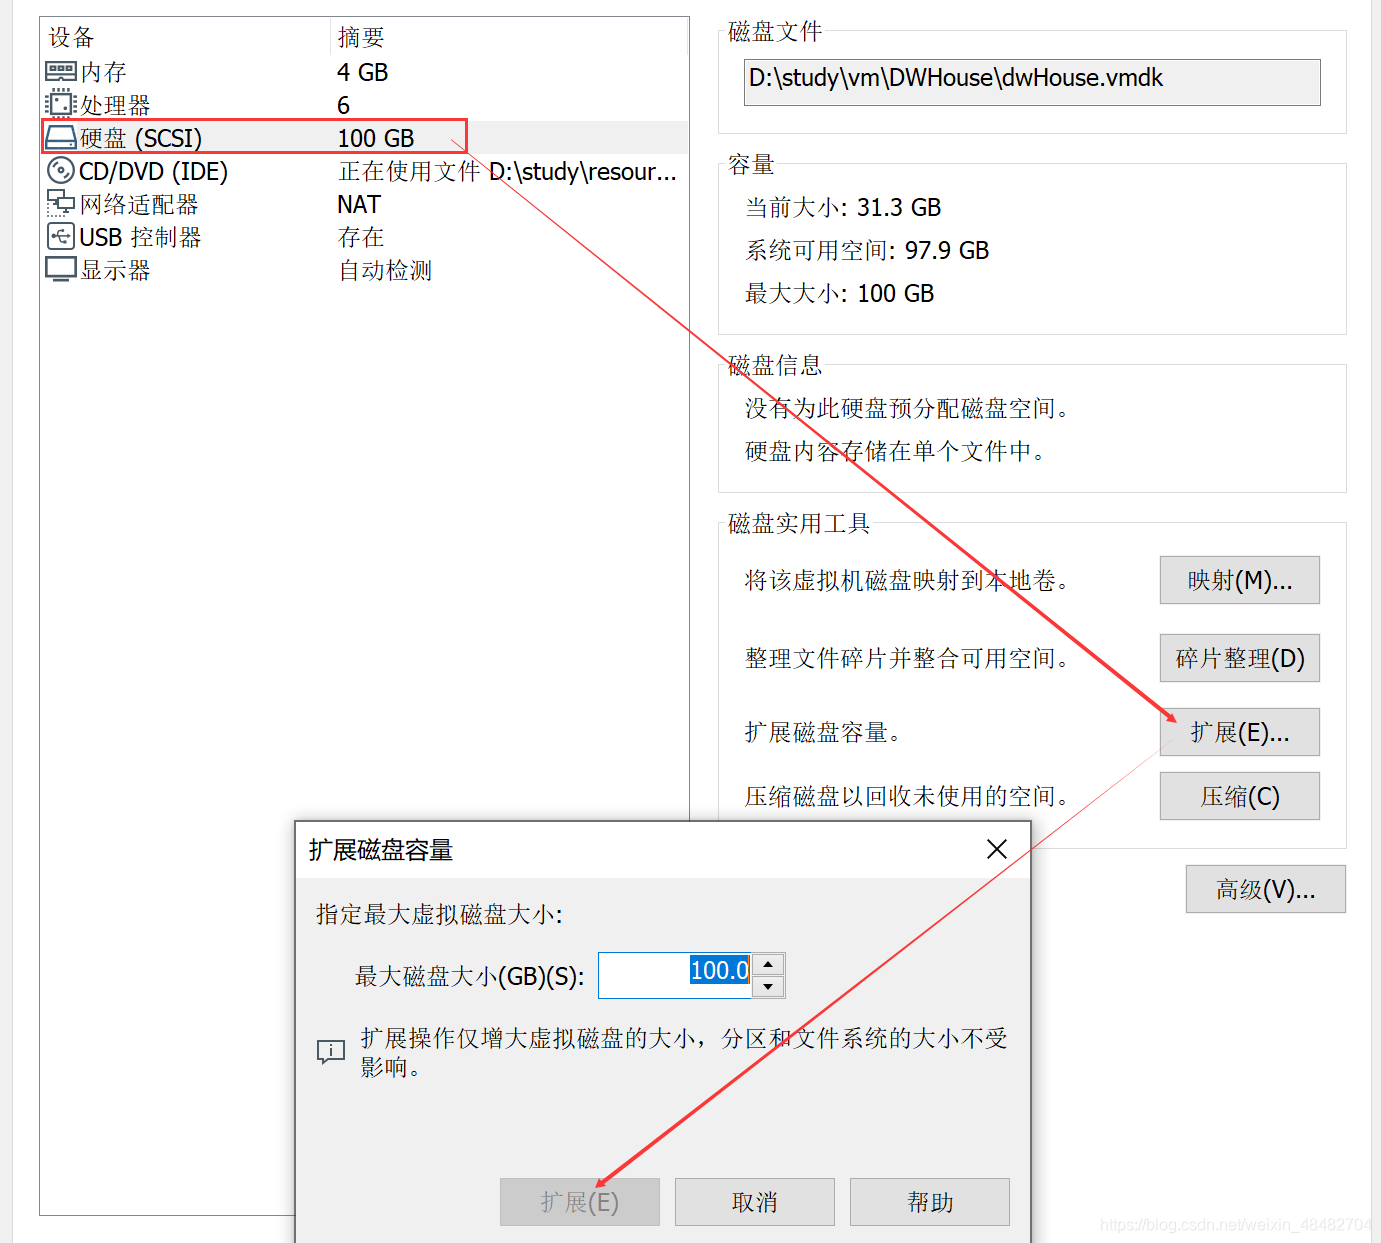
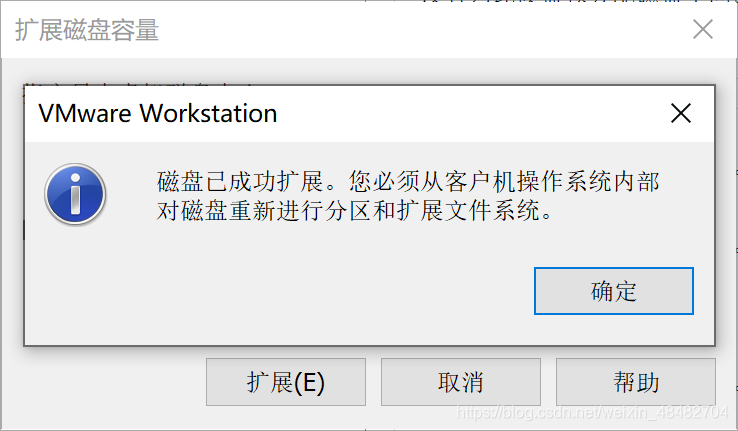
[拡張]を選択して拡張機能をクリックすると、VMwareはディスクが正常に拡張されたことを示すプロンプトを表示します。ディスクを再パーティション化し、ゲストオペレーティングシステム内からファイルシステムを拡張する必要があります。つまり、ここで拡張されたディスク領域は、オペレーティングシステムでまだ使用できず、まだ有効になっていないため、オペレーティングシステムで設定した後でのみ使用できます。
2.ゲストオペレーティングシステムCentosを起動し、ディスクの状況を確認して
、指示を入力します
[root@dw ~]# fdisk -l

Disk /dev/sda: 107.4 GB, 107374182400 bytes, 209715200 sectors
Units = sectors of 1 * 512 = 512 bytes
Sector size (logical/physical): 512 bytes / 512 bytes
I/O size (minimum/optimal): 512 bytes / 512 bytes
Disk label type: dos
Disk identifier: 0x000b0b8a

   Device Boot      Start         End      Blocks   Id  System
/dev/sda1   *        2048     2099199     1048576   83  Linux
/dev/sda2         2099200    83886079    40893440   8e  Linux LVM

Disk /dev/mapper/centos-root: 37.7 GB, 37706792960 bytes, 73646080 sectors
Units = sectors of 1 * 512 = 512 bytes
Sector size (logical/physical): 512 bytes / 512 bytes
I/O size (minimum/optimal): 512 bytes / 512 bytes


Disk /dev/mapper/centos-swap: 4160 MB, 4160749568 bytes, 8126464 sectors
Units = sectors of 1 * 512 = 512 bytes
Sector size (logical/physical): 512 bytes / 512 bytes
I/O size (minimum/optimal): 512 bytes / 512 bytes
その中で、現在のパーティションの状況は次のとおりです。
   Device Boot      Start         End      Blocks   Id  System
/dev/sda1   *        2048     2099199     1048576   83  Linux
/dev/sda2         2099200    83886079    40893440   8e  Linux LVM
3.パーティションsda3
入力コマンドを作成します
[root@dw ~]# fdisk /dev/sda
次に、コマンドプロンプトに従ってパーティションを作成します。詳細については、#に続く注を参照してください。
Welcome to fdisk (util-linux 2.23.2).

Changes will remain in memory only, until you decide to write them.
Be careful before using the write command.


Command (m for help): n    # 输入 n 表示创建新分区
Partition type:
   p   primary (2 primary, 0 extended, 2 free)
   e   extended
Select (default p): p
Partition number (3,4, default 3): 3    # 输入 3 表示sda3,因为前面已经有两个了
First sector (83886080-209715199, default 83886080):    # 回车,按默认值
Using default value 83886080
Last sector, +sectors or +size{

    K,M,G} (83886080-209715199, default 209715199):    # 回车,按默认值
Using default value 209715199
Partition 3 of type Linux and of size 60 GiB is set

Command (m for help): w    # 输入 w 保存退出
The partition table has been altered!

Calling ioctl() to re-read partition table.

WARNING: Re-reading the partition table failed with error 16: Device or resource busy.
The kernel still uses the old table. The new table will be used at
the next reboot or after you run partprobe(8) or kpartx(8)
Syncing disks.
パーティションをもう一度確認してください
[root@dw ~]# fdisk -l

Disk /dev/sda: 107.4 GB, 107374182400 bytes, 209715200 sectors
Units = sectors of 1 * 512 = 512 bytes
Sector size (logical/physical): 512 bytes / 512 bytes
I/O size (minimum/optimal): 512 bytes / 512 bytes
Disk label type: dos
Disk identifier: 0x000b0b8a

   Device Boot      Start         End      Blocks   Id  System
/dev/sda1   *        2048     2099199     1048576   83  Linux
/dev/sda2         2099200    83886079    40893440   8e  Linux LVM
/dev/sda3        83886080   209715199    62914560   83  Linux

Disk /dev/mapper/centos-root: 37.7 GB, 37706792960 bytes, 73646080 sectors
Units = sectors of 1 * 512 = 512 bytes
Sector size (logical/physical): 512 bytes / 512 bytes
I/O size (minimum/optimal): 512 bytes / 512 bytes


Disk /dev/mapper/centos-swap: 4160 MB, 4160749568 bytes, 8126464 sectors
Units = sectors of 1 * 512 = 512 bytes
Sector size (logical/physical): 512 bytes / 512 bytes
I/O size (minimum/optimal): 512 bytes / 512 bytes
その中で、パーティションは3に変更されましたが、今回はマウントされておらず、まだ使用できません。
   Device Boot      Start         End      Blocks   Id  System
/dev/sda1   *        2048     2099199     1048576   83  Linux
/dev/sda2         2099200    83886079    40893440   8e  Linux LVM
/dev/sda3        83886080   209715199    62914560   83  Linux
4.オペレーティングシステムを再起動します
[root@dw ~]# reboot
5.新しいパーティションをext3としてフォーマットします
入力コマンド
[root@dw ~]# mkfs -t ext3 /dev/sda3
結果は
mke2fs 1.42.9 (28-Dec-2013)
Filesystem label=
OS type: Linux
Block size=4096 (log=2)
Fragment size=4096 (log=2)
Stride=0 blocks, Stripe width=0 blocks
3932160 inodes, 15728640 blocks
786432 blocks (5.00%) reserved for the super user
First data block=0
Maximum filesystem blocks=4294967296
480 block groups
32768 blocks per group, 32768 fragments per group
8192 inodes per group
Superblock backups stored on blocks:
        32768, 98304, 163840, 229376, 294912, 819200, 884736, 1605632, 2654208,
        4096000, 7962624, 11239424

Allocating group tables: done
Writing inode tables: done
Creating journal (32768 blocks): done
Writing superblocks and filesystem accounting information: done
6.物理ハードディスクパーティションを物理ボリュームとして初期化し、LVMで使用できるようにするには、命令を入力します
[root@dw ~]# lvs
  LV   VG     Attr       LSize   Pool Origin Data%  Meta%  Move Log Cpy%Sync Convert
  root centos -wi-ao---- <35.12g
  swap centos -wi-ao----  <3.88g
[root@dw ~]# pvcreate /dev/sda3
WARNING: ext3 signature detected on /dev/sda3 at offset 1080. Wipe it? [y/n]: y
  Wiping ext3 signature on /dev/sda3.
  Physical volume "/dev/sda3" successfully created.
7.ボリュームグループに物理ボリュームを追加して、ボリュームグループの容量を増やします
lvmグループ名を表示し、コマンドdf-hを入力します
[root@dw ~]# df -h
Filesystem               Size  Used Avail Use% Mounted on
devtmpfs                 1.9G     0  1.9G   0% /dev
tmpfs                    1.9G     0  1.9G   0% /dev/shm
tmpfs                    1.9G   12M  1.9G   1% /run
tmpfs                    1.9G     0  1.9G   0% /sys/fs/cgroup
/dev/mapper/centos-root   36G   18G   18G  49% /
/dev/sda1               1014M  149M  866M  15% /boot
tmpfs                    378M     0  378M   0% /run/user/0
その中で、centos-rootはルートが配置されているグループの名前です
ボリュームグループの容量を増やすための指示を入力します
[root@dw ~]# vgextend centos /dev/sda3
  Volume group "centos" successfully extended
8.拡張可能なスペースのサイズを確認します
コマンドを入力して、LNMボリュームグループのメタデータ情報を表示します
[root@dw ~]# vgdisplay
  --- Volume group ---
  VG Name               centos
  System ID
  Format                lvm2
  Metadata Areas        2
  Metadata Sequence No  4
  VG Access             read/write
  VG Status             resizable
  MAX LV                0
  Cur LV                2
  Open LV               2
  Max PV                0
  Cur PV                2
  Act PV                2
  VG Size               98.99 GiB
  PE Size               4.00 MiB
  Total PE              25342
  Alloc PE / Size       9982 / 38.99 GiB
  Free  PE / Size       15360 / 60.00 GiB
  VG UUID               zJfuos-4OrR-b2OS-g589-oj2P-Jhqe-laP5QC
その中で、Free PE / Sizeは、最大60.00Gの割り当てに使用できる空き領域であり、拡張時にこの値よりも少ない入力になります。
9、ディスク容量を拡張します
[root@dw ~]# lvextend -L+58G /dev/mapper/centos-root /dev/sda3
迅速な拡張の成功
  Size of logical volume centos/root changed from <35.12 GiB (8990 extents) to <93.12 GiB (23838 extents).
  Logical volume centos/root successfully resized.
10. e2fsckコマンドを使用して、ファイルシステムエラーを確認します
[root@dw ~]# e2fsck -a /dev/mapper/centos-root
/dev/mapper/centos-root is mounted.
e2fsck: Cannot continue, aborting.
11. xfs形式のファイル拡張では、xfs_growfsコマンドを使用して、アンロードされた「ext2 / ext3」ファイルシステムのサイズを拡大または縮小する必要があります。
[root@dw ~]# df -hT
Filesystem              Type      Size  Used Avail Use% Mounted on
devtmpfs                devtmpfs  1.9G     0  1.9G   0% /dev
tmpfs                   tmpfs     1.9G     0  1.9G   0% /dev/shm
tmpfs                   tmpfs     1.9G   12M  1.9G   1% /run
tmpfs                   tmpfs     1.9G     0  1.9G   0% /sys/fs/cgroup
/dev/mapper/centos-root xfs        94G   18G   76G  19% /
/dev/sda1               xfs      1014M  149M  866M  15% /boot
tmpfs                   tmpfs     378M     0  378M   0% /run/user/0
[root@dw ~]# xfs_growfs /dev/mapper/centos-root
meta-data=/dev/mapper/centos-root isize=512    agcount=4, agsize=2301440 blks
         =                       sectsz=512   attr=2, projid32bit=1
         =                       crc=1        finobt=0 spinodes=0
data     =                       bsize=4096   blocks=9205760, imaxpct=25
         =                       sunit=0      swidth=0 blks
naming   =version 2              bsize=4096   ascii-ci=0 ftype=1
log      =internal               bsize=4096   blocks=4495, version=2
         =                       sectsz=512   sunit=0 blks, lazy-count=1
realtime =none                   extsz=4096   blocks=0, rtextents=0
data blocks changed from 9205760 to 24410112
12.スペースを拡張した後の結果を表示します
[root@dw ~]# df -h
Filesystem               Size  Used Avail Use% Mounted on
devtmpfs                 1.9G     0  1.9G   0% /dev
tmpfs                    1.9G     0  1.9G   0% /dev/shm
tmpfs                    1.9G   12M  1.9G   1% /run
tmpfs                    1.9G     0  1.9G   0% /sys/fs/cgroup
/dev/mapper/centos-root   94G   18G   76G  19% /
/dev/sda1               1014M  149M  866M  15% /boot
tmpfs                    378M     0  378M   0% /run/user/0
ご覧のとおり、ルートディレクトリのディスク領域が拡張され、完了です。