Table of contents
Basic configuration of Ubuntu
Internet connection
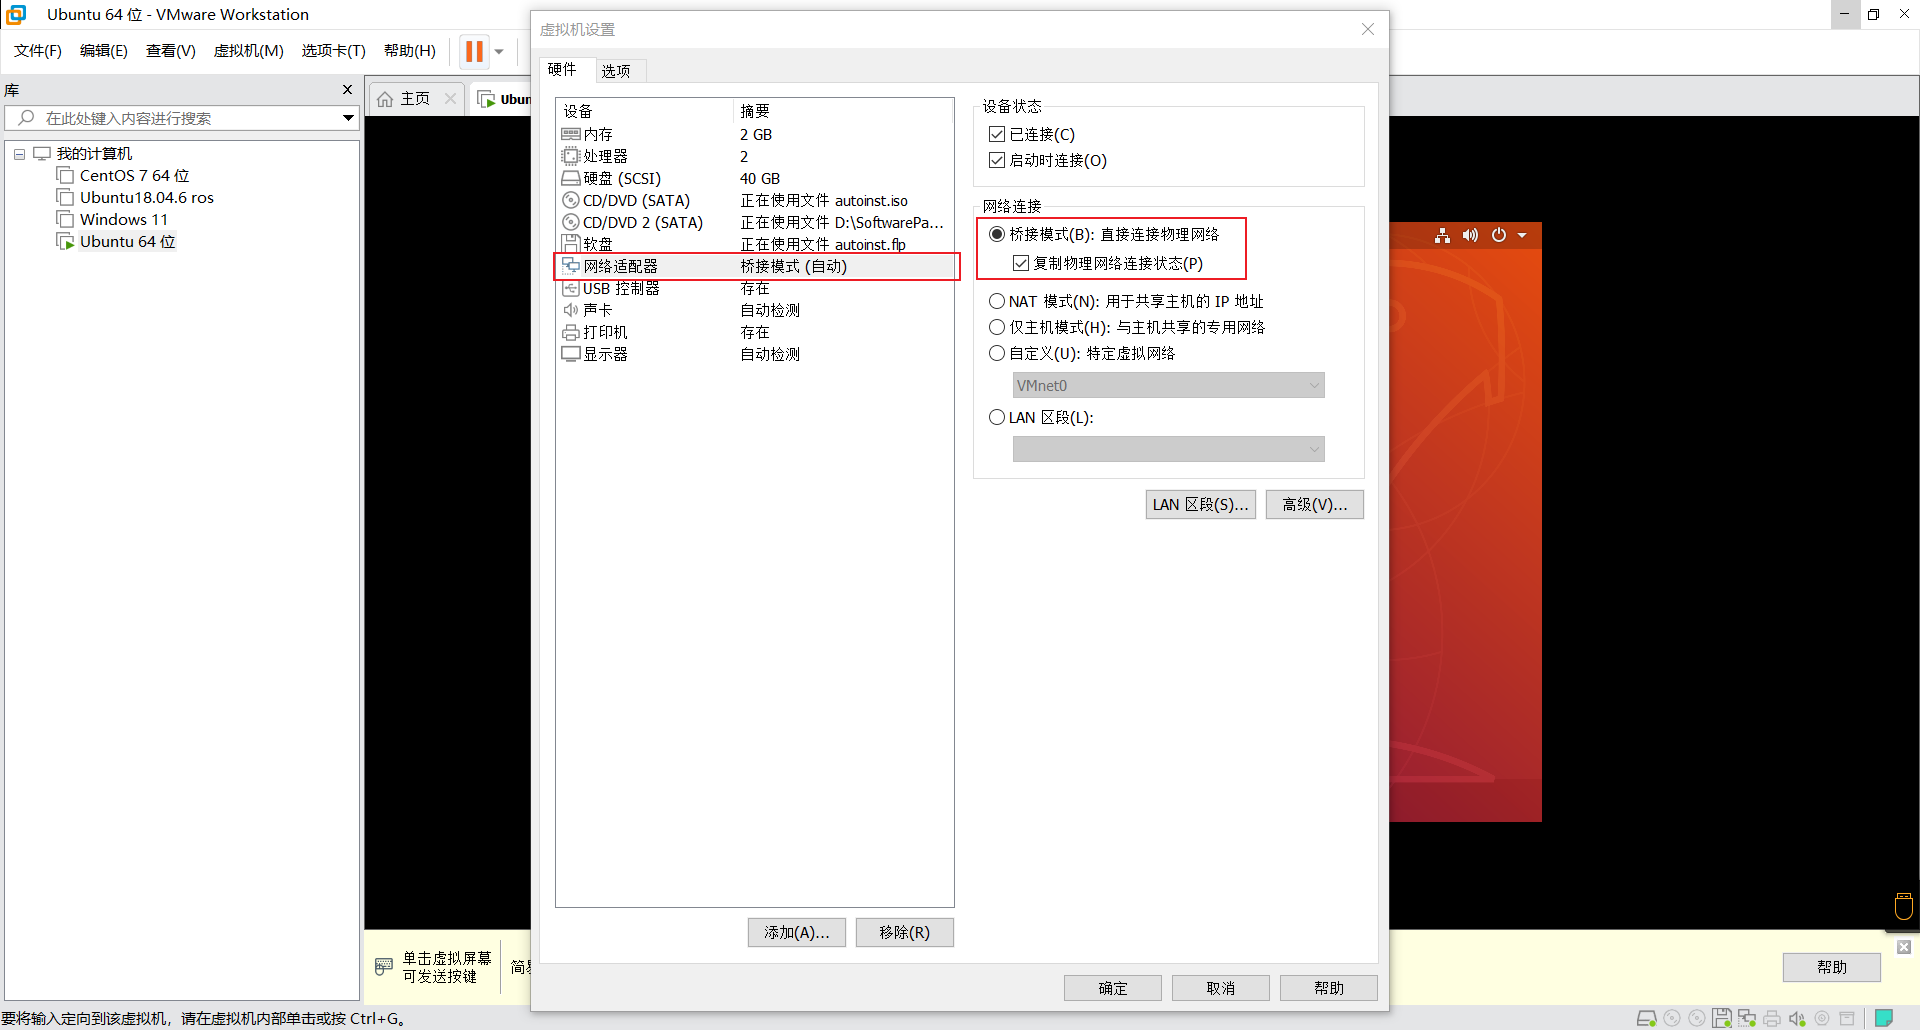
Find the virtual machine in the menu bar above, click Settings, then select Network Adapter, select Bridge Mode in Network Connection, check Copy Physical Network Connection Status, and the Ubuntu system we installed will have a network.
Solution to the problem of Ubuntu network icon suddenly disappearing
Basically, if the network icon disappears, there is a problem with Ubuntu's NetworkManager.
-
Enter root
sudo su
-
Update NetworkManager configuration
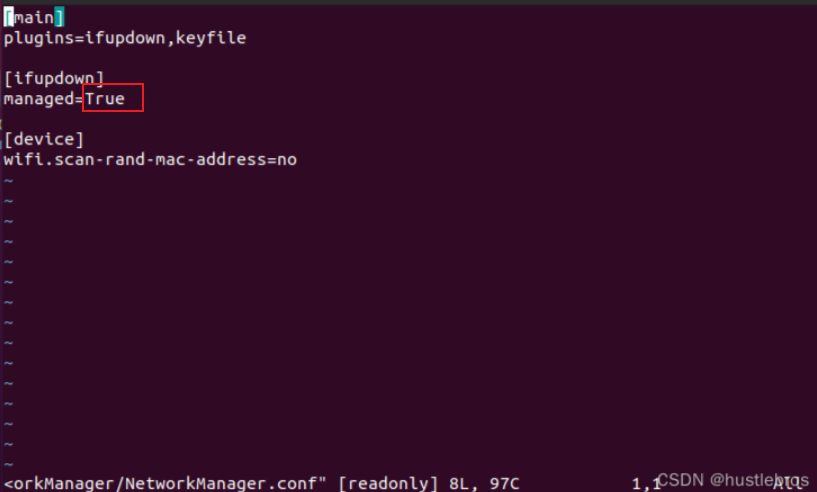
vim /etc/NetworkManager/NetworkManager.conf
The configuration file that needs to be modified is as follows. Just change flase to True. If it is True, there is no need to modify it. The modification is as shown below;
-
Delete the original configuration and restart the service
service NetworkManager stop
rm /var/lib/NetworkManager/NetworkManager.state
service NetworkManager start
After completing the above operations, the Ubuntu network icon that originally disappeared will suddenly appear again!
Finally, it is recommended to restart Ubuntu. This can solve most problems. Don’t ask why!
Of course, this may not be the solution for everyone. If this method cannot solve your problem, you can refer to other methods.
Change source
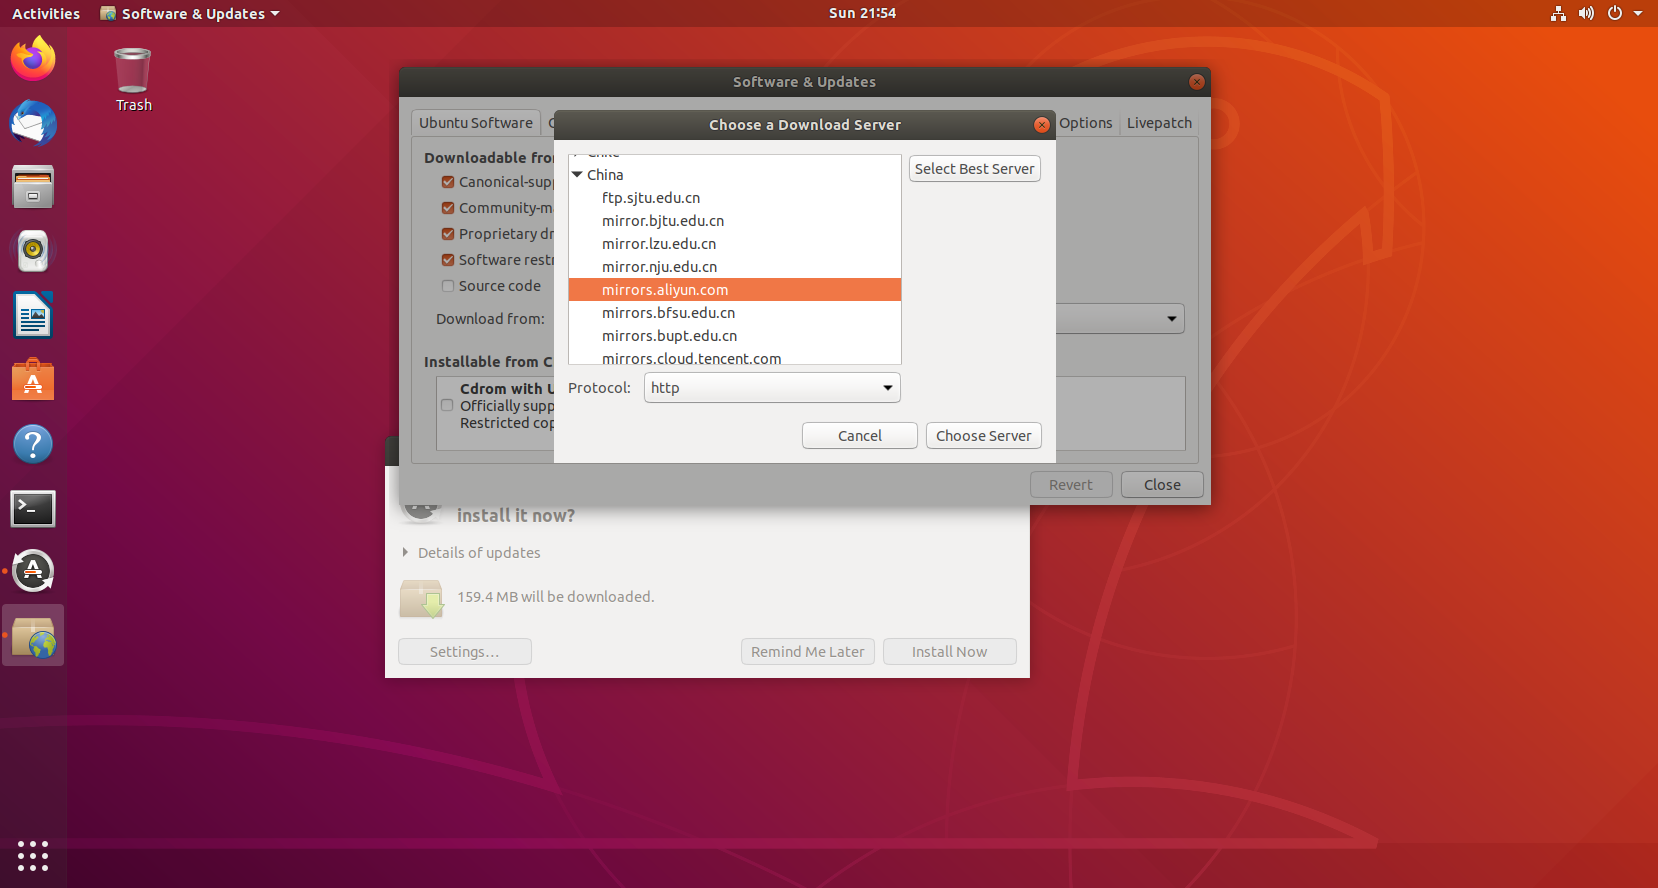
We find 软件与更新(Software Updater)--Settings--Ubuntu Software--Download form.
Then select: Other (Other...) Scroll up, select China (china) to open, select the source you want here, I chose Alibaba Cloud,
After selecting, click Choose Server, then you will be asked to enter the password, and finally click Close to complete the source change.
Install Vmware Tools
Method 1: Online installation
When the virtual machine has a network, it is very simple to install Vmware Tools. You can install it directly online.
-
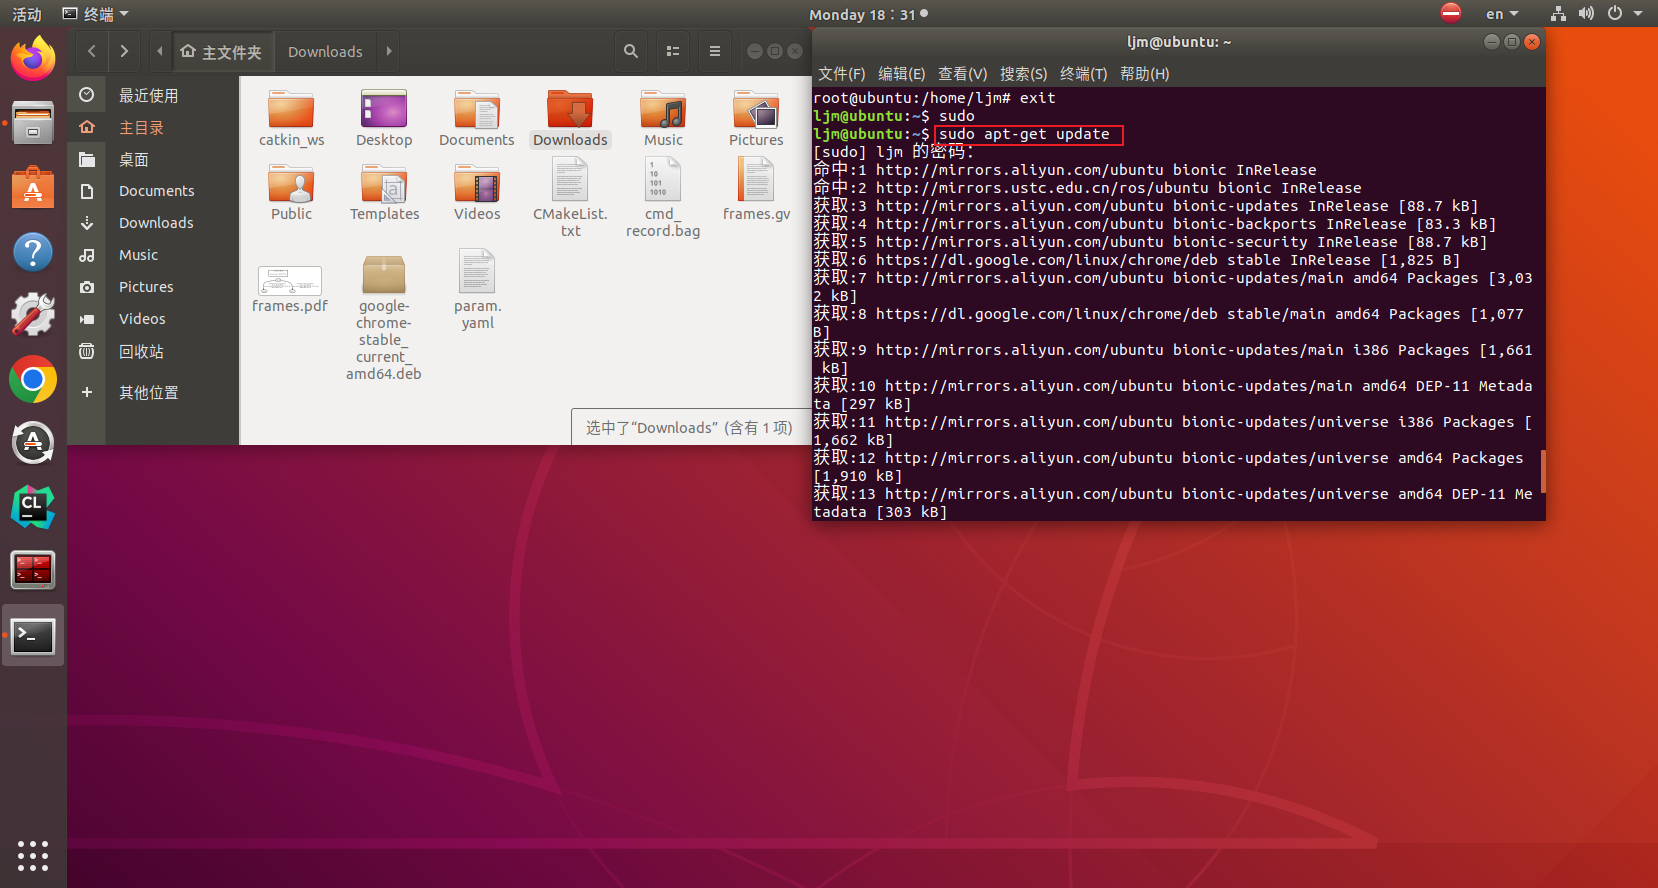
Update software source list
sudo apt-get update
-
Update software
sudo apt-get upgrade
-
Download and install open-vm-tools-desktop
sudo apt-get install open-vm-tools-desktop -y
(-y means to respond yes in scenarios that require confirmation, without manual confirmation)
Method 2: Manual installation
When there is no network, manual installation is the best option
After we installed the Ubuntu system and started it, we found that the window was not full screen. At this time, we need to install the VMware Tools tool.
VMware ships with an image ISO file that contains VMware Tools installers for all supported guest operating systems. This file is located on the host machine and can be installed on the virtual machine system from the VMware GUI menu. Once mounted, you can begin installing VMware Tools on the guest system.
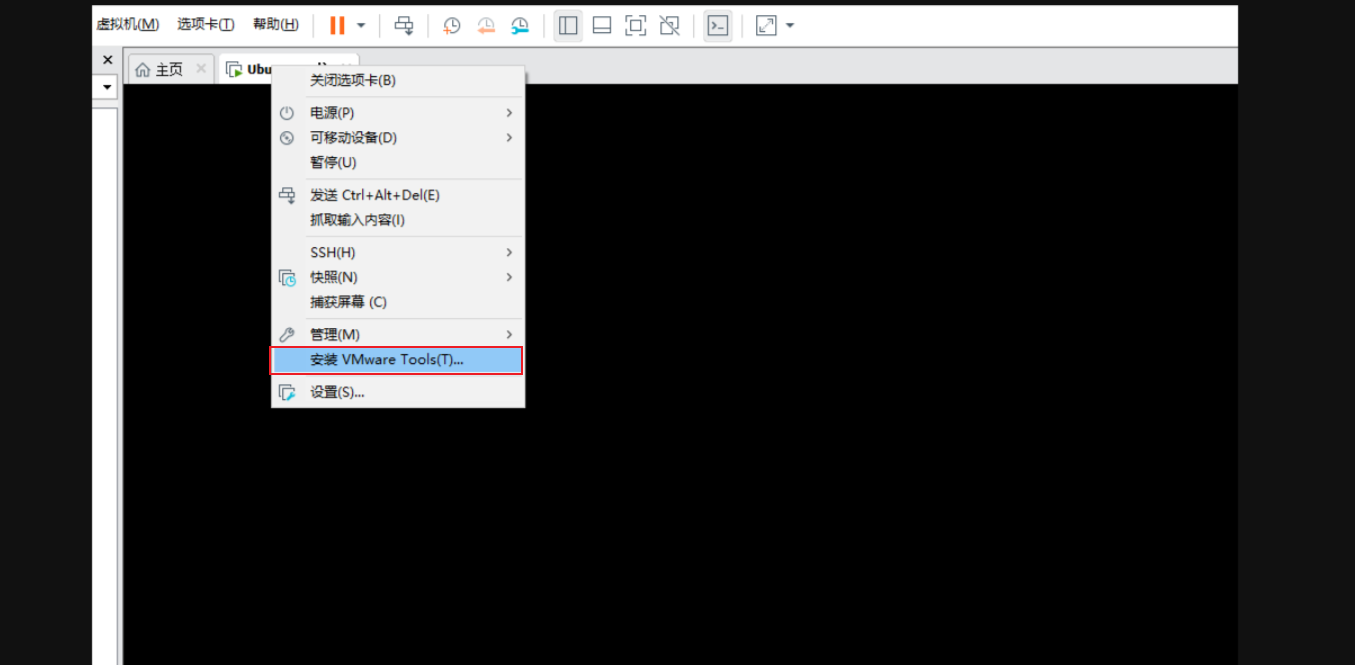
Click on the Ubuntu system we installed, right-click and check the VMware-Tool button status.
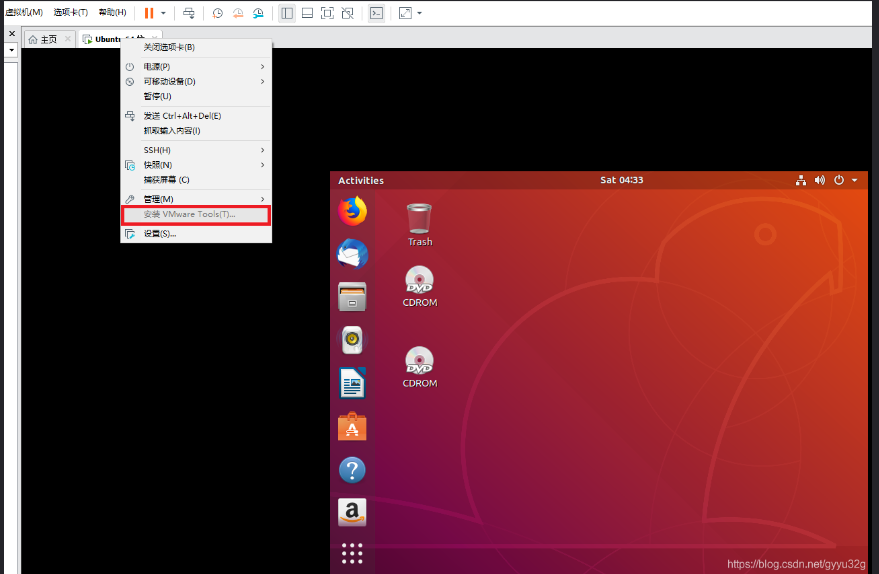
If like mine, VMware-Tools is grayed out, the reason is that your VMware does not recognize your VMware Tools installation program, then first configure CD/DVD (SATA), CD/DVD2 (SATA), and floppy disk For automatic detection, try to let VMware recognize the VMware Tools installer itself.
Here's how to do it:
-
Shut down first;
-
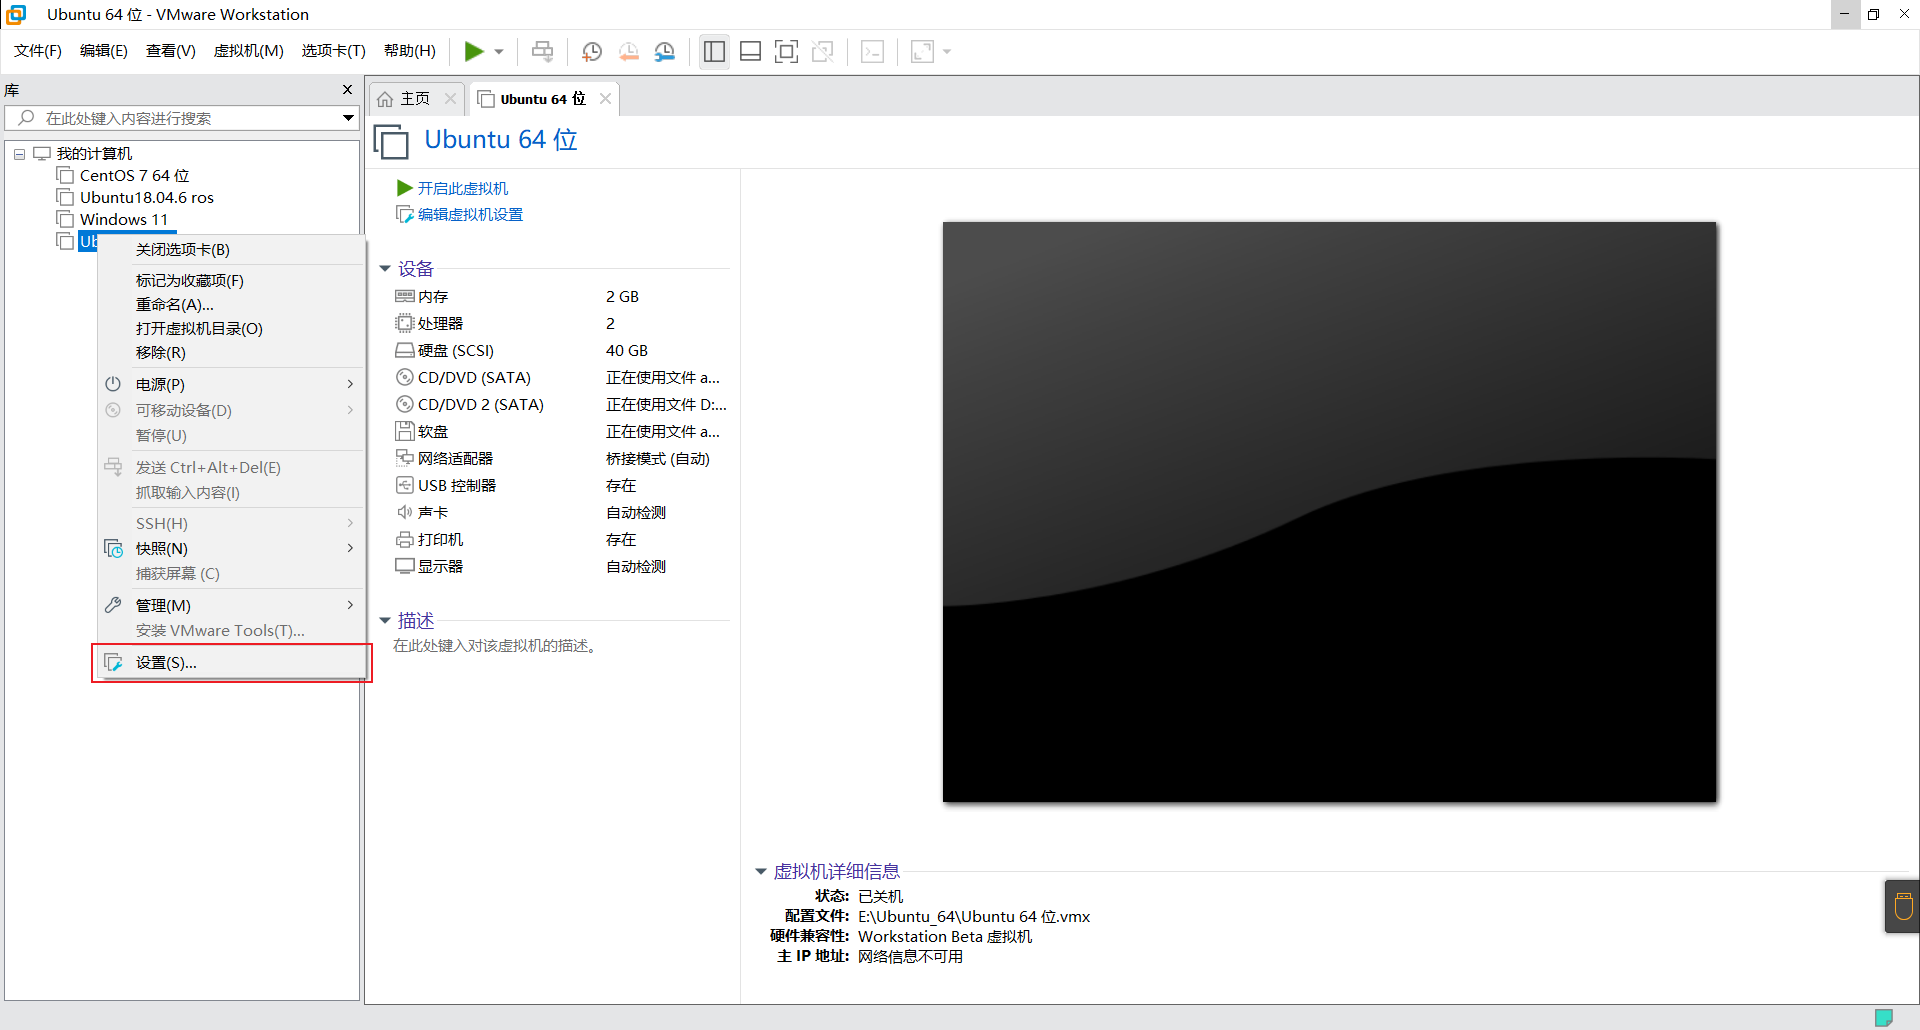
After shutting down, bring up the picture below, and then click Settings;
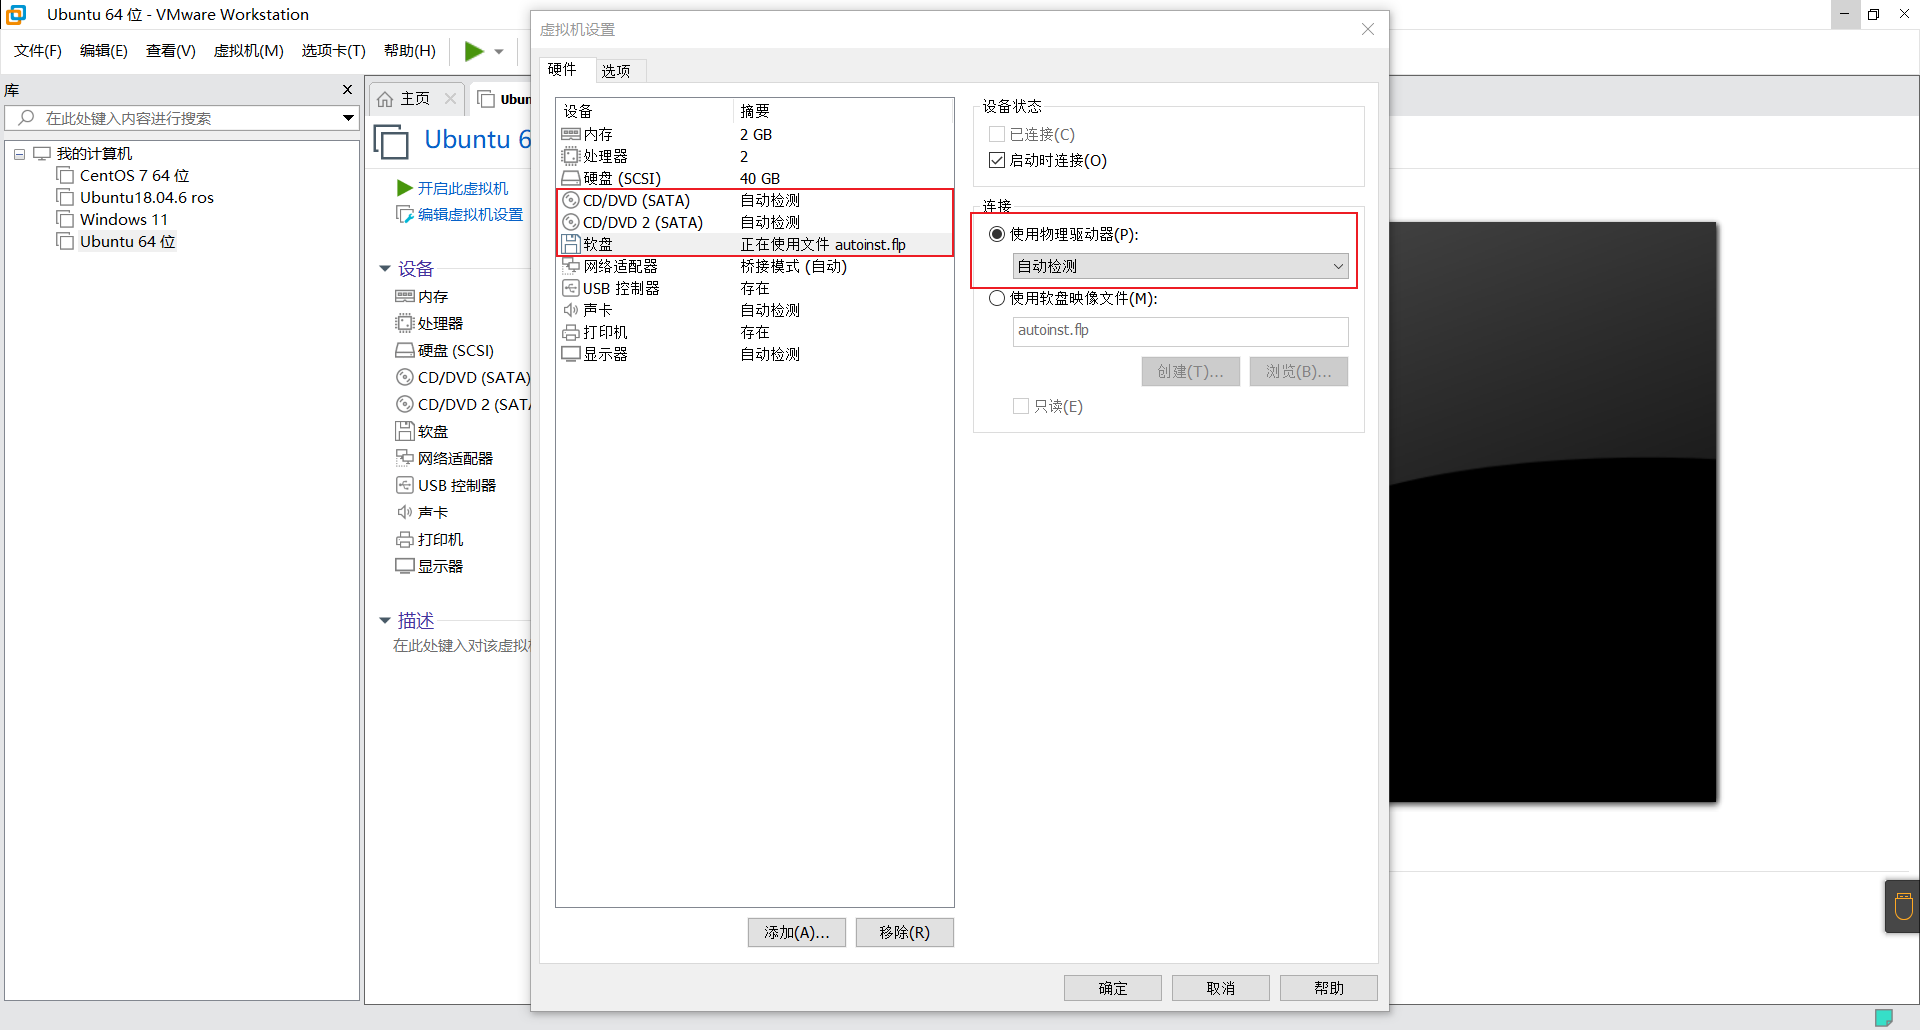
Then click to check the following three items in turn. If the right side of these three items is not "Automatic Detection", then you need to set all three items to "Automatic Detection". The result of the change is as follows.
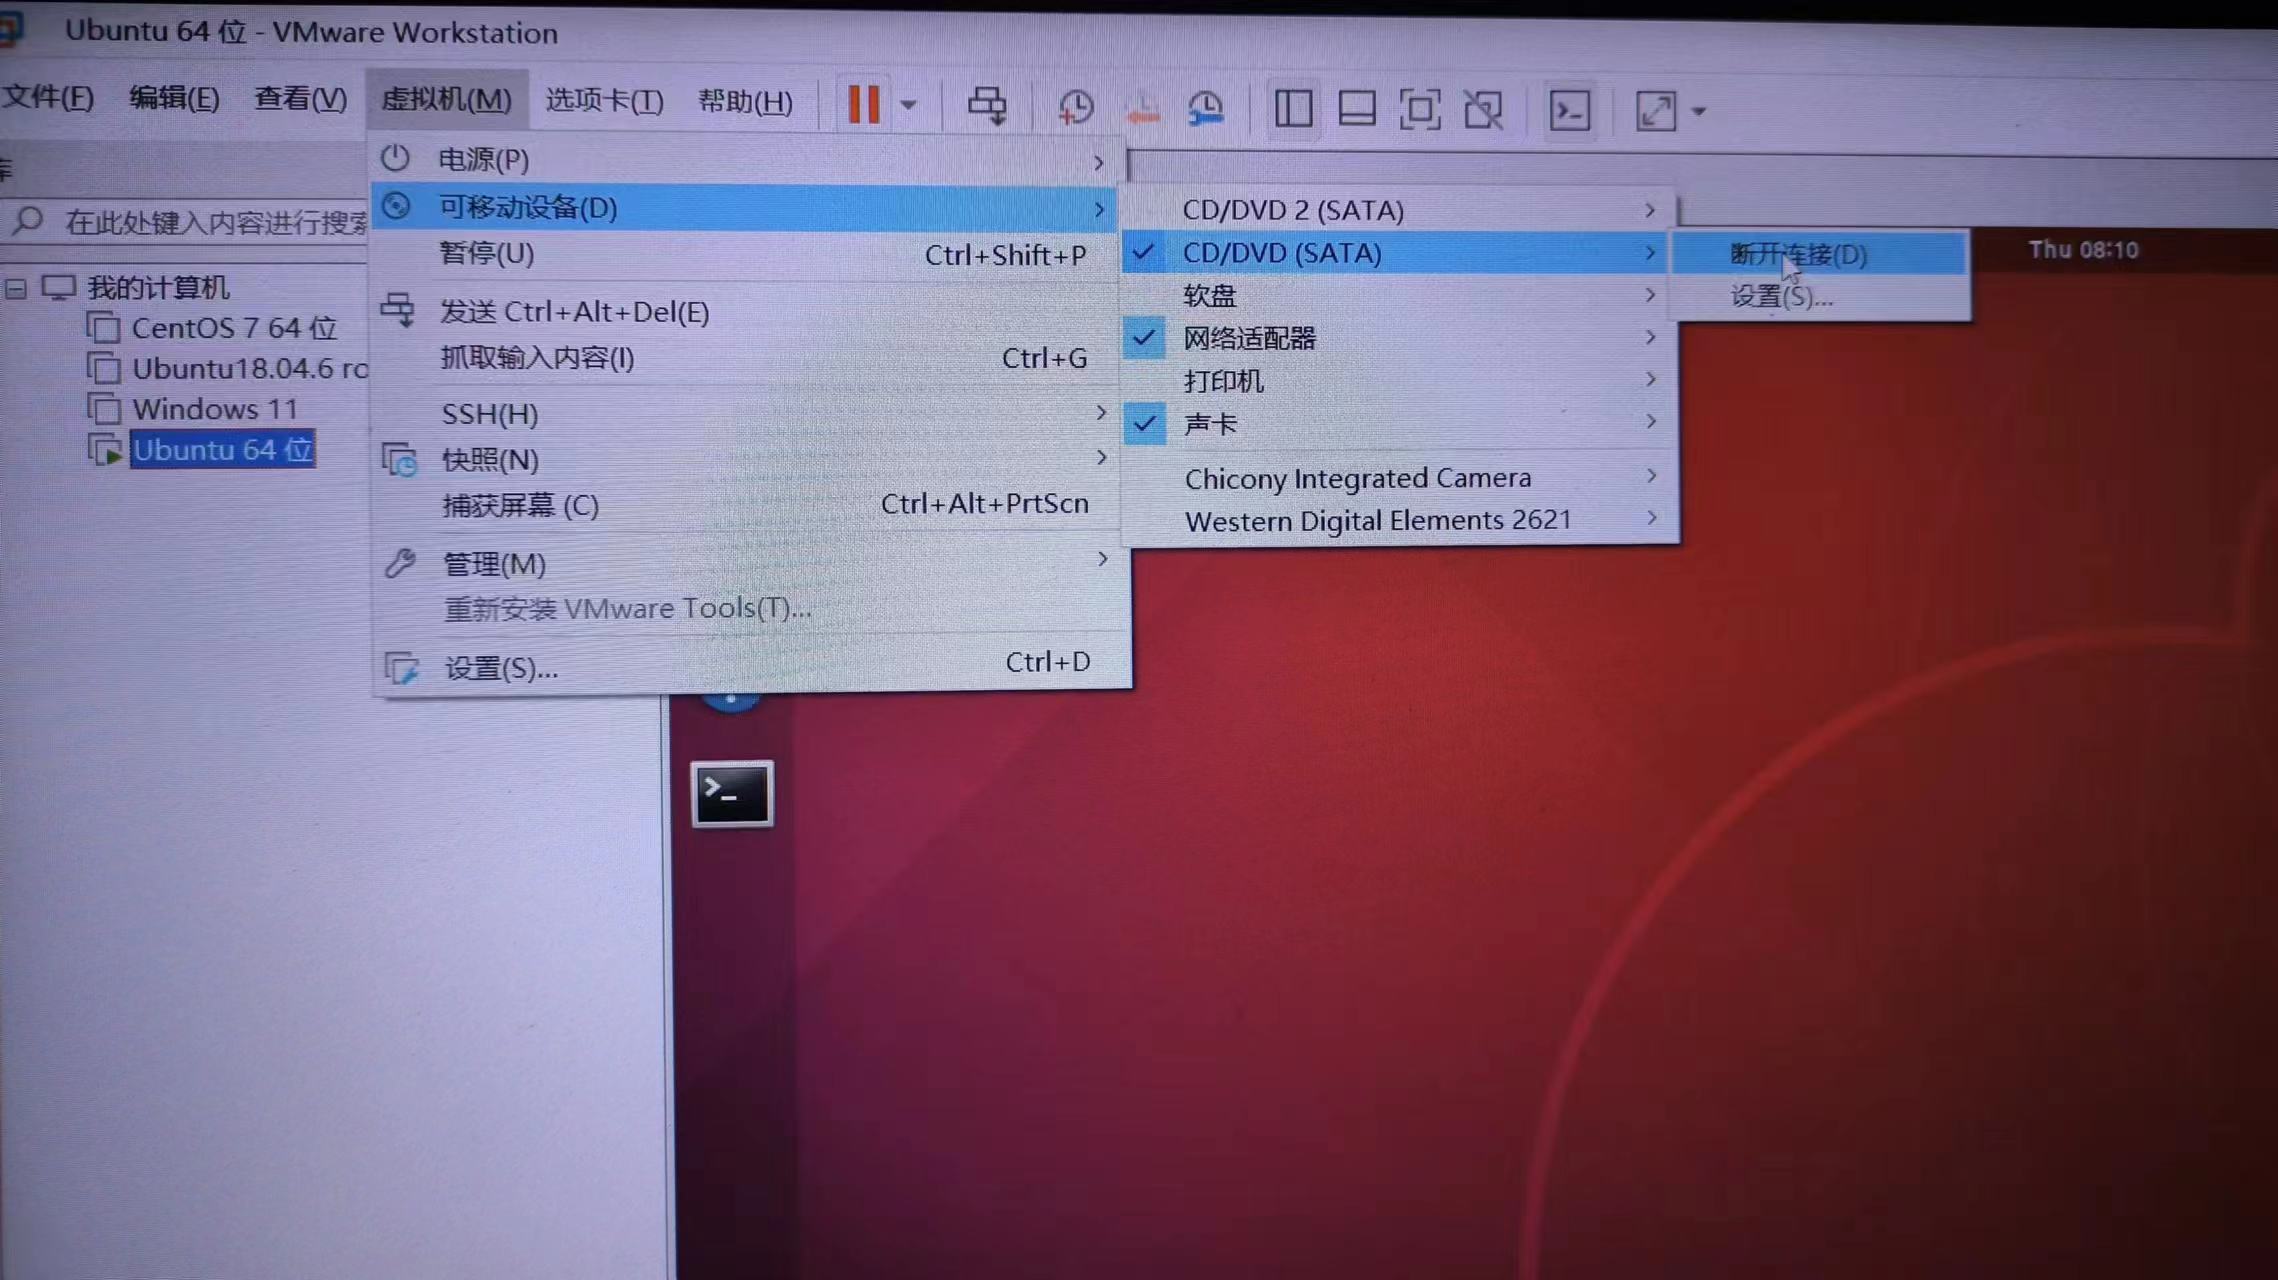
If the above operation is completed, let's right- click the virtual machine--Removable Device--CD/DVD (SATA)--Connect! ! ! , this step is essential, otherwise the compressed package of the VMware-Tools installation program will not be found. The connection effect is as follows:
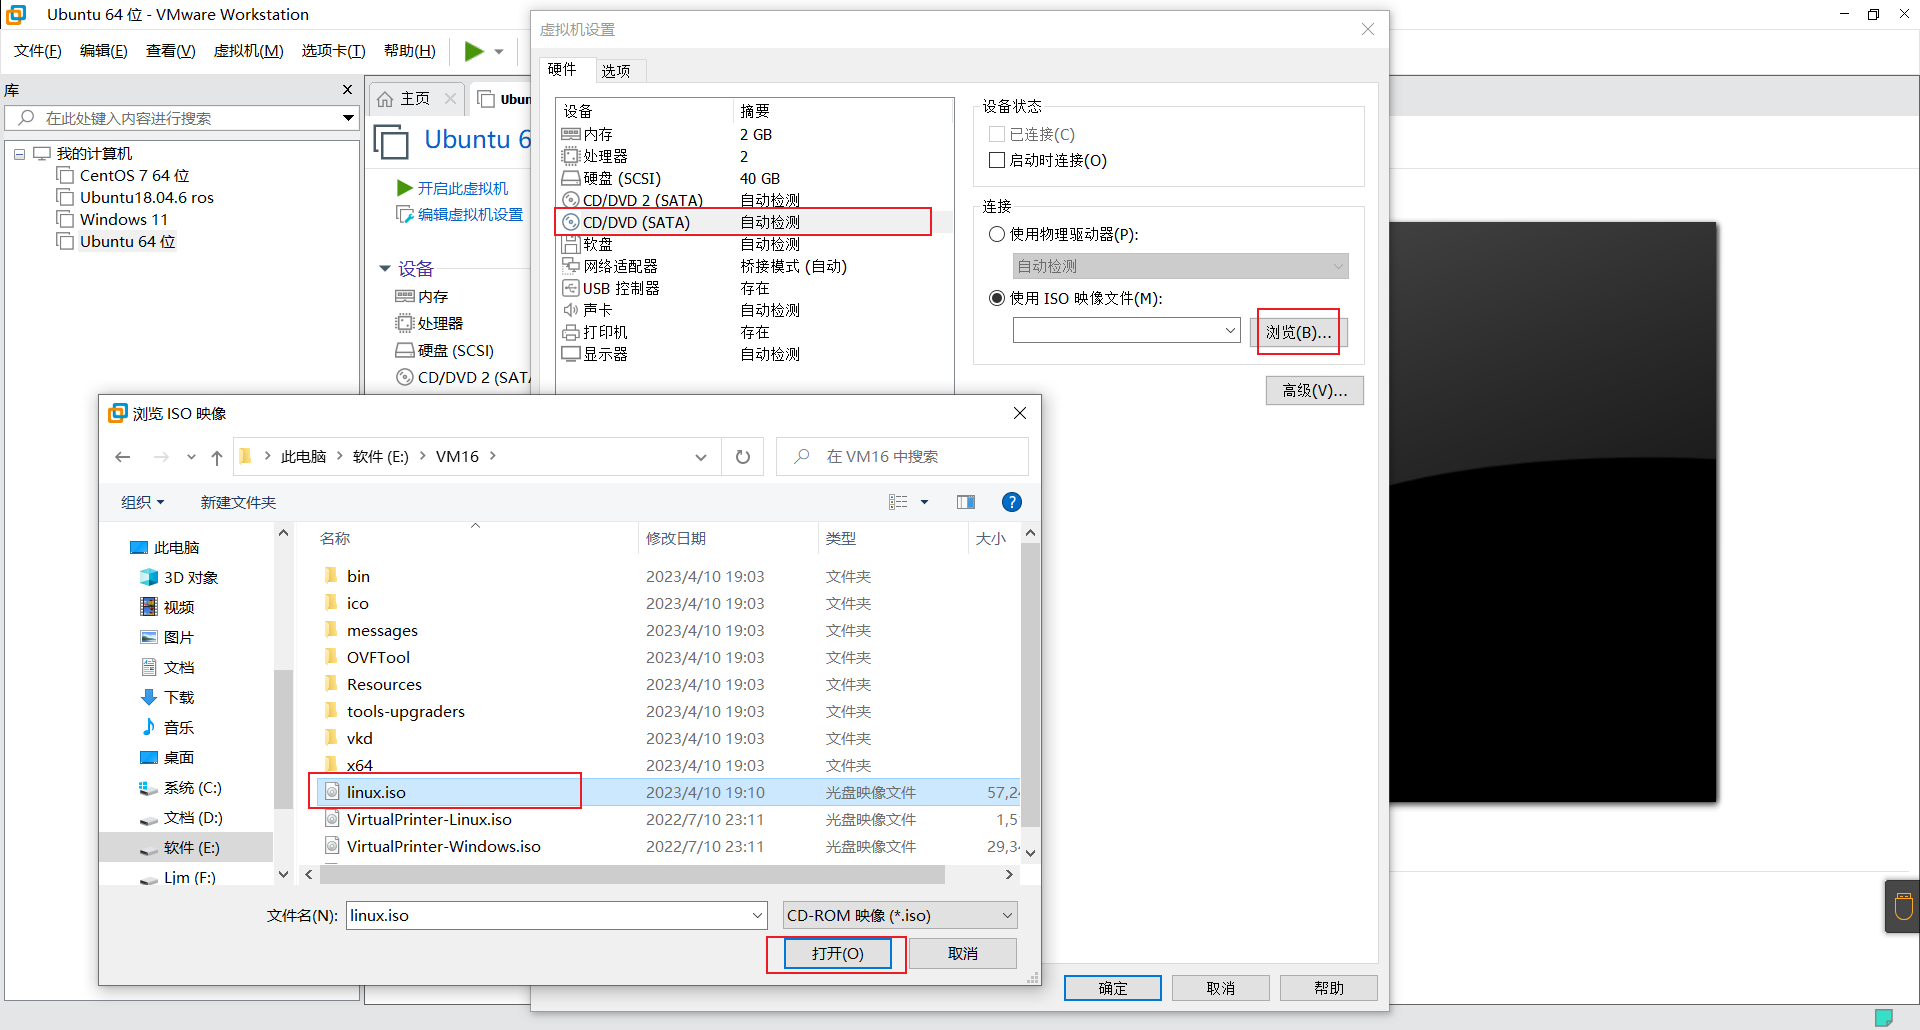
Then click CD/DVD(SATA)the [Browse] button on the right to open the VMware Workstation installation directory in the file directory, then select the inux.isoimage file and open it.
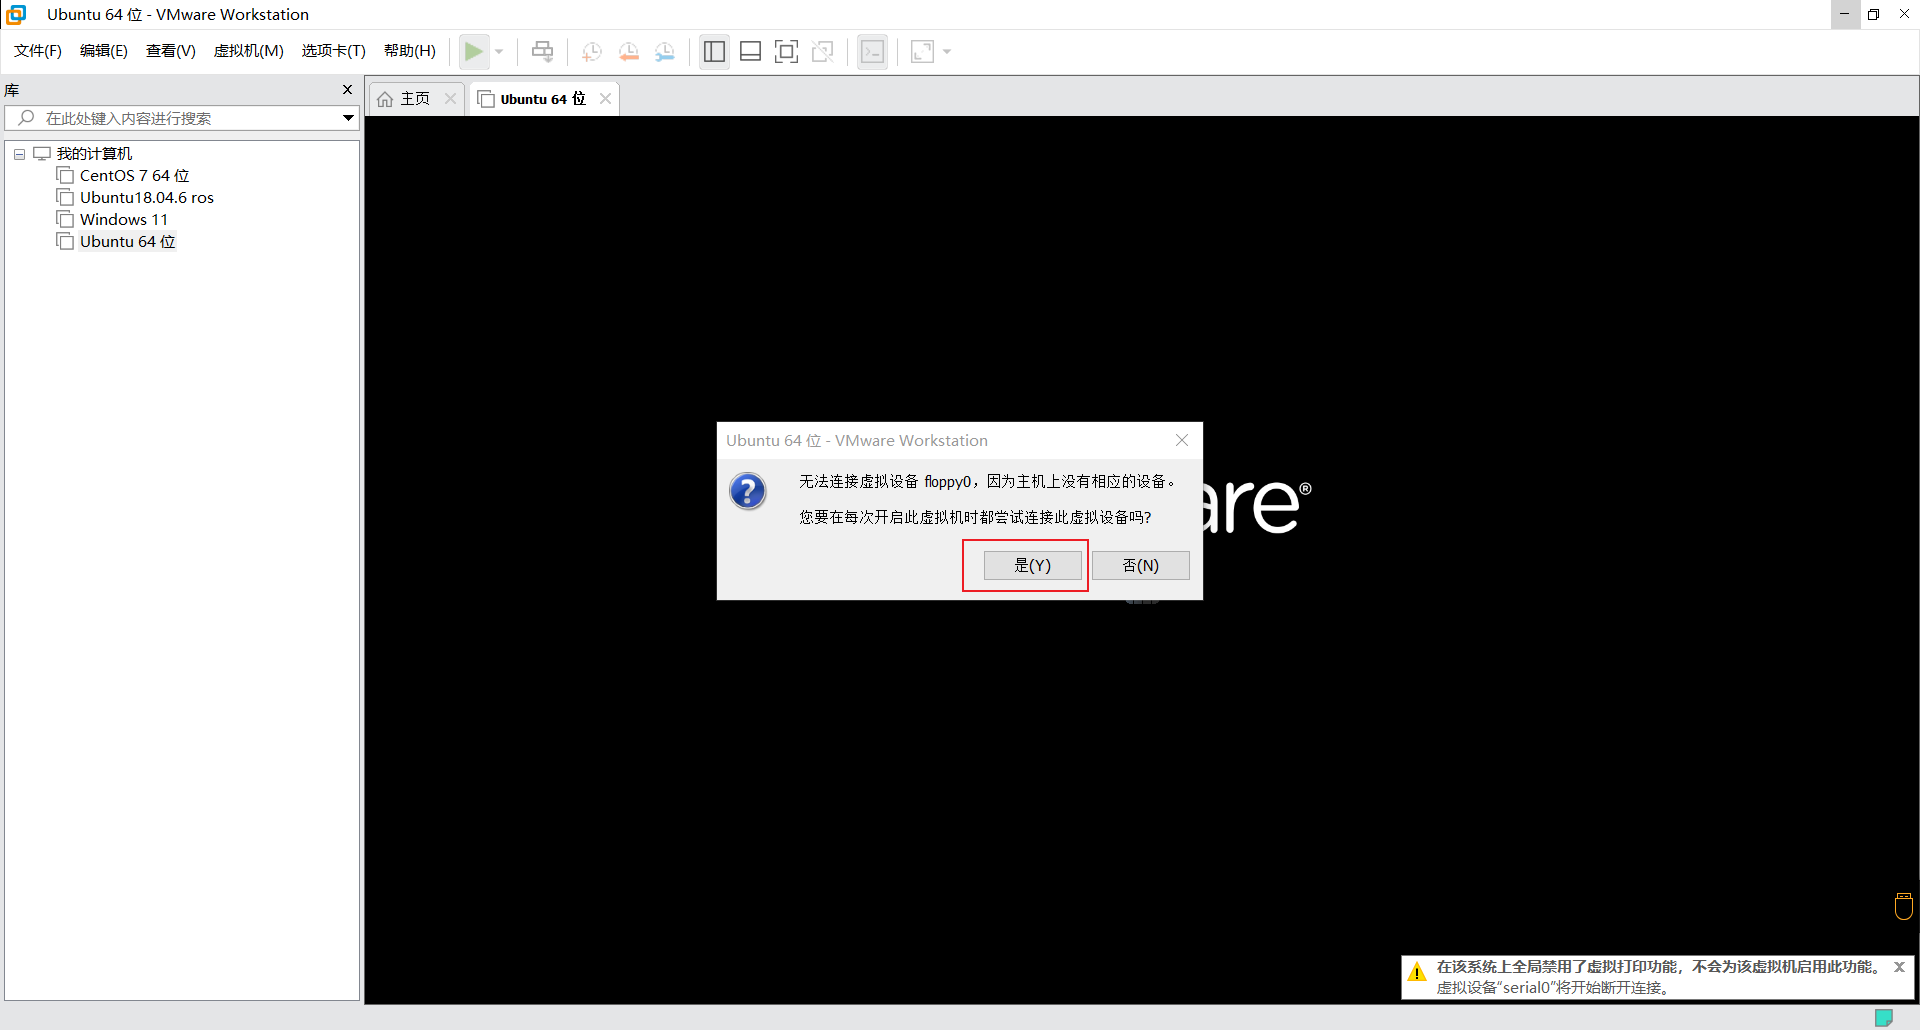
After setting up, click OK to turn on the computer. A pop-up window similar to the following may appear after turning on the computer. Don't worry, just select OK.
When you check VMware-Tools again, it can be displayed normally. Just click Install.
After clicking Install, we will find an extra CD on the desktop after booting the computer.
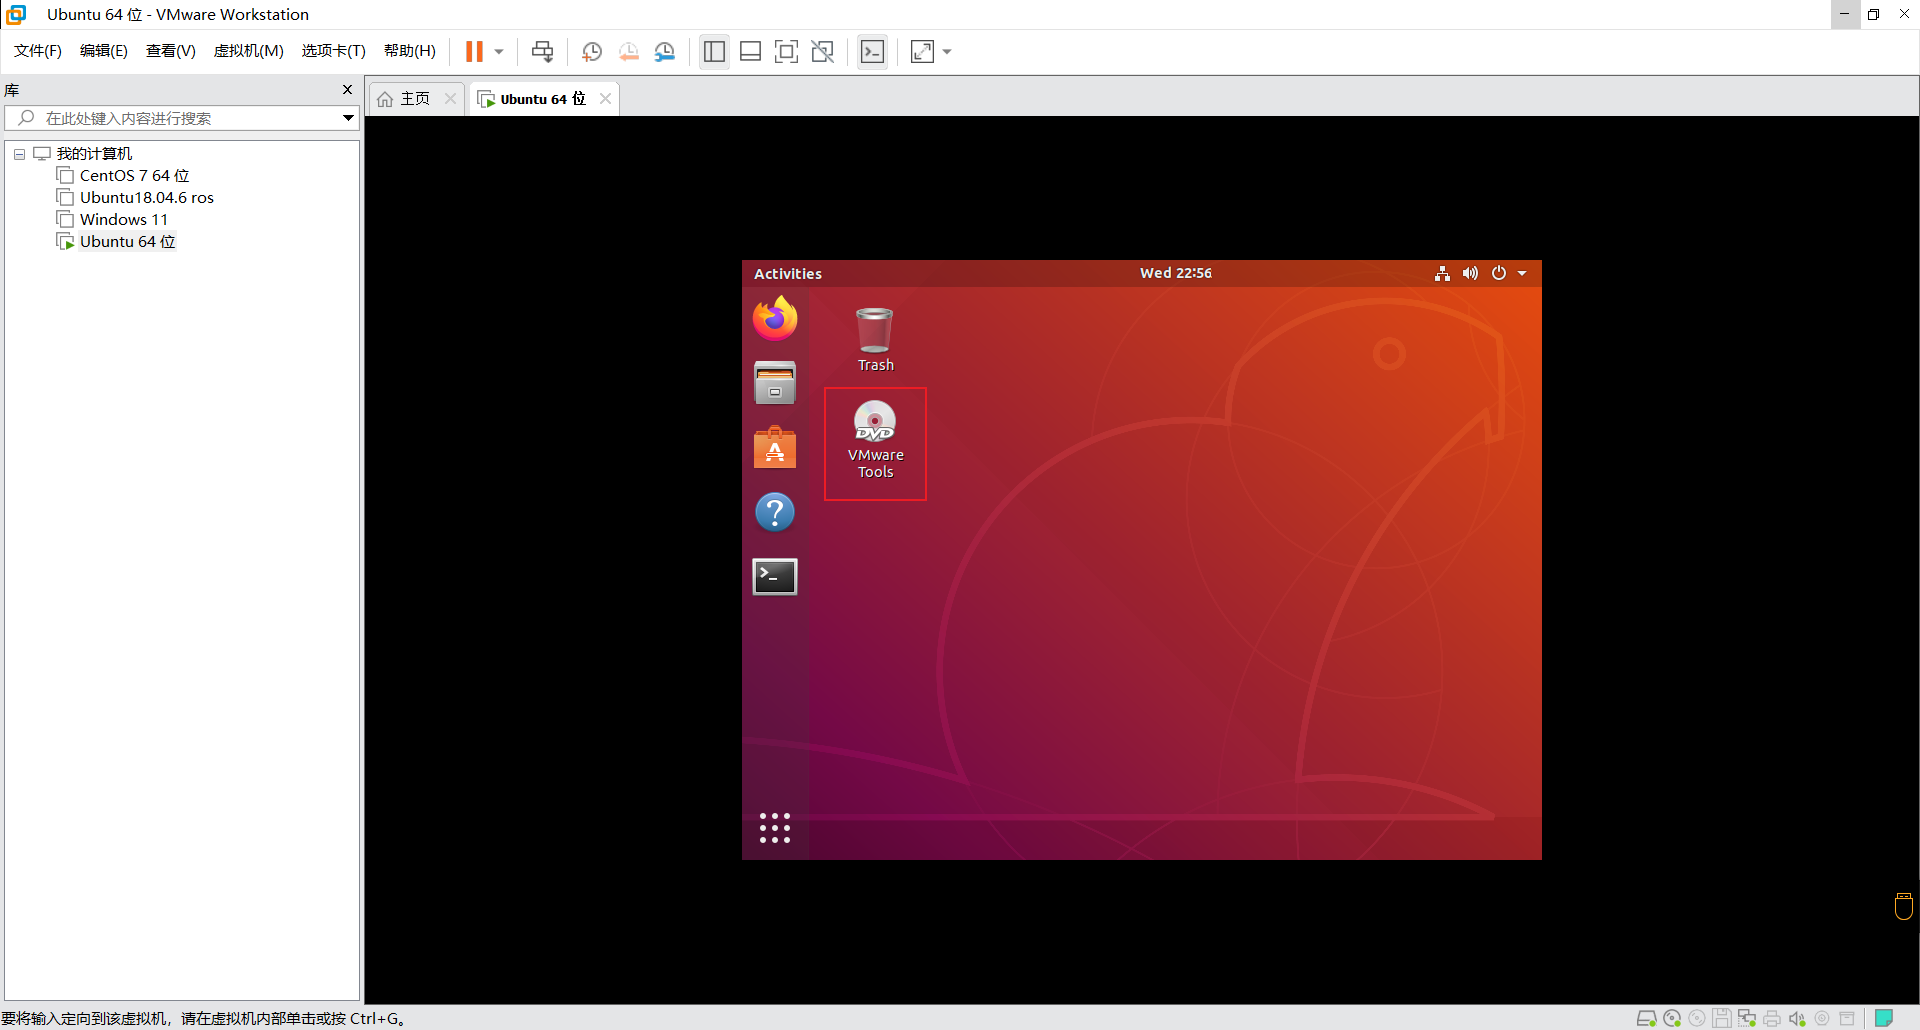
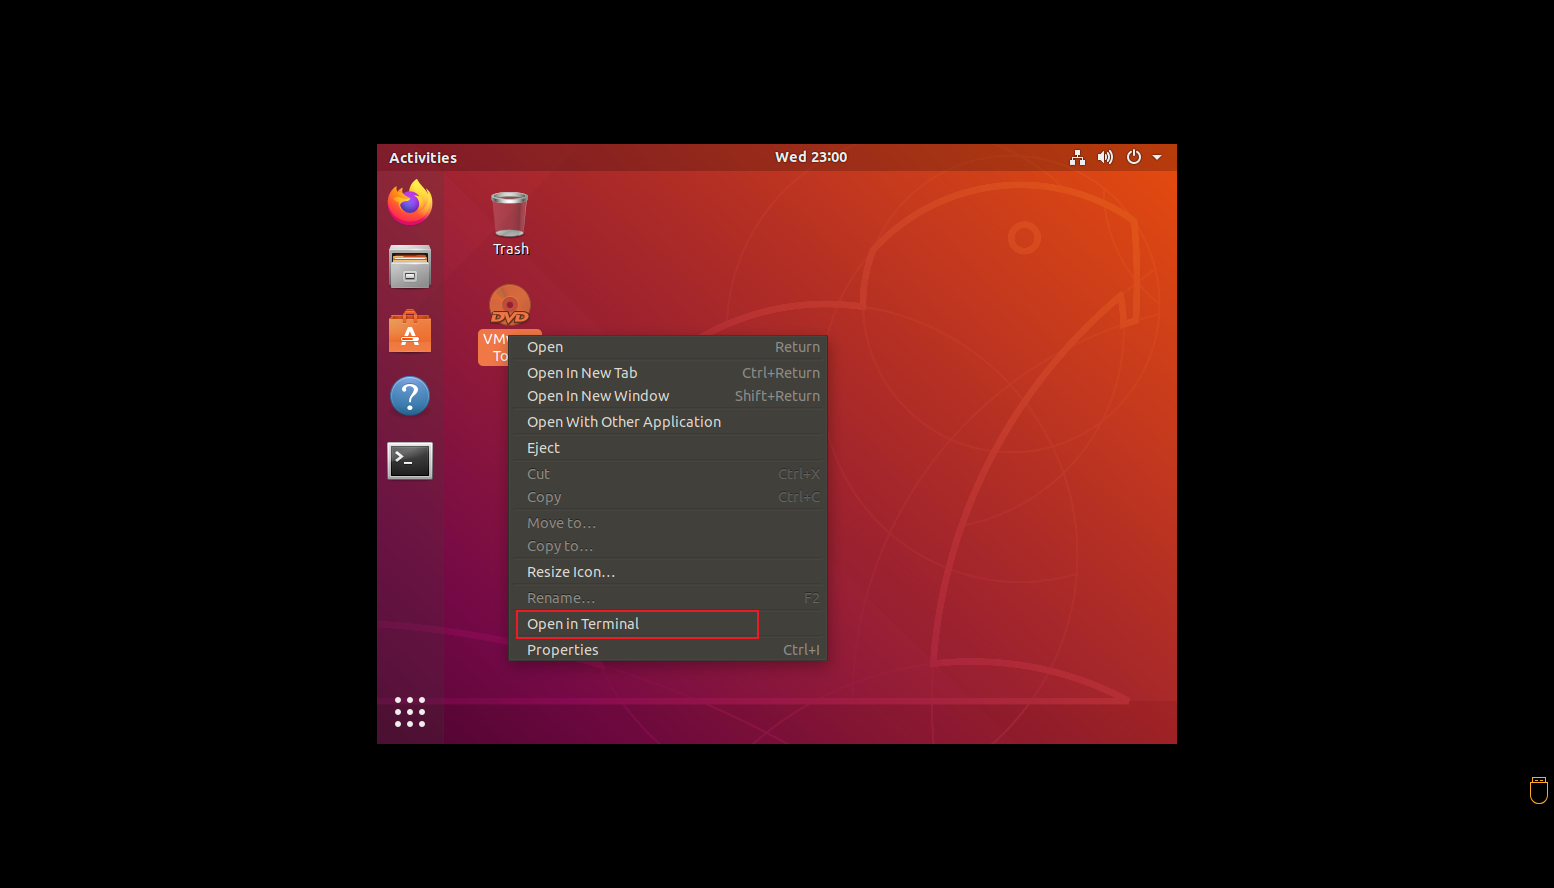
If there is this CD, it means that the button clicked above has taken effect, then we right-click the CD and click Open in Terminal
After clicking, you will enter a command line interface. We use the ls command to view the files in the current directory.
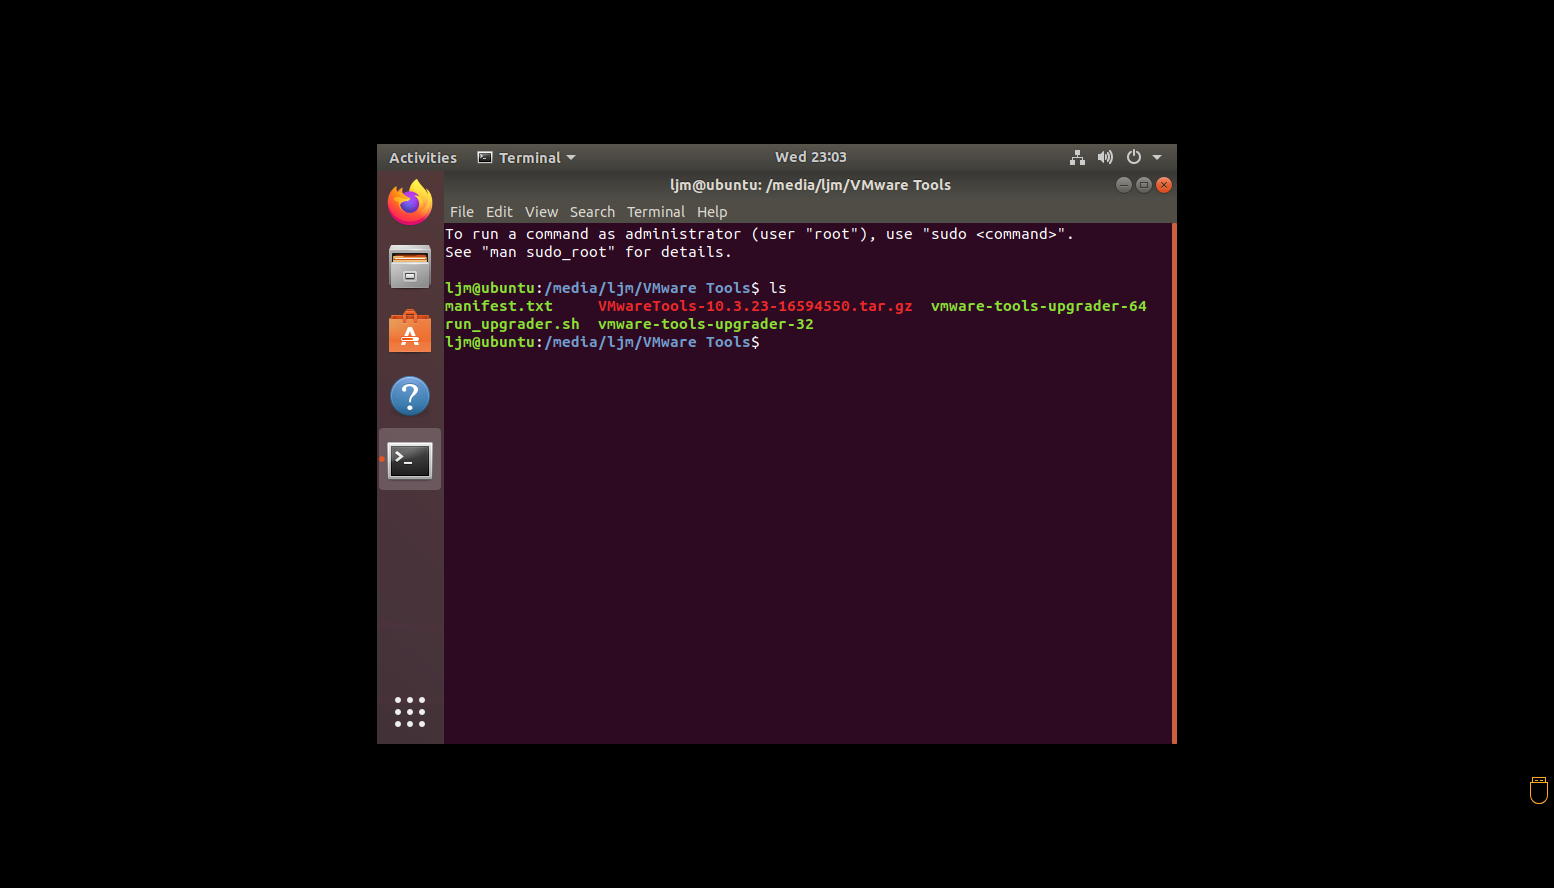
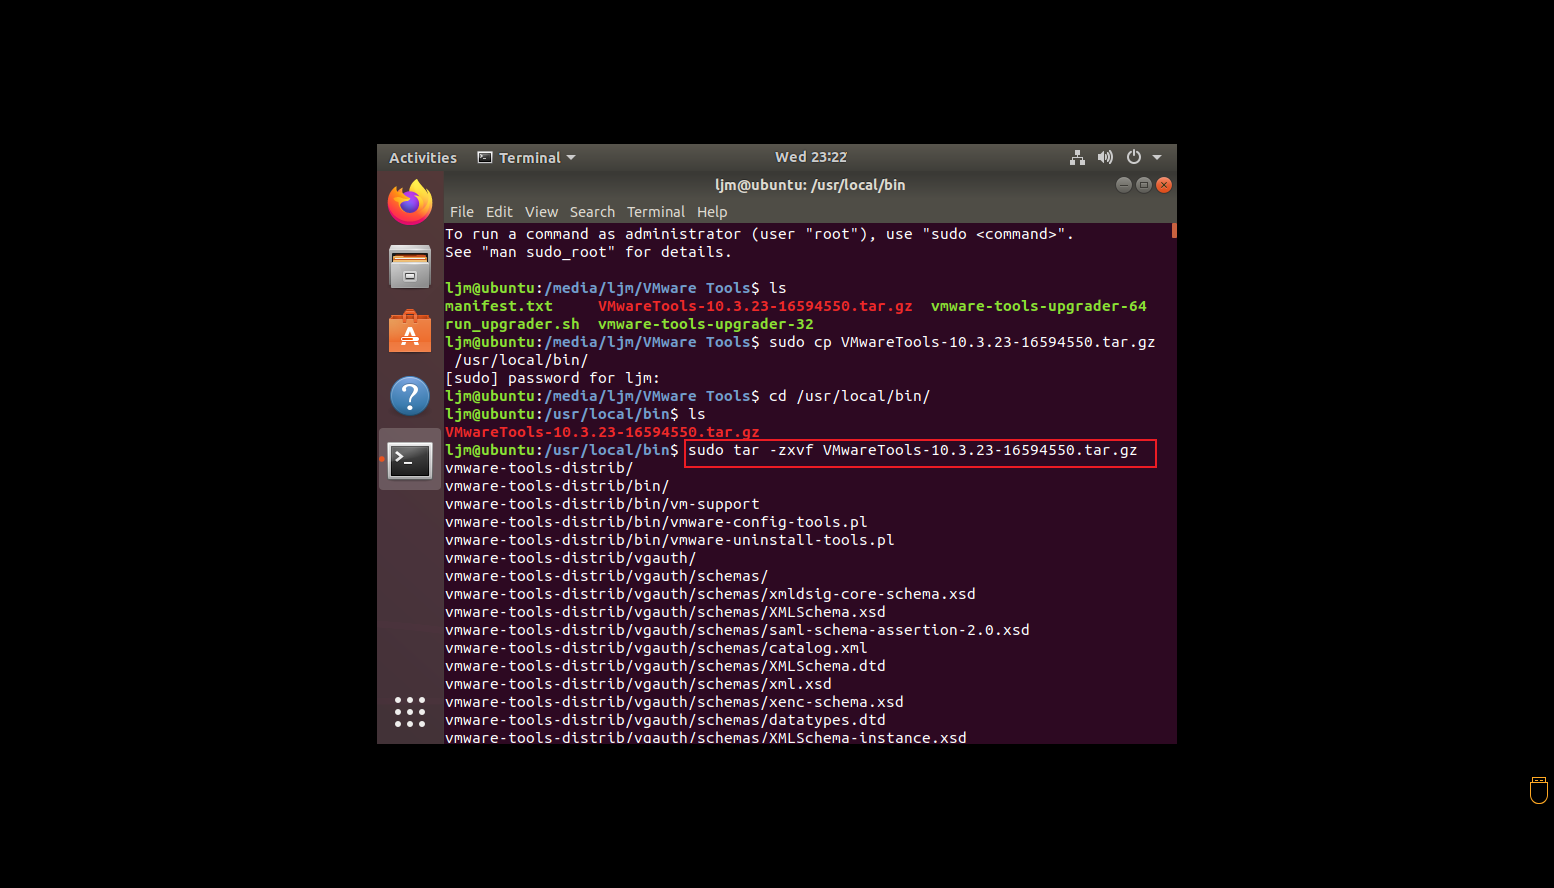
The red compressed package is exactly what we need, and then we copy it to the /usr/local/bin/ directory,
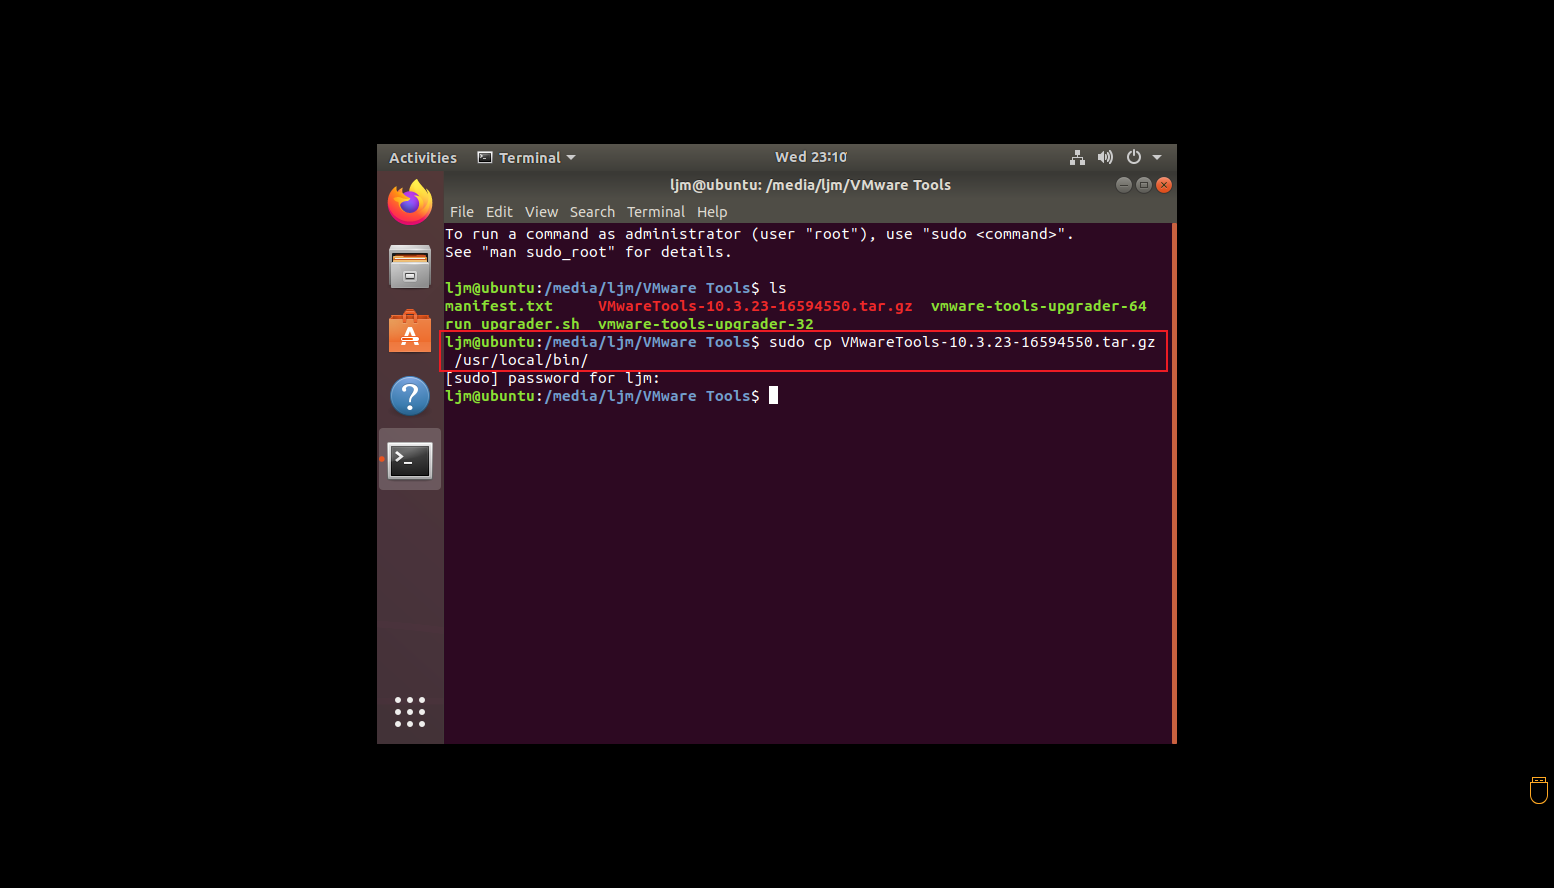
Execute the following command:
sudo cp ./VMwareTools-10.3.23-16594550.tar.gz /usr/local/bin/
Notice:
Perhaps due to version issues, the name of your red compressed package may be different, so the compressed package name in the command needs to be changed to your own.
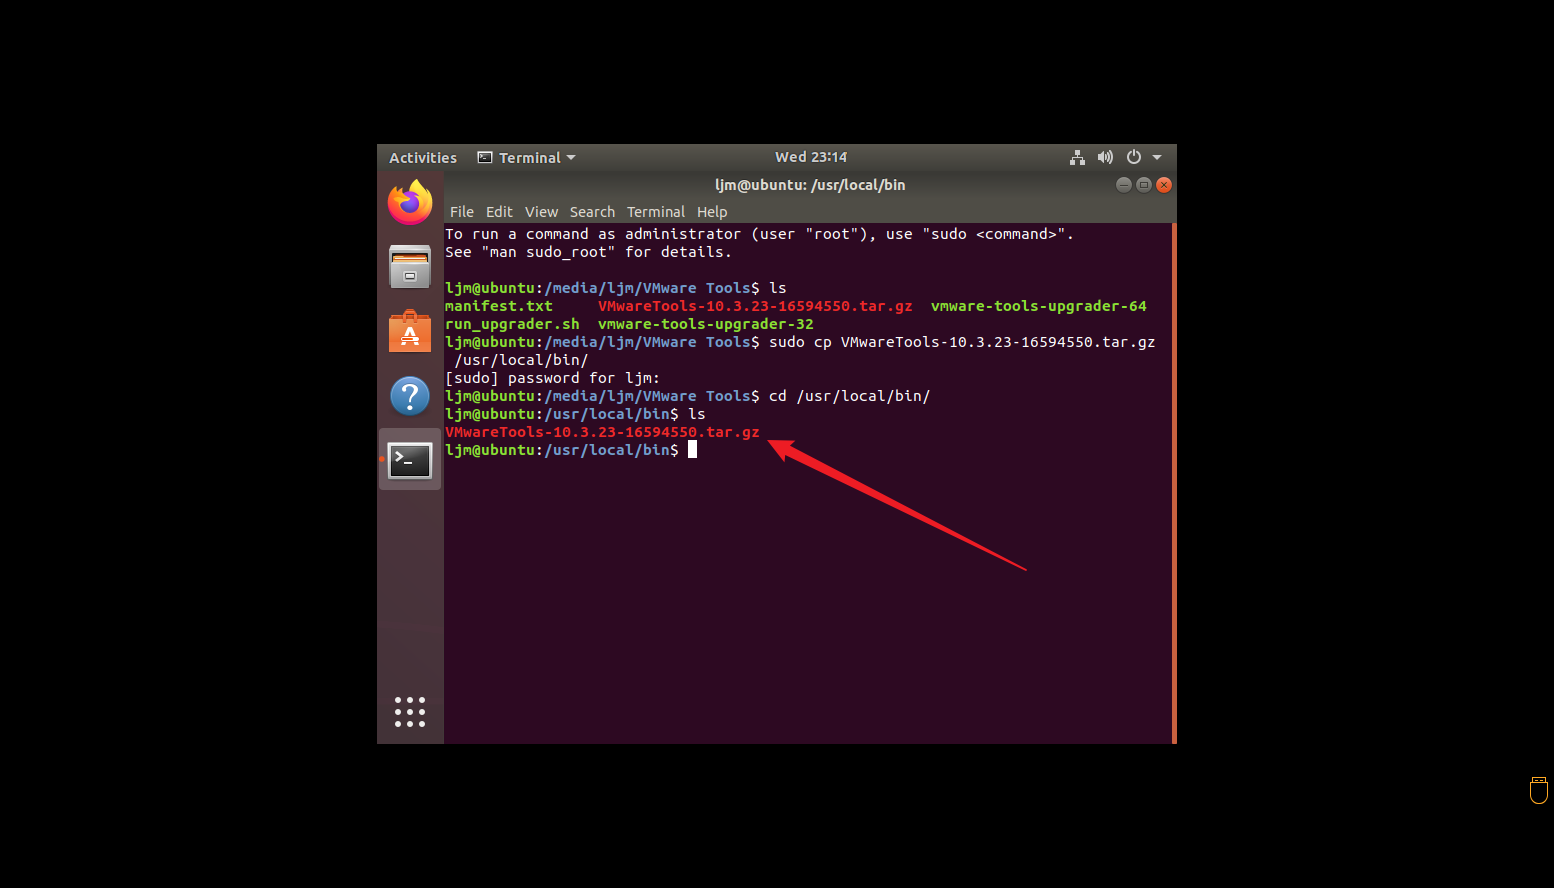
Then go to the /usr/local/bin/ directory and run ls to see if the copy is successful.
cd /usr/local/bin/
ls
The content pointed to by the red arrow in the picture below appears, indicating successful copying.
Unzip the compressed package, and be sure to change the compressed package name in the command to your own.
Execute the following command:
sudo tar -zxvf VMwareTools-10.3.23-16594550.tar.gz
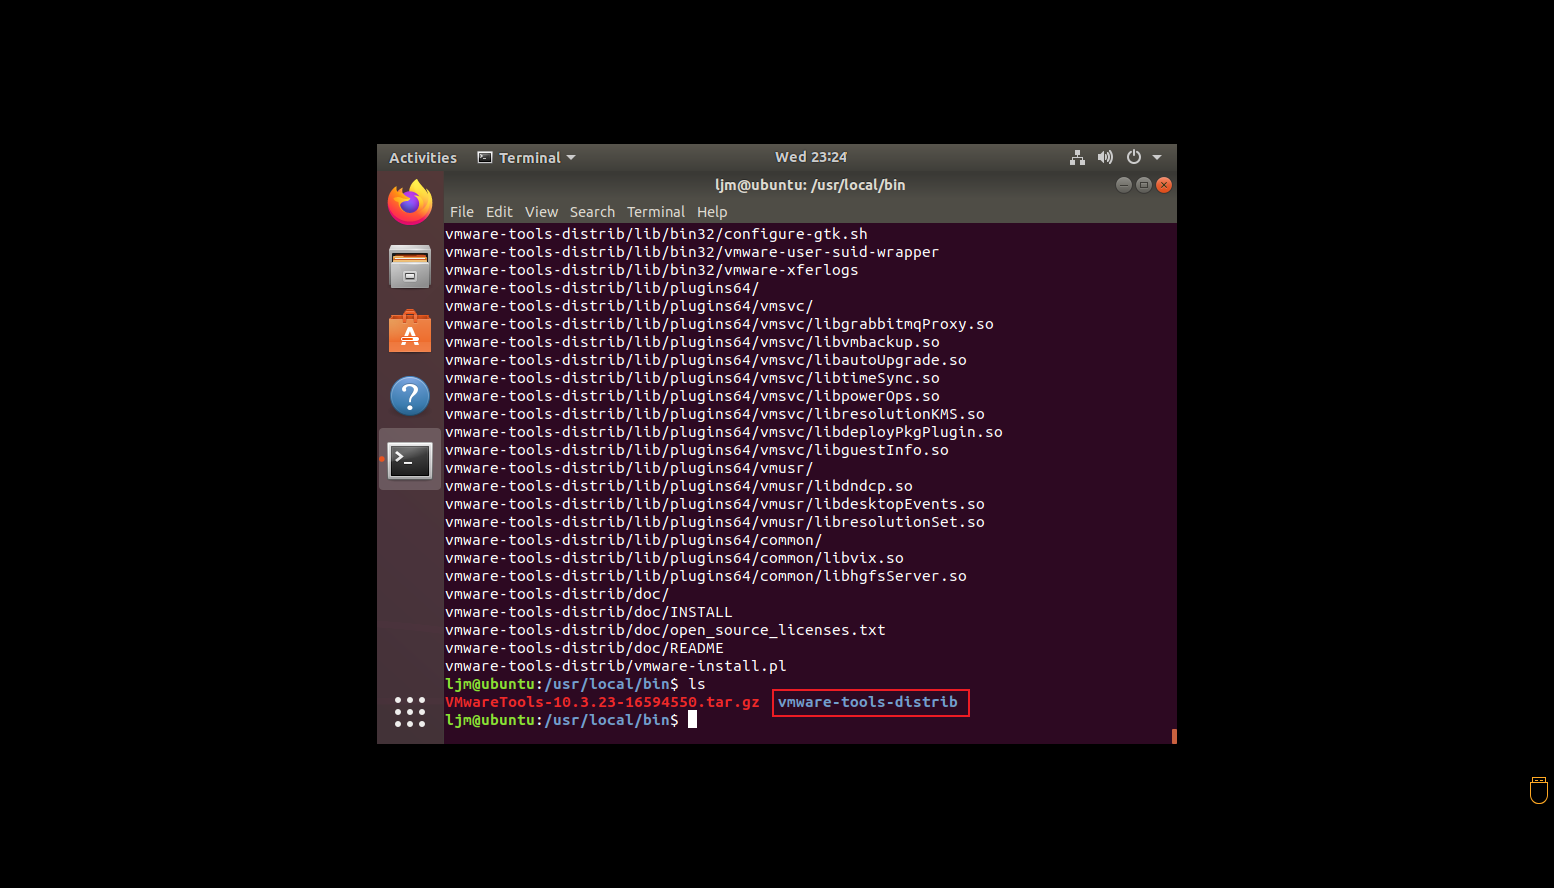
Notice:
The terminal will generate a large number of files during the decompression process, so ignore them.
After decompression, we do ls and it will show an additional vmware-tools-distrib folder.
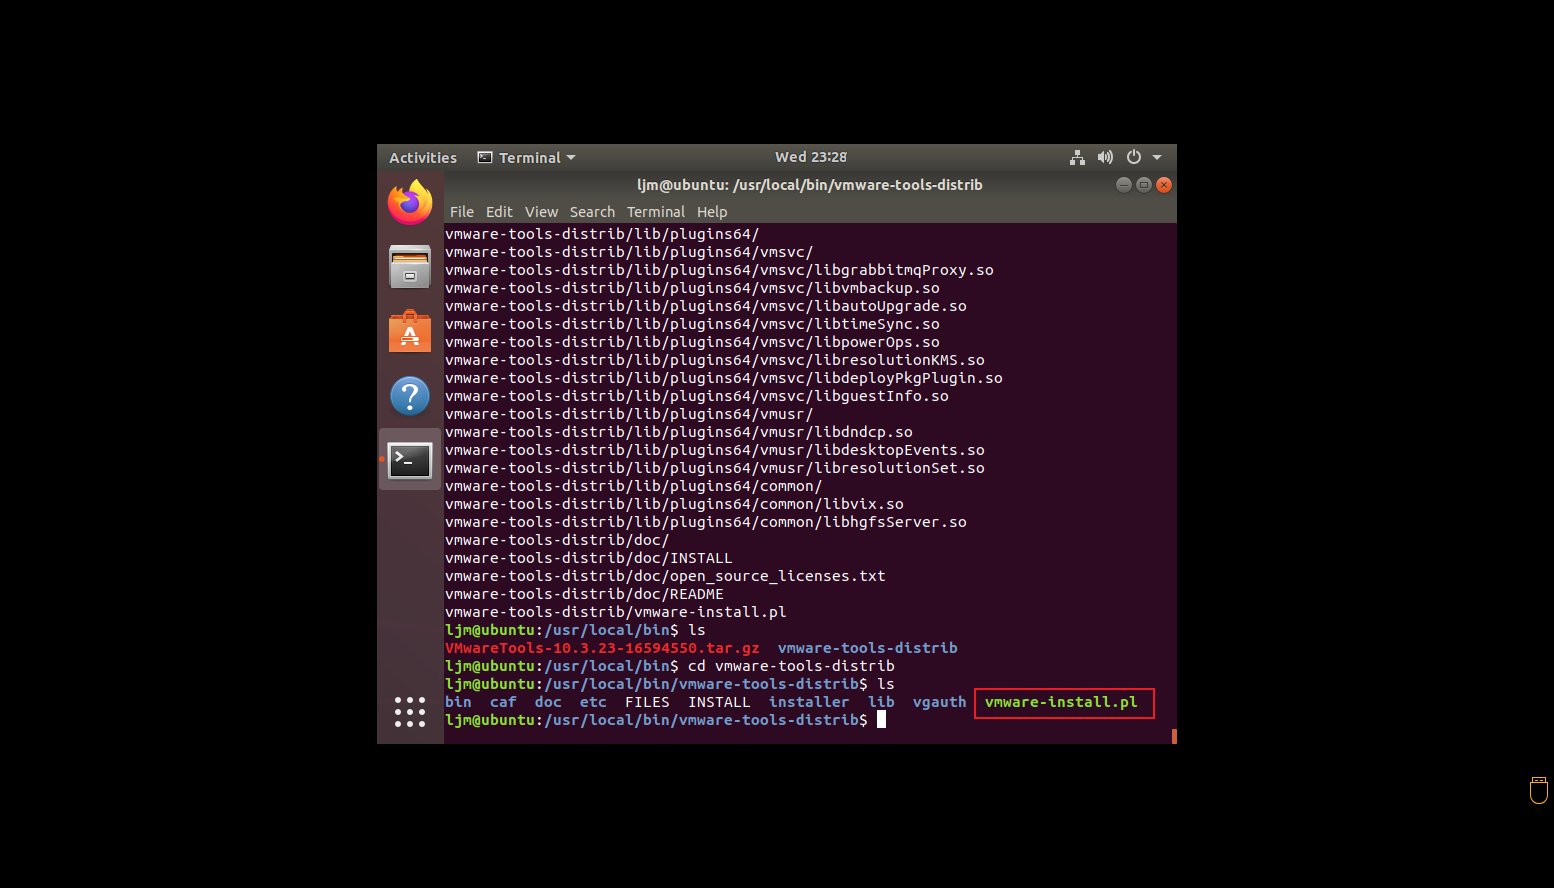
Enter the vmware-tools-distrib folder and ls to view
cd vmware-tools-distrib
ls
You can see that there are 10 files (folders),
Our target is vmware-install.pl, which is an installer
Execute this installer
sudo ./vmware-install.pl

When [no] appears as shown below, enter y and press Enter. If [yes] appears, just press Enter. There will be many Enter keys that need to be pressed.
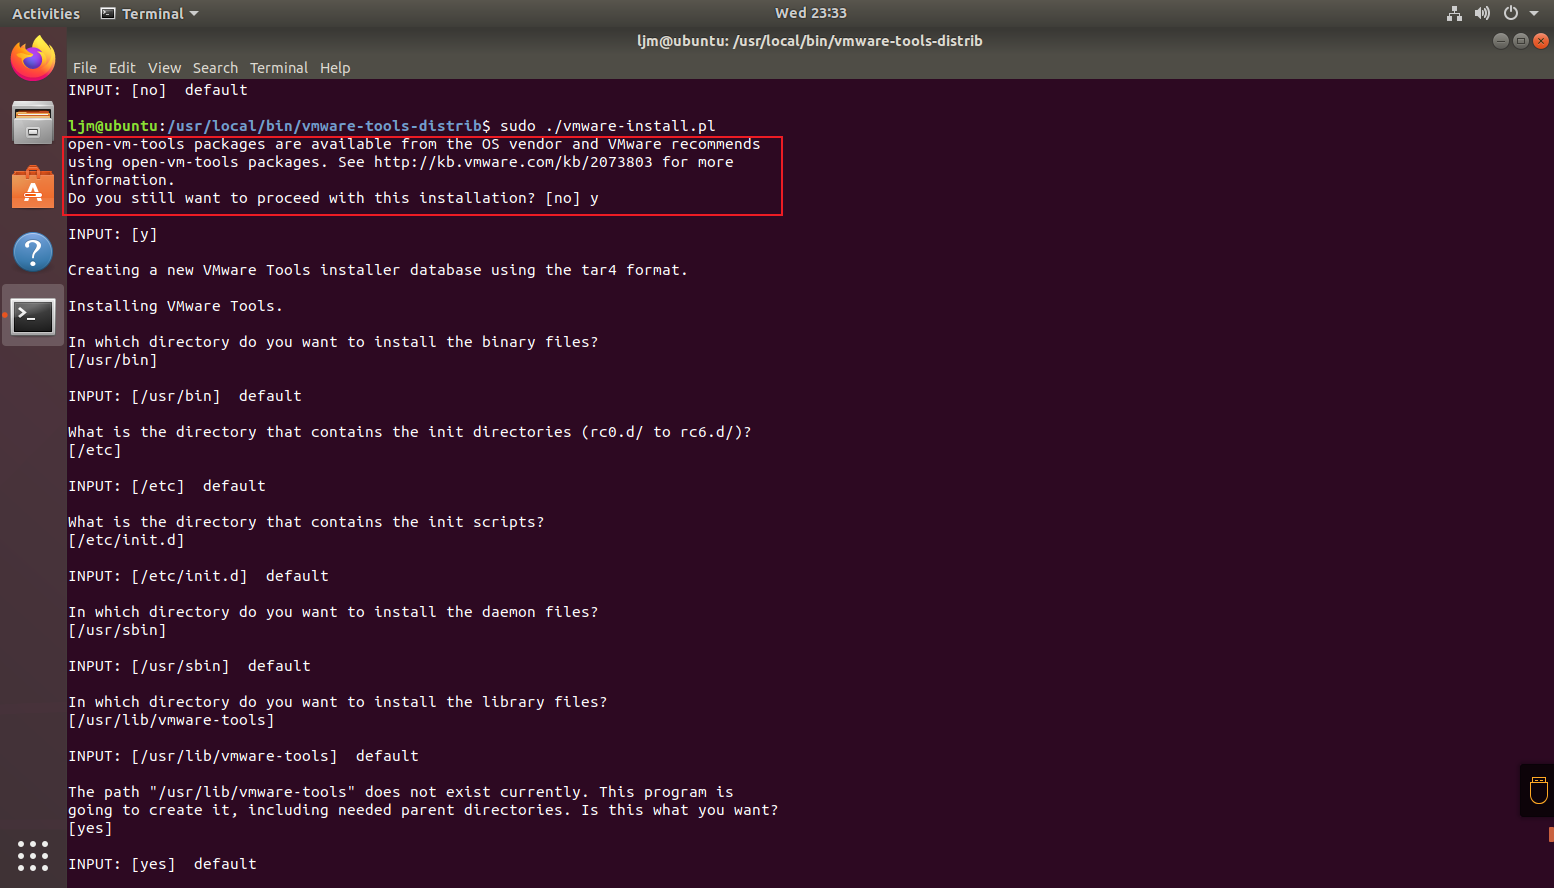
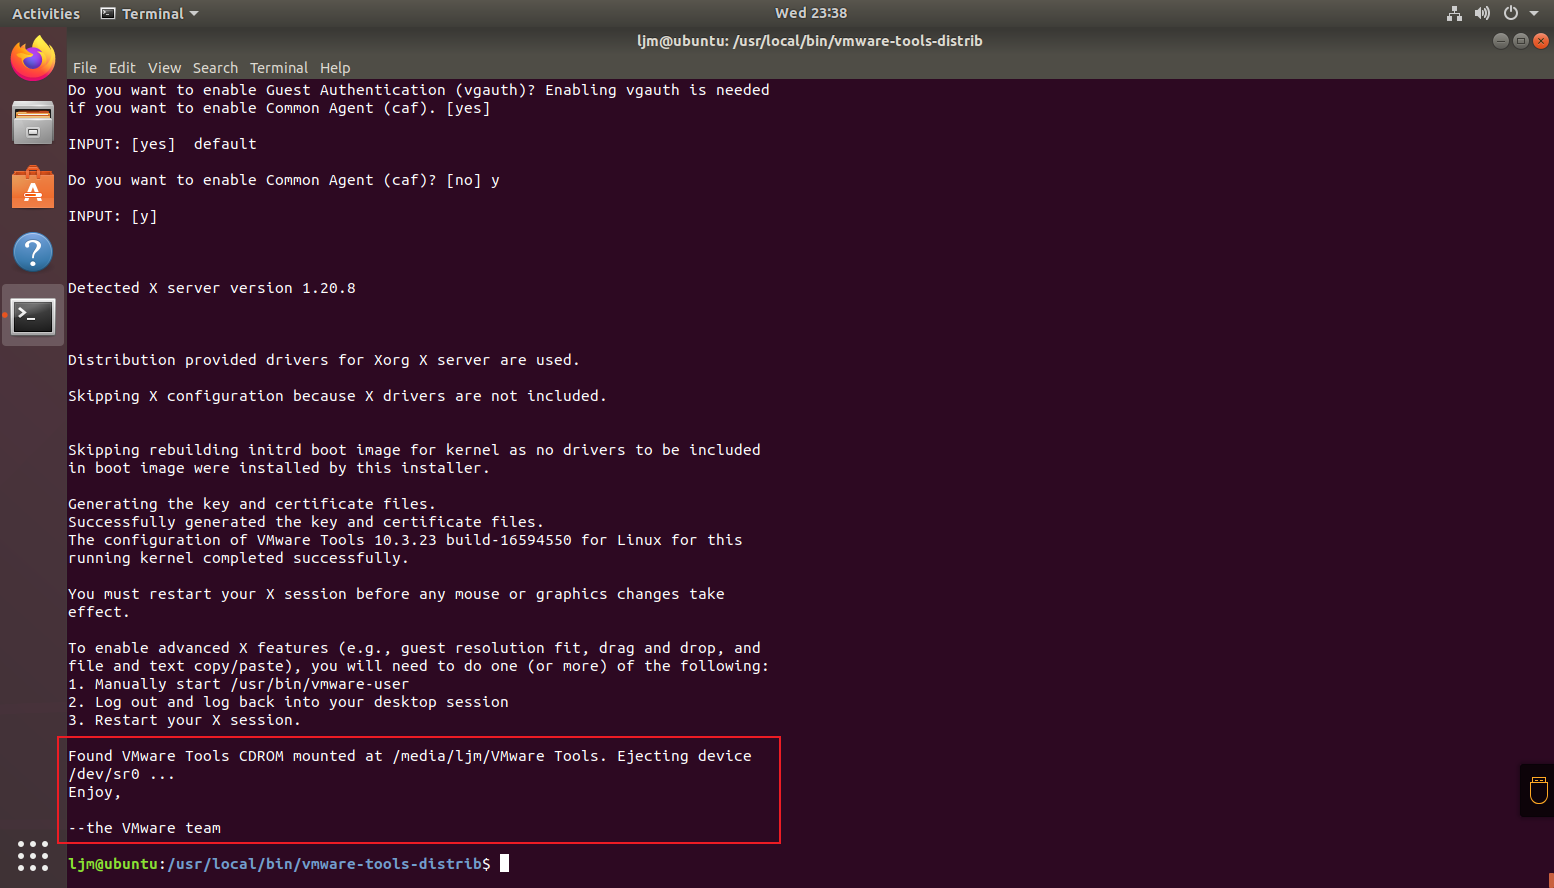
After waiting for a while, the red frame in the picture below appears, and then the original small screen automatically changes to full screen, indicating that the installation is successful. If the screen still cannot be enlarged after the installation is successful, and the copy and paste function cannot be used, restart the virtual machine or reinstall it.
Ubuntu common commands
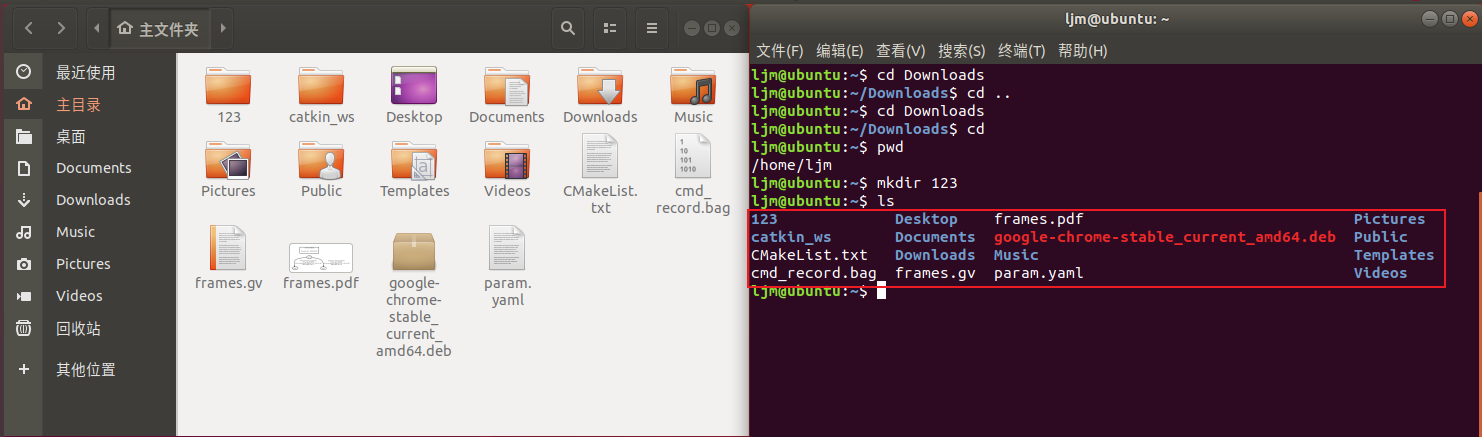
cd
Function: switch working directory
cd 目标目录: Switch to the target directory
cd ..: Switch back to the previous directory
Notice:
If cd is not followed by any parameters, it will switch to the HOME directory of the currently logged in user by default.
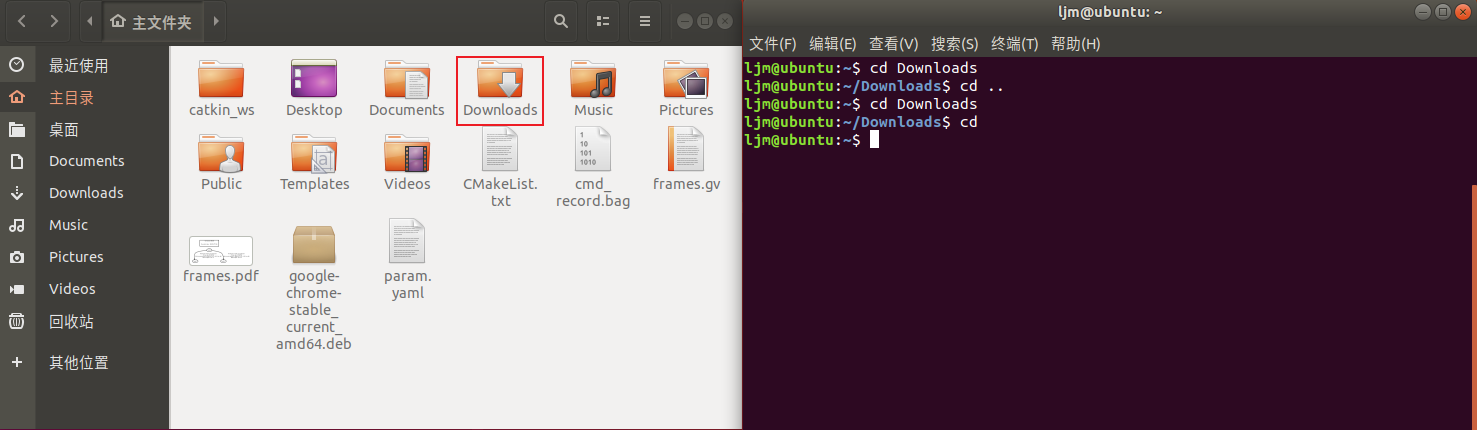
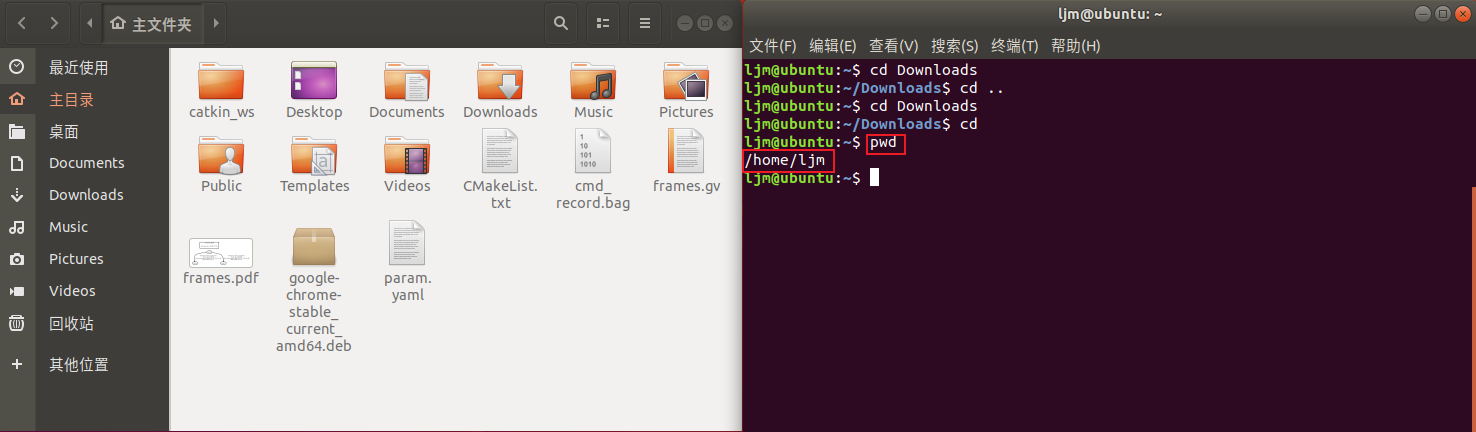
pwd
Function: Display the current working directory
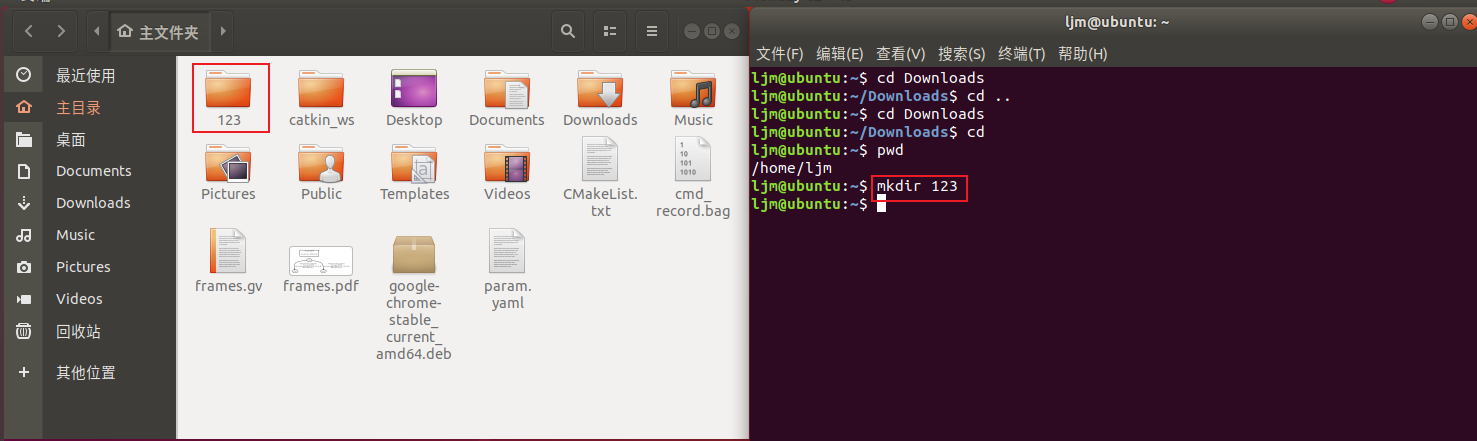
mkdir
Function: Create a new folder
mkdir 新文件夹名
ls
Function: Display all files in the specified directory
ls 指定目录
Notice:
If ls is not followed by any parameters, all files in the current working directory will be displayed by default.
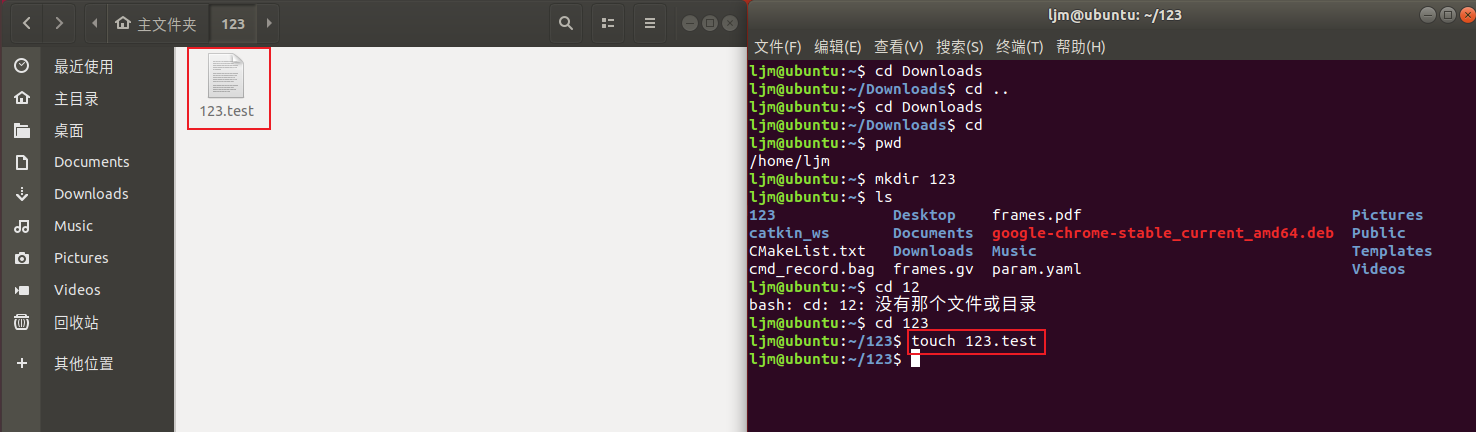
touch
Function: Create a new file
touch 新文件名
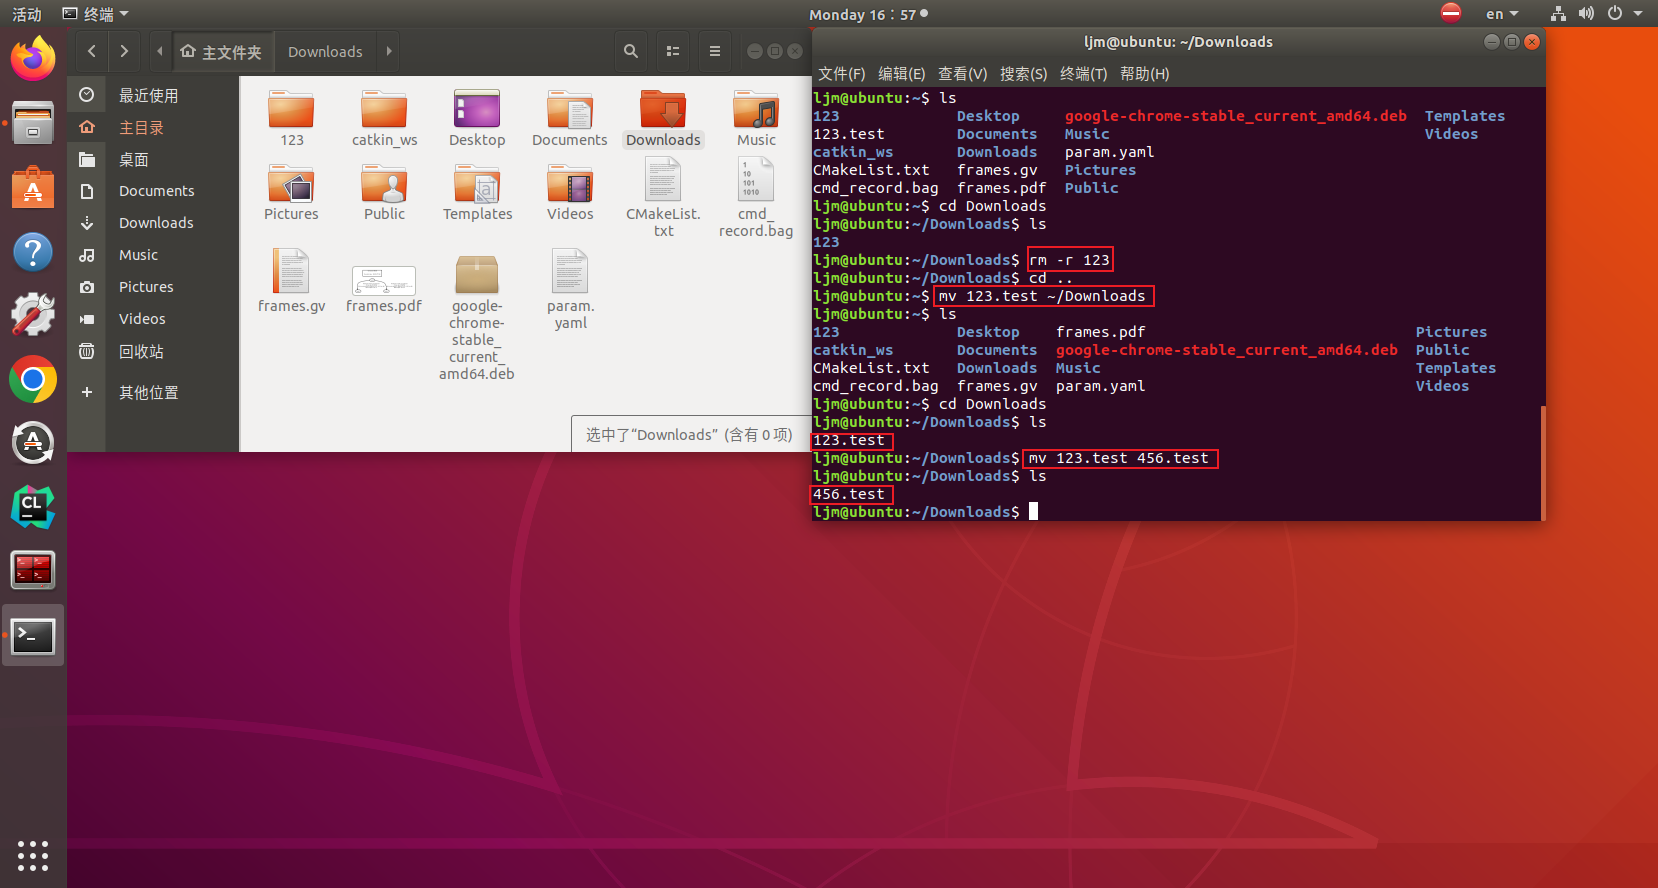
mv
Function: Move files and folders
mv 参数1 参数2
Parameter 1: The target to be moved
Parameter 2: The place where the target is to be moved. If parameter 2 is another file or folder name, parameter 1 will be renamed to parameter 2.
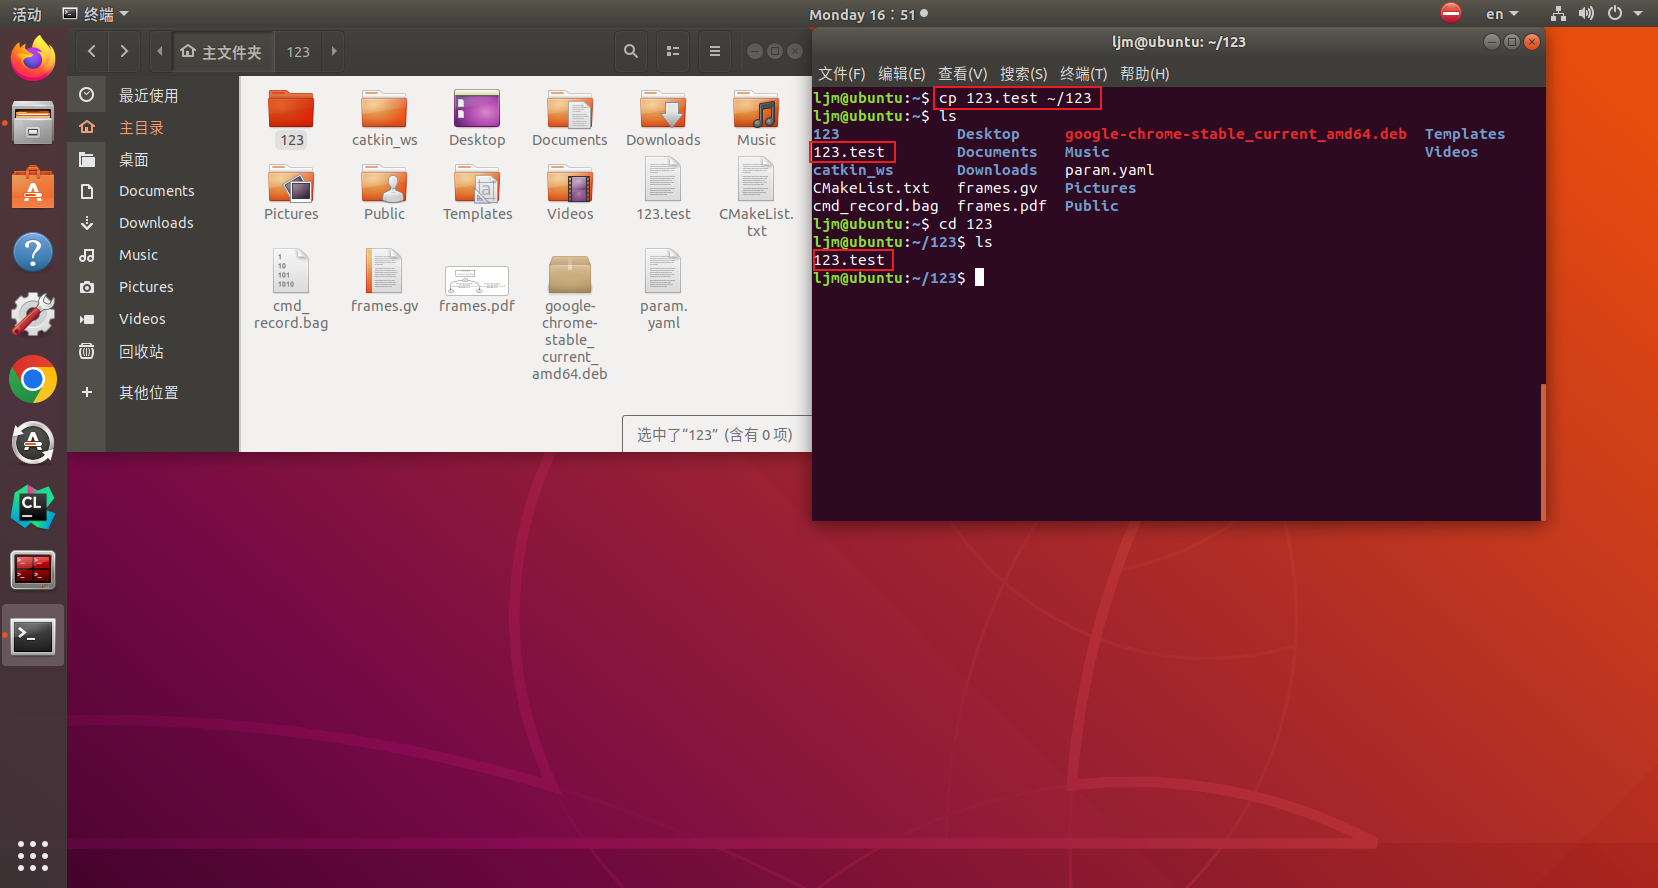
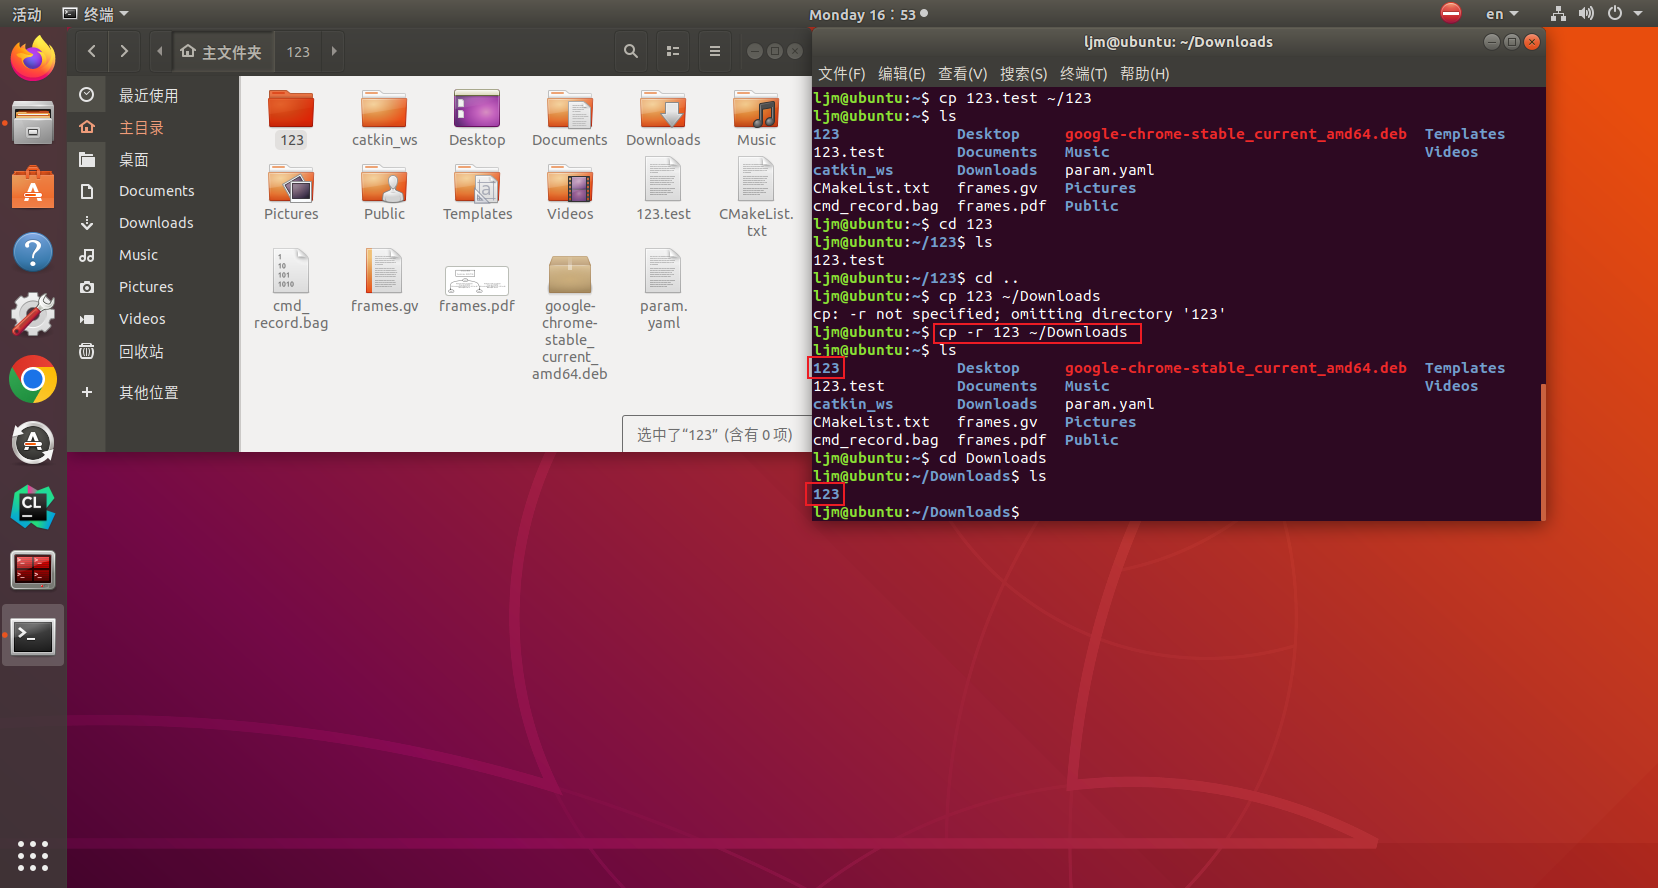
cp
Function: Copy files and folders
cp 参数1 参数2
Parameter 1: The target file to be copied
Parameter 2: The target directory to be copied to
cp -r 参数1 参数2
Parameter 1: The target folder to be copied
Parameter 2: The target directory to be copied to
Notice:
The working directory must be in the directory of the target file or files to be copied in order to copy successfully, otherwise the target to be copied will not be found.
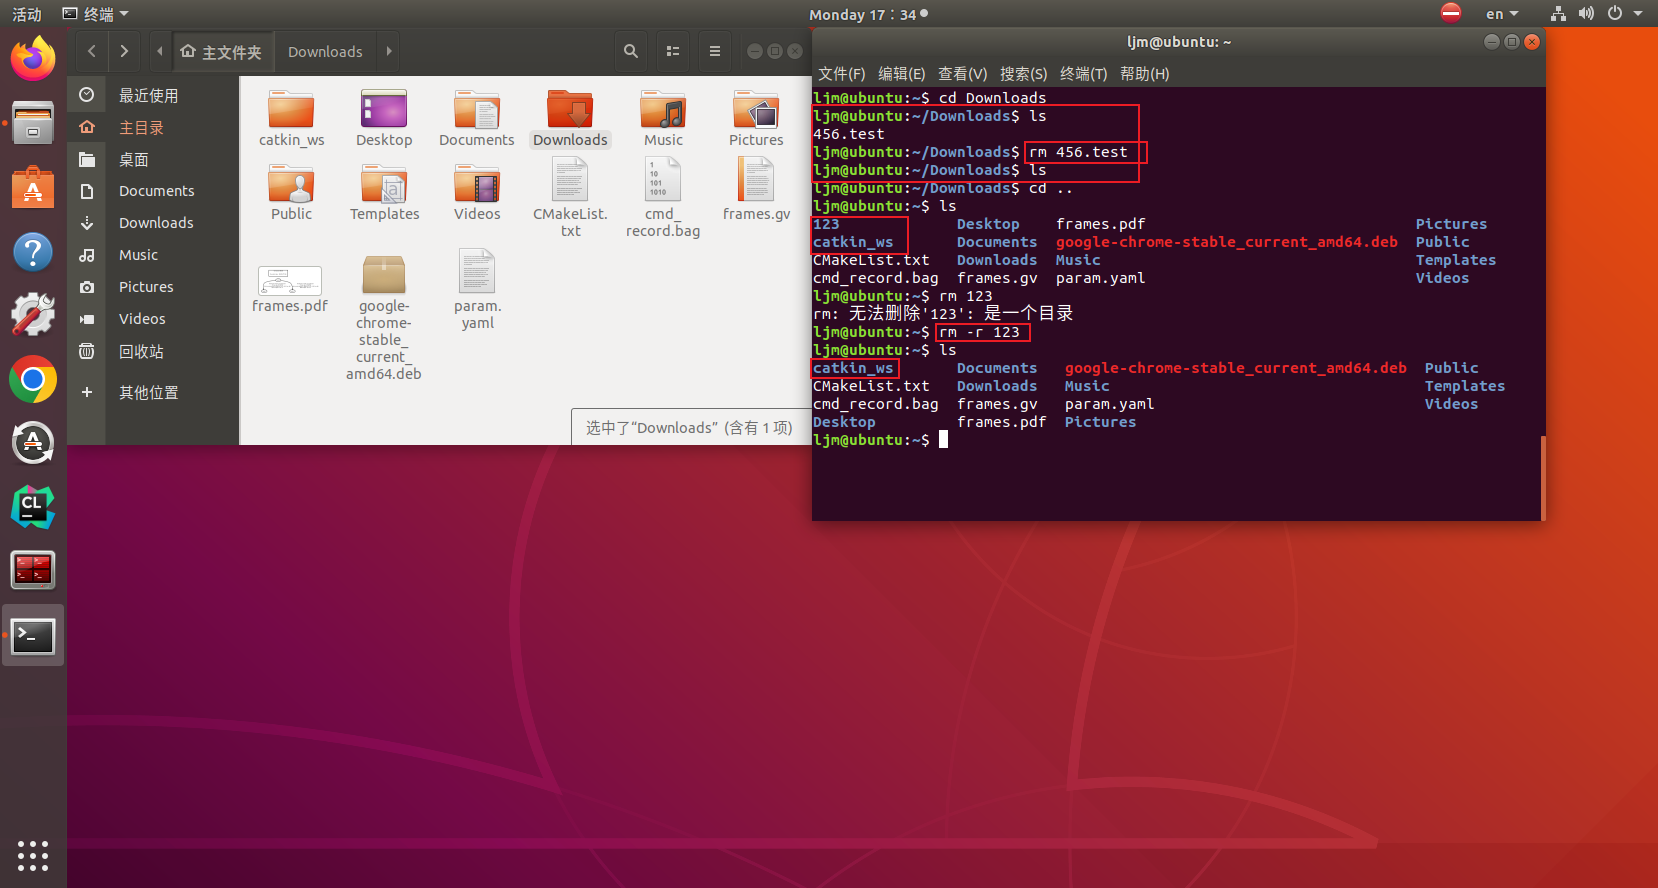
rm
Function: Delete one or more files and folders
rm 参数1 参数2 ... 参数n
Parameter 1 Parameter 2 ... Parameter n: the target file to be deleted
rm -r 参数1 参数2 ... 参数n
Parameter 1 Parameter 2 ... Parameter n: the target folder to be deleted
Notice:
-
Deleting one or more target folders will delete all subdirectories and files in the directory. Please be careful when deleting folders;
-
For linked files, only the link is deleted, and the original files remain unchanged.
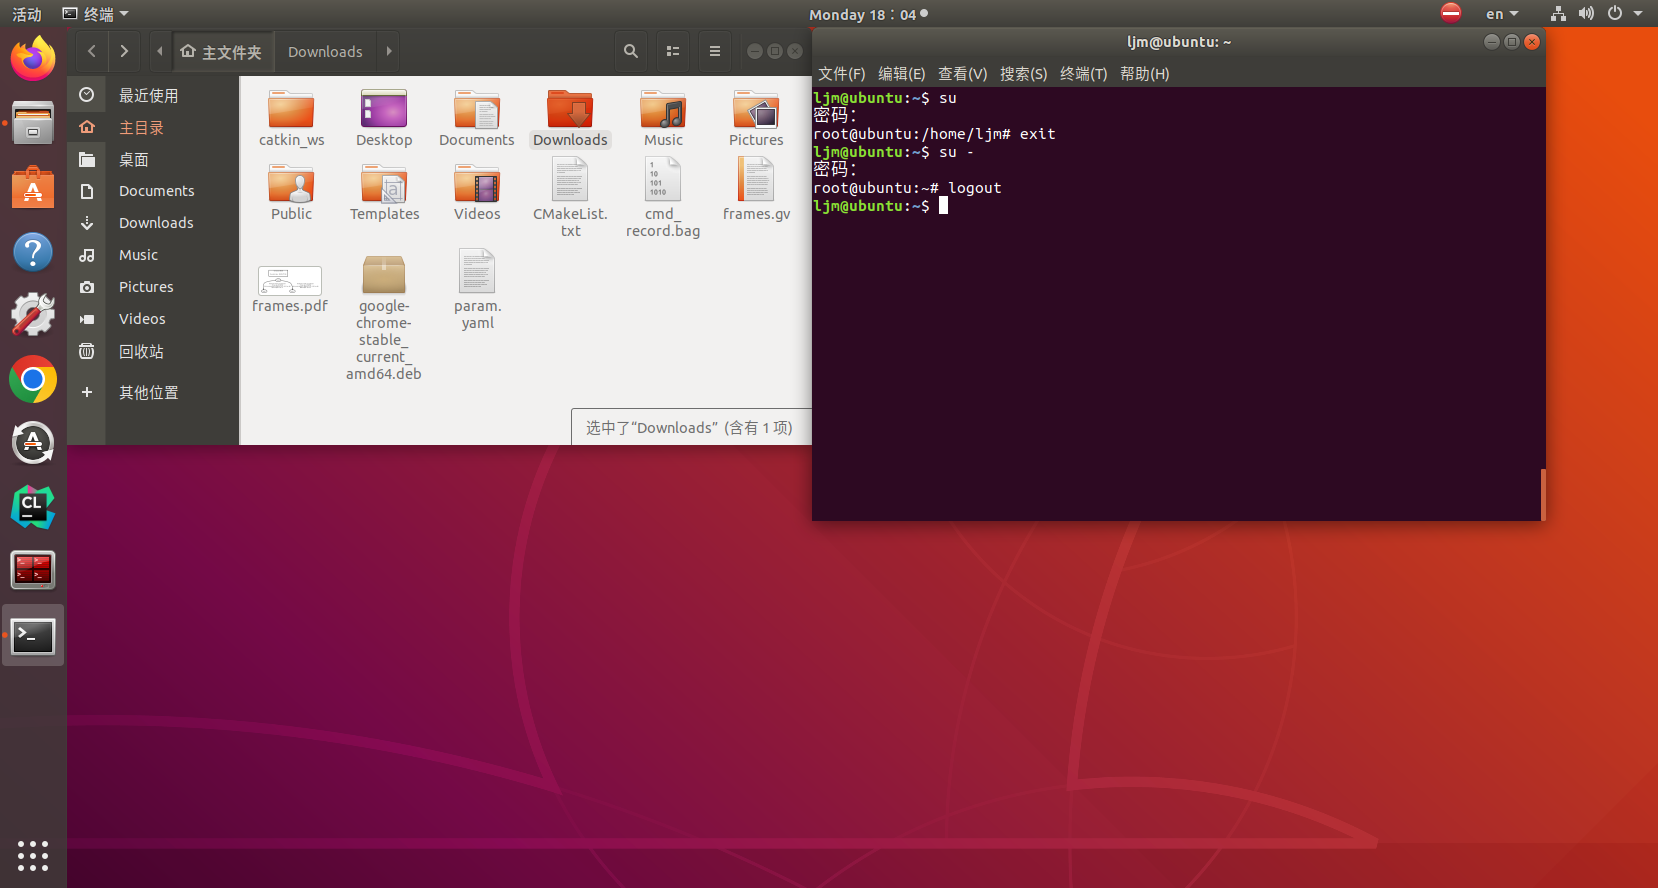
are
Function: switch users,
The permissions of ordinary users are generally unrestricted in their HOME directory. Once they leave the HOME directory, in most places, ordinary users only have read and execute permissions and no modification permissions.
su [-] [用户名]
-: The symbol is optional and indicates whether to load environment variables after switching users.
It is recommended to bring;
用户名: Indicates the user to be switched. The user name can also be omitted. If omitted, it means
Switch to root by default
Notice:
-
Switching users requires entering a password;
-
After switching users, you can use the exit command to return to the previous user, or you can use the shortcut key: ctrl + d
sudo
Function: Allow an ordinary command to temporarily have root permissions
sudo 其它命令
Example:
Update software source listsudo apt-get update