For Vue's instructions, the official website explains this: Directives are special attributes with a v- prefix. The value of the directive attribute is expected to be a single JavaScript expression. The responsibility of the instruction is to act on the DOM in a responsive manner when the value of the expression changes.
Introduction to instructions on Vue official website
Article directory
Official website introduction
v-bind directive , v-on directive , v-model directive , v-for directive , v-text directive , v-html directive , v-pre directive , v-cloak directive, v - if directive , v-else-if instruction , v-else instruction , v-show instruction , v-once instruction , v-slot instruction .
1. v-bind command
v-bind can accept a parameter, which is used to update the attribute value of the HTML attribute in response, v-bind: can be abbreviated as:
<template>
  <div id="app">
    <a href='https://www.csdn.net/'>CSDN</a>
    <br> <!-- 用做换行 -->
    <a v-bind:href="url">v-bind</a>
    <br> <!-- 用做换行 -->
    <a :href="url">v-bind缩写</a><!--缩写-->
  </div>
</template>

<script>
export default {


  name: 'App',
  data () {


    return {


      url: 'https://www.csdn.net/'
    }
  }
}
</script>

2. v-on command
v-on can be used to bind event listeners. The event type is specified by the parameter. The expression can be a method name or an inline statement, and can be omitted if there are no modifiers. Used to bind event functions in methods in Vue, v-on: can be abbreviated as @
<template>
  <div id="app">
    <button v-on:click="Click('第一次点击')">v-on点击事件</button>
    <br><!--用作换行-->
    <br><!--用作换行-->
    <button @click="Click('第二次点击')">v-on 缩写@点击事件</button>
  </div>
</template>

<script>
export default {


  name: 'App',
  data () {


    return {


    }
  },
  methods: {


    Click (val) {


      console.log('点击事件触发', val)
    }
  }
}
</script>

3. v-model command
Create a two-way binding on a form control or component. When the data changes, the view is updated synchronously, and when the view is updated, the data is also updated synchronously.
The principle is to bind the value attribute and listen to the input event
<template>
  <div id="app">
    v-model:<input type="text" v-model="text">
    <br>
    v-model原理:<input type="text" :value="text" @input="inputChange">
    <p>text的值是:{

   {text}}</p>
  </div>
</template>

<script>
export default {


  name: 'App',
  data () {


    return {


      text: '我是一个输入框'
    }
  },
  methods: {


    inputChange (e) {


      this.text = e.target.value // 获取输入框内容,对数据text重新赋值
    }
  }
}
</script>

4. v-for instruction
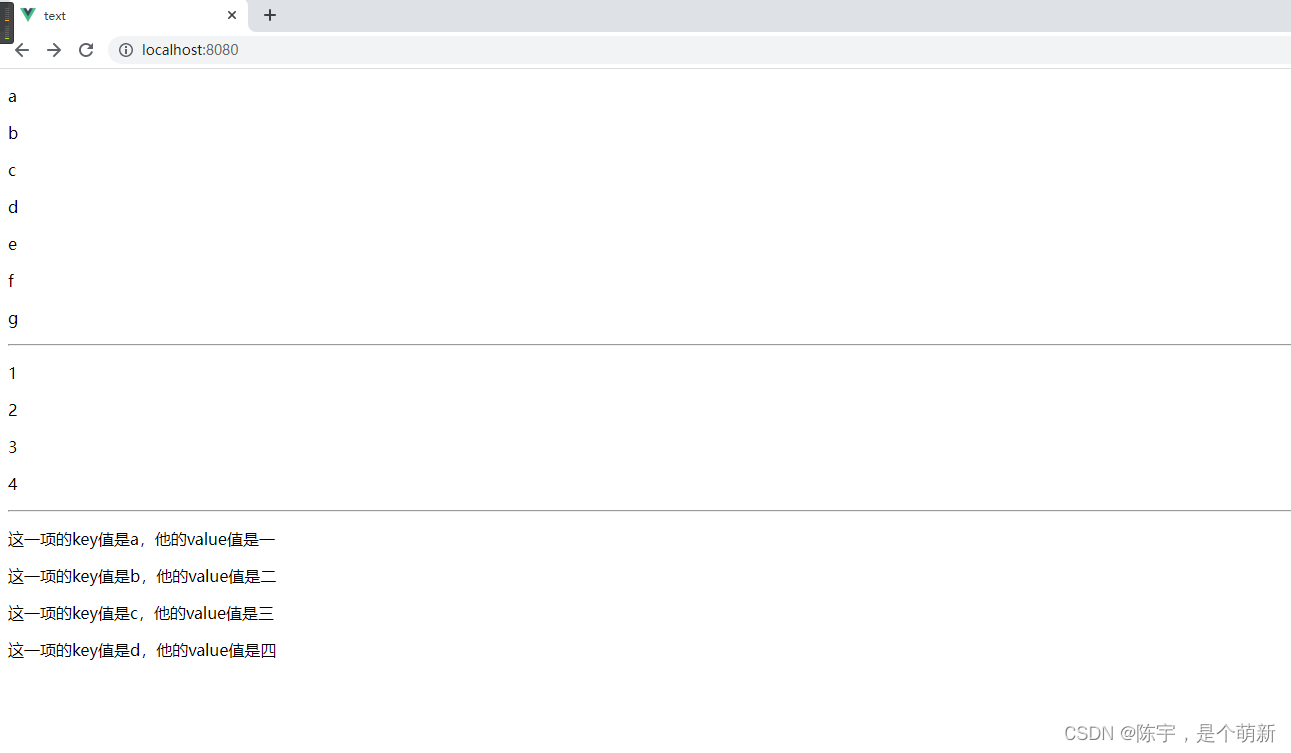
Renders an element or template block multiple times based on source data. It can be used to traverse arrays, objects, and strings
. When using the v-for loop in vue, the key primary key should be added as a unique identifier. The purpose of using the key is to update the virtual DOM efficiently. The principle is to pass the key during the update process to accurately determine whether the two nodes are the same, avoid frequent update elements, reduce DOM operations, and improve performance (involving Vue's Diff algorithm)
<template>
  <div id="app">
    <p v-for="i in str" :key="i">{

   {i}}</p>
    <hr>
    <p v-for="(val,index) in arr" :key="index">{

   {val}}</p>
     <!--通常情况下不建议使用下标index作为key值,如果只是用来展示数据,可以考虑使用-->
    <hr>
    <p v-for="val,key in obj" :key="key"> <!--也可以使用对象中的每一项作为key值,毕竟每一个成员都不相同-->
      <span>这一项的key值是{

   {key}},他的value值是{

   {val}}</span>
    </p>
  </div>
</template>

<script>
export default {


  name: 'App',
  data () {


    return {


      str: 'abcdefg',
      arr: ['1', '2', '3', '4'],
      obj: {

       a: '一', b: '二', c: '三', d: '四' }
    }
  }
}
</script>
5. v-text command
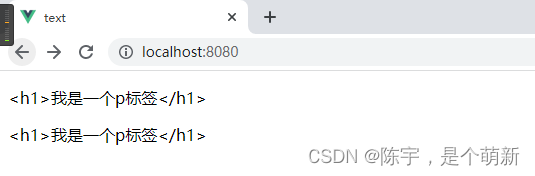
Update the element's textContent. If you want to update the partial textContent, you need to use {
{ Mustache }} interpolation.
It is equivalent to the innerText attribute in Js native, but it cannot parse the tag, and it will be output as plain text
<template>
  <div id="app">
     <p v-text="str"></p>
    <p id="text"></p>
  </div>
</template>

<script>
export default {


  name: 'App',
  data () {


    return {


      str: '<h1>我是一个p标签</h1>'
    }
  },
  mounted () {

       // Vue的生命周期钩子函数,从这开始可以获取到页面中的dom元素
    const p = document.getElementById('text')
    p.innerText = this.str
  }
}
</script>
6. v-html command
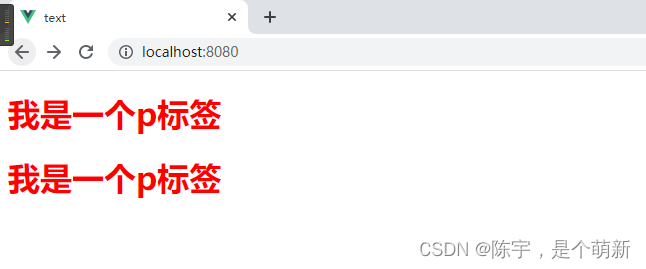
Update the innerHTML of the element. NOTE: Content is inserted as plain HTML - it will not be compiled as a Vue template. If you're trying to combine templates with v-html, reconsider using components instead.
<template>
  <div id="app">
     <p v-html="str"></p>
    <p id="text"></p>
  </div>
</template>

<script>
export default {


  name: 'App',
  data () {


    return {


      str: '<h1 style=color:red;>我是一个p标签</h1>'
    }
  },
  mounted () {

       // Vue的生命周期钩子函数,从这开始可以获取到页面中的dom元素
    const p = document.getElementById('text')
    p.innerHTML = this.str
  }
}
</script>
7. v-pre command
Skips compilation of this element and its children. Can be used to display raw Mustache tags. Skipping lots of nodes without instructions speeds up compilation.
In fact, what is written in the label is what it is, and it has no effect on the content
<span v-pre>{

   { this will not be compiled }}</span>
8. v-cloak command
When using {
{}} to display or update page data: When the network speed is relatively slow, there will be a bad excessive phenomenon, which will make users see our expression { {variable name}} first, and then can
see Specific value, so the user experience is very bad.
The v-cloak directive can be used with the CSS attribute selector [v-cloak] { display: none }. This directive can hide uncompiled Mustache tags until the instance is ready to be displayed.
<template>
  <div id="app">
     <!-- <img :src="src" alt=""> -->
     <div v-cloak>{

   {message}}</div>
  </div>
</template>

<script>
export default {


  name: 'App',
  data () {


    return {


      message: 'this is a book'
    }
  }
}
</script>

<style lang="scss">
[v-cloak]{


  display: none !important;
}
</style>
9、v-if、v-else-if、v-else指令
The v-if instruction can control the display and hiding of labels or components according to conditions. If it
is true, it will be displayed, and if it is false, it will be hidden. It can be used together with v-else-if and v-else instructions, which is equivalent to the if statement
v-esle- in Js The if/v-else command cannot be used alone
to control the display and hiding of v-if. The principle is to remove the label that is false from the dom directly.
<template>
  <div id="app">
    <p v-if="number >= 95">优秀</p>         <!--成绩位于95-100-->
    <p v-else-if="number >=85">良好</p>     <!--成绩位于85-94-->
    <p v-else-if="number>=60">及格</p>      <!--成绩位于60-84-->
    <p v-else>不及格</p>                    <!--成绩位于0-59-->
  </div>
</template>

<script>
export default {


  name: 'App',
  data () {


    return {


      number: parseInt(Math.random() * 101)
    }
  },
  created () {


    console.log('小明的分数是----->', this.number)
  }
}
</script>

10. v-show command
According to the true and false value of the expression, the display and hiding of the control element is similar to v-if,
but the working principle of v-show is to achieve the effect of displaying and hiding from the style by switching whether the display attribute of the element is none
and v-show Can only be used alone, not v-else-if, v-else together
<template>
  <div id="app">
    <p v-show="boolean">只有为真,我才会显示</p>
    <button @click="change">切换</button>
  </div>
</template>

<script>
export default {


  name: 'App',
  data () {


    return {


      boolean: true
    }
  },
  methods: {


    change () {


      this.boolean = !this.boolean
      // 点击的时候将boolean切换为相反值
    }
  }
}
</script>

11. v-once command
Elements and components are rendered only once. Subsequent re-renders, the element/component and all its children will be considered static content and skipped. This can be used to optimize update performance.
<template>
  <div id="app">
    <button v-once @click="add">+</button>
    <p v-once>{

   {num}}</p>
    <button @click="reduce">-</button>
  </div>
</template>

<script>
export default {


  name: 'App',
  data () {


    return {


      num: 1
    }
  },
  methods: {


    add () {


      this.num++
      console.log(this.num)
    },
    reduce () {


      this.num--
      console.log(this.num)
    }
  }
}
</script>
Because the page has been rendered once when it is initialized, even if num is changing, the page will not be rendered again but skipped

12. v-slot instruction
Provides a named slot or a scoped slot. Can be abbreviated as #A
JavaScript expression that can be placed in place of a function parameter (destructuring is available where supported). Optional, i.e. only required when passing in props for slots.
When we need to display the data of the child component in the parent component, we need to write it in advance through the slot inside the child component
父组件
<template>
  <div class="home">
    <HelloWorld></HelloWorld>
  </div>
</template>

<script>
import HelloWorld from '@/components/HelloWorld.vue'
export default {


  name: 'HomeView',
  components: {


    HelloWorld
  }
}
</script>
子组件
<template>
  <div>
      <slot>{

   { sport.basketball }}</slot>
  </div>
</template>

<script>
export default {


  data () {


    return {


      sport: {


        basketball: '篮球',
        football: '足球',
        tabletennis: '乒乓球'
      }
    }
  },
}
</script>
At this time, basketball is displayed on the page
, but when we want to change the displayed content, we need to use the v-slot scope slot method
父组件
<template>
  <div class="home">
    <HelloWorld>
      <template v-slot:default="type">
          {

   {type.sport.tabletennis}}   <!--通过v-slot获取子组件把暴露出来的数据,然后进行展示-->
      </template>
    </HelloWorld>
  </div>
</template>

<script>
import HelloWorld from '@/components/HelloWorld.vue'

export default {


  name: 'HomeView',
  components: {


    HelloWorld
  }
}
</script>
子组件
<template>
  <div>
      <slot :sport="sport">{

   { sport.basketball }}</slot>   <!--把sport对象暴露出去,使父组件可以通过作用域插槽获取-->
  </div>
</template>

<script>
export default {


  data () {


    return {


      sport: {


        basketball: '篮球',
        football: '足球',
        tabletennis: '乒乓球'
      }
    }
  }
}
</script>
At this point, the content displayed on the parent component page can be replaced as required