Directorio de artículos
CentOS Stream 8 instala OpenStack de código abierto (versión V) a través de Packstack
necesito saber
- Versión de la plataforma de virtualización
VMware Workstation 16.2.3- versión del sistema operativo
CentOS Linux Stream 8- Puede visitar la estación de espejo permanente Ali / la estación de espejo permanente de Huawei u otras estaciones de espejo para descargar la fuente de instalación
- El entorno utiliza 2 máquinas virtuales, una sola tarjeta de red y configura IP estática y DNS para ellas.
- A partir de
Ussurila versión, debe usarCentOS 8oRHEL 8, en el momento de la publicación,Stream 8la versión más alta admitida por la versión es xena- para construirpila abiertaLo más problemático es el problema de la fuente de yum . Se recomienda seguir estrictamente este blog para configurar la fuente de yum.
- Nivel de niñera, siga los pasos, éxito de instalación absolutamente único.
planificación ambiental
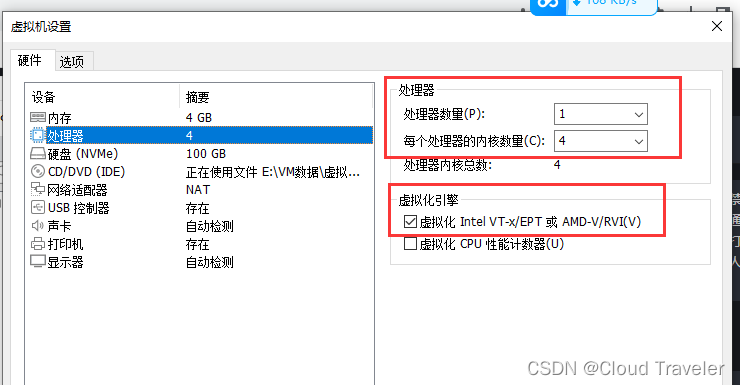
El nodo de control y el nodo de computación deben iniciar el motor de virtualización
Intel VT-xoAMD-V. Los nodos de control se reutilizarán como nodos informáticos y nodos de red en el futuro. La configuración de la máquina virtual se puede ajustar según la situación real.
| nombre de la CPU | IP | Puerta de enlace/DNS | CPU/Memoria | disco | Role | Observación |
|---|---|---|---|---|---|---|
| controlador | 192.168.129.185 | 192.168.129.2 | 4c8g | 100 gramos | Nodo de control/red/cómputo | El motor de virtualización debe estar habilitado |
| computadora | 192.168.129.186 | 192.168.129.2 | 4c8g | 100 gramos | calcular nodo | El motor de virtualización debe estar habilitado |
Configuración del entorno del sistema
configuración de la red
Los tipos de tarjeta de red del nodo de control y del nodo informático en el entorno actual son
NAT
Configuración de tarjeta de red, cerrar firewall, Selinux, NetworkManager
- nodo de control
### 网卡配置

[root@tmp ~]# hostnamectl set-hostname controller
[root@tmp ~]# hostname
controller

[root@tmp ~]# cd /etc/sysconfig/network-scripts/
[root@tmp network-scripts]# ls
ifcfg-ens160
[root@tmp network-scripts]# vi ifcfg-ens160
[root@tmp network-scripts]# cat ifcfg-ens160
TYPE=Ethernet
BOOTPROTO=none
NAME=ens160
DEVICE=ens160
ONBOOT=yes
IPADDR=192.168.129.185
NETMASK=255.255.255.0
GATEWAY=192.168.129.2
DNS1=192.168.129.2

### 可以再配置完ip之后关机拍摄快照

### 关闭防火墙
[root@controller ~]# systemctl stop firewalld
[root@controller ~]# systemctl disable firewalld
Removed /etc/systemd/system/multi-user.target.wants/firewalld.service.
Removed /etc/systemd/system/dbus-org.fedoraproject.FirewallD1.service.

### 关闭SELINUX
[root@controller ~]# setenforce 0
[root@controller ~]# sed -i 's/SELINUX=enforcing/SELINUX=disabled/g' /etc/selinux/config

### 关闭NetworkManager
[root@controller ~]# systemctl stop NetworkManager
[root@controller ~]# systemctl disable NetworkManager
Removed /etc/systemd/system/multi-user.target.wants/NetworkManager.service.
Removed /etc/systemd/system/dbus-org.freedesktop.nm-dispatcher.service.
Removed /etc/systemd/system/network-online.target.wants/NetworkManager-wait-online.service.
- calcular nodo
### 网卡配置

[root@tmp ~]# hostnamectl set-hostname computer
[root@tmp ~]# hostname
computer

[root@tmp ~]# cd /etc/sysconfig/network-scripts/
[root@tmp network-scripts]# ls
ifcfg-ens160
[root@tmp network-scripts]# vi ifcfg-ens160
[root@tmp network-scripts]# cat ifcfg-ens160
TYPE=Ethernet
BOOTPROTO=none
NAME=ens160
DEVICE=ens160
ONBOOT=yes
IPADDR=192.168.129.186
NETMASK=255.255.255.0
GATEWAY=192.168.129.2
DNS1=192.168.129.2
[root@tmp network-scripts]#

### 可以再配置完ip之后关机拍摄快照
De acuerdo con la situación real del procesador.
### 关闭防火墙
[root@computer ~]# systemctl stop firewalld
[root@computer ~]# systemctl disable firewalld
Removed /etc/systemd/system/multi-user.target.wants/firewalld.service.
Removed /etc/systemd/system/dbus-org.fedoraproject.FirewallD1.service.

### 关闭SELINUX
[root@computer ~]# setenforce 0
[root@computer ~]# sed -i 's/SELINUX=enforcing/SELINUX=disabled/g' /etc/selinux/config

### 关闭NetworkManager
[root@computer ~]# systemctl stop NetworkManager
[root@computer ~]# systemctl disable NetworkManager
Removed /etc/systemd/system/multi-user.target.wants/NetworkManager.service.
Removed /etc/systemd/system/dbus-org.freedesktop.nm-dispatcher.service.
Removed /etc/systemd/system/network-online.target.wants/NetworkManager-wait-online.service.
Configure ip y nombre de host para instalar el paquete básico
- nodo de control
### 配置ip及主机名
[root@controller ~]# vi /etc/hosts
[root@controller ~]# cat /etc/hosts
127.0.0.1   localhost localhost.localdomain localhost4 localhost4.localdomain4
::1         localhost localhost.localdomain localhost6 localhost6.localdomain6
192.168.129.185 controller
192.168.129.186 computer

[root@controller ~]# ping computer

### 安装基础包
[root@controller ~]# yum install -y vim net-tools bash-completion chrony.x86_64 centos-release-openstack-victoria.noarch
- calcular nodo
### 配置ip及主机名
[root@computer ~]# vi /etc/hosts
[root@computer ~]# cat /etc/hosts
127.0.0.1   localhost localhost.localdomain localhost4 localhost4.localdomain4
::1         localhost localhost.localdomain localhost6 localhost6.localdomain6
192.168.129.185 controller
192.168.129.186 computer
[root@computer ~]# ping controller

### 安装基础包
[root@computer ~]# yum install -y vim net-tools bash-completion chrony.x86_64 centos-release-openstack-victoria.noarch
Si hay un error al instalar el paquete básico y no hay ip después de reiniciar, puede reiniciar NetworkManager y luego apagarlo
Configuración de sincronización de hora NTP
La versión de Linux 8 ya no es compatible con
ntpdatela herramienta de forma predeterminada, utilícela en su lugarchronydpara la sincronización
- nodo de control
[root@controller ~]#  vi /etc/chrony.conf

# Please consider joining the pool (http://www.pool.ntp.org/join.html).
#pool 2.centos.pool.ntp.org iburst
sever  pool ntp.aliyun.com iburst     ### 配置了阿里云ntp

# Record the rate at which the system clock gains/losses time.
driftfile /var/lib/chrony/drift
..............

### 启动服务
[root@controller ~]# systemctl start chronyd.service
Job for chronyd.service failed because the control process exited with error code.
See "systemctl status chronyd.service" and "journalctl -xe" for details.
[root@controller ~]# systemctl enable chronyd.service
- calcular nodo
[root@computer ~]# vi /etc/chrony.conf

# Please consider joining the pool (http://www.pool.ntp.org/join.html).
#pool 2.centos.pool.ntp.org iburst
sever  pool ntp.aliyun.com iburst     ### 配置了阿里云ntp

# Record the rate at which the system clock gains/losses time.
driftfile /var/lib/chrony/drift
..............

### 启动服务
[root@computer ~]# systemctl start chronyd.service
Job for chronyd.service failed because the control process exited with error code.
See "systemctl status chronyd.service" and "journalctl -xe" for details.
[root@computer ~]# systemctl enable chronyd.service
Configurar fuente YUM
- nodo de control
[root@controller ~]# mkdir /etc/yum.repos.d/bak
[root@controller ~]# mv /etc/yum.repos.d/*.repo /etc/yum.repos.d/bak/

[root@controller ~]# cat <<EOF > /etc/yum.repos.d/cloudcs.repo

[highavailability]
name=CentOS Stream 8 - HighAvailability
baseurl=https://mirrors.aliyun.com/centos/8-stream/HighAvailability/x86_64/os/
gpgkey=file:///etc/pki/rpm-gpg/RPM-GPG-KEY-centosofficial
gpgcheck=1
repo_gpgcheck=0
metadata_expire=6h
countme=1
enabled=1

[nfv]
name=CentOS Stream 8 - NFV
baseurl=https://mirrors.aliyun.com/centos/8-stream/NFV/x86_64/os/
gpgkey=file:///etc/pki/rpm-gpg/RPM-GPG-KEY-centosofficial
gpgcheck=1
repo_gpgcheck=0
metadata_expire=6h
countme=1
enabled=1

[rt]
name=CentOS Stream 8 - RT
baseurl=https://mirrors.aliyun.com/centos/8-stream/RT/x86_64/os/
gpgkey=file:///etc/pki/rpm-gpg/RPM-GPG-KEY-centosofficial
gpgcheck=1
repo_gpgcheck=0
metadata_expire=6h
countme=1
enabled=1

[resilientstorage]
name=CentOS Stream 8 - ResilientStorage
baseurl=https://mirrors.aliyun.com/centos/8-stream/ResilientStorage/x86_64/os/
gpgkey=file:///etc/pki/rpm-gpg/RPM-GPG-KEY-centosofficial
gpgcheck=1
repo_gpgcheck=0
metadata_expire=6h
countme=1
enabled=1

[extras-common]
name=CentOS Stream 8 - Extras packages
baseurl=https://mirrors.aliyun.com/centos/8-stream/extras/x86_64/extras-common/
gpgkey=file:///etc/pki/rpm-gpg/RPM-GPG-KEY-CentOS-SIG-Extras-SHA512
gpgcheck=1
repo_gpgcheck=0
metadata_expire=6h
countme=1
enabled=1

[extras]
name=CentOS Stream $releasever - Extras
mirrorlist=http://mirrorlist.centos.org/?release=$stream&arch=$basearch&repo=extras&infra=$infra
#baseurl=http://mirror.centos.org/$contentdir/$stream/extras/$basearch/os/
baseurl=https://mirrors.aliyun.com/centos/8-stream/extras/x86_64/os/
gpgcheck=1
enabled=1
gpgkey=file:///etc/pki/rpm-gpg/RPM-GPG-KEY-centosofficial

[centos-ceph-pacific]
name=CentOS - Ceph Pacific
baseurl=https://mirrors.aliyun.com/centos/8-stream/storage/x86_64/ceph-pacific/
gpgcheck=0
enabled=1
gpgkey=file:///etc/pki/rpm-gpg/RPM-GPG-KEY-CentOS-SIG-Storage

[centos-rabbitmq-38]
name=CentOS-8 - RabbitMQ 38
baseurl=https://mirrors.aliyun.com/centos/8-stream/messaging/x86_64/rabbitmq-38/
gpgcheck=1
enabled=1
gpgkey=file:///etc/pki/rpm-gpg/RPM-GPG-KEY-CentOS-SIG-Messaging

[centos-nfv-openvswitch]
name=CentOS Stream 8 - NFV OpenvSwitch
baseurl=https://mirrors.aliyun.com/centos/8-stream/nfv/x86_64/openvswitch-2/
gpgcheck=1
enabled=1
gpgkey=file:///etc/pki/rpm-gpg/RPM-GPG-KEY-CentOS-SIG-NFV
module_hotfixes=1

[baseos]
name=CentOS Stream 8 - BaseOS
baseurl=https://mirrors.aliyun.com/centos/8-stream/BaseOS/x86_64/os/
gpgkey=file:///etc/pki/rpm-gpg/RPM-GPG-KEY-centosofficial
gpgcheck=1
repo_gpgcheck=0
metadata_expire=6h
countme=1
enabled=1

[appstream]
name=CentOS Stream 8 - AppStream
baseurl=https://mirrors.aliyun.com/centos/8-stream/AppStream/x86_64/os/
gpgkey=file:///etc/pki/rpm-gpg/RPM-GPG-KEY-centosofficial
gpgcheck=1
repo_gpgcheck=0
metadata_expire=6h
countme=1
enabled=1

[centos-openstack-victoria]
name=CentOS 8 - OpenStack victoria
baseurl=https://mirrors.aliyun.com/centos/8-stream/cloud/x86_64/openstack-victoria/
#baseurl=https://repo.huaweicloud.com/centos/8-stream/cloud/x86_64/openstack-yoga/
gpgcheck=1
enabled=1
gpgkey=file:///etc/pki/rpm-gpg/RPM-GPG-KEY-CentOS-SIG-Cloud
module_hotfixes=1

[powertools]
name=CentOS Stream 8 - PowerTools
#mirrorlist=http://mirrorlist.centos.org/?release=$stream&arch=$basearch&repo=PowerTools&infra=$infra
baseurl=https://mirrors.aliyun.com/centos/8-stream/PowerTools/x86_64/os/
gpgcheck=1
enabled=1
gpgkey=file:///etc/pki/rpm-gpg/RPM-GPG-KEY-centosofficial
EOF

[root@controller ~]# ls /etc/yum.repos.d/
bak  cloudcs.repo
[root@controller ~]# yum clean all
27 files removed
[root@controller ~]# yum repolist all
repo id                           repo name                                   status
appstream                         CentOS Stream 8 - AppStream                 enabled
baseos                            CentOS Stream 8 - BaseOS                    enabled
centos-ceph-pacific               CentOS - Ceph Pacific                       enabled
centos-nfv-openvswitch            CentOS Stream 8 - NFV OpenvSwitch           enabled
centos-openstack-victoria         CentOS 8 - OpenStack victoria               enabled
centos-rabbitmq-38                CentOS-8 - RabbitMQ 38                      enabled
extras                            CentOS Stream  - Extras                     enabled
extras-common                     CentOS Stream 8 - Extras packages           enabled
highavailability                  CentOS Stream 8 - HighAvailability          enabled
nfv                               CentOS Stream 8 - NFV                       enabled
powertools                        CentOS Stream 8 - PowerTools                enabled
resilientstorage                  CentOS Stream 8 - ResilientStorage          enabled
rt                                CentOS Stream 8 - RT                        enabled
[root@controller ~]#
- calcular nodo
[root@computer ~]# mkdir /etc/yum.repos.d/bak
[root@computer ~]# mv /etc/yum.repos.d/*.repo /etc/yum.repos.d/bak/

### 通过远程拷贝方式将 控制节点 yum 文件,拉取到计算节点
[root@compute ~]# scp controller:/etc/yum.repos.d/cloudcs.repo /etc/yum.repos.d/
The authenticity of host 'controller (192.168.100.128)' can't be established.
ECDSA key fingerprint is SHA256:0wisA68htG476jVggvEX5wWHxAK9nmDDWXzLAmwP8as.
Are you sure you want to continue connecting (yes/no/[fingerprint])? yes
Warning: Permanently added 'controller,192.168.100.128' (ECDSA) to the list of known hosts.
root@controller's password:
cloudcs.repo

[root@computer ~]#
[root@computer ~]# ls /etc/yum.repos.d/
bak  cloudcs.repo
[root@computer ~]# yum clean all
27 files removed
[root@computer ~]# yum repolist  all
repo id                           repo name                                   status
appstream                         CentOS Stream 8 - AppStream                 enabled
baseos                            CentOS Stream 8 - BaseOS                    enabled
centos-ceph-pacific               CentOS - Ceph Pacific                       enabled
centos-nfv-openvswitch            CentOS Stream 8 - NFV OpenvSwitch           enabled
centos-openstack-victoria         CentOS 8 - OpenStack victoria               enabled
centos-rabbitmq-38                CentOS-8 - RabbitMQ 38                      enabled
extras                            CentOS Stream  - Extras                     enabled
extras-common                     CentOS Stream 8 - Extras packages           enabled
highavailability                  CentOS Stream 8 - HighAvailability          enabled
nfv                               CentOS Stream 8 - NFV                       enabled
powertools                        CentOS Stream 8 - PowerTools                enabled
resilientstorage                  CentOS Stream 8 - ResilientStorage          enabled
rt                                CentOS Stream 8 - RT                        enabled
[root@computer ~]#
configuración de instalación
Nodo de control para instalar herramientas PackStack
[root@controller ~]# yum install -y openstack-packstack

..............
  rubygems-2.7.6.3-110.module_el8.6.0+1187+541216eb.noarch
  yaml-cpp-0.6.3-1.el8.x86_64
Complete!
generar archivo de respuesta
[root@controller ~]# packstack --help | grep ans
  --gen-answer-file=GEN_ANSWER_FILE
                        Generate a template of an answer file.
  --validate-answer-file=VALIDATE_ANSWER_FILE
                        Check if answerfile contains unexpected options.
  --answer-file=ANSWER_FILE
                        answerfile will also be generated and should be used
  -o, --options         Print details on options available in answer file(rst
                        Packstack a second time with the same answer file and
                        attribute where "y" means an account is disabled.
    --manila-netapp-transport-type=MANILA_NETAPP_TRANSPORT_TYPE
                        The transport protocol used when communicating with


[root@controller ~]# packstack --gen-answer-file=memeda.txt   ## 指定文件路径名称
Packstack changed given value  to required value /root/.ssh/id_rsa.pub
Additional information:
 * Parameter CONFIG_NEUTRON_L2_AGENT: You have chosen OVN Neutron backend. Note that this backend does not support the VPNaaS plugin. Geneve will be used as the encapsulation method for tenant networks
Editar archivo de respuesta
Preste atención a la configuración de parámetros
CONFIG_NEUTRON_OVN_BRIDGE_IFACES, OVN creará automáticamente un conmutador virtual br-ex y conectará ens160 al conmutador virtual br-ex. En el futuro, el host de la nube puede conectarse a la red externa a través de br-ex.
[root@controller ~]# cat /etc/redhat-release
CentOS Stream release 8

[root@controller ~]# vi memeda.txt

92 # Server on which to install OpenStack services specific to the
93 # controller role (for example, API servers or dashboard).
94 CONFIG_CONTROLLER_HOST=192.168.129.185
95
### 要安装计算服务的服务器。我们在计算和控制节点都安装,复用
96 # List the servers on which to install the Compute service.
97 CONFIG_COMPUTE_HOSTS=192.168.129.185,192.168.129.186

### 身份验证密码
322 # Password to use for the Identity service 'admin' user.
323 CONFIG_KEYSTONE_ADMIN_PW=redhat

### 创建测试用例,关闭
1168 # Specify 'y' to provision for demo usage and testing. ['y', 'n']
1169 CONFIG_PROVISION_DEMO=n

### 编排组件
59 # Specify 'y' to install OpenStack Orchestration (heat). ['y', 'n        ']
60 CONFIG_HEAT_INSTALL=y

### 桥接,映射射到自己控制节点的网卡
907 # ovn-bridge-mappings=ext-net:br-ex --os-neutron-ovn-bridge-
908 # interfaces=br-ex:eth0
909 CONFIG_NEUTRON_OVN_BRIDGE_IFACES=br-ex:ens160   -------注意自己网卡
Ejecute el archivo de respuesta para instalar
### 大概需要等待30分钟
[root@controller ~]# packstack --answer-file=memeda.txt
Welcome to the Packstack setup utility

The installation log file is available at: /var/tmp/packstack/20230806-151155-lamn_upk/openstack-setup.log

Installing:
Clean Up                                             [ DONE ]
Discovering ip protocol version                      [ DONE ]
[email protected]'s password:          ### 输入两台节点密码
[email protected]'s password:          ### 输入两台节点密码
Setting up ssh keys                                  [ DONE ]
Preparing servers                                    [ DONE ]
Pre installing Puppet and discovering hosts' details [ DONE ]
Preparing pre-install entries                        [ DONE ]
Setting up CACERT                                    [ DONE ]
Preparing AMQP entries                               [ DONE ]
Preparing MariaDB entries                            [ DONE ]
Fixing Keystone LDAP config parameters to be undef if empty[ DONE ]
Preparing Keystone entries                           [ DONE ]
Preparing Glance entries                             [ DONE ]
Checking if the Cinder server has a cinder-volumes vg[ DONE ]
Preparing Cinder entries                             [ DONE ]
Preparing Nova API entries                           [ DONE ]
Creating ssh keys for Nova migration                 [ DONE ]
Gathering ssh host keys for Nova migration           [ DONE ]
Preparing Nova Compute entries                       [ DONE ]
Preparing Nova Scheduler entries                     [ DONE ]
Preparing Nova VNC Proxy entries                     [ DONE ]
Preparing OpenStack Network-related Nova entries     [ DONE ]
Preparing Nova Common entries                        [ DONE ]
Preparing Neutron API entries                        [ DONE ]
Preparing Neutron L3 entries                         [ DONE ]
Preparing Neutron L2 Agent entries                   [ DONE ]
Preparing Neutron DHCP Agent entries                 [ DONE ]
Preparing Neutron Metering Agent entries             [ DONE ]
Checking if NetworkManager is enabled and running    [ DONE ]
Preparing OpenStack Client entries                   [ DONE ]
Preparing Horizon entries                            [ DONE ]
Preparing Swift builder entries                      [ DONE ]
Preparing Swift proxy entries                        [ DONE ]
Preparing Swift storage entries                      [ DONE ]
Preparing Heat entries                               [ DONE ]
Preparing Heat CloudFormation API entries            [ DONE ]
Preparing Gnocchi entries                            [ DONE ]
Preparing Redis entries                              [ DONE ]
Preparing Ceilometer entries                         [ DONE ]
Preparing Aodh entries                               [ DONE ]
Preparing Puppet manifests                           [ DONE ]
Copying Puppet modules and manifests                 [ DONE ]
Applying 192.168.129.185_controller.pp
192.168.129.185_controller.pp:                       [ DONE ]
Applying 192.168.129.185_network.pp
192.168.129.185_network.pp:                          [ DONE ]
Applying 192.168.129.186_compute.pp
Applying 192.168.129.185_compute.pp
192.168.129.185_compute.pp:                          [ DONE ]
192.168.129.186_compute.pp:                          [ DONE ]
Applying Puppet manifests                            [ DONE ]
Finalizing                                           [ DONE ]

 **** Installation completed successfully ******

Additional information:
 * Parameter CONFIG_NEUTRON_L2_AGENT: You have chosen OVN Neutron backend. Note that this backend does not support the VPNaaS plugin. Geneve will be used as the encapsulation method for tenant networks
 * Time synchronization installation was skipped. Please note that unsynchronized time on server instances might be problem for some OpenStack components.
 * File /root/keystonerc_admin has been created on OpenStack client host 192.168.129.185. To use the command line tools you need to source the file.
 * To access the OpenStack Dashboard browse to http://192.168.129.185/dashboard .
Please, find your login credentials stored in the keystonerc_admin in your home directory.
 * The installation log file is available at: /var/tmp/packstack/20230806-151155-lamn_upk/openstack-setup.log
 * The generated manifests are available at: /var/tmp/packstack/20230806-151155-lamn_upk/manifests
terminar la instalación
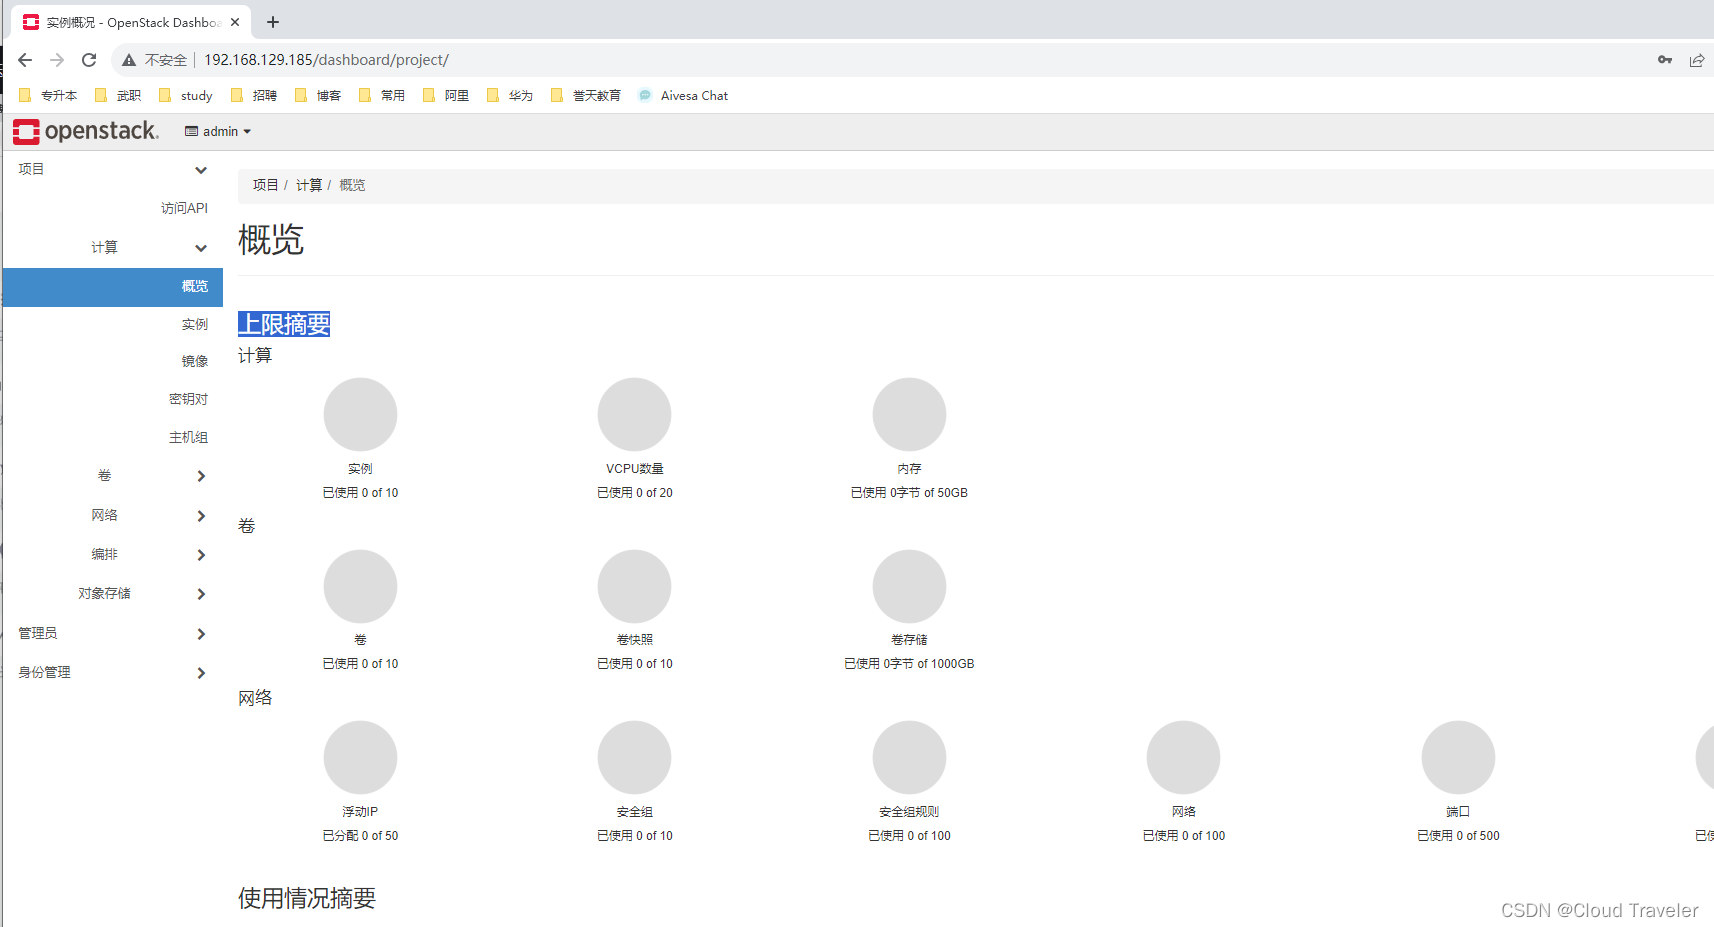
inicio de sesión de prueba
Abra un navegador, visite
http://192.168.129.185/dashboardcuenta: administrador
contraseña: sombrero rojo
red abierta
- nodo de control
Debido a que cerrar el servicio NetworkManager hará que la red no se habilite automáticamente después de que se reinicie el nodo y también provocará anomalías en los componentes openstack, por lo tanto, habilite la red para reemplazar el servicio NetworkManager.
[root@controller ~]# systemctl enable network
network.service is not a native service, redirecting to systemd-sysv-install.
Executing: /usr/lib/systemd/systemd-sysv-install enable network
[root@controller ~]# systemctl start  network
- calcular nodo
[root@computer ~]# systemctl enable network
network.service is not a native service, redirecting to systemd-sysv-install.
Executing: /usr/lib/systemd/systemd-sysv-install enable network
[root@computer ~]# systemctl start  network
- Reponer
- Al usar la herramienta Packstack para compilar OpenStack, debe cerrar NetworkManager y abrir y usar la red, principalmente porque los requisitos y la configuración de la red en el entorno OpenStack no son adecuados para el método de trabajo de NetworkManager. NetworkManager es una administración de red para gráficos y entornos de línea de comandos Una herramienta diseñada para proporcionar una configuración de red conveniente para usuarios de escritorio. Es capaz de manejar varios tipos de redes, incluidas las cableadas, inalámbricas, bluetooth, etc., y se administra dinámicamente de acuerdo con el entorno de la red. Sin embargo, en un entorno OpenStack, los requisitos de red suelen ser más complejos y requieren más control y personalización.
- OpenStack es una plataforma de código abierto para crear infraestructura en la nube, lo que implica la configuración y gestión de varias máquinas virtuales, redes, almacenamiento y otros componentes. En un entorno OpenStack, la red generalmente necesita ser altamente personalizada y detallada para satisfacer las necesidades de diferentes inquilinos y escenarios de aplicaciones. Esto no encaja bien con el enfoque de administración de red dinámico y automatizado proporcionado por NetworkManager.
- Con los servicios de red tradicionales, puede configurar y administrar con mayor precisión parámetros como interfaces de red, direcciones IP y rutas para cumplir con requisitos de red complejos en el entorno OpenStack. Esto es muy importante para las funciones de OpenStack, como la creación de redes virtuales, el aislamiento de inquilinos y la realización de la interoperabilidad de la red.
- Por lo tanto, para garantizar que la configuración de red del entorno OpenStack pueda satisfacer con precisión sus necesidades, generalmente se recomienda cerrar NetworkManager al compilar OpenStack y utilizar el servicio de red tradicional para la configuración de red. Esto permite un mejor control y ajuste de los parámetros de la red para garantizar la estabilidad y el rendimiento de la red OpenStack.
- Fin