1. Desarrollo rápido de sitios web
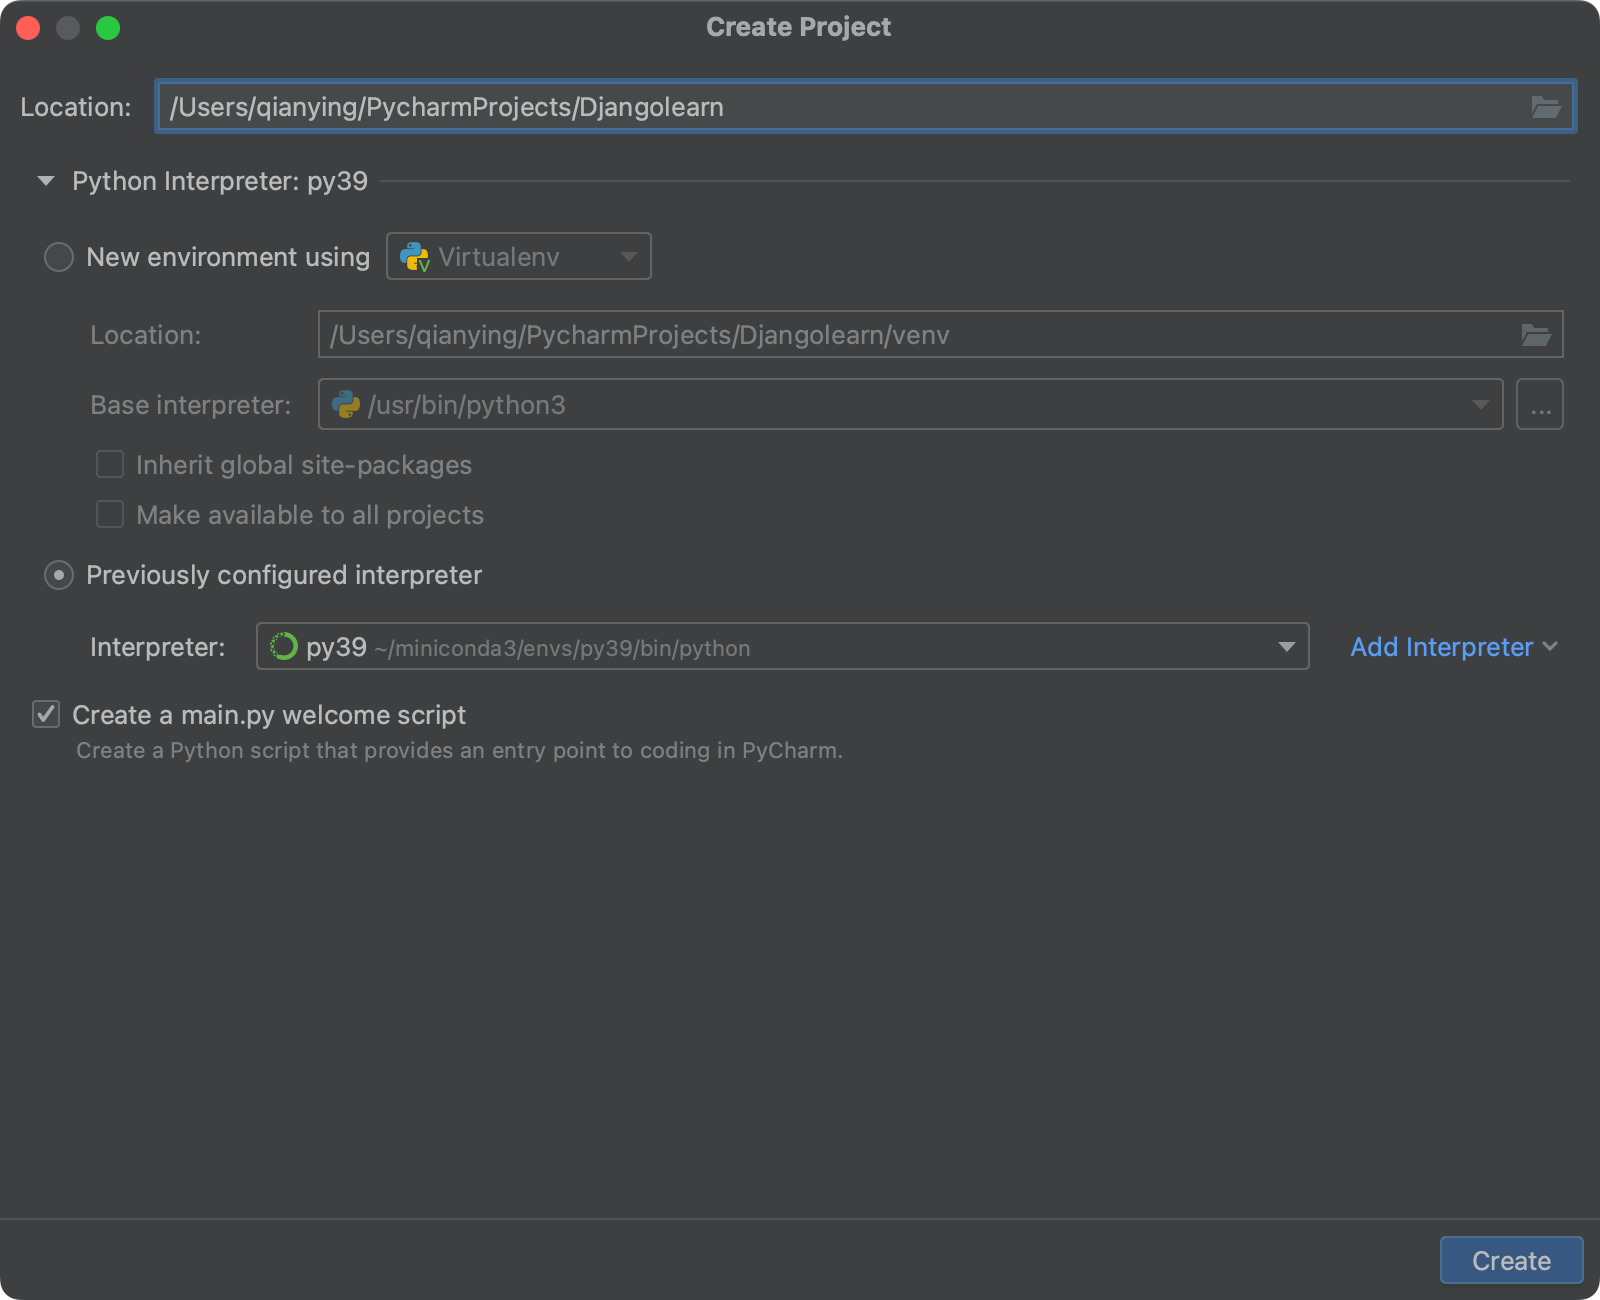
crear un nuevo proyecto
instalar matraz
conda install flask
conda list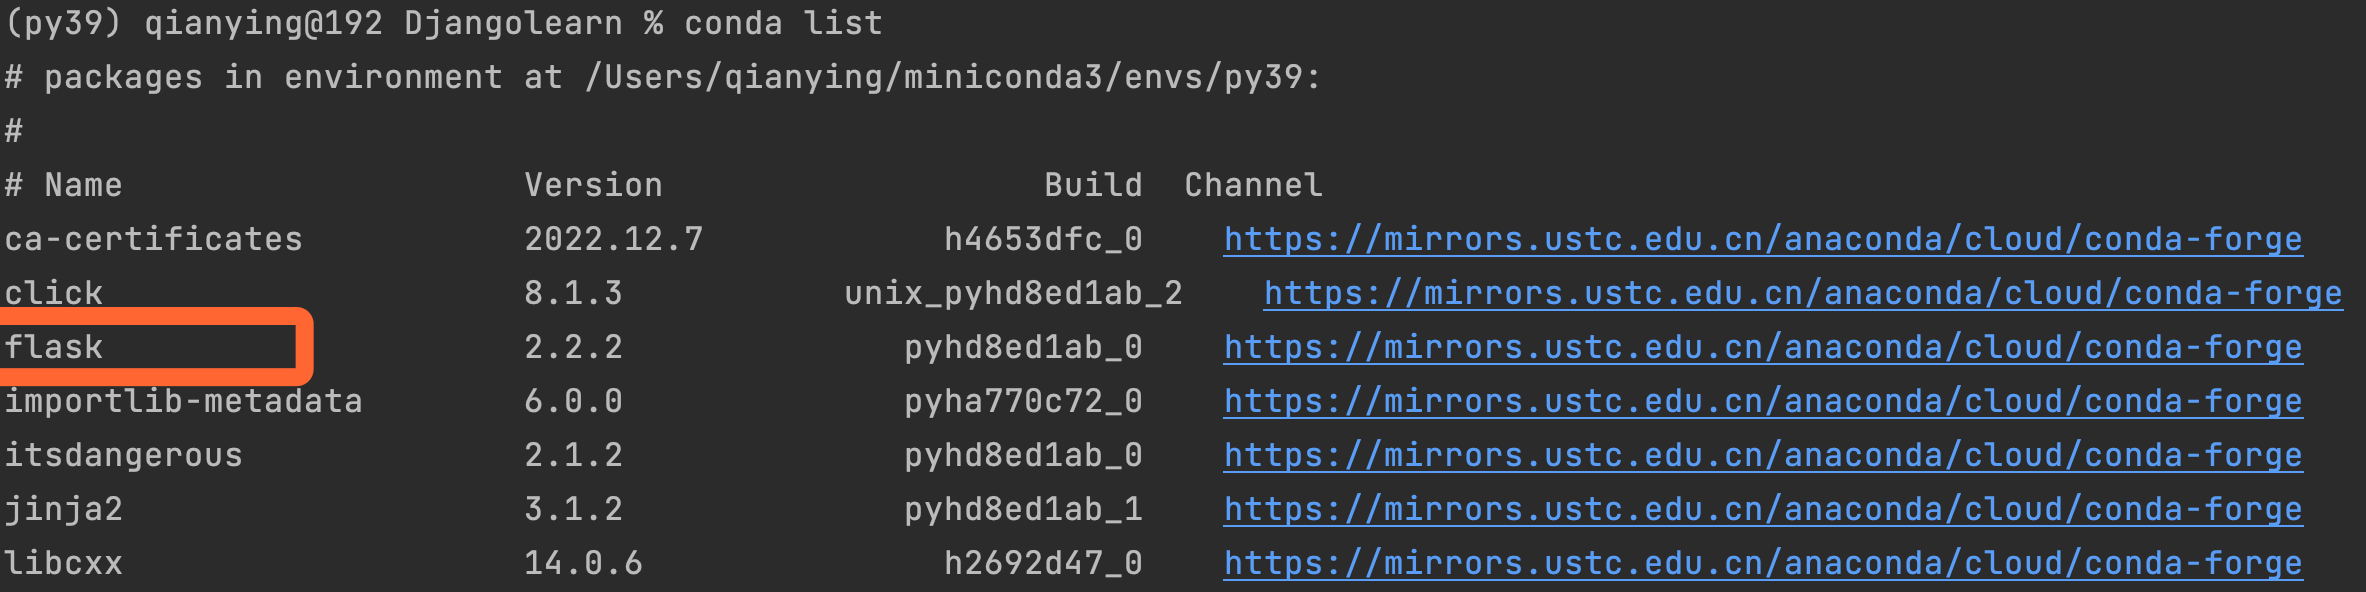
Instalación exitosa
Crear un nuevo archivo web.py
from flask import Flask

# 实力化对象Flask
app = Flask(__name__)


# 创建了网址/show/info和函数index的对应关系
# 以后用户再浏览器访问/show/info时,网站自动执行函数index
@app.route("/show/info")
def index():
    return "hello world"


if __name__ == "__main__":
    app.run()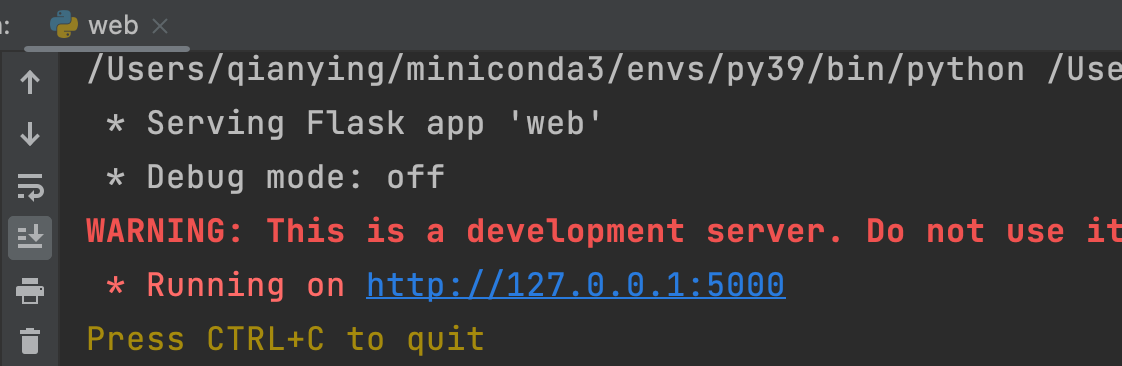
Ingrese http://127.0.0.1:5000/show/info en el navegador para ver "hola mundo".
Cierre la ejecución de este programa (haga clic en el cuadrado rojo en la esquina superior derecha de pycharm) y no se podrá acceder a este sitio web.
Para hacer que la página web sea más hermosa, el marco del matraz admite la escritura de etiquetas en un archivo y el acceso a ellas.
from flask import Flask, render_template

# 实力化对象Flask
app = Flask(__name__)


# 创建了网址/show/info和函数index的对应关系
# 以后用户再浏览器访问/show/info时,网站自动执行函数index
@app.route("/show/info")
def index()
    # flask内部会自动打开这个文件,读取内容,并将内容返回给用户
    # 默认:去当前项目目录的templates文件夹中找。
    return render_template("index.html")


if __name__ == "__main__":
    app.run()
Cree una plantilla de carpeta en la carpeta actual y luego cree un archivo index.html en el directorio de plantillas.
Agregar debajo de la etiqueta
<h1>hello world</h1>Vuelva a ejecutar el archivo web.py y "hola mundo" se convierte en un título de episodio en negrita y ampliado.
2. Etiquetas HTML
Idioma de transferencia de hipertexto (con navegador)
2.1 codificación (cabeza)
<meta charset="UTF-8"><!--文字编码-->2.2 título (cabeza)
<title>hot & cold</title><!--浏览器的标题-->2.3 Título
<h1></h1>
<h2></h2>
<h3></h3>
2.4 divisiones y tramos
<!--块级标签,无论有多少文字占据一行空间-->
<div>hello</div>
<div>world</div>
<!--行内标签,内链标签,文字有多少占多少空间-->
<span style="color:lightblue">hello</span>
<span style="color:lightblue">world</span>
2.5 Hipervínculos
<!--超链接,跳转其他的网站时需要写全网址-->
<a href="https://www.baidu.com">百度</a>
<!--超链接,跳转到自己网站的其他地址-->
<a href="/goods/list">查看更多</a>
2.6 fotos
<!--显示网上的图片,如果不能显示就说明别人加了防盗链-->
<img src="xxxx"/>
<!--显示自己的图片,创建static目录,图片放在static里-->
<div>
    <!--设置大小,像素形式-->
    <img style="height:200px;width:200px" src="/static/xxx.jpeg" />
</div>
<div>
    <!--设置大小,只能用宽度设置百分比形式-->
    <img style="width:15%" src="/static/xxx.jpeg"/>
</div>
2.7 lista
<!--无序列表-->
<ul>
    <li>KAI</li>
    <li>SEULGI</li>
    <li>JENO</li>
    <li>KARINA</li>
</ul>
<!--有序列表-->
<ol>
    <li>KAI</li>
    <li>SEULGI</li>
    <li>JENO</li>
    <li>KARINA</li>
</ol>
2.8 Formulario
<table border="1">
    <!--表头-->
    <thead>
        <tr>    <th>ID</th> <th>name</th>   <th>age</th>    </tr>
    </thead>
    <!--表格内容-->
    <tbody>
        <tr>    <td>1111</td>   <td>Tina</td>   <td>20</td> </tr>
        <tr>    <td>1112</td>   <td>Jack</td>   <td>21</td> </tr>
        <tr>    <td>1111</td>   <td>Jeno</td>   <td>22</td> </tr>
    </tbody>
</table>
Serie de entrada 2.9
<!--input系列-->
<!--1.纯文本框-->
<input type="text">
<!--2.密码框-->
<input type="password">
<!--3.选择文件-->
<input type="file">
<!--4.单选框-->
<input type="radio" name="sex">男
<input type="radio" name="sex">女
<!--5.复选框-->
<input type="checkbox">篮球
<input type="checkbox">足球
<input type="checkbox">排球
<!--按钮 6.button普通按钮 7.submit提交表单的按钮-->
<input type="button" value="提交">
<input type="submit" value="提交">
2.10 Cuadro desplegable
<!--下拉框 多选加上multiple-->
<select multiple>
    <option>北京</option>
    <option>上海</option>
    <option>深圳</option>
    <option>广州</option>
</select>
2.11 Cuadro de texto de varias líneas
<!--多行文本-->
<textarea rows="3"></textarea>
3. Solicitud de red
Ingrese la dirección en la URL del navegador, presione Entrar y visite
Cuando el navegador envía una solicitud al backend
Solicitud GET [método de URL/envío de formulario]
Fenómeno: salte, transfiera datos al fondo y los datos se empalmarán en la URL
Por ejemplo, al buscar en Baidu, se enviará una solicitud GET
Solicitud POST [envío de formulario]
Fenómeno: Los datos enviados no aparecen en la URL, pero en el cuerpo de la solicitud
Por ejemplo, al iniciar sesión, se enviará una solicitud POST
Si los datos de la página quieren enviarse a segundo plano, se deben cumplir las siguientes condiciones:
La etiqueta del formulario debe contener los datos que se van a enviar y estas etiquetas deben tener un atributo de nombre
Enviar método: método = "obtener"
Dirección enviada: action="/xxx/xxx/xx"
Debe haber una etiqueta de envío en la etiqueta del formulario
<form method="get" action="/do/reg">
    <div>
        用户名:<input type="text" name="username">
    </div>
    <div>
        密码:<input type="password" name="userpassword">
    </div>
    <input type="submit" value="xxx">
</form>
Caso: registro de usuario
from flask import Flask, render_template, request

app = Flask(__name__)


@app.route('/register', methods=['GET'])
def register():
    return render_template("register.html")


@app.route('/do/reg', methods=['GET'])
def do_register():
    # 1.接收用户通过GET形式发送的数据
    print(request.args)
    # 2.给用户返回结果
    return "注册成功"


@app.route('/post/reg', methods=['POST'])
def post_register():
    # 1.接收用户通过GET形式发送的数据
    print(request.form)
    # 2.给用户返回结果
    return "注册成功"


if __name__ == "__main__":
    app.run()
registro.html
<!DOCTYPE html>
<html lang="en">
<head>
    <meta charset="UTF-8">
    <title>用户注册</title>
</head>
<body>
    <h1>【GET】注册</h1>
    <form method="get" action="/do/reg">
        <div>
            用户名:<input type="text" name="username">
        </div>
        <div>
            密码:<input type="password" name="userpwd">
        </div>
        <input type="submit" value="注册">
    </form>
    <h1>【POST注册】</h1>
    <form method="post" action="/post/reg">
        <div>
            用户名:<input type="text" name="username">
        </div>
        <div>
            密码:<input type="password" name="userpwd">
        </div>
        <input type="submit" value="注册">
    </form>
</body>
</html>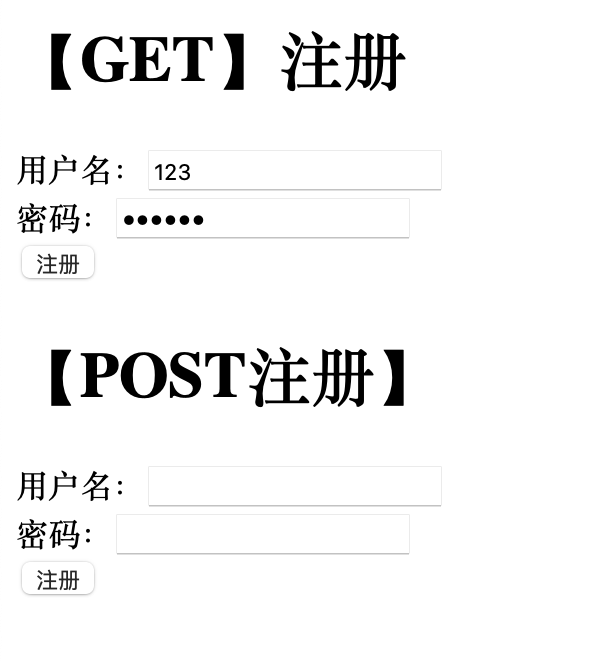
如果使用GET形式的注册,输入好用户名和密码后,点击注册,会显示“注册成功”。上面的URL变为http://127.0.0.1:5000/do/reg?username=123&userpwd=123456
如果使用POST形式的注册,输入好用户名和密码后,点击注册,会显示“注册成功”。上面的URL变为http://127.0.0.1:5000/post/reg
但一般来说,注册时的操作是POST请求
案例:登陆和注册结合
from flask import Flask, render_template, request

app = Flask(__name__)


@app.route('/register', methods=['GET', 'POST'])
def register():
    if request.method == "GET":
        return render_template("register.html")
    else:
        # 1.接收用户通过GET形式发送的数据
        print(request.form)
        username = request.form.get("username")
        userpwd = request.form.get("userpwd")
        sex = request.form.get("sex")
        hobby = request.form.get("hobby")
        city = request.form.get("city")
        notes = request.form.get("notes")
        print(username, userpwd, sex, hobby, city, notes)
        # 2.给用户返回结果
        return "注册成功"


@app.route('/login', methods=['GET', 'POST'])
def login():
    if request.method == "GET":
        return render_template("login.html")
    else:
        # 1.接收用户通过GET形式发送的数据
        print(request.form)
        username = request.form.get("username")
        userpwd = request.form.get("userpwd")
        print(username, userpwd)
        # 2.给用户返回结果
        return "登陆成功"


if __name__ == "__main__":
    app.run()
register.html
<!DOCTYPE html>
<html lang="en">
<head>
    <meta charset="UTF-8">
    <title>用户注册</title>
</head>
<body>
    <h1>【POST注册】</h1>
    <form method="post" action="/register">
        <div>
            用户名:<input type="text" name="username">
        </div>

        <div>
            密码:<input type="password" name="userpwd">
        </div>

        <div>
            性别:
            <input type="radio" name="sex" value="man">男
            <input type="radio" name="sex" value="woman">女
        </div>

        <div>
            爱好:
            <input type="checkbox" name="hobby" value="basketball">篮球
            <input type="checkbox" name="hobby" value="football">足球
            <input type="checkbox" name="hobby" value="volleyball">排球
        </div>

        <div>
            城市:
            <select name="city">
                <option value="beijing">北京</option>
                <option value="shanghai">上海</option>
                <option value="shenzhen">深圳</option>
                <option value="guangzhou">广州</option>
            </select>
        </div>
        <div>
            备注:<textarea name="notes"></textarea>
        <div>
            <input type="submit" value="注册">
        </div>
        <a href="/login">去登陆</a>
    </form>
</body>
</html>
login.html
<!DOCTYPE html>
<html lang="en">
<head>
    <meta charset="UTF-8">
    <title>用户登陆</title>
</head>
<body>
    <h1>登陆</h1>
    <form method="post" action="login">
        <div>
            姓名:<input type="text" name="username">
        </div>
        <div>
            密码:<input type="password" name="userpwd">
        </div>
        <div>
            <input type="submit" value="登陆">
        </div>
        <a href="/register">还没有账号?去注册</a>
    </form>

</body>
</html>
4.总结
1.网站请求流程

2.HTML标签
h/div/span/a/img/ul/ol/li/table/input/textarea/select/form