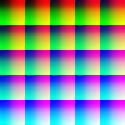
La tabla de búsqueda (LUT, LookUp Table) es una poderosa herramienta para la conversión del color de la imagen, utilizada en muchos editores de gráficos y video.
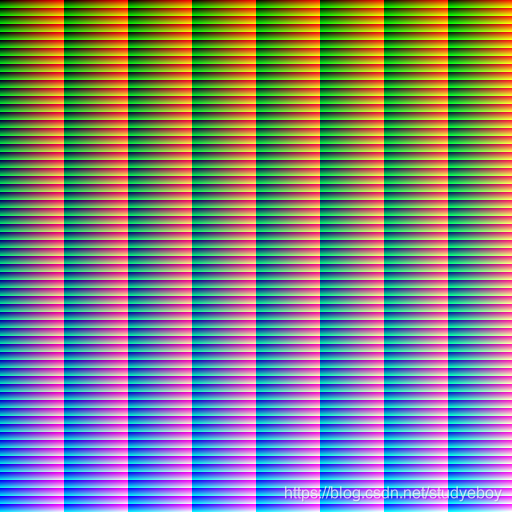
LUT 2D
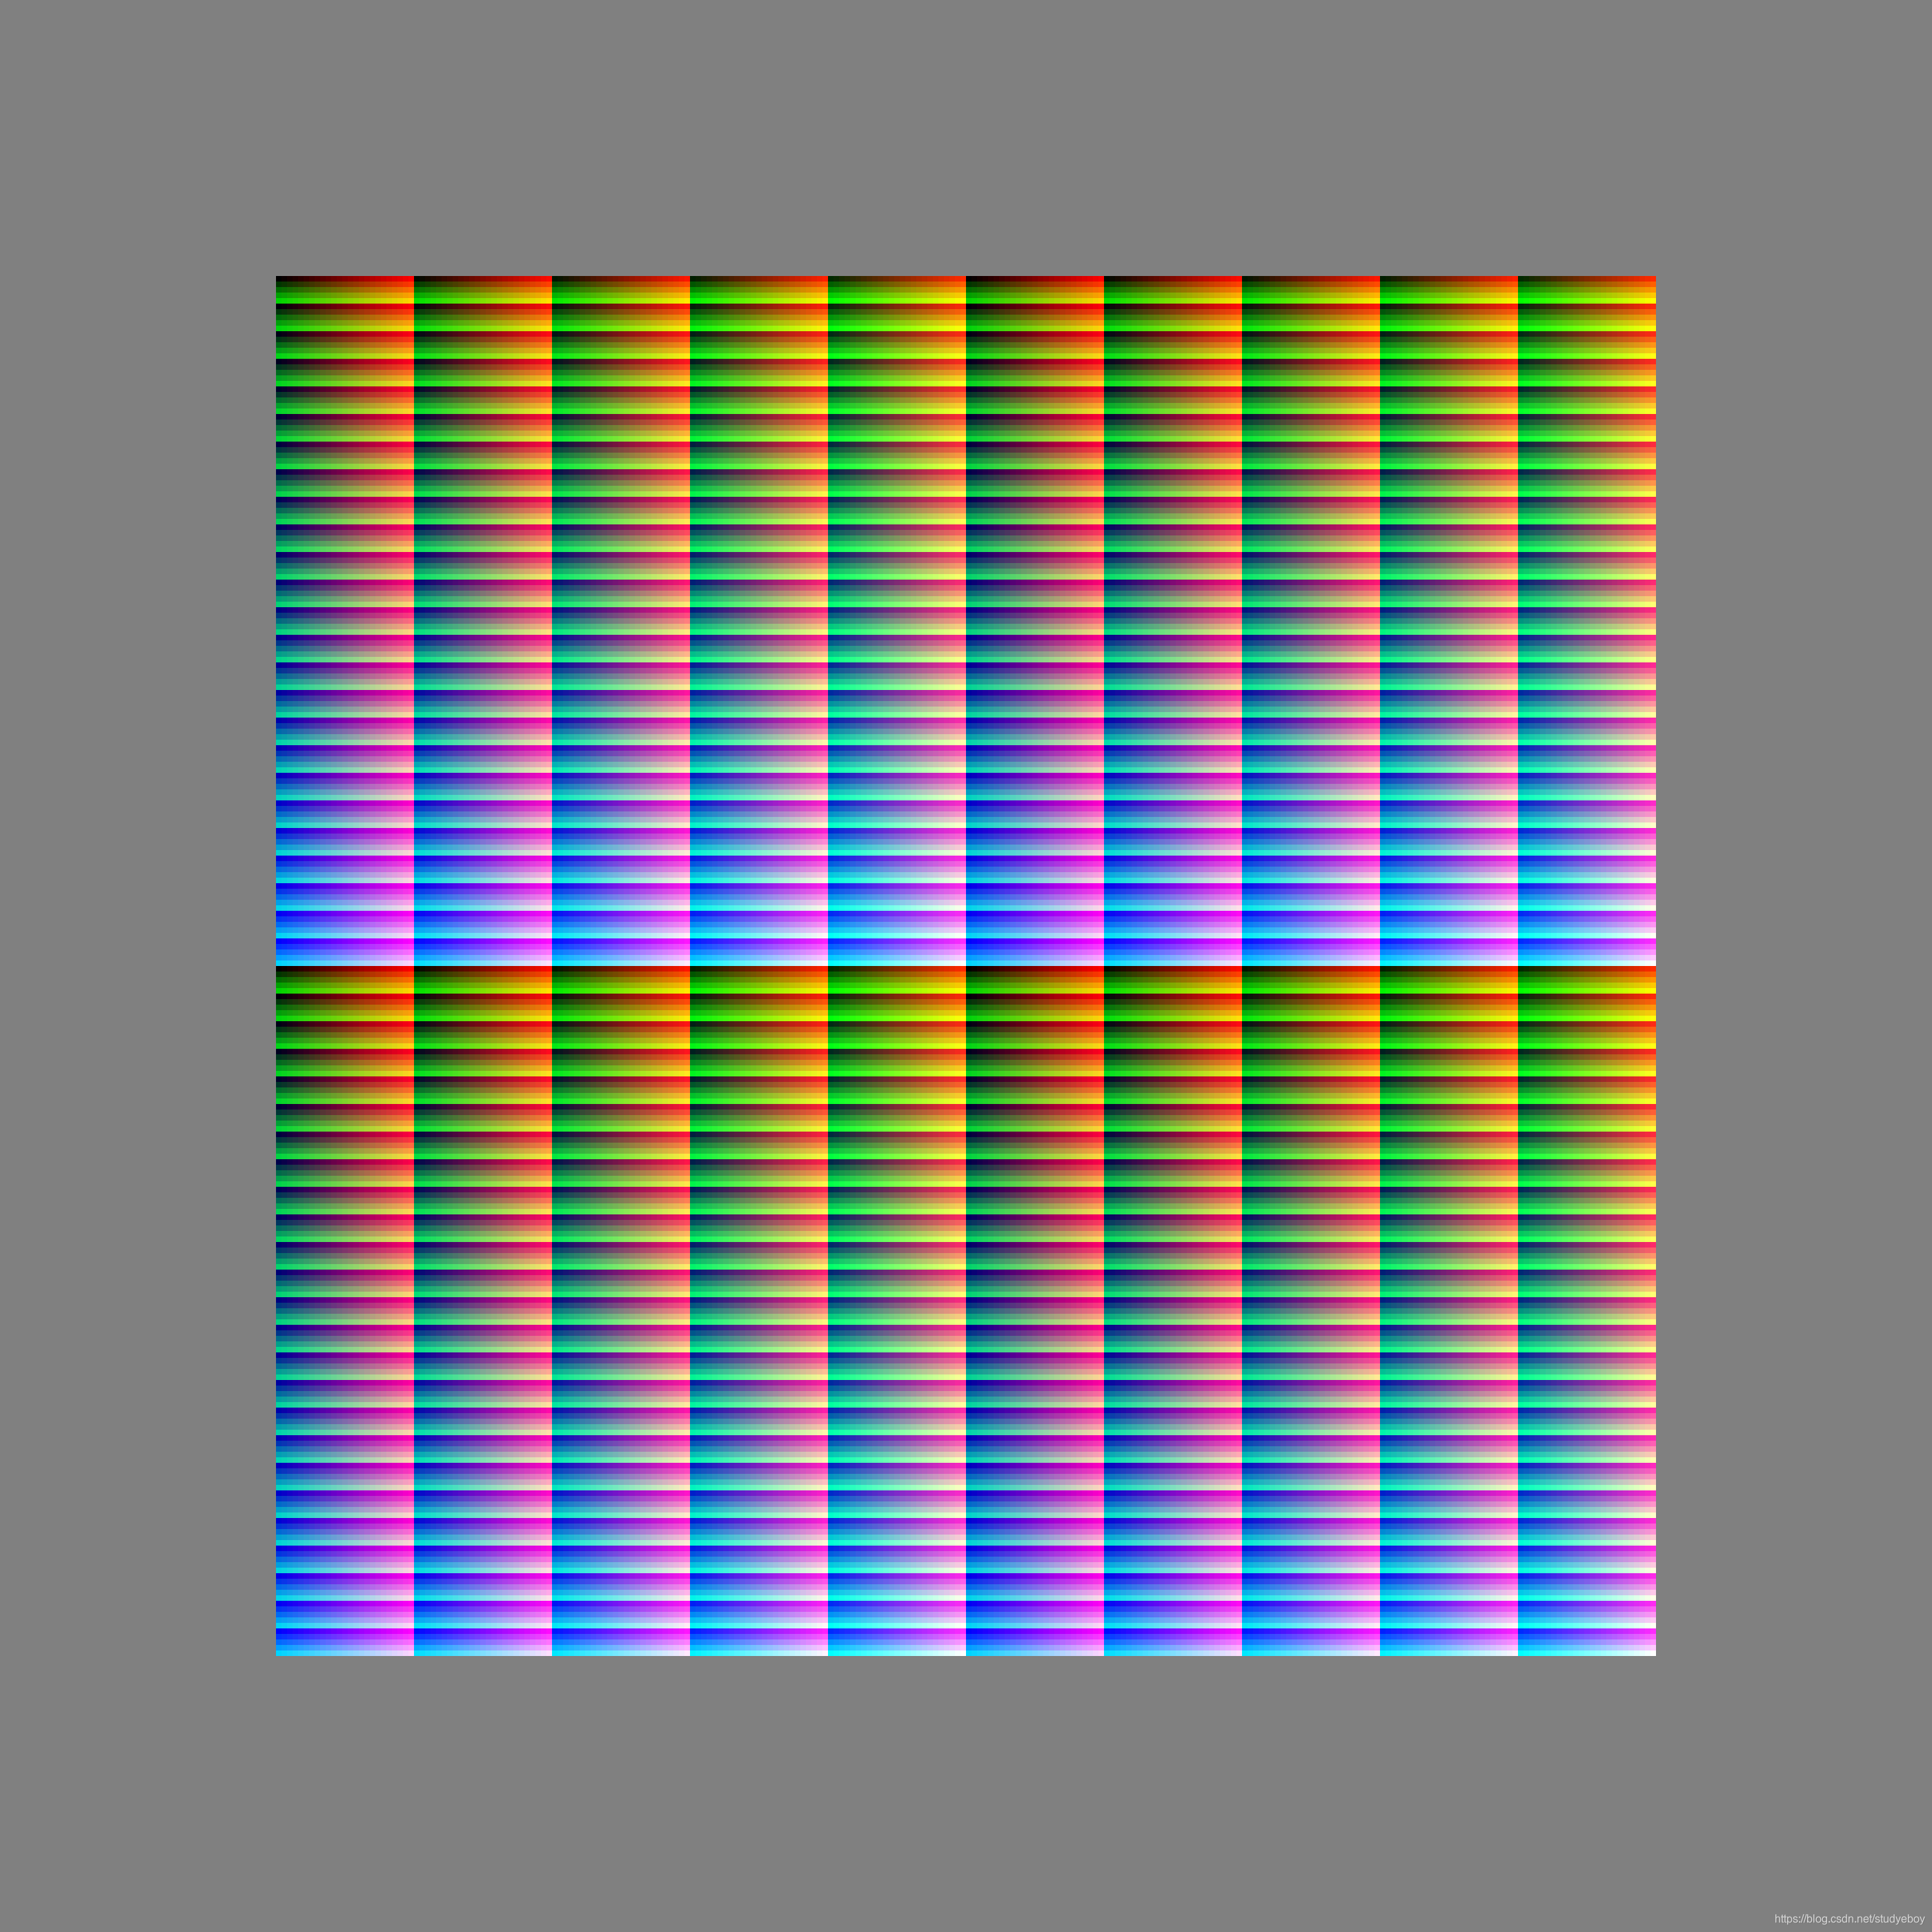
Generación de LUT 2D
def generate_identify_color_matrix(width, height, channel):
    img = np.zeros((width, height, channels), dtype=np.uint8)
    for by in range(8):
        for bx in range(8):
            for g in range(64):
                for r in range(64):
                    x = r + bx * 64
                    y = g + by * 64
                    img[y][x][0] = int(r * 255.0 / 63.0 + 0.5)
                    img[y][x][1] = int(g * 255.0 / 63.0 + 0.5)
                    img[y][x][2] = int((bx + by * 8.0) * 255.0 / 63.0 + 0.5)
    return img
 identity_lut = generate_identify_color_matrix()

LUT 2D para conversión de imágenes
from typing import Tuple
from functools import lru_cache
from math import floor
import numpy as np
import cv2

def lut_apply(image, lut):
    img_list = image.tolist()
    # dst_img = image.copy()
    dst_img = np.zeros((image.shape[0], image.shape[1], image.shape[2]), dtype=np.uint8)
    for iy in range(image.shape[0]):
        for ix in range(image.shape[1]):
            b, g, r = img_list[iy][ix] #bgr mode
            x, y, bx, by = color_coordinate(r, g, b)
            lut_y = y + by * 64
            lut_x = x + bx * 64
            dst_img[iy][ix][0] = lut[lut_y][lut_x][0]
            dst_img[iy][ix][1] = lut[lut_y][lut_x][1]
            dst_img[iy][ix][2] = lut[lut_y][lut_x][2]
    return dst_img
@lru_cache(maxsize=512)
def color_coordinate(r, g, b) -> Tuple[int, int, int, int]:
    x, y, bx, by = 0, 0, 0, 0
    x = floor(r / 4.0)
    y = floor(g / 4.0)
    bx, by = blue_coordinate(floor(b / 4.0))
    return x, y, bx, by


@lru_cache(maxsize=64)
def blue_coordinate(b: int) -> Tuple[int, int]:
    assert b >= 0 and b <= 63, 'GOT {}'.format(b)
    x, y = 0, 0
    y = floor(floor(b) / 8.0)
    x = int(floor(b) - y * 8.0)
    return x, y

image = cv2.imread('./test.jpg')
lut = cv2.imread('./YV2.JPG')
result_img = lut_apply(image, lut)
cv2.imwrite('./test_YV2_cv.jpg', result_img)

class LUT_WHITEN:
    def __init__(self, lut):
        cube64rows = 8
        cube64size = 64
        cube256size = 256
        cubescale = (int)(cube256size / cube64size) #4

        reshapelut = np.zeros((cube256size, cube256size, cube256size, 3))
        for i in range(cube64size):
            tmp = math.floor(i / cube64rows)
            cx = int((i - tmp * cube64rows) * cube64size)
            cy = int(tmp * cube64size)
            cube64 = lut[cy:cy+cube64size, cx:cx+cube64size]#cube64 in lut(512*512 (512=8*64))
            _rows, _cols, _ = cube64.shape
            if _rows == 0 or _cols == 0:
                continue
            cube256 = cv2.resize(cube64, (cube256size, cube256size))
            i = i * cubescale
            for k in range(cubescale):
                reshapelut[i + k] = cube256
        self.lut = reshapelut
        # print('reshapelut shape:', reshapelut.shape)

    def imageInLut(self, src):
        arr = src.copy()
        bs = arr[:, :, 0]
        gs = arr[:, :, 1]
        rs = arr[:, :, 2]
        arr[:, :] = self.lut[bs, gs, rs]
        return arr
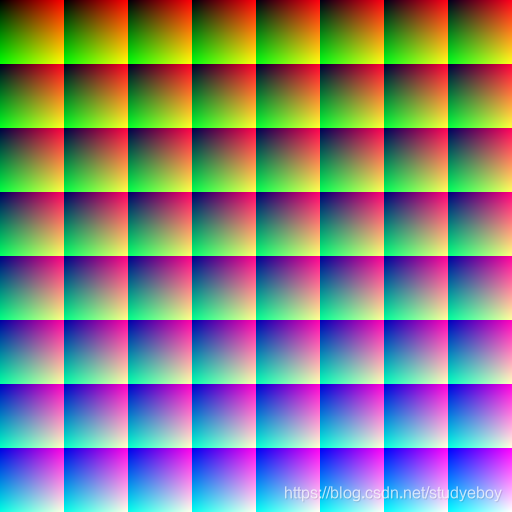
3D LUT
Formatos comunes de 3D LUT:
- Hald CLUT (.png)
- 3D LUT (.3dl)
- Cubo LUT (.cube)
Generación 3D LUT (Hald CLUT)
reconstrucción-filtros-de-color
-
Crear imagen de identidad (3D LUT)
./bin/generate.pydef generate_hald(size): b, g, r = numpy.mgrid[ 0 : 255 : size**2*1j, 0 : 255 : size**2*1j, 0 : 255 : size**2*1j ].astype(numpy.uint8) rgb = numpy.stack((r, g, b), axis=-1) return Image.fromarray(rgb.reshape(size**3, size**3, 3))Para evitar la distorsión que pueda ocurrir durante la transformación, como viñeteado, rayones, gradación y artefactos JPEG. Generado 25 × 25 × 25 25 \ times 25 \ times 252 5×2 5×La imagen de hadl de 2 5 d es la siguiente (se muestran 4):
-
Utilice un software de procesamiento de imágenes para transformar la imagen hald para obtener la imagen hald filtrada del mismo tamaño.

-
Método mejorado, que utiliza la imagen filtrada Desenfoque gaussiano para procesar y reducir el ruido.
Si el filtro de destino está muy distorsionado a nivel local o el centro de la imagen tiene un gradiente significativo, pueden aparecer algunos efectos indeseables. La imagen filtrada en cuestión es la siguiente:
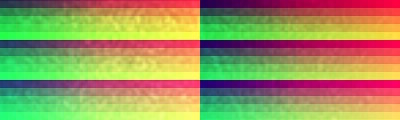
./bin/convert.py raw/15.Hudson.jpg halds/ --smooth 1.5 -
Convierta la imagen filtrada en una imagen de hald real (una de las 4 mostradas está recortada).

3D LUT (Hald CLUT) aplicado a imágenes (biblioteca de almohadas)
pillow-lut-tools Herramientas
Pillow LUT Las herramientas
Pillow LUT contienen herramientas para cargar, operar y generar tablas de búsqueda 3D, y están diseñadas específicamente para la biblioteca Pillow.
from PIL import Image
from pillow_lut import load_hald_image

hefe = load_hald_image('./res/test_hald.5.png')
img = Image.open('./res/test.jpg')
img.filter(hefe).save('./res/test.hald.jpg')
Funciones incluidas en Pillow LUT:
-
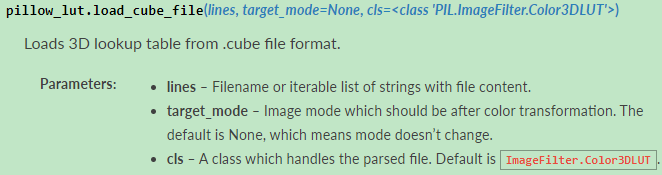
load_cube_file carga la tabla de búsqueda 3D desde el formato de archivo .cube
-
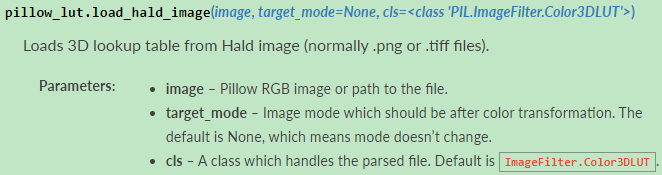
load_hald_image carga una tabla de búsqueda 3D desde una imagen Hald (generalmente un archivo .png o .tiff).
-
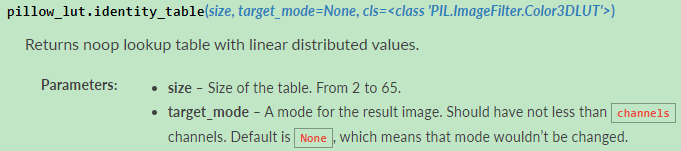
identity_table devuelve una tabla de búsqueda noop con valores distribuidos linealmente.
-
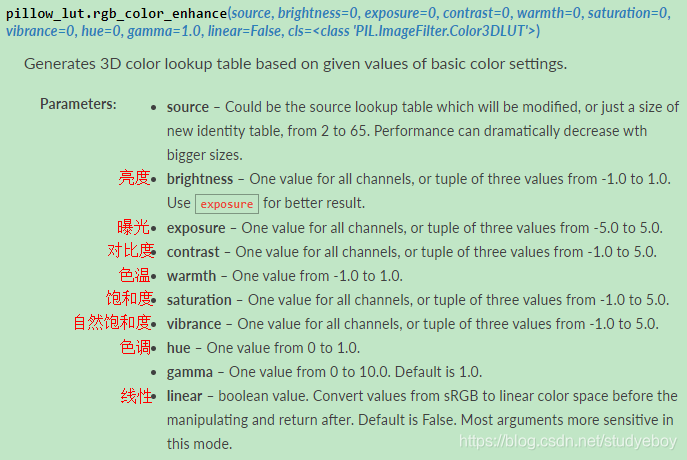
rgb_color_enhance genera una tabla de búsqueda de color tridimensional basada en el valor dado de la configuración de color básica.
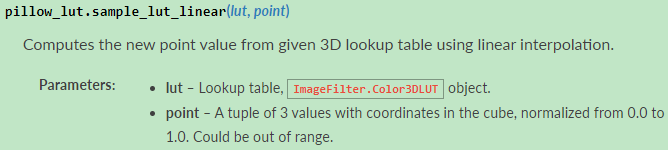
-
sample_lut_linear utiliza la interpolación lineal para calcular nuevos valores de puntos a partir de una tabla de búsqueda tridimensional determinada.
-
sample_lut_cubic usa interpolación cúbica para calcular nuevos valores de puntos a partir de una tabla de búsqueda tridimensional dada.

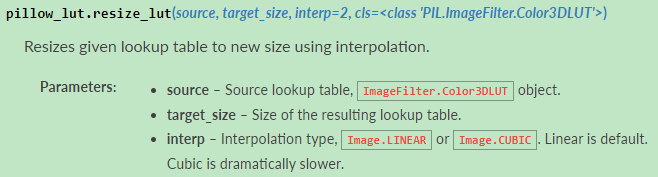
-
resize_lut usa la interpolación para cambiar el tamaño de la tabla de búsqueda dada al nuevo tamaño.
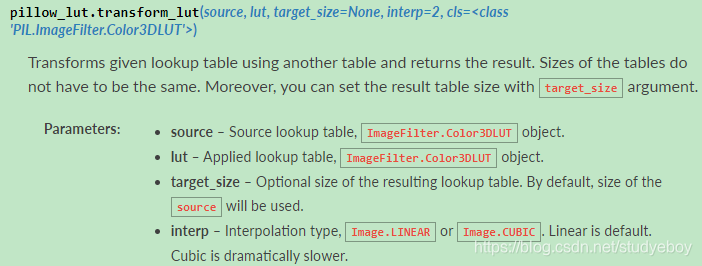
-
transform_lut usa otra tabla para transformar la tabla de búsqueda dada y devuelve el resultado.
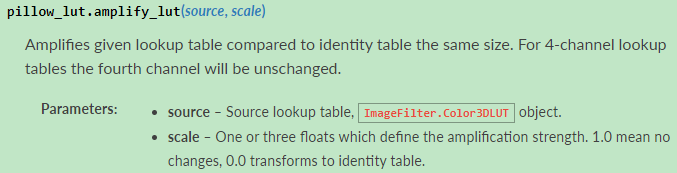
-
amplity_lut amplifica la tabla de búsqueda dada
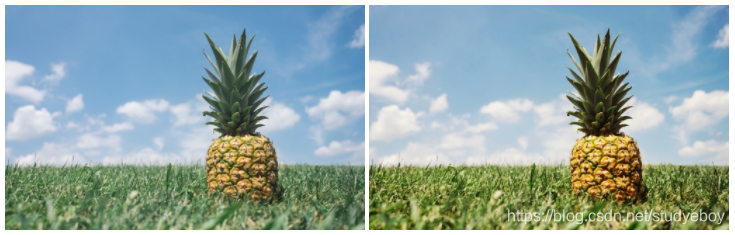
Ejemplo de uso de la función Pillow LUT:
from PIL import Image
from pillow_lut import load_hald_image
hefe = load_hald_image('./res/hald.6.hefe.png')
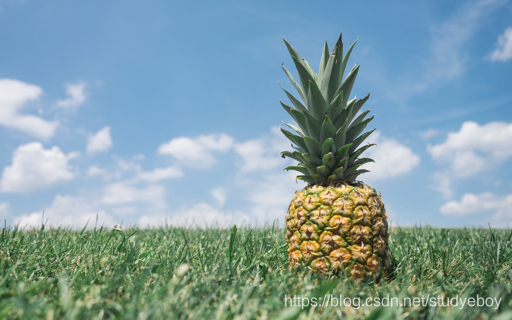
im = Image.open('./res/pineapple.jpeg')
im.filter(hefe).save('./res/pineapple.hefe.jpeg')
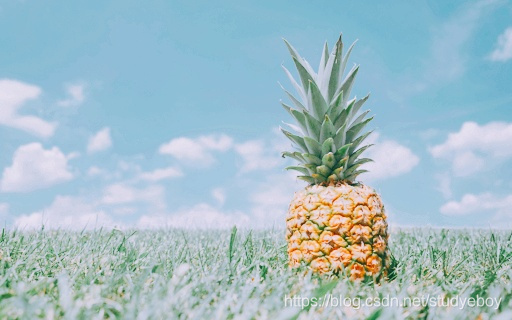
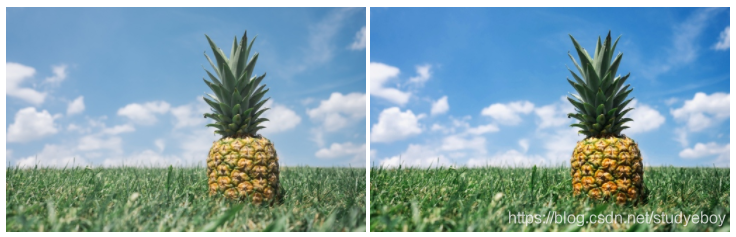
from pillow_lut import rgb_color_enhance

lut = rgb_color_enhance(11, exposure=0.2, contrast=0.1, vibrance=0.5, gamma=1.3)
im = Image.open('./res/pineapple.jpeg')
im.filter(lut).save('./res/pineapple.enhance.jpeg')
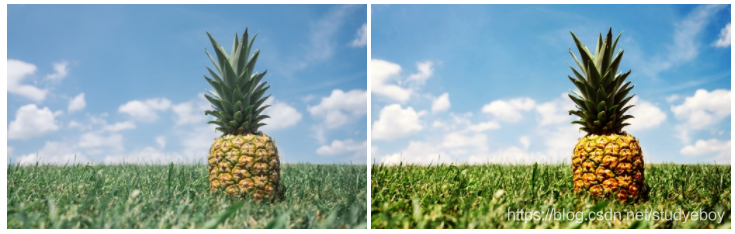
from pillow_lut import load_hald_image, rgb_color_enhance

hefe = load_hald_image('./res/hald.6.hefe.png')
lut = rgb_color_enhance(hefe, exposure=0.2, contrast=0.1, vibrance=0.5, gamma=1.3)
im = Image.open('./res/pineapple.jpeg')
im.filter(lut).save('./res/pineapple.hefe.enhance.jpeg')
3D LUT (Hald CLUT) convertido a 2D cuadrado CLUT
import numpy, cv2

hald = cv2.imread('1.Clarendon.png')

size = int(hald.shape[0] ** (1.0/3.0) + .5)
clut = numpy.concatenate([
    numpy.concatenate(im.reshape((size, size, size**2, size**2, 3))[row], axis=1)
    for row in range(size)
])

cv2.imwrite("clut.png", clut)

Conversión entre 2D LUT y 3D LUT
El diagrama de conversión de un solo canal es fácil de entender Las áreas propensas a errores de 3D LUT a 2D LUT se han marcado en rojo.
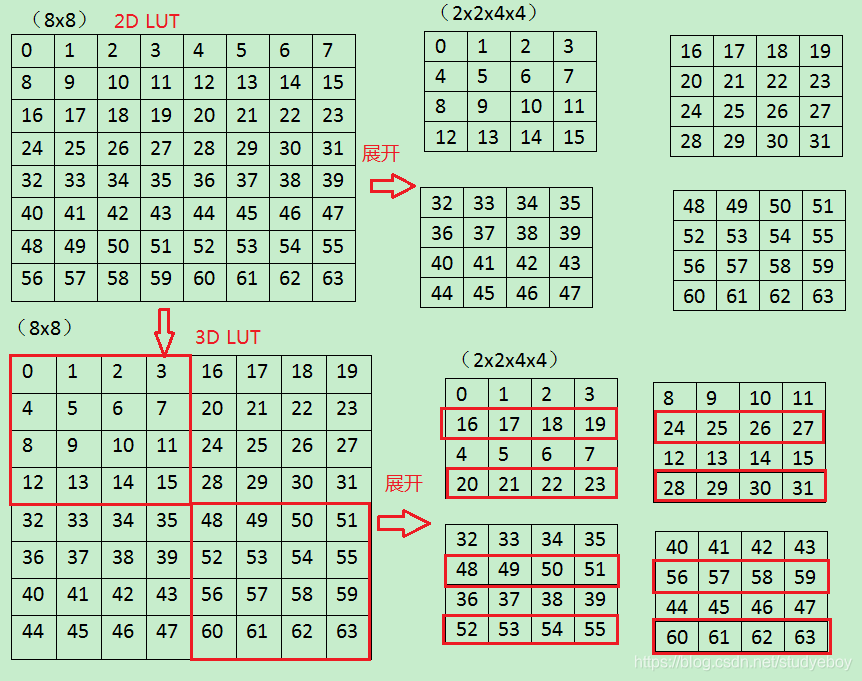
Conversión de 2D LUT a 3D LUT
# 2D LUT(size**3, size**3, 3) ->  3D LUT(size**3, size**3, 3)
clut = cv2.imread('./identity_clut_8.png')
size = int(clut.shape[0] ** (1.0 / 3.0) + 0.5)
clut_result = np.zeros((size ** 2, size ** 2, size ** 2, 3))
for i in range(size ** 2):
    tmp1 = math.floor(i / size)
    cx = int((i - tmp1 * size) * size ** 2)
    cy = int(tmp1 * size ** 2)
    clut_result[i] = clut[cy: cy + size ** 2, cx : cx + size ** 2]

hald = clut_result.reshape((size ** 3, size ** 3, 3))

cv2.imwrite('./identity_hald_{}_test.png'.format(size), hald)


Conversión de 3D LUT a 2D LUT
#3D LUT(size**3, size**3, 3) ->  2D LUT(size**3, size**3, 3)
hald = cv2.imread('./identity_hald_8.png')

size = int(hald.shape[0] ** (1.0/3.0) + .5)
#method1
clut = np.concatenate([
    np.concatenate(hald.reshape((size, size, size**2, size**2, 3))[row], axis=1)
    for row in range(size)
])
cv2.imwrite("2d_identity.png", clut)
#method2
hald_reshape = hald.reshape((size, size, size ** 2, size ** 2, 3))
print('hald_reshape shape:', hald_reshape.shape)
img_list = []
for i in range(size):
    print('hald_reshape[i] shape:', hald_reshape[i].shape)
    tmp = np.concatenate(hald_reshape[i], axis=1)
    print('tmp shape:', tmp.shape)
    img_list.append(tmp)

result = np.concatenate(img_list)
print('result shape:', result.shape)

cv2.imwrite("identity_clut_8_test.png", result)
Referencia
filtros de color-reconstrucción
de almohada-LUT herramientas
herramientas Almohada LUT
Crear su propio LUT
CLUT-de-imágenes