Foreword
Recently Qt programming in the study Tiny4412. The first step, first of all have to build a good cross development debugging environment. After several agonizing, finally almost complete. Hereby notes during tidy, sent to the blog, as a summary. I also hope that over into the pit, others avoid re-entry.
Also mention that (also after the network learned of the investigation), the industry's popular Yocto / OpenEmbedded framework, many manufacturers use this framework to build distributed BSP development board (including the kernel, rootfs, toolchain, gdb, libraries and qt libraries, etc. ), the user can directly based on the BSP to build Qt cross-development environment, eliminating encountered when building their own environments such as missing dependencies, toolchain version mismatch and other issues, saving unnecessary time cost. Related cases very much, "References 2 to 5" in column a few examples (all unproven, for reference).
However, Tiny4412 seems to have not provided BSP yocto, it is currently not law experience, but Yocto estimate is the trend, the time to learn about.
First, the experimental environment
1.1 virtual machine environment
a) Vmware printed books: Vmware Workstation 12.5.7
b) Ubuntu versions: Ubuntu 16.04.4 LTS (I use the net JZ2440 Hundred Questions Data CD _20180516 the version, the address is: http://wiki.100ask.org/Download , then find: 002_JZ2440 data CD _20180516 (free) )
c) kernel version: 4.13.0
d) gcc Version: 5.4.0
e) toolchain version:
arm-linux-gcc 4.3.2
1.2 development environment board
1.2.1 Hardware
Development board: a friendly arm tiny4412, floor: Tiny4412 / Super4412SDK 1611, core board: Tiny4412 version 1412
1.2.2 Software
a) kernel version (tiny4412 carrying disc): linux-3.5-20170221
b) the root file system (tiny4412 carrying disc): rootfs_qtopia_qt4-20160514
Second, the specific process
2.1 compile, install qte-4.8.5
Note: CD tiny4412's have been compiled target-qte-4.8.5-to-hostpc.tgz, but because of my Ubuntu version and friendly as when compiling target-qte-4.8.5-to-hostpc.tgz Ubuntu version is not the same, so after decompression, can not be used (after clicking the build button will be reported directly in qt-creator in:. the Qt version is invalid Could not determine the path to the binaries of the Qt installation, maybe the qmake path is wrong?), only by rebuilding.
The arm-qte-4.8.5-20131207.tar.gz copied to the development machine, and then execute the following command mobaXterm serial terminal:
tar xzvf arm-qte-4.8.5-20131207.tar.gz
cd arm-qte-4.8.5
./build.sh
Note: The first time through ./build.sh, error: tslib functionality test failed. But after re-execute ./build.sh, but not reported to the mistake. The reason is unknown, of unknown origin.
2.2 download, compile, install gdb-7.10, and then compile and install gdbserver
Why choose this version? Because previously learned Wei Dongshan embedded Linux training three cameras to monitor the project, with gdb-7.10 has been successfully set up remote debugging environment through development board (in fact, when selecting the version 7.10 is also a little seat of your pants ![]() ).
).
2.2.1 download, compile, install gdb-7.10 (Download: http://ftp.gnu.org/gnu/gdb/gdb-7.10.tar.gz )
The gdb-7.10.tar.gz downloaded to the development in the machine (assuming downloaded to / home / book / Downloads /), and then execute the following command mobaXterm serial terminal:
takes xzvf gdb 7.10.tar.gz
cd /home/book/Downloads/gdb-7.10
mkdir build && cd build
../configure --target=arm-linux --prefix=/usr/local/arm-gdb-7.10 --with-python
Note: You might also add: - with-expat --includedir = / home / book / / expat-2.2.9 / bin / include --libdir = / home / book / Downloads / expat-2.2.9 Downloads / bin / lib, see below Notes
make
make install
export PATH=$PATH:/usr/local/arm-gdb-7.10
(This sentence can be added to the / etc / environment or ~. / Bashrc, to save the changes to the $ PATH environment variable)
| Note 1: When to gdb-7.10 conduct configure, to join the --with-python option (may need to download and install python2.7-dev ), or when to start debugging qt-creator, the error might be: Note 2: If the configure option --with-python added, reported: checking for python2.7... no configure: error: python is missing or unusable The solution is: to download and install-dev python2.7: APT-GET install python2.7-dev, after the installation is complete, you can do dpkg -l | grep python2.7-dev to verify that the installation was successful Note 3: After compiling install gdb-7.10, if the time to start debugging qt-creator, in the Application Output in error: warning: the Description of Can not target the parse XML; XML Support ./configure --prefix=$PWD/bin mkdir bin make && make install Then recompile, install gdb-7.10 (when configure, but also add the following options: - with --includedir-expat = / Home / Book / Downloads / expat-2.2.9 / bin / the include Note 4: If an error is executed next make: checking for libexpat... (cached) no configure: error: expat is missing or unusable 解决办法是:删除gdb-7.10整个文件夹,然后重新解压gdb-7.10.tar.gz,编译、安装。 原因是: 为了加快速度,configure会把上次的检查结果作为一个cache变量(名字是ac_cv_libexpat)缓存到gdb/configure.cache中,而本次configure时,会先从 这个文件中查该cache变量,如果找不到,才会真正去检查libexpat这个库是否存在。所以,应该清除这个cache文件,强制configure去执行真正的检查。 |
2.2.2 编译、安装gdbserver
在mobaXterm串口终端执行以下命令:
cd /home/book/Downloads/gdb-7.10/gdb/gdbserver
mkdir build && cd build
../configure --target=arm-linux -host=arm-linux
make CC=arm-linux-gcc
完成之后,会在build目录下生成gdbserver可执行文件。把它拷贝到开发板的/usr/bin里(可以用ftp或者nfs,过程略):
2.3 把根文件系统拷贝解压到开发机上
把Tiny4412随机光盘中的rootfs_qtopia_qt4-20160514.tgz拷到开发机上(假设拷贝到/home/book/Downloads/friendly_arm/tiny4412/linux_rootfs/),然后执行:
tar xzvf rootfs_qtopia_qt4-20160514.tgz
2.4 下载、安装Qt-5.9.0(下载地址:https://download.qt.io/archive/qt/5.9/5.9.0/qt-opensource-linux-x64-5.9.0.run)
为什么选择这个版本?因为网上有很多成功案例,用这个版本搭建了交叉调试平台,有经验可借鉴。
把qt-opensource-linux-x64-5.9.0.run下载到开发机里,然后在mobaXterm串口终端执行以下命令:
chmod +x qt-opensource-linux-x64-5.9.0.run
./qt-opensource-linux-x64-5.9.0.run
然后按照安装向导的提示,一步步做即可(注:在“选择组件”这一步,把Qt5.9.0下面的所有组件都选上,保险起见)
2.5 打开qt-creator,进入Tools==>Options进行配置
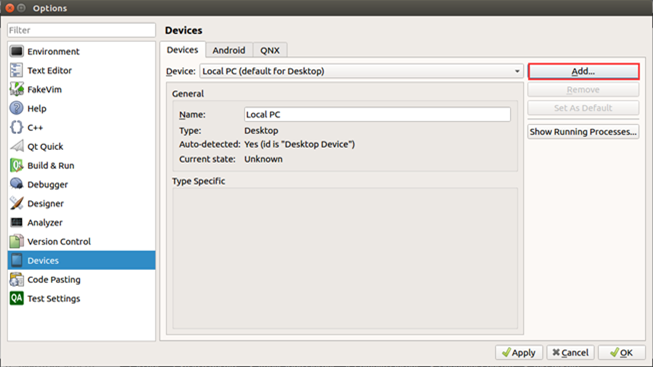
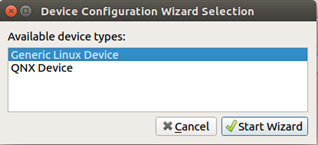
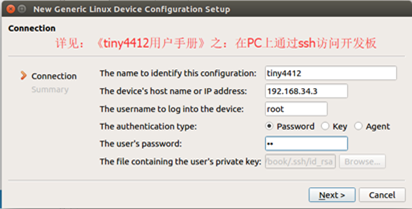
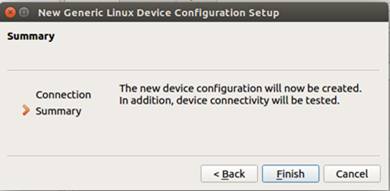
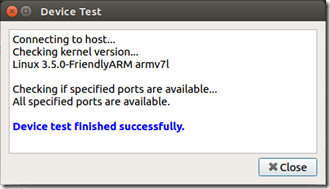
2.5.1 添加device
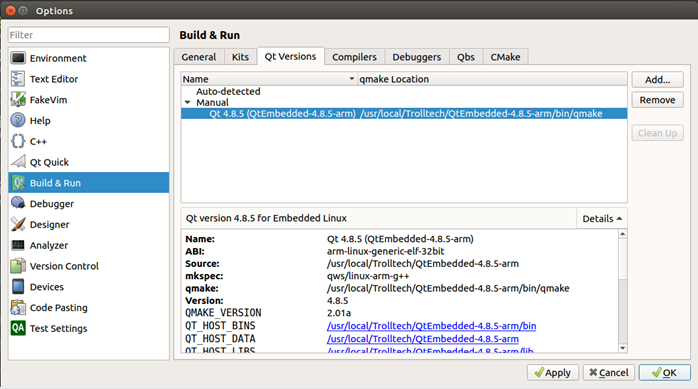
2.5.2 添加Qt version
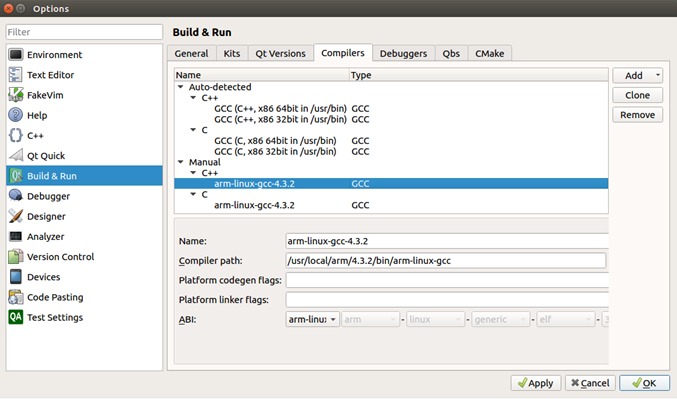
2.5.3 添加compiler
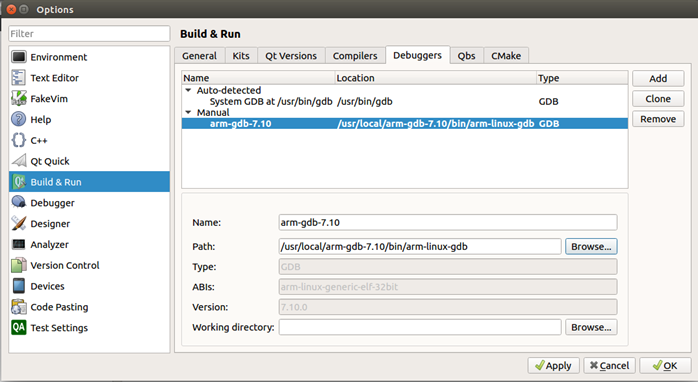
2.5.4 添加debugger
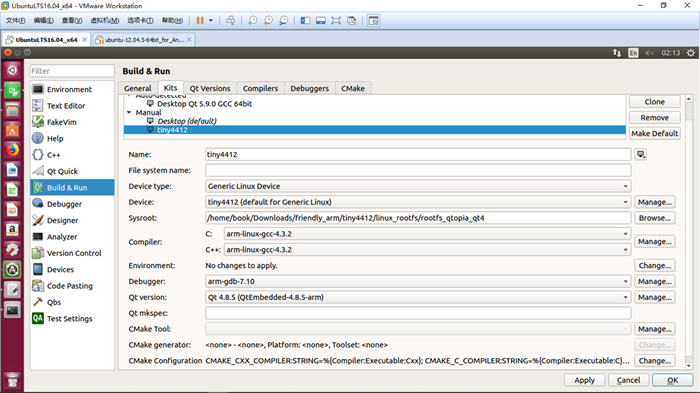
2.5.5 添加kit
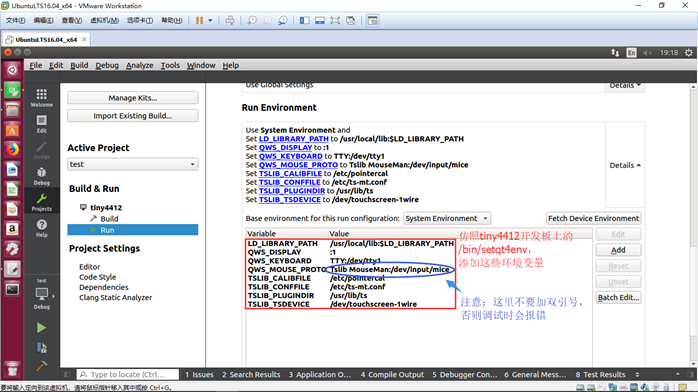
2.5.6 添加环境变量,以支持触摸屏操作
方法1)修改开发板上的/etc/profile,(仿照/bin/setqt4env的内容)添加以下环境变量:
export LD_LIBRARY_PATH=/usr/local/lib:$LD_LIBRARY_PATH
export QWS_DISPLAY=:1
export QWS_KEYBOARD=TTY:/dev/tty1
export QWS_MOUSE_PROTO="Tslib MouseMan:/dev/input/mice"
export TSLIB_CALIBFILE=/etc/pointercal
export TSLIB_CONFFILE=/etc/ts-mt.conf
export TSLIB_PLUGINDIR=/usr/lib/ts
export TSLIB_TSDEVICE=/dev/touchscreen-1wire
Method 2) developing machine qt-creator, into, project ==> Build & Run ==> tiny4412 ==> Run ==> Base environment for this run configuration, adding the environment variables:
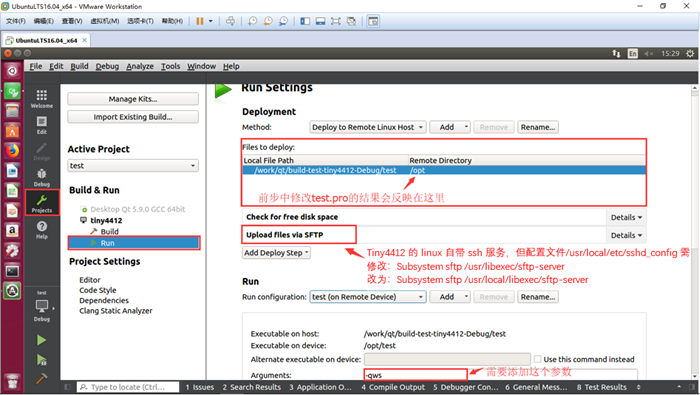
2.5.7 modify the development board / usr / local / etc / sshd_config, in order to solve the debug Times: "SFTP initialization failed: Server could not start SFTP subsystem" problem
Subsystem sftp /usr/libexec/sftp-server
Read:
Subsystem sftp /usr/local/libexec/sftp-server
2.6 qt-creator program to create a new widget test test, and then do some configuration
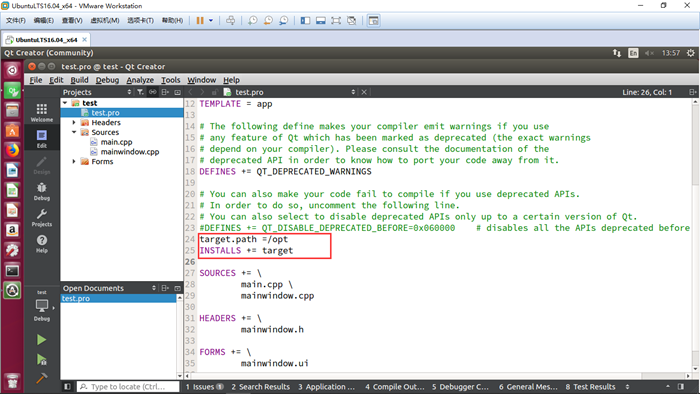
2.6.1 Modify "test.pro" file, add the following two lines:
target.path = / opt # installation path specified in the program development board
INSTALLS += target
2.6.2 进入Project==>Build&Run==>Tiny4412==>Run Settings
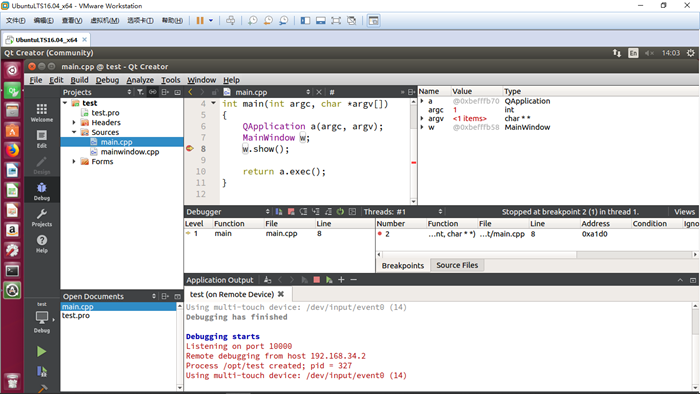
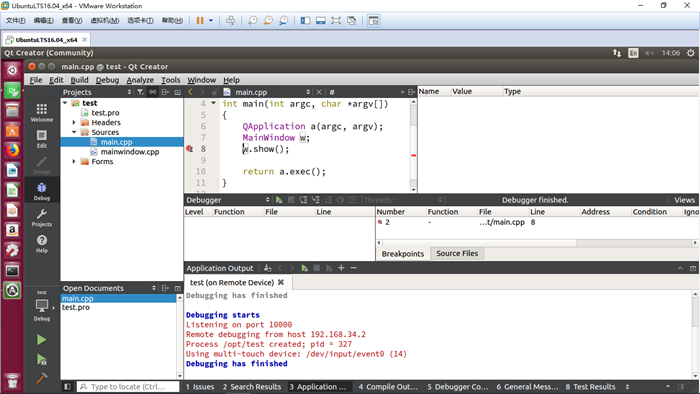
At this point, Tiny4412 Qt development environment, debugging finally completed structures, the effect is as follows:
1) Start debugging:
2) Stop debugging:
Third, reference materials
1) "Tiny4412 User's Manual"
2) QtCreator + Arm development and online debugging
3) Yocto Full Record (L4.1.15_2.0.0) development environment to build the imx6

