First, create and execute test cases
A simple test plan is as follows:
Thread Group - "Creating HTTP request -" Adding see the results tree - "Adding Aggregate Report
1, add a thread group.
Select the test plan, right click, add - "thread User -" thread group 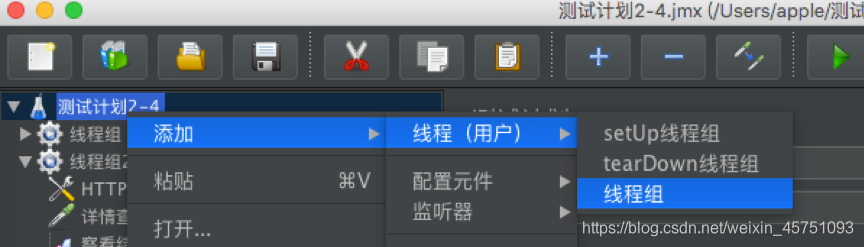
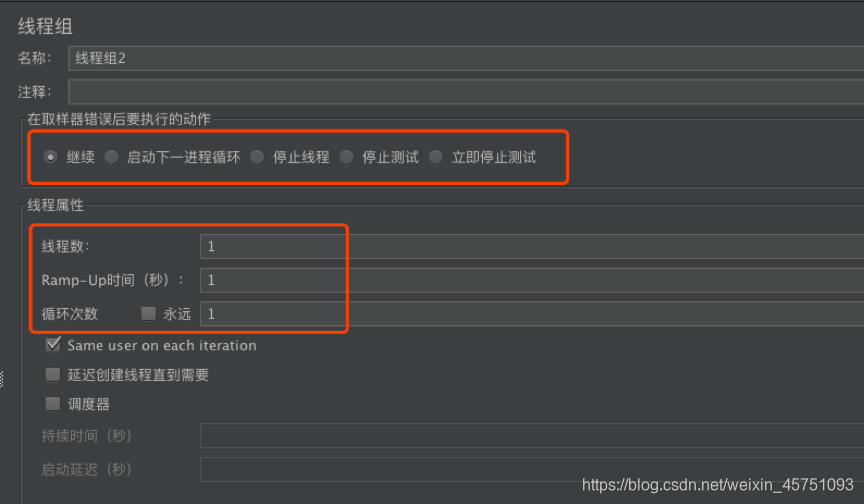
thread group can be configured as follows current thread:
Operation after performing sampling error: the case if a plurality of requests, an error occurs, but also whether to continue following the request operation.
Threads: the number of concurrent, multi-user operation simulated situations.
Cycles: the current thread after clicking to start the cycle several times. Check always been equal to the task of running the timing, sometimes you can use this feature to aid testing.
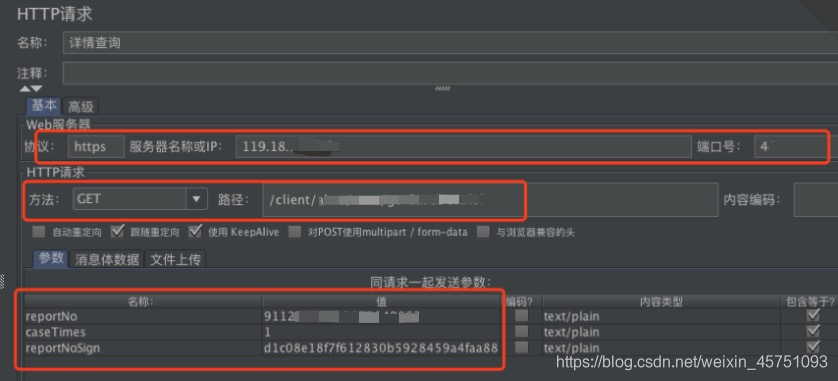
2, create HTTP request
In the HTTP request page, fill in the parameters and links, as shown below:
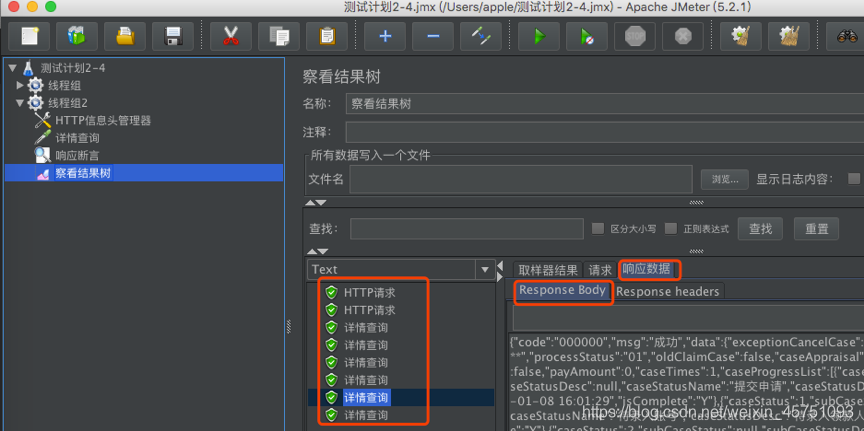
3, add the result tree view
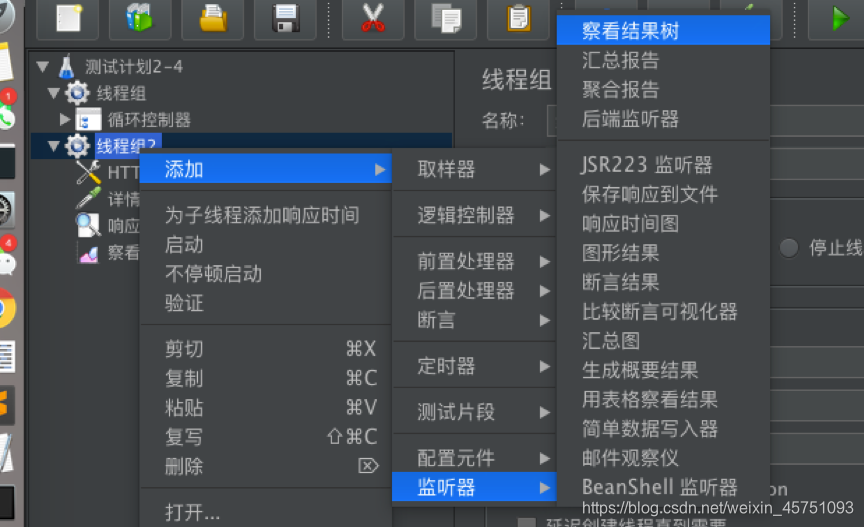
Click to view results in response to the start
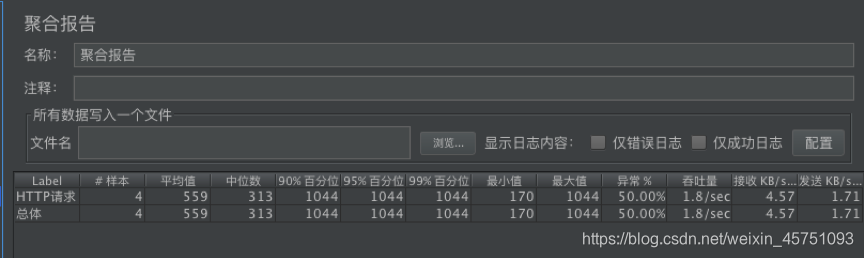
4, adding a polymerization report
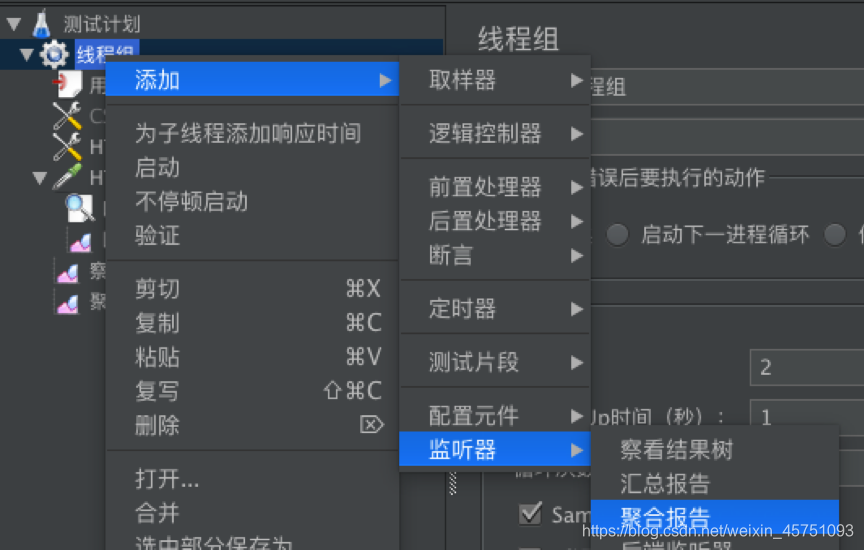
View Results tree to view the results of polymerization report statistics to the implementation of the
Second, the introduction of the function
1, the scope of the element
A simple list of what the various elements of the region's role in the test plan
Element configuration (config elements): affects all elements within its scope the
pre-processing program (Per-processors): Each sampler within its range of action performed before (Sampler) element
timers (timers): thereof each sampler within the scope of (sampler) effective
post-processor (post-processors): each sampler within its range of action performed after (sampler) device
asserts (assertions): each within its range of action result of performing a sampler member (sampler) performs a checksum
listener (listeners): collecting each of which sampler scope information (sampler) and presentation elements
sampler (sampler) element does not interact with other elements, Therefore, the scope of the problem does not exist
如果在同一作用域范围内有多个同一类型的元件
一般执行顺序:配置元件-》前置-》定时器-》sampler-》后置-》断言-》监听器
2、 线程组
分类有以下三种
线程组:虚拟用户组,可配置 Setup thread group:可用于执行预测试操作,类似于LoadRunner中的init
Teardown thread group:可用户执行测试后动作。类似于LoadRunner中的end
常用的是线程组,线程组常用的配置有:
线程数:模拟用户数 Ramp-up
period:等待周期,添加模拟用户之前的等待时间。列如:有20个模拟用户。Ramp-up=10,那么实际加压情况是每秒像数据库加2个用户(20/10)。等候周期这里设为0,JMeter会一次性启动所有用户
循环次数:执行的重复次数。可以设置为永远,持续不断的执行下去 调度器:5.2.1版本的调度器只有这两个时间设置
持续时间(秒):测试运行多久停止 启动延迟(秒):启动时间延迟秒数
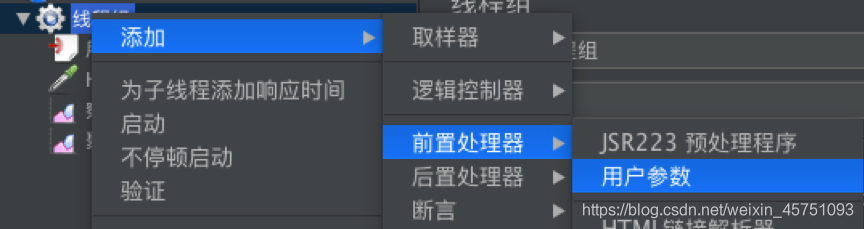
3、参数化1-用户参数
在线程组点击右键,添加-》前置处理器-》用户参数
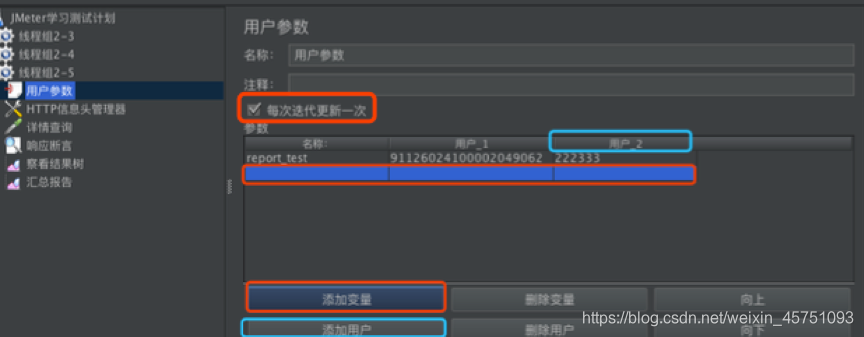
(1)先配置想要配置需要的变量,如果有多个变量,添加多个即可
一个变量需要多个值,就点击添加用户。变量名称随意填写,用户直接填写接口,
一个变量有多个值需勾选上每一次迭代更新一次,如下图:
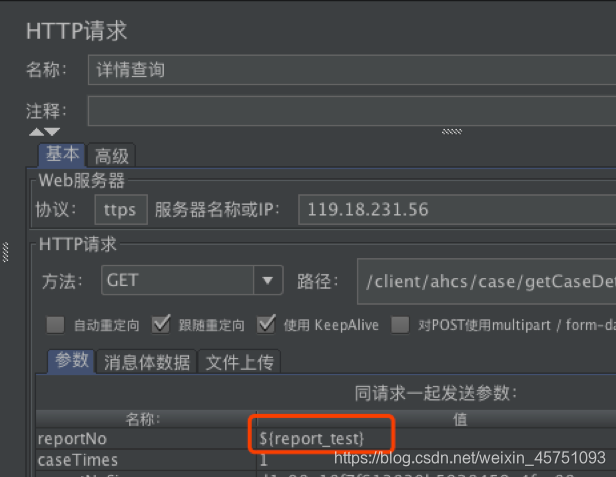
(2)在HTTP请求页面修改参数
找到对应的字段,修改对应的值,如图:
4、参数化2- CSV 数据文件设置
(1)创建一个txt文档

(2)在线程组添加一个CSV 数据文件设置,选择刚刚保存的文档
注:正常情况不需要填写文件编码,如果传入的值出现乱码,可填写一下UTF-8或GBK

(3)同样在HTTP请求页面修改值,如上一个方法一样。
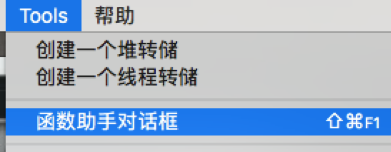
5、参数化3-函数助手对话框
利用函数助手对话框创建随机值
(1)在tool打开函数助手对话框
(2)选择函数 _ _Random,随机函数
填写最小值和最大值的范围,点击合成会生成函数字符串,复制
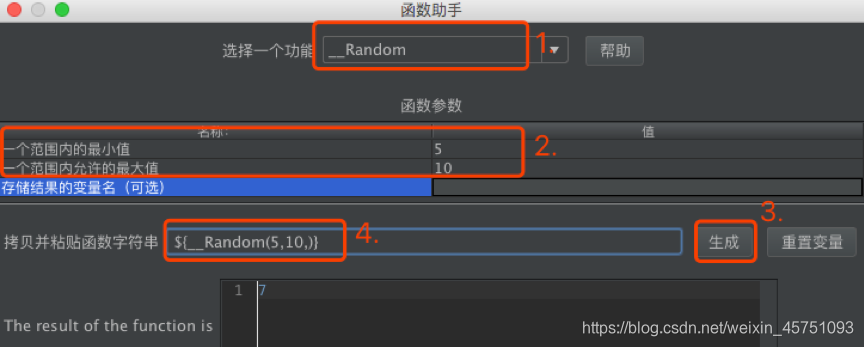
(3)把复制的函数字符串替换到对应的值,运行时这个字段便会取函数值内的随机数

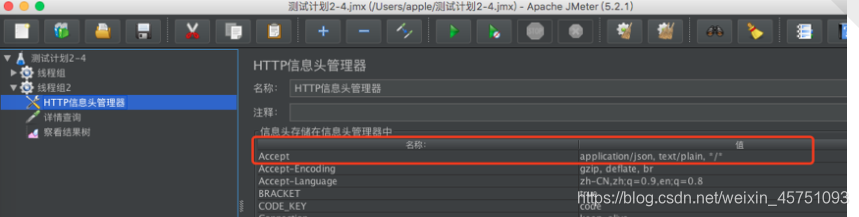
6、添加HTTP信息头管理器

HTTP信息头管理器,填写必要request headers信息
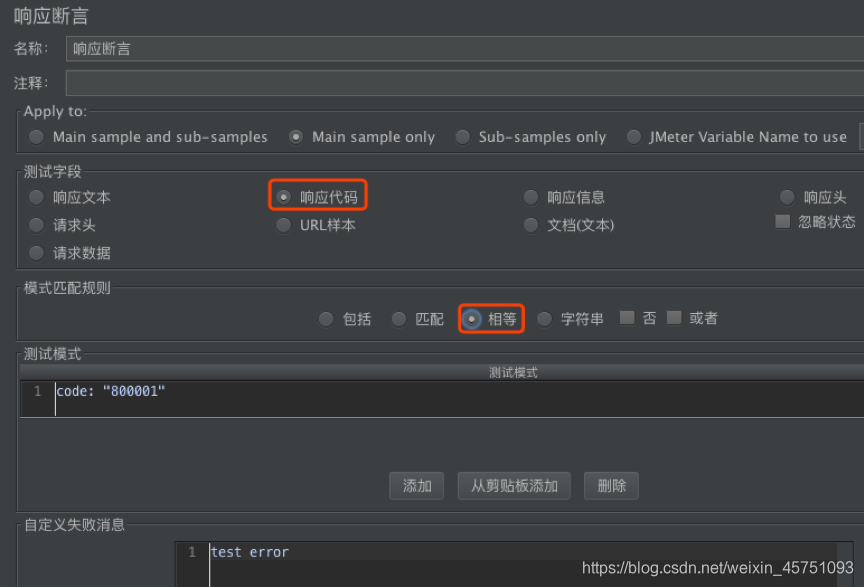
7、响应断言、断言结果
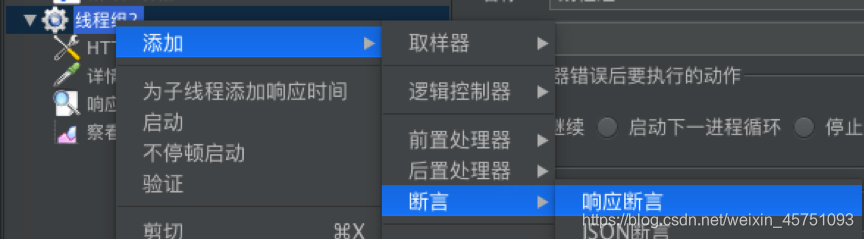
配置相应类型
同时还可以添加对应的响应断言结果
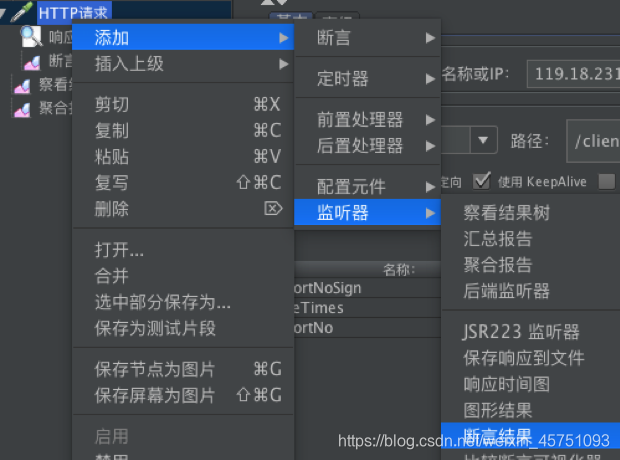
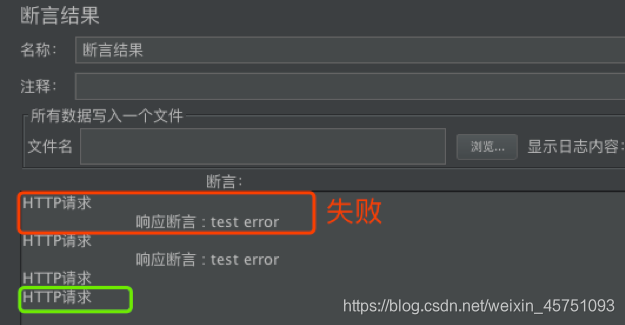
断言结果,可以查看响应断言是否成功
一般成功就只会显示一行,失败会多一行错误原因
8、集合点
集合点:让所有请求在不满足条件的时候处于等待状态。
(1)添加同步定时器(Synchronizing Timer)
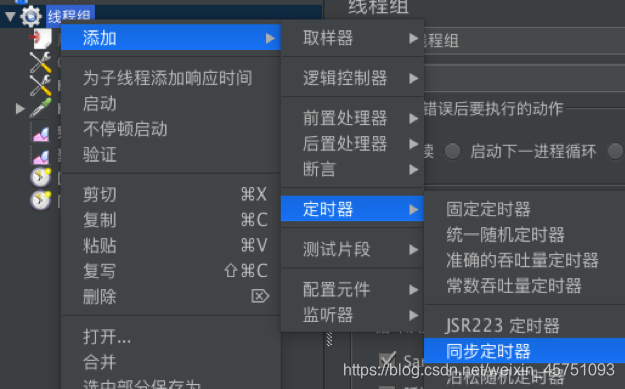
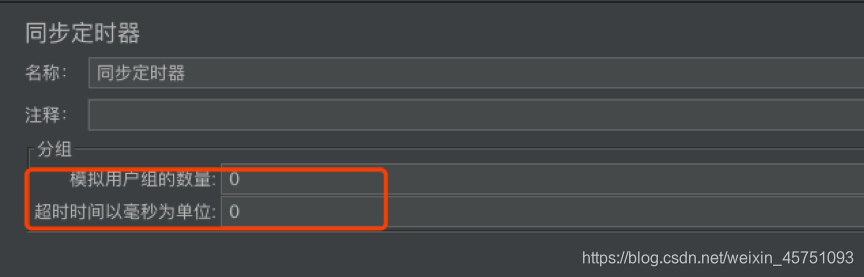
(2)设置定时器的参数
模拟用户组的数量:是指请求用户数达到了这个数量时,一起发起请求
超时时间以毫秒为单位:默认0,就是不存在超时时间,未达到模拟用户数不发起请求;如配置5000,则是超过5秒未达到模拟的用户数,剩余要发起请求。
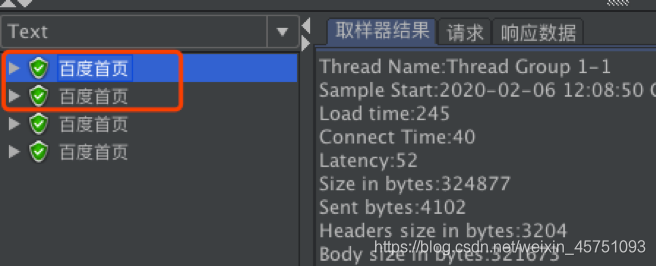
通过结果树可以看到,请求是批量执行的。观察开始执行的脚本,观察请求的增加数量趋势;或对比请求的发送时间。为了方便查看请求结果,可把线程组的Ramp-up时间值设置大一点
场景一:线程数设置为4,集合点为2,超时为0,点击运行。可以看到有4个结果,此处分成了2组进行并发,每次是2个用户。
场景二:线程数设置3,集合点设置为4,超时为0,点击运行。发现没有执行请求,需要手动stop。原因:不够并发数且超时为0
场景三:线程数设置3,集合点设置为2,超时为0,点击运行。发现只有2个请求,然后一直都没有停止,需要手动stop。原因:第一组够集合点,一起并发,第二组只有1个,不够集合点。
场景四:线程数设置3,集合点设置为2,超时为5000,点击运行。分2组,发现先有2个请求,为第一组,5秒后,出现后1个请求,为第二组。
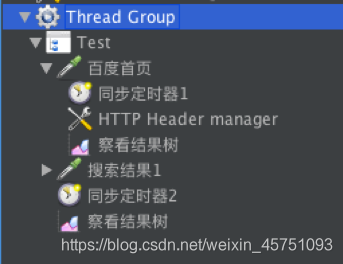
场景五:定时器放在不同的位置,作用的域不同,如下图:
同步定时器1:作用于百度首页
同步定时器2:作用于百度首页、搜索结果1
三、JMeter的断言
断言是请求的返回层面增加一层判断机制。请求成功并不代表结果一定正确,因此增加断言提测测试准确性
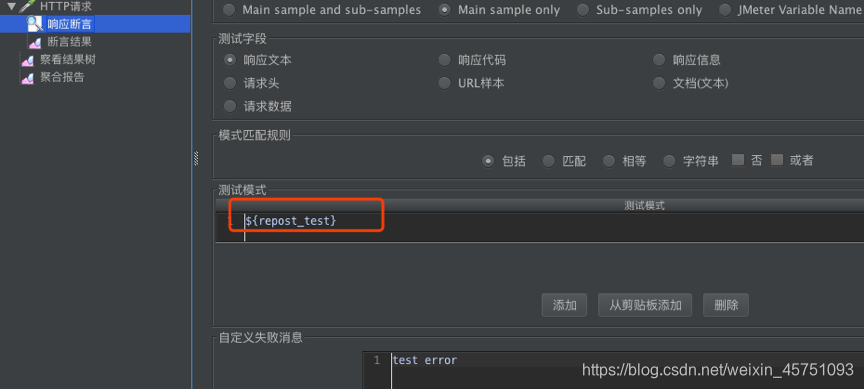
1、响应断言之变量断言
响应断言之前描述过了,这里补充一个响应断言的变量断言设置。
当某些字段的值是变量时,响应断言设置的固定值,得到的断言结果就会不准确。可以把对应的变量值放入响应断言的判断中,即可实现变量断言。

模式匹配规则:
包括:返回结果包括你指定的内容,支持正则匹配
匹配:根据指定内容进行匹配,支持正则匹配
相等:返回结果与你指定结果一致
字符串:返回结果是指定结果的字符串
否/或:就相当于取反,取或。
如果断言结果为true,勾选“否”后,最终断言结果为false。
如果断言结果为false,勾选“否”后,则最终断言结果true。
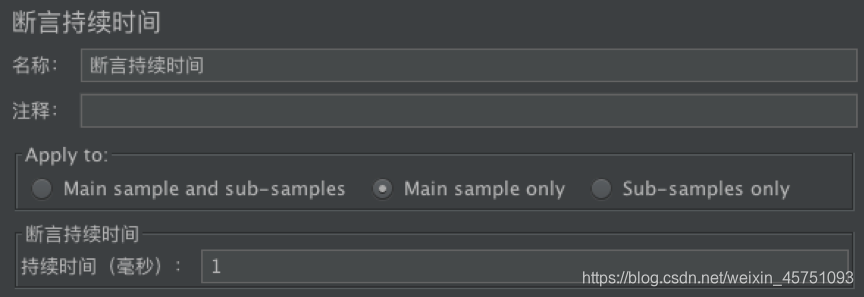
2、断言持续时间
判断是否在给定的时间内返回响应结果,单位是毫秒
添加路径:添加-》断言-》断言持续时间
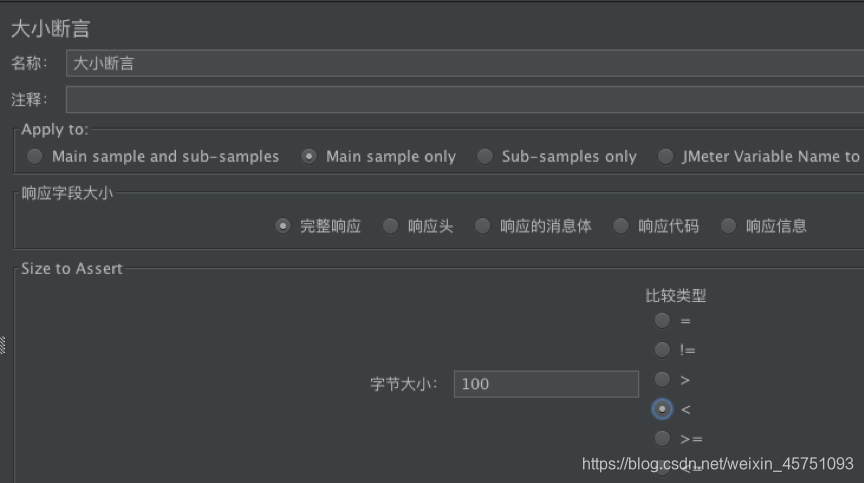
3、返回结果大小断言
Response result determination contains the correct number of byte. Define (! =, =,>, <,> =, <=)
Add Path: Right-click, add - 'assertion - "the size of the assertion
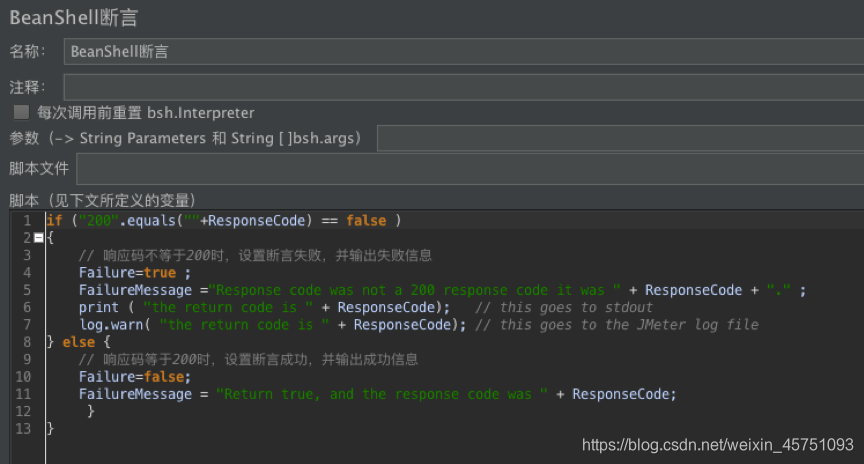
4、BeanShell Assertion断言
BeanShell Assertions can use beanshell scripts to perform assertion checking can be used for more complex individual needs, more flexible, more powerful, but to be able to skillfully use beanshell script.
Beanshell herein may be used in addition to built-in variables, the major Failure to make assertions and results FailureMessage.