CNN return convolution neural network directory
Previous: depth articles - CNN convolutional neural network (c) the ROI Pooling and ROI Align interpolation on
In this section, the use of elaborate carried mnist handwritten numeric code demo project tf cnn
The project github Code: https://github.com/wandaoyi/tf_cnn_mnist_pro
Five. TF_CNN_MNIST handwritten numeric code demonstrates
(1 Introduction
Prior depth articles - neural network we learned ANN and DNN, now, we have learned CNN, to apply their knowledge, we will use to build a convolution neural network CNN.
(2) a clear demand
Project requirements, we want a handwritten Arabic numerals 0 to 9 pictures identified. For example, the above invoice number (the first to do digital handwriting recognition, in 1989, a Bank of America hired chiefs wrote, was with convolutional neural network technology LeNet-5 write earlier. Depth articles - neural networks (seven) DNN elaborate neural network handwritten digital code shows have used DNN case explained; now, we do use LeNet-5 was a case to explain this project is to identify digital signing checks above). Network training, of course inseparable from the data, so we have to download the data, the data is already uploaded for everyone to Baidu cloud disk: link: https: //pan.baidu.com/s/13OokGc0h3F5rGrxuSLYj9Q extraction code: qfj6.
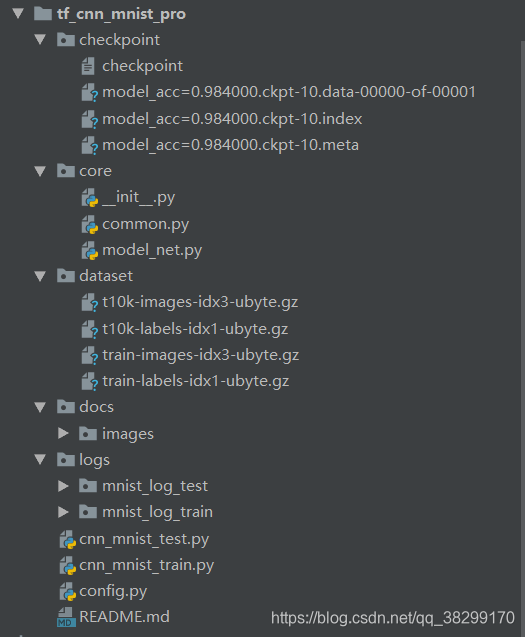
(3). Building project
Project is structured as follows:
The above model, I get random training 10 epoch accuracy: 0.984000. Before we use DNN when 10 epoch before 0.96+ accuracy. In this way, we see an increase of 2 percent accuracy, say, maybe some people will not mind, do not think how. However, if we look in turn, can be seen, the error rate was reduced by half, so that the effect will be very substantial. In the company doing the project, work will be very important, however, language skills, are also important.
(4) Environmental dependence
Environmental Dependence:
pip install numpy==1.16
pip install easydict
conda install tensorflow-gpu==1.13.1 # 建议不要用 2.0 版本的 tf,坑多
tensorflow installed, my previous blog a detailed explanation: broken point articles --tensorflow gpu version installed if not installed, you can see how to install.
README.md file:
# tf_cnn_mnist_pro
tf_cnn 手写数字预测 2020-02-09
- 项目下载地址:https://github.com/wandaoyi/tf_cnn_mnist_pro
- 请到百度云盘下载项目所需要的训练数据:
- 链接:https://pan.baidu.com/s/13OokGc0h3F5rGrxuSLYj9Q 提取码:qfj6
## 参数设置
- 在训练或预测之前,我们要先进行参数设置
- 打开 config.py 文件,对其中的参数或路径进行设置。
## 模型
- 模型代码 model_net.py
- 在这里,使用了 lenet-5 网络模型来提取特征
## 训练模型
- 运行 cnn_mnist_train.py ,简单操作,右键直接 run
- 训练效果如下:
- acc_train: 1.0
- epoch: 10, acc_test: 0.984000
- 下面是随意训练的效果,如果想效果好,可以多训练多点epoch
- 也可以自己添加 early-stopping 进去,不麻烦的
## 预测
- 运行 cnn_mnist_test.py ,简单操作,右键直接 run
- 运行后,部分预测结果会打印在控制台上
- 预测效果如下:
- 预测值: [7 2 1 0 4]
- 真实值: [7 2 1 0 4]
## tensorboard 日志
- 使用 tensorboard 的好处是,这个日志是实时的,可以一边训练一边看效果图。
- 在 cmd 命令窗口,输入下面命令:
- tensorboard --logdir=G:\work_space\python_space\pro2018_space\wandao\mnist_pro\logs\mnist_log_train --host=localhost
- 在 --logdir= 后面是日志的文件夹路径,
- 在 --host= 是用来指定 ip 的,如果不写,则只能电脑的地址,而不能使用 localhost
- 在 谷歌浏览器 上打开 tensorboard 日志: http://localhost:6006/
- 模型 acc

- 模型结构

The following files or code, which, well commented
(5) The configuration file config.py
#!/usr/bin/env python
# _*_ coding:utf-8 _*_
# ============================================
# @Time     : 2020/02/08 19:23
# @Author   : WanDaoYi
# @FileName : config.py
# ============================================


from easydict import EasyDict as edict
import os


__C = edict()

cfg = __C

# common options 公共配置文件
__C.COMMON = edict()
# windows 获取文件绝对路径, 方便 windows 在黑窗口 运行项目
__C.COMMON.BASE_PATH = os.path.abspath(os.path.dirname(__file__))
# # 获取当前窗口的路径, 当用 Linux 的时候切用这个,不然会报错。(windows也可以用这个)
# __C.COMMON.BASE_PATH = os.getcwd()

__C.COMMON.DATA_PATH = os.path.join(__C.COMMON.BASE_PATH, "dataset")

# 图像的形状
__C.COMMON.DATA_RESHAPE = [-1, 28, 28, 1]
# 图像 rezise 的形状
__C.COMMON.DATA_RESIZE = (32, 32)


# 训练配置
__C.TRAIN = edict()

# 学习率
__C.TRAIN.LEARNING_RATE = 0.01
# batch_size
__C.TRAIN.BATCH_SIZE = 32
# 迭代次数
__C.TRAIN.N_EPOCH = 10

# 模型保存路径, 使用相对路径,方便移植
__C.TRAIN.MODEL_SAVE_PATH = "./checkpoint/model_"
# dropout 的持有量,0.7 表示持有 70% 的节点。
__C.TRAIN.KEEP_PROB_DROPOUT = 0.7


# 测试配置
__C.TEST = edict()

# 测试模型保存路径
__C.TEST.CKPT_MODEL_SAVE_PATH = "./checkpoint/model_acc=0.984000.ckpt-10"


# 日志配置
__C.LOG = edict()
# 日志保存路径,后面会接上  train 或 test: 如 mnist_log_train
__C.LOG.LOG_SAVE_PATH = "./logs/mnist_log_"
(6). Common.py common code
#!/usr/bin/env python
# _*_ coding:utf-8 _*_
# ============================================
# @Time     : 2020/02/08 19:26
# @Author   : WanDaoYi
# @FileName : common.py
# ============================================

import tensorflow as tf
from tensorflow.examples.tutorials.mnist import input_data
from config import cfg
import numpy as np


class Common(object):

    def __init__(self):
        # 数据路径
        self.data_file_path = cfg.COMMON.DATA_PATH

        pass

    # 读取数据
    def read_data(self):
        # 数据下载地址: http://yann.lecun.com/exdb/mnist/
        mnist_data = input_data.read_data_sets(self.data_file_path, one_hot=True)
        train_image = mnist_data.train.images
        train_label = mnist_data.train.labels
        _, n_feature = train_image.shape
        _, n_label = train_label.shape

        return mnist_data, n_feature, n_label

    # bn 操作
    def deal_bn(self, input_data, train_flag=True):
        bn_info = tf.layers.batch_normalization(input_data, beta_initializer=tf.zeros_initializer(),
                                                gamma_initializer=tf.ones_initializer(),
                                                moving_mean_initializer=tf.zeros_initializer(),
                                                moving_variance_initializer=tf.ones_initializer(),
                                                training=train_flag)
        return bn_info
        pass

    # 池化处理
    def deal_pool(self, input_data, ksize=(1, 2, 2, 1), strides=(1, 2, 2, 1),
                  padding="VALID", name="avg_pool"):
        pool_info = tf.nn.avg_pool(value=input_data, ksize=ksize,
                                   strides=strides, padding=padding,
                                   name=name)
        tf.summary.histogram('pooling', pool_info)
        return pool_info
        pass

    # dropout 处理
    def deal_dropout(self, hidden_layer, keep_prob):
        with tf.name_scope("dropout"):
            tf.summary.scalar('dropout_keep_probability', keep_prob)
            dropped = tf.nn.dropout(hidden_layer, keep_prob)
            tf.summary.histogram('dropped', dropped)
            return dropped
        pass

    # 参数记录
    def variable_summaries(self, param):
        with tf.name_scope('summaries'):
            mean = tf.reduce_mean(param)
            tf.summary.scalar('mean', mean)
            with tf.name_scope('stddev'):
                stddev = tf.sqrt(tf.reduce_mean(tf.square(param - mean)))
            tf.summary.scalar('stddev', stddev)
            tf.summary.scalar('max', tf.reduce_max(param))
            tf.summary.scalar('min', tf.reduce_min(param))
            tf.summary.histogram('histogram', param)

    # 全连接操作
    def neural_layer(self, x, n_neuron, name="fc"):
        # 包含所有的计算节点对于这一层, name_scope 可写可不写
        with tf.name_scope(name=name):
            n_input = int(x.get_shape()[1])
            stddev = 2 / np.sqrt(n_input)

            # 这层里面的w可以看成是二维数组,每个神经元对于一组w参数
            # truncated normal distribution 比 regular normal distribution的值小
            # 不会出现任何大的权重值,确保慢慢的稳健的训练
            # 使用这种标准方差会让收敛快
            # w参数需要随机,不能为0,否则输出为0,最后调整都是一个幅度没意义
            with tf.name_scope("weights"):
                init_w = tf.truncated_normal((n_input, n_neuron), stddev=stddev)
                w = tf.Variable(init_w, name="weight")
                self.variable_summaries(w)

            with tf.name_scope("biases"):
                b = tf.Variable(tf.zeros([n_neuron]), name="bias")
                self.variable_summaries(b)
            with tf.name_scope("wx_plus_b"):
                z = tf.matmul(x, w) + b
                tf.summary.histogram('pre_activations', z)

            return z

    # 卷积操作
    def conv2d(self, input_data, filter_shape, strides_shape=(1, 1, 1, 1),
               padding="VALID", train_flag=True, name="conv2d"):
        with tf.variable_scope(name):
            weight = tf.get_variable(name="weight", dtype=tf.float32,
                                     trainable=train_flag,
                                     shape=filter_shape,
                                     initializer=tf.random_normal_initializer(stddev=0.01))

            conv = tf.nn.conv2d(input=input_data, filter=weight,
                                strides=strides_shape, padding=padding)

            conv_2_bn = self.deal_bn(conv, train_flag=train_flag)

            return conv_2_bn
            pass
        pass
(7) The model code is model_net.py
#!/usr/bin/env python
# _*_ coding:utf-8 _*_
# ============================================
# @Time     : 2020/02/08 22:26
# @Author   : WanDaoYi
# @FileName : model_net.py
# ============================================

import tensorflow as tf
from core.common import Common


class ModelNet(object):

    def __init__(self):
        self.common = Common()
        pass

    def lenet_5(self, input_data, n_label=10, keep_prob=1.0, train_flag=True):
        with tf.variable_scope("lenet-5"):
            conv_1 = self.common.conv2d(input_data, (5, 5, 1, 6), name="conv_1")
            tanh_1 = tf.nn.tanh(conv_1, name="tanh_1")
            avg_pool_1 = self.common.deal_pool(tanh_1, name="avg_pool_1")

            conv_2 = self.common.conv2d(avg_pool_1, (5, 5, 6, 16), name="conv_2")
            tanh_2 = tf.nn.tanh(conv_2, name="tanh_2")
            avg_pool_2 = self.common.deal_pool(tanh_2, name="avg_pool_2")

            conv_3 = self.common.conv2d(avg_pool_2, (5, 5, 16, 120), name="conv_3")
            tanh_3 = tf.nn.tanh(conv_3, name="tanh_3")

            reshape_data = tf.reshape(tanh_3, [-1, 120])

            dropout_1 = self.common.deal_dropout(reshape_data, keep_prob)

            fc_1 = self.common.neural_layer(dropout_1, 84, name="fc_1")
            tanh_4 = tf.nn.tanh(fc_1, name="tanh_4")

            dropout_2 = self.common.deal_dropout(tanh_4, keep_prob)

            fc_2 = self.common.neural_layer(dropout_2, n_label, name="fc_2")
            scale_2 = self.common.deal_bn(fc_2, train_flag=train_flag)
            result_info = tf.nn.softmax(scale_2, name="result_info")

            return result_info

        pass
The model here, I used lenet-5, of course, in the future want to change other models, is also possible. In lenet-5 inside, model input is required shape requirements are 32 x 32 size image, otherwise, the scale is not enough, the model will complain. Therefore, to resize the image size is 32 x 32.
(8) The training Code cnn_mnist_train.py
#!/usr/bin/env python
# _*_ coding:utf-8 _*_
# ============================================
# @Time     : 2020/02/08 19:24
# @Author   : WanDaoYi
# @FileName : cnn_mnist_train.py
# ============================================

from datetime import datetime
import tensorflow as tf
from config import cfg
from core.common import Common
from core.model_net import ModelNet


class CnnMnistTrain(object):

    def __init__(self):
        # 模型保存路径
        self.model_save_path = cfg.TRAIN.MODEL_SAVE_PATH
        self.log_path = cfg.LOG.LOG_SAVE_PATH

        self.learning_rate = cfg.TRAIN.LEARNING_RATE
        self.batch_size = cfg.TRAIN.BATCH_SIZE
        self.n_epoch = cfg.TRAIN.N_EPOCH

        self.data_shape = cfg.COMMON.DATA_RESHAPE
        self.data_resize = cfg.COMMON.DATA_RESIZE

        self.common = Common()
        self.model_net = ModelNet()
        # 读取数据和 维度
        self.mnist_data, self.n_feature, self.n_label = self.common.read_data()

        # 创建设计图
        with tf.name_scope(name="input_data"):
            self.x = tf.placeholder(dtype=tf.float32, shape=(None, self.n_feature), name="input_data")
            self.y = tf.placeholder(dtype=tf.float32, shape=(None, self.n_label), name="input_labels")

        with tf.name_scope(name="input_shape"):
            # 784维度变形为图片保持到节点
            # -1 代表进来的图片的数量、28,28是图片的高和宽,1是图片的颜色通道
            image_shaped_input = tf.reshape(self.x, self.data_shape)
            # 将 输入 图像 resize 成 网络所需要的大小
            image_resize = tf.image.resize_images(image_shaped_input, self.data_resize)
            tf.summary.image('input', image_resize, self.n_label)

        self.keep_prob_dropout = cfg.TRAIN.KEEP_PROB_DROPOUT
        self.keep_prob = tf.placeholder(tf.float32)

        # 获取最后一层 lenet_5 的返回结果
        self.result_info = self.model_net.lenet_5(image_resize, n_label=self.n_label,
                                                  keep_prob=self.keep_prob_dropout)

        # 计算损失
        with tf.name_scope(name="train_loss"):
            # 定义损失函数
            self.cross_entropy = tf.reduce_mean(-tf.reduce_sum(self.y * tf.log(self.result_info),
                                                               reduction_indices=[1]))
            tf.summary.scalar("train_loss", self.cross_entropy)
            pass

        with tf.name_scope(name="optimizer"):
            self.optimizer = tf.train.AdamOptimizer(learning_rate=self.learning_rate)
            self.train_op = self.optimizer.minimize(self.cross_entropy)
            pass

        with tf.name_scope(name="accuracy"):
            self.correct_pred = tf.equal(tf.argmax(self.result_info, 1), tf.argmax(self.y, 1))
            self.acc = tf.reduce_mean(tf.cast(self.correct_pred, tf.float32))
            tf.summary.scalar("accuracy", self.acc)
            pass

        # 因为我们之前定义了太多的tf.summary汇总操作,逐一执行这些操作太麻烦,
        # 使用tf.summary.merge_all()直接获取所有汇总操作,以便后面执行
        self.merged = tf.summary.merge_all()

        self.sess = tf.InteractiveSession()
        # 保存训练模型
        self.saver = tf.train.Saver()

        # 定义两个tf.summary.FileWriter文件记录器再不同的子目录,分别用来存储训练和测试的日志数据
        # 同时,将Session计算图sess.graph加入训练过程,这样再TensorBoard的GRAPHS窗口中就能展示
        self.train_writer = tf.summary.FileWriter(self.log_path + 'train', self.sess.graph)
        self.test_writer = tf.summary.FileWriter(self.log_path + 'test')

        pass

    # 灌入数据
    def feed_dict(self, train_flag=True):
        # 训练样本
        if train_flag:
            # 获取下一批次样本
            x_data, y_data = self.mnist_data.train.next_batch(self.batch_size)
            keep_prob = self.keep_prob_dropout
            pass
        # 验证样本
        else:
            x_data, y_data = self.mnist_data.test.images, self.mnist_data.test.labels
            keep_prob = 1.0
            pass
        return {self.x: x_data, self.y: y_data, self.keep_prob: keep_prob}
        pass

    def do_train(self):
        # 定义初始化
        init = tf.global_variables_initializer()
        self.sess.run(init)

        test_acc = None
        for epoch in range(self.n_epoch):
            # 获取总样本数量
            batch_number = self.mnist_data.train.num_examples
            # 获取总样本一共几个批次
            size_number = int(batch_number / self.batch_size)
            for number in range(size_number):
                summary, _ = self.sess.run([self.merged, self.train_op], feed_dict=self.feed_dict())

                # 第几次循环
                i = epoch * size_number + number + 1
                self.train_writer.add_summary(summary, i)

                if number == size_number - 1:
                    # 获取下一批次样本
                    x_batch, y_batch = self.mnist_data.train.next_batch(self.batch_size)
                    acc_train = self.acc.eval(feed_dict={self.x: x_batch, self.y: y_batch})
                    print("acc_train: {}".format(acc_train))

            # 验证 方法二 两个方法,随便挑一个都可以的。
            test_summary, acc_test = self.sess.run([self.merged, self.acc], feed_dict=self.feed_dict(False))
            print("epoch: {}, acc_test: {}".format(epoch + 1, acc_test))
            self.test_writer.add_summary(test_summary, epoch + 1)

            test_acc = acc_test
            pass

        save_path = self.model_save_path + "acc={:.6f}".format(test_acc) + ".ckpt"
        # 保存模型
        self.saver.save(self.sess, save_path, global_step=self.n_epoch)

        self.train_writer.close()
        self.test_writer.close()

        pass


if __name__ == "__main__":

    # 代码开始时间
    start_time = datetime.now()
    print("开始时间: {}".format(start_time))

    demo = CnnMnistTrain()
    demo.do_train()

    # 代码结束时间
    end_time = datetime.now()
    print("结束时间: {}, 训练模型耗时: {}".format(end_time, end_time - start_time))
Code training, but rough to train a bit, did not do a grid search, nor do the fine-tunning. And no early-stopping, interested, you can add their own look.
(9) Test Code cnn_mnist_test.py
#!/usr/bin/env python
# _*_ coding:utf-8 _*_
# ============================================
# @Time     : 2020/02/08 19:24
# @Author   : WanDaoYi
# @FileName : cnn_mnist_test.py
# ============================================

from datetime import datetime
import tensorflow as tf
import numpy as np
from config import cfg
from core.common import Common
from core.model_net import ModelNet


class CnnMnistTest(object):

    def __init__(self):
        self.common = Common()
        self.model_net = ModelNet()
        # 读取数据和 维度
        self.mnist_data, self.n_feature, self.n_label = self.common.read_data()

        # ckpt 模型
        self.test_ckpt_model = cfg.TEST.CKPT_MODEL_SAVE_PATH
        print("test_ckpt_model: {}".format(self.test_ckpt_model))

        # tf.reset_default_graph()
        # 创建设计图
        with tf.name_scope(name="input"):
            self.x = tf.placeholder(dtype=tf.float32, shape=(None, self.n_feature), name="input_data")
            self.y = tf.placeholder(dtype=tf.float32, shape=(None, self.n_label), name="input_labels")

        self.data_shape = cfg.COMMON.DATA_RESHAPE
        self.data_resize = cfg.COMMON.DATA_RESIZE
        with tf.name_scope(name="input_shape"):
            # 784维度变形为图片保持到节点
            # -1 代表进来的图片的数量、28 x 28 是图片的高和宽,1是图片的颜色通道
            self.image_shaped_input = tf.reshape(self.x, self.data_shape)
            # 将 输入 图像 resize 成 网络所需要的大小 32 x 32
            self.image_resize = tf.image.resize_images(self.image_shaped_input, self.data_resize)

        # 获取最后一层 lenet_5 的返回结果
        self.result_info = self.model_net.lenet_5(self.image_resize, n_label=self.n_label)

        pass

    # 预测
    def do_ckpt_test(self):

        saver = tf.train.Saver()

        with tf.Session() as sess:
            saver.restore(sess, self.test_ckpt_model)

            # 预测
            output = self.result_info.eval(feed_dict={self.x: self.mnist_data.test.images})

            # 将 one-hot 预测值转为 数字
            y_perd = np.argmax(output, axis=1)
            print("预测值: {}".format(y_perd[: 5]))

            # 真实值
            y_true = np.argmax(self.mnist_data.test.labels, axis=1)
            print("真实值: {}".format(y_true[: 5]))
            pass

        pass


if __name__ == "__main__":
    # 代码开始时间
    start_time = datetime.now()
    print("开始时间: {}".format(start_time))

    demo = CnnMnistTest()
    # 使用 ckpt 模型测试
    demo.do_ckpt_test()

    # 代码结束时间
    end_time = datetime.now()
    print("结束时间: {}, 训练模型耗时: {}".format(end_time, end_time - start_time))
(10) The log results View
acc images:

graphs image:

In tensorboard inside the log, you can double lenet-5, the following model structure:

After opening the log graphs, a clear image can be enlarged view
从这 DNN 和 CNN 的训练中,不难看成,对于图像信息预测,CNN 比 DNN 要好上一些(DNN 的 10 个 epoch 才 96% 的精度,而 CNN 的 10 个 epoch 精度则达到了 98%,当然,这个只是前期的训练效果,不好直接说明什么。但是,两者训练的次数足够的话,还是 CNN 的效果会稍微好点的。这,就是为什么,在图像处理中,大多使用 CNN,而不是纯粹的 DNN)

上一章:深度篇—— CNN 卷积神经网络(三) 关于 ROI pooling 和 ROI Align 与 插值
