Setting up an environment
Click Settings in the Configure
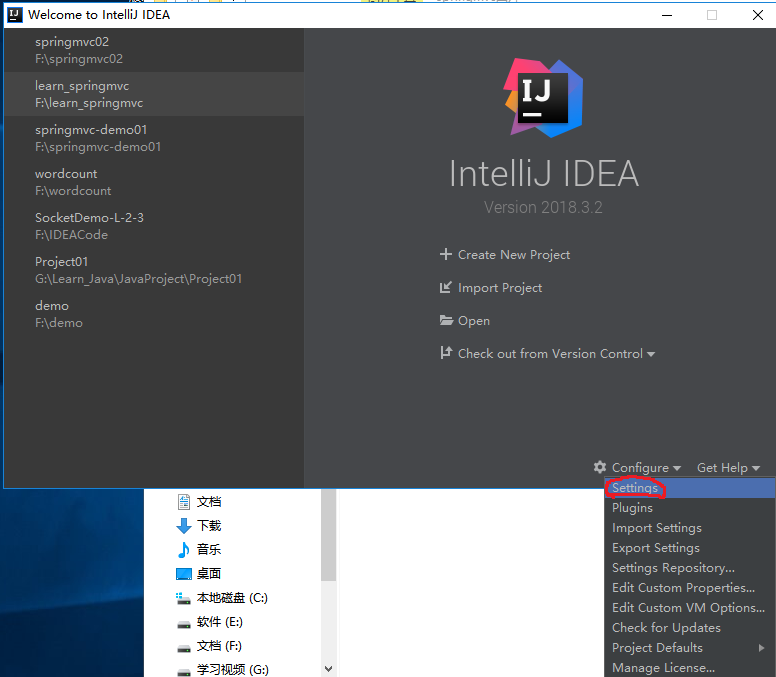
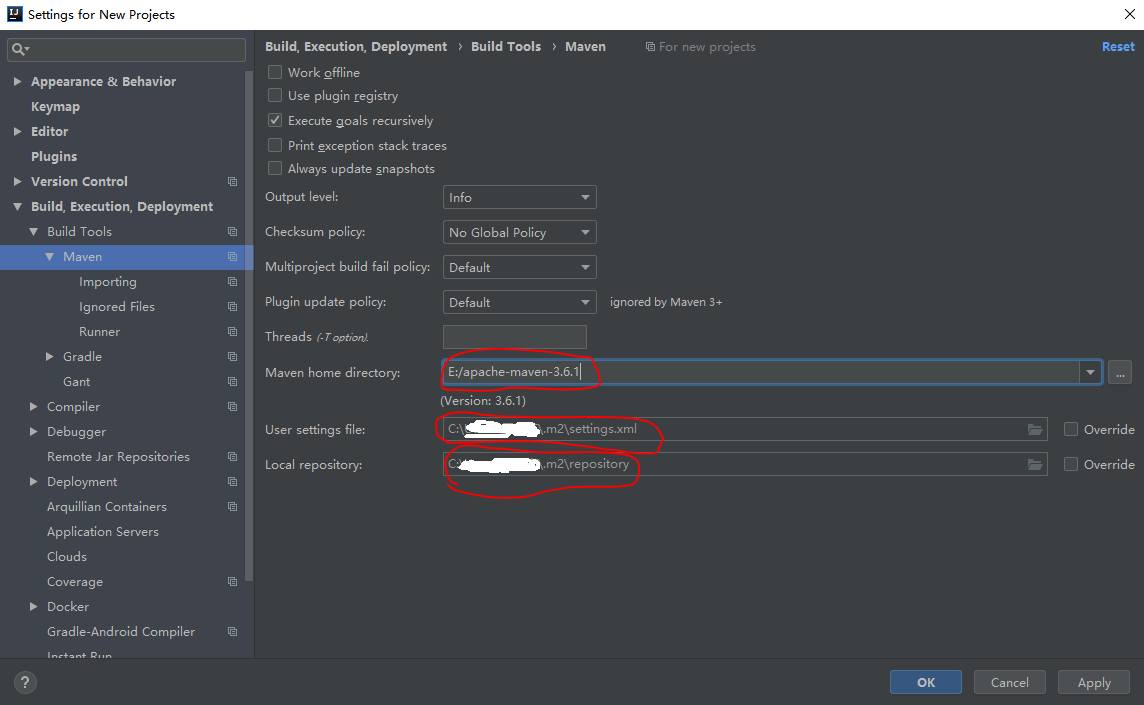
The purpose is to find Maven modify the configuration to use Maven to configure their own and Ali cloud images
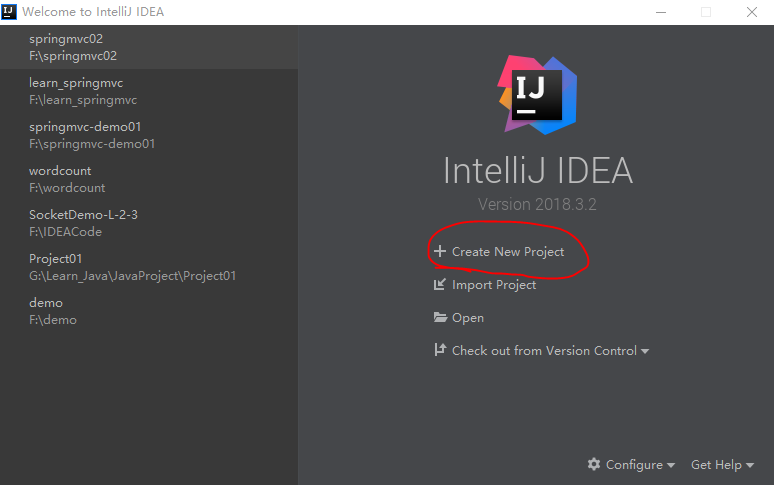
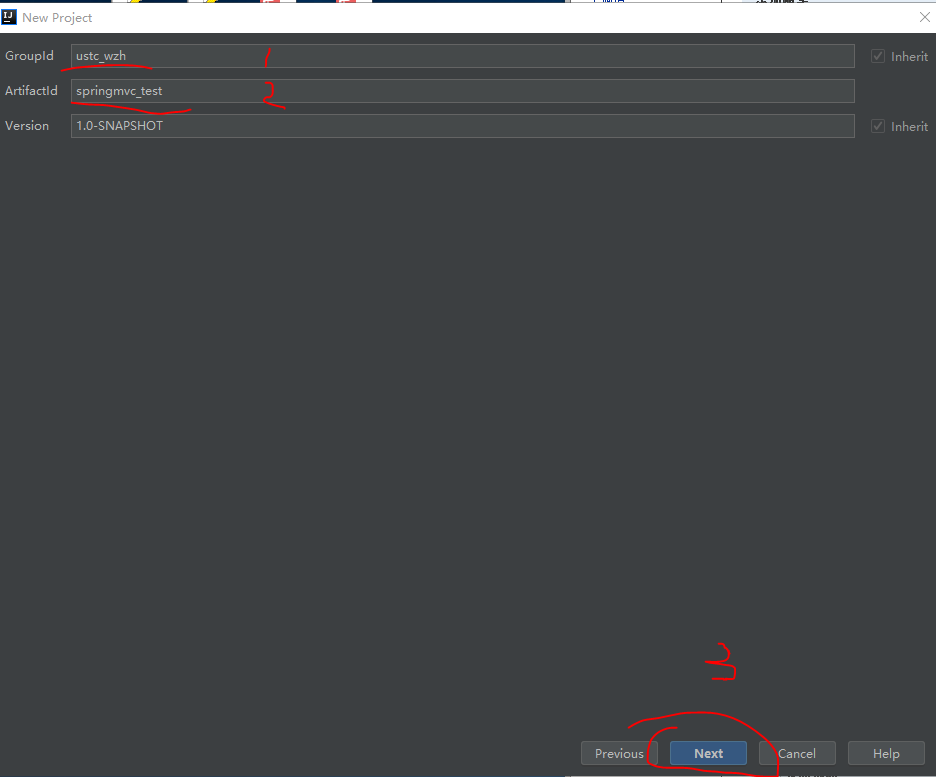
Start creating project
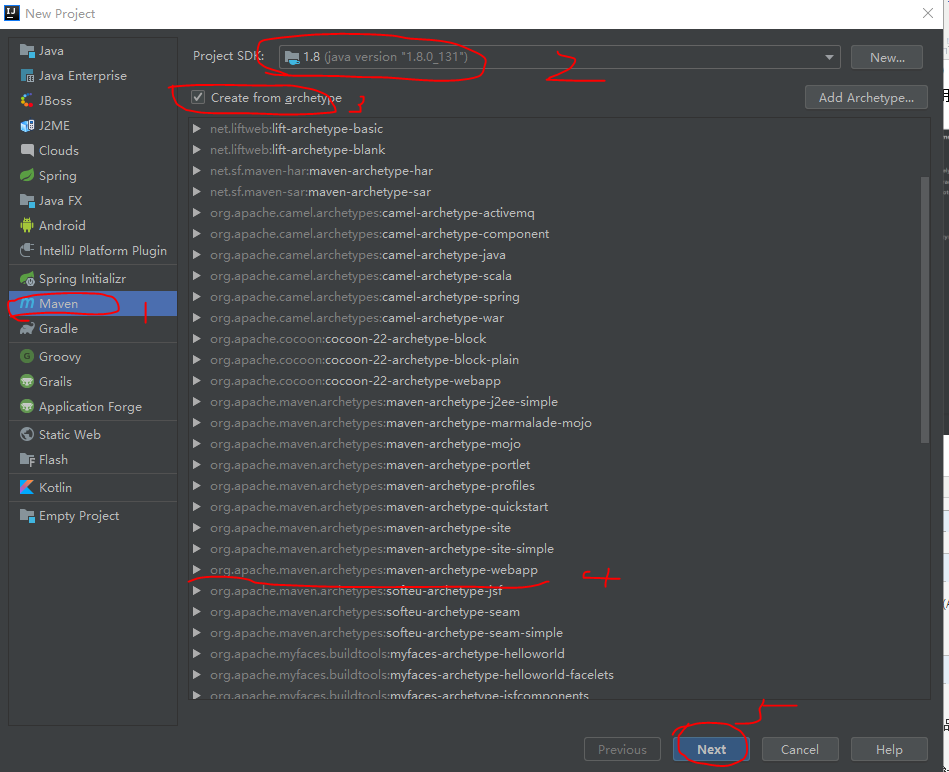
Write your company name, project name and click Next
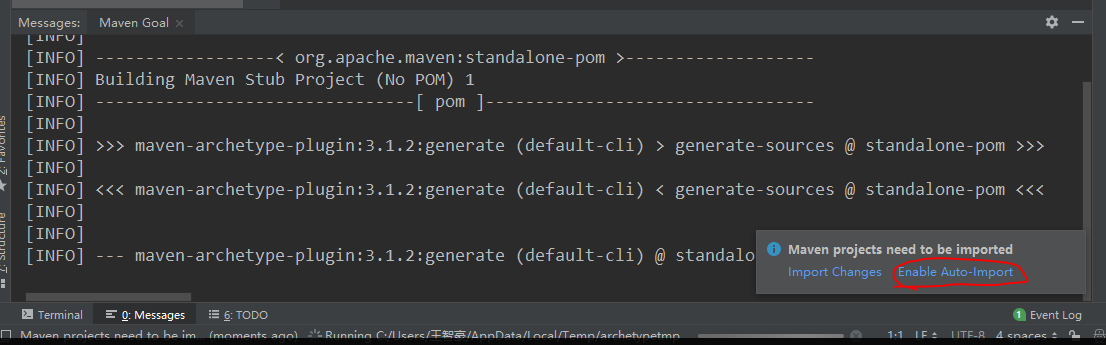
Add information to speed up the configuration maven

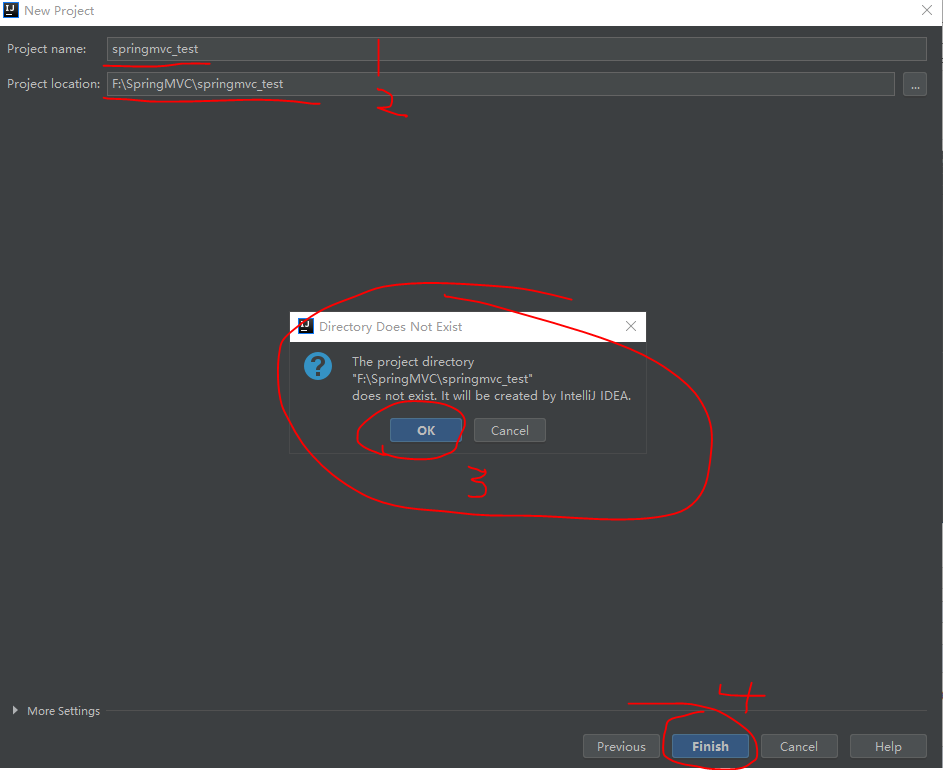
Set your project name and the location of their folder
Provided automatically imported package
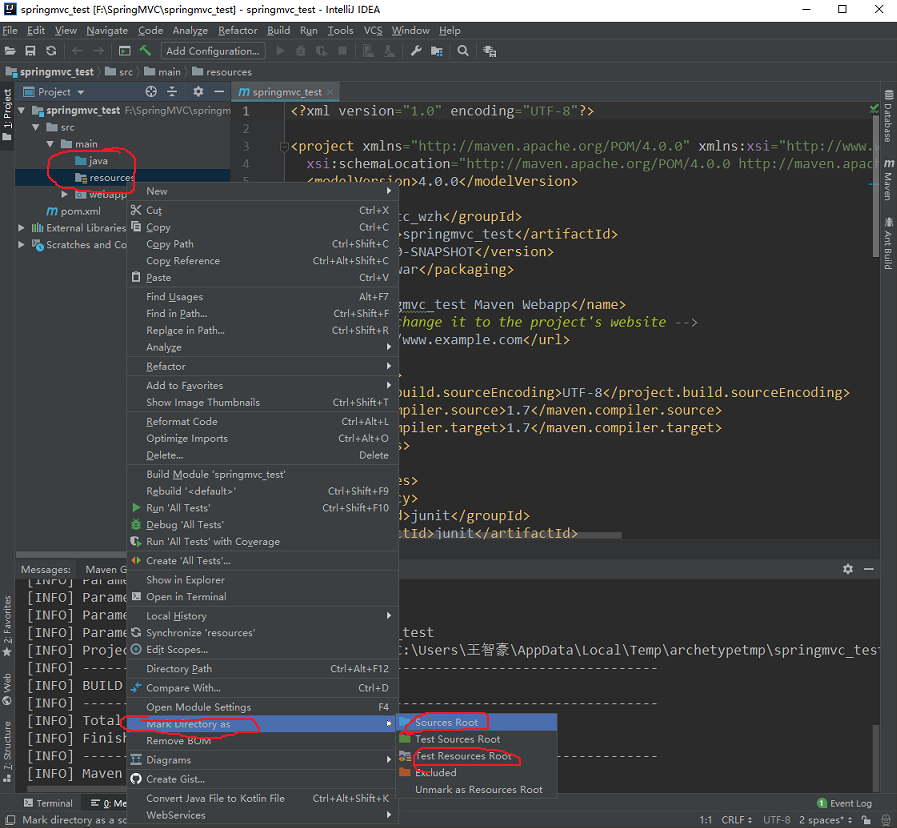
2. Start Configuration Items
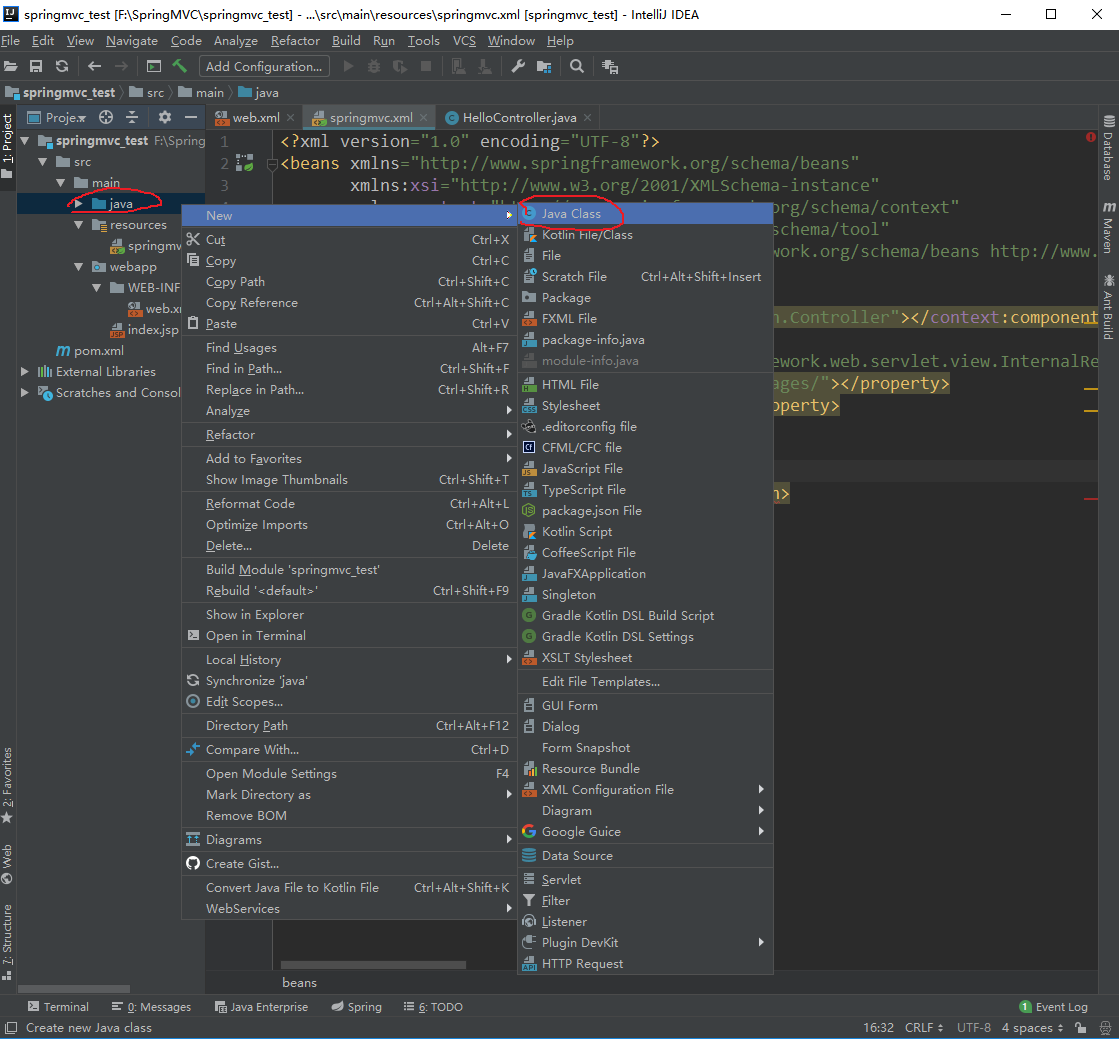
Add java, resources directory under the main directory and modifying directory attributes
Dependence modified configuration pom.xml


 1 <properties>
 2         <project.build.sourceEncoding>UTF-8</project.build.sourceEncoding>
 3         <maven.compiler.source>1.8</maven.compiler.source>
 4         <maven.compiler.target>1.8</maven.compiler.target>
 5         <spring.version>5.0.2.RELEASE</spring.version>
 6     </properties>
 7
 8     <dependencies>
 9         <dependency>
10             <groupId>org.springframework</groupId>
11             <artifactId>spring-context</artifactId>
12             <version>${spring.version}</version>
13         </dependency>
14         <dependency>
15             <groupId>org.springframework</groupId>
16             <artifactId>spring-web</artifactId>
17             <version>${spring.version}</version>
18         </dependency>
19         <dependency>
20             <groupId>org.springframework</groupId>
21             <artifactId>spring-webmvc</artifactId>
22             <version>${spring.version}</version>
23         </dependency>
24         <dependency>
25             <groupId>javax.servlet</groupId>
26             <artifactId>servlet-api</artifactId>
27             <version>2.5</version>
28             <scope>provided</scope>
29         </dependency>
30         <dependency>
31             <groupId>javax.servlet.jsp</groupId>
32             <artifactId>jsp-api</artifactId>
33             <version>2.0</version>
34             <scope>provided</scope>
35         </dependency>
36     </dependencies>
建立一个java类HelloController.java

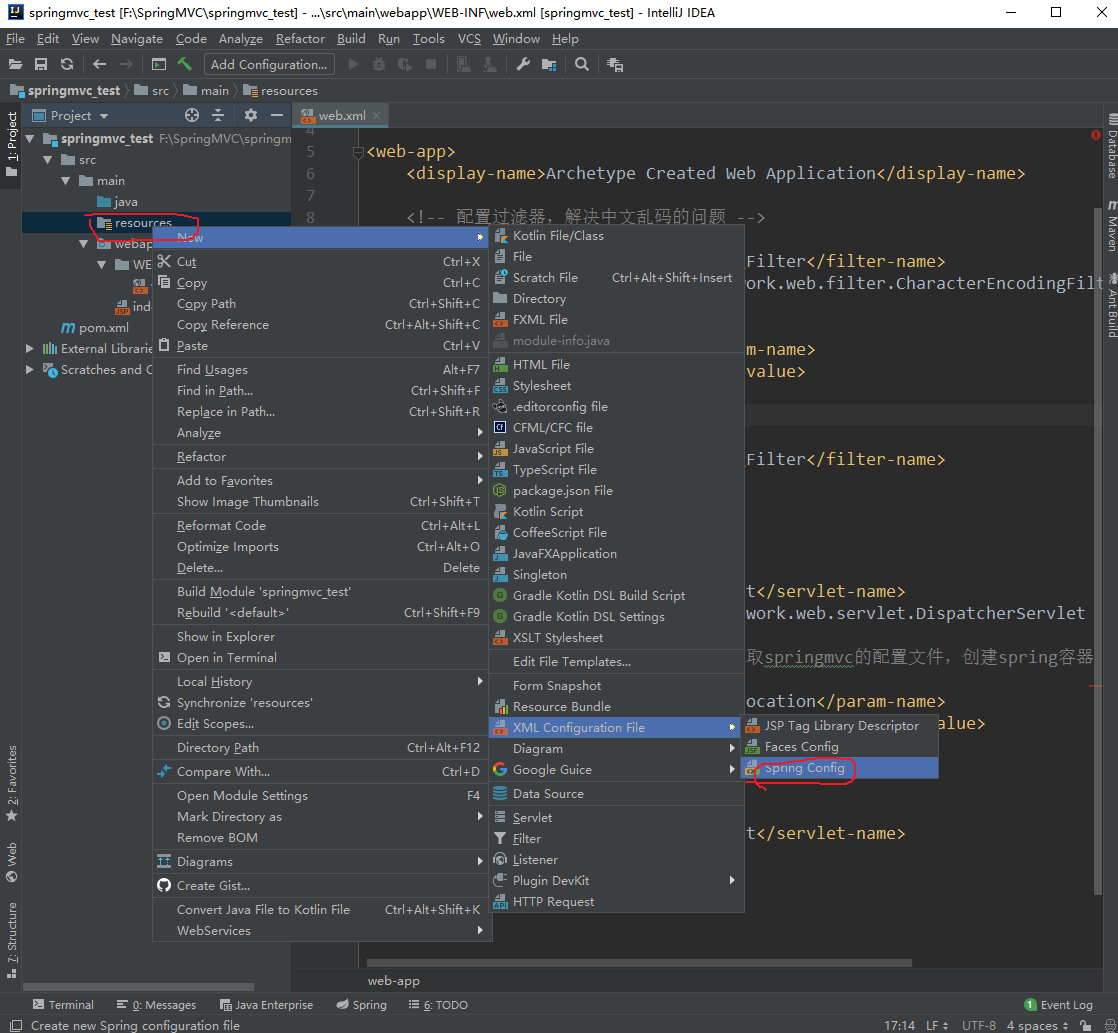
配置springmvc.xml的配置文件
修改扫描的包的路径为java中的包名以及bean中的配置信息
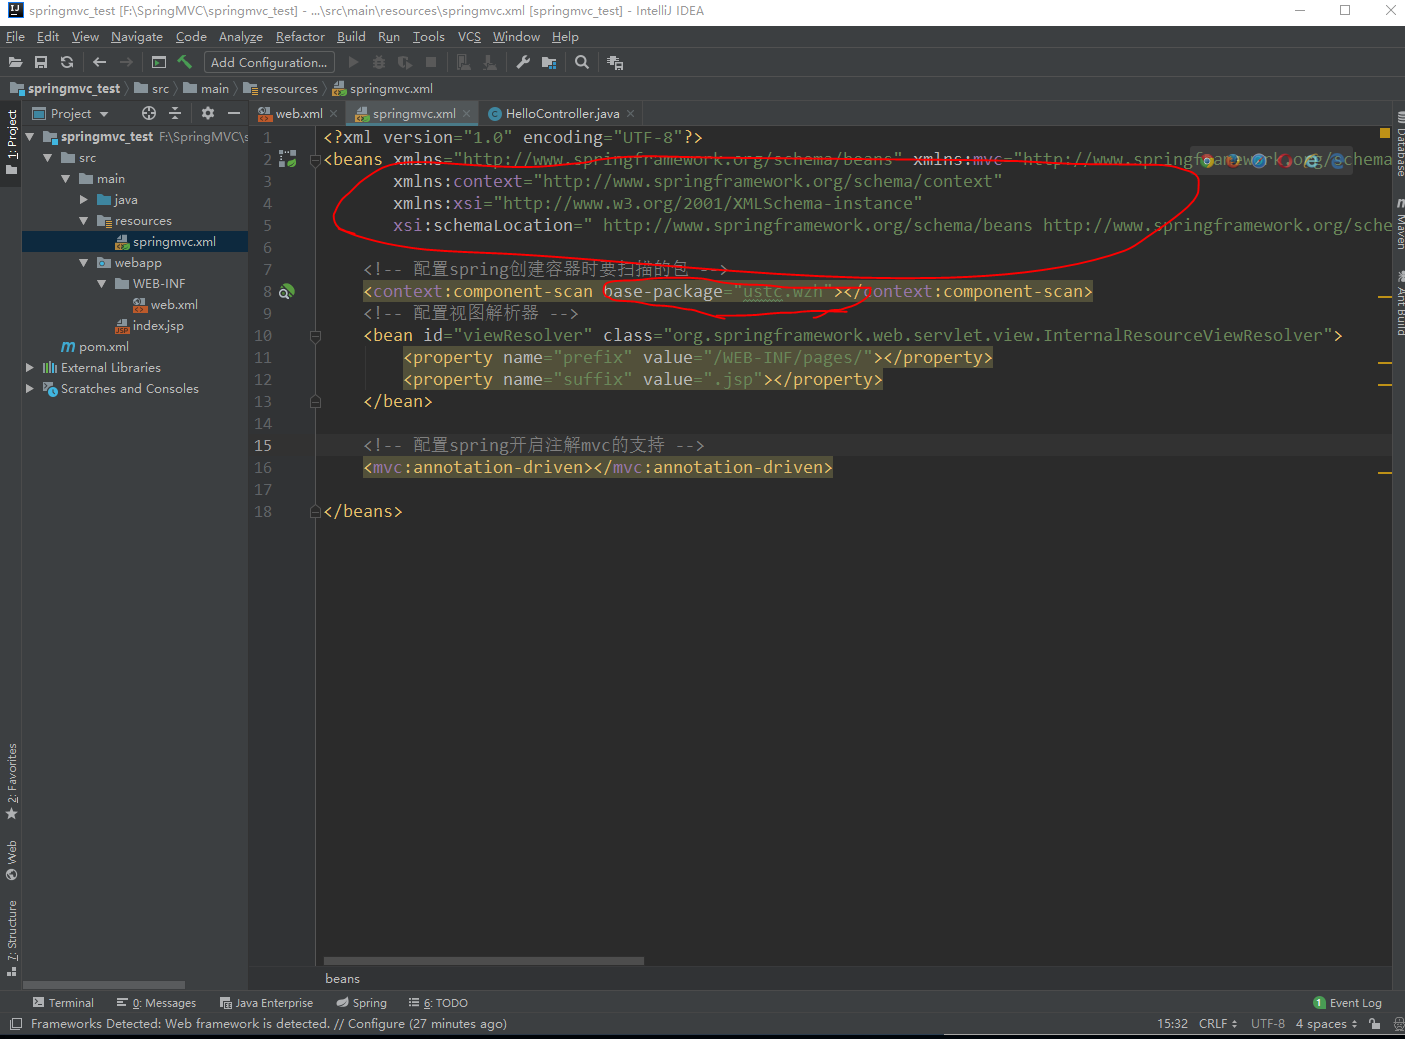
 1 <?xml version="1.0" encoding="UTF-8"?>
 2 <beans xmlns="http://www.springframework.org/schema/beans" xmlns:mvc="http://www.springframework.org/schema/mvc"
 3        xmlns:context="http://www.springframework.org/schema/context"
 4        xmlns:xsi="http://www.w3.org/2001/XMLSchema-instance"
 5        xsi:schemaLocation=" http://www.springframework.org/schema/beans http://www.springframework.org/schema/beans/spring-beans.xsd http://www.springframework.org/schema/mvc http://www.springframework.org/schema/mvc/spring-mvc.xsd http://www.springframework.org/schema/context http://www.springframework.org/schema/context/spring-context.xsd">
 6
 7     <!-- 配置spring创建容器时要扫描的包 -->
 8     <context:component-scan base-package="ustc.wzh"></context:component-scan>
 9     <!-- 配置视图解析器 -->
10     <bean id="viewResolver" class="org.springframework.web.servlet.view.InternalResourceViewResolver">
11         <property name="prefix" value="/WEB-INF/pages/"></property>
12         <property name="suffix" value=".jsp"></property>
13     </bean>
14
15     <!-- 配置spring开启注解mvc的支持 -->
16     <mvc:annotation-driven></mvc:annotation-driven>
17
18 </beans>
配置web.xml
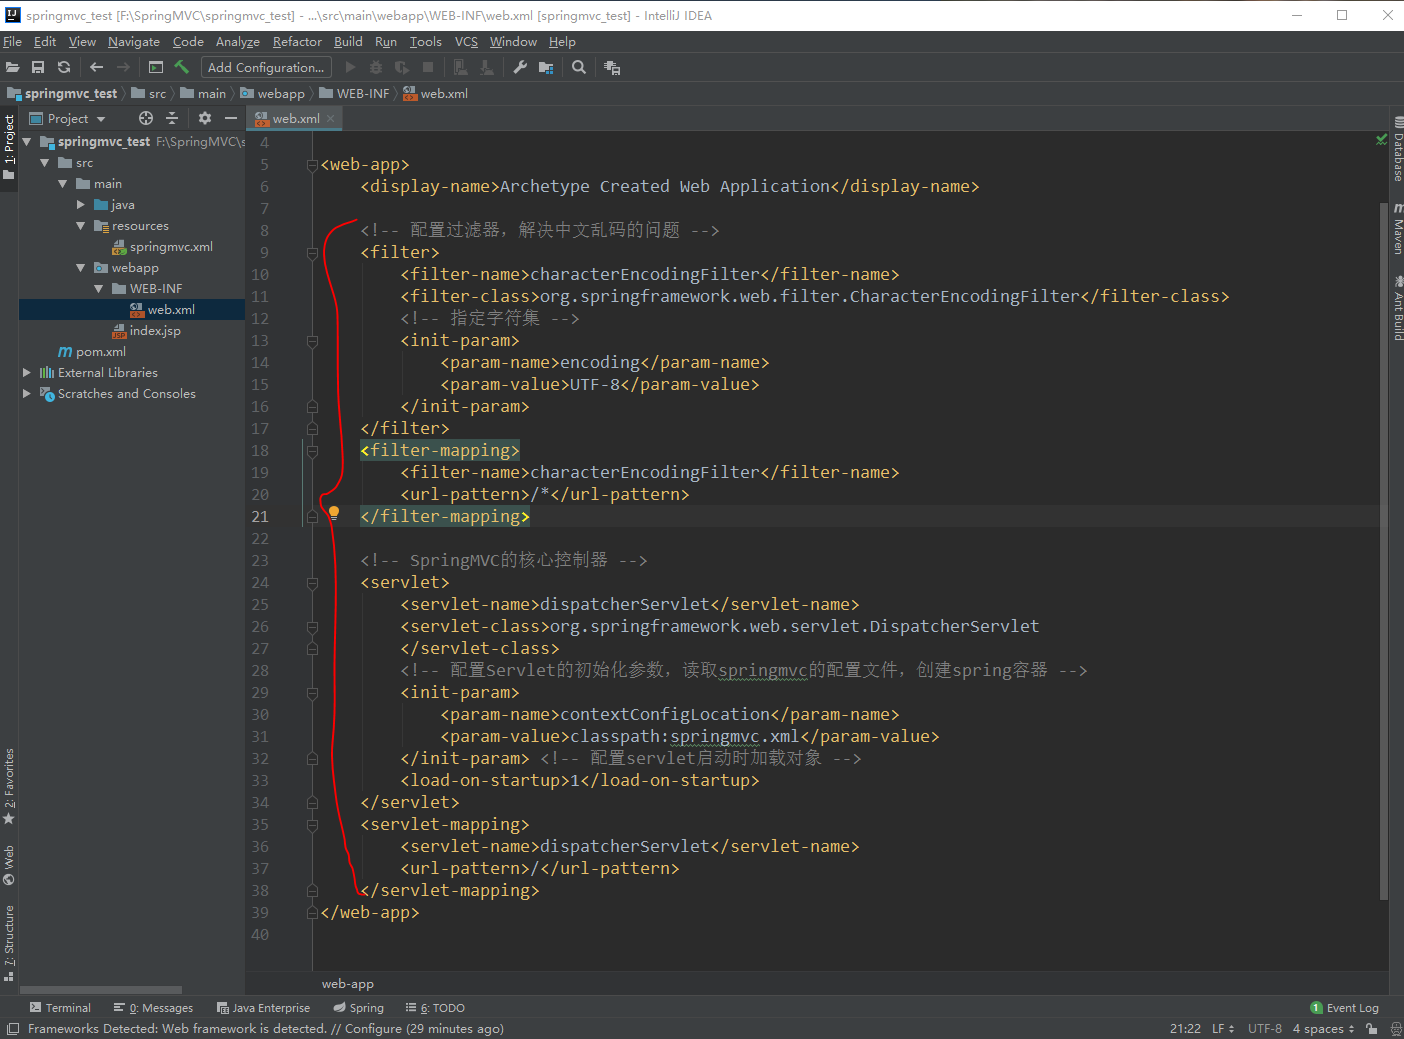
 1 <!-- 配置过滤器,解决中文乱码的问题 -->
 2     <filter>
 3         <filter-name>characterEncodingFilter</filter-name>
 4         <filter-class>org.springframework.web.filter.CharacterEncodingFilter</filter-class>
 5         <!-- 指定字符集 -->
 6         <init-param>
 7             <param-name>encoding</param-name>
 8             <param-value>UTF-8</param-value>
 9         </init-param>
10     </filter>
11     <filter-mapping>
12         <filter-name>characterEncodingFilter</filter-name>
13         <url-pattern>/*</url-pattern>
14     </filter-mapping>
15
16     <!-- SpringMVC的核心控制器 -->
17     <servlet>
18         <servlet-name>dispatcherServlet</servlet-name>
19         <servlet-class>org.springframework.web.servlet.DispatcherServlet
20         </servlet-class>
21         <!-- 配置Servlet的初始化参数,读取springmvc的配置文件,创建spring容器 -->
22         <init-param>
23             <param-name>contextConfigLocation</param-name>
24             <param-value>classpath:springmvc.xml</param-value>
25         </init-param> <!-- 配置servlet启动时加载对象 -->
26         <load-on-startup>1</load-on-startup>
27     </servlet>
28     <servlet-mapping>
29         <servlet-name>dispatcherServlet</servlet-name>
30         <url-pattern>/</url-pattern>
31     </servlet-mapping>
3.配置tomcat服务器

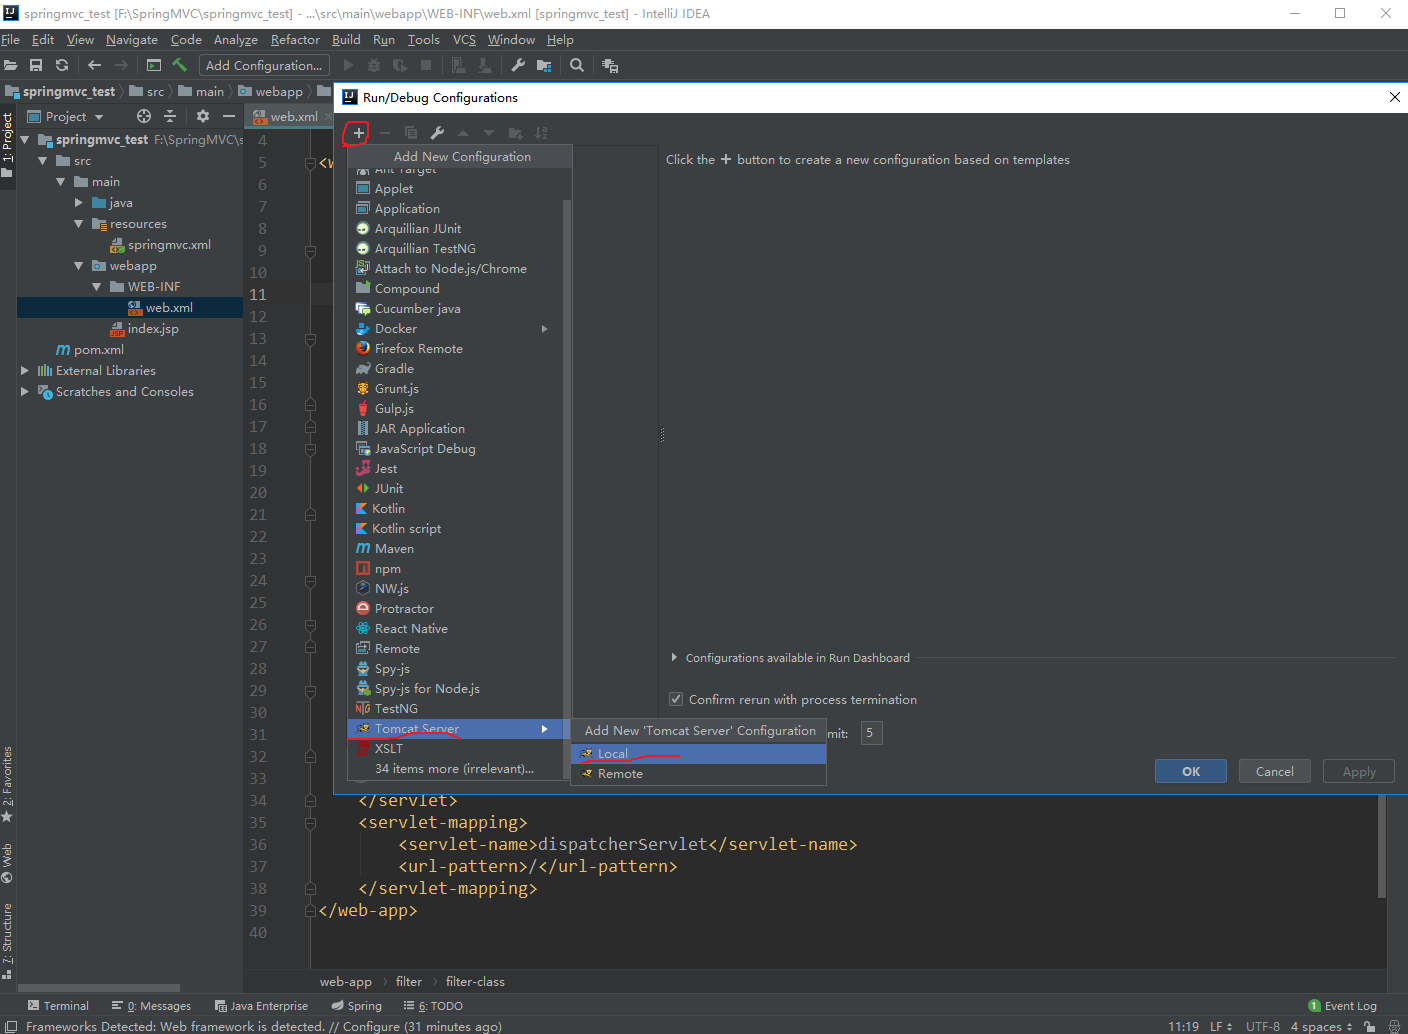
配置服务器的名字和下载好的tomcat服务器以及可以运行的war包
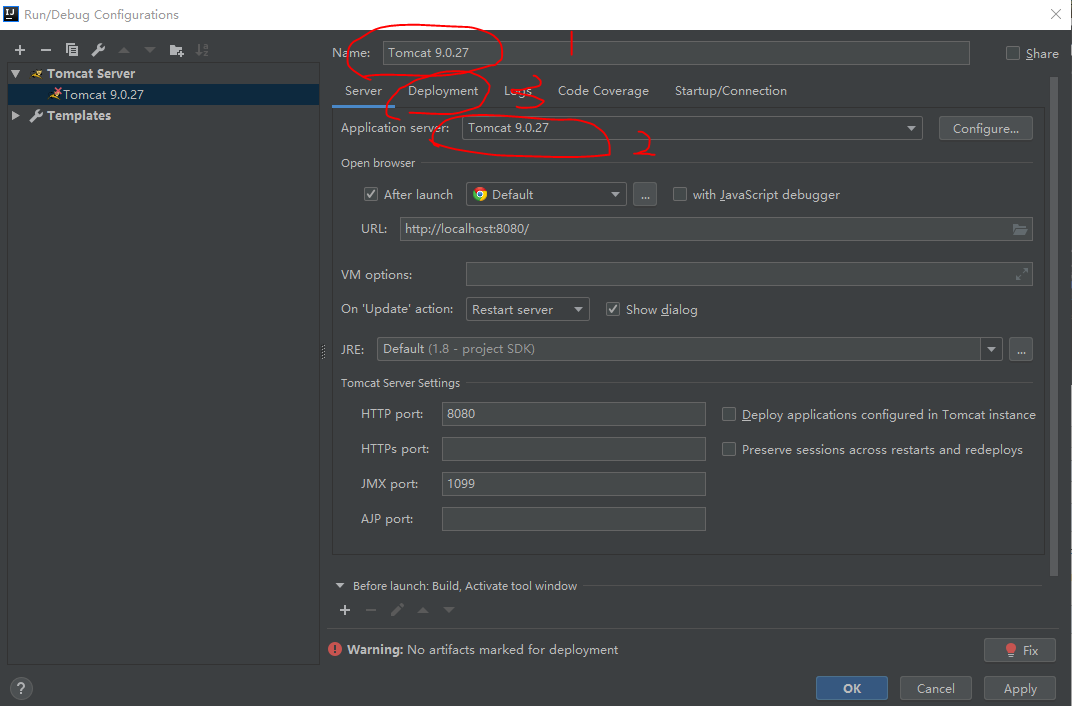

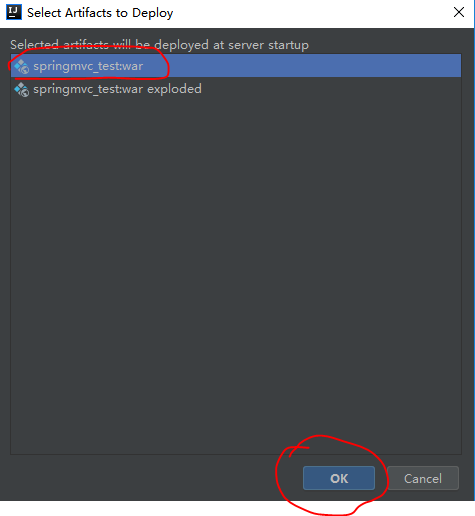
最后点击OK!
4.编写程序
删除index.jsp重新在原来位置创建一个index.jsp
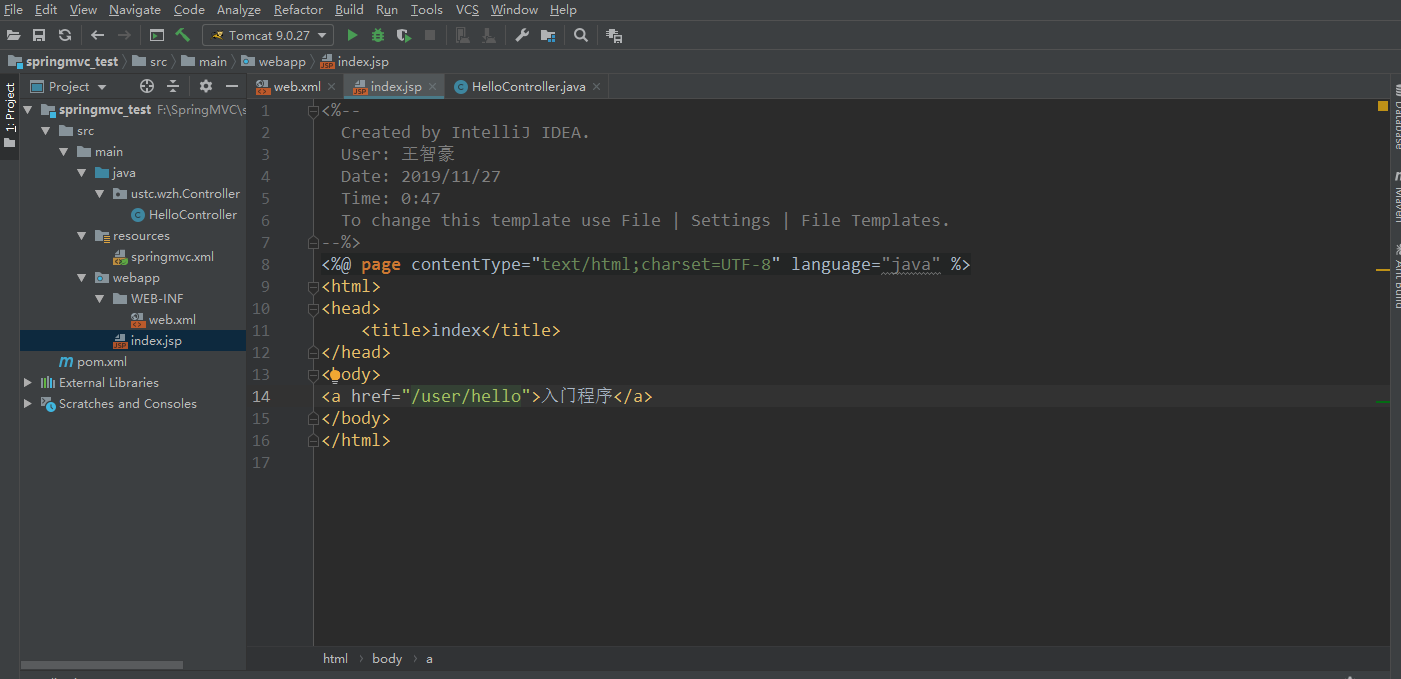
1 <%@ page contentType="text/html;charset=UTF-8" language="java" %>
2 <html>
3 <head>
4     <title>index</title>
5 </head>
6 <body>
7 <a href="/user/hello">入门程序</a>
8 </body>
9 </html>
编写HelloWorld.java中的内容

 1 @Controller
 2 @RequestMapping("/user")
 3 public class HelloController {
 4
 5     @RequestMapping("hello")
 6     public String helloworld(){
 7         System.out.println("hello world!");
 8         return "success";
 9     }
10 }
在WEB-INF中添加文件夹为pages,在其中添加success.jsp
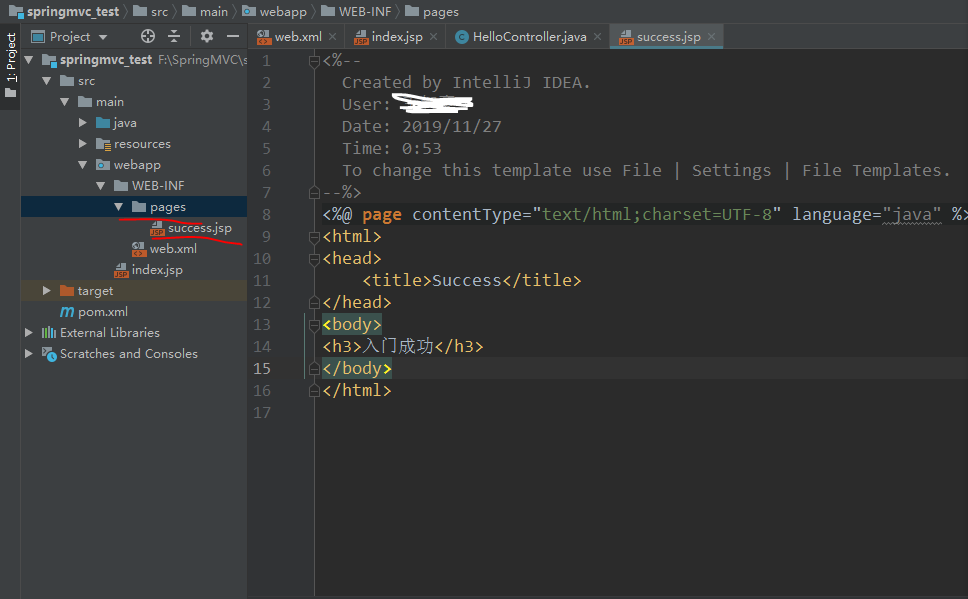
1 <%@ page contentType="text/html;charset=UTF-8" language="java" %>
2 <html>
3 <head>
4     <title>Success</title>
5 </head>
6 <body>
7 <h3>入门成功</h3>
8 </body>
9 </html>
运行tomcat服务器

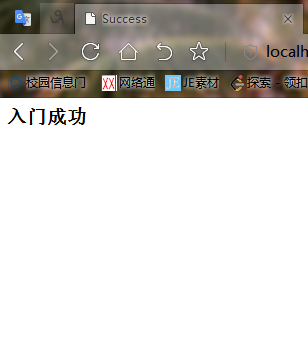
恭喜你入门成功!