Hotlink Protection Overview
防盗链就是防止别人的网站代码里面盗用服务器的图片文件、视频等相关资源.如果别人盗用网站的这些静态资源,明显的是会增大服务器的带宽压力.所以作为网站的维护人员,要杜绝我们服务器的静态资源被其他网站盗用.Configuration Variable Description Rules
% {HTTP_ REFERER}: Browse the link header fields, eleven store chain
connected to the URL, representatives are required to access the page from which the link
^:! Not to start with the back
* $: at the end of any character
NC: not distinguish between upper-
R: forced jump
Rules match Description
RewriteEngine On: rewriting open web
RewriteCond: Set matching rules (conditions)
the RewriteRule: setting a skip operation (operation)
Matching rules
If the rule matches the value of the corresponding variable is set, the process down one by one; if you do not match, then the next rule no longer match
Examples of presentation
Environmental deployment
一台linux虚拟机作为源网站服务器,(IP:192.168.235.158/域名:www.bdqn.com)
一台win7 x64虚拟机作为测试客户机
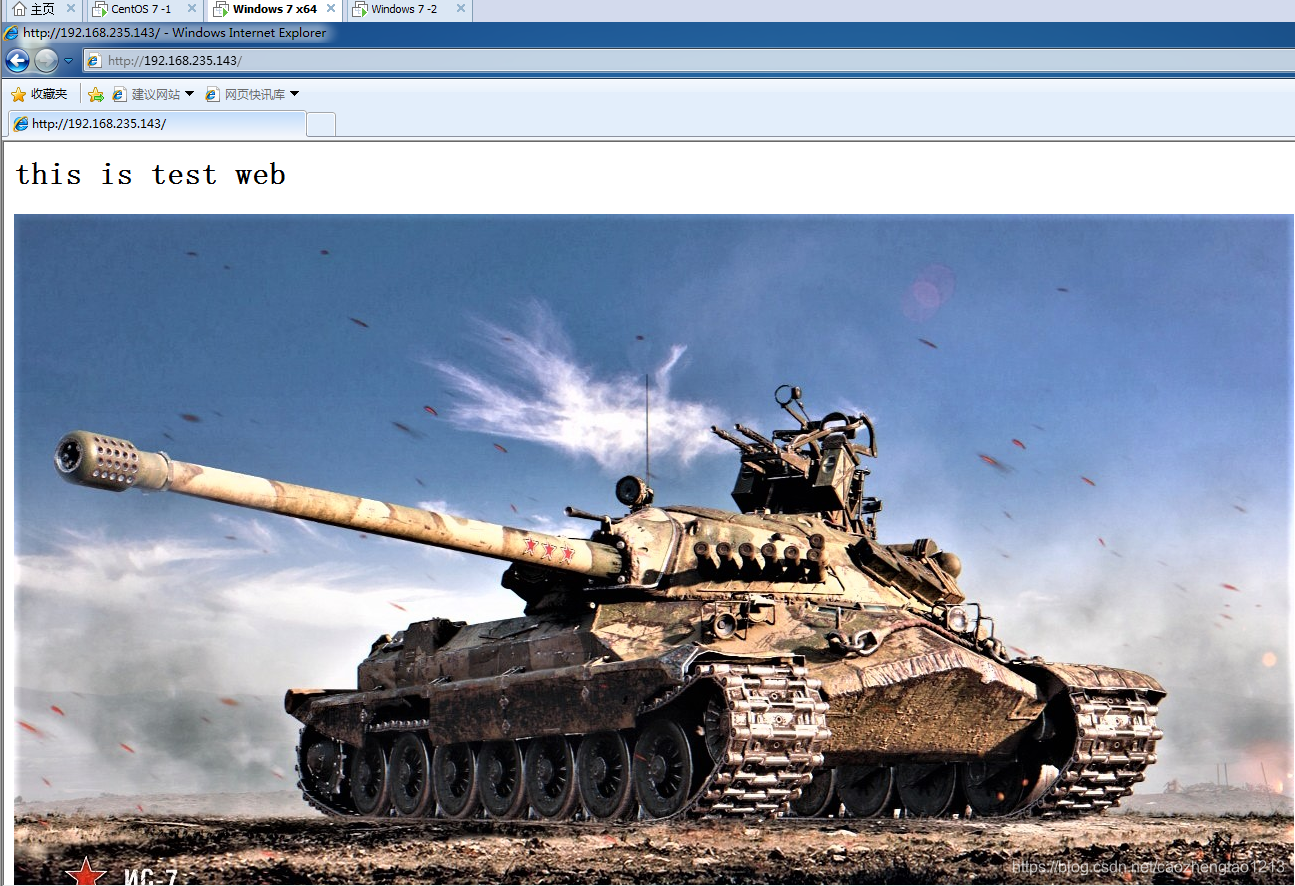
一台win7 -2虚拟机作为盗链网站服务器(192.168.235.143)Demonstration starts
Step 1: Install and configure the DNS service
1. Install Service
[root@localhost ~]# yum install bind -y 2. Configure DNS master configuration file
[root@localhost ~]# vim /etc/named.conf         //编辑主配置文件
options {
        listen-on port 53 { any; };         //将括号内127.0.0.1替换为any
        ...                                 //省略部分不做修改
        allow-query     { any; };           //将括号内localhost替换为any
3. Configure DNS zone configuration file
[root@localhost ~]# vim /etc/named.rfc1912.zones    //编辑区域配置文件
zone "bdqn.com" IN {                                //指定域名
        type master;
        file "bdqn.com.zone";                       //指定域名的区域数据文件
        allow-update { none; };
};
4. DNS zone configuration data configuration file
[root@localhost ~]# cd /var/named/                      //切换目录
[root@localhost named]# cp -p named.localhost bdqn.com.zone         //保留权限复制区域数据文件模板
[root@localhost named]# vim bdqn.com.zone                           //编辑区域数据文件
$TTL 1D
@       IN SOA  @ rname.invalid. (
                                        0       ; serial
                                        1D      ; refresh
                                        1H      ; retry
                                        1W      ; expire
                                        3H )    ; minimum
        NS      @
        A       127.0.0.1
www IN  A       192.168.235.158
//删除末行的内容,输入www IN  A       192.168.235.158 此段内容,地址为本地Linux的IP地址
5. Turn DNS service
[root@localhost named]# systemctl start named
[root@localhost named]# systemctl stop firewalld.service
[root@localhost named]# setenforce 0
Step two: compile and install Apache Service
1. Remote Shared get LAMP Kit
[root@localhost named]# smbclient -L //192.168.56.1 //查看由Windows共享的内容
    Sharename       Type      Comment
    ---------       ----      -------
    LAMP            Disk

[root@localhost named]# mkdir /abc              //创建目录
[root@localhost named]# mount.cifs //192.168.56.1/LAMP /abc
//远程挂载工具包到创建的目录
[root@localhost named]# cd /abc         //切换至目录查看
[root@localhost abc]# ls
apr-1.6.2.tar.gz                  game.jpg
apr-util-1.6.0.tar.gz             httpd-2.4.29.tar.bz2
awstats-7.6.tar.gz                install_lamp.sh
cronolog-1.6.2-14.el7.x86_64.rpm  mysql-5.6.26.tar.gz
Discuz_X2.5_SC_UTF8.zip           php-5.6.11.tar.bz2
error.png
2. Unzip the toolkit source code files, and
//解压源码文件
[root@localhost abc]# tar jxvf httpd-2.4.29.tar.bz2 -C /opt/
...
[root@localhost abc]# tar zxvf apr-1.6.2.tar.gz -C /opt/
...
[root@localhost abc]# tar zxvf apr-util-1.6.0.tar.gz -C /opt/
...

//查看/opt目录下解压后的组件包
[root@localhost abc]# ls /opt
apr-1.6.2  apr-util-1.6.0  httpd-2.4.29  rh

//移动组件包到Apache服务的srclib目录中
[root@localhost abc]# cd /opt
[root@localhost opt]# mv apr-1.6.2/ httpd-2.4.29/srclib/apr
[root@localhost opt]# mv apr-util-1.6.0/ httpd-2.4.29/srclib/apr-util
3. Install a compiled language environment, and configure Apache configuration function module
[root@localhost opt]# cd httpd-2.4.29/
[root@localhost httpd-2.4.29]#  yum install gcc gcc-c++ pcre pcre-devel zlib-devel expat-devel -y
//安装语言环境
[root@localhost httpd-2.4.29]# ./configure \
> --prefix=/usr/local/httpd \
> --enable-deflate \
> --enable-so \
> --enable-rewrite \
> --enable-charset-lite \
> --enable-cgi
//配置相关功能模块
4. compile and compiler installation
[root@localhost httpd-2.4.29]# make
//编译
...
[root@localhost httpd-2.4.29]# make install
//编译安装
...
5. Turn on the main Apache configuration file associated module
[root@localhost httpd-2.4.29]# vim /usr/local/httpd/conf/httpd.conf
//编辑Apache主配置文件

198 ServerName www.bdqn.com:80
//删除文件的第198行前的#号注释,并将网址替换成之前创建的域名www.bdqn.com

 51 Listen 192.168.235.158:80
 //删除文件的第51行前的#号注释,并将监听地址替换为本地Linux的IP地址
 52 #Listen 80
 //在第52行前加上#来注释掉IPv6的监听

156 LoadModule rewrite_module modules/mod_rewrite.so
//删除文件的第156行前的#号注释,开启重写功能模块
6. Create a home page and place pictures
[root@localhost httpd-2.4.29]# cd /usr/local/httpd/bin/
//切换至Apache服务的/bin目录中
[root@localhost bin]# vim /usr/local/httpd/htdocs/index.html
//编辑首页文件

<html><body><h1>It works!</h1>
<img src="game.jpg"/>                           //将图片放入标签中
</body></html>

[root@localhost bin]# cp /abc/game.jpg /usr/local/httpd/htdocs/
//将先前挂载目录中的图片复制到站点目录下
7. Turn on the Apache Service
[root@localhost bin]# ./apachectl start
//使用Apache自带的脚本开启服务
The third step: using the test client to view the site
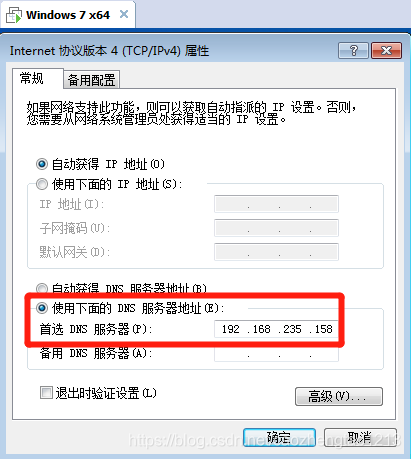
1. Open a Win 7 x64 test host, change the DNS server address to the IP address of the local Linux
2. Open your browser and enter the domain name www.bdqn.com to access the page 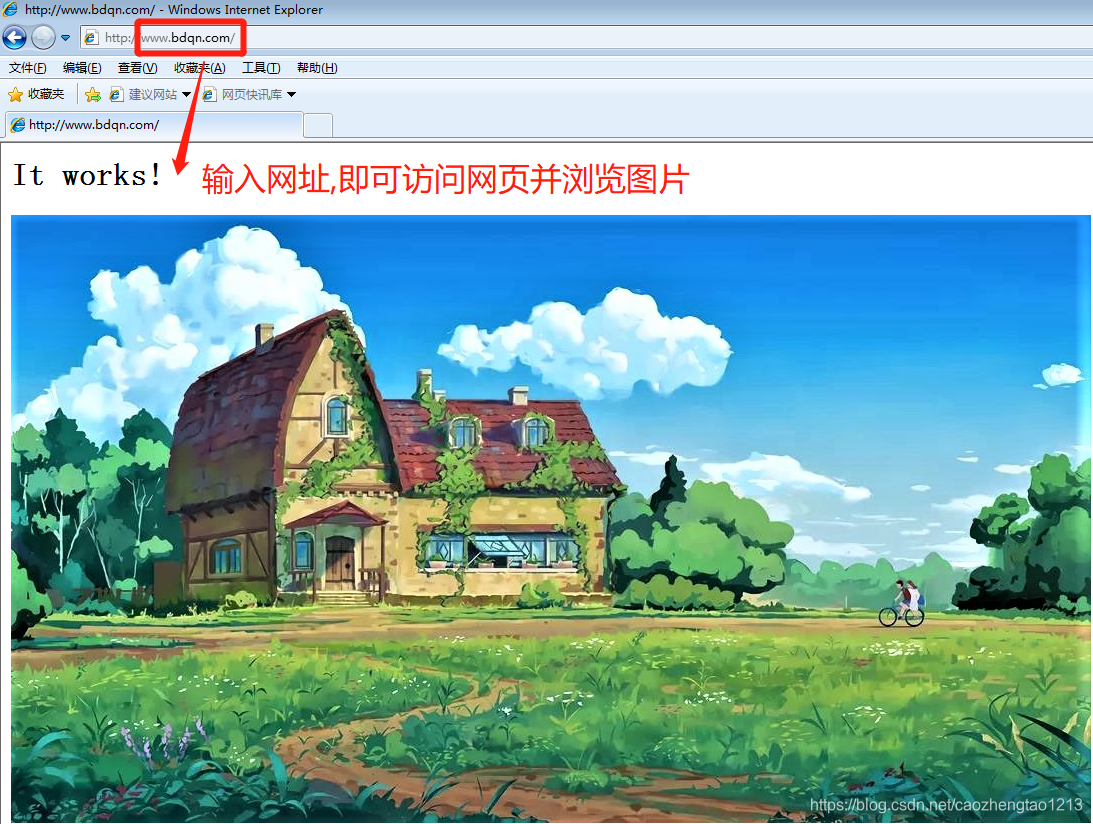
3. View the web property to get pictures of the URL
right-click the image, click Properties to view the URL of the picture is http: // www. bdqn.com/game.jpg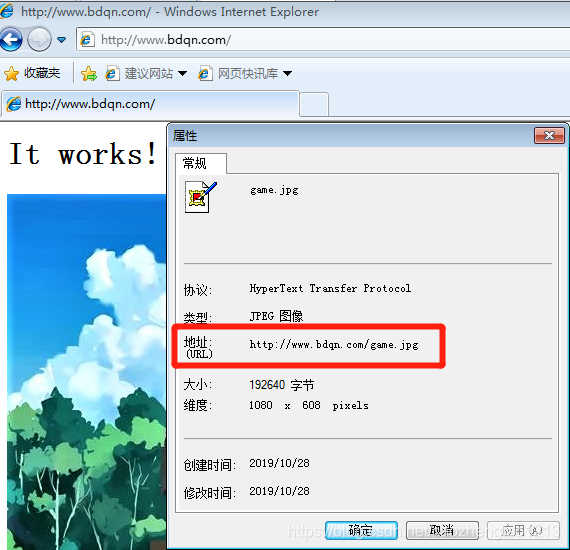
Step Four: Create and configure Irvine site
1. Open a Win 7-2 host, build website
Control Panel - Programs - Programs and Features - open and close the windows function - Select the Internet Information Services 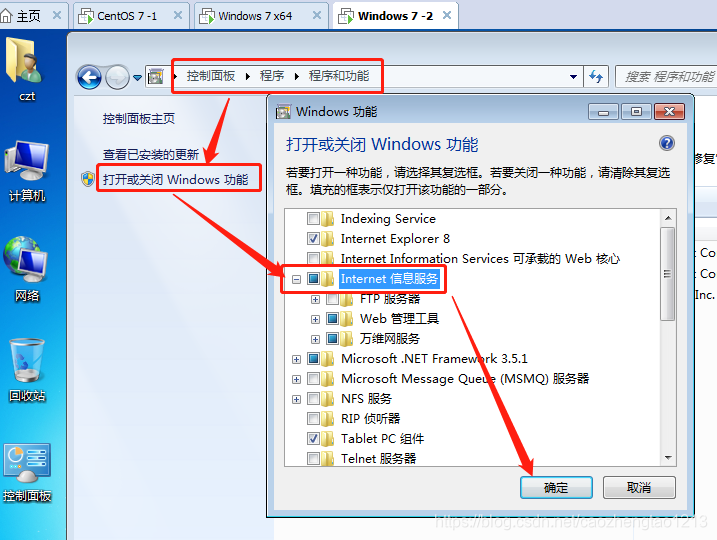
2. Use the txt file to write web content, and change the document named index.html
txt document content:
<html>
 <head></head>
  <body>
    <h1>this is test web</h1>
    <img src="http://www.bdqn.com/game.jpg"/>
  </body>
</html>
3. Place the index.html file in C: \ inetpub \ wwwroot in the site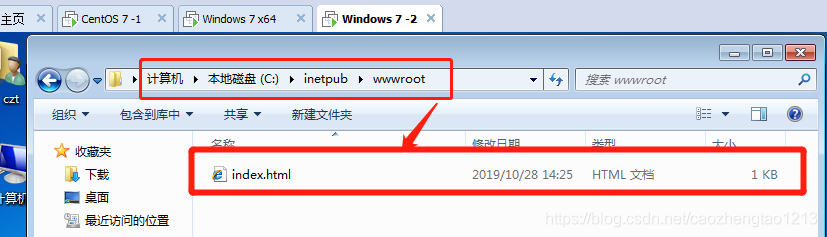
Step 5: Use the test client to view the Irvine site
Use Win 7 x64 test host access Win 7-2 (IP: 192.168.235.143), you can access to the web, but this is Irvine site, and visit this site not only steal the resources of others, the source site, traffic prizes lead back to the source site, resulting in server load others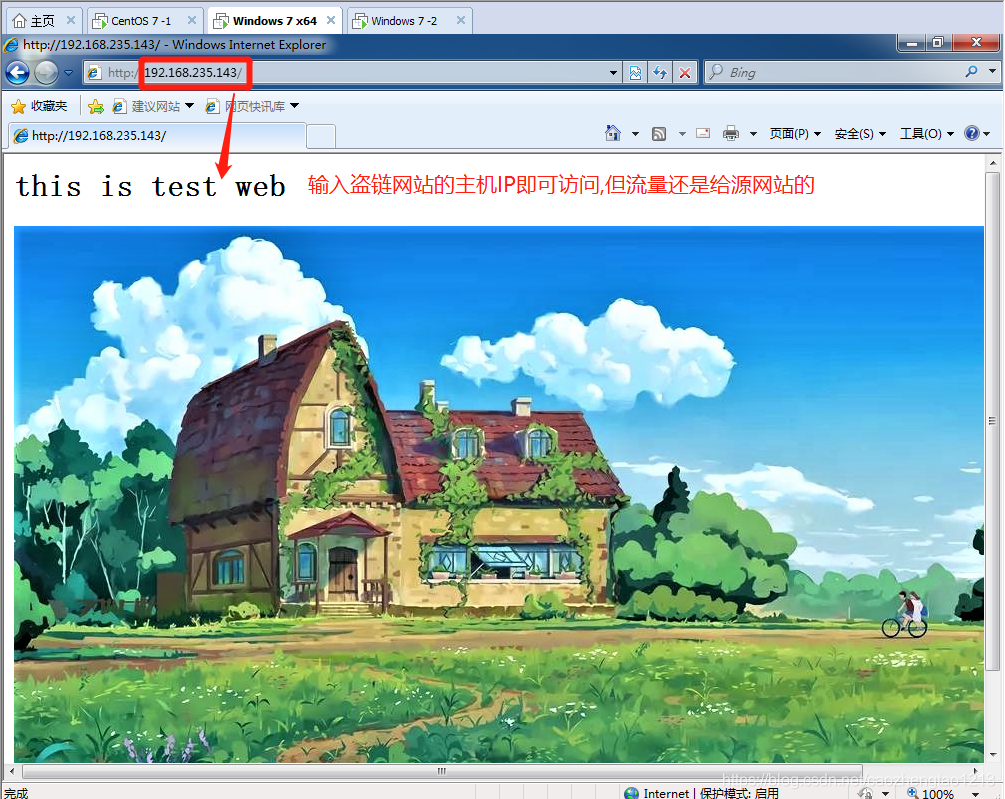
Step 6: Configuring security chain
1. Modify the Apache configuration file
[root@localhost bin]# vim /usr/local/httpd/conf/httpd.conf

248     Require all granted
//在第248行下追加以下6行内容,用以防止其他网站盗链.一旦截取到盗链图片信息,便会跳出错误图片
249         RewriteEngine On
250         RewriteCond %{HTTP_REFERER} !http://bdqn.com/.*$ [NC]
251         RewriteCond %{HTTP_REFERER} !^http://bdqn.com$ [NC]
252         RewriteCond %{HTTP_REFERER} !^http://www.bdqn.com/.*$ [NC]
253         RewriteCond %{HTTP_REFERER} !^http://www.bdqn.com/$ [NC]
254         RewriteRule .*\.(gif|jpg|swf)$ http://www.bdqn.com/error.png
2. The error pictures into the site directory
[root@localhost bin]# cp /abc/error.png /usr/local/httpd/htdocs/
[root@localhost bin]# ls /usr/local/httpd/htdocs/
error.png  game.jpg  index.html
3. Re-open service
[root@localhost bin]# ./apachectl stop
[root@localhost bin]# ./apachectl start
Step Seven: Test security chain
Use Win 7 x64 test host access Win 7-2 again (IP: 192.168.235.143) Web page, it will jump out another photo, anti-theft chain configuration successful!