Preparing the environment:
consul: Tools highly available, distributed service discovery
master host -docker01: 172.16.1.30
node01 host -docker02: 172.16.1.31
node02 host -docker03: 172.16.1.32
Note: Because the test environment, so temporarily turn off the firewall, disable selinux, if it is issued by the external network server, a firewall is not turned off, you can set iptables rules.
Project operations:
(1) deployment consul on docker01:
download or upload consul_1.5.1_linux_amd64 package:
[root@sqm-docker01 ~]# unzip consul_1.5.1_linux_amd64.zip  #使用unzip工具进行一个解压
[root@sqm-docker01 ~]# mv consul /usr/local/bin/
[root@sqm-docker01 ~]# chmod +x /usr/local/bin/consul
[root@sqm-docker01 ~]# consul agent -server -bootstrap -ui -data-dir=/var/lib/consul-data \
> -bind=172.16.1.30 \ #docker01本机的ip地址
> -client=0.0.0.0 \
> -node=masterParameter Description:
-server: add a service
-bootstrap: general use in a single server node when the self-elected as leader.
-data-dir: Specifies the data stored in the directory
-ui: turn on the internal web interface
-bind: open services specified ip
-client: The client specified service
-node: in the name of internal communication cluster, the default is the host name.
#### to keep running in the background consul Service:[root@sqm-docker01 ~]# nohup consul agent -server -bootstrap -ui -data-dir=/var/lib/consul-data -bind=172.16.1.30 -client=0.0.0.0 -node=master &

After performing the background, it will generate a file in the current directory, and generate all of the cluster information will be saved in this file: 
## View service port is running: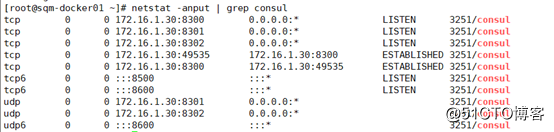
8300: Cluster nodes (the announced)
8301: Internal cluster Access
8302: communication between the data center across
8500: HTTP - the UI
8600: dns
## View consul info:[root@sqm-docker01 ~]# consul info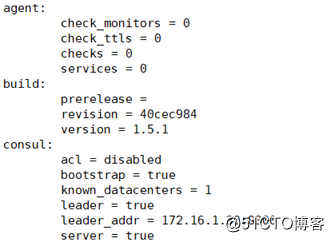
说明:consul信息中多为一些算法,这些算法保证数据的同步,以及加上-bootstrap自选举为leader,也是通过这些算法来实现的。
## View the cluster information:[root@sqm-docker01 ~]# consul members
Log in to access the web interface: http://172.16.1.30:8500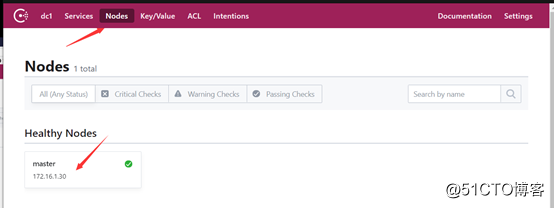
(2) Operation on docker02:
Deployment consul Service:
Download progrium / consul Mirror:[root@sqm-docker02 ~]# docker pull myprogrium-consul
## Creating a consul container, and add consul cluster:[root@sqm-docker02 ~]# docker run -d --name consul -p 8301:8301 -p 8301:8301/udp -p 8500:8500 -p 8600:8600 -p 8600:8600/udp --restart=always progrium/consul -join 172.16.1.30 -advertise 172.16.1.31 -client 0.0.0.0 -node=node01
Explain:
-join: docker01 cluster is added, it is designated a host address docker01
-advertise: Notice that the present machine (docker02) address,
-client: it indicates the host access node
-node: Custom Node Name It is node01
Ensure that the container has been running:
Check whether the node is added on the page: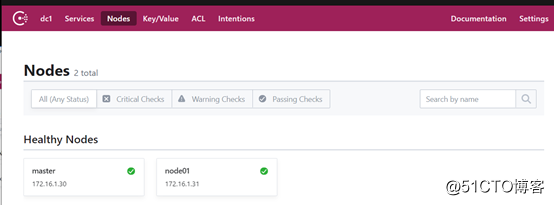
(3) On docker03 operation:
same download progrium / consul Mirror: [root@sqm-docker02 ~]# docker pull myprogrium-consul
Run vessel and added to the cluster:[root@sqm-docker03 ~]# docker run -d --name consul -p 8301:8301 -p 8301:8301/udp -p 8500:8500 -p 8600:8600 -p 8600:8600/udp --restart=always progrium/consul -join 172.16.1.30 -advertise 172.16.1.32 -client 0.0.0.0 -node=node02
#注意需要通告的是自身的ip地址,节点名称为node02

After adding a cluster view cluster information on docker01:
[root@sqm-docker01 ~]# consul members

Browsing the web interface: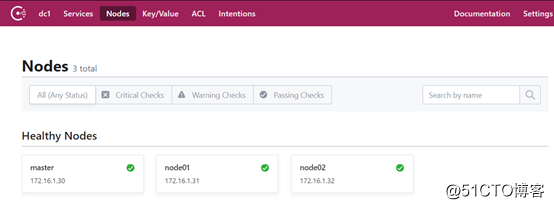
ensure node1 and node2 have been added to the cluster
(4) mounted on the consul-template docker01:
The software package can be downloaded on github, download path (selection can be customized version): https://releases.hashicorp.com/consul-template/
Download after decompression, and give execute permissions:
[root@sqm-docker01 ~]# unzip consul-template_0.19.5_linux_amd64.zip
Archive:  consul-template_0.19.5_linux_amd64.zip
  inflating: consul-template
[root@sqm-docker01 ~]# mv consul-template /usr/local/bin/
[root@sqm-docker01 ~]# chmod +x /usr/local/bin/consul-template
Being the first to complete the installation, do not do other operations.
(5) deployment registrator:
The main container used to collect information to run the service, and sent to the consul.
Automatic discovery service docker container provided, and the service registry (data center) registration services in the backend.
Common data center: consul, etcd, zookeeper, related technologies can find relevant technical documentation.
在docker02和docker03上部署registrator:
注意:#两台都要部署
docker02:
我导入了一个本地下载好的镜像(在pull进行拉取):[root@sqm-docker02 ~]# docker load --input myregistrator.tar
运行一个registrator容器:[root@sqm-docker02 ~]# docker run -d --name registrator -v /var/run/docker.sock:/tmp/docker.sock --restart=always gliderlabs/registrator consul://172.16.1.31:8500
以上命令的作用是把收集过来容器的信息给本机的8500端口来显示
访问web网页查看是否收集到容器的信息:
url:http://172.16.1.30:8500/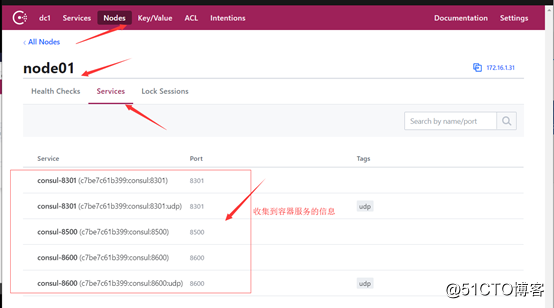
现在在docker02上运行一个ngnx服务,测试是否能够发现:[root@sqm-docker02 ~]# docker run -d -P --name test nginx

docker03:
执行在docker02同样的操作,查看是否能够发现服务:
下载镜像并创建容器:[root@sqm-docker03 ~]# docker run -d --name registrator -v /var/run/docker.sock:/tmp/docker.sock --restart=always gliderlabs/registrator consul://172.16.1.32:8500
运行nginx服务:[root@sqm-docker03 ~]# docker run -d --name test2 -P nginx
确保容器正常运行: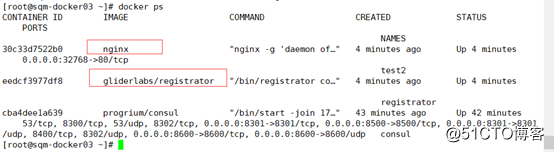
web网页进行查看:
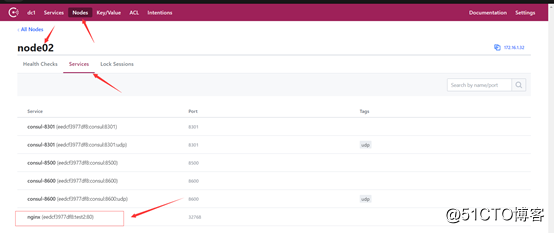
确保也能够收集到node2上的nginx容器信息。
(6)在docker01上部署nginx,提供反向代理:
1)安装nginx:
安装依赖:[root@sqm-docker01 ~]# yum -y install gcc pcre pcre-devel openssl openssl-devel zlib zlib-devel
创建nginx用户[root@sqm-docker01 ~]# useradd -M -s /usr/sbin/nologin nginx
编译安装:
[root@sqm-docker01 ~]# tar zxf nginx-1.14.0.tar.gz  -C /usr/src/
[root@sqm-docker01 ~]# cd /usr/src/nginx-1.14.0/
[root@sqm-docker01 nginx-1.14.0]# ./configure --prefix=/usr/local/nginx --user=nginx --group=nginx --with-http_stub_status_module --with-http_realip_module --with-pcre --with-http_ssl_module && make && make install软链接:[root@sqm-docker01 ~]# ln -s /usr/local/nginx/sbin/nginx /usr/local/sbin/
启动nginx:[root@sqm-docker01 ~]# nginx
2)现在就开始部署刚才安装完的consul-template插件了
consul-template的作用:把收集到的信息(把registrator收集到容器的信息)写入template模板中,并且最终写入nginx的配置文件中,通过该模板来实现自动化。
##编写consul-template网页:
[root@sqm-docker01 ~]# cd /usr/local/nginx/
[root@sqm-docker01 nginx]# mkdir consul  #在nginx目录下创建存放template网页的目录
[root@sqm-docker01 nginx]# cd consul/
[root@sqm-docker01 consul]# vim nginx.ctmpl
内容如下(以go语言实现):
upstream  http_backend {
  {{range service  "nginx"}}
  server {{.Address}}:{{.Port}};
  {{ end }}
}

server {
  listen 8000;   #监听端口可以自定义,只要不与自己的80端口冲突即可
  server_name localhost;
  location / {
  proxy_pass http://http_backend;
 }
}##修改nginx配置文件:[root@sqm-docker01 consul]# vim /usr/local/nginx/conf/nginx.conf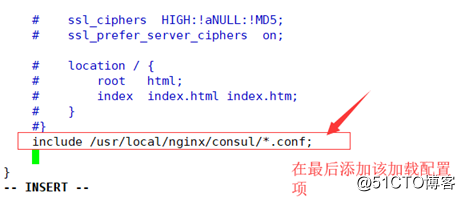
//根据刚才的模板生成一个.conf文件:
[root@sqm-docker01 consul]# consul-template -consul-addr 172.16.1.30:8500 -template "/usr/local/nginx/consul/nginx.ctmpl:/usr/local/nginx/consul/vhost.conf:/usr/local/sbin/nginx -s reload"
注意:执行命令回车后将会卡在终端,所以接下来我们另开一个终端查看。
也可以将其设置为后台运行:(加上nohup和&参数):[root@sqm-docker01 consul]# nohup consul-template -consul-addr 172.16.1.30:8500 -template "/usr/local/nginx/consul/nginx.ctmpl:/usr/local/nginx/consul/vhost.conf:/usr/local/sbin/nginx -s reload" &

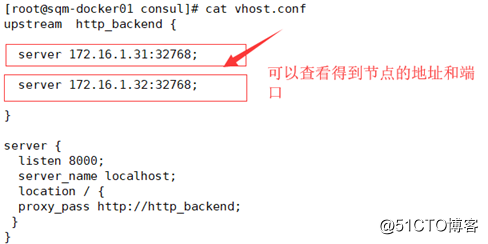
##能看到vhost文件中有node01和node02的地址及端口号,说明nginx代理成功。
(7)实现服务自动发现:
In order to verify achieve service discovery, create a container on docker02 and docker03 :( services running on nginx)
Use the following command:
docker02:
mkdir html
echo docker02_web01 > html/index.conf
docker run -itd --name web01 -v /root/html:/usr/share/nginx/html -P nginx
To see more intuitive, we run the second nginx container:
docker run -itd --name web02 -P nginx:latest
docker exec  -it web02 /bin/bash
echo docker02_web02 > /usr/share/nginx/html/index.html
docker03 :( create the same two containers):
docker run -itd  --name web03  -P  nginx:latest
docker exec -it  web03  /bin/bash
echo docker03-web01 > /usr/share/nginx/html/index.html
docker run -itd --name web04 -P nginx:latest
docker exec -it web04 /bin/bash
echo docker03-web02 > /usr/share/nginx/html/index.htmFinally, verification nginx page automatic discovery:
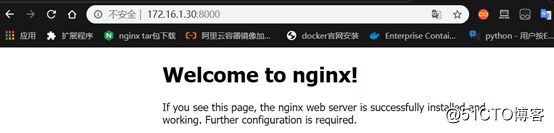
access is nginx proxy server address to keep up with custom access port 8000
the URL of: http://172.16.1.30:8000/
The first page is accessed by its own proxy server nginx page:
Second visit to the first page on nginx docker02:
Third visit to the page is the second nginx on docker02: 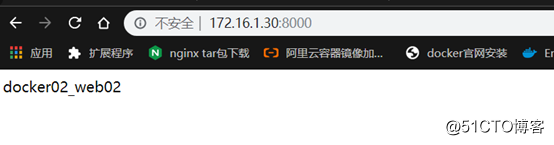
nginx1 page on docker03: 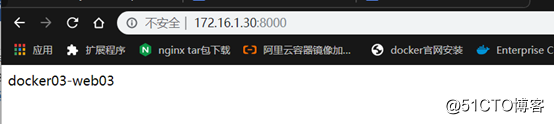
nignx2 page on docker03: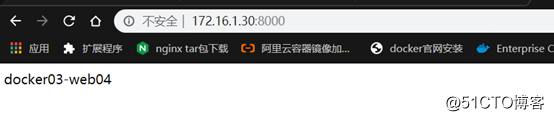
So far deployed cluster on Docker, implement an automatic service discovery, has been built and tested. . . . .
-------- end of this article so far, thanks for reading --------