abp (net core) + easyui + efcore implement warehouse management system directory
abp (net core) + easyui + efcore implement Warehouse Management System - Solutions Introduction (b)
abp (net core) + easyui + efcore implement Warehouse Management System - Multilingual (X)
abp (net core) + easyui + efcore implement Warehouse Management System - menu - on (XVI)
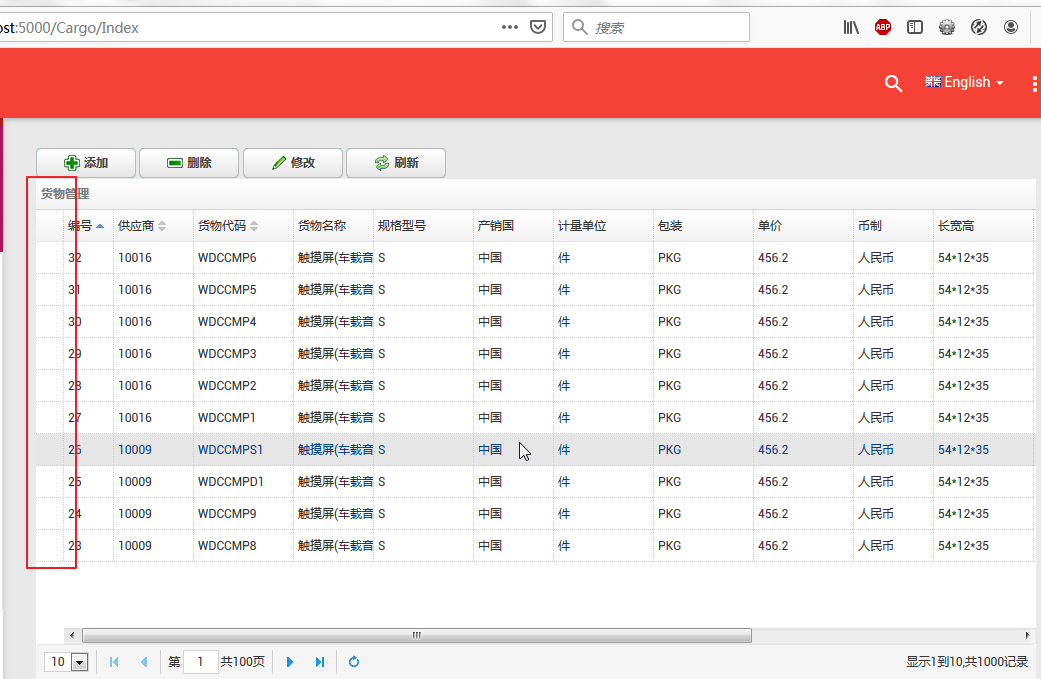
We have now realized the function we want to achieve, but these features are not perfect. If you are careful reader, in a fancy article ( ABP (NET Core) + easyui + efcore implement warehouse management system --EasyUI of four cargo management (xxii) ) will be found and we need some check boxes It does not appear in the position we want it to appear. As shown in the red box, we want to see a check box, but the realization did not appear. Let's solve this problem.
XIV style conflict
1. First, we press F5 to run the application in Visual Studio 2017.
2. Type in the address bar in the browser "http: // localhost: 5000 /", and then enter the administrator user name to log on.
3. In the main menu interface, select "Business-> Cargo Management" menu item, the browser presents a list of information goods and four buttons. As shown below. You will find this list in question. Below red box, box no.

4. We in the browser (Firefox) in the position of the check box, use the right mouse click, the pop-up menu, select "Show elements", as shown below. Then we saw in the html code is related to the code of the box, but it does not show on the page. We look at this check box style, red box in the figure below, original stylesheet element of the conflict checkbox. Checkbox style element here is not what we want is the style definition EasyUI.css and actually use the style definitions materialize.css style sheet. This caused the Checkbox elements to the left of the -9999px pixels, change can not be met.
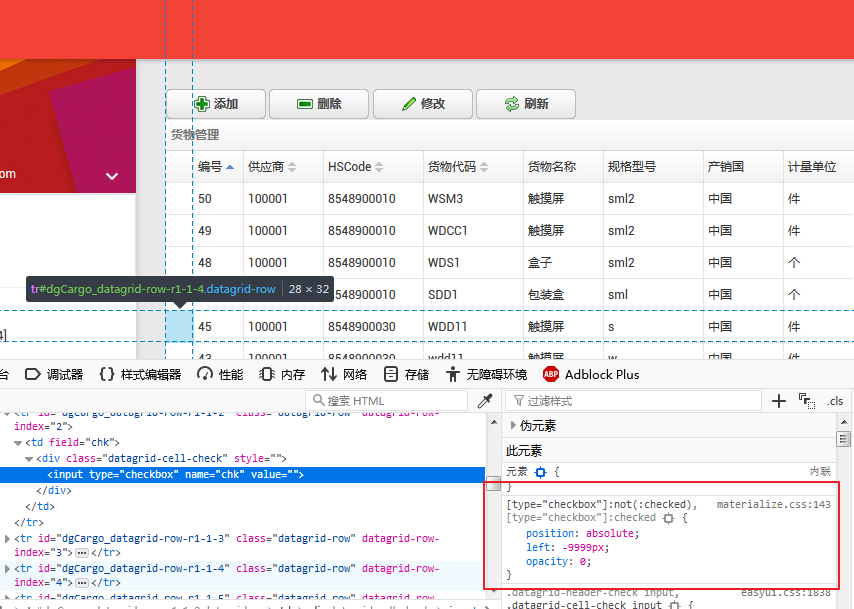
5. know the cause of the problem, we can directly in the Firefox debugger to modify it in style, the style of value left in the -9999px as modified by 1px, opacity value from 0 to 2 , as shown in red box office, and then we required box appears in the position we want. As shown below.

6. That should be how to solve this problem? Careful observation debugger HTML code and found out there is a layer Checkbox DIV, which line the DIV class name "datagrid-cell-check". This finding, we have a solution to this conflict of style. In Visual Studio 2017's "Solution Explorer", find "ABP.TPLMS.Web.MVC" project "wwwroot \ lib \ easyui-1.8 \ themes \ bootstrap" folder, locate the file easyui.css, in this file, add the following style. code show as below.
   .datagrid-header-check input[type=checkbox],
    .datagrid-cell-check input[type=checkbox] {
        position: absolute;
        left: 5px;
        opacity: 1;
        margin: 0;
        padding: 0;
        width: 15px;
        height: 18px;
}
7.在浏览器中先访问一下其他页面,然后再来访问货物信息列表,此时列表的复选框出现了。如下图。
