abp (net core) + easyui + efcore implement warehouse management system directory
abp (net core) + easyui + efcore implement Warehouse Management System - Solutions Introduction (b)
abp (net core) + easyui + efcore implement Warehouse Management System - Multilingual (X)
abp (net core) + easyui + efcore implement Warehouse Management System - WEBAPI achieve CURD (XII)
abp (net core) + easyui + efcore implement Warehouse Management System - WEBAPI achieve CURD (XIII)
abp (net core) + easyui + efcore implement Warehouse Management System - WEBAPI achieve CURD (xiv)
abp (net core) + easyui + efcore implement Warehouse Management System - WEBAPI achieve CURD (XV)
abp (net core) + easyui + efcore implement Warehouse Management System - menu - on (XVI)
abp (net core) + easyui + efcore implement Warehouse Management System - menu - under (17)
By the previous article ( ABP (NET Core) + easyui + efcore and cargo management of a warehouse management system --EasyUI (xix) ), we have created a pagination class cargo information entity and the query used. Now we come to realize the required cargo information management services with the controller type, the page is rendered.
Sixth, the interface is defined ICargoAppService
6. In Visual Studio 2017's "Solution Explorer", the right-click "Cargos" folder and select "Add"> "New Item" in the pop-up dialog box, select "Interface." Called for the application service definition ICargoAppServiceinterface. code show as below.
the using Abp.Application.Services;
 the using ABP.TPLMS.Cargos.Dto;
 the using the System;
 the using the System.Collections.Generic;
 the using the System.Text;

namespace ABP.TPLMS.Cargos
{

    public  interface ICargoAppService: IAsyncCrudAppService < // defines CRUD methods
             CargoDto, // used to display merchandise information
             int , // primary key of cargo entities
             PagedCargoResultRequestDto, // time information to obtain goods for paging
             CreateUpdateCargoDto, // for creating cargo information
             CreateUpdateCargoDto> //Goods for updating information
    {

    }
}
Seven, to achieve ICargoAppService
7. In Visual Studio 2017's "Solution Explorer", right-click "Cargos" folder and select "Add"> "New Item" in the pop-up dialog box, select the "class." Application service definition is called a CargoAppServiceservice class. code show as below.
using Abp.Application.Services;
using Abp.Domain.Repositories;
using ABP.TPLMS.Entitys;
using ABP.TPLMS.Cargos.Dto;
using System;
using System.Collections.Generic;
using System.Text;
using System.Threading.Tasks;

namespace ABP.TPLMS.Cargos
{
   public class CargoAppService :AsyncCrudAppService<Cargo, CargoDto, int, PagedCargoResultRequestDto,
                            CreateUpdateCargoDto, CreateUpdateCargoDto>,ICargoAppService

    {
        public CargoAppService(IRepository<Cargo, int> repository)
            : base(repository)

    {

    }

    }
}
Eight Creating CargoController inherited from TPLMSControllerBase
1. In Visual Studio 2017's "Solution Explorer", right-click Controller directory domain layer "ABP.TPLMS.Web.Core" project. Find TPLMSControllerBase file, add a new method JsonEasyUI. This method is to achieve function entity object sequence string as JSON, and JSON format string meets the requirements EasyUI DataGrid data format. code show as below.
protected dynamic JsonEasyUI(dynamic t,int total)
  {

      var obj= new
      {
          total = total,
           rows = t
      };

      var  json = Json(obj);
       return json;
   }
2. In Visual Studio 2017's "Solution Explorer", right-click Controller directory domain layer "ABP.TPLMS.Web.Mvc" project. Select "Add"> "New Item ...." As shown below.
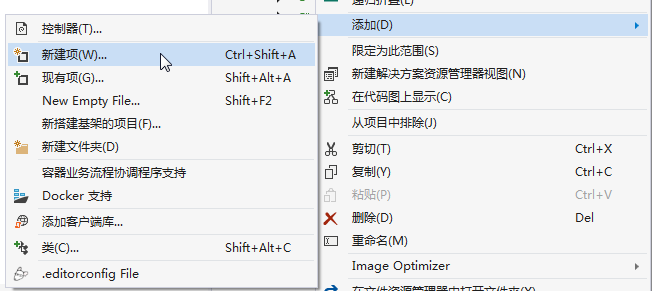
3. In the dialog box "Add New Item -ABP.TPLMS.Web.Mvc" select "controller class" and then enter "CargoController" In the Name input box, and then click the "Add" button. As shown below.
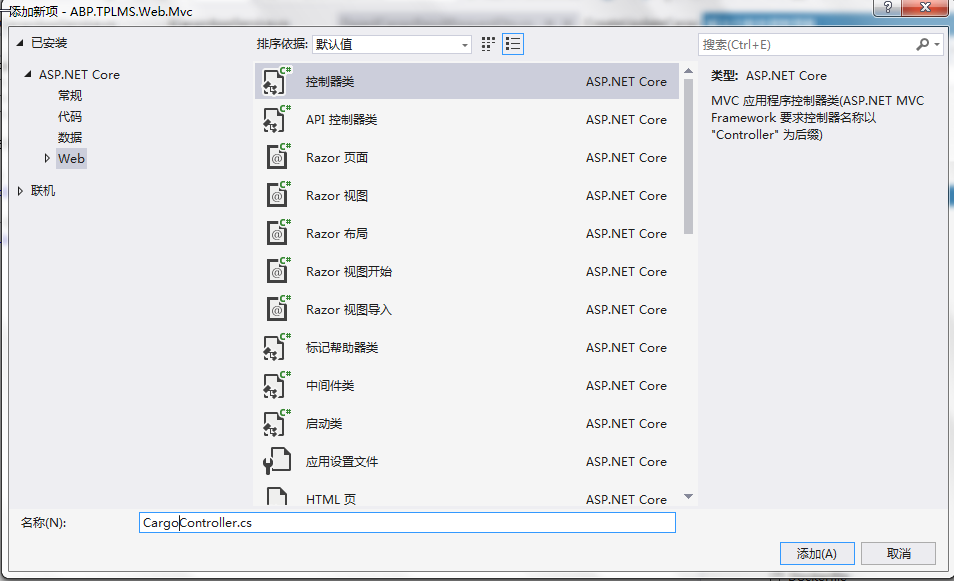
4. CargoController.cs enter the following code file, the application service dependency injection by the constructor.
using System;
using System.Collections.Generic;
using System.Linq;
using System.Threading.Tasks;
using Abp.Application.Services.Dto;
using Abp.AspNetCore.Mvc.Authorization;
using Abp.Runtime.Validation;
using ABP.TPLMS.Controllers;
using ABP.TPLMS.Cargos;
using ABP.TPLMS.Cargos.Dto;
using Microsoft.AspNetCore.Mvc;
using Microsoft.EntityFrameworkCore;


namespace ABP.TPLMS.Web.Controllers
{

    [AbpMvcAuthorize]
    public class CargoController : TPLMSControllerBase
    {
        const int MaxNum= 10;
        // GET: /<controller>/
        public IActionResult Index()
        {

            ViewData["SupplierId"] = "100001";
            return View();
        }

        private readonly ICargoAppService _cargoAppService;

        public CargoController(ICargoAppService cargoAppService)
        {
            _cargoAppService = cargoAppService;

        }

        public JsonResult List()
        {

             var page = Request.Form["page"].ToString();
            var size = Request.Form["rows"].ToString();

            int pageIndex = page == null ? 1 : int.Parse(page);

            int pageSize = size == null ? 20 : int.Parse(size);

            PagedCargoResultRequestDto paged = new PagedCargoResultRequestDto();
            paged.MaxResultCount = pageSize;
            paged.SkipCount = ((pageIndex-1)<0?0: pageIndex - 1) * pageSize;
            var userList = _cargoAppService.GetAll(paged).GetAwaiter().GetResult().Items;

            int total = 1000;
            var json = JsonEasyUI(userList,total);

            return json;
     }
    }
}
九、使用EasyUI创建货物管理页面
1. 在Visual Studio 2017的“解决方案资源管理器”中,右键单击在领域层“ABP.TPLMS.Web.Mvc”项目中的Views目录。 选择“添加” > “新建文件夹”。并重命名为“Cargo”。
2. 在Visual Studio 2017的“解决方案资源管理器”中,鼠标右键单击“Cargo”文件夹,然后选择“添加” > “新建项…”。 在“添加新项-ABP.TPLMS.Web.Mvc”对话框中,选择“Razor视图”,并将名称命名为Index.cshmtl。
3. 在我们刚才创建的Index.cshmtl文件中,编写如下代码:
@using ABP.TPLMS.Web.Startup
@{

    ViewData["Title"] = PageNames.Cargo;
}

@section scripts
    {
    <script src="~/view-resources/Views/Cargo/cargomgr.js" asp-append-version="true"></script>
    <script type="text/javascript">
        $(function () {
            initable();
            init();
            reloaded();
            updCargoInfo();
            showCargoDialog();
            deleteCargo();
        });
    </script>
}

<div data-options="region:'center'" style="overflow: hidden;">
    <div id="containter" style="width: 1000px; height: auto; margin: 0px auto;">
        <!--toolbar-->
        <div style="margin-bottom:1px;font-weight:bold;">
            <a href="#" id="add" class="easyui-linkbutton" data-options="iconCls:'icon-add'" style="width:100px; height:30px; ">添加</a>
            <a href="#" id="del" class="easyui-linkbutton" data-options="iconCls:'icon-remove'" style="width:100px; height:30px; ">删除</a>
            <a href="#" id="edit" class="easyui-linkbutton" data-options="iconCls:'icon-edit'" style="width:100px; height:30px; ">修改</a>
            <a href="#" id="reload" class="easyui-linkbutton" data-options="iconCls:'icon-reload'" style="width:100px; height:30px; ">刷新</a>
        </div>
        <!--panel-->
        <div data-options="region:'center',split:false" style="height:500px;">
            <!--表格-->

            <table id="dgCargo"></table>

        </div>

    </div>
</div>
<!---------------------------新增修改货物信息---------------------------->

<div id="divAddUpdCargo" class="easyui-dialog" closed="true" data-options="buttons: '#dlg-buttons'">

    <table>
        <tr>
            <td><input type="hidden" name="ID" id="IDUpdate" /></td>

        </tr>
        <tr>
            <td>供应商:</td>

            <td>
                <input type="text" id="SupplierIdUpdate" name="USupplierId" class="form-control input-sm" value=@ViewData["SupplierId"].ToString() />

            </td>
            <td> 货物代码:</td>

            <td><input type="text" id="UpdCargoCode" name="UCargoCode" class="form-control input-sm" /></td>

            <td>货物名称:</td>
            <td>
                <input type="text" id="CargoNameUpdate" name="UCargoName" class="form-control input-sm" />

            </td>
        </tr>
        <tr>
            <td>品牌:</td>

            <td>
                <input type="text" id="BrandUpdate" name="UBrand" class="form-control input-sm" />

            </td>
            <td> 规格型号:</td>
            <td colspan="3"><input type="text" id="SpcfUpdate" name="USpcf" class="form-control input-sm" /></td>
        </tr>
        <tr>
            <td>HSCode:</td>

            <td>
                <input type="text" id="HSCodeUpdate" name="UHSCode" class="form-control input-sm" />

            </td>
            <td>单价:</td>

            <td>
                <input type="number" id="PriceUpdate" name="UPrice" class="form-control input-sm" />

            </td>
            <td> 计量单位:</td>
            <td><input type="text" id="UnitUpdate" name="UUnit" class="form-control input-sm" /></td>

        </tr>
        <tr>
            <td>货币:</td>
            <td>
                <input type="text" id="CurrUpdate" name="UCurr" class="form-control input-sm" />
            </td>
            <td>包装:</td>
            <td>
                <input type="text" id="PackageUpdate" name="UPackage" class="form-control input-sm" />
            </td>

            <td>体积:</td>
            <td>
                <div class="input-group">
                    <input type="text" id="VolUpdate" name="UVol" class="form-control input-sm" readonly />
                    <span class="input-group-addon" id="basic-addon2">立方米</span>

                </div>
            </td>
        </tr>
        <tr>
            <td> 长:</td>
            <td>

                <div class="input-group">
                    <input type="number" id="LengthUpdate" name="ULength" class="form-control input-sm" aria-describedby="basic-addon2">

                    <span class="input-group-addon" id="basic-addon2">cm *</span>

                </div>
            </td>
            <td>宽:</td>
            <td>
                <div class="input-group">

                    <input type="number" id="WidthUpdate" name="UWidth" class="form-control input-sm" aria-describedby="basic-addon2">

                    <span class="input-group-addon" id="basic-addon2">cm * </span>

                </div>
            </td>
            <td>高:</td>

            <td>
                <div class="input-group">
                    <input type="number" id="HeightUpdate" name="UHeight" class="form-control input-sm" aria-describedby="basic-addon2">

                    <span class="input-group-addon" id="basic-addon2">cm</span>
                </div>
            </td>
        </tr>
        <tr>

            <td>毛重:</td>
            <td>
                <input type="number" id="GrossWtUpdate" name="UGrossWt" class="form-control input-sm" />

            </td>
            <td> 净重:</td>
            <td><input type="number" id="NetWtUpdate" name="UNetWt" class="form-control input-sm" /></td>

            <td>国家:</td>
            <td>
                <input type="text" id="CountryUpdate" name="UCountry" class="form-control input-sm" />

            </td>
        </tr>
        <tr>
            <td>安全库存:</td>

            <td>
                <input type="number" id="MinNumUpdate" name="UMinNum" class="form-control input-sm" />

            </td>
            <td> 最大库存:</td>

            <td><input type="number" id="MaxNumUpdate" name="UMaxNum" class="form-control input-sm" /></td>

            <td>创建时间:</td>
            <td>
                <input type="text" id="CreateTimeUpdate" name="UCreateTimey" class="form-control input-sm" />

            </td>
        </tr>
        <tr>
            <td>备注:</td>

            <td colspan="5">
                <input type="text" id="RemarkUpdate" name="URemark" class="form-control input-sm" />

            </td>
        </tr>
    </table>
</div>

<div id="dlg-buttons">
    <input type="submit" id="btnSave" value="保存" class="btn btn-primary" />
    <input type="submit" id="btnCancle" value="取消" class="btn btn-info" />
</div>