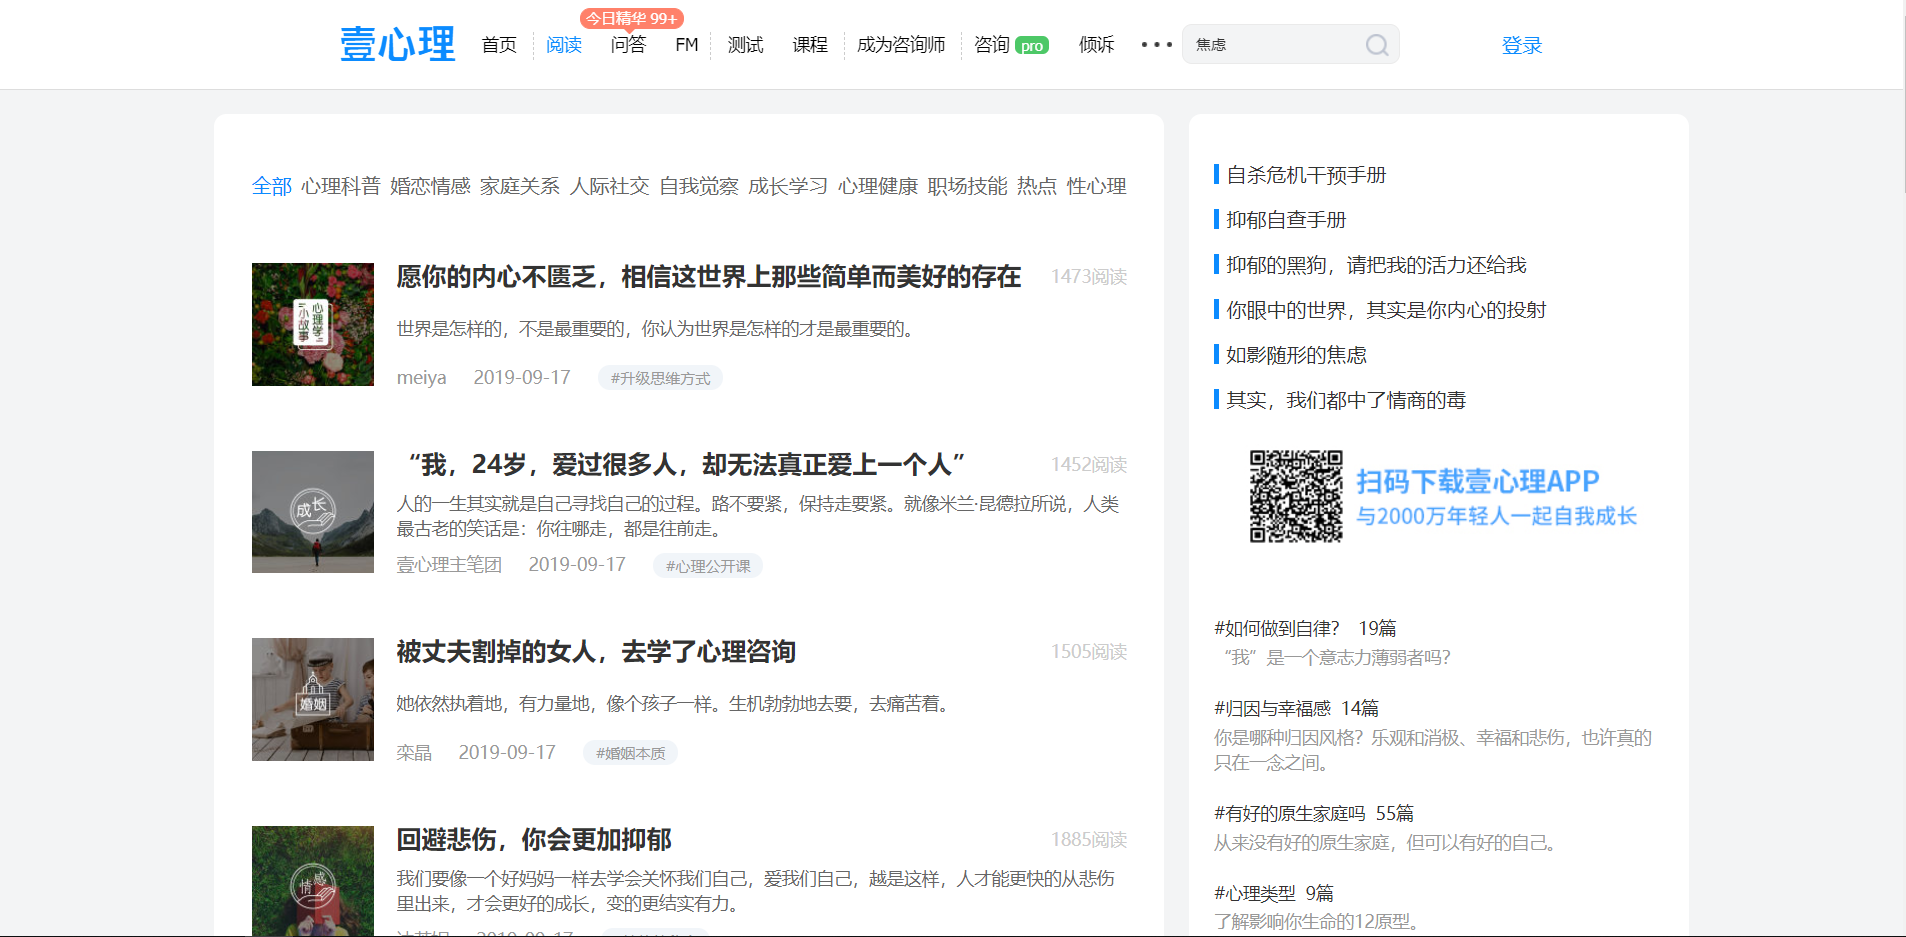
Here with a very simple small reptiles, for example, crawling One psychological websites Read all articles and pages corresponding picture on the first page of the article page as follows:
Create a project
First create a new scrapyproject, installed its dependencies (refer to steps: scrapy install and run new project and reptiles ).
Create a new reptile:
scrapy genspider xinli001 'www.xinli001.com/info'
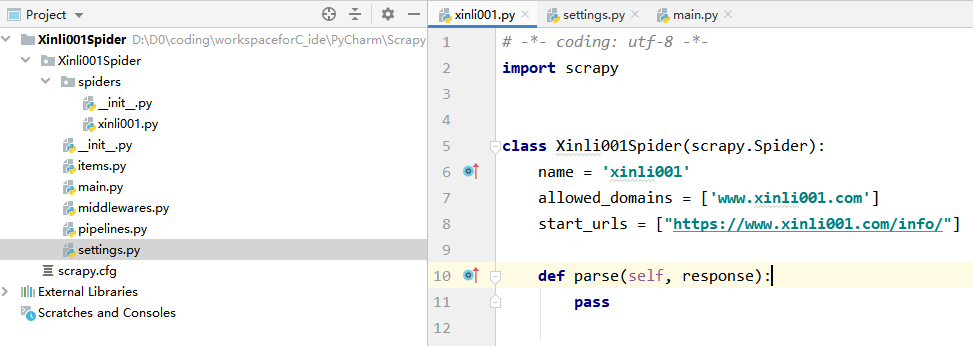
At this point the new project directory and reptiles as follows:
Crawling pictures automatically download information and write logic
This is mainly a custom record pipelineto crawl pictures, so simply select some information to crawl, including the title of the article, picture, posting time and author.
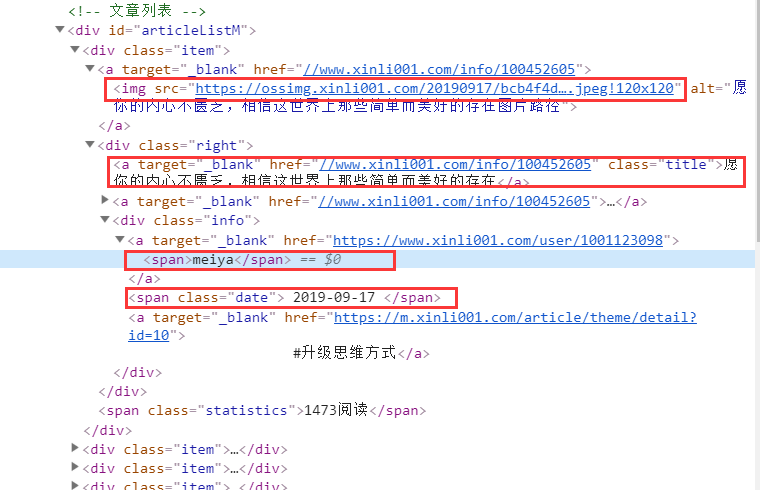
1. By xpathextracting the article module, is the next chart boxes in:
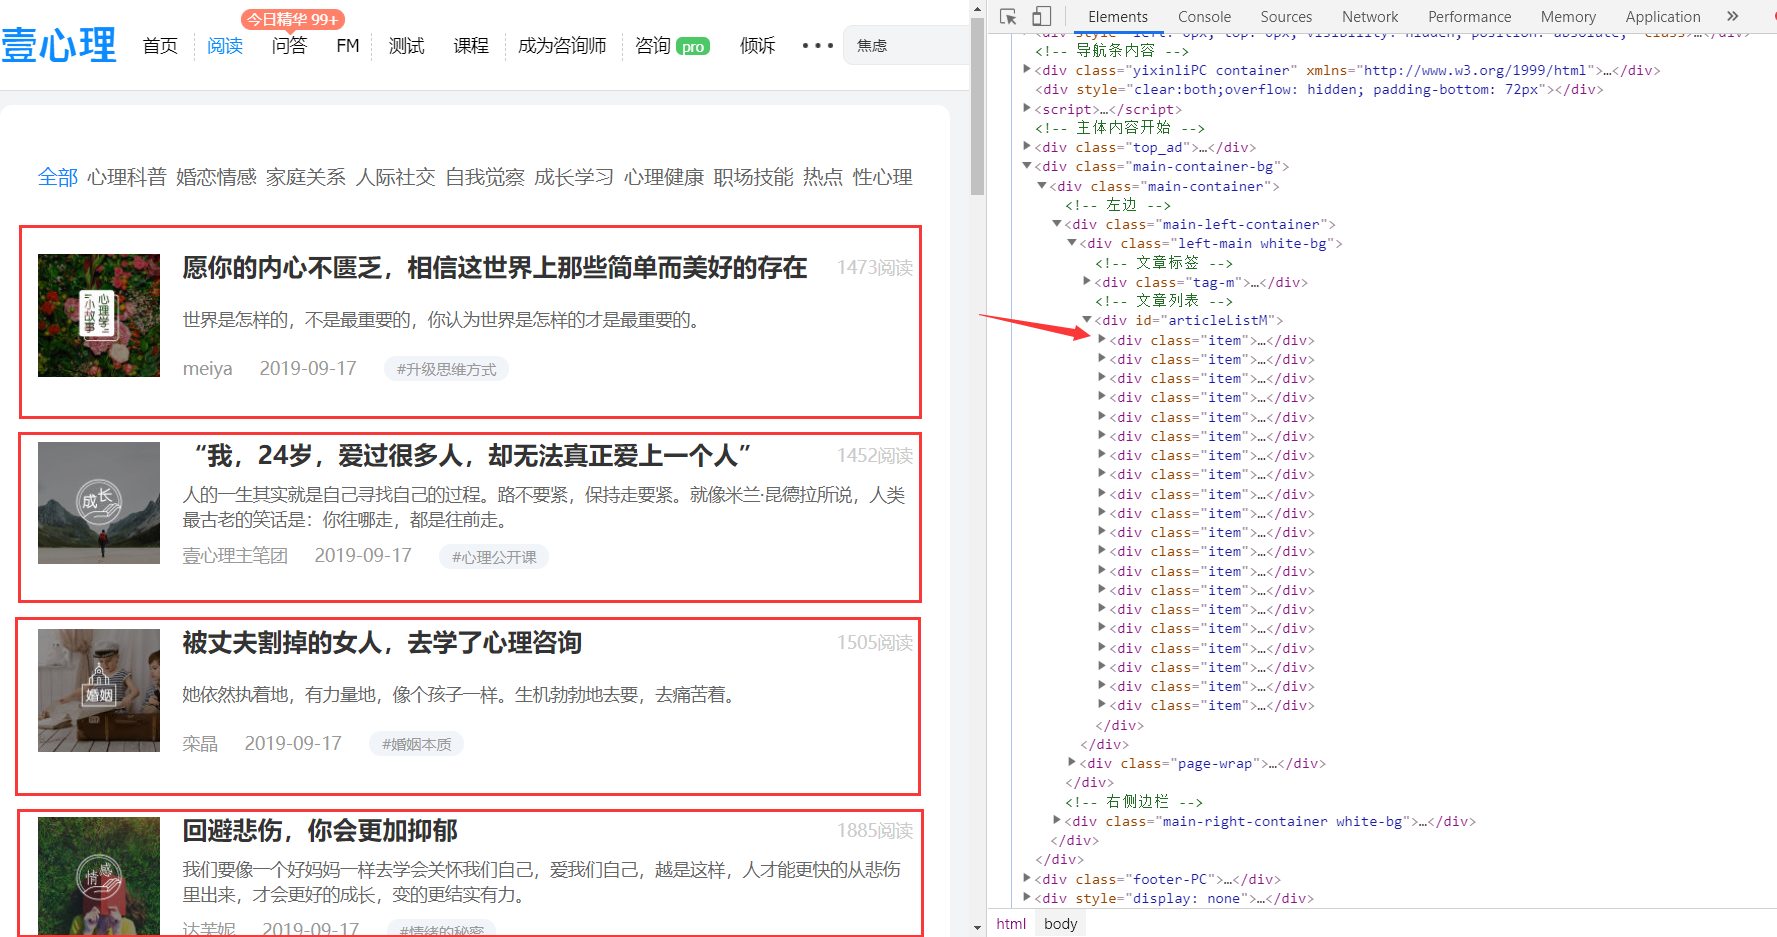
Is on the right side of FIG position corresponding code, will be used first xpathto extract all the itemmodules, after all item, respectively extract the relevant information corresponding block traversal.
Extract item:
post_nodes = response.xpath('//*[@id="articleListM"]//div[@class="item"]')
2. traverse post_nodesand extract relevant information:
The following presents a first itemweb structure:
The above configuration control extract the relevant information:
# 图片
image_url= post_node.xpath('a/img/@src').extract_first()
# 标题
title = post_node.xpath('div[@class="right"]/a/text()').extract_first()
# 发布时间
create_date = post_node.xpath('div[@class="right"]/div[@class="info"]/span/text()').extract_first()
# 作者
writer = post_node.xpath('div[@class="right"]/div[@class="info"]/a[1]/span/text()').extract_first()
3.定义 Xinli001Item
在 item.py 文件中添加 xinli001 爬虫对应的 item:
class Xinli001SpiderItem(scrapy.Item):
    title = scrapy.Field()
    image_url = scrapy.Field()
    writer = scrapy.Field()
    create_date = scrapy.Field()
4.提交 item 实例
# -*- coding: utf-8 -*- import scrapy from scrapy.http import Request from urllib import parse from Xinli001Spider.items import Xinli001SpiderItem class Xinli001Spider(scrapy.Spider): name = 'xinli001' allowed_domains = ['www.xinli001.com'] start_urls = ["https://www.xinli001.com/info/"] def parse(self, response): # 提取文章 model post_nodes = response.xpath('//*[@id="articleListM"]//div[@class="item"]') for post_node in post_nodes: # 创建 item 实例 article_item = Xinli001SpiderItem() # 图片 image_url= post_node.xpath('a/img/@src').extract_first() # 标题 title = post_node.xpath('div[@class="right"]/a/text()').extract_first() # 发布时间 create_date = post_node.xpath('div[@class="right"]/div[@class="info"]/span/text()').extract_first() # 作者 writer = post_node.xpath('div[@class="right"]/div[@class="info"]/a[1]/span/text()').extract_first() article_item['image_url'] = [image_url] article_item['title'] = title article_item['create_date'] = create_date article_item['writer'] = writer # 提交 item 实例给 pipeline 处理 yield article_item
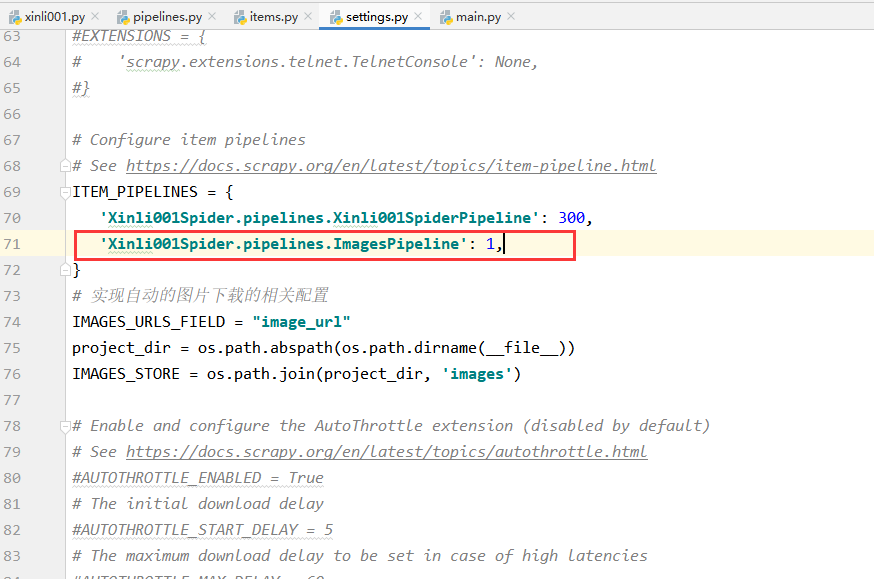
5.配置图片下载相关参数:
# 实现自动的图片下载的相关配置
IMAGES_URLS_FIELD = "image_url"     # 图片
project_dir = os.path.abspath(os.path.dirname(__file__))    # 获取当前路径
IMAGES_STORE = os.path.join(project_dir, 'images')  # 将图片保存到当前项目路径下的 images 文件夹下
将上面的代码加入到 settings.py 中 Configure item pipelines 相关代码的下方。
6.启用 scrapy 的图片下载
在第5步之后,需要在 settings.py 中开启图片下载的服务:
7.再次运行爬虫,便可实现图片的自动下载
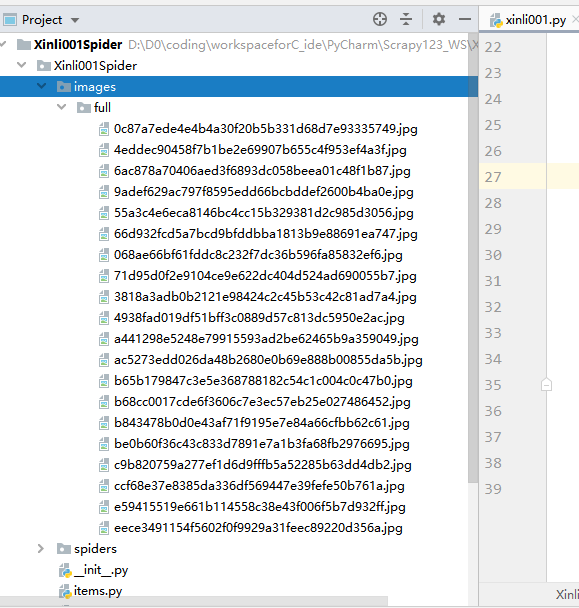
获取图片存放路径
图片下载之后,若要想访问图片,则需要获得图片的存放路径,此时我们便可对上面的 ImagePipeline 实现自定义来将获取图片存放路径的逻辑填充进代码中。
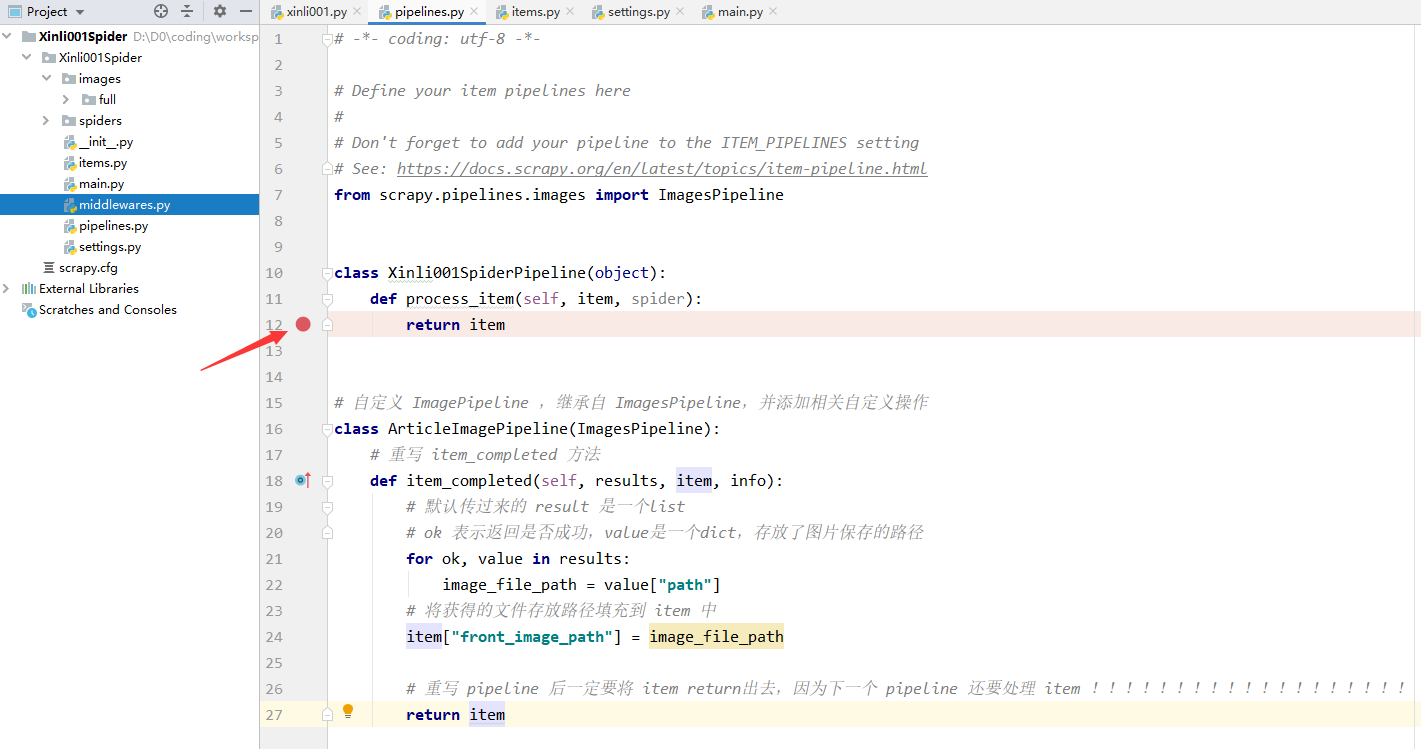
1-首先,添加 ArticleImagePipeline 类:
# 自定义 ImagePipeline ,继承自 ImagesPipeline,并添加相关自定义操作 class ArticleImagePipeline(ImagesPipeline): # 重写 item_completed 方法 def item_completed(self, results, item, info): # 默认传过来的 result 是一个list # ok 表示返回是否成功,value是一个dict,存放了图片保存的路径 for ok, value in results: image_file_path = value["path"] # 将获得的文件存放路径填充到 item 中 item["front_image_path"] = image_file_path # 返回item return item
2-将 ArticleImagePipeline 配置到 settings.py 文件中:
# Configure item pipelines
# See https://docs.scrapy.org/en/latest/topics/item-pipeline.html
ITEM_PIPELINES = {
   'Xinli001Spider.pipelines.Xinli001SpiderPipeline': 300,
   # 'Xinli001Spider.pipelines.ImagesPipeline': 1,
   'Xinli001Spider.pipelines.ArticleImagePipeline': 1,
}
注意上面之前使用的 ImagesPipeline 不需要了,要注释掉。
3-添加相关 item 属性
在 Xinli001SpiderItem 中添加一个 front_image_path 属性来存储图片存放路径:

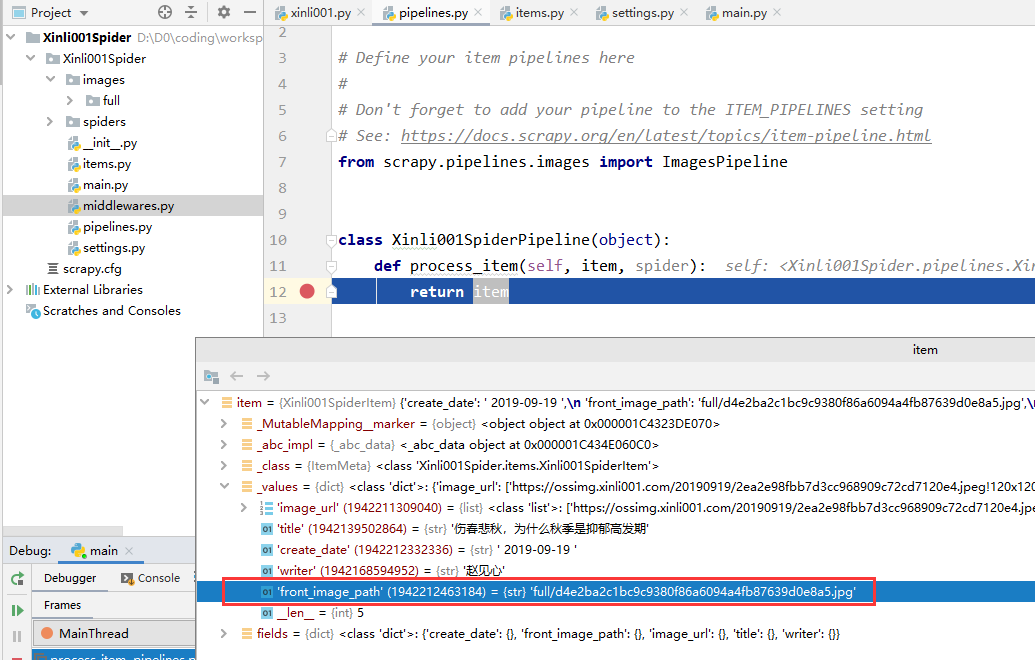
4-查看返回的图片路径
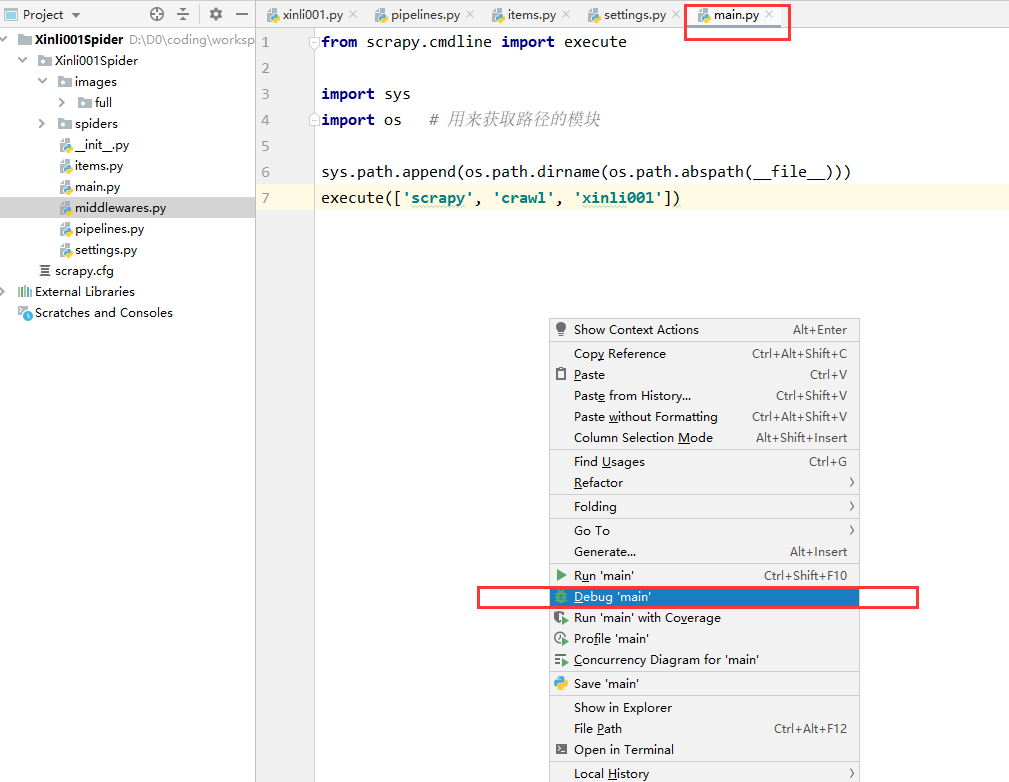
第二步中我们配置了两个 Pipeline ,一个顺序在前(ArticleImagePipeline:1),一个在后(Xinli001SpiderPipeline:300),我们可以在后面的 Pipeline 处理函数处打个断点,然后启动调试功能来运行。
打断点:
debug 一下:
可以看到执行到断点处时,已经提取到了图片存放路径: