NFS(Network File System)
I.e., network file system, which allows the network between the computers to share the resources, the client application may transparently local NFS read and write files located on the distal end of the NFS server, as access to a local file.
A server capacity has been limited, in addition to increasing the disk, there is a way to achieve this goal. This blog will lead you to use NFS data stored in the HTTP service in remote server, and can be read at any time.
Prepared:
Two Centos7 virtual machine (one as server and the other as a client)
Experimental Procedure:
A server-side experiments
First, add a disk as a carrier for the next NFS server to provide out.
Experimental Procedure:
1, add a virtual machine disk and restart the virtual machine;
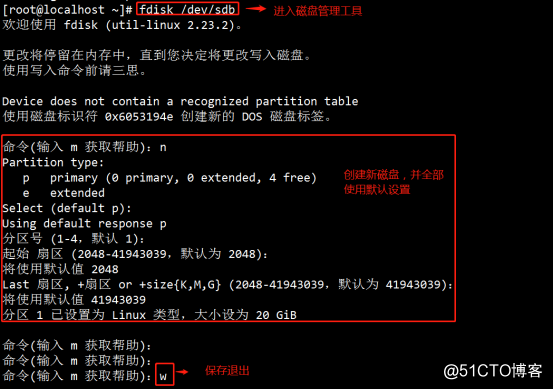
2, enter: fdisk / dev / sdb // enter the disk management tool
3, according to the "n" is created, and all use the default settings,
press the "w" to save and exit
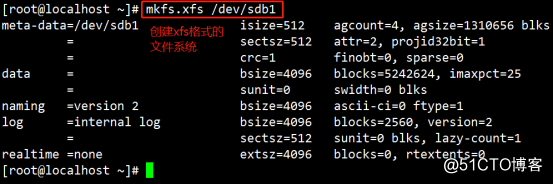
4, input: mkfs.xfs / dev / sdb1 // create the xfs file system format
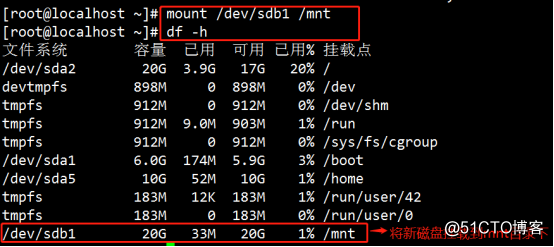
5, enter: mount / dev / sdb1 / mnt / // new disk mounted to / mnt directory under
examples are as follows

Next, install the server and nfs-utils package rpcbind package (key service!)
Experimental Procedure:
1, input: yum install nfs-utils rpcbind -y // key installation package
2, input: systemctl enable nfs // services provided nfs boot from Kai
3, enter: systemctl enable rpcbind // set the boot from Kai rpcbind service
instance:Finally, set up and provide services
Experimental procedure:
1. Input: vim / etc / exports // set sharing profile在配置文件内
(1)按“I”插入
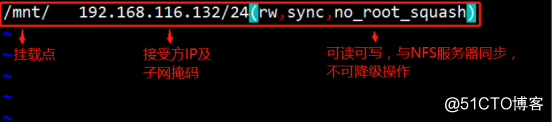
(2)输入:/mnt/ 192.168.116.132/24(rw,sync,no_root_squash)
——其中mnt目录代表挂载点,“192.168.116.132/24”代表服务接受方IP及子网掩码,括号内代表该空间可读可写,与服务器同步,不可降级操作。
(3)输入“:wq”保存退出
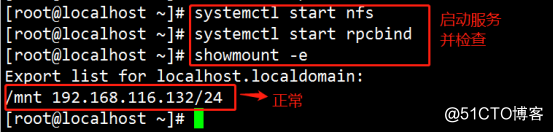
实例如下2、输入:systemcrl start nfs //启动nfs服务
3、输入:systemctl start rpcbind //启动rpcbind服务
4、输入:showmount -e //检查
5、输入:systemctl stop fireswalld //关闭防火墙
6、输入:setenforce 0 //关闭增强性安全功能
实例


上面就是NFS服务器端的全部配置,下面需要进行的就是在客户端检查是否能够使用服务器提供的空间。
二、客户端的验证
安装HTTP服务用于验证,并将远程共享的磁盘空间挂载到HTTP服务默认路径下
实验步骤:
1、输入:yum install httpd -y //安装HTTP服务
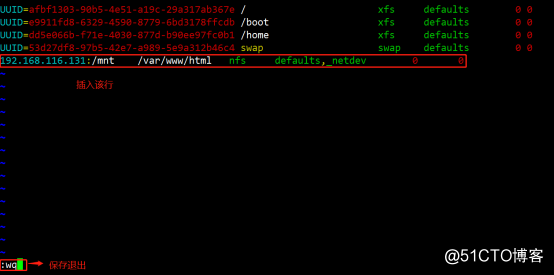
2、输入:vim /etc/fstab //进行自动挂载设置In a file:
(1) Press the "G" into the article last line, press "o" is inserted into the next line
(2) Input: 192.168.116.131: / mnt / var / WWW / HTML NFS Defaults, the _netdev 0 0
- wherein, "192.168.116.131:/mnt" remote NFS provides the spatial position of the representative of the
"/ var / www / html" represents the mount point (/ var / www / html http service as the default path)
(3) input ": wq" to save and exit
examples
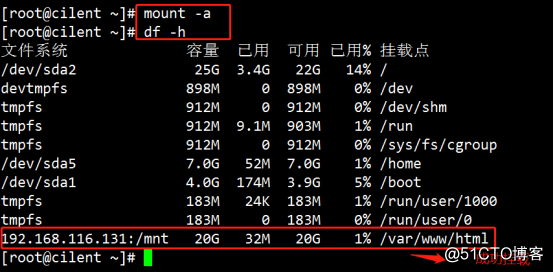
3, enter: mount -a // mount all
4, enter: df -hT // Check mount case
examples
Important reminder! ! !
If the remote server disk space suddenly goes down, this time using the df command on the client causes the client to thoroughly stuck. This time, with the umount command can not be de-linked! ! ! !
You need to use another terminal enters a new use "umount -lf" unsuspend command.