2019-08-26 18:26:16
1. Create a Project
1.1 Installation
Download .NETCORE SDK installation
Download NETCORE RUNTIME installation.
Download Runtime & Hosting Bundle installation
Download: https://dotnet.microsoft.com/download/dotnet-core
Microsoft's installation is very simple in terms of windows, basic is a key installation.
1.2 Development Tools
VisualStudio 2019
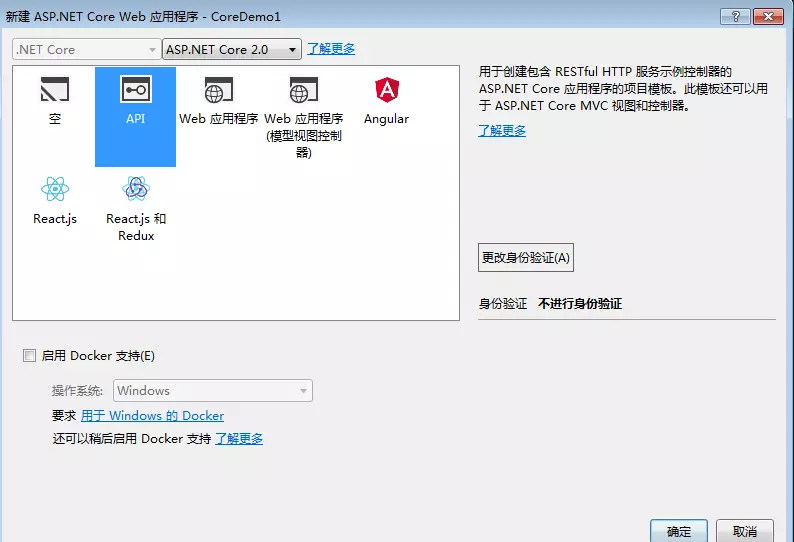
1.3 establish project
Click to create a project file, the following icon appears
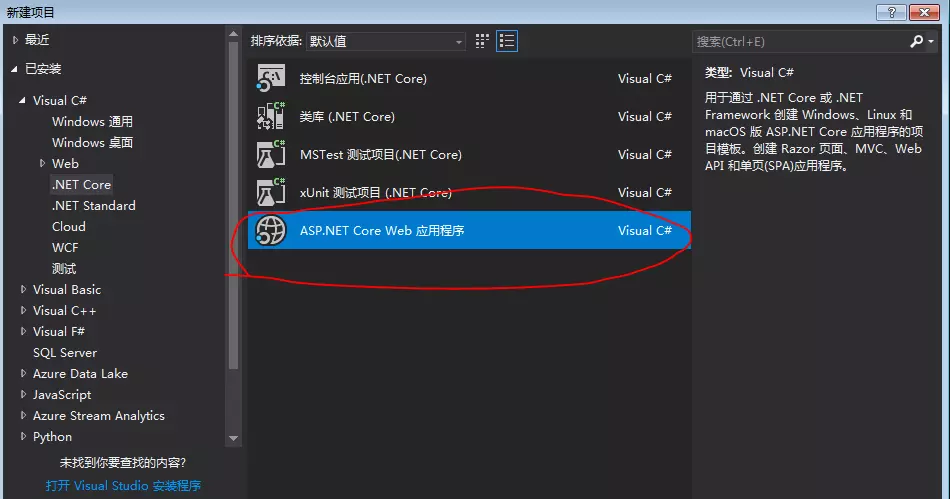
Select the portion circled in red, then there are illustrated
2. Azure AD B2C
2.1 Creating Azure Active Directory B2C tenants
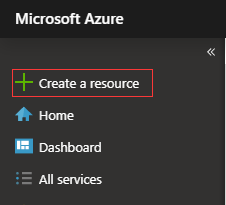
2.1.1 "Create Resource" Azure portal in the upper left corner, select
2.1.2 Search and select "Active Directory B2C", then click "Create."

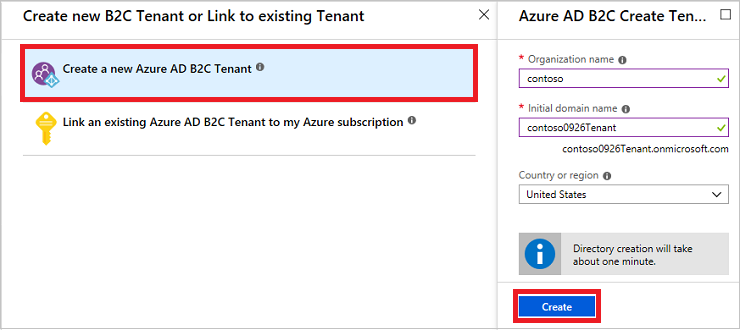
2.1.3 Select "Create a new Azure AD B2C tenants" and enter the name of the organization and the initial domain. Select Country / Region (can not be changed later), and then click "Create."
The initial domain name as part of your tenant's name. In this example, the tenant name contoso0926Tenant.onmicrosoft.com :
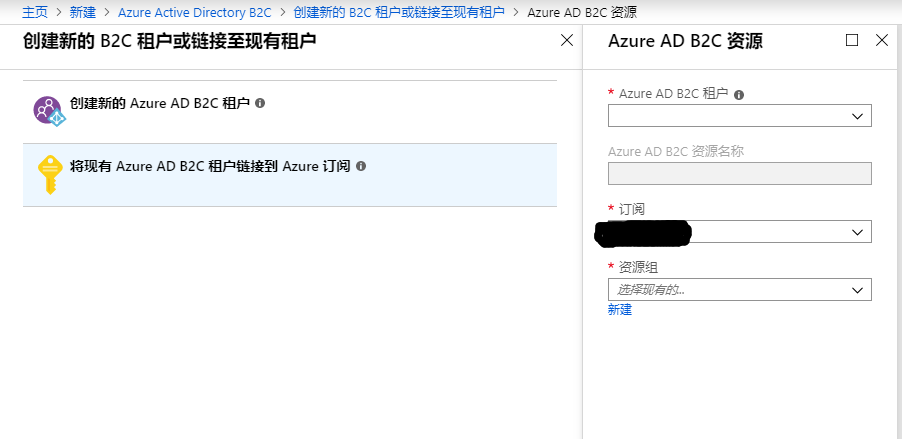
2.1.4 In the "Create a new B2C tenants" or "tenants link to an existing" page, select "Azure AD B2C will link existing tenants to my Azure subscription."
Select the tenants created, and choose subscription.
2.2 registration application in Azure Active Directory B2C in
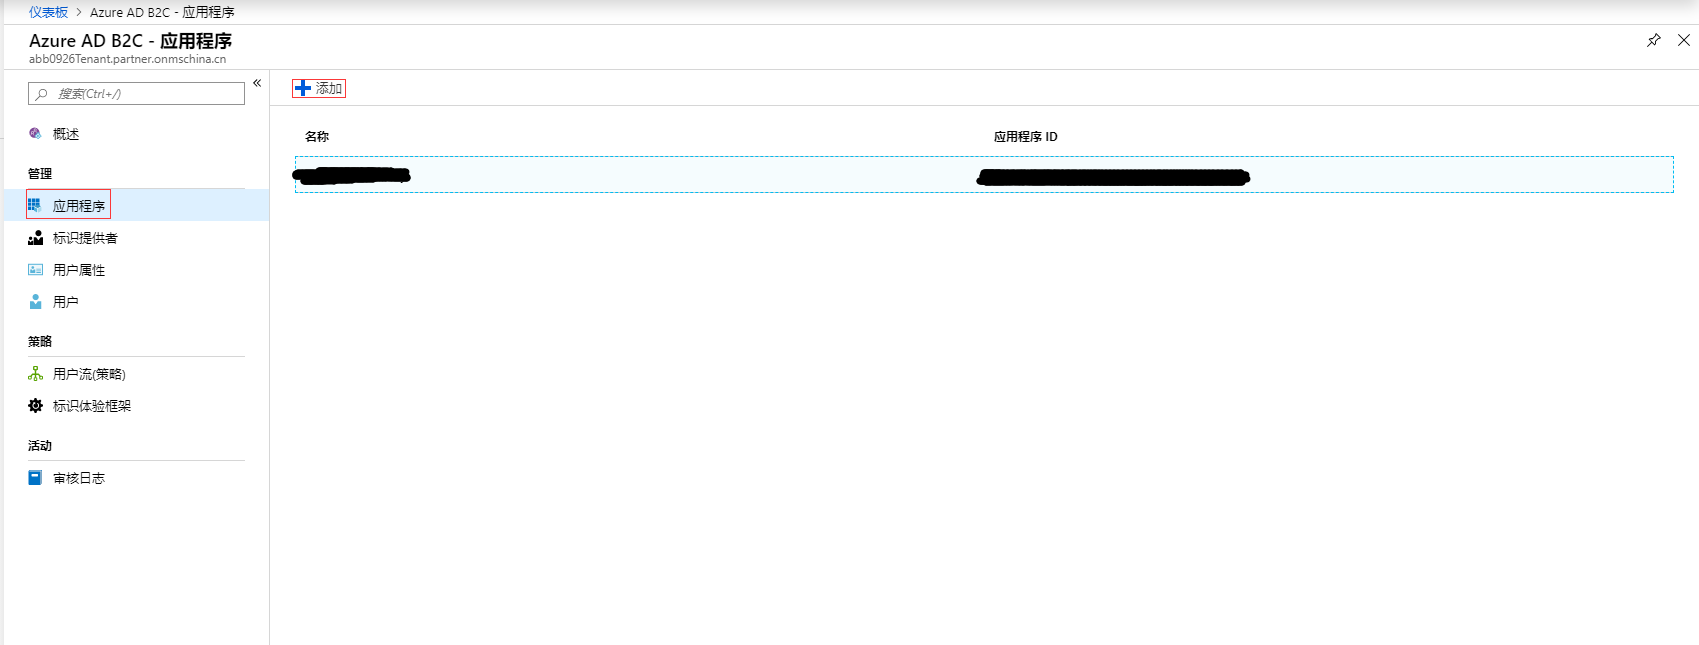
2.2.1 Select the upper left corner of the Azure portal "all services" and then search for and select "Azure AD B2C", select "Applications" and then select "Add."
2.2.2 Enter the name of the application. For example, "webapp1", for "including Web applications / Web API" and "allows implicit flow", select "Yes", for "reply URL", enter any token Azure AD B2C To return the requested application to the end point. For example, it may be set to https://localhost:44316 the local snoop.

2.2.3 Creating client confidentiality
- In the "Azure AD B2C - Applications" page, select the application you have created, such as webapp1.
- Select "key", and then select the "generation key."
- Select "Save" to see the keys. Jot down the "application key" value.

2.3 Creating user flow in Azure Active Directory B2C in
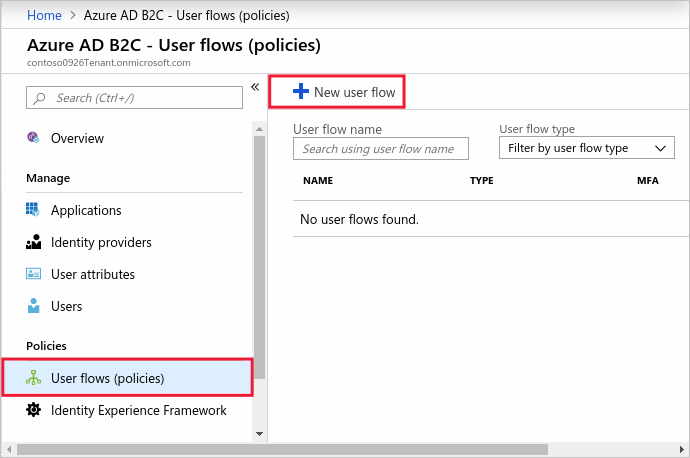
2.3.1 Select the upper left corner of the Azure portal "all services" and then search for and select "Azure AD B2C", in the left menu under "strategy", select "user flow (policy)" and then select "New User Flow . "
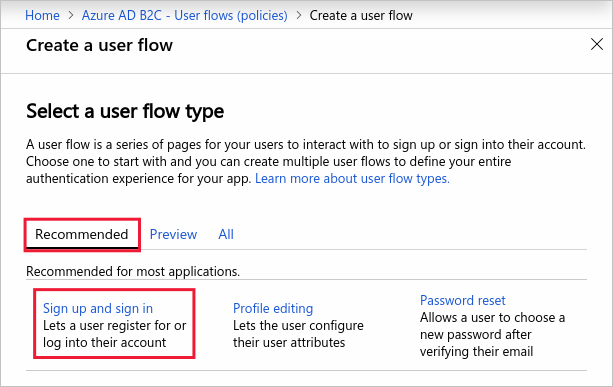
2.3.2 On the "recommendations" tab, select "registered and logged in user flow."
2.3.3 Enter the name of the user flow. For example signupsignin1, for the "identity provider", select "email sign."

For the "user attributes and statements", please select from the user to collect and send statements and property during registration. For example, select "Show More" and then select the "country / region", "Display Name" and "Zip Code." Click "OK."

Click "Create" to add user flow. Name will automatically append the prefix B2C_1 .
2.3.4 Creating a user profile editing stream
- In Azure AD B2C tenant overview "menu on the left page, select" user flow (policy) "and select" New User flow. "
- Select "Edit Profile" user flow on "recommendations" tab.
- Enter the name of the user flow. For example profileediting1 .
- For the "identity provider", select "Local login account."
- For the "User Properties", select you want customers to be able to edit their profile properties. For example, select "Show More" and then select "Display Name" and "duty" of the property and declarations. Click "OK."
- Click "Create" to add user flow. Name will automatically append the prefix B2C_1 .
2.3.5 Create a password reset user flow
- On the left menu, select "user flow (policy)" and select "New User flow."
- On the "recommendations" tab, select "Reset Password" user flow.
- Enter the name of the user flow. For example passwordreset1 .
- For the "identity provider", enable "Use e-mail address to reset your password."
- In the "Application Statement" click "more", and returned in the select statement sent back to the application of the authorization token you wish. For example, select "User object ID."
- Click "OK."
- Click "Create" to add user flow. Name will automatically append the prefix B2C_1 .
3.4 Use Azure Active Directory B2C enable authentication in Web applications
3.4.1 update application
- Log on to the Azure portal .
- Be sure to use the directory containing the Azure AD B2C tenants by clicking the top menu "catalog and subscription filters" and then select the directory containing the tenants.
- Select the top left corner of the Azure portal "all services" and then search for and select "Azure AD B2C".
- Select "Applications" and then select "webapp1" application.
- Add in the "reply the URL of"
https://localhost:44316. - Select "Save."
- On the property sheet, recording the application ID you want to use when you configure Web applications.
- Select "key", "Generate Key", "Save." Record key you want to use when you configure Web applications.
3.4.2 Configuration Example
In this tutorial, you will be an example of a configuration can be downloaded from GitHub. This example uses ASP.NET provides a simple to-do list. This example uses Microsoft OWIN middleware components . From GitHub download the zip file or cloned example. To ensure that the extracted sample to the file folder, the total path length of less than 260 characters.
git clone https://github.com/Azure-Samples/active-directory-b2c-dotnet-webapp-and-webapi.git
The sample solution contains the following two items:
- TaskWebApp - create and edit a task list. This example uses a registered user login or to register or login user flow.
- TaskService - Support create, read, update and delete task list functions. The API protection Azure AD B2C subject, called by TaskWebApp.
The sample application changes with the registered tenants, including the application ID and noted earlier keys. In addition, user profiles created stream. This example is provided as defined in the Web.config configuration values in the file. To change the settings, do the following:
- Open B2C-WebAPI-DotNet solution in Visual Studio.
- Open the Web.config file in TaskWebApp project. The
ida:Tenantvalue replaced with the name of the tenant created. Theida:ClientIdvalue is replaced with the application ID recorded. Theida:ClientSecretvalues replaced with a key recorded. Before adding client code to Web.config, it must be encoded as XML. - In Web.config file, the
ida:SignUpSignInPolicyIdvalue is replacedb2c_1_signupsignin1. Theida:EditProfilePolicyIdvalue is replacedb2c_1_profileediting1. Theida:ResetPasswordPolicyIdvalue is replacedb2c_1_passwordreset1.
Run the sample
- In Solution Explorer, right-click TaskWebApp project, and then click "Set as Startup Project."
- Press F5. The default browser will launch to the local website address
https://localhost:44316/.