This and introduce the RAID disk array of RAID1 wherein the specific configuration operations
First, to introduce under the RAID
. 1, is the RAID Redundant Array of Independent Disk English abbreviation, Chinese referred to as Redundant disk array
2, RAID is the plurality of independent physical disk combined in different ways to form a disk group ( logical drive), providing greater than a single disk storage xing providing data backup technology and
3, the disk array composed of different ways called RAID level (RAID levels), common RAID levels are as follows: RAID0, RAID1, RAID5 , RAID6, RAID1 + 0 and the like
RAID 1 arrays
RAID 1 is achieved by the disk array data redundancy disk mirroring data, generates data on a mutual backup pair of independent disks., When the original data is busy, data can be read directly from the mirrored copy thus read can be improved RAID performance, but the write speed is usually slow, since the data obtained are written to two disks and compared.
·
RAID 1 provides high data security and availability. When a disk fails, the system can automatically switch to the reader the mirror disk failure without data reorganization is therefore suitable for high security environment requirements.
·
RAID 1 disk array is the highest unit costs, but do not have the scalability, its disk space utilization is 50%.
Car RAID1 disk array configuration
1, the first add three new hard disk to the virtual machine, and then restart 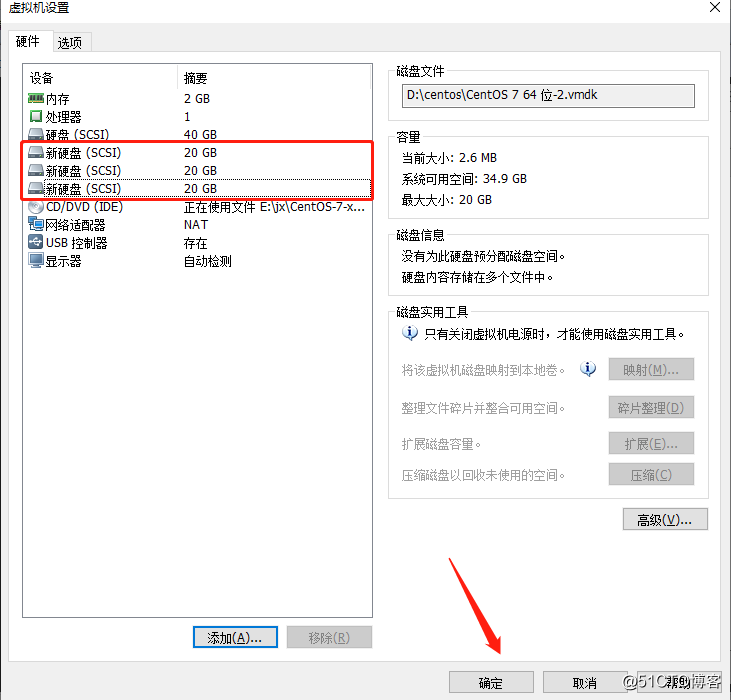
2, the three disks sdb, sdc, sdd configure, set the partition, select the partition type for the type of raid. (Additional configuration steps several disks and the same)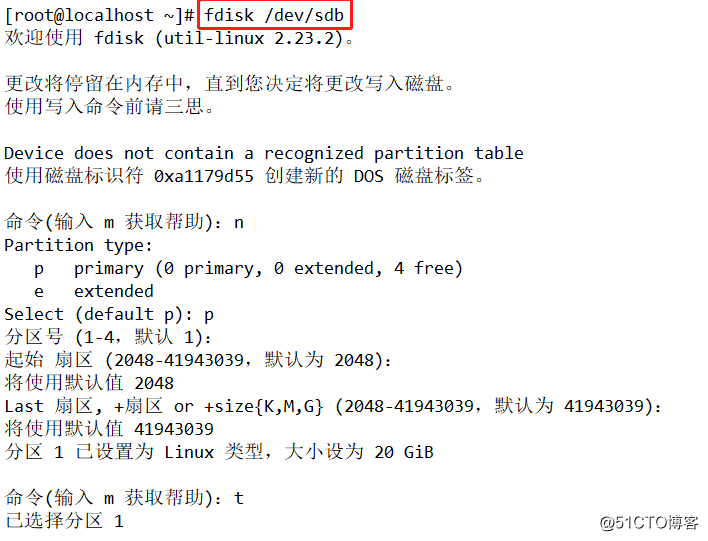

3 ,. first look there is no RAID volume production tool, if you can not own equipment from a source yum. 
4. Next, create raid1 volume
input
mdadm -C -v /dev/md1 -l1 -n2 /dev/sd{b..e}1 -x /dev/sdd1Wherein
mdadm: command character
-C: Create
-v: Details
/ dev / md1: Create a directory stored
-l1: Level
-n2: using two disks
-x: Reserved disk
/ dev / sdd1: indicates that the disk directory and Title 
5, raid1 volume format, formatted xfs format, if the format is to use ext4 "mkfs.ext4". 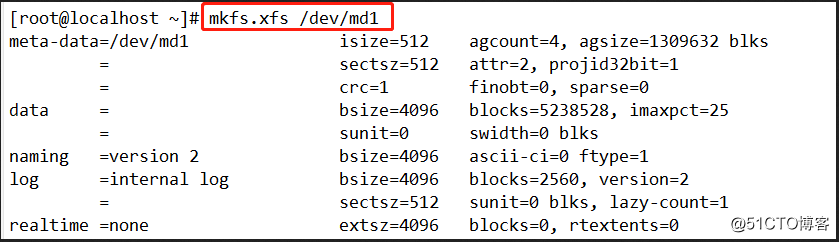
6, after the end of formatting you can mount, create a mount point in md1 mnt, enter mkdir / mnt / md1, enter Mount / dev / md1 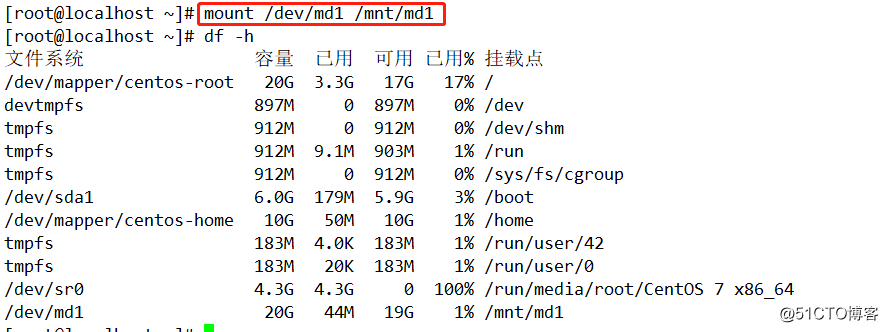
7, if you think the trouble can be automatically mounted.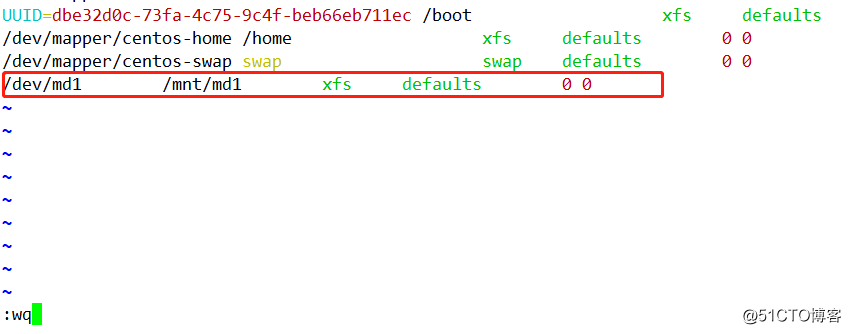
RAID 1 arrays verification
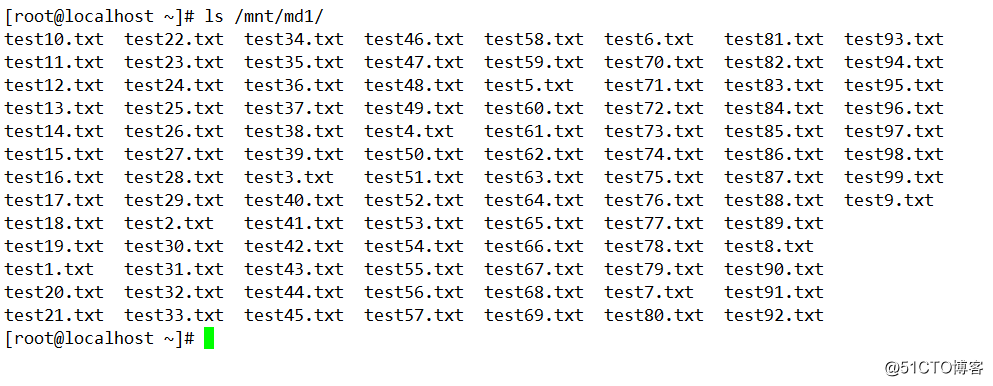
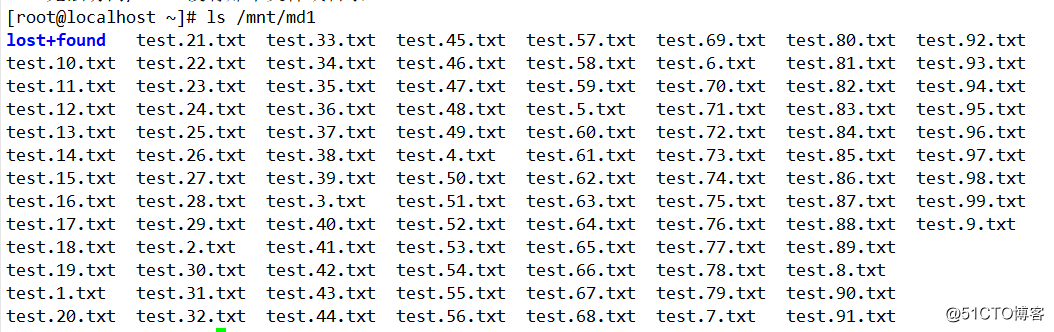
1, some of the new empty files in / mnt / md1 / directory, type ls / mnt / md1 view. 
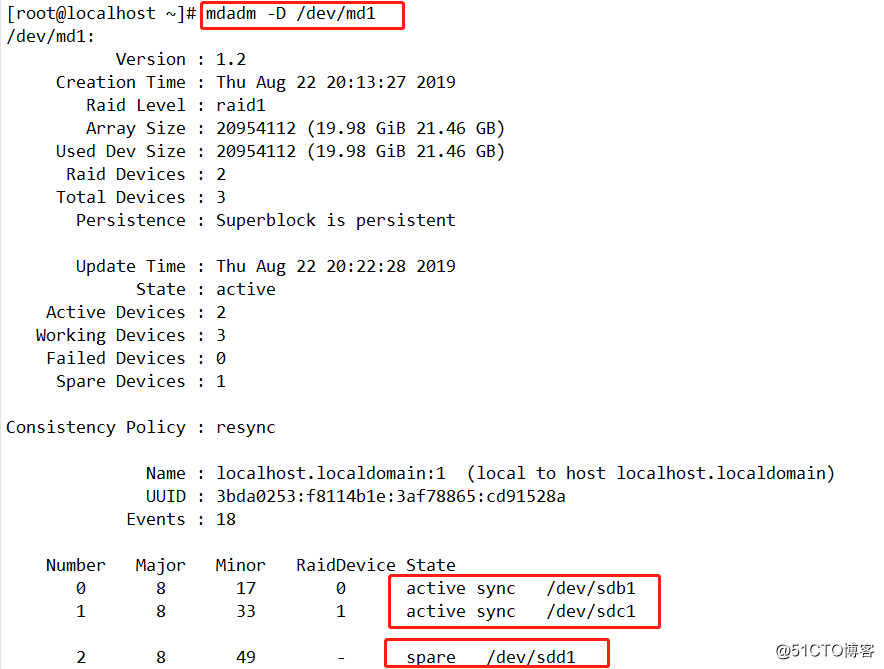
2, see the RAID with mdadm -D / dev / md1 information, see sdb1, sdc1 active. 
3, this time we simulate the disk is damaged, with "mdadm -f" command sdb1 removed from the RAID disk arrays md1, the watch can automatically replace the spare disk sdd1 up. 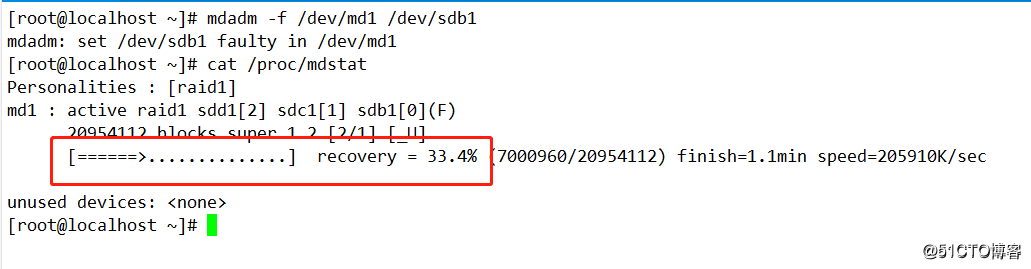
4, this time we can see sdd1 has been replaced sdb1, and is synchronizing data, we then mdadm -D / dev / md1, view state.
5, this time we look at the original documents are still not in, enter ls / mnt / mb1.