RAID 5 disk array Introduction
1, RAID 5 disk array of N disk blocks (N> 3 =) in arrays, a data generating the N-1 band, as well as a part of check data, a total of N data parts iterative equalization block on disk N storage.
2, RAID 5 and RAID 0 approximating having a data read speed, but with an additional parity information, the data writing speed slower than write operations on a single disk. And because the multiple data corresponding to a parity information, RAID 5 disk space utilization than RAID 1 high storage costs are relatively low, is the use of more of a solution.
3, high reliability, allowing a bad disk, does not affect any data.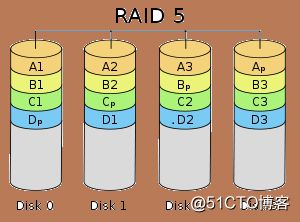
RAID 5 disk array configuration
1, four is added to the virtual machine hard drives, used to make three RAID 5 disk array, used for a spare disk, and then restart the system. 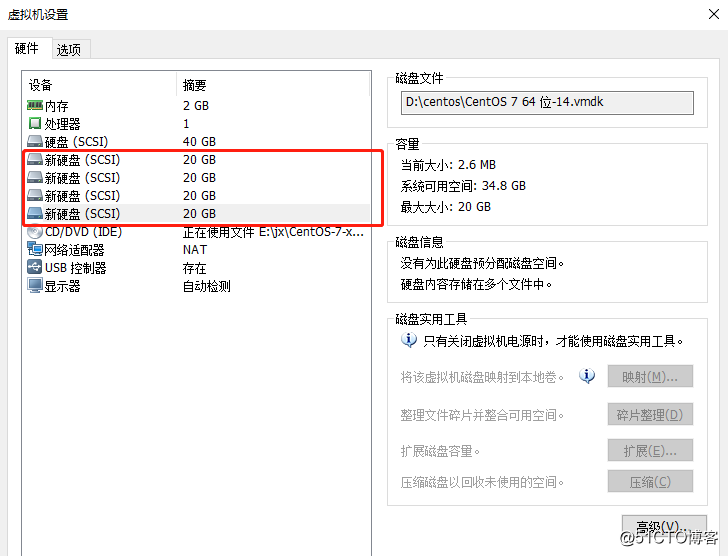
2, sdb, sdc, sdd, sde be configured to set the partition raid. (The remaining steps and disk partitions as sdb) 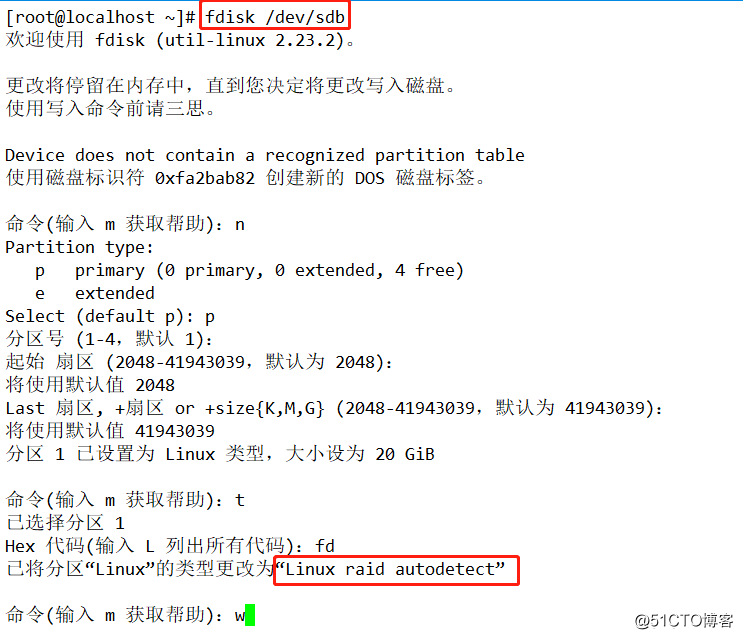
3, first look there is no tool to create RAID volumes, if not you can own equipment from a source yum. 
4. Next, create raid5 volume, input
mdadm -C -v /dev/md5 -l5 -n3 /dev/sd{b-d}1 -x1 /dev/sde1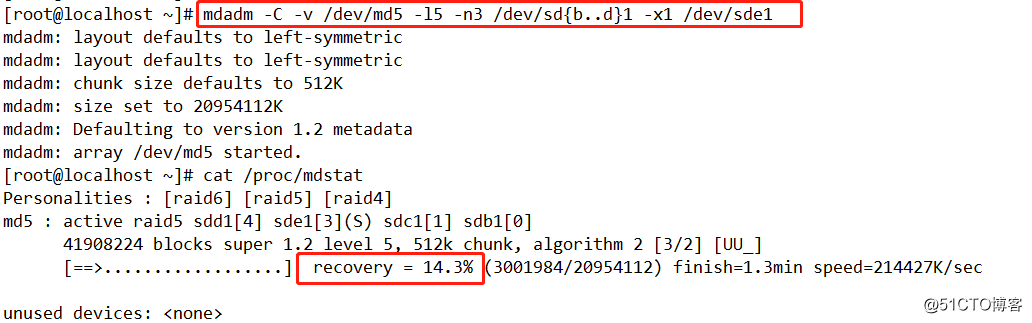
Wherein
mdadm: command word
-C: Create
-v: show details
/ dev / md5: Create a directory stored
-L5: Level
-N3: using three disks
-x: the number of spare disk
/ dev / sde1: represented directory of the disk names and
5, format, formatted xfs format. 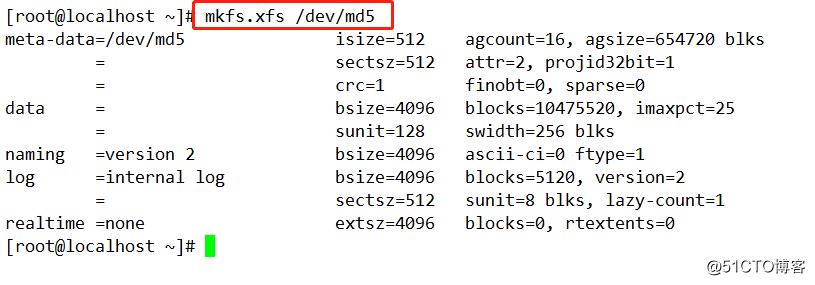
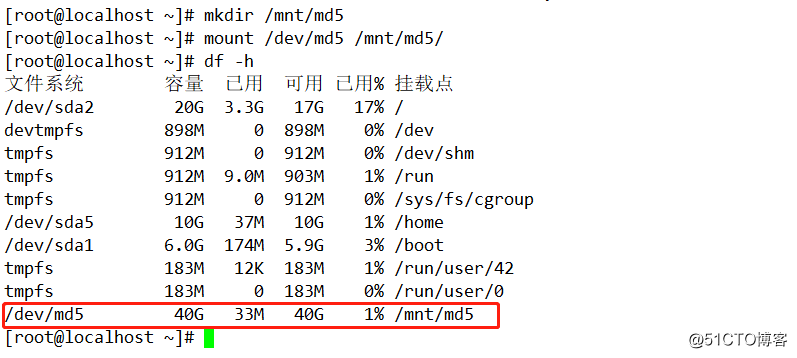
6, to create md5 in the mnt as a mount point, RAID5 will be mounted.
7, it can also be mounted automatically.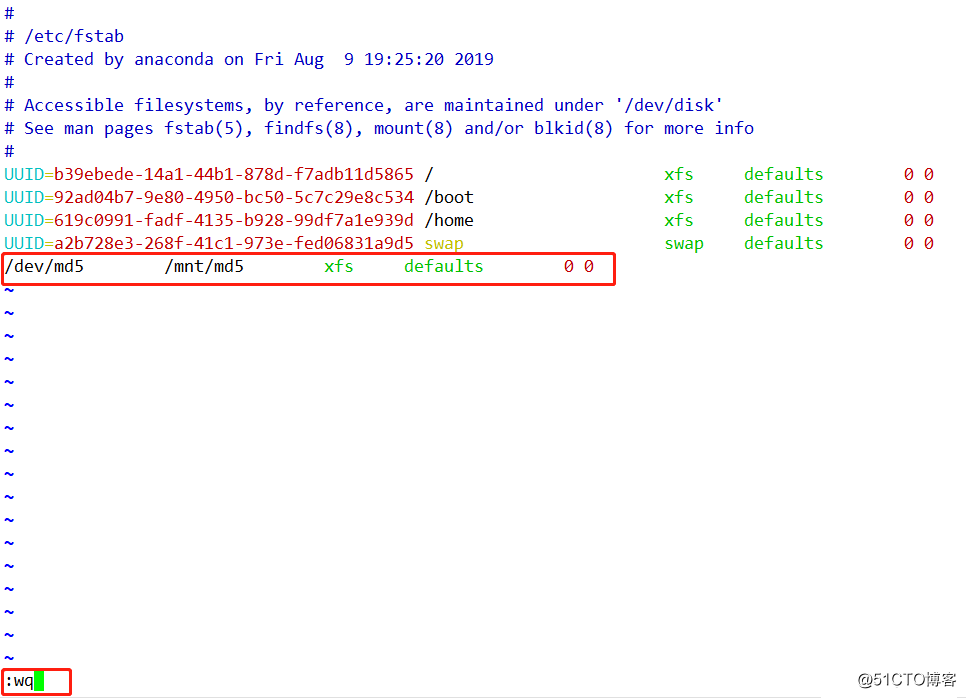
Verify RAID5 disk array
1, create many empty file in mnt / md5 years. 
2, / dev / md5 view with mdadm -D disk, found sdb1, sdc1, sdd1 is active, sde1, at the standby state. 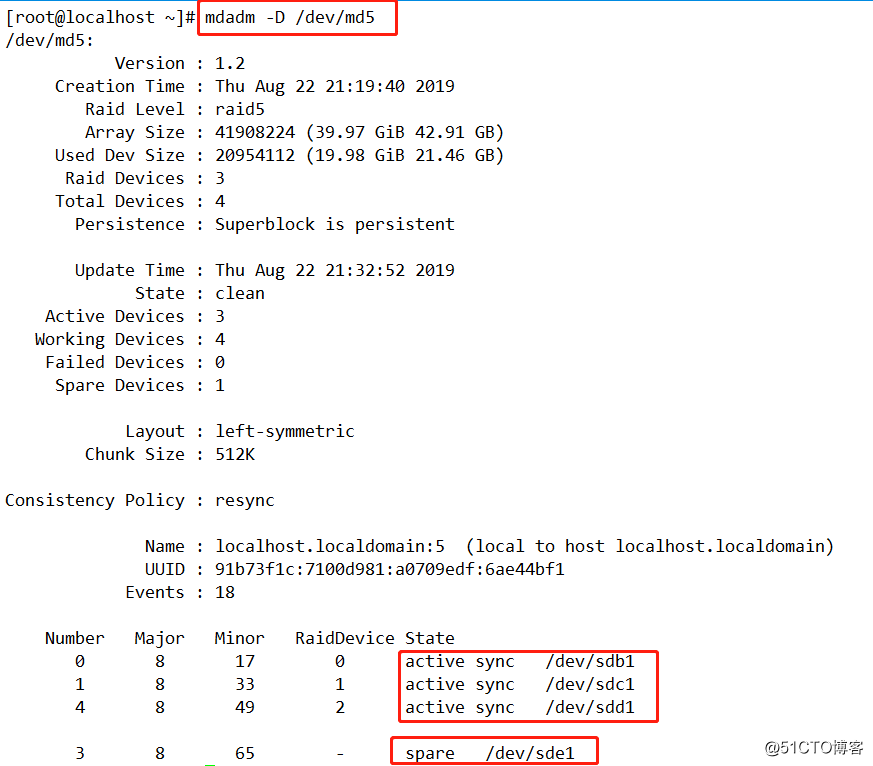
3, this time we simulate the disk is damaged, with "mdadm -f" command sdb1 removed from the RAID disk array md5, see spare sde1 can automatically replace up. 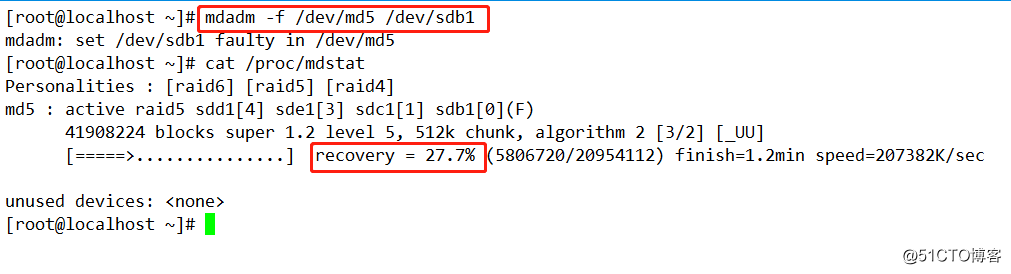
4, this time we can see sdd1 has been replaced sdb1, and is synchronizing data, we then mdadm -D / dev / md1, view state. 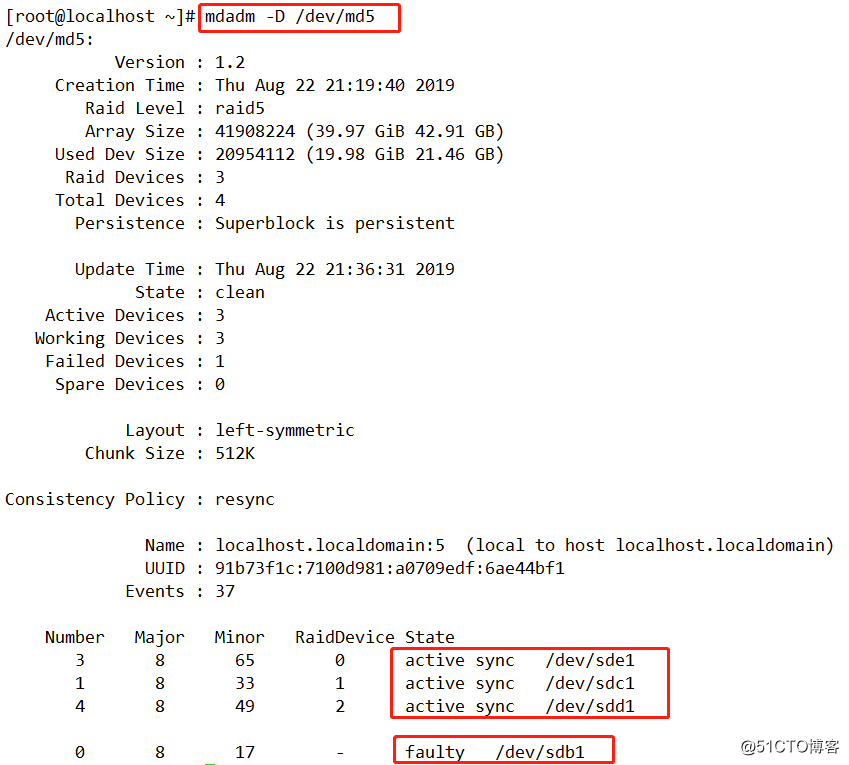
5,
this time we look at the original documents are still not in, enter ls / mnt / mb1.