table of Contents
1. Preparation stage
For the convenience of writing documents, 4 hard disks are used to create RAID5 and RAID10.
Here, a virtual machine is used for technical operations.
1. Add 4 40G hard drives
- To add a hard disk when the system is shut down, click the Add button in the figure below, and add it step by step according to the options. (If it is normal in the enterprise, the device supports hot-swappable, no need to shut down to add)
- After logging in to the system, you can use fdisk -l to view the information of the added hard disk.

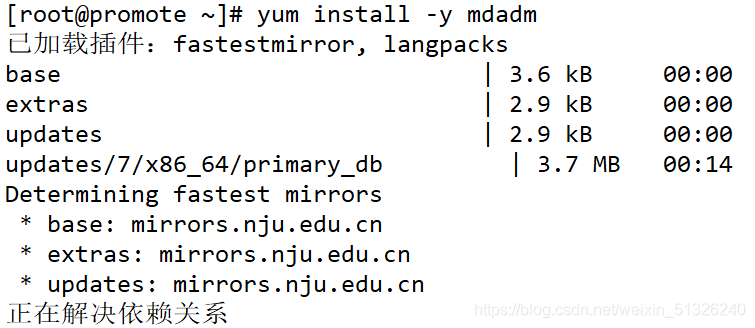
2. Check whether the mdadm package has been installed
rpm -q mdadm
I have installed it here, so the file is displayed

yum install -y mdadm
The output page here is too long, and I can't show it all. I cut off the beginning and the end, because I have installed it, so I will perform an upgrade operation here.

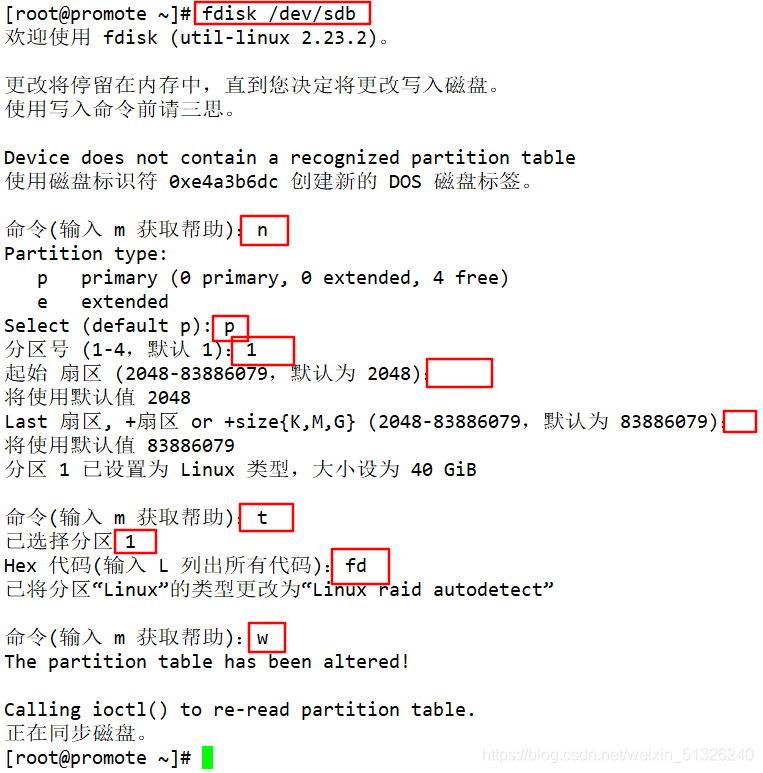
3. Use fdisk tool to manage disk
Divide the new disk device /dev/sdb, /dev/sdc, /dev/sdd, /dev/sde into primary partitions sdb1, sdc1, sdd1, sde1, and change the ID mark number of the partition type to "fd"
fdisk /dev/sdb
fdisk /dev/sdc
We will only divide all the disks into one primary partition here. If you don't want to divide only one area or the details, please see the previous blog Disk Management . The other three disks are the same. Note that it must be saved at the end.
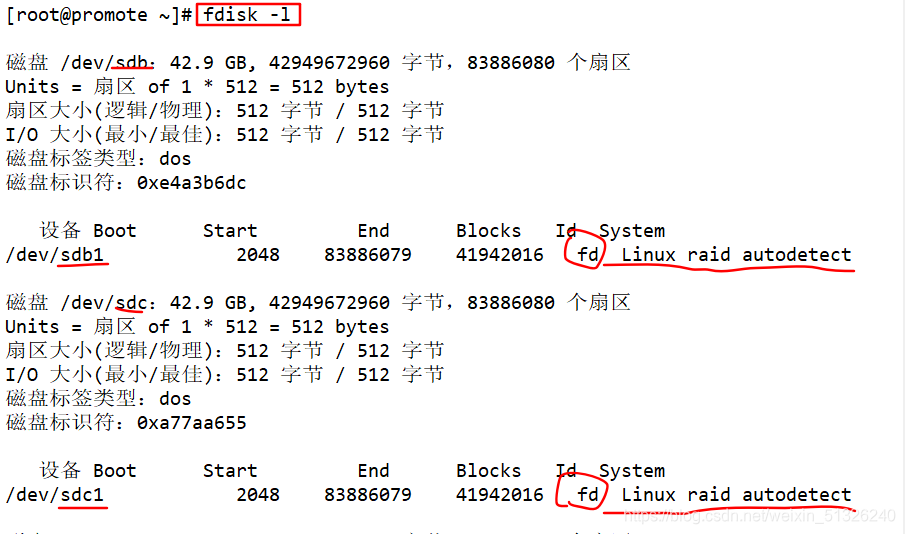
After all the disks are divided, use fdisk -l to view. As shown in the figure below, the ID number of the disk has become fd. Here I only cut two disks, and the following two are the same.
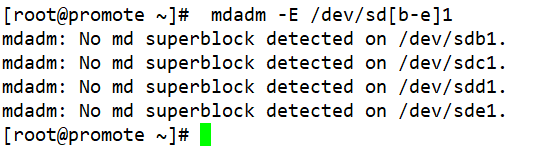
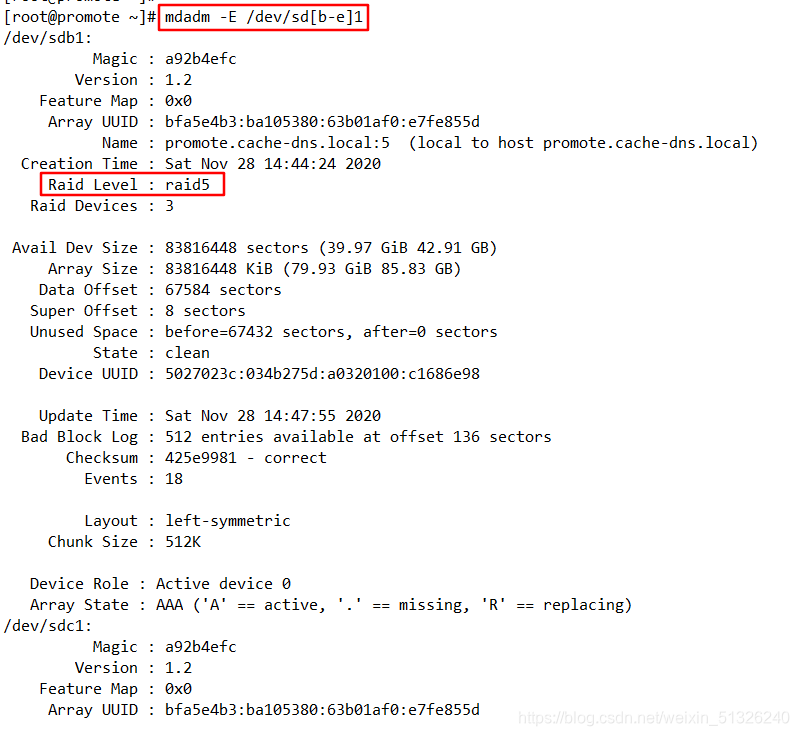
After the disk partition is completed, the disk does not perform any operations. Now you can use the mdadm -E /dev/sd[be]1 command to check whether the disk has been RAID. It must be normal.
Two, create a RAID5 device
1. Create RAID5
1) Create RAID5
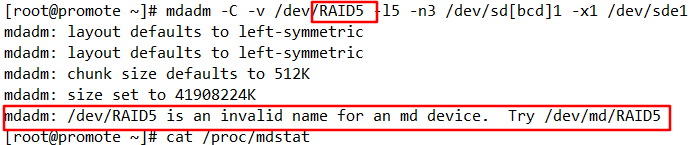
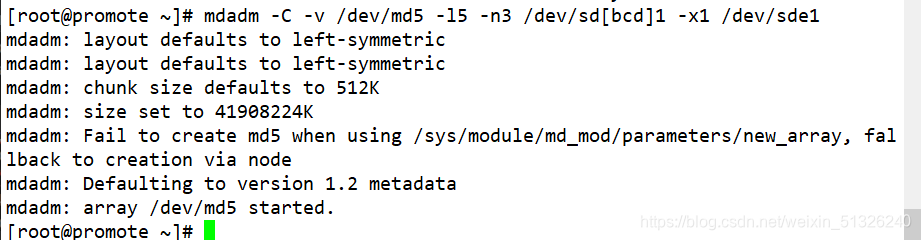
Create RAID5, name note 1
mdadm -C -v /dev/md5 -l5 -n3 /dev/sd[bcd]1 -x1 /dev/sde1
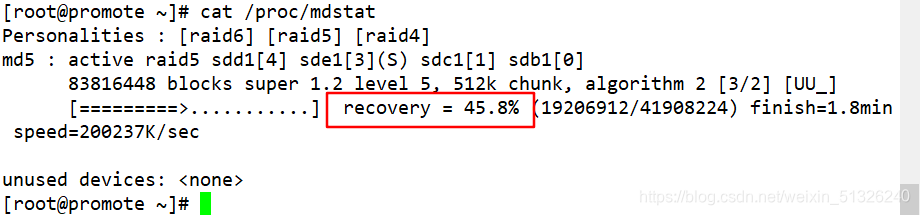
Use the cat /proc/mdstat command to view the progress. As shown in the figure, a progress bar indicates that it is being created.
Use mdadm -D /dev/md05 to view, compared with the above one, this kind of displayed more information can be used by the situation.
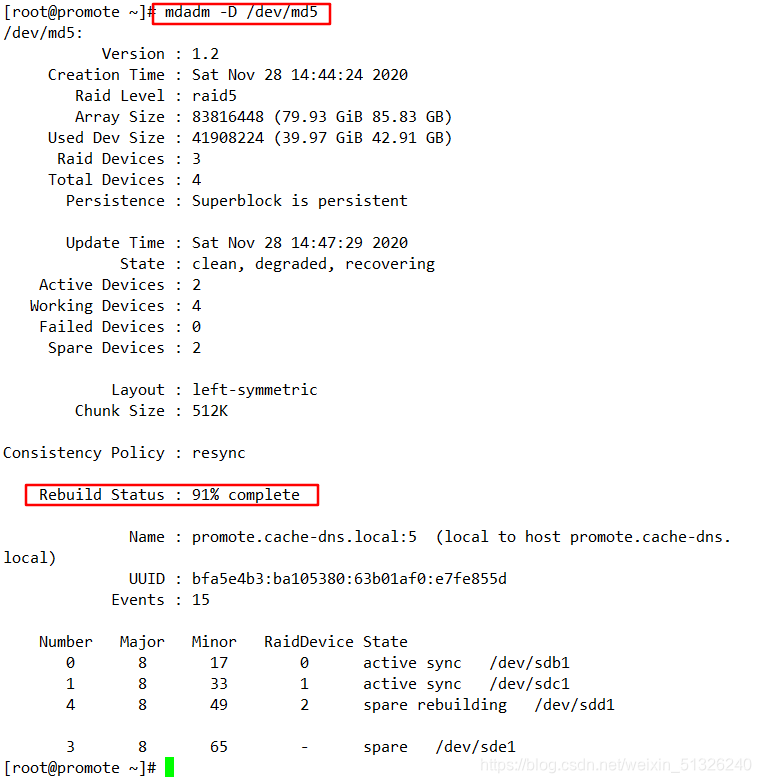
As shown in the figure below, the creation is successful.

At this time, you can see if the disk has been configured with RAID. The partitions of other disks are similar to sdb1.
2) Mount and use
After it is done, it is created and mounted for use.
Format the newly created RAID5 (md5) and

mount the RAID to the system directory. The last one shows that the mount was successful. The capacity here is only 2 disks, not 3 disks, because the disk utilization efficiency of RAID5 is (N-1)/n, so there is only 2/3 of the disk capacity (I added 40G to the virtual machine here, and the system displays 43G, which may be a question of disk conversion display). The temporary mount I used here, if you want to use permanent mount, please check my last blog, which contains the mount configuration, server hardware and RAID configuration (a brief understanding) .

3) Simulate failure
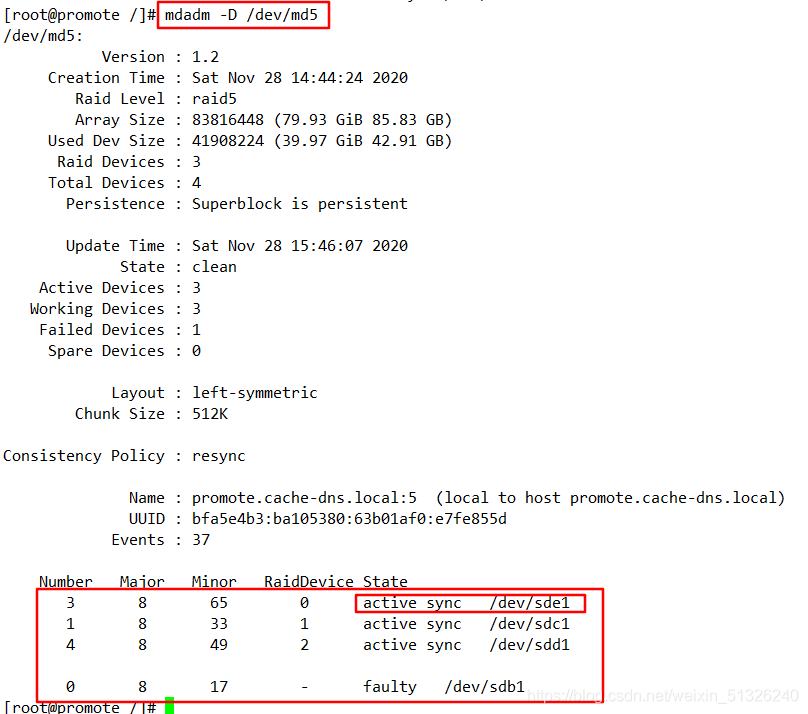
Use mdadm /dev/md5 -f /dev/sdb1 to make sdb1 simulate the point of failure, mdadm -D /dev/md0 to view the detailed information, you can see the error of sdb1 in the hard disk list below, sde1 replaces the location of sdb1, and the status is Building, check again later.

You can see that sde1 has replaced sdb1, and the state has become dynamic synchronization. If there are files in the hard disk, you can also find that the files are still there and the data is not lost, so I won't demonstrate it here.
When deleting RAID5 and deleting hard disks, it is all good. When sdb1 simulates a failure before, it reports an error for the deletion for recovery. To restore after mdadm /dev/md0 -f /dev/sdb1, you need mdadm /dev/md0 -r /dev/sdb1 to remove the hard disk and then mdadm /dev/md0 -a /dev/sdb1 to add it in, and then delete it. .

2. Create RAID10
1) Create RAID10
10, 1 is in the front and 0 is in the back, so we will do RAID1 first and then do RAID0.
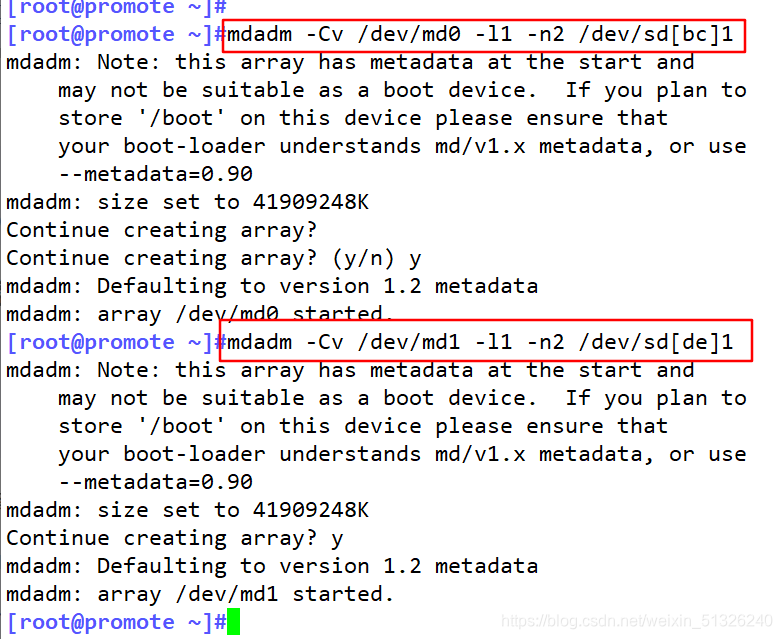
mdadm -Cv /dev/md0 -l1 -n2 /dev/sd[bc]1
mdadm -Cv /dev/md1 -l1 -n2 /dev/sd[de]1
mdadm -Cv /dev/md10 -l0 -n2 /dev/md0 /dev/md1
Create two RAID1 named md0 and md1, and assign disks b and c and disks d and e to them respectively.
Combine the created RAID1 into a RAID0.

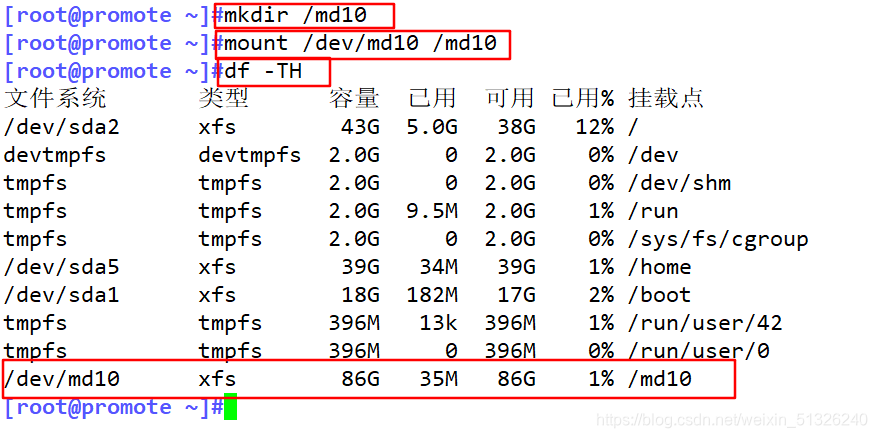
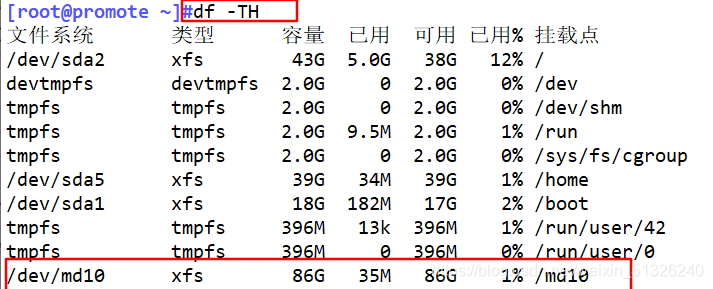
2) Mount and use
Format raid10 to
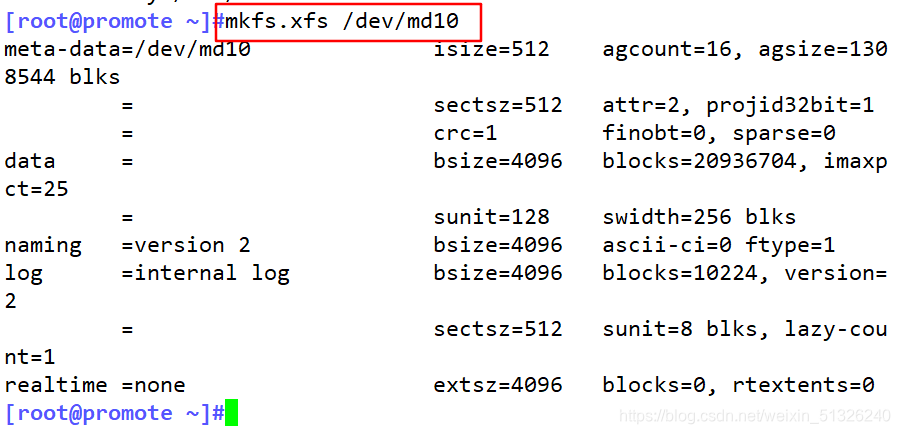
create a directory, and mount md10. Because there are two disks in RAID10 for backup, the actual used space is 1/2 of the maximum capacity.
3) Failure demonstration
Because the hard disk is placed in md0 and md1, the operation of the hard disk must be in the corresponding level, error demonstration 2

The disk has failed, but it can still be used normally.

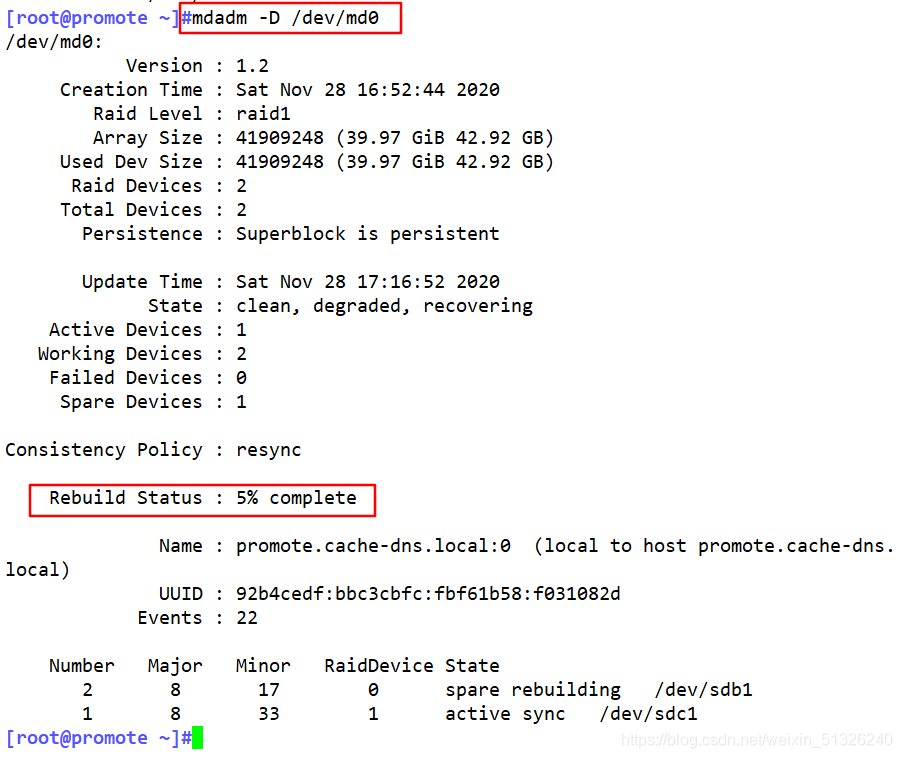
To restore the disk, first move sdb1 out of md0 and then add it.

During reconstruction The
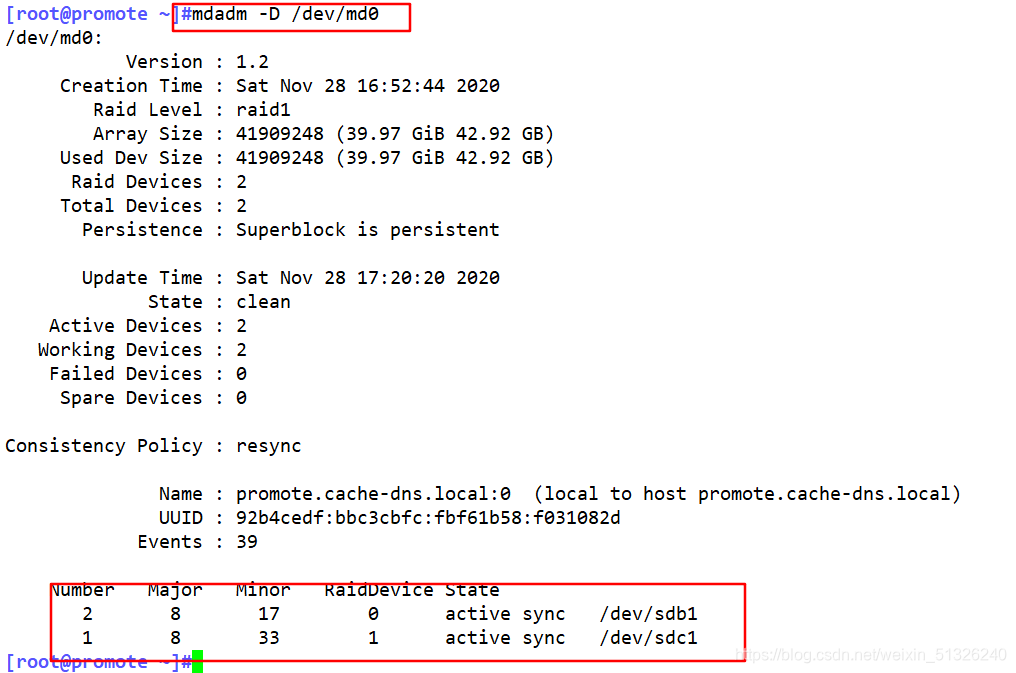
reconstruction is successful and it can be used normally again.
This is the end of this creation. If you have any questions or additions to the document, please leave a message in the comment section.