After understanding some of the documents, as well as some time of pondering. I think we can do some small projects with a django
Let us talk about it login feature.
First create an app, use the command admin
Cmd to open in the next manage.py the same directory, django-admin startapp appname.
If you do not project, first startproject. I am here app name is login_new. Once created open the project in pycharm. First of all, we want to create a model.
In order to achieve just the function, I am here only two fields, user and password. Enter the code in the models file
from django.db import models

class User(models.Model):
    user = models.CharField(max_length=20)
    password = models.CharField(max_length=200)

    def __str__(self):
        return self.user

# Create your models here.
CharField is a field type, models as well as other types of concrete can go to the next document, this field is rather special, you need to field length, see brackets. So far, the model is built, is relatively simple.
Under the first statement, I generally prefer to start with models began to read some other tutorials are from the beginning. All the same, how to understand how come
Then, add this model to admin file,
from django.contrib import admin
from .models import User

admin.site.register(User)
# Register your models here.
The 'login_new.apps.LoginNewConfig' sentence is added in the app configuration setting, as shown below

And then generate a database creation script python manage.py makemigrations login_new, successful, enter python manage.py migrate to build a database table. Mysqlclient need to download consciously download package, not installed https://www.cnblogs.com/afei123/p/11240182.html
Finish above them, finished the half on the other language, the background to complete better. You can see if we can create a new account the python manage.py runserver to start the service in the admin area.
These done, do you have to view things.
First to resolve url, urls under which to project configuration. In the following plus
path ( ' test app / ' , include ( ' testApp.urls ' ))
This sentence, after making changes to urls in the app can go inside. First, go to the next file views create a login function and I am directly attached to the finished product bar code.
from django.shortcuts Import the render
 from .models Import the User

DEF Login (Request):
    context = {}
     # set state
    context [ ' STAT ' ] = ' Login '
    IF  ' User '  and  ' password '  in `` request.GET``:   # if presented data words
        # transfer data
        user `` request.GET`` = [ ' user ' ]
         # to the user database query
        = User.objects.get passw (= User User)

        IF `` request.GET`` [ ' password ' ] == passw.password:        # comparative data
            context [ ' titl1 ' ] = ' Success '
            context [ ' name ' ] = `` request.GET`` [ ' User ' ]
             # after successful jump success page
            return the render (Request, ' Login / results.html ' , context)
         the else :                # contrast failed to modify the state of
            context [' Wrong ' ] = ' failed '
    the else :
        context [ ' Wrong ' ] = ' Please input data '
    # failed to stay in the original interface
    return the render (Request, ' Login / the login.html ' , context)
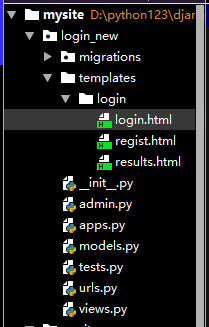
The code is actually a html file with the corresponding, request.GET take parameters, return type is a dictionary, we create a dictionary type of context is used to return the data to the front in the background, key corresponding to the value of context is set in html , first posted my directory structure and login.html Code
<!DOCTYPE html>
<html lang="en">
<head>
    <meta charset="UTF-8">
    <title>{{title1}}</title>
</head>
<body>
    <form action="/login" method="get">
        <input type="text" name="user">
        <input type="password" name="password">
        <input type="submit" value="登录">
    </form>
    {% if wrong %}
        <h1>{{wrong}}</h1>
    {% endif %}
</body>
</html>
First explain, because I urls points over, so he created a urls file to specify url, Codes into the next
from django.urls import path
from . import views

app_name = 'login_new'

urlpatterns = [
  #127.0.0.1:8000/login
    path('',views.login,name='login'),
  #127.0.0.1:8000/login/regist
    path('regist',views.regist,name='regist'),
]
这表明我指定了两个url,一个对应login,一个对应regist,整段复制进代码的时候记得先去views里def一个regist方法。
回归到login,实现了之后再去看就觉得很简单,实际上就是一个数据传递,然后对模板不是很懂的话可以去看一下,jinja2。
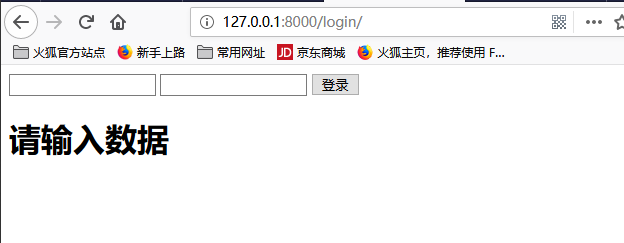
在login.html里我们创建了一个form和一个,{{wrong}},这会返回错误,如果后台里wrong里有值,那么就会显示这一行。
按理说上述代码就完成了登录,结果如下
登录成功
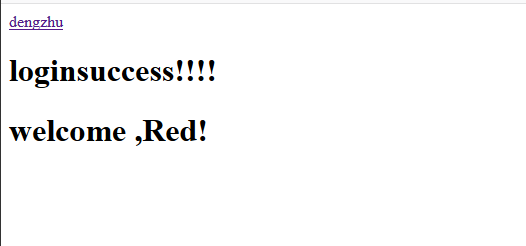
这边忘了results文件,代码如下
<!DOCTYPE html>
<html lang="en">
<head>
    <meta charset="UTF-8">
    <title>results</title>
</head>
<body>
<a href="/login">dengzhu</a>
</body>
<h1>{{stat}}success!!!!</h1>
<h1>welcome ,{{name}}!</h1>
</html>
不过忘了处理错误数据了,输入错的会直接报错
这个程序的url中会直接暴露密码,安全性也不是很足。
然后下面是regist的代码和html。
def regist(request):
    context = {}
    context['stat'] = 'regist'
    if 'user' and 'password' in request.GET:
        name = request.GET['user']
        password = request.GET['password']

        new_user = User(user=name,password=password)

        new_user.save()
        context['name'] = name

        return render(request,'login/results.html',context)
    else:
        context['wrong'] = '请输入数据'

    return render(request,'login/regist.html',context)
<!DOCTYPE html>
<html lang="en">
<head>
    <meta charset="UTF-8">
    <title>regist</title>
</head>
<body>
    <form action="/login/regist" method="get">
        <input type="text" name="user">
        <input type="password" name="password">
        <input type="submit" value="注册">
    </form>
<h1>{{wrong}}</h1>
</body>
</html>
regist那段没什么含量,我完成login功能后十分钟就写完了。
emmmm,讲的有点乱七八糟的