First, create a WebService in ASP.NET
First, let's create an ASP.NET Web application, here we have an example to VS2017
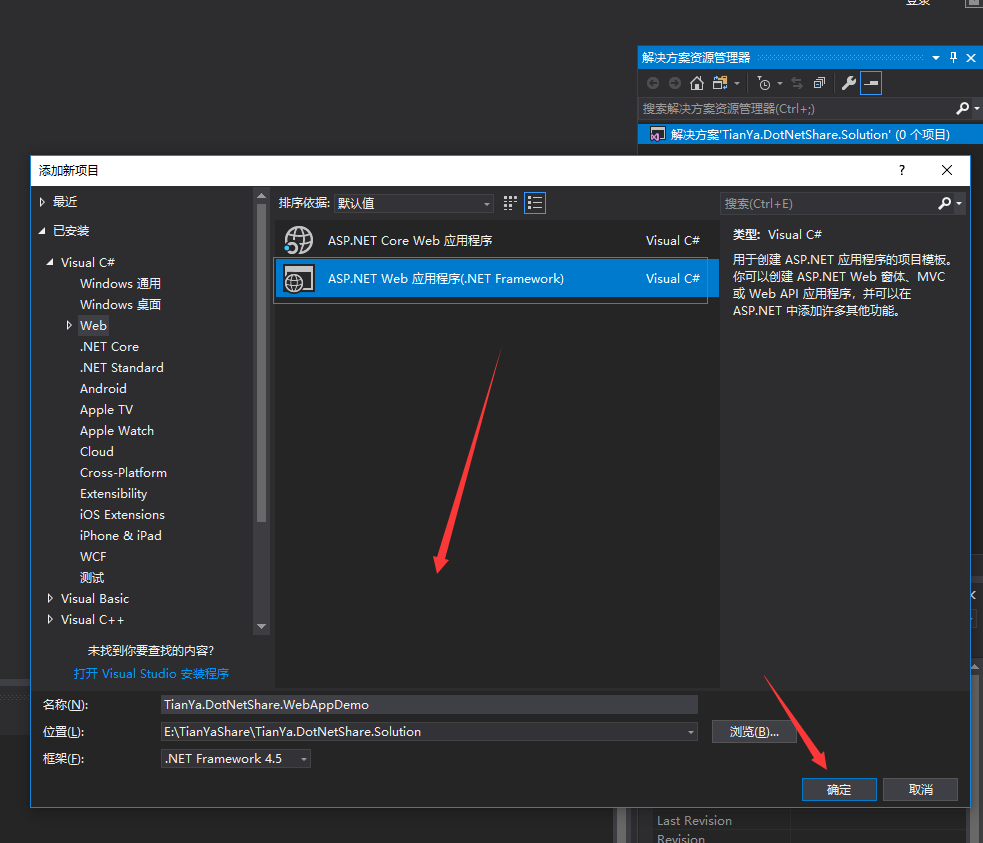
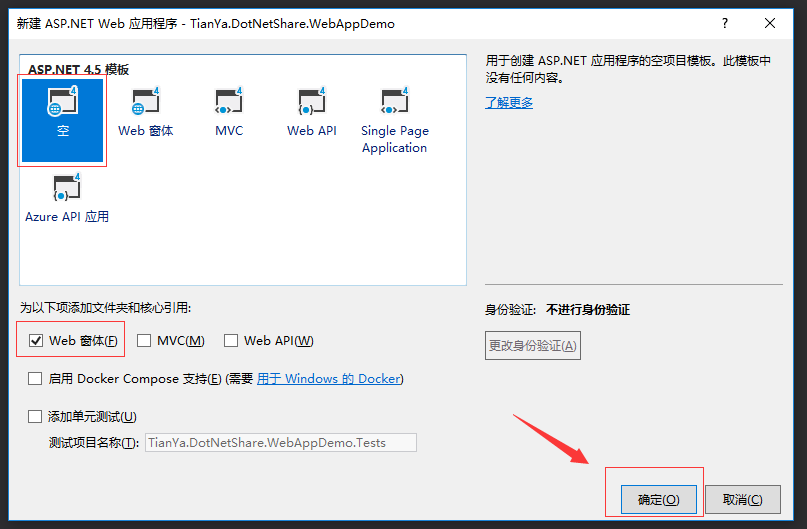
Click on the newly created project, right Add New Item, select the Web service, click Add enter the name

So that our foundation has been created WebService
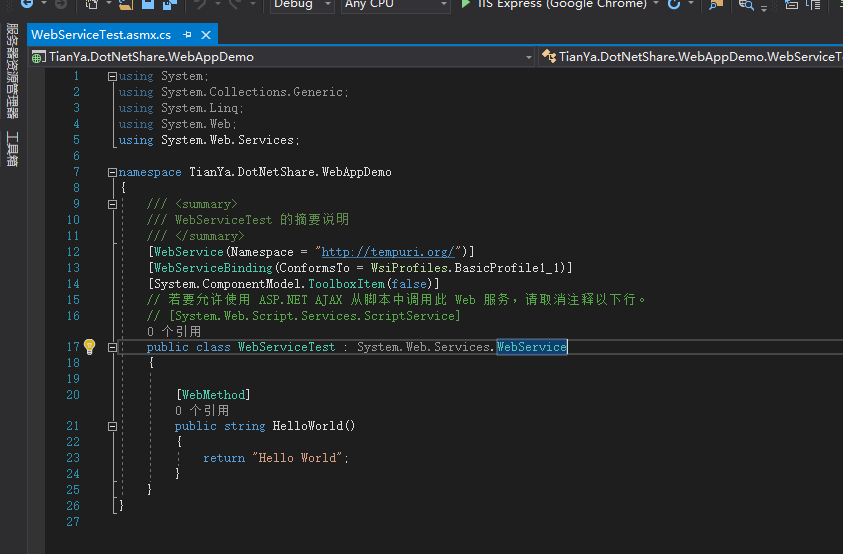
Next we filling a webservice test method, and labels marked WebMethod properties, only properties marked with labels WebMethod and external access modifier is set to the public can call to this method
using System;
using System.Collections.Generic;
using System.Linq;
using System.Web;
using System.Web.Services;

namespace TianYa.DotNetShare.WebAppDemo
{
    /// <summary>
    /// WebServiceTest 的摘要说明
    /// </summary>
    [WebService(Namespace = "http://tempuri.org/")]
    [WebServiceBinding(ConformsTo = WsiProfiles.BasicProfile1_1)]
    [System.ComponentModel.ToolboxItem(false)]
    // 若要允许使用 ASP.NET AJAX 从脚本中调用此 Web 服务,请取消注释以下行。
    // [System.Web.Script.Services.ScriptService]
    public class WebServiceTest : System.Web.Services.WebService
    {

        [WebMethod]
        public string HelloWorld()
        {
            return "Hello World";
        }

        /// <summary>
        /// WebService测试方法
        /// </summary>
        /// <param name="paramIn">入参</param>
        /// <param name="paramOut">出参</param>
        /// <returns>返回值</returns>
        [WebMethod(Description = "WebService测试方法")]
        public string SayHello(string paramIn, ref string paramOut)
        {
            paramOut = string.Format("Hello {0}!", paramIn);
            return "Success";
        }
    }
}
到此我们的WebService就创建完毕了,很简单吧!
二、将创建的WebService部署到我们的IIS上面
其实WebService部署和我们的网站部署是一样的,下面就简单的介绍下
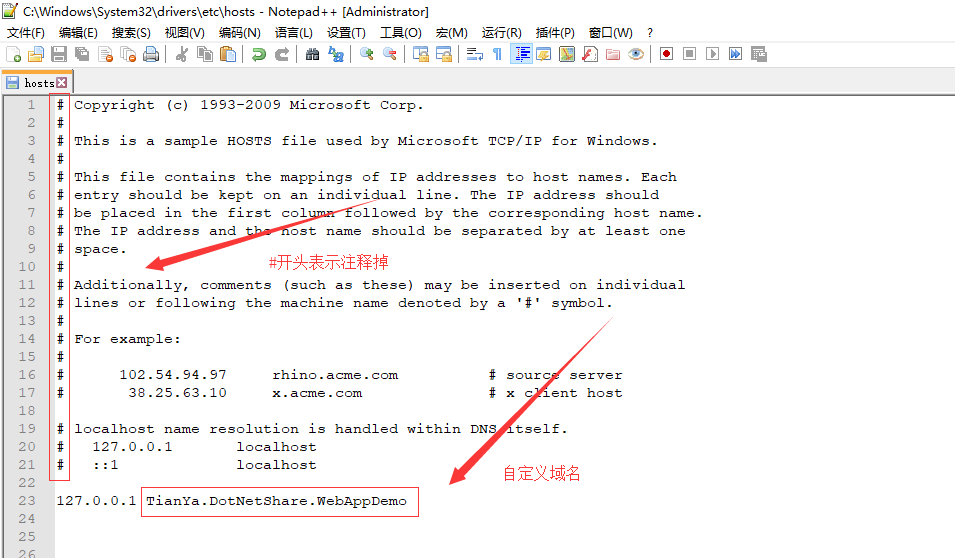
首先我们需要先配置域名解析,修改hosts文件
hosts文件路径:C:\Windows\System32\drivers\etc
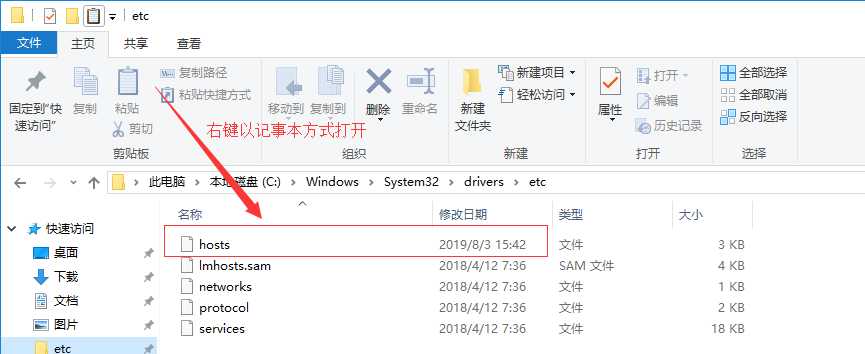
以记事本方式打开,配置方式如下,格式:127.0.0.1 一个空格 自定义的域名 ,配置完成后记得保存
接下来我们添加一个公用的应用程序池,点击“应用程序池”右键“添加应用程序池”

选择完后点击确定,然后点击生成的应用程序池右键选择高级设置,将标识改成LocalSystem,点击确定

设置完成后效果如下

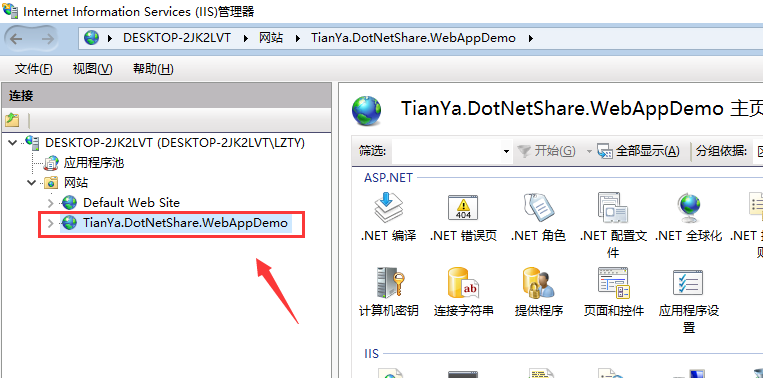
最后就是添加网站了,点击“网站”右键选择“添加网站”

物理路径就是指我们的项目路径,弄完后点击确定
到此我们的WebService就全部部署好了,下面测试一下是否成功
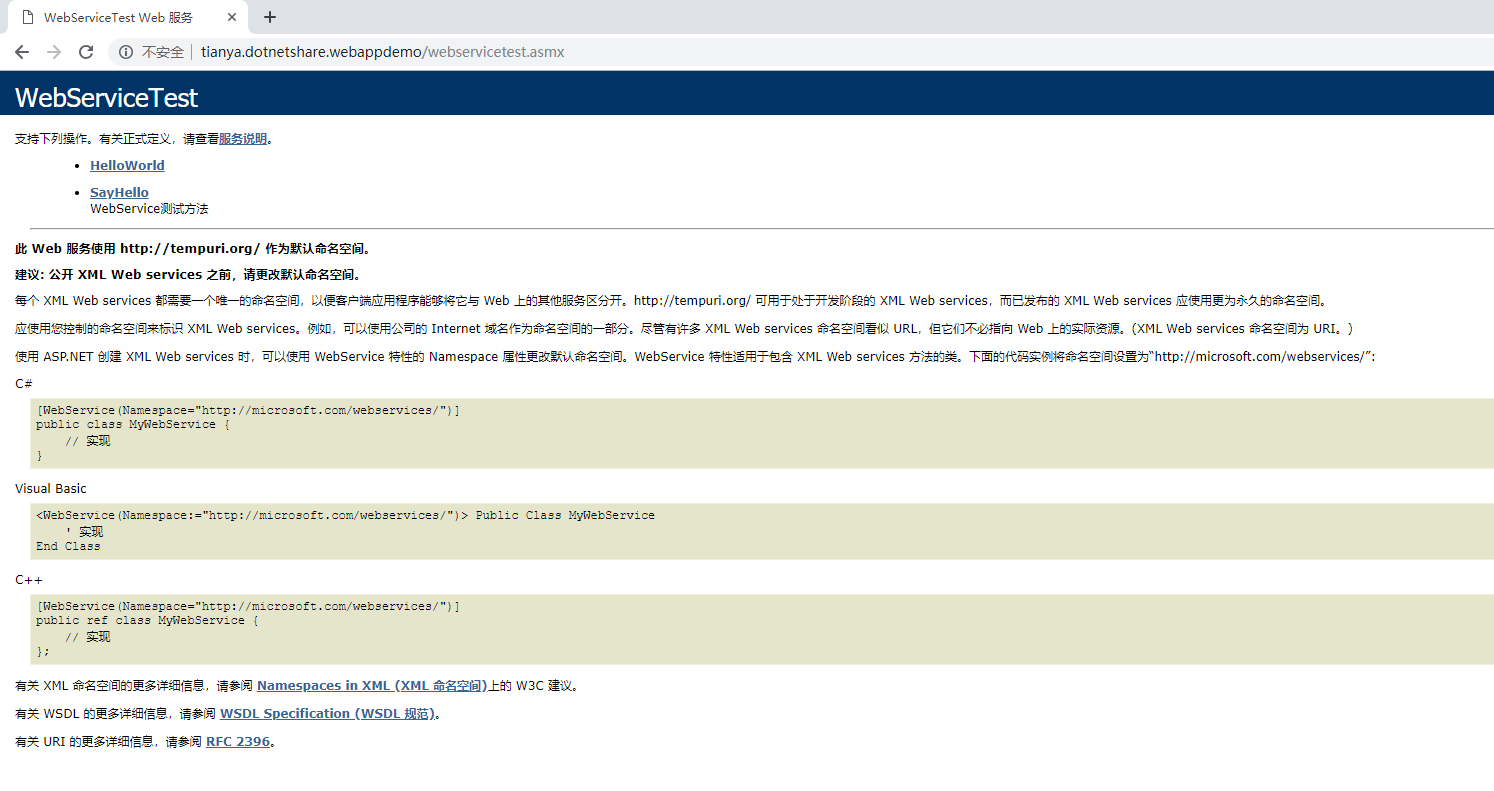
浏览器访问正常,说明我们WebService部署成功啦!
三、通过反射动态调用WebService
此处为了演示,首先我们在App_Code文件夹下添加一个WebService的帮助类WebServiceHelper.cs

代码如下:
未完待续......