In this article we describe the installation of Linux systems, as well as the learning process large data commonly used Linux commands what.
A .Linux (CentOs6.8) mounted
1. Install the VMware Virtual Machine
Virtual Machine Download: https: //pan.baidu.com/s/1siu4Pst0srLlbzpKdfKAPA
Extraction code: 684o
This is relatively simple, direct and then double-click to open the next step has been to know the installation is complete on the line, in the middle installation needs to pay attention to their own path, and try not to put the C drive
Finally, you can check whether the installation is successful, the installation is successful in Control Panel - Network to connect this road> Network and Internet-> There are fresh into the next two network configuration

2. To install the virtual machine inside CentOs system
(1). Pre-Installation Environment Preparation
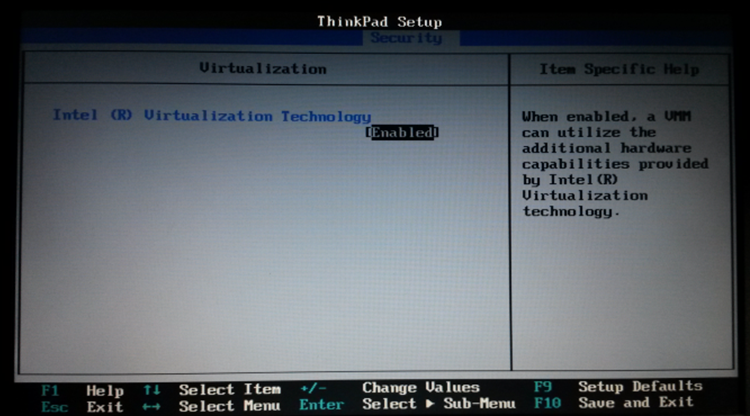
Before installing the virtual machine must be turned BIOS virtualization support (self-Baidu how their computer is turned on or not to support virtualization or virtual);
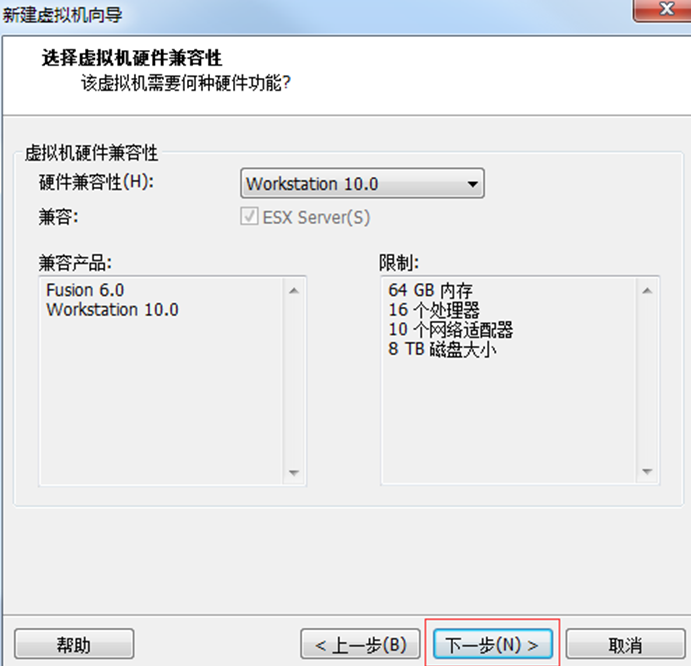
(2) Install a virtual machine hardware (hardware resource allocation based on their status, the minimum required to create three virtual machines)
(2) .1 New Virtual Machine

(2) .2 New Virtual Machine Wizard
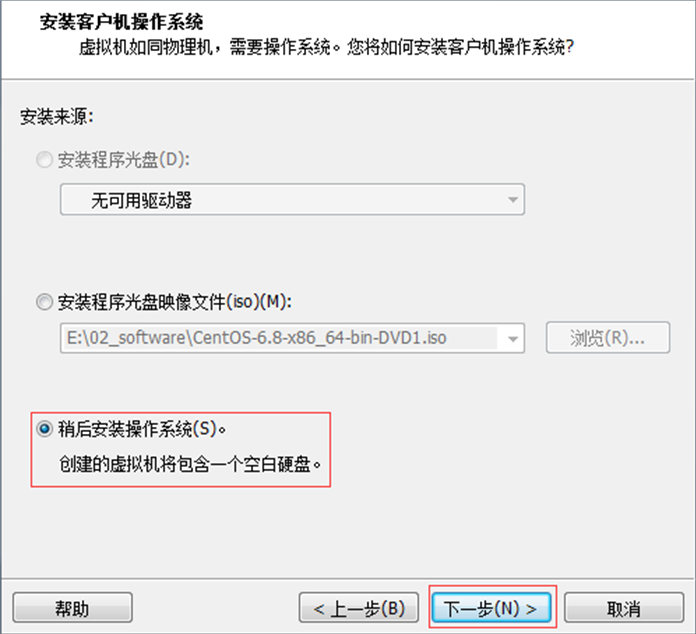
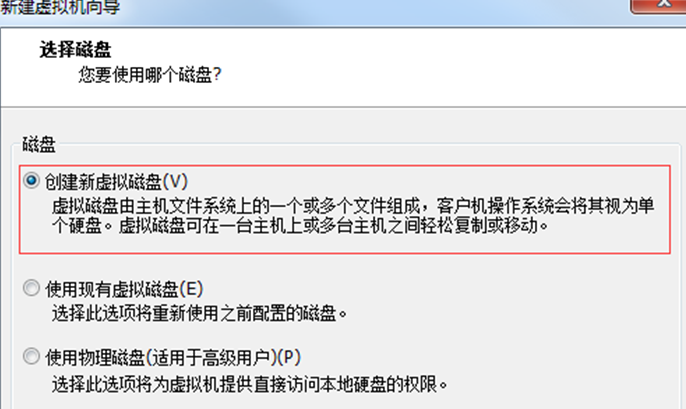
(2) .3 create a virtual blank disc
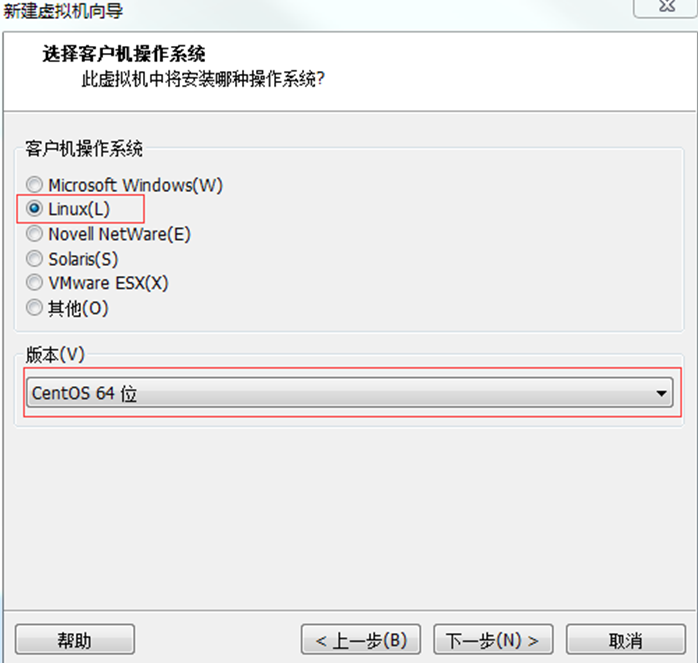
(2) .4 corresponding mounting system Linux version CentOS
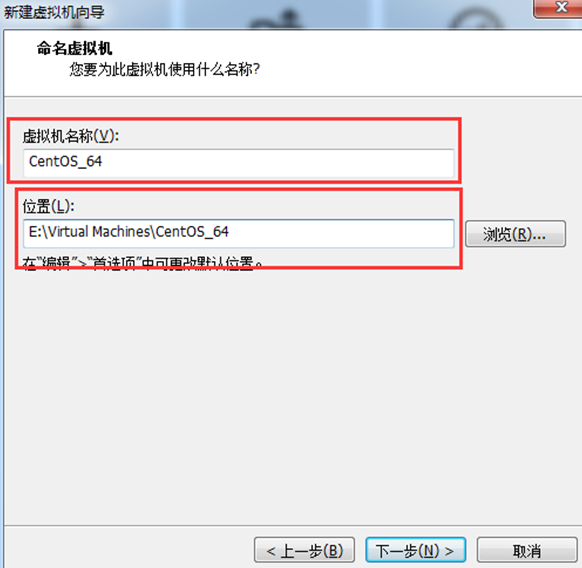
(2) .5 name and location of the virtual machine disk location
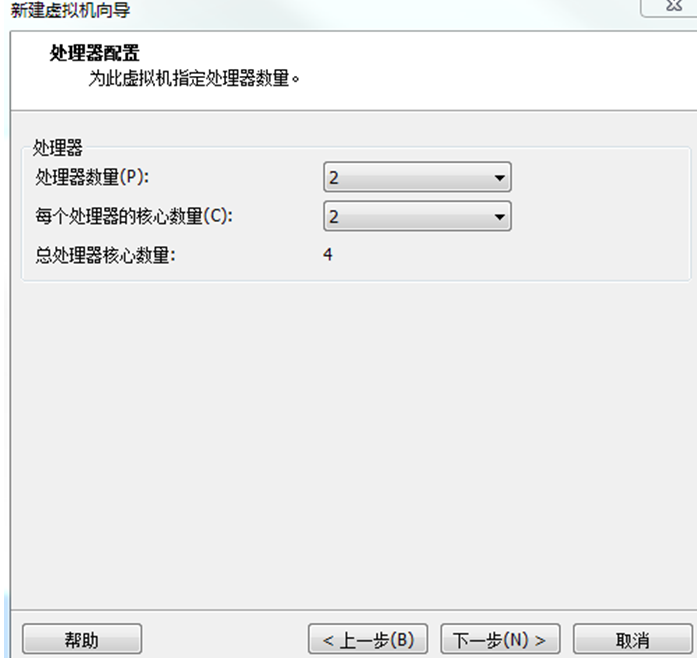
(2) .6 processor configuration, to see if they are dual-core, multicore
(2) .7 set to 2GB memory (RAM can give a large dot)

(2) setting network NAT .8

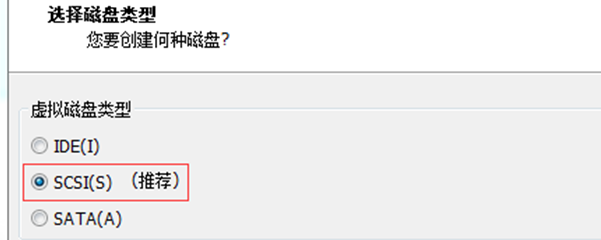
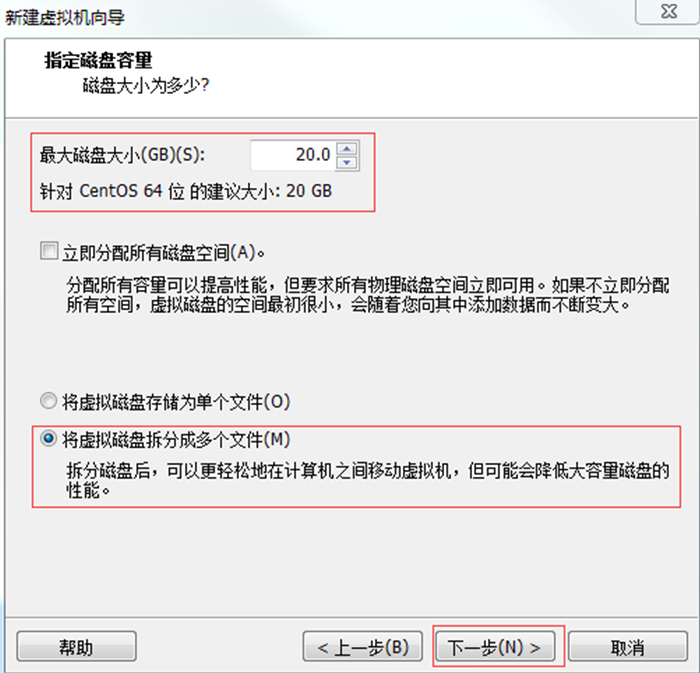
(2) .9 IO controller types have been selected and click Next until the Setup disk capacity

(2) .10 disk capacity is provided (the first recommended 50G, 30G of the second third stage)
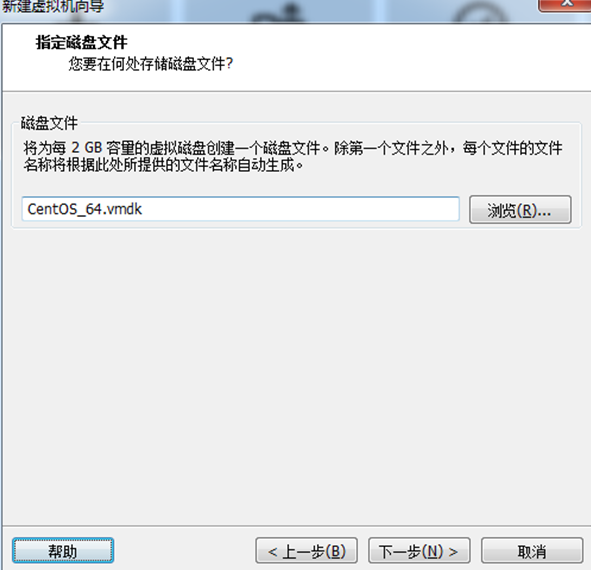
(2) .11 Where do you store the disk file
(2) .12 New Virtual Machine Wizard configuration

3. Install Virtual Machine software system
CentOs6.8 link: https: //pan.baidu.com/s/1OS9Aq3CY319krsH9l2aQQQ
extraction code: vqkd
3.1 VM settings
3.2 ISO load

3.3 Installation Configuration and power CentOS
3.4 加电后初始化欢迎进入页面
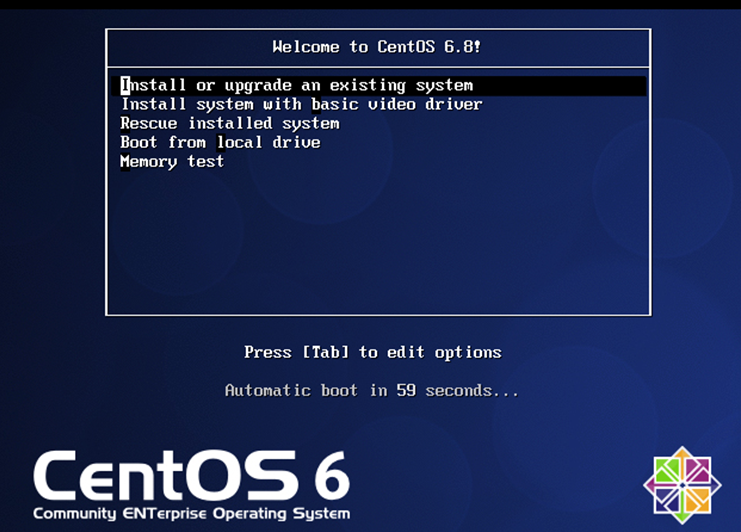
回车选择第一个开始安装配置,此外,在Ctrl+Alt可以实现Windows主机和VM之间窗口的切换
3.5 是否对CD媒体进行测试,直接跳过Skip

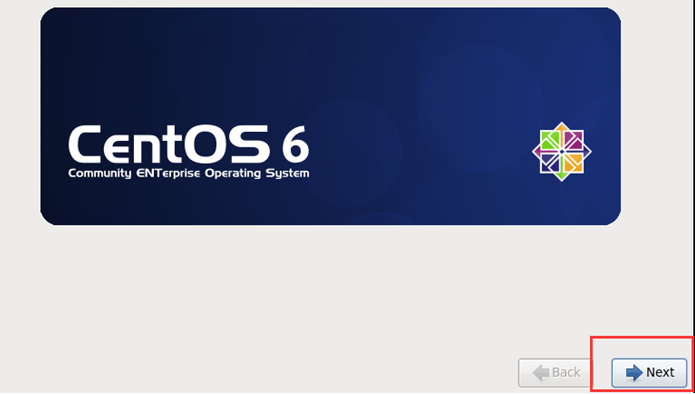
3.6 CentOS欢迎页面,直接点击Next
3.7 选择简体中文进行安装

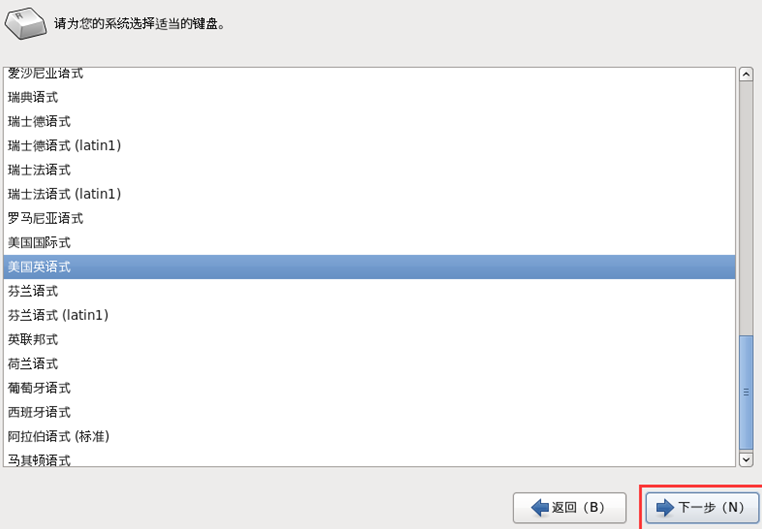
3.8 选择语言键盘
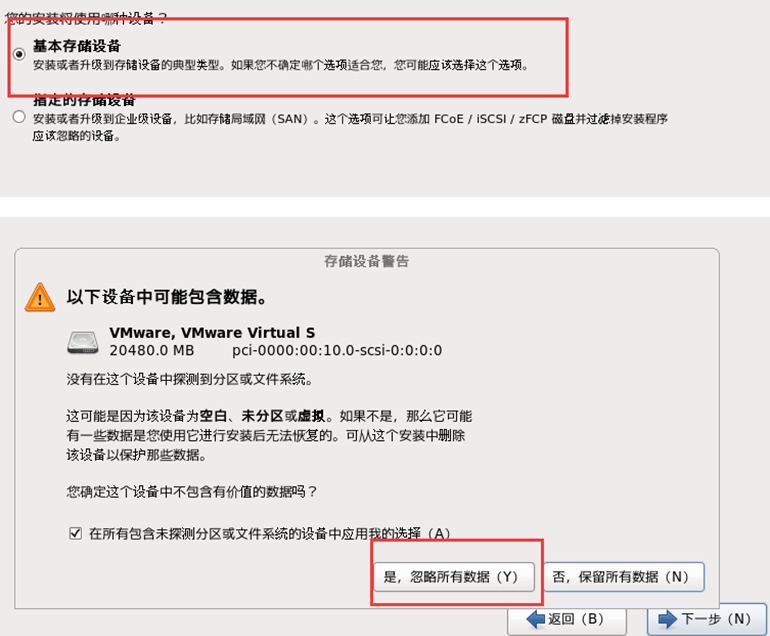
3.9 选择存储设备
3.10 给计算机起名
我给的三台主机名(hostname)分别是hadoop101,hadoop102,hadoop103,
3.11 设置网络环境
暂时不管,等进入系统后再配置
3.12 选择时区

3.13 设置root密码 (一定记住)
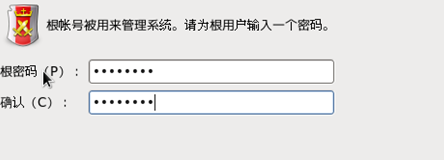
我的是123456比较容易记,学习期间没必要这么复杂
3.14 硬盘分区

3.14.1 根分区新建
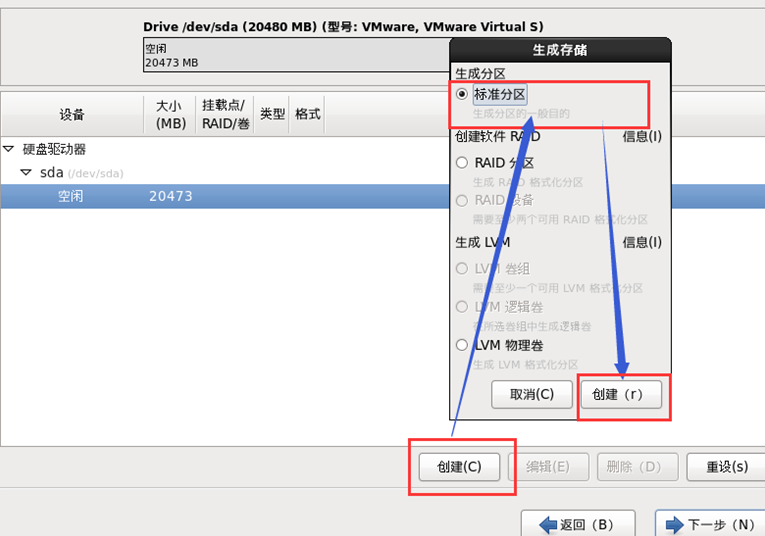
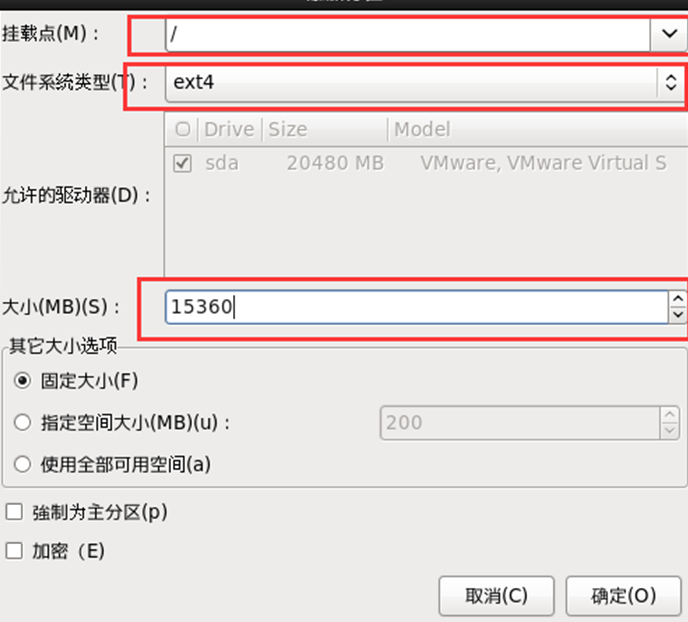
根分区推荐最后再创建,先把boot分区和swap分区创建好之后,剩下的所有存储空间都可以给根分区
3.14.2 Boot
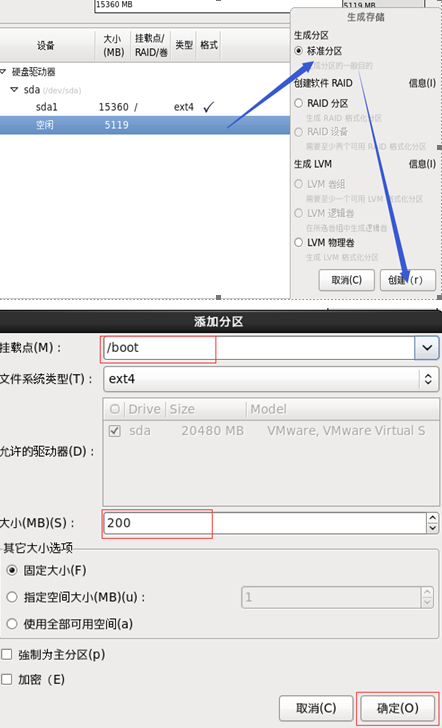
boot分区给200M空间就行
3.14.3 swap分区设置
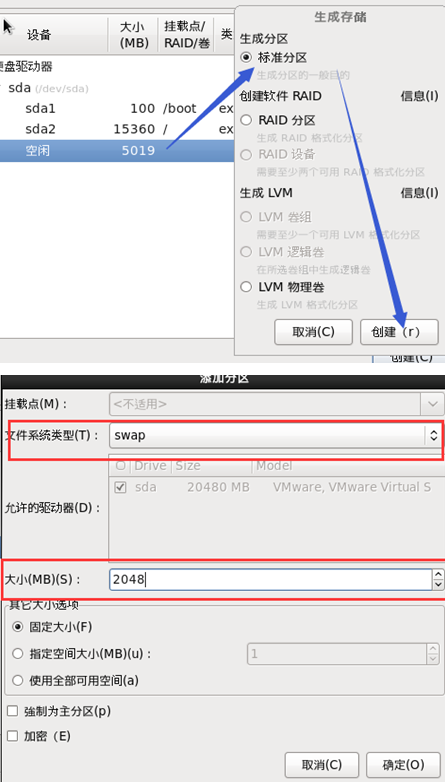
swap分区给2048M
3.14.4 分区完成
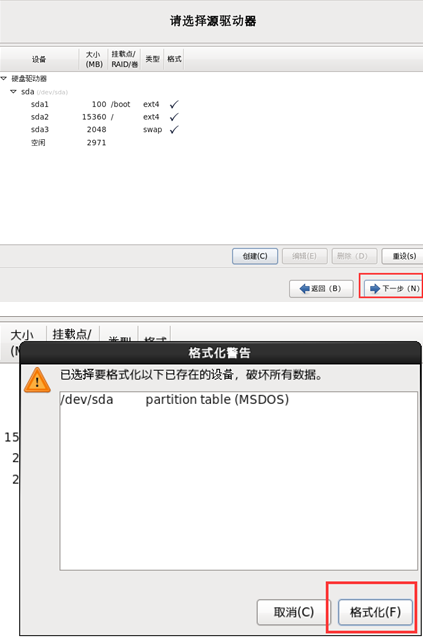

3.14.5 程序引导,直接下一步

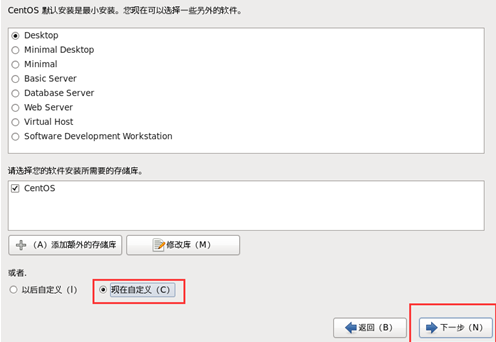
3.15 定制系统软件
3.15.1 Web环境
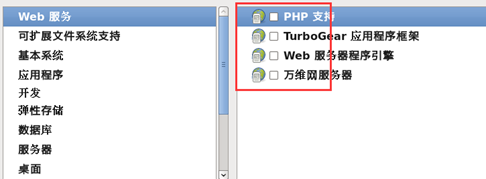
全部不勾选
3.15.2 可扩展文件系统支持
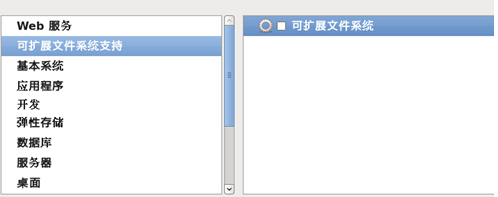
全部不勾选
3.15.3 基本系统
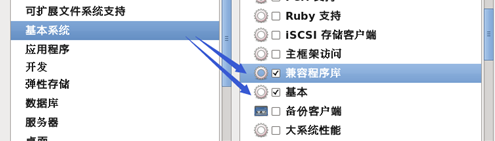
只选图中两个已经勾中的
3.15.4 应用程序

只勾选图中选中
3.15.5 开发、弹性存储、数据库、服务器
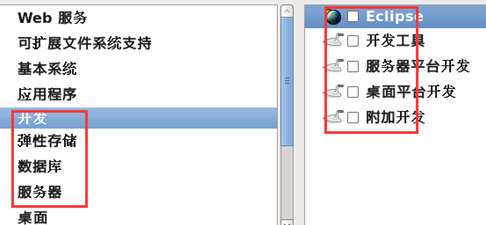
这些东西都不勾,有需要,以后使用中有需要再手动安装
3.15.6 桌面
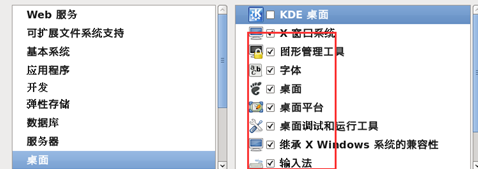
除了KDE,其他都选就可以了。
3.15.7 语言支持
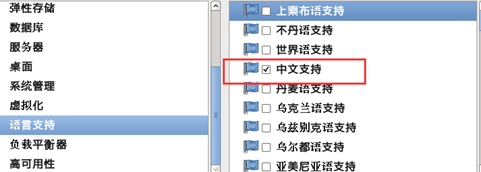
3.15.8 系统管理、虚拟化、负载平衡器、高可用性可以都不选
3.16 完成配置,开始安装CentOS

3.17 等待安装完成,等待等待等待等待……20分钟左右(取决于机器性能)
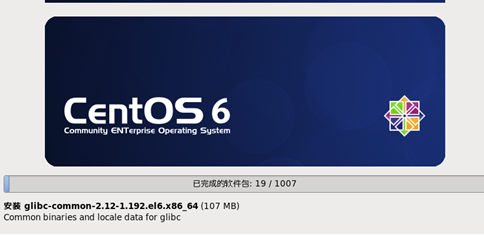
如果上面选择安装包没错的话会和图上的软件包数量一样
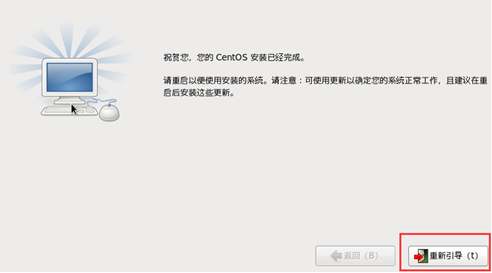
3.18 安装完成,重新引导
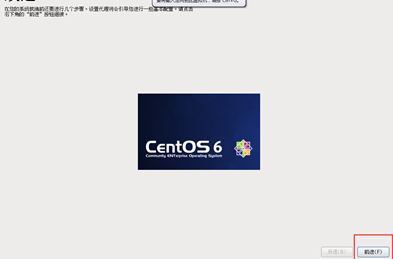
3.19 欢迎引导页面
3.20 许可证

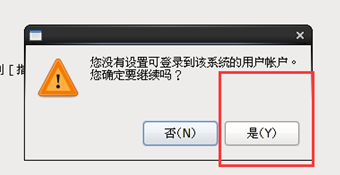
3.21 创建用户,可以先不创建,用root账户登录就行(以后会练习创建用户命令)

3.22 时间和日期
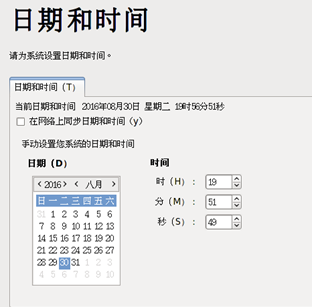
默认就行
3.23 Kdump,去掉

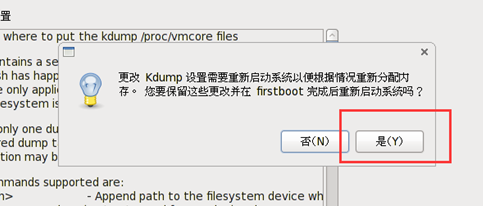
初学者没必要用这个,会占用硬件资源
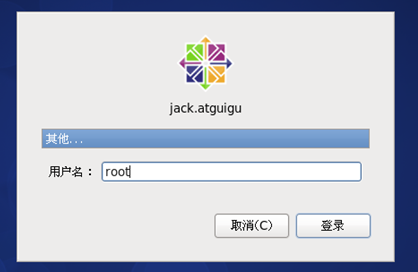
3.24 重启后用root登录
到此,Linux的安装已经全部结束了.其中最关键的就是需要一步一步耐心的操作,这个里面很多操作只要一个不小心就需要重装了,因为部分的设置界面官方并没有提供回到上一步按钮,所以还是需要小心一点比较好.