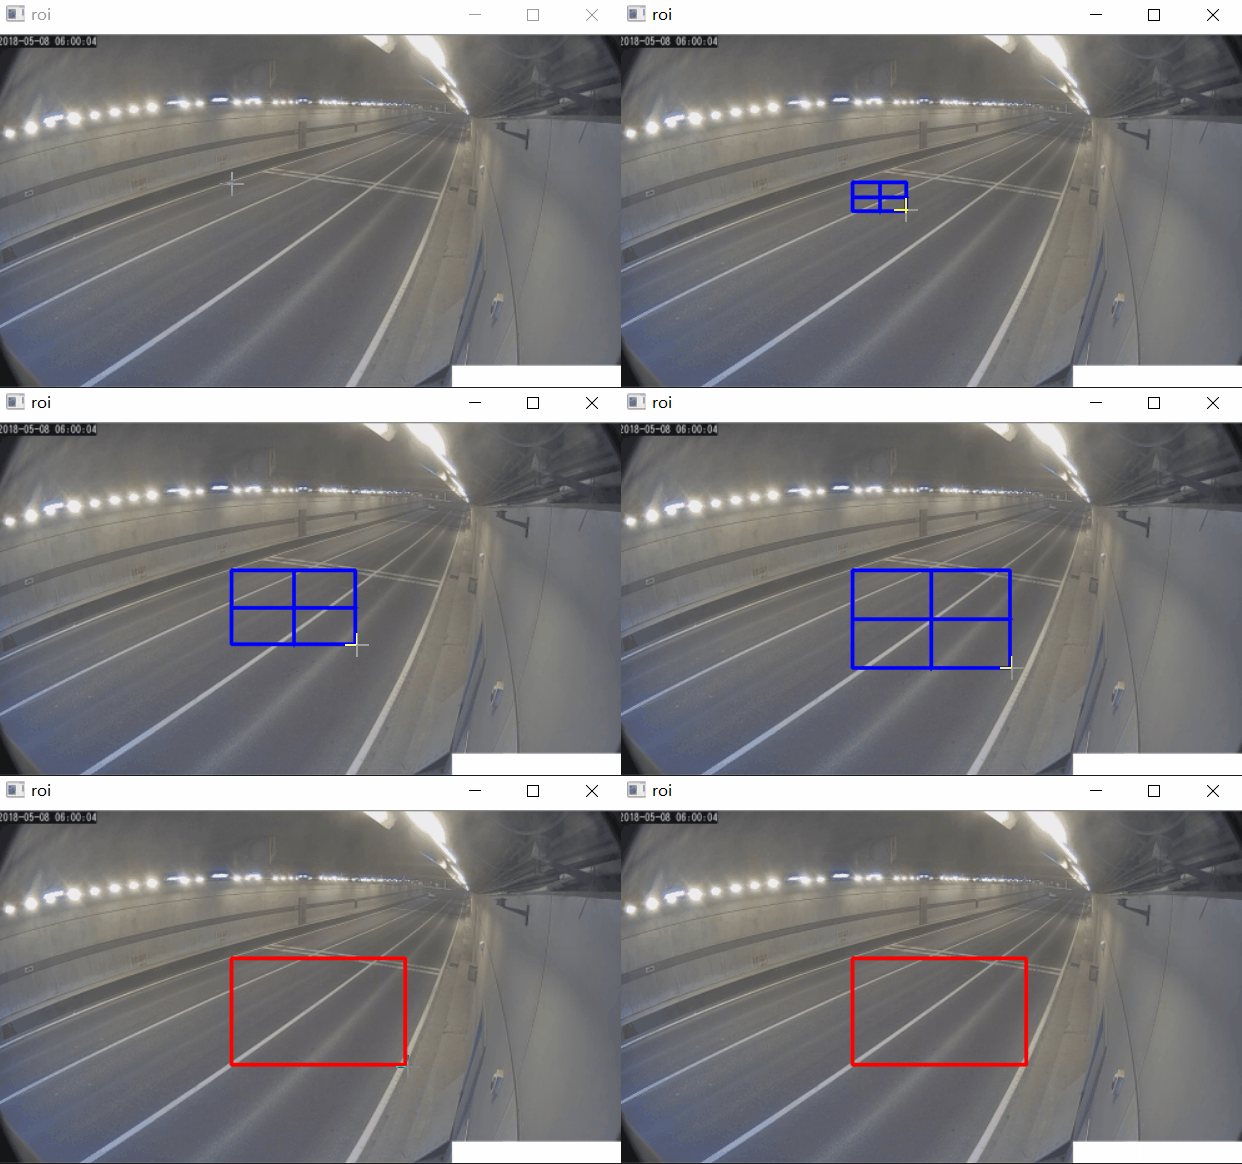
1. rectangular ROI
OpenCV API comes directly select a rectangular region as the ROI, the API is located in the target tracking module, mainly cv2.selectROI () function.
import cv2
import imutils

img = cv2.imread("./test_image.jpg")
img = imutils.resize(img, width=500)

roi = cv2.selectROI(windowName="roi", img=img, showCrosshair=True, fromCenter=False)
x, y, w, h = roi

cv2.rectangle(img=img, pt1=(x, y), pt2=(x + w, y + h), color=(0, 0, 255), thickness=2)
cv2.imshow("roi", img)
cv2.waitKey(0)
cv2.destroyAllWindows()

2. polygon ROI
Polygon ROI, the main draw with a mouse interactions:
1. Click the left button, select the polygon points;
2. Right-click to delete the last point selected;
3. Click the button, the ROI is determined and visualized.
4. Press the "S" key, to save the ROI polygon point to a local "config.pkl" file.

import cv2
import imutils
import numpy as np
import joblib

pts = []  # 用于存放点


# 统一的:mouse callback function
def draw_roi(event, x, y, flags, param):
    img2 = img.copy()

    if event == cv2.EVENT_LBUTTONDOWN:  # 左键点击,选择点
        pts.append((x, y))

    if event == cv2.EVENT_RBUTTONDOWN:  # 右键点击,取消最近一次选择的点
        pts.pop()

    if event == cv2.EVENT_MBUTTONDOWN:  # 中键绘制轮廓
        mask = np.zeros(img.shape, np.uint8)
        points = np.array(pts, np.int32)
        points = points.reshape((-1, 1, 2))
        # 画多边形
        mask = cv2.polylines(mask, [points], True, (255, 255, 255), 2)
        mask2 = cv2.fillPoly(mask.copy(), [points], (255, 255, 255))  # 用于求 ROI
        mask3 = cv2.fillPoly(mask.copy(), [points], (0, 255, 0))  # 用于 显示在桌面的图像

        show_image = cv2.addWeighted(src1=img, alpha=0.8, src2=mask3, beta=0.2, gamma=0)

        cv2.imshow("mask", mask2)
        cv2.imshow("show_img", show_image)

        ROI = cv2.bitwise_and(mask2, img)
        cv2.imshow("ROI", ROI)
        cv2.waitKey(0)

    if len(pts) > 0:
        # 将pts中的最后一点画出来
        cv2.circle(img2, pts[-1], 3, (0, 0, 255), -1)

    if len(pts) > 1:
        # 画线
        for i in range(len(pts) - 1):
            cv2.circle(img2, pts[i], 5, (0, 0, 255), -1)  # x ,y 为鼠标点击地方的坐标
            cv2.line(img=img2, pt1=pts[i], pt2=pts[i + 1], color=(255, 0, 0), thickness=2)

    cv2.imshow('image', img2)


# 创建图像与窗口并将窗口与回调函数绑定
img = cv2.imread("./test_image.jpg")
img = imutils.resize(img, width=500)
cv2.namedWindow('image')
cv2.setMouseCallback('image', draw_roi)
print("[INFO] 单击左键:选择点,单击右键:删除上一次选择的点,单击中键:确定ROI区域")
print("[INFO] 按‘S’确定选择区域并保存")
print("[INFO] 按 ESC 退出")

while True:
    key = cv2.waitKey(1) & 0xFF
    if key == 27:
        break
    if key == ord("s"):
        saved_data = {
            "ROI": pts
        }
        joblib.dump(value=saved_data, filename="config.pkl")
        print("[INFO] ROI坐标已保存到本地.")
        break
cv2.destroyAllWindows()