Table of contents
1. First unzip the compressed package and convert it to a folder
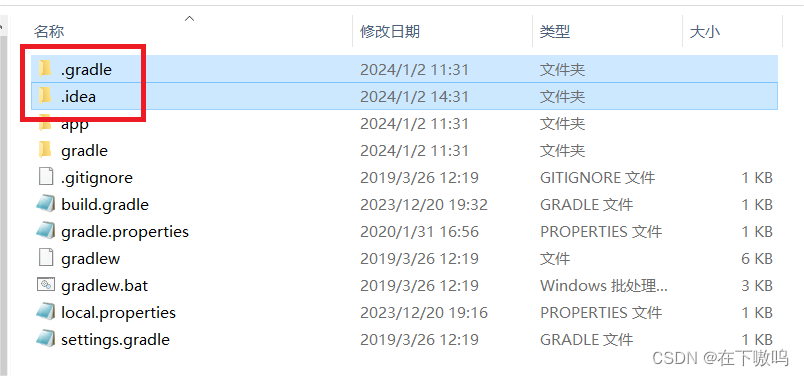
2. Open the decompressed project folder and delete the .gradle and .idea files.
3. Modify the bulid.gradle file and change the gradle version model to your own
5. Open the android stdio software and import the modified project
6. Modify the gradle-wrapper.properties file
7. Cause: connect timed out error report
The files you need to pay attention to when importing projects include build.gradle, gradle-wrapper.properties, .gradle, and .idea.
1. First unzip the compressed package and convert it to a folder
Please note that the project folder path cannot contain Chinese characters . Containing Chinese characters will result in the following error:
(1) org.gradle.api.internal.plugins.PluginApplicationException: Failed to apply plugin 'com.android.internal.application'.
(2) Caused by: org.gradle.api.tasks.StopExecutionException: Your project path contains non-ASCII characters. This will most likely cause the build to fail on Windows. Please move your project to a different directory. See http://b.android.com/95744 for details. This warning can be disabled by adding the line 'android.overridePathCheck=true' to gradle.properties file in the project directory.
After decompression, the contents of the folder should look like the picture below:

2. Open the decompressed project folder and delete the .gradle and .idea files.
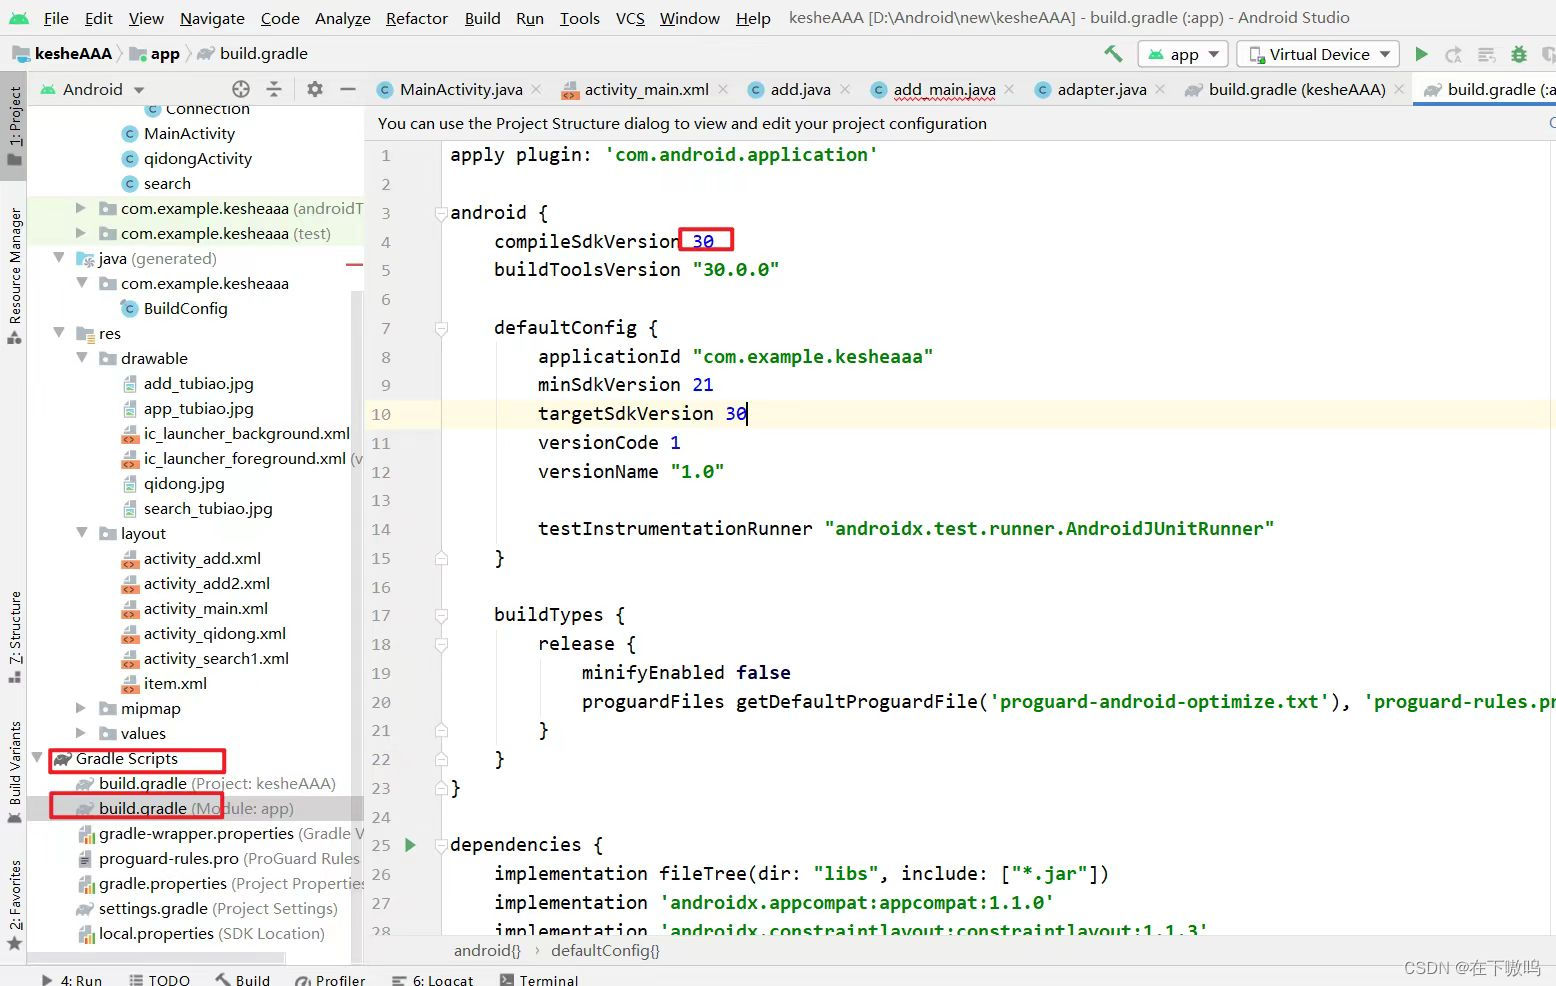
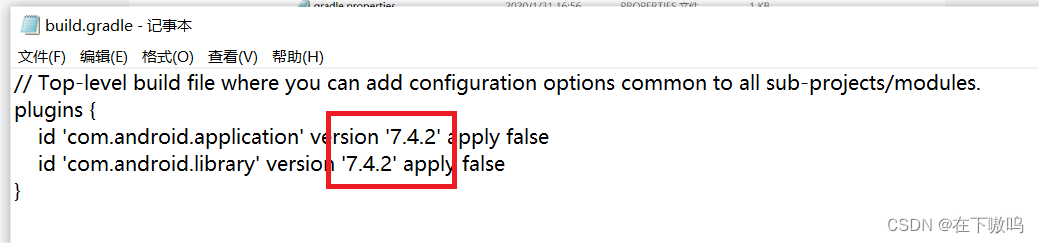
3. Modify the bulid.gradle file and change the gradle version model to your own
The bulid.gradle files of the same type of Android project can be described in multiple ways, with the same effect but different contents.
If you don't know your gradle version, you can create a new project and check its bulid.gradle file.
To modify the bulid.gradle file, you can use Notepad to open the file and edit it.
(1) Traditional structure

(2) Simple structure
4. Modify Sdk path
Modify the sdk.dir property of the local.properties file to the current device sdk path. If you don't know the sdk path, you can create a project and view the file.

5. Open the android stdio software and import the modified project

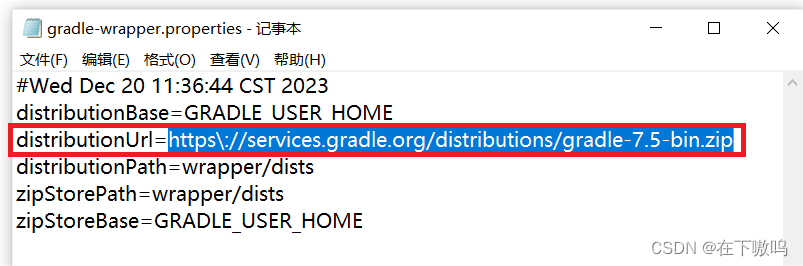
6. Modify the gradle-wrapper.properties file
Path: root directory/gradle/wrapper/ gradle-wrapper.properties
When the following error occurs, it means that the gradle version used by the project is inconsistent with the gradle version used by Android Studio, and the gradle-wrapper.properties file needs to be modified.
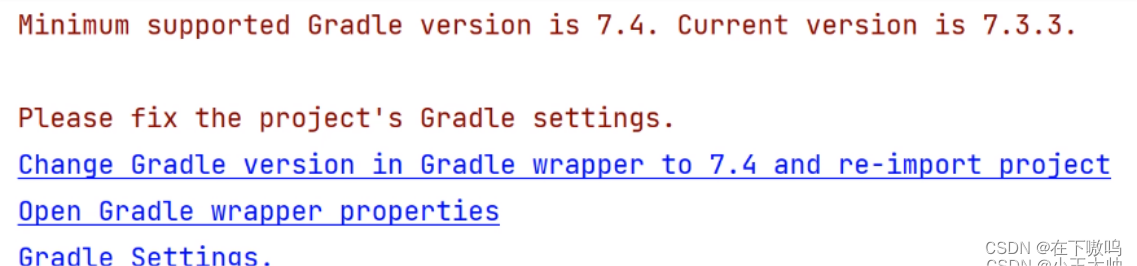
The meanings of these error messages are:
Minimum supported Gradle version is 7.4. Current version is 7.3.3. (The minimum supported Gradle version is 7.4. The current version is 7.3.3.)
PLease fix the project's GradLe settings.
Change GradLe version in GradLe wrapper to 7.4 and re-import project (Change the Gradle version in GradLe wrapper to 7.4 and re-import the project)
Open GradLe wrapper properties (Open Gradle wrapper properties)
Gradle Settings .
(1) Modification method 1
Click on the first blue text, " Change GradLe version in GradLe wrapper to 7.4 and re-import project ", and it will be modified automatically.
(2) Modification method 2
Open the root directory/gradle/wrapper/ gradle-wrapper.properties file, and modify the value of the distributionUrl attribute to the Gradle version number of the current AndroidStudio. If you don’t know the current Gradle version number of Android Studio, you can create a new project and check it.
7. Cause: connect timed out error report
The Cause: connect timed out error occurs, which is most likely caused by the inconsistency between the Gradle version used by the project and AndroidStudio.
Please check whether the package name/gradle/wrapper/gradle-wrapper.properties file and the distributionUrl item in the file are consistent with the Gradle version currently used by AndroidStudio.
Please see item 5 of this article for modifications.
8. Installed Build Tools revision 34.0.0 is corrupted. Remove and install again using the SDK Manager.报错
This error means that your Android Studio has discovered that the installed Build Tools version 34.0.0 may be corrupted. To resolve this issue, you can try the following steps:
-
Open Android Studio.
-
Go to the "Tools" menu and select "SDK Manager".
-
In the "SDK Platforms" tab, find and deselect the checkbox for Android 12 (or other relevant version). This will uninstall the corresponding version of Build Tools.
-
Switch to the "SDK Tools" tab.
-
In the "SDK Tools" tab, find the "Android SDK Build-Tools" project.
-
Right-click on the "Android SDK Build-Tools" project and select "Show Package Details".
-
In the pop-up dialog box, deselect the checkbox for version 34.0.0 and select another lower version.
-
Click "Apply" or "OK" to apply the changes and Android Studio will uninstall the broken Build Tools and install the lower version of your choice.
-
Once you're done, you can try rebuilding your project to make sure everything is working properly.
If the above steps still don't resolve the issue, you may want to consider completely uninstalling Android Studio, deleting related files and folders, and then reinstalling Android Studio. Make sure to back up your projects and settings before reinstalling.
Notice! ! ! If you know that the current version is not 34.0.0 and you are sure you already have the appropriate version, pleasein the bulid.gradle file to the version you have .