1HttpClientIntroduction
The java.net package in the JDK provides basic functions for user HTTP access, but it lacks flexibility or functions required by many applications.
HttpClient was originally a sub-project of Apache Jakarta Common. It is used to provide an efficient, up-to-date, feature-rich client programming toolkit that supports the HTTP protocol, and it supports the latest version of the HTTP protocol. Became a top project in 2007.
Popular explanation: HttpClient can use Java code to complete standard HTTP requests and responses.
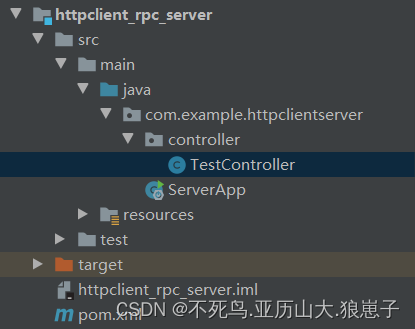
2 Create a new server project
Create a new project httpclient_rpc_server
2.1 Modify maven configuration file
    <dependencyManagement>
        <dependencies>
            <dependency>
                <groupId>org.springframework.boot</groupId>
                <artifactId>spring-boot-dependencies</artifactId>
                <version>2.3.2.RELEASE</version>
                <scope>import</scope>
                <type>pom</type>
            </dependency>
        </dependencies>
    </dependencyManagement>
    <dependencies>
        <dependency>
            <groupId>org.springframework.boot</groupId>
            <artifactId>spring-boot-starter-web</artifactId>
        </dependency>
    </dependencies>
2.2 Create a new controller
package com.example.httpclientserver.controller;
import org.springframework.stereotype.Controller;
import org.springframework.web.bind.annotation.RequestMapping;
import org.springframework.web.bind.annotation.ResponseBody;
@Controller
public class TestController {
/*
* 带参数的get请求
*/
@RequestMapping(value="/params", produces = {"application/json;charset=UTF-8"})
@ResponseBody
public String params(String name, String password){
System.out.println("name - " + name + " ; password - " + password);
return "{\"msg\":\"登录成功\", \"user\":{\"name\":\""+name+"\",\"password\":\""+password+"\"}}";
}
/*
* 不带参数的get请求
*/
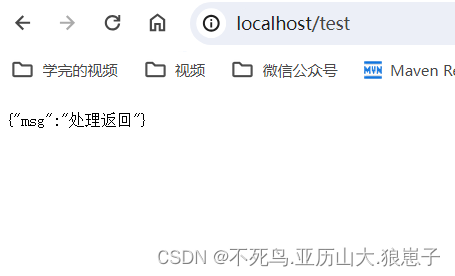
@RequestMapping(value="/test",produces = {"application/json;charset=UTF-8"})
@ResponseBody
public String test(){
return "{\"msg\":\"处理返回\"}";
}
}
2.3 Create a new launcher
package com.example.httpclientserver;

import org.springframework.boot.SpringApplication;
import org.springframework.boot.autoconfigure.SpringBootApplication;

@SpringBootApplication
public class ServerApp {
    public static void main(String[] args) {
        SpringApplication.run(ServerApp.class, args);
    }
}
2.4 Modify the port in application.yml (optional operation)
server:
  port: 80
2.5 Testing

3 Create a new client project
Create a new client project httpclient_rpc_client

3.1 Add maven dependencies
    <dependencies>
        <dependency>
            <groupId>org.apache.httpcomponents</groupId>
            <artifactId>httpclient</artifactId>
            <version>4.5.12</version>
        </dependency>
    </dependencies>
3.2 Create a new main class for httpclient access
package com.example.httpclient;

import org.apache.http.HttpEntity;
import org.apache.http.HttpResponse;
import org.apache.http.NameValuePair;
import org.apache.http.client.HttpClient;
import org.apache.http.client.methods.HttpGet;
import org.apache.http.client.utils.URIBuilder;
import org.apache.http.impl.client.HttpClients;
import org.apache.http.message.BasicNameValuePair;
import org.apache.http.util.EntityUtils;

import java.io.IOException;
import java.net.URI;
import java.net.URISyntaxException;
import java.util.ArrayList;
import java.util.List;

public class TestHttpClient {
    public static void main(String[] args) throws Exception {
        //访问无参数GET请求
        testGetNoParams();
        //访问有参数GET请求
        testGetNoParams();
    }

    /**
     * 有参数GET请求
     * @throws IOException
     */
    public static void testGetParams() throws IOException, URISyntaxException {
        HttpClient client = HttpClients.createDefault();
        // 基于Builder构建请求地址
        URIBuilder builder = new URIBuilder("http://localhost:80/params");
        // 基于单参数传递,构建请求地址
//        builder.addParameter("name", "bjsxt");
//        builder.addParameter("password", "admin123");
//        URI uri = builder.build();

        // 基于多参数传递,构建请求地址
        List<NameValuePair> nvps = new ArrayList<NameValuePair>();
        nvps.add(new BasicNameValuePair("name","bjsxt"));
        nvps.add(new BasicNameValuePair("password", "admin123"));
        builder.addParameters(nvps);
        URI uri = builder.build();
        System.out.println(uri.toASCIIString());

        String result = EntityUtils.toString(client.execute(new HttpGet(uri)).getEntity());
        System.out.println(result);
    }

    /**
     * 无参数GET请求
     * 使用浏览器,访问网站的过程是:
     *  1、 打开浏览器
     *  2、 输入地址
     *  3、 访问
     *  4、 看结果
     * 使用HttpClient,访问WEB服务的过程:
     *  1、 创建客户端,相当于打开浏览器
     *  2、 创建请求地址, 相当于输入地址
     *  3、 发起请求, 相当于访问网站(回车键)
     *  4、 处理响应结果, 相当于浏览器显示结果
     */
    public static void testGetNoParams() throws IOException {
        // 创建客户端对象
        HttpClient client = HttpClients.createDefault();
        // 创建请求地址
        HttpGet get = new HttpGet("http://localhost:80/test");
        // 发起请求,接收响应对象
        HttpResponse response = client.execute(get);
        // 获取响应体。 响应数据是一个基于HTTP协议标准字符串封装的对象。
        // 所以,响应体和响应头,都是封装的HTTP协议数据。直接使用可能有乱码或解析错误
        HttpEntity entity = response.getEntity();

        // 通过HTTP实体工具类,转换响应体数据。 使用的字符集是UTF-8
        String responseString = EntityUtils.toString(entity, "UTF-8");

        System.out.println("服务器响应数据是 - [ " + responseString + " ]");

        // 回收资源
        client = null;

    }
}
There are two parameter-based request methods. One is based on single parameter transfer and constructs the request address, as follows:
        // 基于单参数传递,构建请求地址
        builder.addParameter("name", "bjsxt");
        builder.addParameter("password", "admin123");
        URI uri = builder.build();
One is to build the request address based on multi-parameter passing, as follows:
        // 基于多参数传递,构建请求地址
        List<NameValuePair> nvps = new ArrayList<NameValuePair>();
        nvps.add(new BasicNameValuePair("name","bjsxt"));
        nvps.add(new BasicNameValuePair("password", "admin123"));
        builder.addParameters(nvps);
        URI uri = builder.build();
4 tests
Start httpclient_rpc_server and httpclient_rpc_client. The httpclient_rpc_client console output is as follows:

GET request successful.