1 Introduction
What datahub does is not described here. If you want to know more, please read the DataHub official website documentation . Here we mainly teach you how to install it step by step and then deploy it 100%. In general, the documentation of open source products is the most criticized by everyone. The deployment steps are very simple, and important and key configurations are sometimes not mentioned. Many people want to get started, but installation and deployment will turn away most people. Outside the door, many impatient students give up immediately once they fall into a pit and cannot climb out. The main purpose of this article is to help everyone take this step. If the article is helpful to you, please like and follow. No Please don’t squirt~
2.Software version requirements
- CentOS == 7.6.18-x86-64
- datahub == 0.12.0
- python == 3.8.18
- docker == 24.0.7
- docker-compose == 2.20.3
3. Detailed explanation of the installation process
3.1 Docker installation
Please refer to my previous article for installation. Click here on the portal to introduce and demonstrate the three commonly used installation and deployment methods of docker.
Considering the problem of offline installation of docker, I will write an article about offline deployment of docker for everyone.
3.2 docker-compose installation
Download and install. If the download fails, you can download it locally and then upload it to the server.
curl -SL https://github.com/docker/compose/releases/download/v2.20.3/docker-compose-linux-x86_64 -o /usr/local/bin/docker-compose
Modify script operation permissions
chmod 755 /usr/local/bin/docker-compose
Check whether docker-compose is installed successfully

3.3 python3 installation
Because the installation of datahub0.12.0 depends on python3, but the default python version of CentOS is python2.7.5, python3 needs to be installed here. The python version I installed here is 3.8.18. The following demonstrates the entire process of compilation and installation:
1) Install system dependencies
yum install -y zlib-devel bzip2-devel openssl-devel ncurses-devel epel-release gcc gcc-c++ xz-devel readline-devel gdbm-devel sqlite-devel tk-devel db4-devel libpcap-devel libffi-devel
2) First create the installation directory of python3:
mkdir -p /usr/local/python3
3) Download the installation package of Python3.8.18
mkdir -p /opt/packages

cd /opt/packages

wget https://registry.npmmirror.com/-/binary/python/3.8.18/Python-3.8.18.tgz
4) Unzip the installation package
tar -zxf /opt/packages/Python-3.8.18.tgz
5) Compile and install
cd /opt/packages/Python-3.8.18

./configure --prefix=/usr/local/python3

make && make install
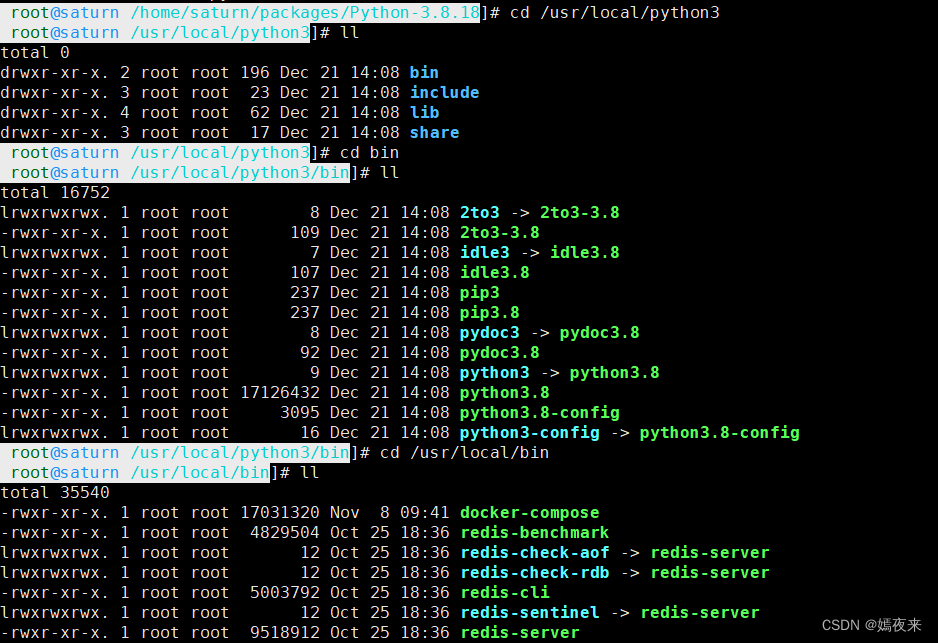
After execution, /usr/local/python3the directory will be as shown below:

6) Configure system environment variables
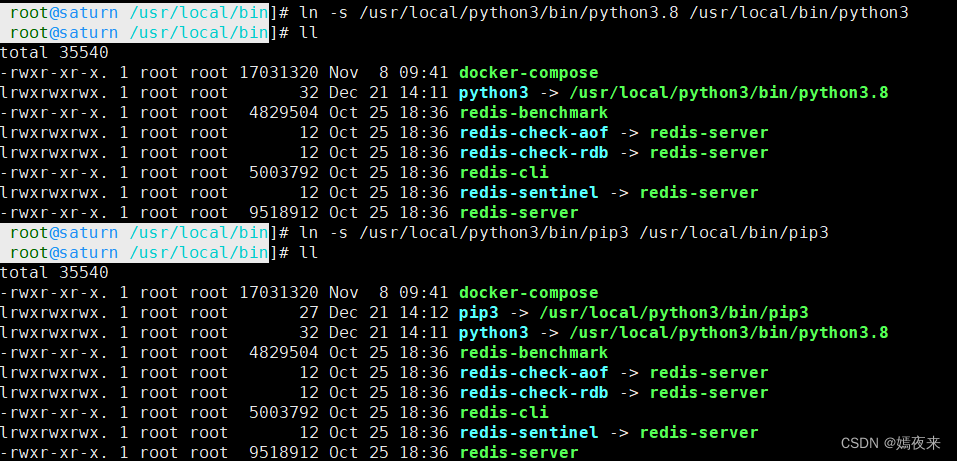
ln -s /usr/local/python3/bin/python3.8 /usr/local/bin/python3

ln -s /usr/local/python3/bin/pip3 /usr/local/bin/pip3
As shown below:
Check whether the system environment variables are valid, as shown in the figure below, it is successful.
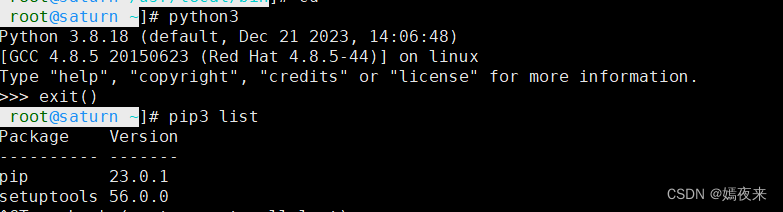
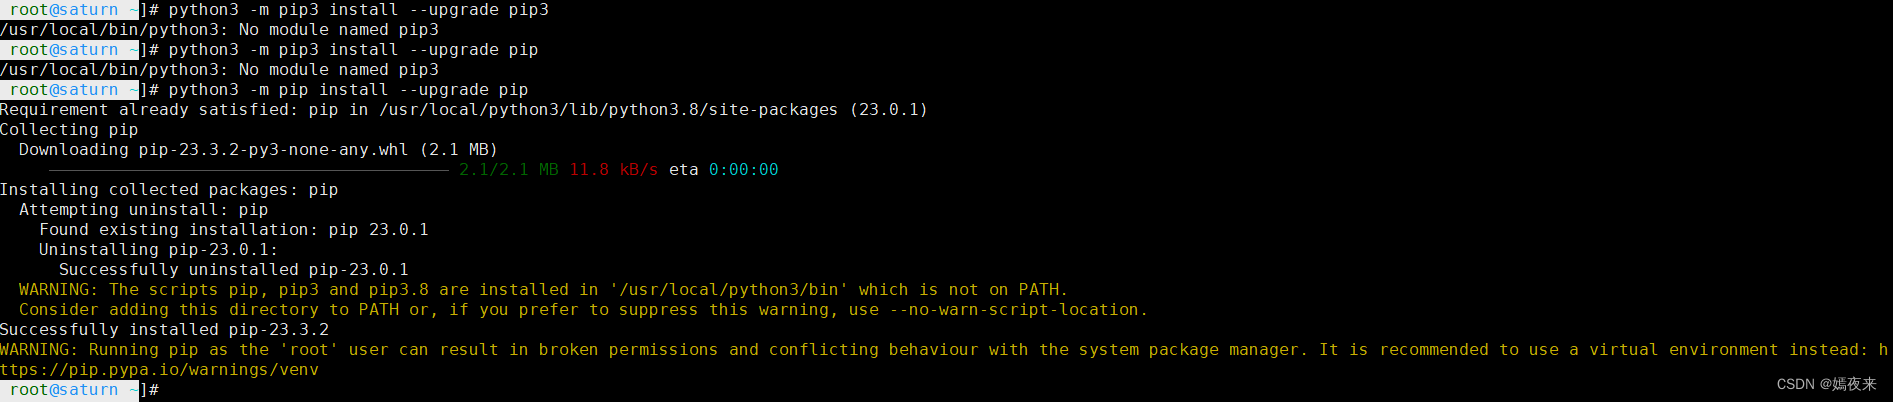
python3 -m pip install --upgrade pip
3.4 datahub installation
Execute the installation command as follows
python3 -m pip install acryl-datahub==0.12.0 -i https://pypi.tuna.tsinghua.edu.cn/simple
Check if datahub is installed successfully
python3 -m pip datahub version
The following error occurs:
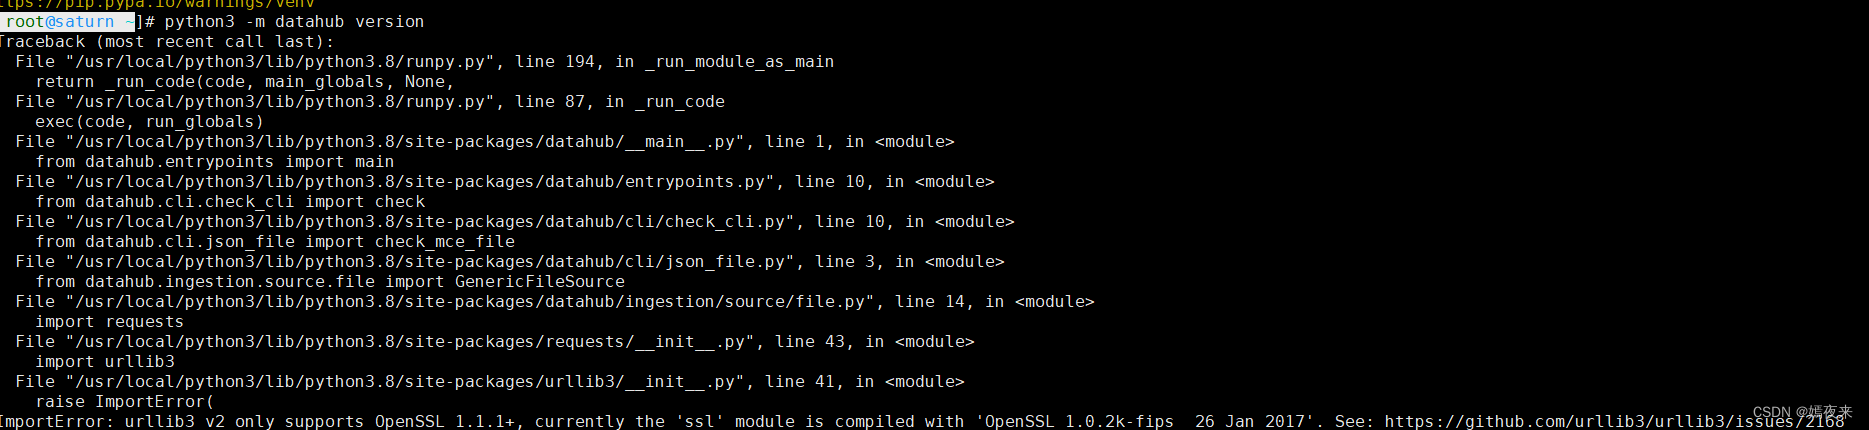
Solution: The urllib3 library version is too high. Downgrade the version and reinstall version 1.25.11 of urllib3.
python3 -m pip install urllib3==1.25.11 -i https://pypi.tuna.tsinghua.edu.cn/simple

Check again whether datahub is installed successfully.
python3 -m pip datahub version
As shown below, the installation is successful.

3.4 Datahub image download and installation
First, we download the DataHubv0.12.0 version source code from the datahub warehouse of github , unzip it and find the docker-compose orchestration script file.
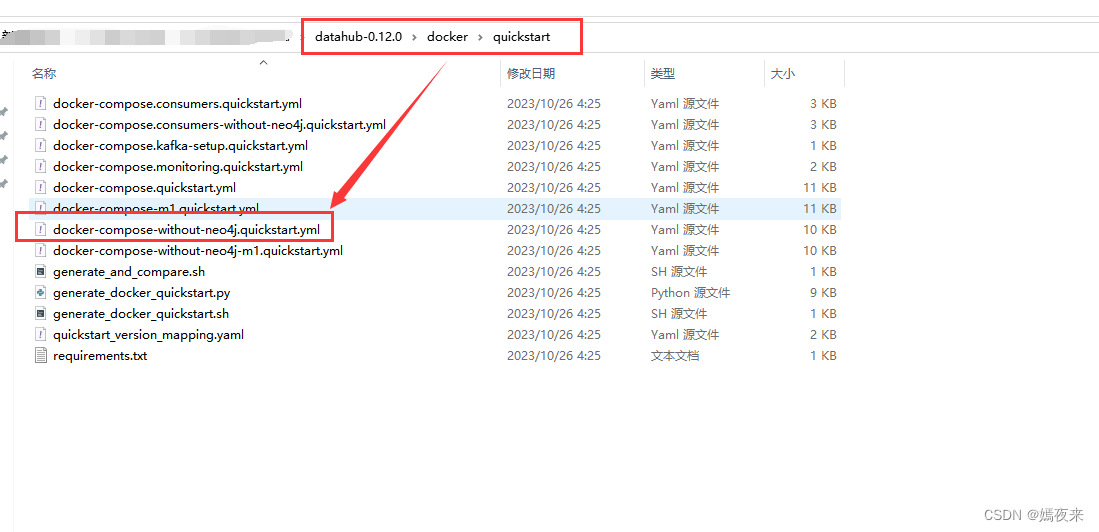
Upload docker-compose-without-neo4j.quickstart.ymlthe script to the server /usr/local/python3/datahub-docker-scriptsdirectory. If there is no such path, please create it yourself. Create the commandmkdir -p /usr/local/python3/datahub-docker-scripts
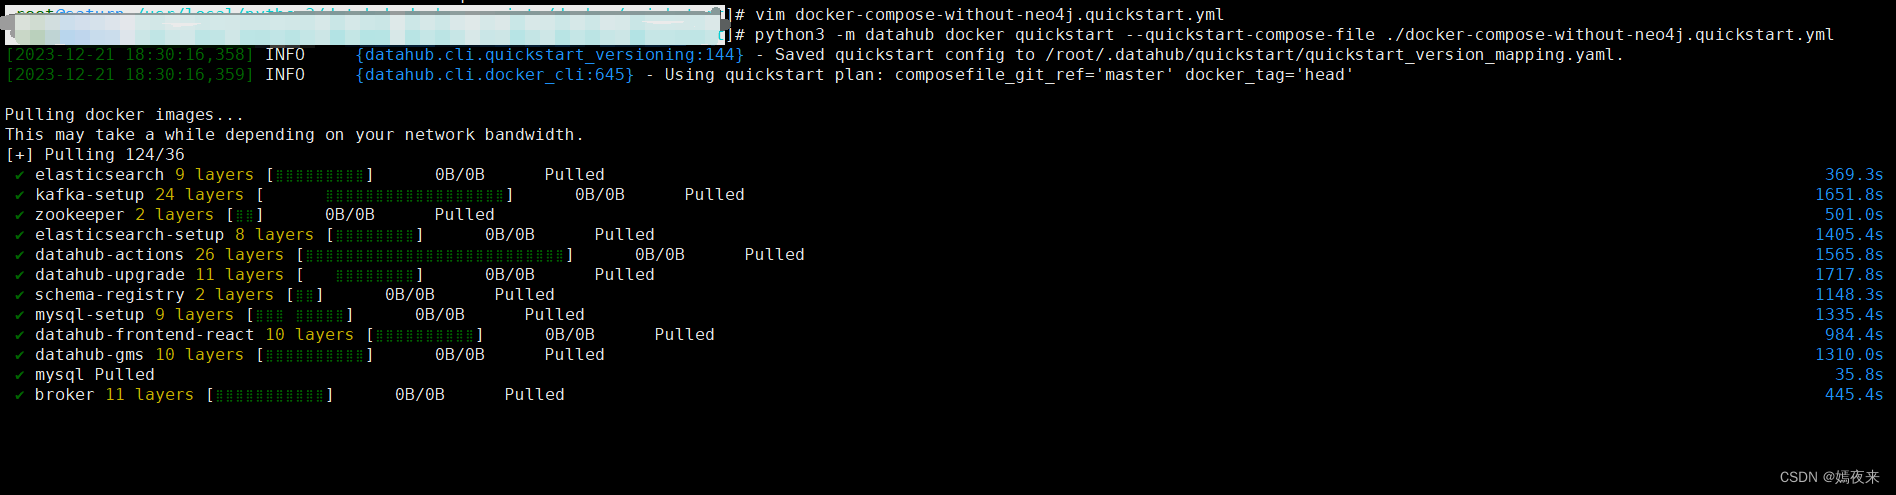
Enter /usr/local/python3/datahub-docker-scriptsthe directory and execute the following command:
python3 -m datahub docker quickstart --quickstart-compose-file ./docker-compose-without-neo4j.quickstart.yml
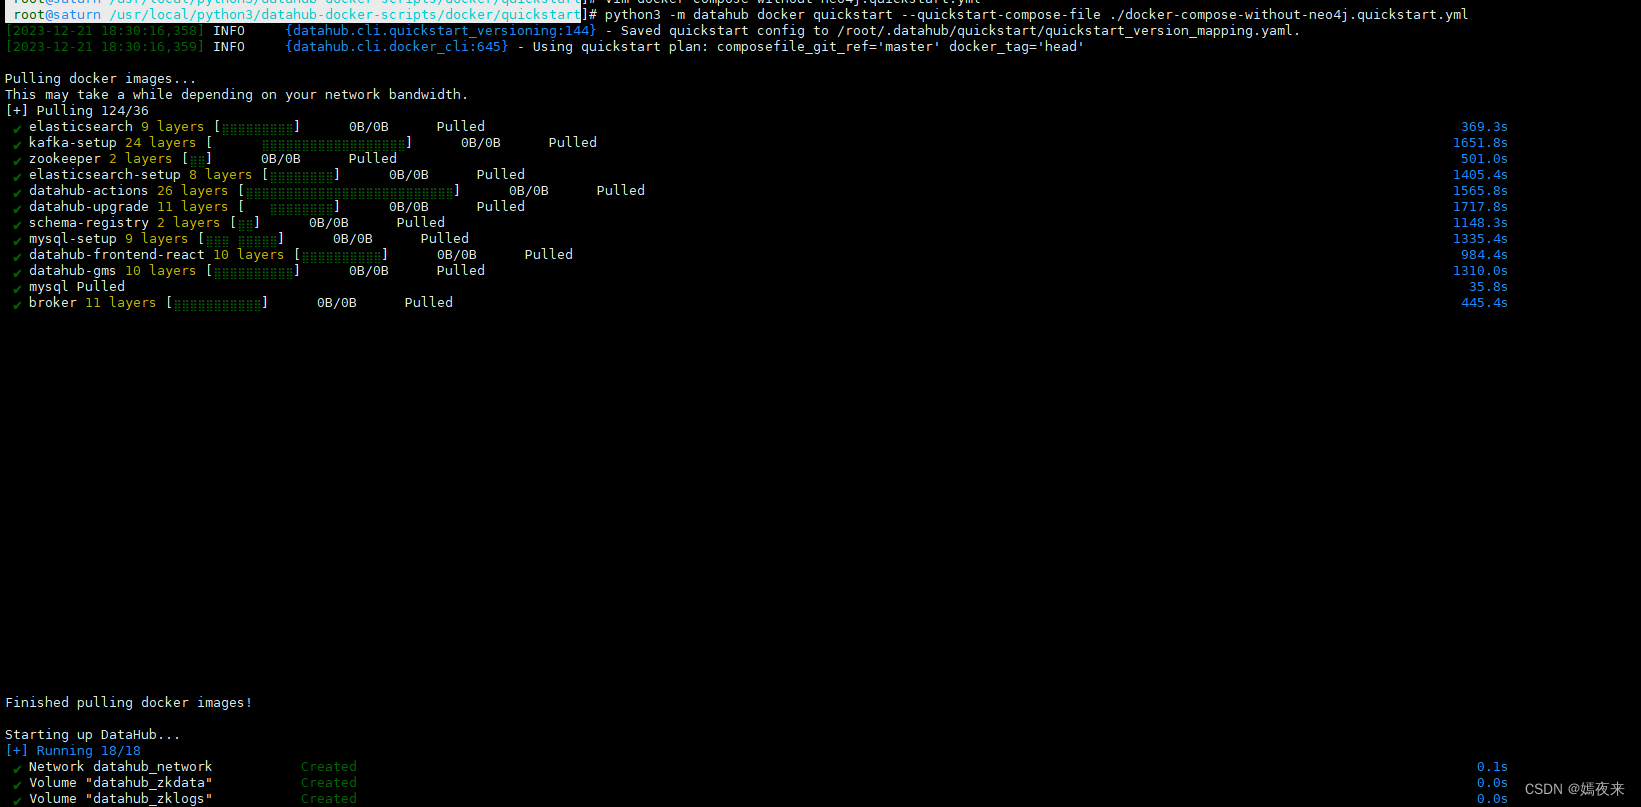
After a long process of downloading and pulling the image, and after the container runs successfully, the entire installation process is completed as shown below:

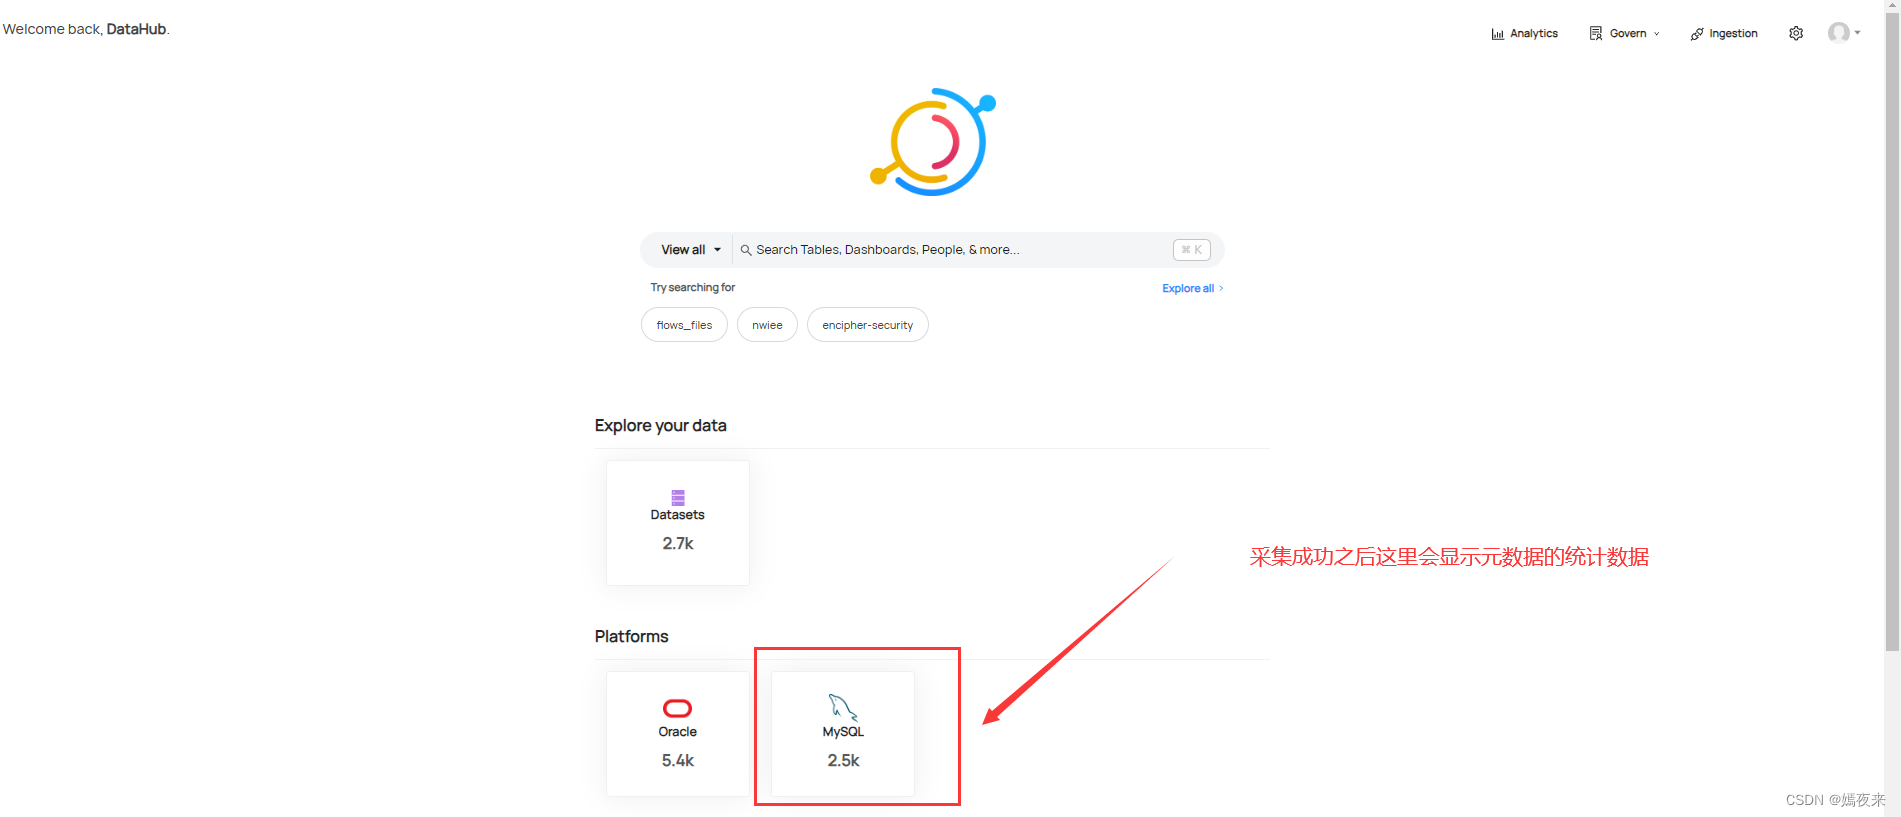
After accessing http://10.10.3.14:9002, the following page appears, indicating that DataHub is installed successfully. The default account and password are as follows:
用户名:datahub

密码:  datahub

4. Common instructions for service management and use
1) Start Datahub with one click
docker-compose -p datahub -f ./docker-compose.consumers-without-neo4j.quickstart.yml up -
2) Stop Datahub with one click
docker-compose -p datahub -f ./docker-compose.consumers-without-neo4j.quickstart.yml stop
3) View the Datahub plug-in list
python3 -m datahub check plugins --verbose
4) Install the Datahub plug-in
pip3 install 'acryl-datahub[数据源]'
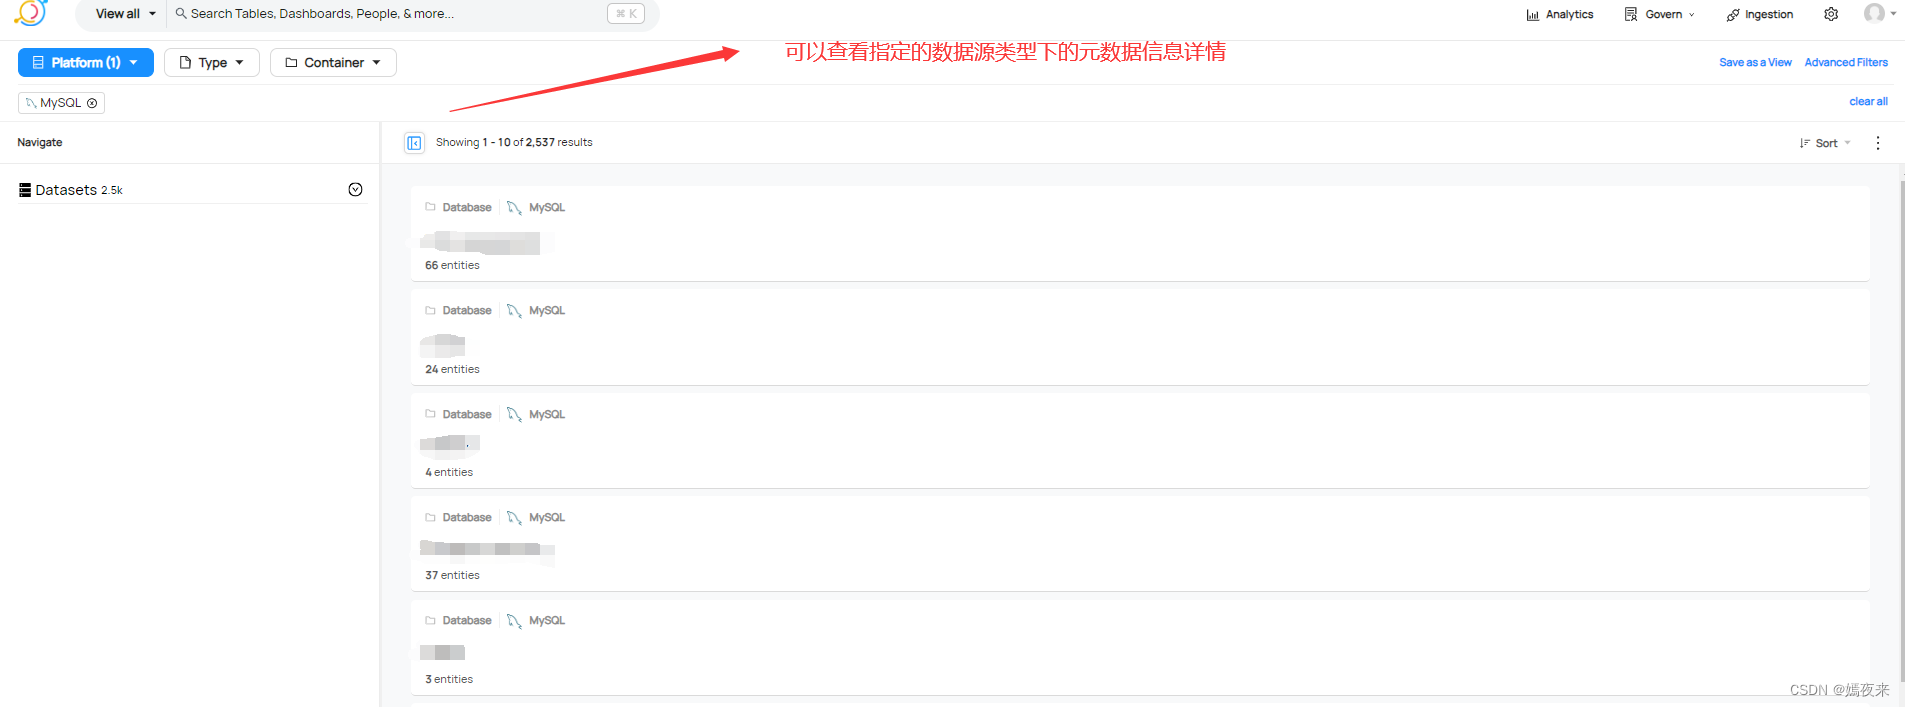
For example, if you now need to manage the metadata of the MySQL data source, you need to integrate the mysql data source plug-in first.
pip3 install acryl-datahub[mysql]
5. Use the demo
Configure metadata source integration.
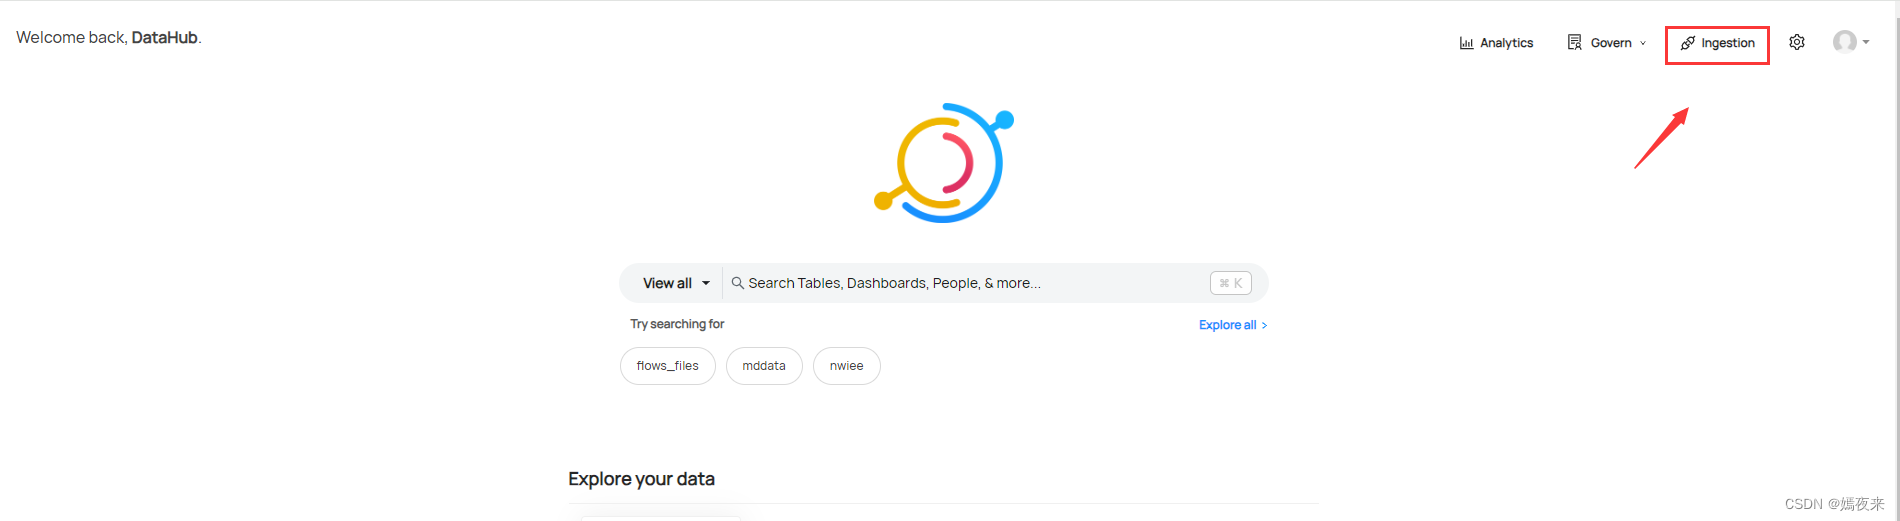
Create a new metadata source
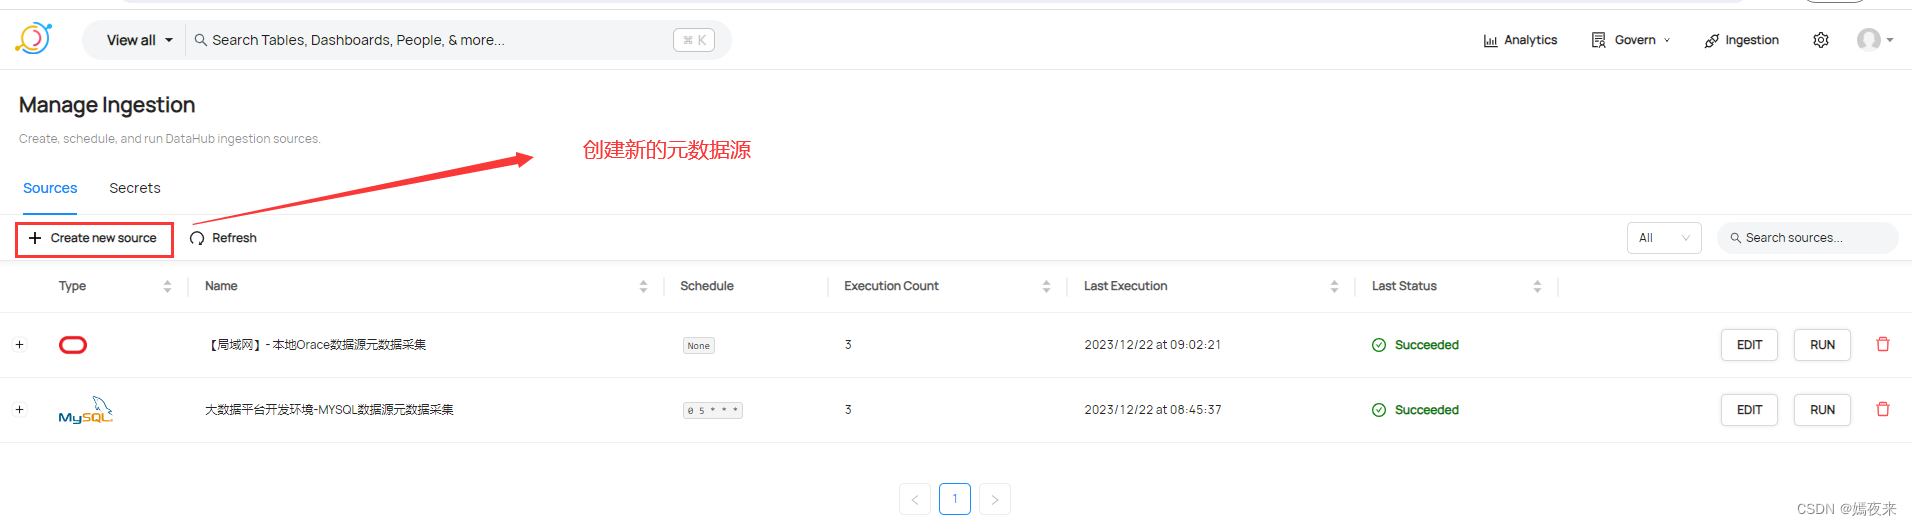
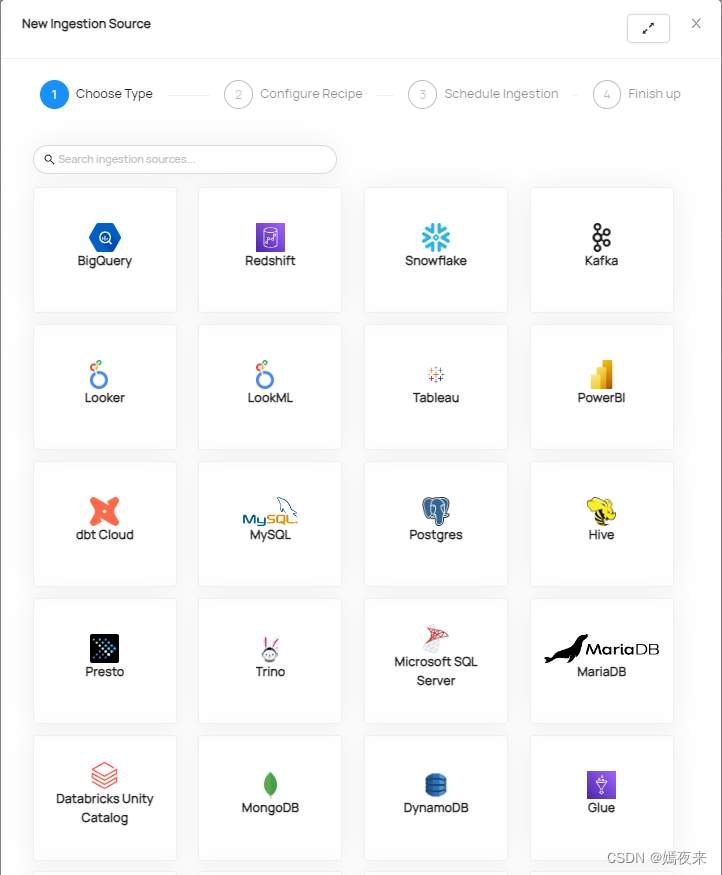
. Select the data source type, configure the data source connection parameters, set the collection task schedule, and then save.
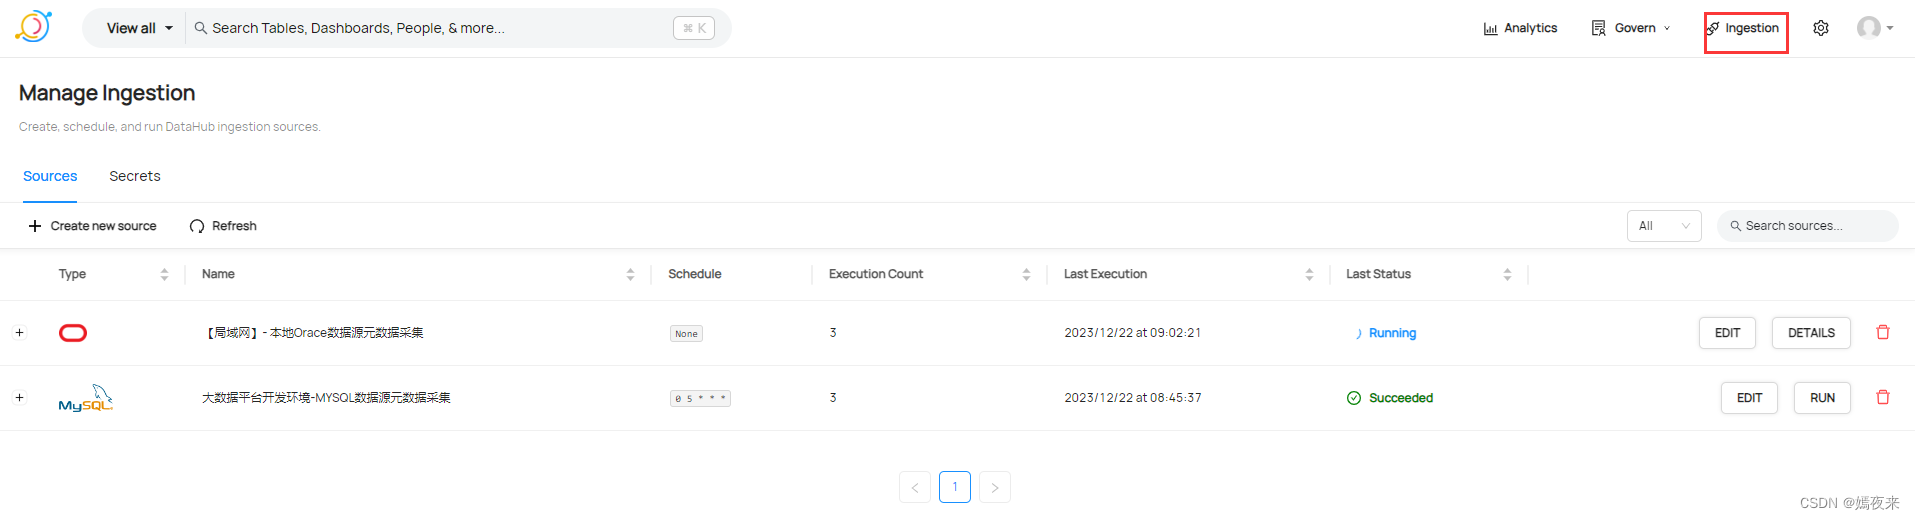
Click "RUN" to run the collection task
. Okay, this article ends here. If you encounter problems during the installation process, please leave a message for discussion. Finally, like and follow, I will give you a little red flower, thank you~~~.