Native machine: windows1
Virtual machine: centos7 x86_64
Network connection method: NAT mode
Step 1: First turn off the firewall. Here I am using the public network.

Part 2: Obtain network sharing permissions for the local computer network
The specific steps are: right-click the network icon in the lower right corner to enter settings, select Advanced Network Settings at the bottom, and enter the "More Network Adapters" option

Step 3: Check the local IP address. There are many methods. Here are two:
(1) Win+r opens the cmd command line, enter ifconfig and press Enter. Remember the ip address and subnet mask of VMnet8.
(2) Double-click VMnet8 to view detailed information and remember the IP address. The dns here I configured is 8.8.8.8, which is a free dns server provided by Google.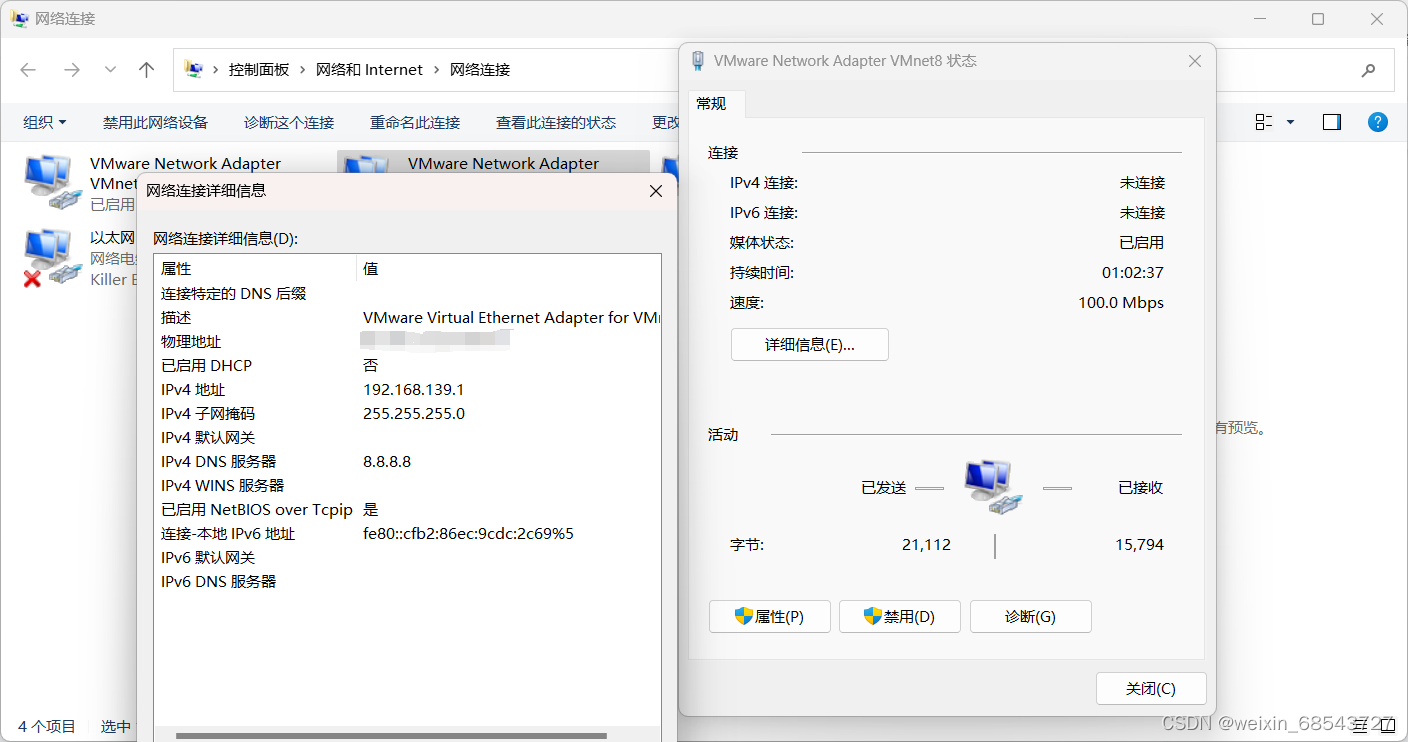
Step 4: After the preparations are completed, we open the virtual machine, enter the virtual machine settings and select NAT mode.

Step 5: Open the virtual network editor in the upper left corner of the editor, Look at the picture and check the box
For the bottom subnet, fill in the IP address you just remembered. The last digit can be filled with a different value, such as 0. Just make sure it is in the same group as the host.
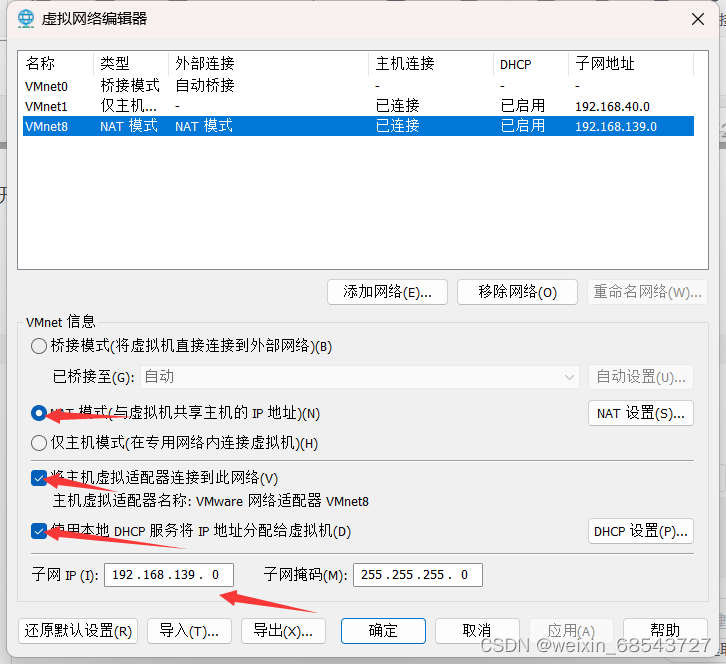

 When you open it here, the starting and ending IP addresses have been automatically filled in for us. Remember to save it after finishing it.
Step 6: Open the virtual machine terminal (right-click on the desktop and select Enter),First enter su and press Enter, then enter the root password to enter root mode (the default root password is 123456, enter Input items are not displayed during the process, but this does not affect)![]()
After entering root mode, we can see that there is an additional root identifier in front of it.
![]()
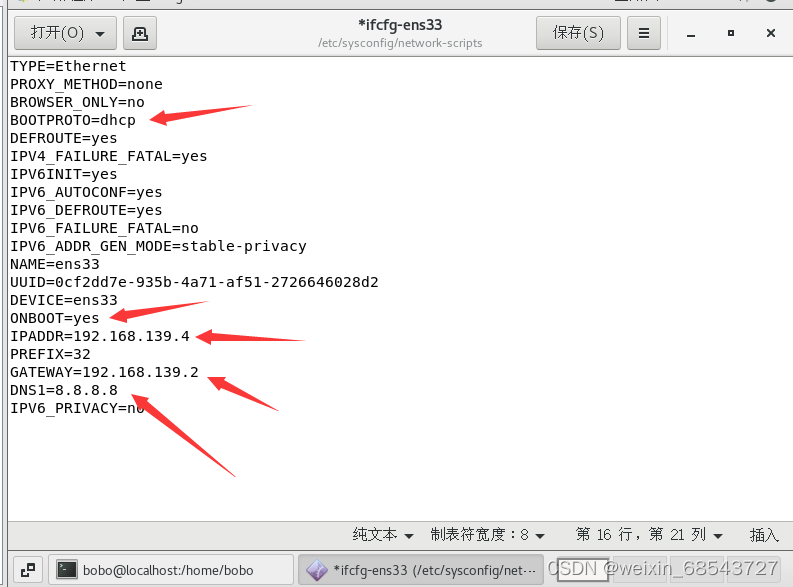
Then enter the command to configure the network configuration file in centos
gedit /etc/sysconfig/network-scripts/ifcfg-ens33
(1) Change BOOTPROTO=static to =dhcp
(2) Change ONBOOT=no to yes
(3) Modify the IP address behind IPADDR to ensure that the network number is consistent with the network number of the previous IP address. The host number behind is optional. I filled in 4 here.
(4) Change the GETWAY back to the gateway IP address in the previous NAT settings.
(5)DNS1=8.8.8.8

Step 7: Restart the network service, it failed here
Reason: On the CentOS system, there are currently two network management tools, NetworkManager and network. If both are configured, conflicts will occur.
Here we can choose to turn off the NetworkManager service
systemctl stop NetworkManager
systemctl disable NetworkManager
Restart the network service
systemctl restart network
systemctl status network
It's probably a success here.
Step 8: Test whether the Internet connection is successful
enter
ping www.baidu.comDisplaying the results indicates success.