1. Environment configuration
Environment: centos7+git(gitee)
Briefly describe the implementation steps: install jenkins on docker, configure jenkins basic information, and use Dockerfile and shell scripts to automatically pull, package and run the project.
2. Install docker
Docker installs community version CE
Make sure the yum package is updated to the latest.
yum update
Uninstall the old version of docker (if an old version is installed)
yum remove docker docker-common docker-selinux docker-engine
Install required packages
yum install -y yum-utils device-mapper-persistent-data lvm2
Set up yum source
yum-config-manager --add-repo https://download.docker.com/linux/centos/docker-ce.repo
Install docker
yum install docker-ce  #由于repo中默认只开启stable仓库,故这里安装的是最新稳定版17.12.0
yum install <自己的版本>  # 例如:sudo yum install docker-ce-17.12.0.ce
Starting and booting
systemctl start docker
systemctl enable docker
Verify installation was successful
docker version
3. Install Jenkins
Docker installation is so simple,Please check whether 8080 is already occupied! If it occupies the modified port
docker run --name jenkins -u root --rm -d -p 8080:8080 -p 50000:50000 -v /var/jenkins_home:/var/jenkins_home -v /var/run/docker.sock:/var/run/docker.sock jenkinsci/blueocean
If the port number is not changed
After the installation is complete, visit the address -> http://{Service IP where Jenkins is deployed}:8080
3.1. Initialize Jenkins
For details, see the official website tutorial -> https://www.jenkins.io
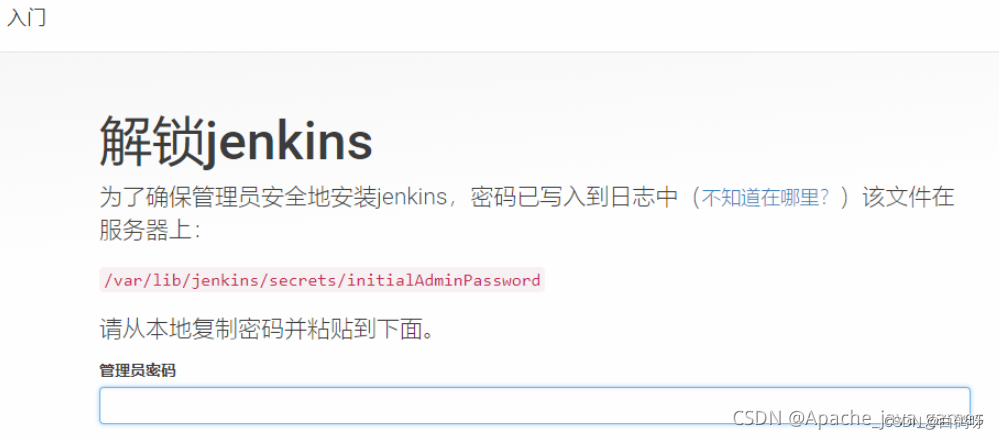
3.2. Unlock Jenkins
Enter the Jenkins container: docker exec -it {Jenkins container name} bash
For example docker exec -it jenkins bash
View password: cat /var/lib/jenkins/secrets/initialAdminPassword
Enter the password
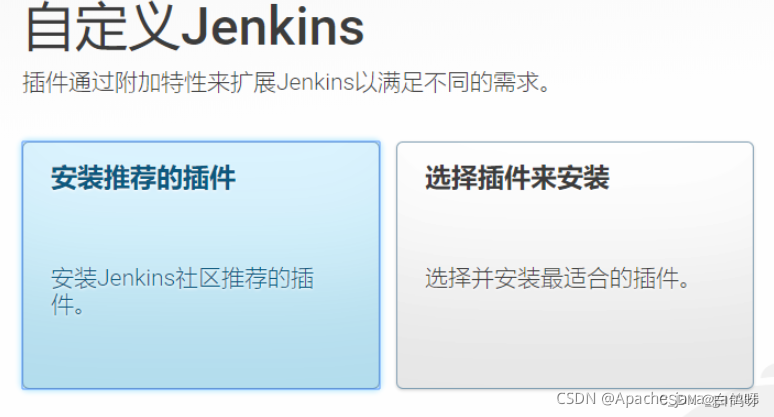
3.3. Install plug-in
3.4. Create an administrator account
4. System configuration
4.1. Install required plug-ins
Enter [Homepage] – [System Management] – [Plug-in Management] – [Optional Plug-in]
1. Install Maven Integration
2. Install Publish Over SSH (if you don’t need remote push, no installation is required)
3. If you use Gitee code cloud, install the Gitee plug-in (Git comes with it, no need to install it)
4. Configure Maven
Enter [Homepage] – [System Management] – [Global Configuration], and pull to the bottom maven – maven installation

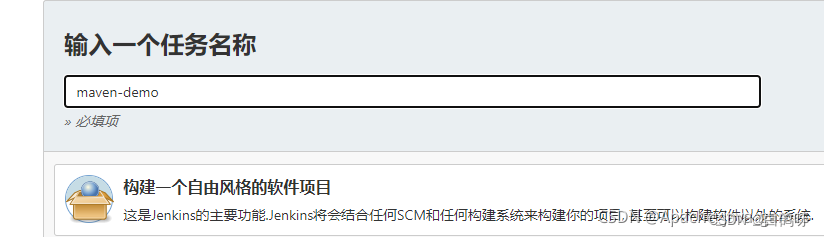
5. Create tasks
Click [New Task], enter the task name, and click to build a free-style software project
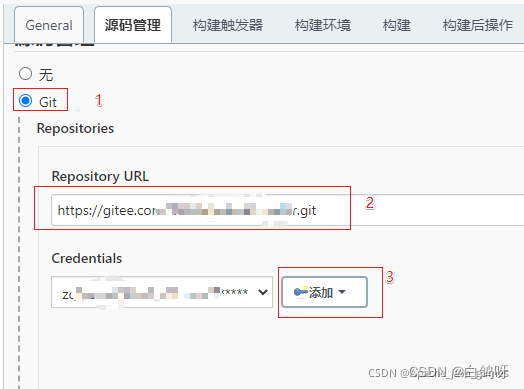
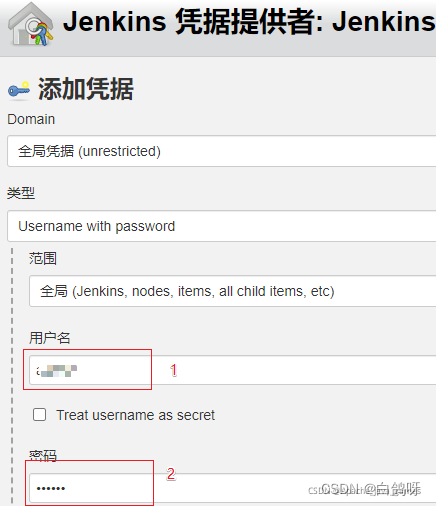
 Click [Source Code Management]-[Git], enter the warehouse address, add the certificate, and select the certificate.
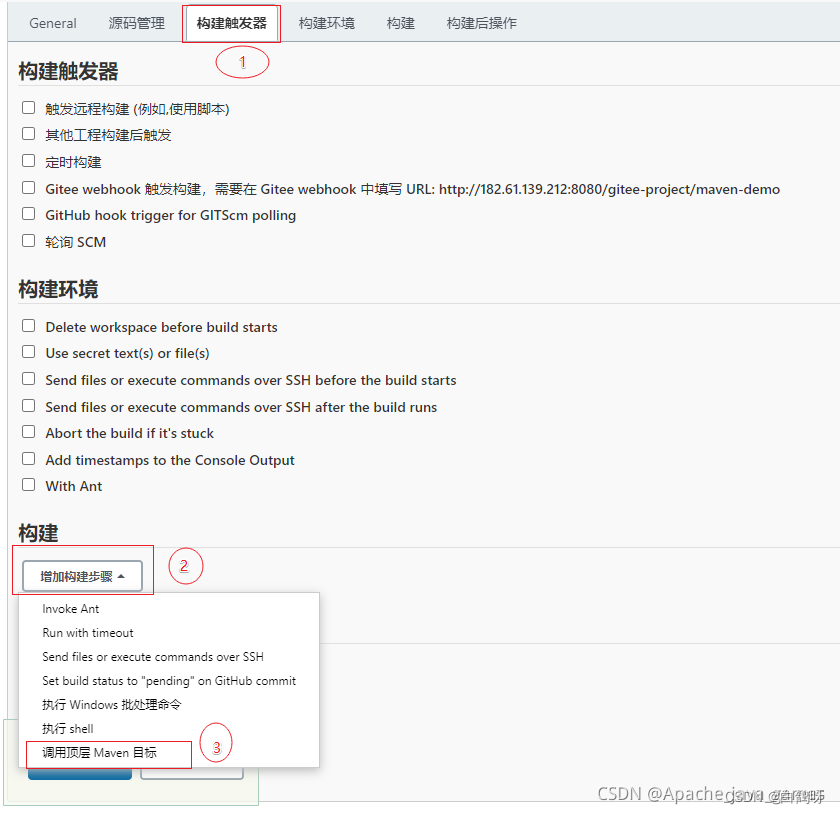
 Click [Build Trigger] – [Build] – [Add Build Step] – [Call Top-Level Maven Goal] – [Fill in Configuration] – [Save]
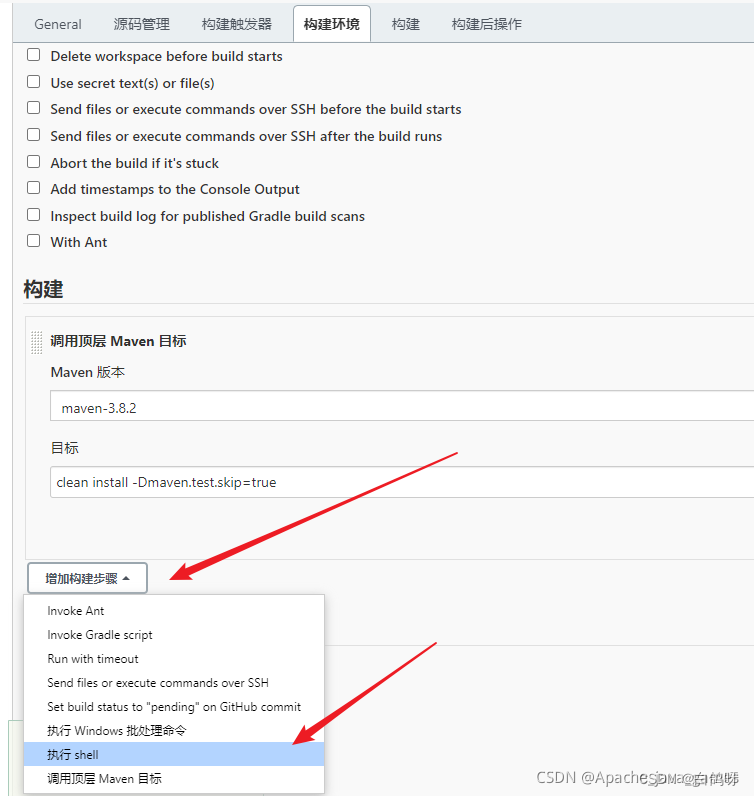
The command here is just install to see if the jar package can be generated.
clean install -Dmaven.test.skip=true

6. Test
Click the build button
 View the log
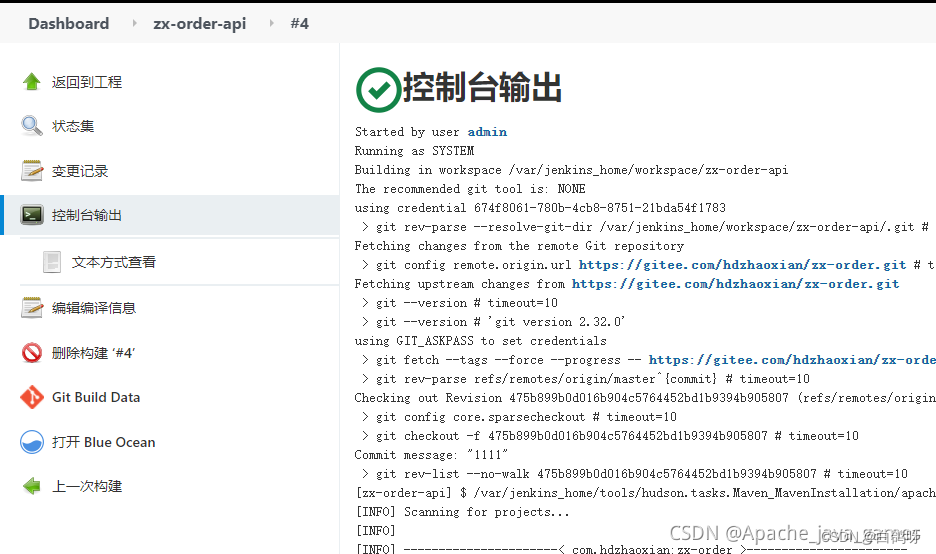
Click on the task being built, or click on the task name to enter the details page and check the console output to see if it can be successfully built into a jar package.
The log here may fail to download the dependent jar package for the first time. Click Build again to succeed.

View project location
cd /var/jenkins_home/workspace
7. Run the project
Because our project and Jenkins are on the same server, we use a shell script to run the project. The principle is to package the image through dockerfile and then run docker.
7.1、dockerFile
Create a new file named Dockerfile in the root directory of the springboot project. Note that there is no suffix name. Its content is as follows: (roughly, use jdk8, add the jar package to docker and then run the prd configuration file)
FROM jdk:8
VOLUME /tmp
ADD target/zx-order-0.0.1-SNAPSHOT.jar app.jar
EXPOSE 8888
ENTRYPOINT ["Bash","-DBash.security.egd=file:/dev/./urandom","-jar","/app.jar","--spring.profiles.active=prd"]
7.2. Modify jenkins configuration
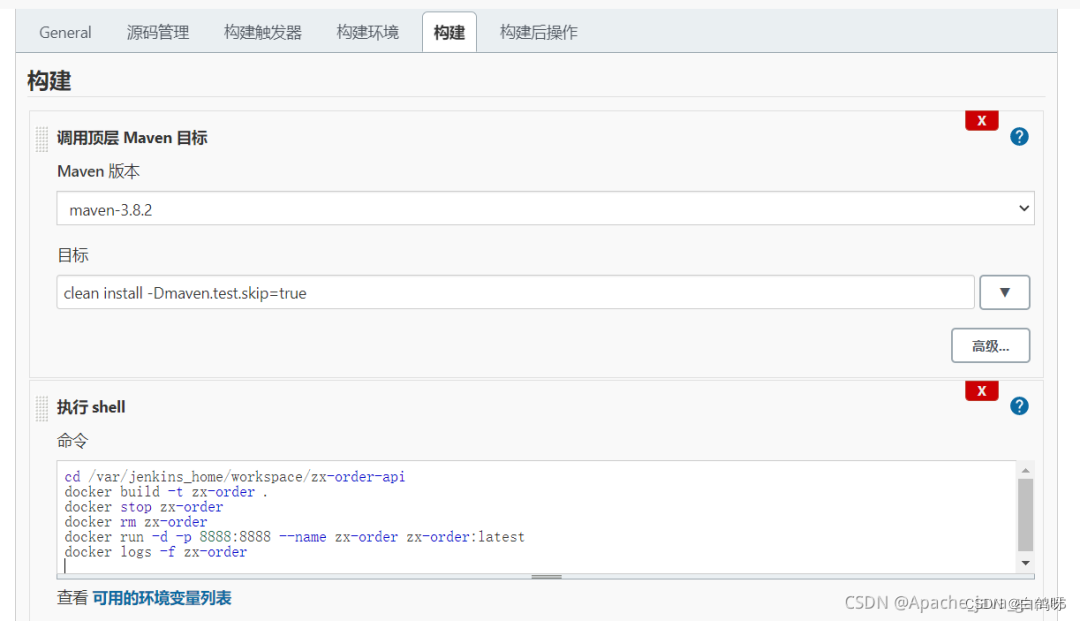
-t:指定新镜像名
.:表示Dockfile在当前路径
cd /var/jenkins_home/workspace/zx-order-api
docker stop zx-order || true
docker rm zx-order || true
docker rmi zx-order || true
docker build -t zx-order .
docker run -d -p 8888:8888 --name zx-order zx-order:latest
Finally, check the jenkins console to see whether the build is successful.