opencv study notes three
import cv2 #opencv读取的格式是BGR
import numpy as np
import matplotlib.pyplot as plt#Matplotlib是RGB
%matplotlib inline
def cv_show(img,name):
    b,g,r = cv2.split(img)
    img_rgb = cv2.merge((r,g,b))
    plt.imshow(img_rgb)
    plt.show()
def cv_show1(img,name):
    plt.imshow(img)
    plt.show()
    cv2.imshow(name,img)
    cv2.waitKey()
    cv2.destroyAllWindows()
Histogram
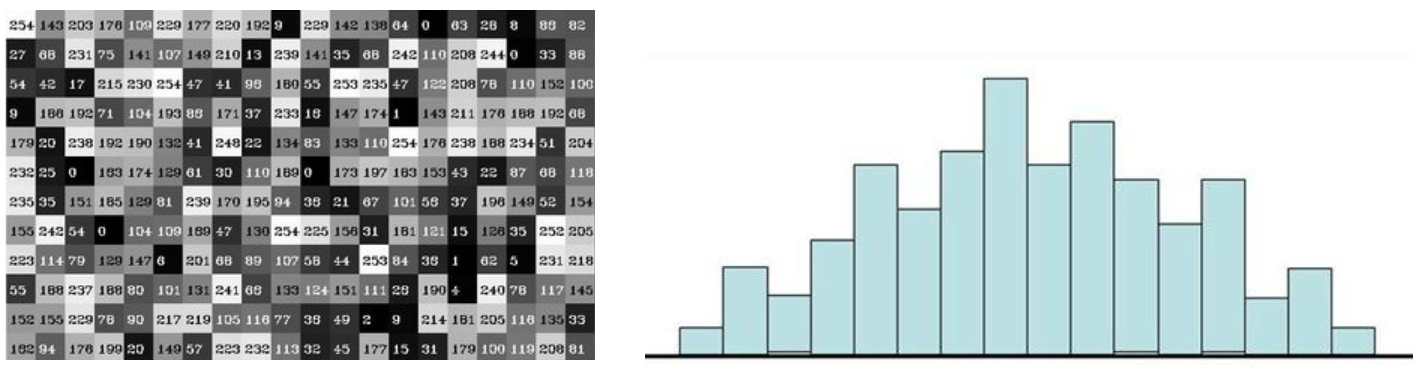
cv2.calcHist(images,channels,mask,histSize,ranges)
- images: The original image image format is uint8 or float32. Use square brackets [] when passing in a function, for example [img]
- channels: also enclosed in square brackets will tell the function the histogram of our overall image. If the incoming image is a grayscale image, its value is [0]. If it is a color image, the incoming parameters can be [0][1][2], which respectively correspond to BGR.
- mask: mask image. To unify the histogram of the entire image, set it to None. But if you want to unify the histogram of a certain part of the image you make a mask image and use it.
- histSize:The number of BINs. Also use square brackets
- ranges: The pixel value range is usually [0256]
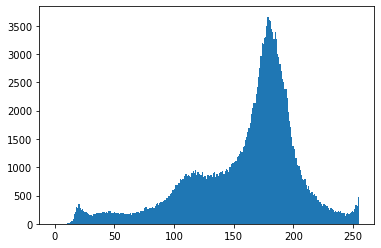
img = cv2.imread('cat.jpg',0) #0表示灰度图
hist = cv2.calcHist([img],[0],None,[256],[0,256])
hist.shape
(256, 1)
plt.hist(img.ravel(),256);
plt.show()
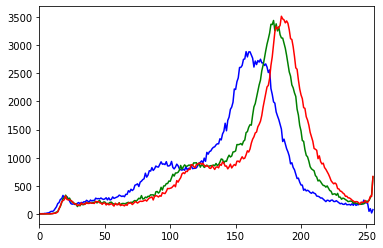
img = cv2.imread('cat.jpg')
color = ('b','g','r')
for i,col in enumerate(color):
    histr = cv2.calcHist([img],[i],None,[256],[0,256])
    plt.plot(histr,color = col)
    plt.xlim([0,256])
mask operation
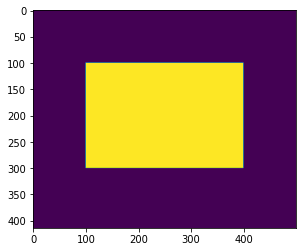
# 创建mast
mask = np.zeros(img.shape[:2], np.uint8)
print (mask.shape)
mask[100:300, 100:400] = 255
cv_show1(mask,'mask')
(414, 500)
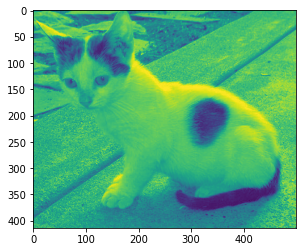
img = cv2.imread('cat.jpg', 0)
cv_show1(img,'img')
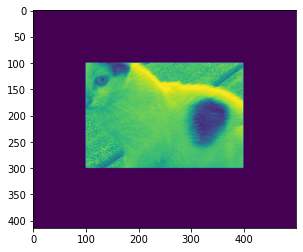
masked_img = cv2.bitwise_and(img, img, mask=mask)#与操作
cv_show1(masked_img,'masked_img')
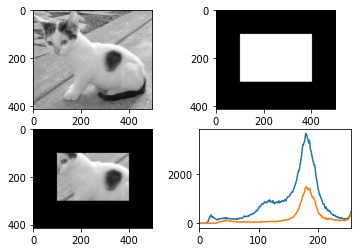
hist_full = cv2.calcHist([img], [0], None, [256], [0, 256])
hist_mask = cv2.calcHist([img], [0], mask, [256], [0, 256])
plt.subplot(221), plt.imshow(img, 'gray')
plt.subplot(222), plt.imshow(mask, 'gray')
plt.subplot(223), plt.imshow(masked_img, 'gray')
plt.subplot(224), plt.plot(hist_full), plt.plot(hist_mask)
plt.xlim([0, 256])
plt.show()
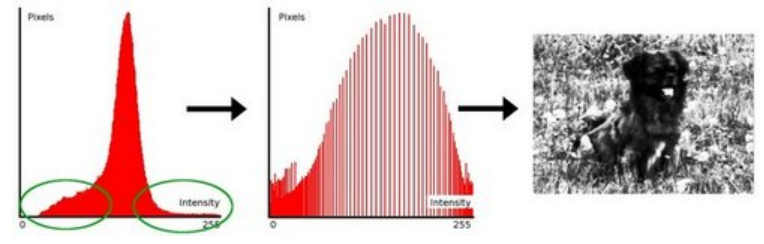
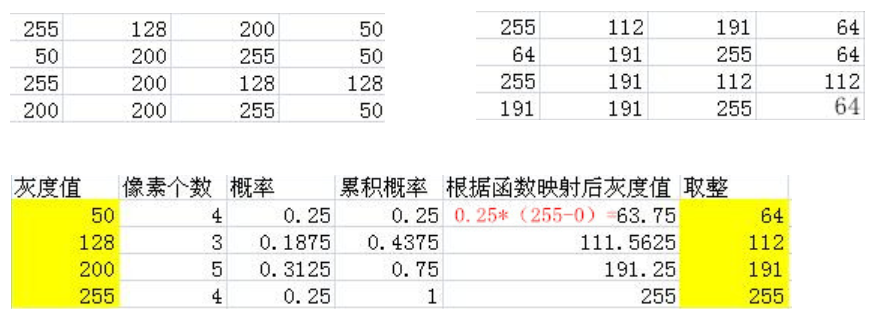
Histogram equalization

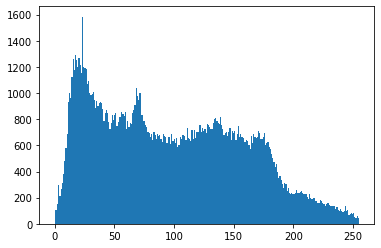
img = cv2.imread('clahe.jpg',0) #0表示灰度图 #clahe
plt.hist(img.ravel(),256);
plt.show()
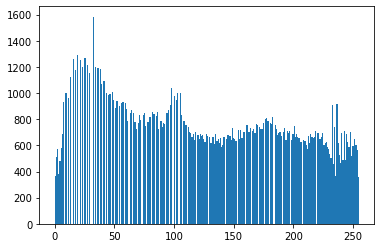
equ = cv2.equalizeHist(img)
plt.hist(equ.ravel(),256)
plt.show()
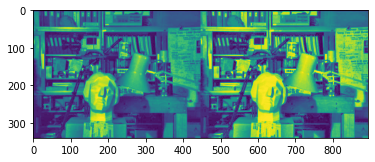
res = np.hstack((img,equ))
cv_show1(res,'res')
Adaptive histogram equalization
clahe = cv2.createCLAHE(clipLimit=2.0, tileGridSize=(8,8))
res_clahe = clahe.apply(img)
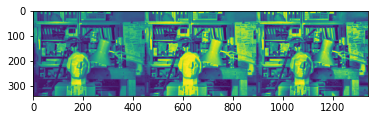
res = np.hstack((img,equ,res_clahe))
cv_show1(res,'res')
template matching
The principle of template matching is very similar to that of convolution. The template slides from the origin on the original image, and the degree of difference between the template and (the place where the image is covered by the template) is calculated. There are 6 ways to calculate the degree of difference in opencv, and then each time The calculated results are put into a matrix and output as the result. If the original graphic is AxB size and the template is axb size, the matrix of the output result is (A-a+1)x(B-b+1)
# 模板匹配
img = cv2.imread('lena.jpg', 0)
template = cv2.imread('face.jpg', 0)
h, w = template.shape[:2]
img.shape
(263, 263)
template.shape
(110, 85)
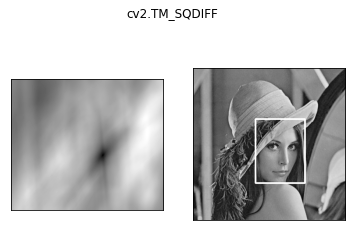
- TM_SQDIFF: Calculation of squares is different. The smaller the calculated value, the more relevant it is.
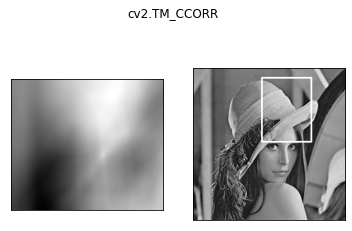
- TM_CCORR: Calculate correlation. The larger the calculated value, the more relevant it is.
- TM_CCOEFF: Calculate the correlation coefficient. The larger the calculated value, the more relevant it is.
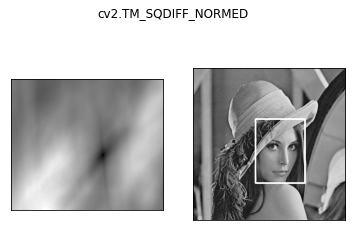
- TM_SQDIFF_NORMED: Calculate the normalized square difference. The closer the calculated value is to 0, the more relevant it is.
- TM_CCORR_NORMED: Calculate the normalized correlation. The closer the calculated value is to 1, the more relevant it is.
- TM_CCOEFF_NORMED: Calculate the normalized correlation coefficient. The closer the calculated value is to 1, the more relevant it is.
Official: https://docs.opencv.org/3.3.1/df/dfb/group__imgproc__object.html#ga3a7850640f1fe1f58fe91a2d7583695d
methods = ['cv2.TM_CCOEFF', 'cv2.TM_CCOEFF_NORMED', 'cv2.TM_CCORR',
           'cv2.TM_CCORR_NORMED', 'cv2.TM_SQDIFF', 'cv2.TM_SQDIFF_NORMED']
res = cv2.matchTemplate(img, template, cv2.TM_SQDIFF)
res.shape
(154, 179)
min_val, max_val, min_loc, max_loc = cv2.minMaxLoc(res) #值越小越好
min_val
39168.0
max_val
74403584.0
min_loc
(107, 89)
max_loc
(159, 62)
for meth in methods:
    img2 = img.copy()

    # 匹配方法的真值
    method = eval(meth)
    print (method)
    res = cv2.matchTemplate(img, template, method)
    min_val, max_val, min_loc, max_loc = cv2.minMaxLoc(res)

    # 如果是平方差匹配TM_SQDIFF或归一化平方差匹配TM_SQDIFF_NORMED,取最小值
    if method in [cv2.TM_SQDIFF, cv2.TM_SQDIFF_NORMED]:
        top_left = min_loc
    else:
        top_left = max_loc
    bottom_right = (top_left[0] + w, top_left[1] + h)

    # 画矩形
    cv2.rectangle(img2, top_left, bottom_right, 255, 2)

    plt.subplot(121), plt.imshow(res, cmap='gray')
    plt.xticks([]), plt.yticks([])  # 隐藏坐标轴
    plt.subplot(122), plt.imshow(img2, cmap='gray')
    plt.xticks([]), plt.yticks([])
    plt.suptitle(meth)
    plt.show()
4

5

2
3

0
1
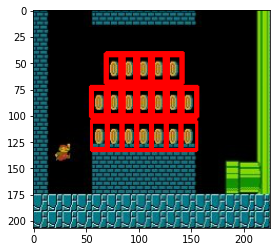
Match multiple objects
img_rgb = cv2.imread('mario.jpg')
img_gray = cv2.cvtColor(img_rgb, cv2.COLOR_BGR2GRAY)
template = cv2.imread('mario_coin.jpg', 0)
h, w = template.shape[:2]

res = cv2.matchTemplate(img_gray, template, cv2.TM_CCOEFF_NORMED)
threshold = 0.8
# 取匹配程度大于%80的坐标
loc = np.where(res >= threshold)
for pt in zip(*loc[::-1]):  # *号表示可选参数
    bottom_right = (pt[0] + w, pt[1] + h)
    cv2.rectangle(img_rgb, pt, bottom_right, (0, 0, 255), 2)

cv_show(img_rgb,'img_rgb')