Unity is a very popular and versatile game engine with a long list of supported platforms and devices. 3D games are probably the first thing that comes to mind when you think of Unity. The engine was even once called Unity 3D! However, most mobile, console, and desktop games are presented in 2D, so it's important to understand the capabilities Unity provides for building 2D games.
In this tutorial, you will build a 2D space lander game and learn the following skills along the way:
- How to use sprites and cameras.
- All about _physical 2D_ components and how to handle collisions and gameplay.
- How to set up 2D animations and states.
- How layer and sprite ordering affects 2D games.
The material for this tutorial was built in Unity version 2020.3.
start
Open the Lander scene in the scenes folder. You should see something similar to the following in the Game view:

You may not see the exact same picture due to sprite sorting, which is explained later in the tutorial. The starter project is a functional 2D space lander game, but it has a few issues you need to solve to actually complete it.
Are you ready to take off and make the dangerous journey to the nearest landing pad? It's time to get started!
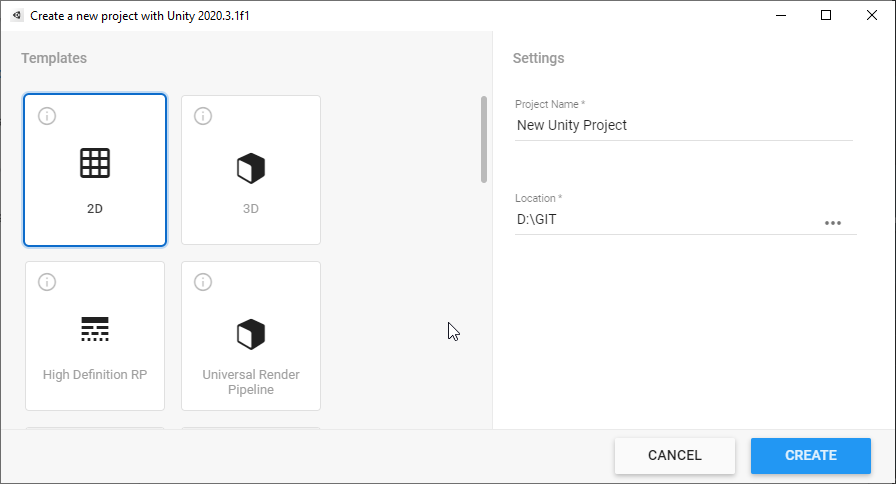
Note : 2D games in Unity — quite logically — use the Unity editor's 2D mode . When creating a project from scratch, you can choose between 2D or 3D mode. This option is already set for you in the starter project.
Sprites in Unity
At a high level, sprites are just 2D graphics objects. They are essentially standard textures that you would normally use for 3D objects. However, Unity has special techniques for combining and managing these sprite textures for ultra-efficient performance in your game, as well as a convenient development experience.
In short, sprites are easy to use in Unity, thanks to the excellent 2D workflow and built-in editor.
To add a sprite to your game, drag and drop it from the Project folder into the Scene view. To see for yourself how easy the process is, start by selecting the Scene_ view. Then, drag the Player sprite from the Sprites folder into the Scene view:
In the hierarchy, click on the Player that Unity created for you and view its details in the Inspector. Note that Unity automatically attaches the sprite_renderer_component containing the player sprite to the game object:
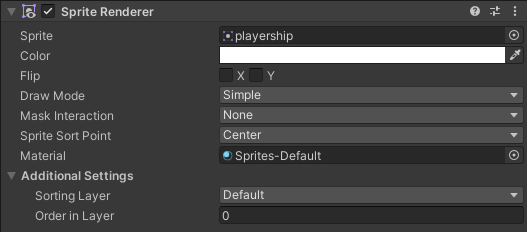
That's all it takes! The _Sprite Renderer_ allows you to display images as sprites in 2D and 3D scenes.
Now, remove _Player_ from the hierarchy.
Elf mode
Click on the sprite in the "Assets/Sprites" folder. In the Inspector, there are three different modes for working with sprites:
- Single: Single_image sprite.
- Multiple: A sprite with multiple elements (such as an animation), or a sprite sheet with different parts of a character.
- Polygon: A custom polygon-shaped sprite that you can use to create many different types of primitive shapes. Examples: triangle, square, pentagon, hexagon.
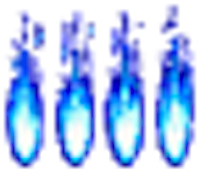
A sprite sheet (atlas) is a single image that contains many smaller individual images, like this:
The reason for using sprite sheets is that every image you use in your game will take up a draw call . With a few dozen sprites, this isn't a big deal, but as the game grows in complexity and scope, it can be a potential problem.
By using sprite sheets, you can make a single draw call to a large number of sprites, giving your game a performance boost. Of course, the organization of your sprite sheets is just as important as using them, but that’s another tutorial!
Elf editor
Packing multiple graphic elements into a single image is very convenient for animations or objects with many moving parts; Unity makes it easy to manage these sprite sheets using the built-in 2D sprite editor.
You'll use two spritesheets in this game: one for the lander's thruster animation and one for the explosion animation. Both animations are made up of multiple frames, which you can edit and slice using the Sprite Editor.
Assets/Sprites/Explosion/explosion-spritesheet.png has been sliced and prepared for animation for you, but Assets/Sprites/thruster-spritesheet.png still needs attention.
![]()
Slice sprite sheet
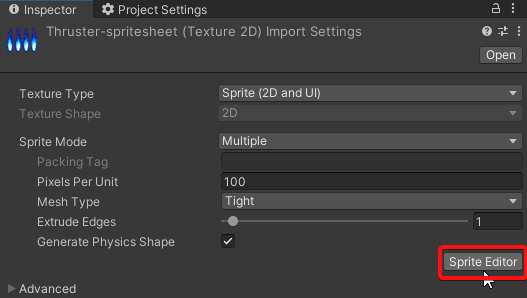
Click _Assets/Sprites/thruster-spritesheet.png_ in the project window. In the inspector, Sprite mode is already set to Multiple (if not, change it and click Apply).
Next, click on the _Sprite editor:
In newer versions of Unity, the Sprite Editor is not installed by default; it has been moved to the package system and needs to be added.
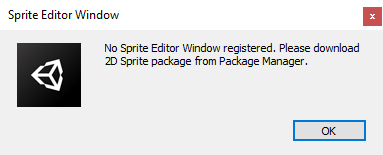
This warning appears the first time you try to open the sprite editor.
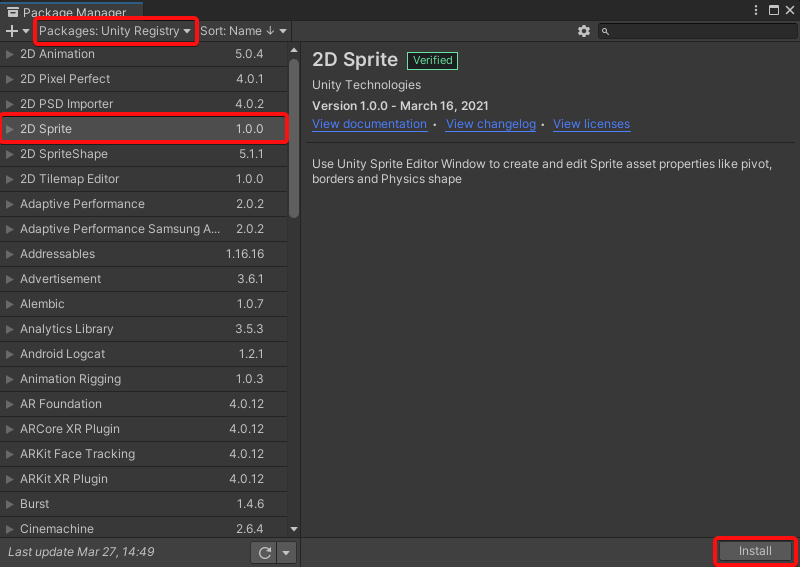
Go to Window ▸ Package Manager. Select Unity Registry from the Packages drop-down list and find 2D Sprite. Click Install_ to add the tool to the project.
Go back to thruster-spritesheet.png and click Sprite Editor again. A new window pops up showing the sprite sheet automatically cut into individual frames (the numbers are added for illustration purposes and are not part of the screenshot):
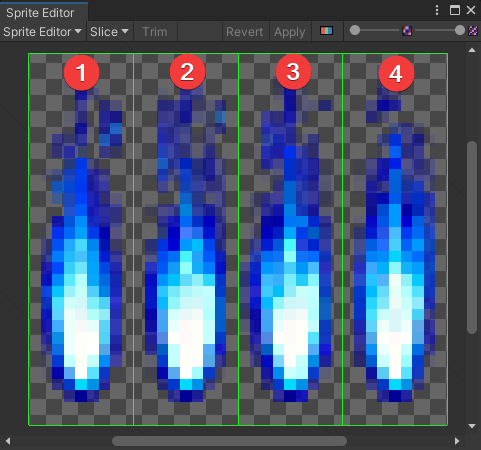
Click _Slice_ in the upper left corner of the window, _note that it is automatically the default slicing operation:
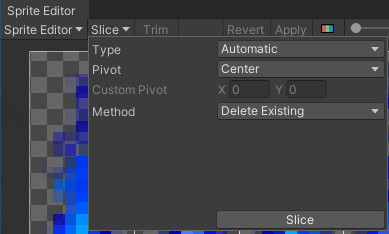
This means that Unity will try to position and slice your sprite sheet itself to the best of its ability. In this case it works fine, but you can also slice the sprite sheet by cell size or cell count.
Custom slice
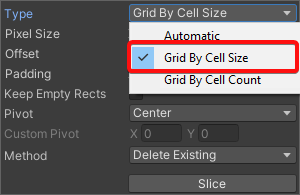
By selecting the Cell Size option, you can specify the size of each frame in the sprite sheet using pixel dimensions.
Click Grid by Cell Size under the Slice menu in the Wizard Editor:
Under Pixel Size, enter 9 for X and 32 for Y. Leave the other values at 0 and set Perspective to Center . Then, click _Slice_:
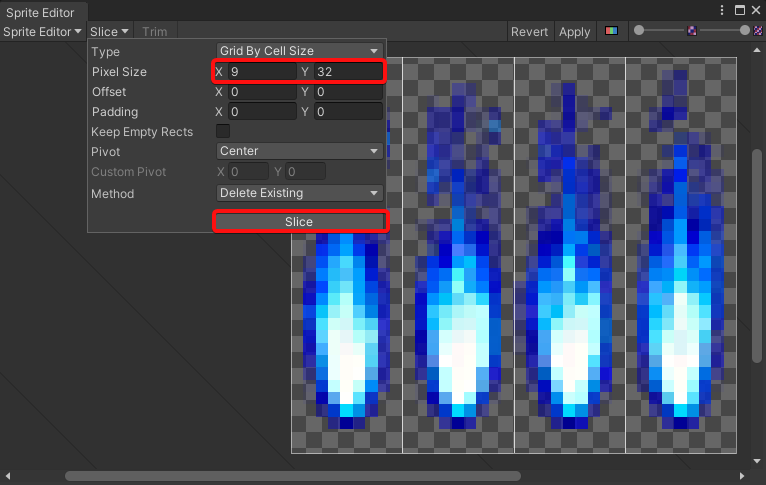
Click Apply in the Wizard Editor window to apply the changes:
![]()
You're done! Your thruster sprite sheet is now ready for use and you can close the sprite editor.
Assign sprites to lander
Now, you can't actually see the lander in the game. That's because it doesn't have any sprite renderer component attached to it. There won't be any spectacular landings - or crashes! – If the lander is not visible on the screen.
To fix this, click on the Lander game object in the hierarchy. In the Inspector, click Add Component and type Sprite Renderer in the search text bar. Finally, select Sprite Renderer Component.
Now, click the small circle icon next to the sprite field in the component properties and select the _playership sprite_:
Set Order in Layers to 1 . More on that later!
Your next job is to assign the landing gear sprites.
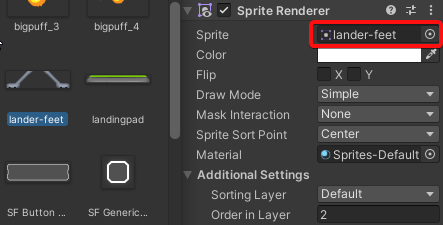
Click on the LanderFeet game object located under Lander Game Objects . Then, click the small circle icon next to the " Sprite " field in the " Sprite Renderer " component properties . Finally, select Landing Foot_Elf_Elf in the Select Elf window, as shown below:
Click _Play_; you will be able to see your lander in the game view. Use WASD or the arrow keys to fly around the screen:
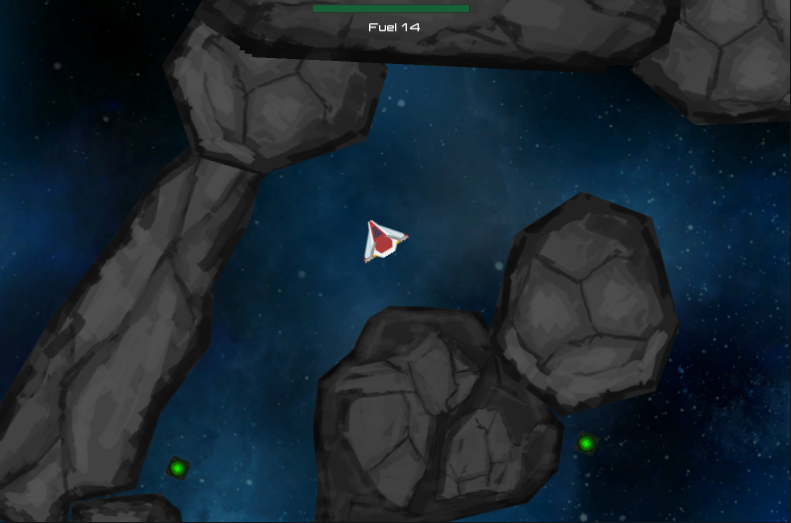
We're airborne!
If your lander is stopped by an unseen force, you might be trying to fly by an asteroid you can't see because of the aforementioned sprite classification problem. Now, go ahead and explore the parts of the universe you can reach (and see). :]
2D cameras and pixels per unit
By default, Unity 2D projects have an orthographic camera view. Typically, you'll want to stick to this in 2D games instead of using a perspective camera view. You can learn more about their differences in the second part of the Introduction to Unity tutorial .
The following image shows the default camera configuration for the scene's main camera:
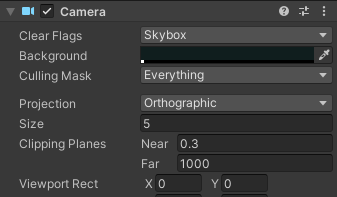
As mentioned above, the Projection property is set to Orthogonal. _
Select the Player character in the Project window and view its Import Settings in the Inspector. The "pixels per unit" property is currently set to the default value of 100 :
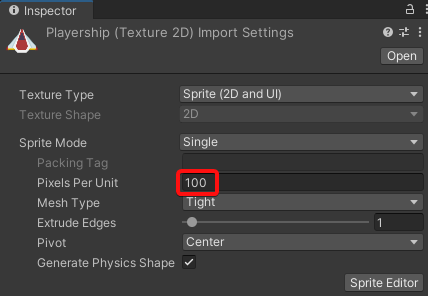
so. . . What does 100 mean in this context?
Words about pixels per unit
Units in Unity do not necessarily correspond to actual pixels on the screen. Instead, you typically resize objects relatively to some arbitrary scale (for example, 1 unit = 1 meter). For sprites, Unity uses pixels per unit to determine their unscaled size in units.
Consider a sprite imported from an image 500 pixels wide. The following table shows how the width of the game object on the x-axis changes when you render the sprite using different scales of pixels-per-unit values:

Still not sure? The following scenario will help you understand what is happening with unit conversions.
Consider a game that uses a static camera and displays a background sprite full screen, similar to a wallpaper on a computer desktop.
Assets/Sprites/backdrop.png has a height of 2048 pixels and a default pixel-per-unit ratio of 100. If you do the math, you'll find that the Background Game object in the hierarchy will be 20.48 units high.
However, the orthographic camera's size property only measures half the height of the screen, so to fit the exact height of a background game object to the screen in full view, an orthographic size of 10.24 should be used:
![]()
However, you don't need to change the camera in your project, as the current size 5 works for the moving camera in the game.
the proud galaxy
The Maximum Size property of the sprite's Import Settings allows you to define the maximum size of the sprite in pixels. You can override this setting for each platform you plan to target.
Zoom in on scene view background with light blue galaxy. Note that it's slightly blurry; when importing sprites, the "max size" property defaults to 2048. Unity must shrink the image to fit the default texture size, resulting in a loss of image quality.
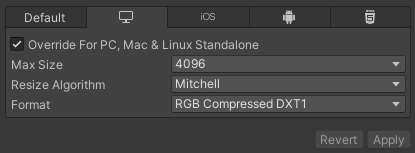
To clear image problems, select Background Sprite in the Project window. Then, in the Inspector window, select Override PC, Mac, and Linux standalone settings (the tab that looks like a computer monitor).
Next, check PC, Mac and Linux independent coverage and change Maximum size to 4096 . Click _Apply_ and wait a moment for Unity to import the scene view's background again. You'll see the background suddenly become clearer:
Setting Maximum Size to 4096 tells Unity to use the full 4096 x 4096 texture so you can see the detail in the original image.
Increased size
However, this fidelity comes at a price. The preview area of the Inspector looks like this; the size of the background texture is now 4.0 MB, up from 1.0 MB previously:
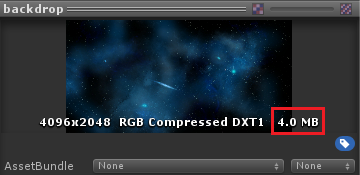
Increasing the size of a texture increases its memory footprint by 4x.
It's also worth mentioning that Unity supports building for other platforms, with some override settings. You can use these override settings if you plan to build your game for other platforms and want to set different size and formatting settings for them.
Note : 4096 x 4096 is a fairly large image file; try to avoid using this size, _especially_ for mobile games. This project only uses large images as examples.
texture
You can also change the texture's _format_ as follows:
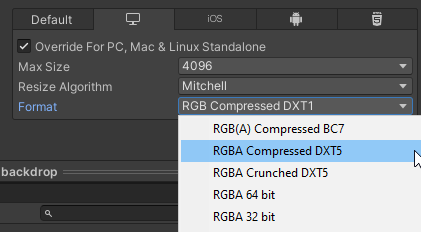
You might want to resize some textures to improve their quality or reduce their size, but this can increase the image's memory footprint or reduce texture fidelity. The best way to adjust these settings is to study how each setting works, test them and compare the quality and size of the resulting textures.
Use the "Tight" format to set the Tight_Quality slider value. A compression value of 50% takes a long time to compress, but it gives you the smallest possible file size, which you can adjust further.
Sets the background import back to the state it was in before using the Format and Compressor Quality settings. Then, click _Apply_.
When developing your own game, you'll want to use compression settings to find a combination that results in the smallest texture size while still giving you the quality you want.
Search and follow the public account " Unity Game Workshop " and reply " 002 " to obtain the materials for this tutorial
To be continued…