Unity is a very popular and versatile game engine with a long list of supported platforms and devices. 3D games are probably the first thing that comes to mind when you think of Unity. The engine was even once called Unity 3D! However, most mobile, console, and desktop games are presented in 2D, so it's important to understand the capabilities Unity provides for building 2D games.
In this tutorial, you will build a 2D space lander game and learn the following skills along the way:
- How to use sprites and cameras.
- All about _physical 2D_ components and how to handle collisions and gameplay.
- How to set up 2D animations and states.
- How layer and sprite ordering affects 2D games.
The material for this tutorial was built in Unity version 2020.3.
[ Continued from above ] [Unity] Introductory Tutorial on 2D Space Login Game Development (Part 1)
2D Colliders and Physics
Unity allows you to adjust the gravity of a physical 3D system just like in a 2D game. Unity's default gravity setting for new projects is the same as Earth's gravity: by definition, 9.80665 m/s2. But you land your spacecraft on the moon instead of the earth, and the gravity on the moon is about 16.6% of the earth, or 1.62519 meters/second2.
NOTE : Gravity in the beginner project is set to -1 for easier flying and testing the game right away.
To modify the game's gravity, click Edit ▸ Project Settings and select the Physics 2D tab and use the Physics 2D panel to change Gravity's Y value from -1 to -1.62519 :

Things are about to get heavy!
Click "Start" to run the game; fly around and see how gravity changes the motion of your spaceship:
It takes one small step for gravity, one giant leap for thruster power!
Collision with object
If you've tried to navigate the scene with a lander, you've probably hit a rock or two. This is Unity's 2D collision system at work.
Every object that should interact with gravity and other physics objects requires a Collider 2D component and a Rigidbody 2D component.
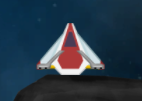
Select the _lander_ game object in the hierarchy.
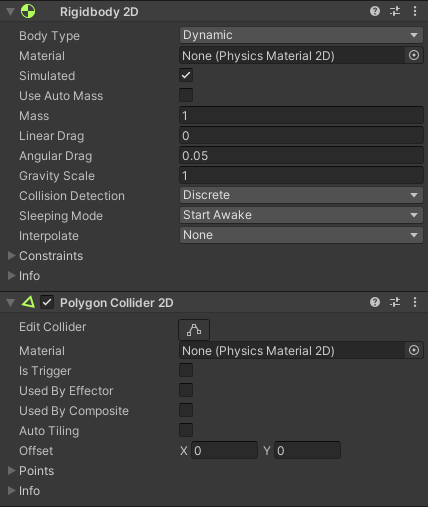
You will see that the Rigidbody 2D and Polygon Collider 2D components are attached. Add a Rigidbody 2D component to the sprite so that it is controlled by Unity's 2D physics system.
Quick Course in Physics Components
By itself, a Rigidbody 2D component means that gravity affects the game object it is attached to. It also allows you to control entities from scripts using Physics2D related methods that apply forces to entities.
However, if you want your sprite to interact and collide with other objects, you will also need a Collider2D component. Adding the appropriate Collider component will make the sprite respond to collisions with other sprites.
Polygonal 2D Colliders are more performant than other simple colliders such as the Box or Circle Collider 2D components, but they enable more precise physical interactions between objects. Always use the simplest collider shape you can get away with in the game to ensure the best performance.
collision surface
Explore the Collider on the spaceship by selecting the Lander game object in the hierarchy and clicking Edit Collider on the polygonal 2D Collider:

Hover the mouse cursor over the edge of the collider in the scene view. Handles allow you to move the collider points, and you can also create or delete points to modify the shape of the collider:

Keep the shape of the _lander_collider unchanged for now.
Note : The code in the Lander.cs script attached to the Lander game object is used to handle collisions with other objects in the game scene. If the magnitude of the collision force exceeds a certain threshold, the lander will be destroyed.OnCollisionEnter2D
Your landing pad also needs a collider; otherwise your ship will just fall right off when you try to land!
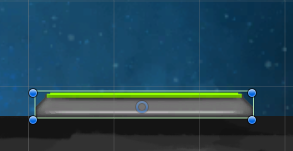
In the hierarchy, double-click the LanderObjective game object to focus on the landing pad. Using the Inspector, click Add Component and select the Box Collider 2D component:
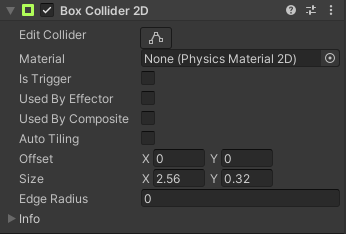
Unity adds the _Box Collider 2D_ component to the LanderObjective game object and automatically resizes the collider to match the sprite size.
cold!
some other things
There are a few other things to remember about rigidbody and 2D collider components:
- Change Rigidbodies to use the Kinematic Body type when you want to move physics entities through transform components rather than just letting gravity affect them. To keep them under the control of Unity's gravity, use Dynamics. If they won't move at all, make them static.
- You can also modify the rigid body component's mass, linear drag, angular drag, and other physical properties.
- Colliders can be used in Triggered mode; they do not physically collide with other physics objects. Instead, they allow code to react to events using all the methods provided on the MonoBehavior script.
OnTriggerEnter2D - To handle conflicting events in script code, use , this is available on all MonoBehavior scripts.
OnCollisionEnter2D - You can assign an optional Physics2D Material 2D reference to the collider to control properties such as springiness or friction.
Note : When there are only a few objects in the game you may not notice this, but when you have hundreds of objects on the screen, all of which involve physical interactions, using simpler collider shapes will improve the game performance.
If you have a lot of objects colliding, you may want to reconsider your strategy of using the Polygon Collider 2D component!
Lander animation
Your lander wouldn't be complete without visible thrusters to fight gravity. Now, the thrusters work, but there's no visual feedback to tell you they're firing.
Unity Animation 101
To assign animations to a game object in your scene, attach an animator component to the game object you want to animate. This component requires a reference to an animation controller, which defines which animation clips to use and how to control those clips, as well as other "more advanced" effects such as animation blending and transitions.
Animation controller for thrusters
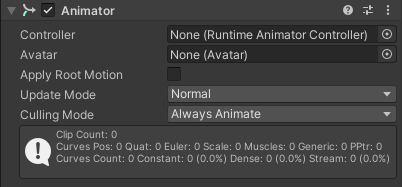
In the hierarchy, expand the Lander game object to reveal four other nested game objects. Select the ThrusterMaster GameObject; you'll see that it has an animator component attached to it, but it has no reference to the AnimationController:
With the Thruster Master Game Object still selected, click the Animation Editor tab. If you don't see this tab in the editor's main window, choose Window ▸ Animation ▸ Animation to open it:

When you select a game object in the hierarchy (and you do!), the Animation Window will show animations related to that game object - just like the Inspector shows the components related to that game object. Click _Create to create _animation clip for ThrusterMain :

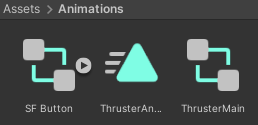
Enter the name ThrusterAnim and place it in the "Resources/Animations" folder.
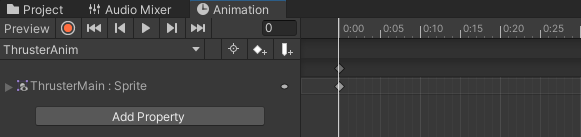
You should now see two new animation assets in the Animation folder of the Project window. ThrusterAnim is the animation clip that will hold the animation of the thruster effect, and ThrusterMain is the animator controller that will control the animation:
You'll see the animation timeline in the animation window; here you can place and order individual thruster sprite frames.
Click Add Attribute and select Sprite Renderer/Sprite as the attribute type to animate:
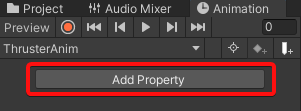
Your editor should now look like this:
Time to process timeline
processing timeline
In the Project window, click the Sprites folder and expand _thruster-spritesheet.png_sprites. Highlight the four sliced thruster sprites and drag them onto the Thruster Master:Sprites timeline in the Animation Editor.
The sprite frames end up coming together on the timeline; you can fix this yourself. Start with the rightmost sprite; click the sprite and drag it to the right, spacing it approximately 0:05 from the adjacent sprite:
Select the last frame at the 1:00 mark and press Delete to delete it.

Click Preview in the animation window, then click Play. Focus on the lander spacecraft in the scene view to see a preview of your work!
Captain is ready!
With ThrusterMain still selected, you can also see the sprite change in the sprite_renderer_component:
ticking :]
Now it's time to configure the animation controller.
Configure animation controller
The _lander.cs_ script currently sets the animation parameters to or depending on whether the player fires thrusters. The animation controller will evaluate these parameters and allow entry or exit of certain states.true``false
In the Project window, click the Animation subfolder. Then, double-click ThrusterMain.controller. This will open the animation editor where you will see the controller Unity added for you when you created the animation clip on the thruster main game object:

The thruster animation is now running continuously. Logically, the thruster animation should only run when the player is currently firing thrusters.
Right-click the grid area of the Animation Editor and click Create State/Empty:

Use the inspector to name the new state NoThrust . This is the default state of the animation when there is no player input:

Starting from Entry , the animator should flow directly to NoThrust and stay there until the Boolean argument changes. For animated state changes to occur, a transition needs to be added using a connection.true
Right-click None Thrust and click Set as Layer Default State. NoThrust should now appear in orange as shown below, and the arrow in Entry should now point to No Thrust :
Orange indicates that the state will be the first state to run.
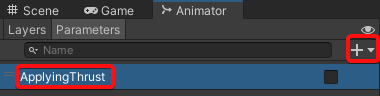
Using the Animation Editor, click + in the Parameters tab to create a new parameter type Bool . Name it _Apply Thrust_:
Right-click NoThrust , click Make Transition , and then click Thruster Animation . This creates a transition that allows the state to change between two states. Now perform the same set of steps, but this time create the transition from ThrusterAnim to NoThrust :
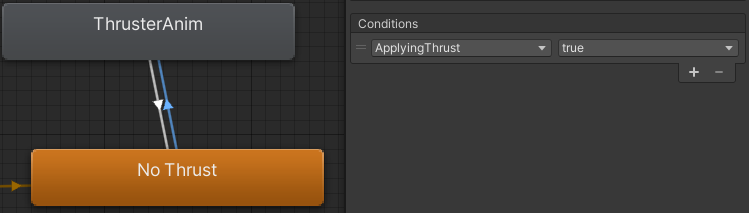
Click the NoThrusterto ThrusterAnim transition line, then click + in the Inspector to add a Condition. This selects the only available condition: applying thrust .
Make sure true is selected in the drop-down list . This means that "Apply Thrust" must be true for the animation to move to the " Thruster Animation " state.
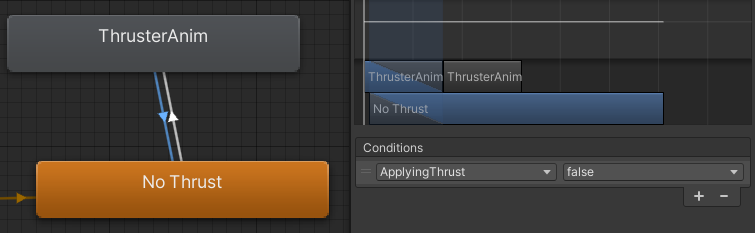
Now edit the transition line from ThrusterAnim to NoThrust to use the same ApplyingThrust condition. However, this time you are checking for an _error_ condition:
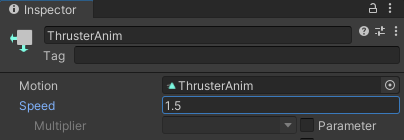
You can adjust the animation playback speed to suit in the animation editor. Click on the Thruster Animation state, and in the Inspector, change the Speed property to 1.5 :
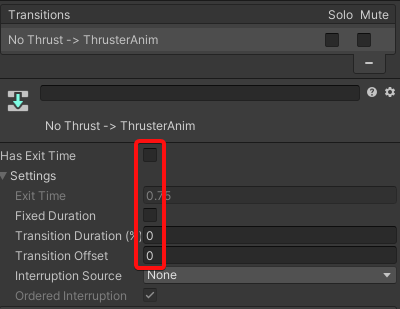
Thruster animations should respond quickly to reflect the player's trigger reaction to show response. Click on both transition lines (the one between NoThrust and ThrusterAnim ) and use the Inspector to change the settings related to Transition to 0 . Unchecking also has exit time and fixed duration:
Finally, apply the same animation and controller to the left and right thrusters. Select ThrusterLeft and ThrusterRight from the hierarchy , then drag and drop ThrusterMain.controller from the Animation folder in the Project window into the Animator component's Controller property:
Click _Start_ to run the game; use _WASD_ or _arrow keys_ to try out your new thrusters:

Houston, we're airborne! :]
Sprite sorting and layers
No 2D engine is complete without sprite sorting capabilities. Unity allows you to sort and sort your sprites using layers and the layer sorting system.
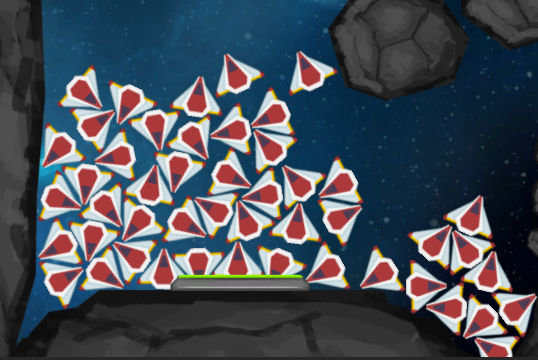
Click "Play" in the editor to run the game again; use your worst driving ability to crash the lander into nearby rocks. When the Restart button appears, look at the Scene view in the editor. You may notice that some of the rocks have disappeared behind the background image:

It may even be that you have the starter project open and can only see the background image. If that's the case, well done!
This happens because the rendering engine cannot determine the layering order of the sprites. All sprites, except the ship, are currently set to use a default sorting layer with a render order of -1. Your graphics card will get all the draw calls, but not tell them the order in which to draw!
To solve this problem, you can use the Layers and Layer Order systems to separate your sprites. Unity will render sprites on these layers in the defined layer order. For each individual layer, Unity will use the order number of the sprites on each sprite within the layer to determine in which order it should render each sprite.
You can think of it as an ordered list:
-
A layer
- Sequence 0
- Sequence 1
-
B floor
Time to add some layers
Click Edit ▸ Project Settings and select Tags and Layers. Expand the Sorting Layers section.
Click + to add three new layers:
- Background
- Rocks
- Player
Click and drag the handles next to each layer to make sure they are in the order listed above. The order of the layers here determines the order in which Unity renders sprites on these layers:
Just like an onion, space is made up of layers!
Click Background in the hierarchy; on the Sprite Renderer component, click the Sort Layers drop-down list and select Background from the list :
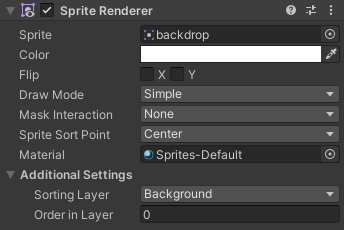
Now the rocks will definitely be behind the background because they are still on the _Default_ layer!
Expand the rock game object and highlight all child_rock_game objects. Use the inspector to change the object to use_rock_sorted layer as shown below:
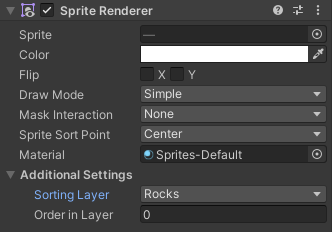
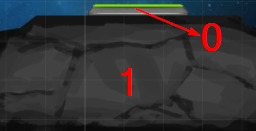
Since rocks in a scene tend to overlap each other, they help demonstrate how the Order in Layer property works for sprites on a specific layer.
If you don't give each _rock_ in the rock layer a separate sort value, you'll notice that other rocks randomly "pop up" during the game. This is because Unity will not consistently render the rocks in the same order as they are currently in the layer.
Find overlapping rocks and assign the rocks in front of them a higher layer order value than the rocks behind them:
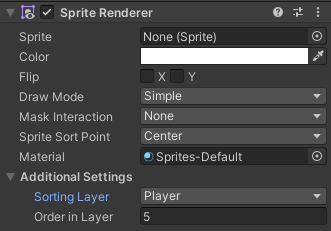
Click a Lander in the hierarchy and change the sorting layer property of its sprite renderer and all its child game object sprite_sprite_renderer_components to _player__sort_layer_.
Do the same for the Fuel game object under Pickup in the hierarchy. This will ensure they are rendered before everything else.
fine-tuning layer
However, there is a problem. What about the sprites for the thruster animation (and the lander's feet, which are usually hidden behind the lander)? If you don't set a specific layer numbering order for these and the lander itself, you'll see some weird rendering issues!
Change the Layer Order property of the Lander itself to 2 . Select each Thrusters child game object as well as the LanderFeet game object and set its Layer_Order_value to 1 .
When the lander touches down on the landing pad, the landing pad sinks down a little to indicate that you've landed. The landing pad and rock sprite overlap each other, so in order for the effect to look right, you have to order the landing pad behind the rock.
Change the LanderObjective sprite to use the ROCK_LAYER and assign it a LAYER_ORDER_value of 0 . Set the rock below the Landing Site Objective to use a Layer Scale value of 1 :
Finally, click on the Exploded Prefab in the Prefabs folder and change its Sorting Layer to Player:
Cool people don't watch explosions. But we did it!
Click _Play_ and test your piloting skills by picking up a fuel supply and landing on the landing pad. Just be careful not to push too hard in either direction to avoid avoiding the rocks!
nailed it! :]
With enough practice, you'll be as good at landing rockets as Space X! :]
完结!!!
[Unity] Introductory Tutorial on 2D Space Login Game Development (Part 1)