Tower defense games are incredibly popular, and there's nothing more satisfying than watching your defenses destroy evil invaders! In this two-part tutorial, you'll build a tower defense game using Unity !
You will learn how to…
- Create waves of enemies
- Have them move by following waypoints
- Build and upgrade towers to reduce your enemies to nothing
Finally, you will have a framework of this type that you can extend!
Note : You need to know Unity basics, such as how to add game assets and components, understand prefabs, and know some basic C# .
Tower defense in its entirety
In this tutorial you will build a tower defense game where enemies (bugs) crawl towards cookies that belong to you and your minions, who are of course monsters! You can place and upgrade monsters at strategic points to earn a little gold.
Players must kill the bugs before they eat your cookies. Each wave of enemies is harder to defeat. The game ends when you survive all waves (victory!) or five enemies reach the cookie. (fail!)
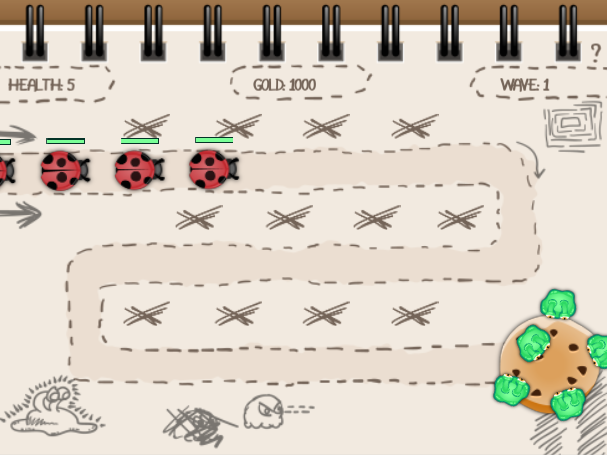
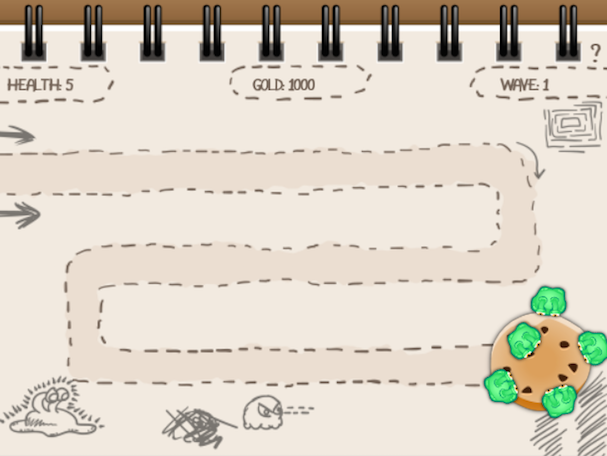
Here are screenshots of the completed game:
Monsters unite! Protect the cookies!
start
Open the TowerDefense-Part1-Starter project in Unity .
The starter project includes art and sound assets, as well as pre-built animations and some helpful scripts. These scripts are not directly related to tower defense games and will not be explained here. However, if you want to learn more about creating Unity 2D animations, check out this Unity 2D tutorial .
The project also contains prefabs that you will later extend to create the character. Finally, the project includes a scene with its background and user interface settings.
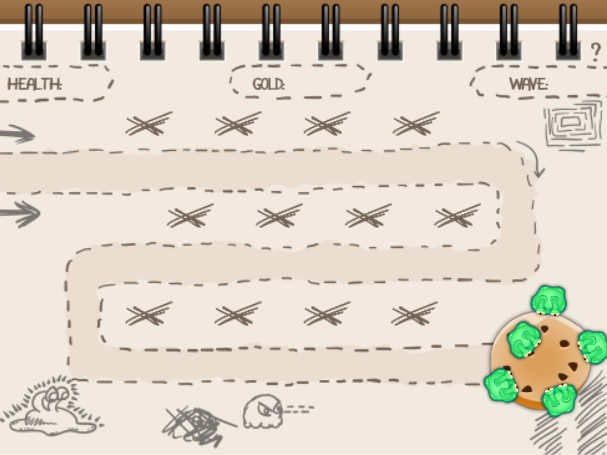
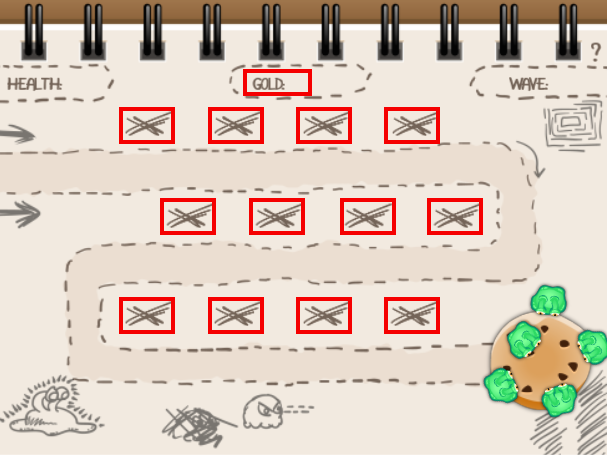
Open the GameScene in the " Scenes " folder and set the game view's aspect ratio to 4:3 to make sure the labels are properly aligned with the background. You should see the following in Game view:
credit:
- The art for this project comes from Vicki Wenderlich's free art pack! You can find more awesome graphics on gameartguppy .
- The cool music comes from BenSound , he has some great soundtracks!
- Thanks to Michael Jasper for the awesomeness .
Starter Project – Check!
Resources – Check!
Take your first step towards world domination... well, I mean your tower defense game... you're done!
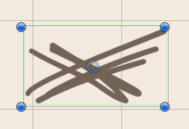
X Marker: Place
Monsters can only be posted in areas marked with _x_.
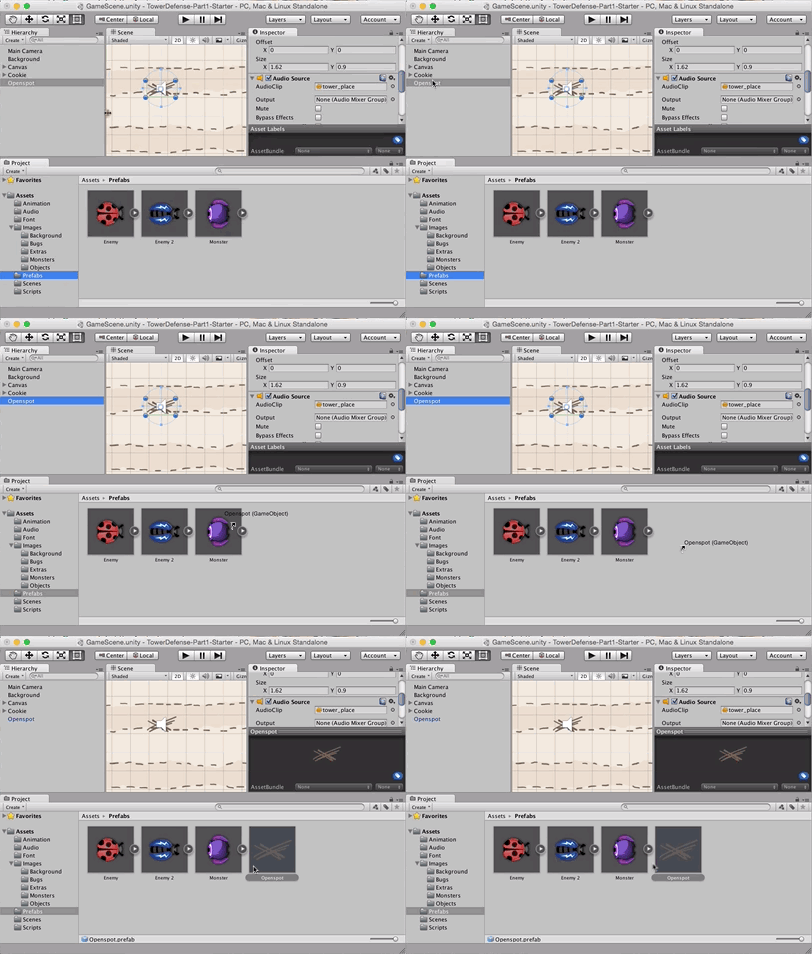
To add them to the scene, drag and drop Images\Objects\Openspot from the Project Browser into the Scene view. For now, position doesn't matter.
With Openspot selected in Hierarchy, click Add Component in the Inspector and select Box Collider 2D . Unity displays box colliders with green lines in the scene view. You will use this collider to detect mouse clicks at this location.
Unity will automatically detect the appropriate size of the collider. How cool is this?
Follow the same steps to add the Audio\Audio Source component to Openspot . Set the audio source's audio clip to tower_place , which you can find in the " Audio " folder, and then deactivate " Play On Awake ".
You need to create 11 more points. While it's tempting to repeat all these steps, Unity has a great solution: prefabs !
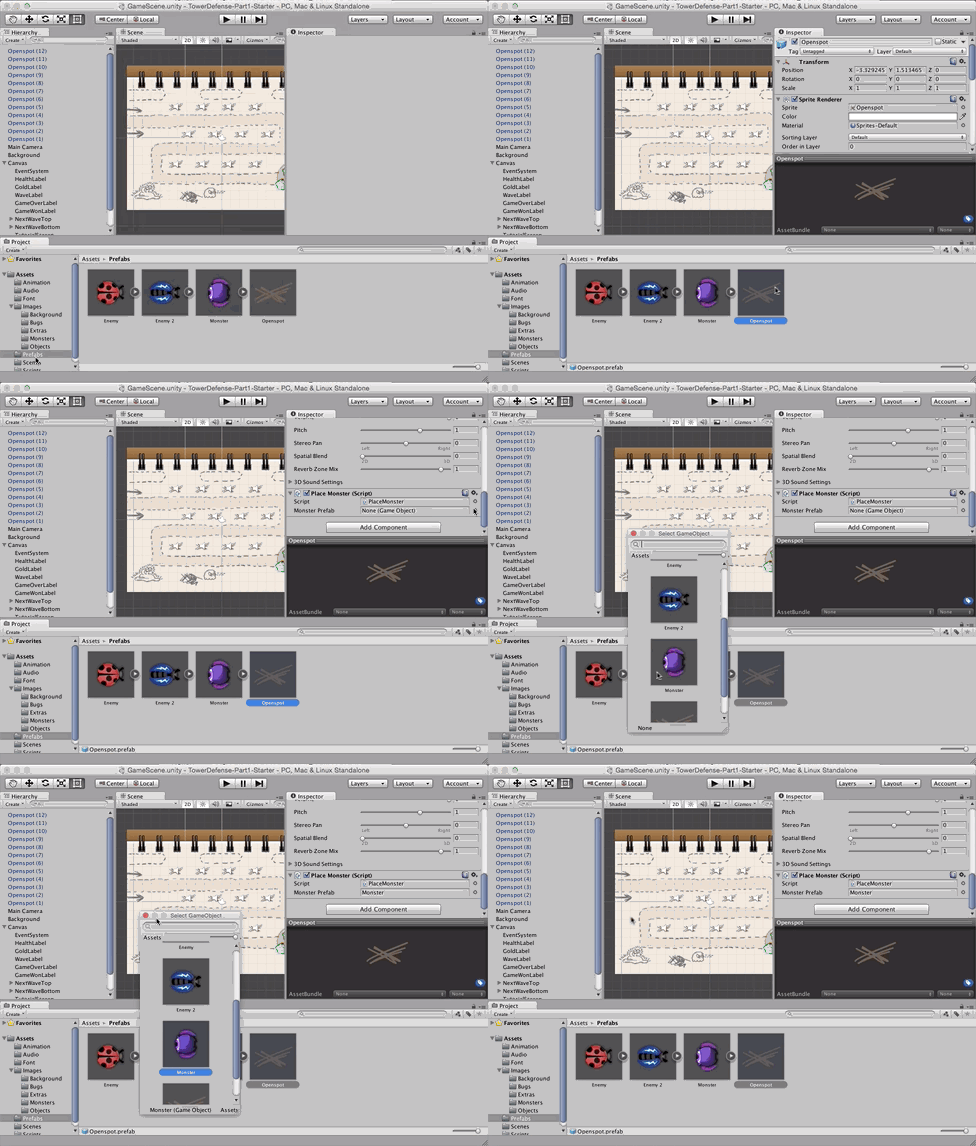
Drag and drop Openspot from the Hierarchy into the Prefabs folder in the Project Browser . Its name then turns blue in the hierarchy to show that it is connected to the prefab. like this:
Now that you have your prefab, you can create as many copies as you need. Just drag and drop Openspot from the Prefabs folder in the Project Browser into the Scene view. Do this 11 times to create a total of 12 Openspot objects in the scene.
Now use the Inspector to set the positions of these 12 Openspot objects to the following coordinates:
- (X:-5.2, Y:3.5, Z:0)
- (X:-2.2, Y:3.5, Z:0)
- (X:0.8, Y:3.5, Z:0)
- (X:3.8, Y:3.5, Z:0)
- (X:-3.8, Y:0.4, Z:0)
- (X:-0.8, Y:0.4, Z:0)
- (X:2.2, Y:0.4, Z:0)
- (X:5.2, Y:0.4, Z:0)
- (X:-5.2, Y:-3.0, Z:0)
- (X:-2.2, Y:-3.0, Z:0)
- (X:0.8, Y:-3.0, Z:0)
- (X:3.8, Y:-3.0, Z:0)
When finished, the scene should look like this.
place monster
For ease of placement, the project's prefab folder contains a _monster__prefab_part.
Monster Prefabs – Ready to Use
At this point, it consists of an empty game object containing the shooting animations of three different sprites and their child elements.
Each sprite represents a monster with a different power level. The prefab also contains an AudioSource component that you trigger to play a sound every time the monster fires its laser.
You will now create a script that can place Monster on Openspot
In the Project Browser , select Openspot in the Prefabs folder. In the Inspector, click Add Component , then choose New Script and name it PlaceMonster. Select C Sharp as Language and click Create and Add. Since you added the script to the Openspot _Prefab, all Openspots in the scene now also have the script attached. tidy!
Double-click the script to open it in the IDE. Then add these two variables:
public GameObject monsterPrefab;
private GameObject monster;
You will instantiate a copy of the object stored in it monsterPrefabto create the monster, and store it in it monsterso that you can manipulate it during the game.
One monster per location
Add the following method to allow only one monster per location:
private bool CanPlaceMonster()
{
  return monster == null;
}
After CanPlaceMonster()you check monsterwhether the variable is still there null. If it is, it means there is currently no monster here, and you can put one.
Now add the following code to actually place the monster when the player clicks on this game object:
void OnMouseUp()
{

  if (CanPlaceMonster())
  {

    monster = (GameObject)
      Instantiate(monsterPrefab, transform.position, Quaternion.identity);

    AudioSource audioSource = gameObject.GetComponent<AudioSource>();
    audioSource.PlayOneShot(audioSource.clip);


  }
}
This code places a monster on mouse click or tap. So how is this achieved?
OnMouseUpUnity automatically calls this when the player clicks on the game object's physics collider.CanPlaceMonster()When called, if returned, this method will place a new monstertrue.- You create a monster using
Instantiatethis method, which creates an instance of the given prefab with a specified position and rotation. In this case you copymonsterPrefab, give it the current game object's position and no rotation, convert the result to aGameObjectand store it in amonster. - Finally, you call
PlayOneShotPlay the sound effect attached to the objectAudioSourcecomponent.
Now your PlaceMonsterscript can place a new monster, but you still have to specify the prefab.
Use the right prefab
Save the file and switch back to Unity.
To assign the monsterPrefab variable, first select Openspot in the Prefabs folder in the Project Browser .
In the Inspector, click the circle to the right of the Monster_Prefab field of the PlaceMonster (Script) component and select Monster from the dialog that appears .
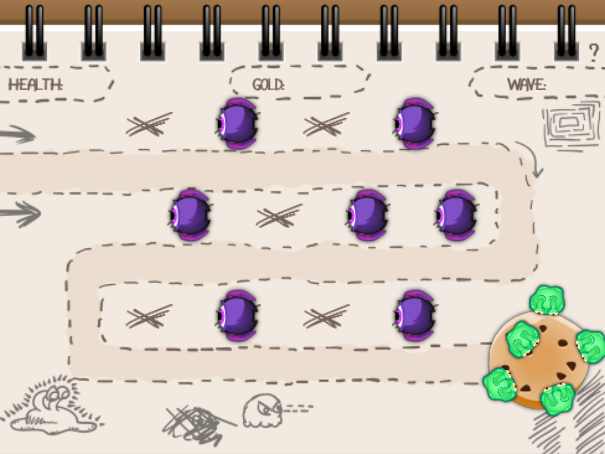
That's it. Run the scene and build monsters at various x-points with clicks or taps.
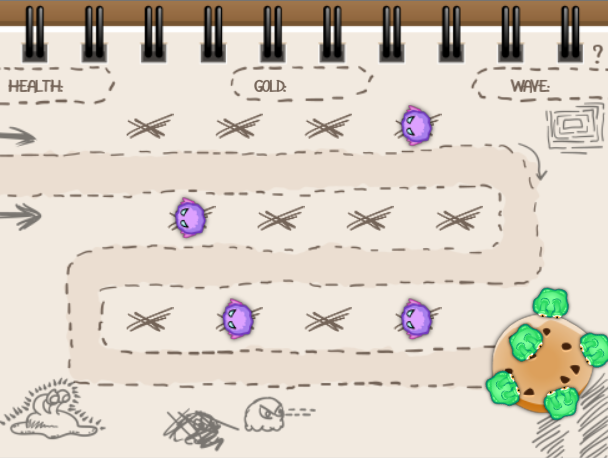
success! You can build monsters. However, they look like a weird mush because all of your monster's sprites are drawn. Next, you'll resolve this issue.
Upgrade those monsters
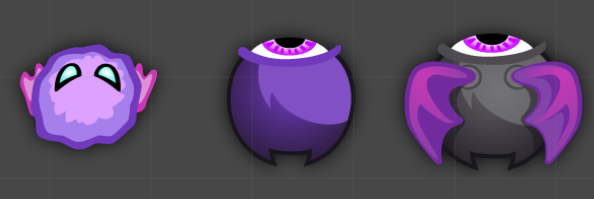
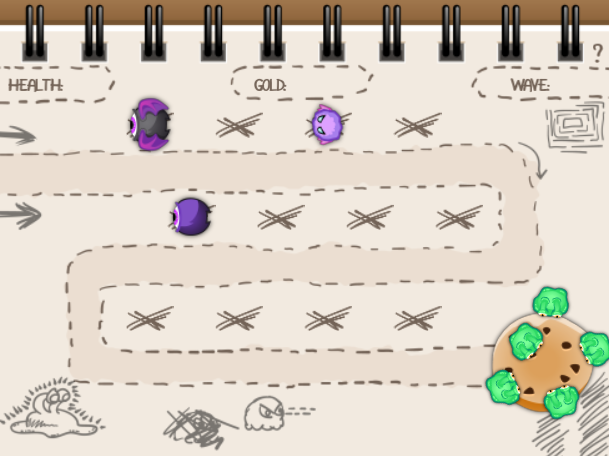
In the image below, you'll see that your monster looks increasingly scary at higher levels.
So fluffy! But this monster can turn into a killer if you try to steal its cookies.
The script serves as the basis for implementing an upgrade system for monsters. It keeps track of how powerful the monster should be at each level, and of course the monster's current level.
Now add this script.
Select Prefab/Monsters in the Project Browser. Add a new C# script named MonsterData . Open the script in the IDE and add the following code _above_ the class.MonsterData
[System.Serializable]
public class MonsterLevel
{
  public int cost;
  public GameObject visualization;
}
This will create MonsterLevel. It groups the cost (in gold, which will be supported later) and a visual representation of the level for a specific monster.
[System.Serializable]You can add at the top to make instances of the class editable from the inspector. This allows you to quickly change all values in the Level class, even while the game is running. It's very useful for balancing your game.
Define monster level
怪物等级In this example, you store the predefined ones 列表<T>in .
Why not simply use MonsterLevel[]? MonsterLevelWell, you will need the index of a specific object many times. While it's not difficult to code this, you will use IndexOf()the functionality it implements Lists. There is no need to write a method again this time. :]
At the top of MonsterData.cs , add the following statements:using
using System.Collections.Generic;
This gives you access to common data structures so you can use the class in your scripts.List<T>
Note : Generics are an important part of C#. They allow you to define type-safe data structures without committing types. This is very useful for container classes such as lists and collections. To learn more about generics, check out Introduction to Generics in C# .
Now add the following variables to MonsterDatato store MonsterLevelthe list:
public List<MonsterLevel> levels;
Using generics you ensure that you can only contain objects.levels``List``MonsterLevel
Save the file and switch to Unity to configure each stage.
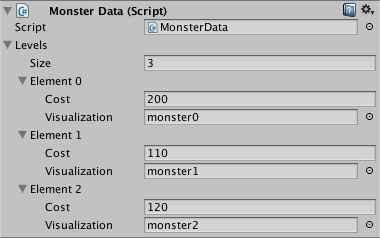
Select Prefab/Monsters in the Project Browser. In __Inspector__ you can now see the "Level " field in the MonsterData (script) component . Set its _size_ to 3 .
Next, set the cost of each level to the following values:
- Element 0 : 200
- Element 1 : 110
- Element 2 : 120
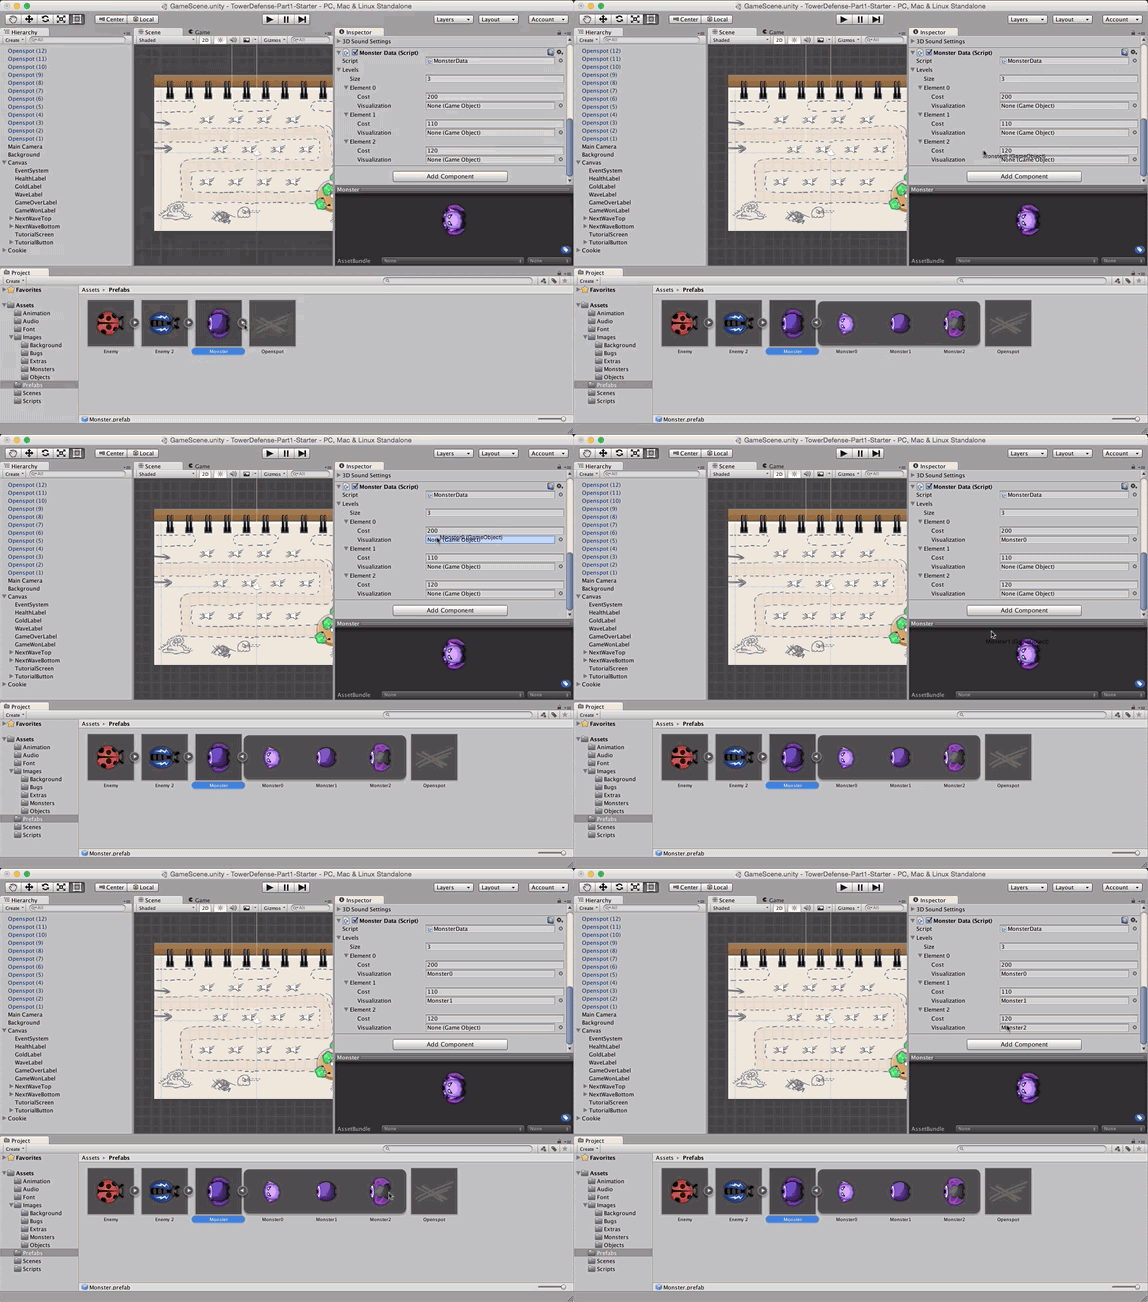
Now assign the visualization field values.
Expand Prefab/Monsters in the Project Browser so you can see its children. Drag and drop the child Monster0 into the Visualization field of Element0.
Repeat this, assigning monster 1 to element 1 and monster 2 to element 2. See the GIF below demonstrating this process:
When selecting prefab_/monster, the prefab_ should look like this:
Define the monster's level in the inspector.
Define current level
In the IDE switch back to MonsterData.cs and add another variable to it MonsterData.
private MonsterLevel currentLevel;
In the private variable currentLevelyou will store...wait for it...the monster's current level. ]
Now set it up currentLeveland make it accessible to other scripts. Add the following to MonsterData, along with the instance variable declaration:
public MonsterLevel CurrentLevel
{

  get
  {
    return currentLevel;
  }

  set
  {
    currentLevel = value;
    int currentLevelIndex = levels.IndexOf(currentLevel);

    GameObject levelVisualization = levels[currentLevelIndex].visualization;
    for (int i = 0; i < levels.Count; i++)
    {
      if (levelVisualization != null)
      {
        if (i == currentLevelIndex)
        {
          levels[i].visualization.SetActive(true);
        }
        else
        {
          levels[i].visualization.SetActive(false);
        }
      }
    }
  }
}
There are quite a few C# scripts out there, eh? Take a look at them all:
- Define the properties of private_variables
currentLevel. _After defining a property, you can call it like any other variable: asCurrentLevel(from inside the class) or asmonster.CurrentLevel(from outside the class). You can define custom behavior in a property's getter or setter method, and you can control whether a property is read-only, write-only, or read/write by providing only a getter, a setter, or both. - In a getter,
currentLevelthe value returned. - In the resource library, assign the new value to currentLevel. Next, you will get the index of the current level. Finally, it loops through all the levels and sets the visualization to active or inactive, depending on the currentLevelIndex. This is great because it means that every time someone sets the currentLevel, the sprite automatically updates. Properties will definitely come in handy!
Add the following implementation OnEnable:
void OnEnable()
{
  CurrentLevel = levels[0];
}
This CurrentLevel will be set on placement, ensuring it only displays the correct sprite.
NOTE : OnEnableIt is very important to initialize the properties in instead of OnStartthe order method as you can call the order method when instantiating the prefab.
Will be called immediately when the prefab is created OnEnable(if the prefab is saved in an enabled state), but not until the object starts running as part of the scene OnStart.
You need to check this data before placing the monster, so you can OnEnableinitialize it in .
Save the file and switch to Unity. Run the project and place the monsters; now they display the correct and lowest level sprites.
Upgrade those monsters
Switch back to your IDE and add the following method to MonsterData:
public MonsterLevel GetNextLevel()
{
  int currentLevelIndex = levels.IndexOf (currentLevel);
  int maxLevelIndex = levels.Count - 1;
  if (currentLevelIndex < maxLevelIndex)
  {
    return levels[currentLevelIndex+1];
  }
  else
  {
    return null;
  }
}
In GetNextLevelyou can get the index of the current level and the highest 级别的index, provided the monster has not reached the max level to return to the next level. Otherwise, return null.
You can use this method to determine if a monster can be upgraded.
Added the following methods to increase monster levels:
public void IncreaseLevel()
{
  int currentLevelIndex = levels.IndexOf(currentLevel);
  if (currentLevelIndex < levels.Count - 1)
  {
    CurrentLevel = levels[currentLevelIndex + 1];
  }
}
Here you can get the index of the current level and then make sure it's not the maximum level by checking if it's less than that. If so, set to the next level.levels.Count - 1``CurrentLevel
Test upgrade capabilities
Save the file, then switch to PlaceMonster.cs in the IDE and add the following new method:
private bool CanUpgradeMonster()
{
  if (monster != null)
  {
    MonsterData monsterData = monster.GetComponent<MonsterData>();
    MonsterLevel nextLevel = monsterData.GetNextLevel();
    if (nextLevel != null)
    {
      return true;
    }
  }
  return false;
}
First check if there is a monster that can be upgraded by checking 怪物if the variable 为 null. If this is the case, you can 数据get the monster's current level from the monster.
Then test if a higher level is available, i.e. when GetNextLevel()not returned null. Return if upgrade is possible, trueotherwise return false.
Enable gold upgrade
To enable the upgrade option, else ifadd the branch to OnMouseUp:
if (CanPlaceMonster())
{

}
else if (CanUpgradeMonster())
{
  monster.GetComponent<MonsterData>().IncreaseLevel();
  AudioSource audioSource = gameObject.GetComponent<AudioSource>();
  audioSource.PlayOneShot(audioSource.clip);

}
Check if you can CanUpgradeMonster()upgrade using . If so, you can use GetComponent()the access MonsterDatacomponent and call IncreaseLevel(),this which will increase the monster's level. Finally, you trigger the monster's audio source.
Save the file and switch back to Unity. Run the game, place and upgrade any number of monsters... for now.
All monsters upgraded
Pay Coins - Game Manager
Now, all monsters can be built and upgraded instantly, but where's the challenge in that?
Let’s dig into the gold question. The problem with tracking it is that you need to share information between different game objects.
The image below shows all the objects that will be involved.
The highlighted game objects all need to know how many gold coins the player has.
You will use a shared object that is accessible to other objects to store this data.
Right-click in Hierarchy and select Create Empty . Name the new game object _GameManager_.
Add a C# script named GameManagerBehavior to GameManager and open the new script in the IDE. You will display the player's total gold in the label, so add the following line at the top of the file:
using UnityEngine.UI;
This gives you access to UI-specific classes that, for example, the project uses for labels. Now add the following variables to the class:Text
public Text goldLabel;
TextThis will store a reference to the component used to display how many coins the player has.
Now that GameManageryou know the label, how do you ensure that the amount of gold stored in the variable is in sync with the amount shown on the label? You will create a property.
Add the following code to GameManagerBehavior:
private int gold;
public int Gold {
  get
  {
    return gold;
  }
  set
  {
    gold = value;
    goldLabel.GetComponent<Text>().text = "GOLD: " + gold;
  }
}
Seems familiar? It is similar to what you define in CurrentLevel Monster. First, create a private variable goldto store the current total amount of gold. Then you define a Goldproperty called – creative, right? -- – and implement a getter and setter.
The getter simply returns goldthe value. The setter is more interesting. In addition to setting the value of the variable, it also textsets the field to "on" to goldLabeldisplay the new amount of gold.
How generous do you feel? Add the following line to Start()give the player 1000 gold, or allocate less if you're feeling stingy:
Gold = 1000;
Assign label object to script
Save the file and switch to Unity.
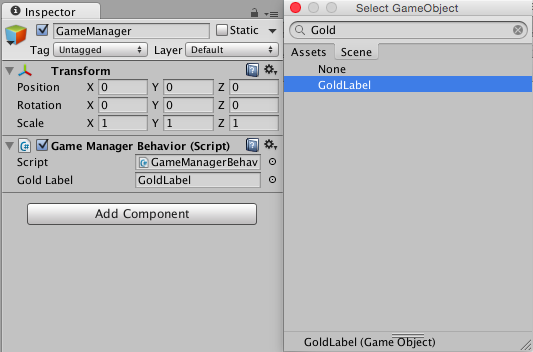
In the Hierarchy , select GameManager . In the Inspector , click the circle to the right of the Gold Label. In the Select Text dialog box, select the Scene tab and select GoldLabel .
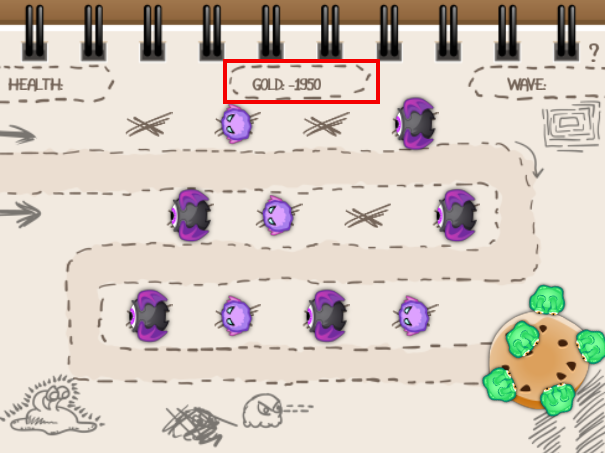
Running the scenario, the label shows _Gold : 1000_.
Check player's "wallet"
Open PlaceMonster_.cs in the IDE and add the following instance variables:
private GameManagerBehavior gameManager;
The component of the GameManager that you will use gameManagerto access GameManagerBehaviorthe scene . To assign it, add the following to :Start()
gameManager = GameObject.Find("GameManager").GetComponent<GameManagerBehavior>();
You can use Get a game object named GameManager, which returns the first game object it finds with a given name. Then, retrieve its components and store them for later use.GameObject.Find()``GameManagerBehavior
Note
GameManager: You can do this by setting a field in the Unity Editor or adding a static method to the , which returns a singleton instance that you can retrieve from游戏管理器行为.However, there is a dark horse method in the above block: , which is slower at runtime, but convenient and can be used with caution.
Find
take money!
You haven't deducted gold yet, so OnMouseUp()add this line twice, replacing each comment// TODO: 扣除金币:
gameManager.Gold -= monster.GetComponent<MonsterData>().CurrentLevel.cost;
Save the file and switch to Unity, upgrade some monsters and watch the gold readings update. Now you deduct gold, but players can build monsters as long as they have space.
Unlimited capabilities? Great! But you can't allow this to happen. Monsters should only be placed if the player has enough gold coins.
Monsters need gold coins
Switch to PlaceMonster.cs in the IDE and CanPlaceMonster()replace the contents with the following:
int cost = monsterPrefab.GetComponent<MonsterData>().levels[0].cost;
return monster == null && gameManager.Gold >= cost;
levelsRetrieve the cost of placing the monster from it MonsterData. Then you check it's monsternot nulland it's gameManager.Goldgreater than the cost.
CanUpgradeMonster()Challenge: Add yourself to check if the player has enough gold coins.Replace this line:
return true;With this:
return gameManager.Gold >= nextLevel.cost;
This will check if the _gold_ the player has exceeds the cost of the upgrade.
Save and run the scene in Unity. Come on and try to place unlimited monsters!
Now you can only build a limited number of monsters.
Tower Politics: Enemies, Waves and Waypoints
It's time to "pave the way" for your enemies. Enemies appear at the first waypoint, move to the next waypoint and repeat until they reach your cookie.
You will make the enemy march:
- Define a path for the enemy
- Move enemies along the way
- Rotate the enemy so that it looks forward
Create a road with waypoints
Right-click in the Hierarchy and select Create Null to create a new Null game object. Name it Road and make sure it is at position (0, 0, 0).
Now, right-click on the Road in the Hierarchy and create another empty game object as a child of the Road. Name it Waypoint0 and set its position to (-12, 2, 0) - this is where the enemy will start their attack.
Create five more waypoints in the same manner using the following names and locations:
- Navigation point 1: (X: 7, Y: 2, Z: 0)
- Navigation point 2: (X: 7, Y: -1, Z: 0)
- Navigation point 3: (X: -7.3, Y: -1, Z: 0)
- Navigation point 4: (X: -7.3, Y: -4.5, Z: 0)
- Navigation point 5: (X: 7, Y: -4.5, Z: 0)
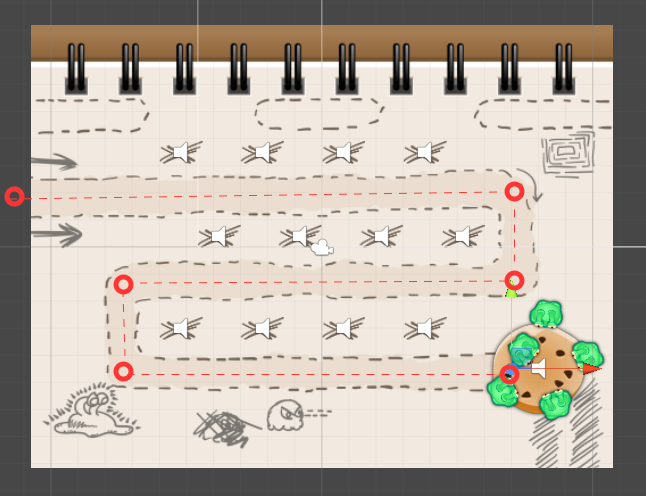
The following screenshot highlights the waypoint locations and the resulting path.
spawn enemies
Now make some enemies to follow. The _Prefabs_ folder contains _enemy_ prefabs. Its position is (-20, 0, 0), so the new instance will be spawned off-screen.
Otherwise, it's set up much like the Monster prefab, with one AudioSourceand a child Sprite, and it's a sprite so you can rotate it later without having to rotate the health bar that you'll need soon.
### Move the monster to the road
Add a new C# script named MoveEnemy to Prefabs_\Enemy Prefabs_. Open the script in the IDE and add the following variables:
[HideInInspector]
public GameObject[] waypoints;
private int currentWaypoint = 0;
private float lastWaypointSwitchTime;
public float speed = 1.0f;
waypointsStoring a copy of the waypoint in an array while the above ensures that you don't accidentally change the field in the __inspector__, but you can still access it from other scripts.[HideIn_inspector_]``waypoints
currentWaypointTracks the waypoint the enemy is currently leaving, lastWaypointSwitchTimestoring the time the enemy passed it. Finally, store the enemy's speed.
Start()Add this line in :
lastWaypointSwitchTime = Time.time;
This will initialize lastWaypointSwitchTimeto the current time.
To make enemies move along a path, add the following code to Update():
Vector3 startPosition = waypoints [currentWaypoint].transform.position;
Vector3 endPosition = waypoints [currentWaypoint + 1].transform.position;

float pathLength = Vector3.Distance (startPosition, endPosition);
float totalTimeForPath = pathLength / speed;
float currentTimeOnPath = Time.time - lastWaypointSwitchTime;
gameObject.transform.position = Vector2.Lerp (startPosition, endPosition, currentTimeOnPath / totalTimeForPath);

if (gameObject.transform.position.Equals(endPosition))
{
  if (currentWaypoint < waypoints.Length - 2)
  {

    currentWaypoint++;
    lastWaypointSwitchTime = Time.time;

  }
  else
  {

    Destroy(gameObject);

    AudioSource audioSource = gameObject.GetComponent<AudioSource>();
    AudioSource.PlayClipAtPoint(audioSource.clip, transform.position);

  }
}
Step by step:
- From the waypoint array, you can retrieve the start and end positions of the current path segment.
- Calculate the time required for the entire journey using the formula time = distance/speed , and then determine the current time on the route. Using
Vector2.Lerp, you can insert the enemy's current position between the segment's start position and end position. - Check to see if the enemy has arrived
endPosition. If yes, please handle these two possible scenarios:- Enemies are not at the last waypoint yet, so added
currentWaypointand updatedlastWaypointSwitchTime. Later, you'll add code to rotate the enemy so that it also points in the direction it's moving. - The enemy reaches the last waypoint, so this destroys it and triggers the sound effect. Later you will also add code to reduce the player's
health.
- Enemies are not at the last waypoint yet, so added
Save the file and switch to Unity.
Give the enemy a sense of direction
In its current state, the enemy does not know the order of the road signs.
Select Road in the Hierarchy and add a new C# script called SpawnEnemy . Then open it in your IDE and add the following variables:
public GameObject[] waypoints;
You'll use this waypointsto store waypoints in your scene in the correct order.
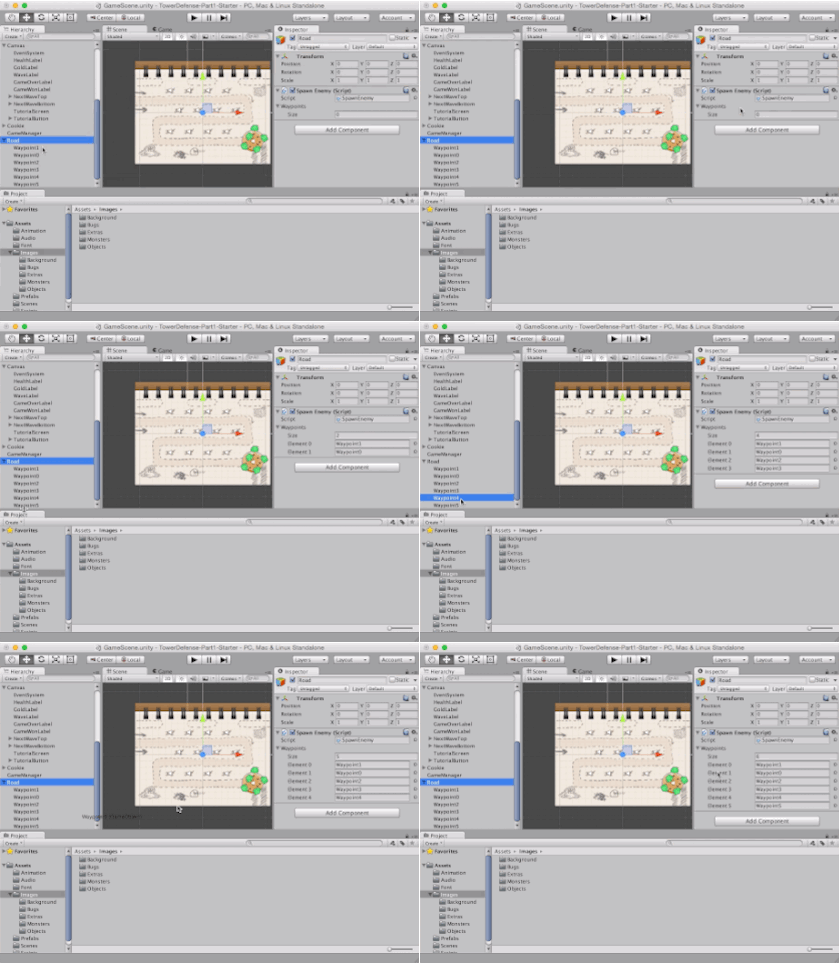
Save the file and switch to Unity. Select Roads in Hierarchy and set the Size of Waypoints Array to 6 .
Drag each child of Road into the field, placing Waypoint0 into Element 0 , Waypoint1 into Element 1, and so on.
Now you have an array with waypoints neatly ordered so there is a path - note that they will never retreat; they will die trying to get to the sugar.
Check if everything is OK
Go to SpawnEnemy in the IDE and add the following variables:
public GameObject testEnemyPrefab;
This will testEnemyPrefabkeep a reference to the Enemy prefab in .
To create enemies when the script starts, add the following code toStart():
Instantiate(testEnemyPrefab).GetComponent<MoveEnemy>().waypoints = waypoints;
This will instantiate testEnemya new copy of the prefab stored in and assign it a waypoint to follow.
Save the file and switch to Unity. Select the Road in the Hierarchy and set its Test Enemy to the Enemy prefab.
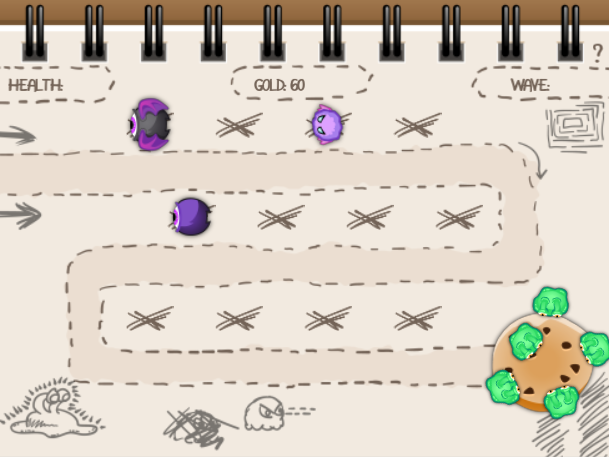
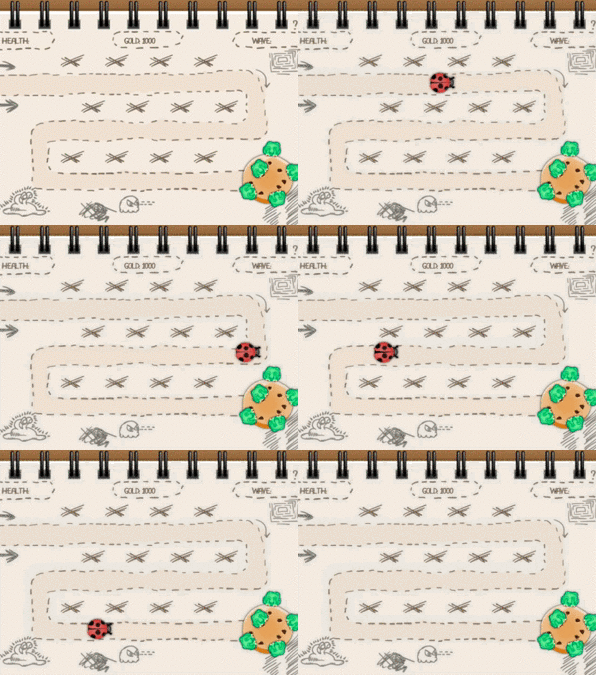
Run the project and see enemies walking along this path.
Run the project to see enemies traveling along the road.
Have you ever noticed that they're not always looking where they're going? interesting! If you want to take this project a step further, continue with Part 2 and refine the project to learn how to make them perform better.
Follow-up
You've done a lot of work and are on your way to having your own tower defense game.
Players can build monsters, but not in unlimited amounts, and have an enemy run towards your cookie. Players have gold coins and can also upgrade monsters.
In part two, you'll cover spawning large numbers of enemies and blowing them away. See you in part two
The blogger is a self-taught player. If you are also a Unity beginner, welcome to join my group chat for mutual help and communication: 618012892
